Cute Card Thursday – Anything Goes with Reindeer Farts

LOL!  Hey friends!  Did I grab your attention with my title today?!

Today starts a brand new challenge over at Cute Card Thursday and it’s an easy ‘ANYTHING GOES!’  Since it’s the first Thursday of the month, we are being sponsored by Whimsy Stamps!  Yay!  So please be sure to remember to add whatever creation you’re working on over in our gallery this week!

*News update:  This will be my last challenge as a design team member for Cute Card Thursday.  I have really loved being apart of the team and the wonderful ladies over there for over a year and a half. I wish them all well.  I’m sure I’ll be playing along in future challenges of course!*

Here’s the card I made with products from our sponsor:

Vicki-CCT611-WSReindeerFarts

BWHAA!! HA! HA!  Yep, I’m most positive it’s probably been that cold out over my way!  LOL!  It’s supposed to get down to the teens next week! Brr!

This hilarious digital image is called Reindeer Farts by Dustin Pike from Whimsy Stamps.  It comes with the sentiment which I wouldn’t want it without that!  LOL!  This image was released back in October, but with all of the Halloween going on, it sort of didn’t get a good “spotlight” on it, so I thought now would be a good time to pull it out and perhaps send it out to my brother for Christmas…which he’ll get a kick out of!  🙂

I started out with a white cardstock panel cut with a stitched rectangle die with the printed out sentiment at the top of it.  I pulled out the Whimsy Stamps Snow Flurry clear stamp set and white heat embossed some snowflakes in the background.  I ink blended some  Distress Oxide Inks over top of them in the colors:  Salty Ocean, Wilted Violet, Mermaid Lagoon and Blueprint Sketch.  I sprizted some water over it, dapped it with a paper towel and once completely dry, I stamped out some more snowflakes in a few of the Distress Oxide Inks over that to give it a little depth.  The ink marks left over the white snowflakes were easily wiped away because the heat embossing resists the inks.  I covered this entire panel with a Shimmer Spray.  (You can see it in the photo below!)

I layered this piece onto a purple cardstock base and then layered it over a blue piece of cardstock cut from a stitched A2 sized rectangle die which was then mounted over a top folding A2 sized white card base.

I’ve used some White Glitterstock and cut a “snow hill” for the deer with a stitched hillside border die and glued that to cover the entire bottom of the card.  I also took another strip of that Glitterstock and used my MS goo border punch to create the small border above the sentiment, which generates a more “cold feeling” to the card.

Vicki-CCT611-WSReindeerFarts-close

I’ve printed out the deer image with Copic Blending Card, colored it up with Copics and then fussy cut it out…including the “fart cloud” and popped it up over the snowy hill with some foam tape.

Before attaching it to the glittery snow hill, I took a couple of Copic markers to create a bit of shading for the deer standing on the snow.  I also took a white gel pen and added some dot markings on the back of the deer.

You can also see where I’ve added some glossy accents to his eyeballs and I even took some Star dust glitter and added it to the snowflake in the “fart cloud”.  🙂

Vicki-CCT611-WSReindeerFarts-flat

Well I hope you got a giggle from my card today! LOL!  This will be a fun one to send along!  Please be sure to stop by the Cute Card Thursday challenge blog and check out the inspiration from the rest of the design team and join in the fun with us this week!

Thanks so much for stopping in today and I’ll see you soon!

Whimsy Stamps products used on my card today with affiliate links:

DP_reindeer_farts_colored_digital_collection_600x600

Snow_Flurry_display_1024x1024

glossy accents

SGG20622_big_600x600

Challenges:

  1.  Creatalicious – #176 Anything Goes with optional Winter
  2. Sparkles Christmas– Winter Wonderland
  3. A Bit More Time to Craft – Anything Goes
  4. Crafts Galore Encore – Anything Goes
  5. Cute As a Button – Anything Goes with optional twist:  Let it Snow!
  6. Cardz 4 Guyz – Christmas Critters
  7. Creative Inspirations – Festive Fun


Embossing for Cute Card Thursday

Hello friends!  I hope you’re having a great week so far!  Many thanks for the kind thoughts about my post yesterday and the video tutorial.  I think I get a bit nervous thinking I’m going to mess up instructions, but perhaps I’ll get the hang of it! 🙂

Today starts a new challenge over at Cute Card Thursday!  This week it’s all about “embossing“!  Now there are a few different ways to emboss and I happen to love them all!  So you could do heat embossing, “dry” embossing with an embossing folder or even maybe do some embossing paste!  However you emboss it, we look forward to seeing what you come up with!
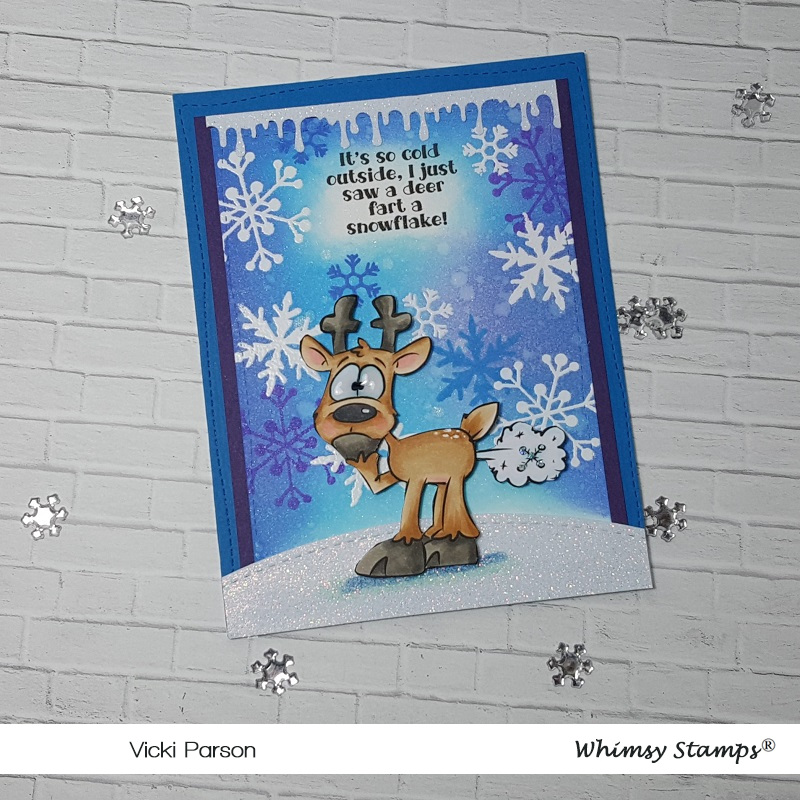
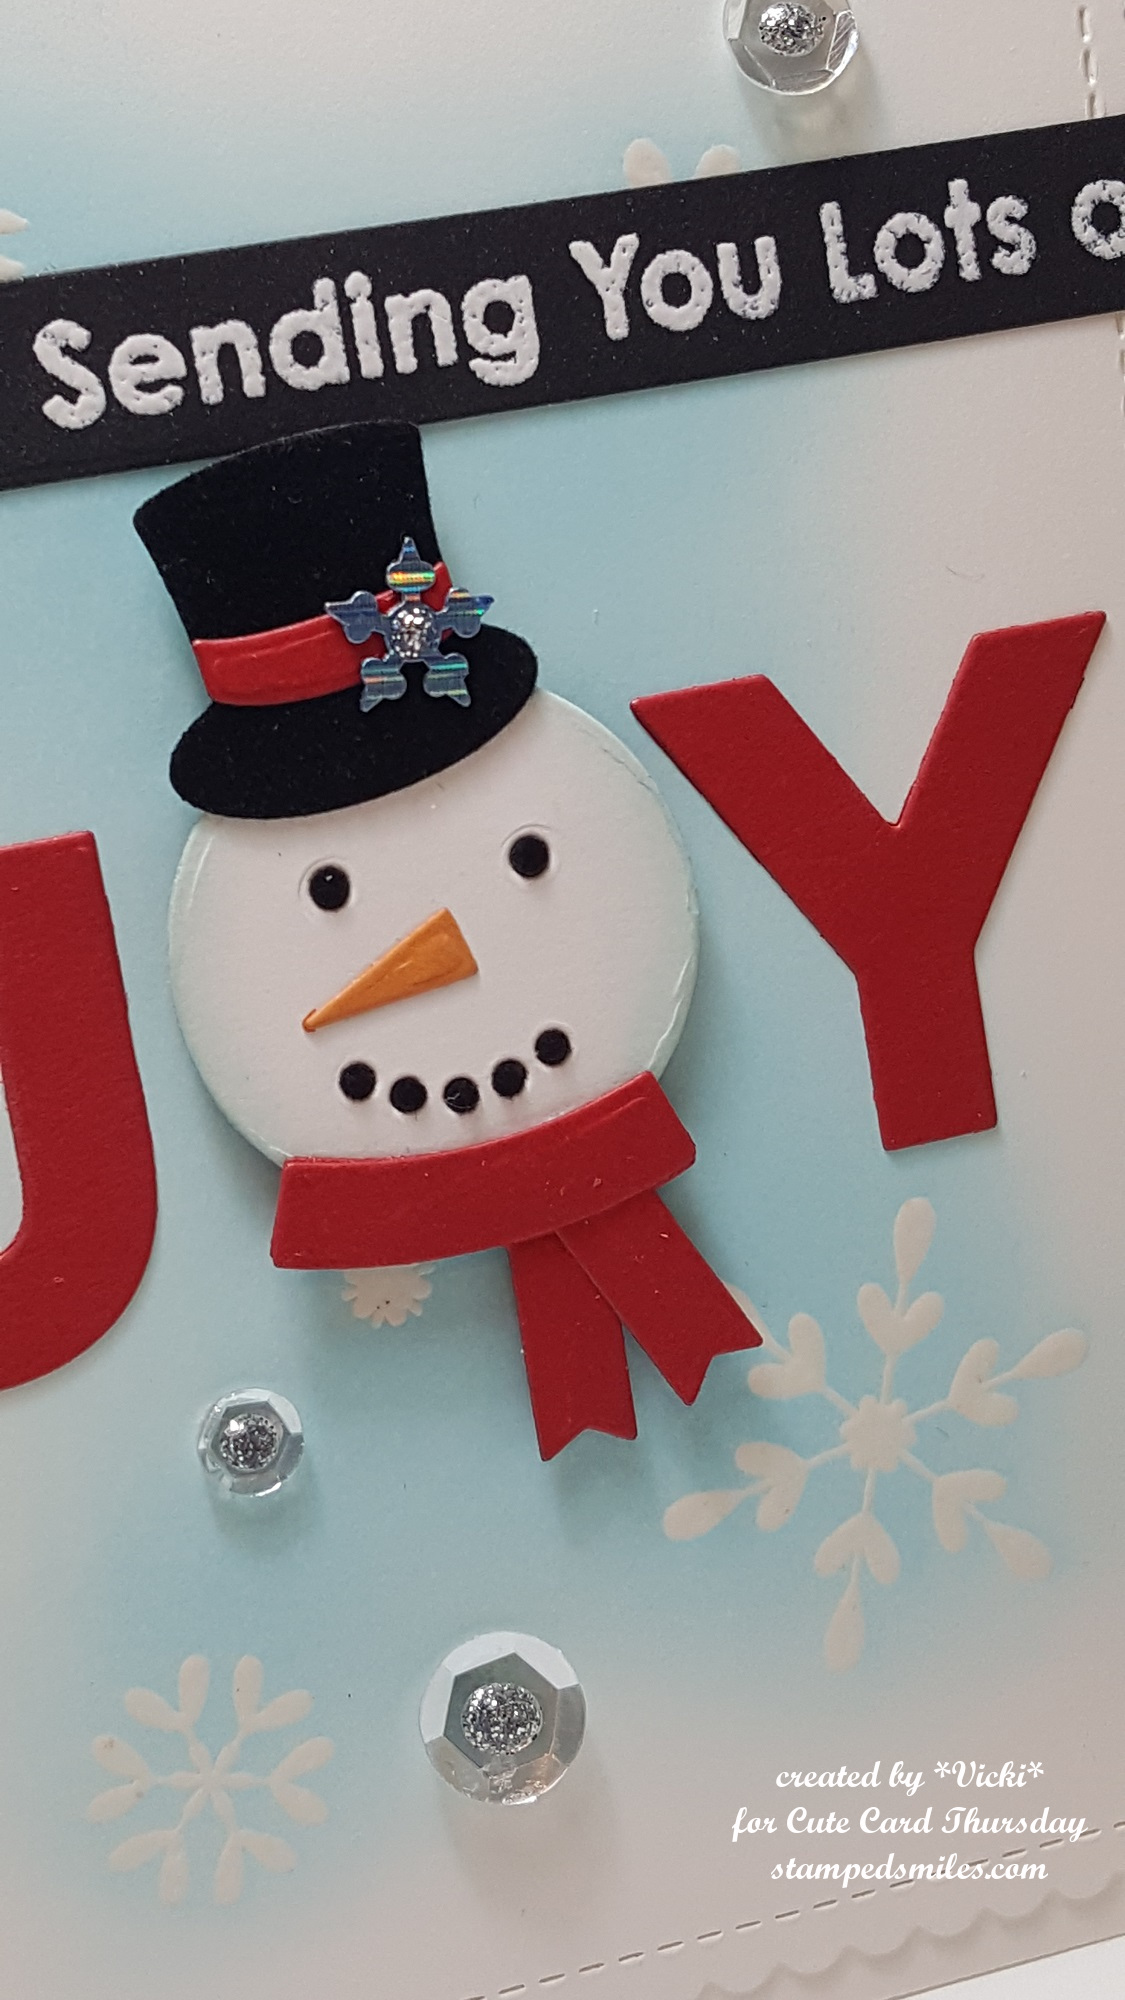
  Here’s the card I made for the challenge:

Vicki-WSPenguinTOT-CCT596

TRICK OR TREATS?!!  Oh my word now how stinkin’ cute are these penguins?!  Don’t they look like they just rang your door bell for Halloween?! LOL!  That penguin image that I’ve used here is from an August Digital Release  (previously released in red rubber) from Whimsy Stamps called Penguin Trick or Treaters and oh were they fun to color!

I was inspired to create with them for this embossing challenge, so I took a piece of Bristol Smooth Watercolor Paper and stamped the stars from the Whimsy Stamps Basic Christmas Backgrounds clear stamp set with a pigment black ink.  I covered it with clear embossing powder and heat set them.  Then I went over the stars with some distress inks (Mustard Seed, Carved Pumpkin, Wilted Violet & Blueprint Sktech)  and ink foam blending tool.  I also spritzed some water over it for the water dropplet look.

All of the panels including the card base were cut from the Whimsy Stamps Notched Squares die set.  So I took the finished colored panel and attached it over a black die cut panel and then I took a piece of orange cardstock that was die cut and ran an embossing folder over it. (We Are Memory Keepers-Next Level Gemstones)  I rubbed a white ink pad over it to pop out the details in the embossing and then I mounted it over the die cut black card base.

After coloring the penguins, they were fussy cut out and popped up with foam tape over the colored panel.  I had an older Halloween set of dies that I couldn’t part with from Whimsy Stamps and I cut out some bats from black cardstock and attached those to the starry background.  I also added some drops with some Tonic Studios Silver Glitter Accents for a bit of sparkle.

Vicki-WSPenguinTOT-CCT596-close

Here’s a closer look at these cute little trick-or-treaters and how I’ve colored them up.  I have used the following Copic markers to color them with.  CLICK HERE to view/purchase Copics from Whimsy Stamps or click numbers below for specific colors:

  • Penguin bodies – C8, C3, C1, 0blender, R00, YR27, YR24, Y35, White gel pen
  • Pumpkin – YR27, YR18, YR14, YR21, R20, YG67, YG63, YG61
  • Candy Bag – E33, E31, E30, wrote letters with Copic liner
  • Sherrif Costume – E89, E87, E84, E81, W5, W3, W1, Silver gel pen
  • Pirate Costume – R39, R37, R35, R32
  • Witch Costume – V17, V15, V12, YR07, YR04, Silver gel pen

Vicki-WSPenguinTOT-CCT596-flat

I think these look like a fun group to go trick-or-treating with, don’t you?! 🙂

I hope  you’ve enjoyed my fun Halloween card today and were inspired in some way!  Please be sure to stop by the Cute Card Thursday blog and have a look at the inspiration and come play along with us this week!  Thanks so much for stopping in and I’ll see you soon!

Here are the Whimsy Stamps products I’ve used on my card today with affliate links:

penguin_trick_or_treaters_digital_display_600x600

Christmas_20Backgrounds_20display_20redo_600x600

notched_square_die_set_display_1024x1024

71-a5dsE2cL._SX425_1024x1024

66212ddf6520cf6796195dbdefa3c0561d9dd00b_600x600

mustard_seed_redo_600x600

WS-Copic display


Faux Metal Technique + video

Hello friends!!  I’m so excited to share with you this fun technique that’s not new, but a cool look to try with your embossing powders!

Vicki-BMHOP-subscriptions

I really love how this one tuned out!  I have used the “Faux Metal” technique on my card along with the “emboss resist” technique.

In order to share the steps of this card, I’ve made video so you can see how I incorporated these techniques into my design.  CLICK HERE to watch on You Tube or check it out below:

Vicki-BMHOP-subscriptions-close

Here’s a closer view of the impressed flower into the embossed panel.  It’s fun to run your fingers over the flower.  I happened to have found the perfect accent for the center of the flower too!  I think it really picks up the pretty colors in the card.

Vicki-BMHOP-subscriptions-flat

I hope you’ve enjoyed my card today!  Thanks for dropping by!

Challenges I’d like to enter this card for:

  1.  Rainbow Card – Passion for Purple0819 Passion for Purple
  2. Crafty Friends – Lace/Ribbon

Bubble Bath Beauty

Hello friends!  Yes, I’m still here!  I was hoping to share some photos with you of my crafty retreat and what I was teaching, but when I got home I had some other troubles to deal with and didn’t get a chance to make a post for it, but I will  hopefully get to it this week so you can see what was happening!  LOTS of fun stuff!! 🙂

Today, I have a silly kitty card to share with you today:

Vicki-Bath Cat-May7

Oh my, that face just really cracks me up!!  It’s been several years since I have ever had to give a cat a bath, but I believe that’s pretty much how they feel about water in general.  I have used this Whimsy Stamps digital image called Bath Cat by Crissy Armstong.  (It was preciously released as a rubber cling stamp, but now you can also get it in digital format if you prefer that!)

I started out my card with a piece of white cardstock and clear heat embossed several of the solid circle images from the Whimsy Stamps Circles Circles Circles clear stamp set.  I then took a few of the distress ink colors and blended them over the heat embossed circles.  The ink resisted those and then I spritzed it with some water and dapped it with a paper towel for water dropplets.  I heat embossed the sentiment with white EP and cut it out in a banner to attach over my background.

The circle inked background was corner chomped on two of the corners and then I placed it over a blue A2 sized top folding card base which I also corner chomped the same two corners on that as well.  I then added the image panel and popped it up over some craft foam to attach to the front of the card.  I then cut off the edge of the circle with my scissors and lastly added some clear sequins to the design.

Vicki-Bath Cat-close-May7

Here’s a closer look at the coloring I’ve done on the kitty.  I’ve used the following Copics to color him in with:  (You can purchase Copic markers at Whimsy Stamps by Clicking HERE.)

  • Kitty – W7, W5, W3, W1, R11, R00
  • Bathtub – B24, B21
  • Bubbles – BG000
  • Duckie – Y17, Y15, Y13

After I cut the image out with a circle die, I sponged around the edges of it with some of the distress ink I used on the background.  I used a Wink of Stella glitter pen on some of the bubbles and then used some Nuvo White Blizzard Glitter Drops on the water drops.

Vicki-Bath Cat-flat-May7

This one gave me a chuckle and sometimes even when you are feeling yucky, you just want someone to tell you that you are beautiful!

Thanks for dropping in today!  I’ll see you again soon!

Whimsy Stamps Products Used on my card today with affiliate links:

bath_cat_color_display_digi_1024x1024

circles_20circles_20circles_20display_wm_1024x1024

WS-Copic display

kuretakewosclear_800x_0fab0d61-5a3e-4885-b433-a6a8b8fc7bee_large

Nuvo White Blizzard

Challenges:

  1.  Simply Create Too – Anything Goes (no twist)
  2. Daisy Chain – Anything Goes
  3. Pammie’s Inky Pinkies – PIP1918 Anything Goes
  4. Get Creative – Anything Goes (no twist)
  5. Crafty Animals – Anything Goes + animal

Rainbow Shaker Birthday!

Hello friends!  Yay!  It’s Friday and I thought I’d share this happy shaker card that I made for my mom’s recent birthday she had.  (Yes, I kept this one a secret until I gave it to her!)

Vicki-MFT Birthday Bear Rainbow

I saw over at My Favorite Things “Birthday Project” Challenge was a “rainbow” theme and I thought this would make for a happy and fun birthday card design!  So I pulled out the MFT Transparent Triangles Background stamp (now retired) and heat embossed it with white EP over some Bristol Smooth Watercolor paper.  I went to work with my rainbow background and sponged several colors of Distress Oxide ink in rainbow form over the heat embossed background for a “resist technique”.  I spritzed some water over it and my sprayer went a tad bit “dropy” and I ended up with a weird large droplet pattern, but I decided I wanted to keep it anyway, I liked it.

So to make sure that my shaker balloon was going to line up with my bear, I needed to stamp, color and fussy cut out this bear from the Beary Special Birthday stamp set.  I needed to fussy cut it out because the coordinating die cut would also cut out the balloon from the image, and I didn’t want to include it as I was making my own!  I’ve also white heat embossed a senitment from the same stamp set and cut it out with the Essential Fishtail Sentiment Strips.  I also took the Mini Balloon Shaker Window & Frame Die-namics to cut out all of the pieces that I needed for the balloon.  (I used the fussy cut out bear for placement to see where I needed to die cut a hole in the background for the shaker area.)  Before attaching the bear down, I also took some green cardstock and cut out a border with the Grassy Fields Die-namics.  I sponged the edges with green ink and took a Copic marker to give a shadow around the bear.  So after I placed my “balloon hole” where I needed it on the background, I took the rainbow sequins to place inside the Mini Balloon Shaker Pouches and added a piece of black cardstock for the background, which was placed over an A2 sized white top folding card base.

Vicki-MFT Birthday Bear Rainbow-close

Here’s a closer look at the bear and how I’ve got him colored in.  I forgot that in addition to the rainbow sequins I had, I put some tiny star sequins in there as well.  At first I thought I had went a bit too dark for coloring the bear, but I like how he blended out and I think he really stands out on the rainbow background and doesn’t get lost with the black accents on the card.  I took a white gel pen to his cheeks and added some shimmer to his present with a glitter brush pen.  (My mom likes the color red, so I purposely made the present red).

Vicki-MFT Birthday Bear Rainbow-flat

Here with the card laying flat, you can better see the shaker bits on the inside of the balloon and how they really stand out against the black balloon background.

I think I got a smile and it was passed around for the shaking.

Hope you’ve enjoyed my card today and I thank you so much for stopping in!  Wishing you a very happy and rainbow filled weekend too!  🙂

challenges:

  1.  MFT Birthday Project – Rainbow
  2. Creative with Stamps – BirthdayCWS#37Birthday
  3. Crafting By Designs – Anything Goes
  4. Little Red Wagon – “Shake It!”
  5. Always Fun – Birthday

Rose Heart Card for the Sparkle N Sprinkle Video Kit Club Inspiration

Hello friends!  I’m back again to share my Rose Heart card for Sparkle N Sprinkle!  I’m still “in the mood for love”, so here’s what I’ve got for you today:

vicki-roseheart-card-project1

I absolutely love this new Rose Heart stamp set from Sparkle N Sprinkle this month!  It’s a wonderful layering stamp set and I can see so many creative possibilities with it!  I really hope to get some time to play with it some more!

I thought this stamp set had an elegant Vintage feel to it and I wanted to create with it in that way.  There are lots of fun heat embossing, ink blending and layering going on in this design.  If you would like to view the full details of how I went about creating my card, please visit my Sparkle N Sprinkle blog post HERE for more photos and steps in how I’ve made my design.

I’m also very excited and honored to have my card behind the inspiration for this month’s Vido Kit Club!  I have enjoyed watching videos from Demo Donna for a while now so it’s really cool to watch her create based on something I’ve made!  Plus she has used some really pretty glittery products that I don’t have on my card, but now are all on my wish list to get!! LOL!!

img_3702_1400x1400

Check out all the awesome things you will receive in the kit!  And if you subscribe monthly, you get a nice discount with it!  (I think it’s great that you can also skip any months you don’t want!)

If you’d like to watch Demo Donna’s video on how she created her version based on my card, please check out the video below or CLICK HERE to see it on You Tube):


Here is the list of Sparkle N Sprinkle products that I’ve used on my card design:         (Click on the links below to purchase products.)

Stamps:  Rose Heart stamp set [939]

Embossing Powders:  Antiquities [EP266], Sparkle [EP107]

Ink:  Nuvo Rose Garden Hybrid Ink Pads [83N], VersaMark [VM001]

Adhesives:  SNS Dimensional Glue [539]

Embellishments:  Nuvo Aqua Shimmer Glitter Gloss Pen [888N]

Tools/Dies:  Tonic Layering Traditional Heart Dies [1459E], Static Free Bag [99512], Tweezers-Fiber Grip [510TWP]

Thanks so much for stopping in today and for checking out all of the links!  I appreciate your time and comments very much! 🙂  If you do click on any of the links to shop, be sure to add my discount code at checkout for 10% off your entire order!

SnS discount code badge

Challenges I’d like to enter my card for:

  1.  QKR Stampede – Anything Goes #329
  2. Simply Create Too – Anything Goes/No Twist
  3. Allsorts – Hearts and Flowers
  4. Happy Little Stampers Mixed Media – Layersjanuary 2019
  5. Pammies Inky Pinkies (PIP1901) – Anything Goes

Anything Goes for Cute Card Thursday!

Hello there friends!  Have you been busy with your Christmas festivities?  I am doing a “run-run Rudolph” right now and trying to finish up my Christmas cards let alone some baking, preparing for a Christmas dinner and finish wrapping up presents!!   It is the fun of the Holiday Season and I enjoy spending time with my family, so I look forward to seeing them all!

It’s a new challenge today over at Cute Card Thursday!  Since it’s that time of year and busy, we made this any easy “ANYTHING GOES” challenge for you!!  We are looking forward to seeing what you’re making!

Since I am trying to finish up some Christmas cards, I thought I’d try and work on some doing “mass production” of a design.  I only do so many of these before I have to switch things up, but I thought these turned out pretty cute:

Vicki-CCT561-Snowman Joy-mass produce

I have used the My Favorite Things “Filled with Joy” card kit (sold out) to make these plus I have pulled out the MFT “Simply Snowflakes” stamp set (retired) to clear heat emboss the background and then rubbed some Tumbled Glass Distress Oxide ink over it.  The panel was cut out with the MFT Die-namics Blueprints 27 and the heat embossed sentiment strip was cut out with the MFT Die-namics Essential Fishtail Sentiment Strips.

Vicki-CCT561-Snowman Joy

Here you can see how I’ve pieced together the snowman.  The die in the card kit cuts out everything including the letters.  I’ve cut his top hat with some black felt paper that was also included in the kit and then I decided to cut out the snowman head so that I could cut out those tiny eyes and mouth with the felt paper as well!  So if you happen to get this card from me, please be sure to rub your finger over the felt pieces in his hat and face!!  I very carefully and lovingly placed each tiny felt dot in!! 🙂  I think that the blue snowflake background really makes him stand out even more!

Vicki-CCT561-Snowman Joy-close

On an even closer look at the card, you can see that I’ve added a sequins snowflake to each snowman’s hat and then added some sequins to the card background.  I filled each one of these with some silver Stickles.  The snowman head was popped up with a foam circle and the rest is just glued down.

Hope you’ve enjoyed my card today!  Please be sure to check out what the rest of the design team has for inspiration and come add your creation to the gallery over on the Cute Card Thursday blog too!

I’ll be back again soon!

Challenges I’d like to enter:

  1.  Daring Cardmakers – Snowflakes Falling
  2. A Bit More Time to Craft – Anything Goes
  3. Always Fun – Snowman
  4. The Creative Crafters – Anything Goes
  5. Double D – Let it Snow!Let it Snow Board