Hello friends! I hope you’ve had a good week and looking forward to a great weekend ahead! The weather has been unseasonably cool for this time of the year and I’m able to get my windows open the last few days and enjoying it! Unfortunately, it’s going to warm up again, so I know that the air will come back on.
Today I’m sharing something that is a bit different and new to me, but I think it will come in very handy for the future as my “goal for next year” is to use up those old card kits that have been stored in my stash for WAY too long! I’m hoping to start this on my blog next year each month and focus on a card kit each month so I can clear things out from my stash! Stay tuned!
I found a fellow crafter Call Me Crafty Al and I decided to give her “Sheetload of Cards“ a try for this month and see how it goes! It would probably have been much easier to do it the way she did, but I challenged myself to use my card kit items instead:
Here’s the set of all eight cards using the same sketch from Crafty Al’s Sheetloadfor this month. You may not recognize the card kit that I’ve used as it’s an old one from Simon Says Stamp. The box had November 2015 written on it, and the paper inside had “Here’s Looking at You” card kit on it. I know that I have pulled it out and used a few things out of it, but there was still plenty to use!
I was looking to make some uplifting/inspirational cards so this all worked out great.
Click on the photos above if you’re on my website so you can get a closer view of them.
I’ve used all of the cardstock except one sheet of kraft, all of the 6×6 papers were used except two sheets and I’ve also used up some of the journaling cards that were included as well as the stamp set and thread. The reason why some of the edges are rounded is because the journaling card inside the kit had rounded edges. I just decided to incorporate that into the design and I think it worked out okay.
Honestly, I don’t know weather to be proud of myself for using up my extremely old card kit or feel embarrassed for having such an old card kit still in my stash!😂
Regardless, I hope you’ve enjoyed my play with the “Sheetload of Cards” for August 2024 utilizing a very old card kit! How about you? Do you still have some card kits or stashes of something from 2015…er older? Would you like to use them up too? Follow along with me next year each month as I attempt to use up those old old old stash items and have a session of “Crafting to the Oldies“! This is me holding myself accountable! Let’s do this!
Thanks so much for dropping in today and have a great weekend!❤️
Hello friends! I hope that you’re enjoying your August so far! Recently, we’ve been experiencing much cooler temperatures than we normally have this time of year, so it’s been great to go out for a few walks.
I’m ALMOST caught up with things that I haven’t posted, with the exception of a few birthday cards that I’ll share later. For today, I’d like to share some projects that I’ve made at an event I attended back in April along with a class from Inky Stamper.
But first, here are a few projects I’ve made for their recent challenges:
This is a tag I’ve made for the Inky Stamper Inkspiration FB Group July challenge. The challenge was to make a tag and I thought I’d try out a fun idea of making a pocket for my tag that held another tag inside so that you could put a message and a gift card.
I’ve used some Limeade Dots/Stripe 12×12 Doodlebug paper to cut it out with and used a border die to help with the pocket decoration. I cut another tag to place inside the pocket for a special message and to include a gift card. At the top of the inside tag, I’ve made little “charms” with images from the Inky Stamper Margarita stamp set. I’ve also stamped the background of the inside tag. I don’t usually color with pencils, but this time I decided to pull them out.
To get the sentiment to fit around the pocket border, I had to curve the stamp a bit to make it work with the tag.
So the Inky Stamper Inkspiration FB Group challenge for August was to use a white pencil. This happens to be a favorite to use for Chelsea with her images and it does make for a nice quick highlight. So the images were just stamped on colored cardstock and I used the white pencil to highlight them with.
I decided to combine this with last week’s Craft Roulette Episode #226 with the parameters of – Project: “See-through” (I made a see-through shaker card) Colors: “Jungle” (I used greens and browns for my jungle) Element: “Teacher(s)” (The sentiment says it all!) Random: “Tangle” (There are a tangle of leaves inside shaker element.)
Back in April there was an Inky Stamper Inky Escape event that I attended and here are some projects that I made from the Make-n-Takes that were provided as well as some of the projects that I was working on using the new release that came out during the event:
(If you are on my website, click each photo to enlarge it and read the captions)
The tag was made my Chelsea that was attached to my “swag bag” and the box was a make-n-take project. There was a moon pie included with project, but when I came home, I added 4 Ghirardelli chocolate squares to show how many fit inside.This card uses the same stamp set as the tag above. The background is a scratch ‘N’ sniff made with Kool-Aid.This was a light up card using the Pear Blossom EZ Light.Cute make ‘N” take with a magnet on the back of the baby roo that fits inside the mama pouch slit!This was an extra make ‘N’ take using some ALL & Create Washi Tape! Cool!
There is actually another Inky Escape coming up in October that I’m attending and I’m sure it will be fun with Halloween and Christmas theme combined!
While I was there, I worked on some more of my own projects using some of the new sets:
I decided to take and use one 6×6 paper pack from my stash and it seemed to go really well with the outer space theme and I love the purple colors from this set. I’ve used the following Inky Stamper stamps sets: Astronaut, Big Words, & Alien.
Click on the photos below to see a close up look at each card:
Before the Inky Escape Event, there was also an on-line class from Inky Stamper that I took part in and that’s because I thought the projects were super cute! Here are the projects that were completed for this class:
These were both created with the Inky Stamper Hedgehog stamp set. The Journal Book , the Doodlebug DIY Snow globe and Doodlebug dimensional stickers/shaker balls were all provided with the class. I decided to add a few extra elements with mine. The tiny hedgehog on top of the snow globe was included in our box, but not apart of the projects…but I thought it would be fun to add it!
Speaking of Doodlebug, while I was at the Inky Escape Event, Chelsea had a few things on sale and I snagged a kit and special ordered the Doodlebug Frame with it. So when I got back home and the frame came in, I wanted to do my project right away:
I have this displayed in my stamp room and I love the rainbow of colors in it with the different crafty tools in smile faces! The size is 8in. x 8in. with a glass on the front. Although it’s not really that visible in the photo, it is actually quite dimensional.
I think it goes well with the black frame that matches my black frame with the crafty squares swap group I was in. (You can see that post here.)
Whew!😳 I’ve been really busy this year, but I don’t think you would’ve known this without my posting about it! I’m glad that I’ve gotten caught up with things that I’ve done and hopefully I won’t be doing posts like this in the future! It just seems like so much all at once!
Anyway, there we go and now I need to finish and send out a few birthday cards coming up, so I will catch up with that later as well! For now, thanks so much for stopping in and keeping tracks of my sporadic postings! I will be back to share a DT post for a challenge coming!
Hello friends! It’s Thanksgiving tomorrow for us in the United States and I’d like to send a heartfelt Thanksgiving greeting to you all! I would also like to say a huge thank you to everyone for your kindness and friendship. I’m very grateful for you and encouraged by your support!
I’ve been working on several things and haven’t spent the time to photograph and share everything yet, but I will be sharing soon. In the meantime, I’d like to share a few projects that I’ve made in lieu of the Thanksgiving holiday:
I don’t normally send Thanksgiving cards, but it’s a great way to say thank you to someone that hosted a dinner or brought something to share or just spend time with you! That is the ONLY turkey stamp I own! The stamp set is called “Sassy Thanksgiving” by CZ Designs at Simon Says Stamp. I thought the sentiments in it were too cute and funny. You certainly could make this any type of thank you as well.
This is also a fancy/fun fold card called a “Swing Easel Card”. I found a tutorial using a vertical style on You Tube here – SWING EASEL TUTORIAL (I also used the same detail of embossing an additional panel with leaves and went over the texture with some gold paste.)
I made another panel for the center area and ink blended some blue that faded out and then splattered some gold paint over it. I then layered it over a piece of gold that fits in the center panel of the easel. I gold heat embossed the large sentiment and cut it out with the die. It was popped up over the leaves. I also cut an additional strip with the gold for the “catcher” of the front panel of the easel card. I added the turkey and leaves along with the stamped sentiment on the inside bottom.
Autumn is my favorite time of the year and I enjoy using the colors and images in the cards I make, so here’s more that I’ve made:
I’ve made a couple of encouragement cards to send out to some people and I’ve used a favorite card kit from my stash by Taylored Expressions. The images come from the stamp set Wheatfield Dreams. I’ve used an oval die and oval mask to do some ink blending and just cut out the colored image to pop them over top. Both sentiments were copper heat embossed.
I kept the backgrounds simple with the one on the left stamped with a background stamp from TE and the other was cut out with a wonky stitch die and layered over a green card base.
Hope you’ve enjoyed my creations, and I am so grateful you’ve chosen to stop by!❤️
Hello friends! Hope you’re enjoying your week so far. We’ve been having some really hot and dry days lately, so I’m trying to get some motivation going and have some play time for crafting!
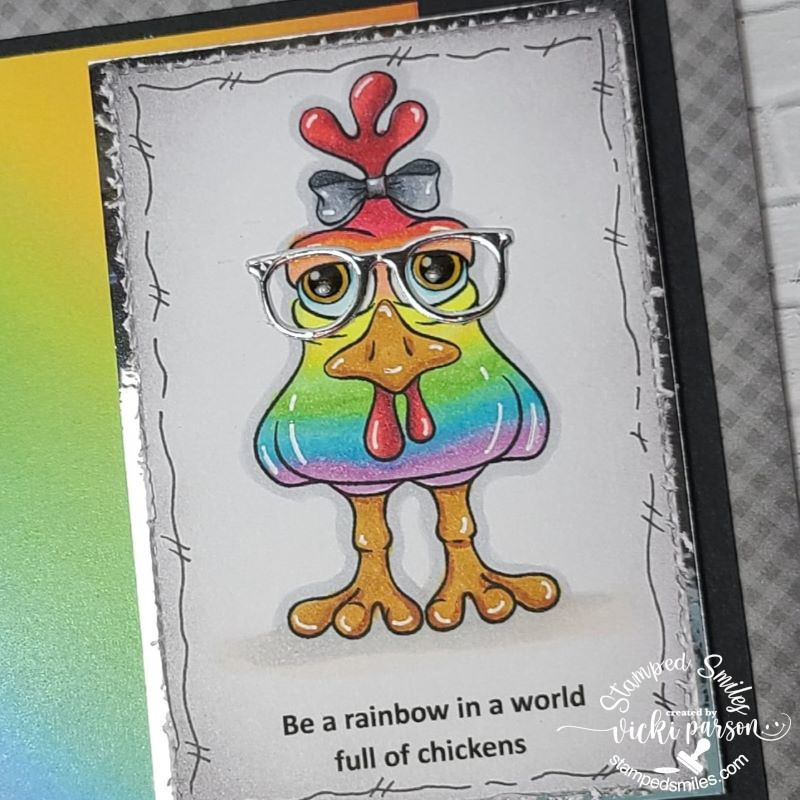
I have not played along before, but I decided to grab this fun digital freebie from the Beccy’s Place Challenge and have a go at it because it really made me laugh when I saw it!
Isn’t this such a fun image?! There was an option of different pre-colored images, but I decided to print out the lined image to color in. I colored the chicken in rainbow and then added a pair of die cut glasses in silver mirror cardstock that I had on hand. (I already had the glasses cut out from another card I made that was laying out on my desk, so when coloring this image, I thought it would be fun to add!)
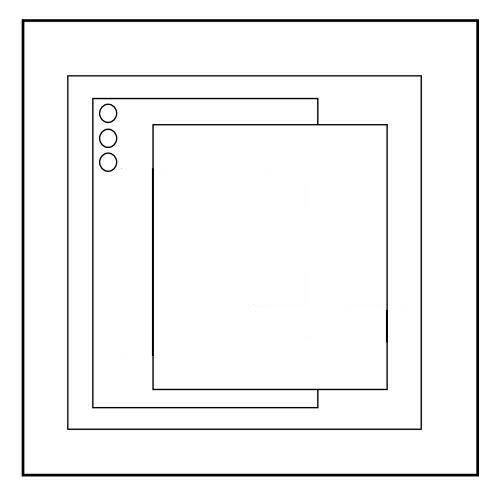
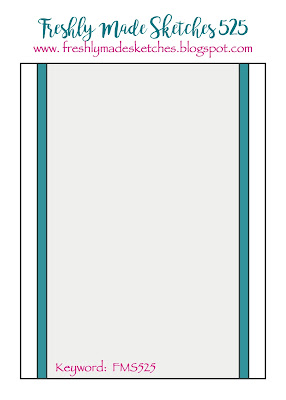
The layout came from a sketch challenge that she’s also sponsoring. (see challenge list below) I thought that I was going to leave it as just black and white to make the rainbow chicken stand out, but I found some fun rainbow papers and decided to add one panel to go with the chicken. I came up with and typed out the sentiment underneath the image and printed them both together.
For another part of Beccy’s challenge, there is an optional theme she included which was “doodling”. So I took a white gel pen and added some lines for highlights on the chicken. I’ve also taken a black marker pen to make some squiggle lines around the image panel too. I blended some grey ink around the edges and then used a distress tool for the distressed edges.
After adding the glasses, I covered the eyeballs with some crystal effects for shine.
And this one has been sent off to hopefully make someone smile! I hope you like it too!
Thanks so much for dropping in and I’ll see you again on Saturday for another AJ page!
Hello friends! Welcome to the weekend and hoping it’s a good one for you.
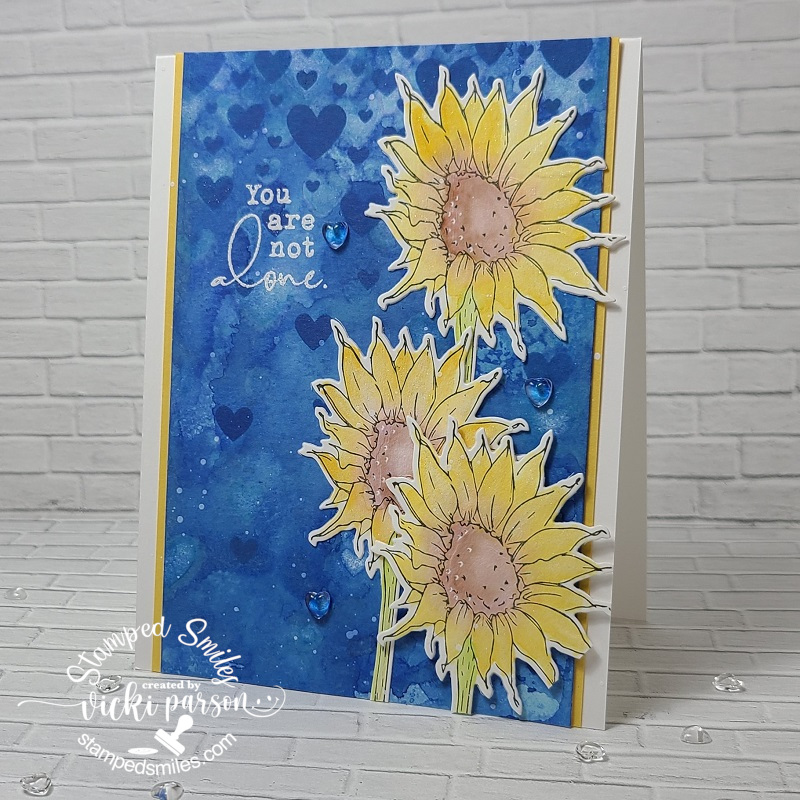
So as I’m sure you’ve been seeing lots of card makers pulling together in making some beautiful inspiration with the Ukraine flag colors and Sunflowers in support. I’m seeing where there is some sort of card auction going on over at Instagram too, but I’m not on there to see anything. It has moved and inspired me, so I would still like to help support in some way as a card maker to share some inspiration and hope for peace in the world too.
So my first thought was to turn to one of my favorite sunflower stamps which comes from the Taylored Expressions Wheatfield Dreams and I thought they would be appropriate for me to pull out some of my Karin Brush markers to watercolor. I’ve also used the coordinating die for the set to die cut the flowers.
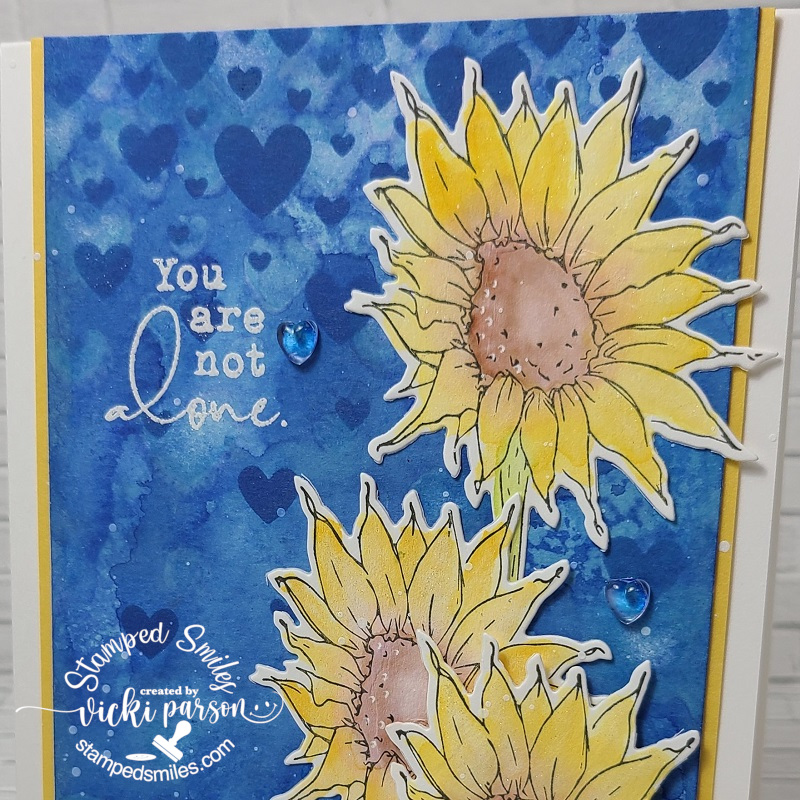
For the background, I’ve used some watercolor paper and some Ranger Blue Ribbon Oxide ink for the background by smooshing the ink pad onto my glass mat, spritzing with water and smooshing it over again with layers of water, smooshing, drying, spritzing, etc. I also used the Taylored Expressions Heart to Heart stencil with the same ink and foam tool to go over top of it.
I prepped the background with an anti-static tool and white heat embossed the sentiment from the Taylored Expressions Beautiful Soul stamp set. I cut down the sides of the watercolor paper and added some strips of yellow cardstock to the edges and attached it over an A2 sized top folding white card base.
I then glued down the die cut sunflowers except for the one in front where I used some foam tape to pop it up.
I took a white gel pen and added a few light dots in the center of each flower for some highlights and then took a glitter brush pen for some shimmer to the petals, but it’s so hard to see in the photo. I decided to water down some white paint to add a few splatters.
Lastly, I’ve taken some heart shaped clear dew drops and attached a few to the background.
I’m pleased with how the card turned out and hope you’ve been inspired in some way too. Thanks for stopping in and sharing your wonderful inspiration and lovely thoughts my friends. Take care of yourself and one another.
Challenges:
1. Festive Friday – ###0104 Choose 3 from list: I chose Flowers/Plants, Encouragement & Stencils
So after getting my calendars ready to start the year off, which is easy to sit and craft during the cold snowy winter where I live, my mind turned to winter when creating! Sometimes it’s nice to create with a “snowflake/winter” theme because I think they can be used interchangeable for Christmas or just a “warm winter greeting” for someone! (Or… because you might be late sending one out or for those friends overseas that won’t arrive one time!)
Today I’m sharing a card that I’ve made for this month’s Inky Stamper challenge on FB with the theme: “Shaped Cards.”
Isn’t she cute?! I was trying to come up with a different shape besides a regular circle, etc. So, I looked up “coloring pages for kids” free online and found this one that I resized to what I wanted and printed it out over some light purple cardstock. I used another printed one as a template so that I could cut another one out over a folded cardstock piece to create a shaped folded card design. (You can partly see the back piece in the photo.) The sparkly “ball” at the top was just die cut out from a scallop circle die with sparkly silver cardstock.
For the card front, I used the Inky Stamper Snow Angel stamp set to stamp the snowflakes in the background with some purple ink. I white heat embossed the sentiment over and wanted it to stand out a bit more, so I sponged some more light purple ink over top of it. I colored “Rosie” over Copic blending card and used the die to cut her out with. I’ve die cut a couple of the large snowflakes from Lawn Fawn with white cardstock and layered them over the beanie hat. You can see that “Rosie” is popped out a bit over that snowflake, which is where I’ve added a “wobbler” to her.
I finished the card with some sparkly Icicles sequins mix. I filled the centers of them with some Silver Stickles.
Because of the “ball” on top and the length of the “beanie band”, it needs to be in a 5.5″ square envelope to mail. You could also make your own envelope which I do all the time anyway. But the 5.5″ size fits perfectly.
*Speaking of Inky Stamper things, this past prior weekend there was an OOAK event (on FB) that Inky Stamper was a part of, so of course I wanted to get the kit and play along too! Here’s my results:
The top card is an interactive “Theater Fold” design. (All of the pieces were included with the kit along with an instructional video/class.) She usually always includes a mini bonus card which measures about an ATC size. (3.5″ x 2.5″) She used the “icicles” from the stamp set, but I decided to stamp and cut out another snowflake for the front of mine. I added a pretty gem to the center of it.
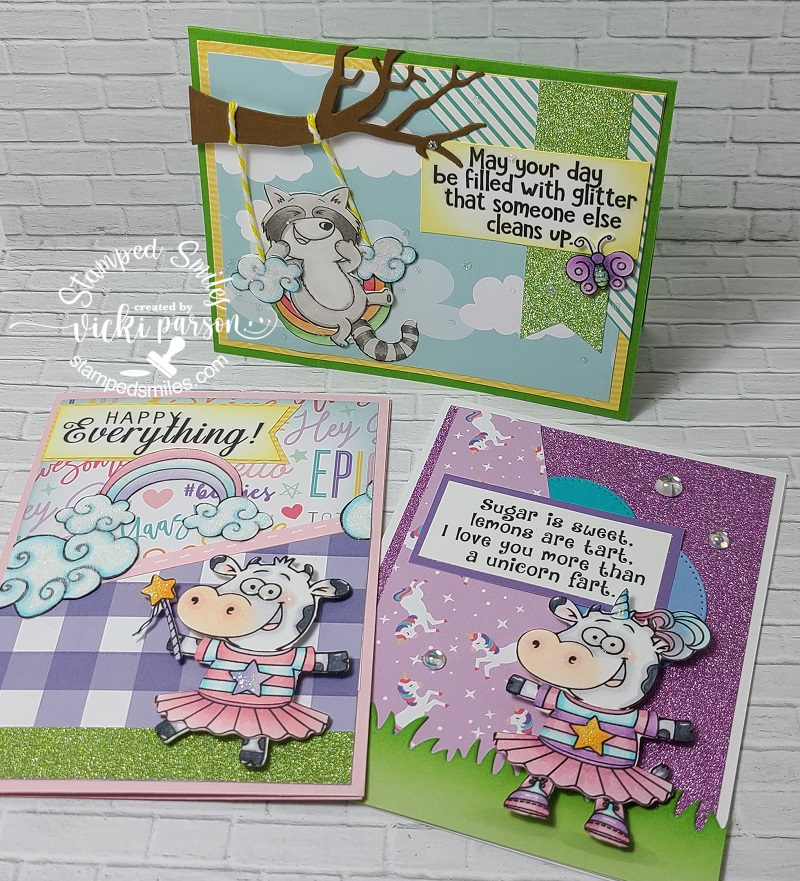
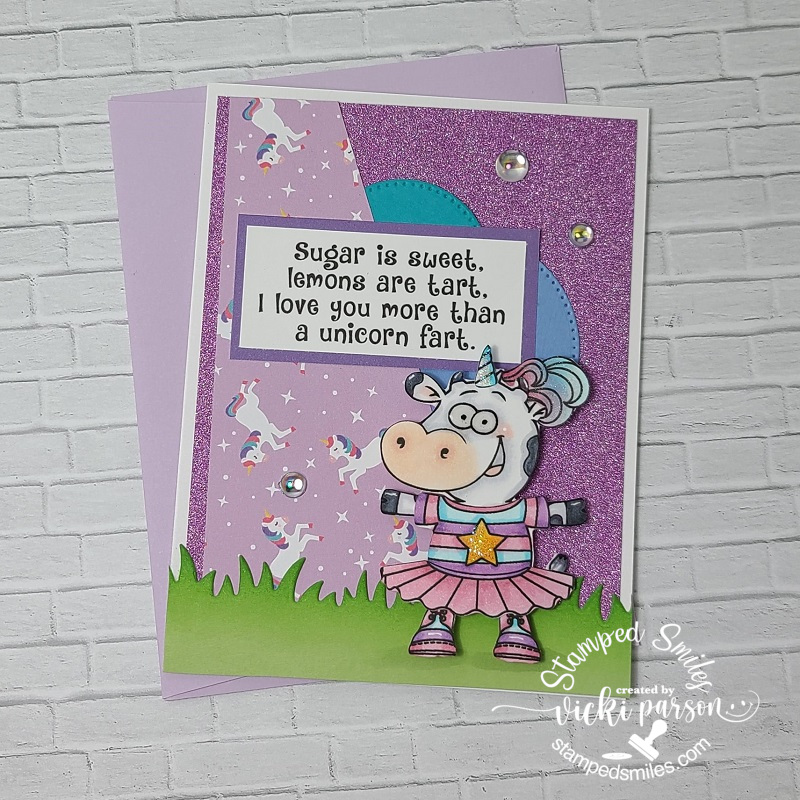
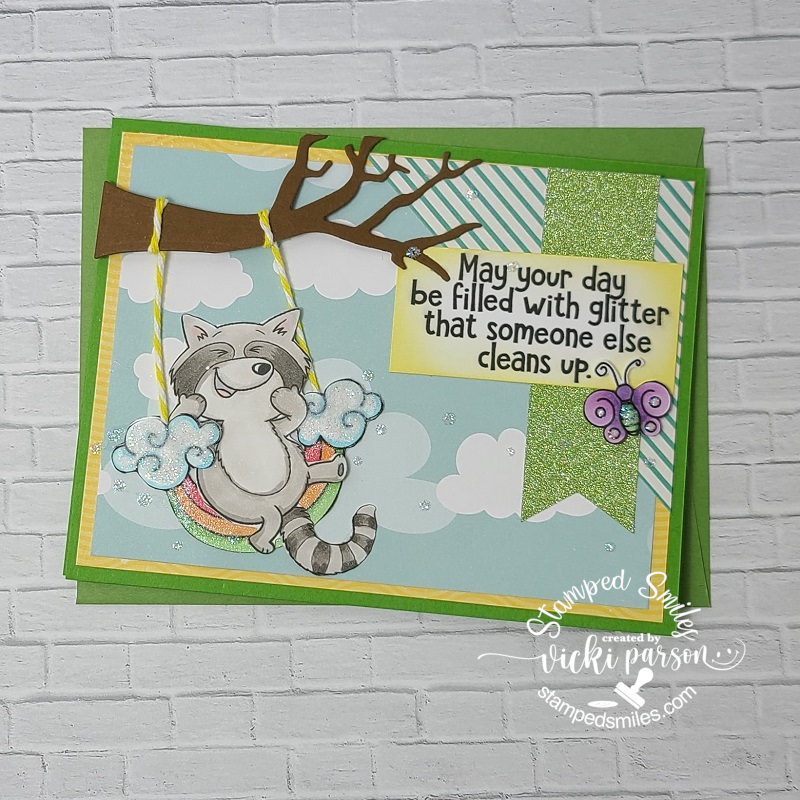
And of course, that’s not the ONLY fun I had during the OOAK event! I decided to play along with the always cute and funny Riley and Co. as well! Here’s the set of cards created from that class:
I just thought these were so cute with the cow images and their little outfits along with the “Funny Bone” sentiments! The instructions came with the kit which were really easy to follow along with. I basically looked at the photos and put together the pieces from the kit. For the clouds, I decided to pull out some sparkly white flock to cover them with. They have a nice soft feel to them! They just make me chuckle and I think it will be fun to send along to someone who needs a smile! 😉
*If you are visiting my website, then you can check out each one of these cards in the gallery below by clicking on the photos to enlarge them: (I’ve found some coordinating envelopes from my stash for each card.)
Flock was added to the clouds.purple, sparkle and funny sentiment…what more could you ask?!rainbow image was turned upside-down for the swing! So clever!
I sure hope that you’ve enjoyed my post today and have been inspired in some way! Really appreciate you stopping in and I’ll be seeing you soon!🥰 Stay warm!
Challenges (For Winter Beanie Hat Shaped card ONLY):
Hello there friends! Just popping in here today to share a smile with you!
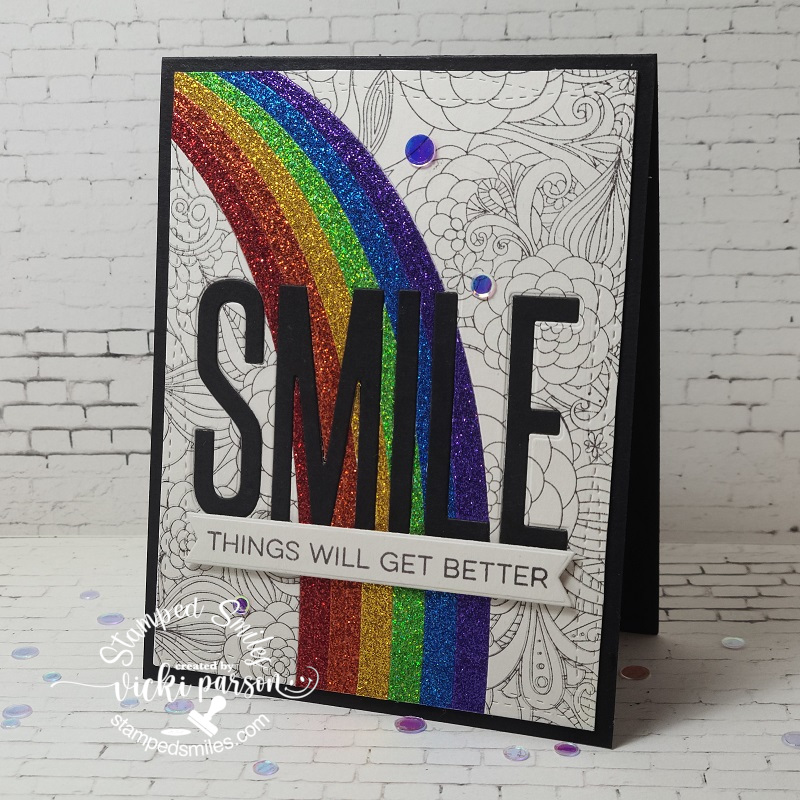
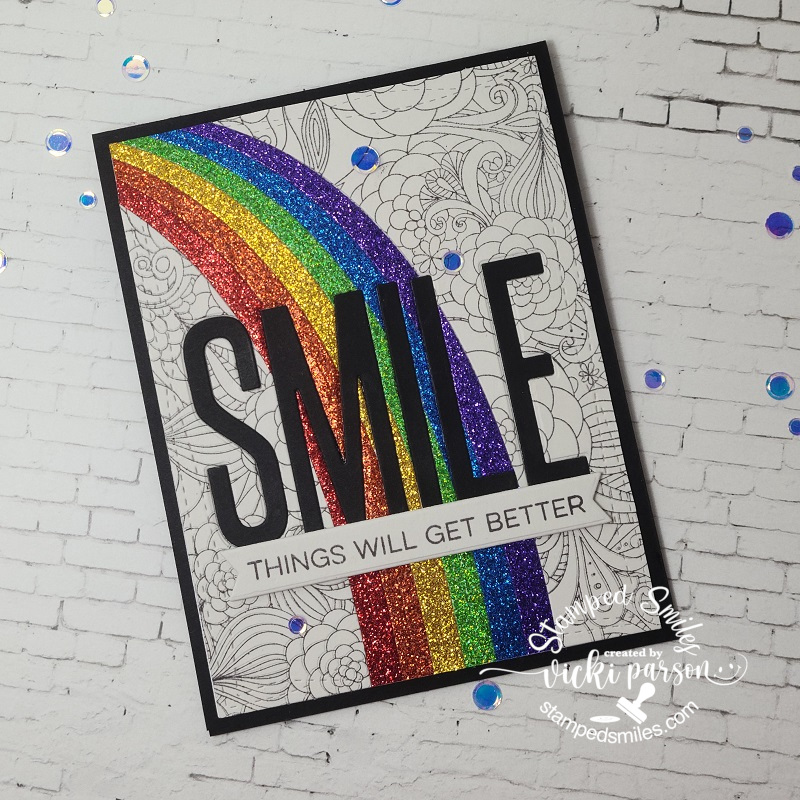
The MFT Summer School lessons continue with Day 2: RAINBOW! For me, nothing says “smile” like a rainbow and we certainly need plenty of smiles these days!😀
I wanted the rainbow on my card to really stand out, so I’ve used an older MFT background stamp no longer available called “Floral Fantasy” and stamped it with Steel Gray Ink over a piece of Grout Gray cardstock that was cut out with the Wonky Stitched Rectangle die.
I used the “End of the Rainbow” die, no longer available, to cut through the background and then I used the different strips in the rainbow to die cut the different colors of glitter paper to fill it in with. I used the Sunset and Mermaid glitter paper stacks for the strips. I then took an older MFT SMILE die and die cut over top of the rainbow and stamped background. I die cut the words again with Black Licorice cardstock and inlaid the letters over top of the background. I mounted the background over an A2 sized top folding Black Licorice card base.
Lastly, I stamped the sentiment from the “All Smiles” stamp set (no longer available) over more of the Grout Gray cardstock and cut out with a banner die and popped it up underneath the die cut letters with foam tape. I finished the card with some sparkling clear sequins.
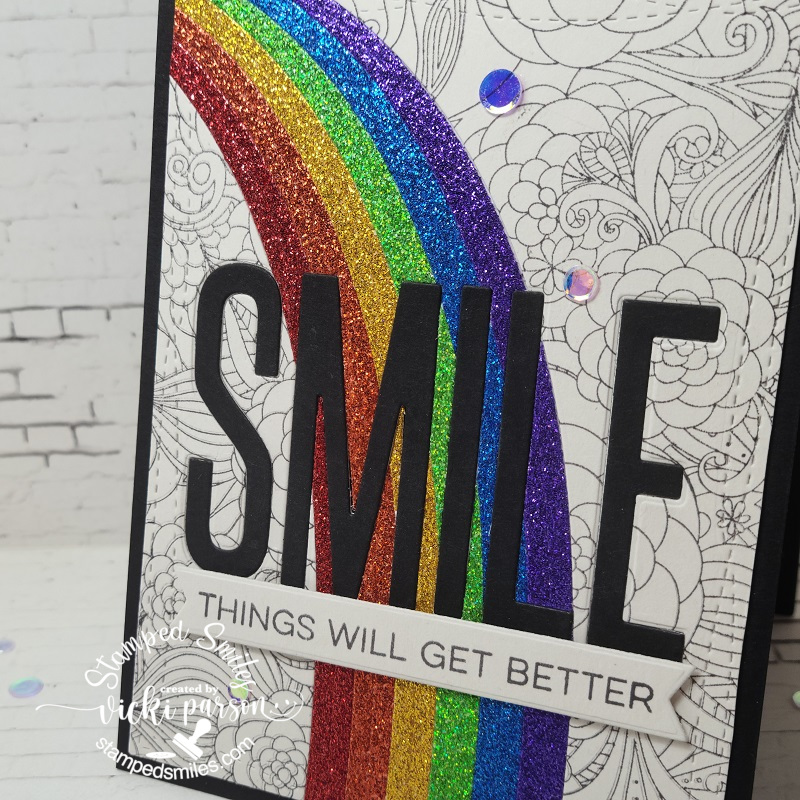
Here’s a closer look at the glittery rainbow that I’ve inlaid for the background as well as the “smile” letters too. Hopefully, you can see from this angle how all of it is incorporated into the background of the design. The only thing that I popped up was the sentiment banner.
I hope that you’ve enjoyed my card today and it helped bring a smile your way! Thank you so much for taking the time to stop in today my friends! I’ll see you soon!
Hello friends! Hope you’re having a great week! I’m so glad you’ve joined me today as I have lots of fun creations to share with you!😀
This past weekend Whimsy Stamps held a “virtual craft retreat“, so I thought I’d tag along and join in on the fun! I’m glad I did because I made several cards:
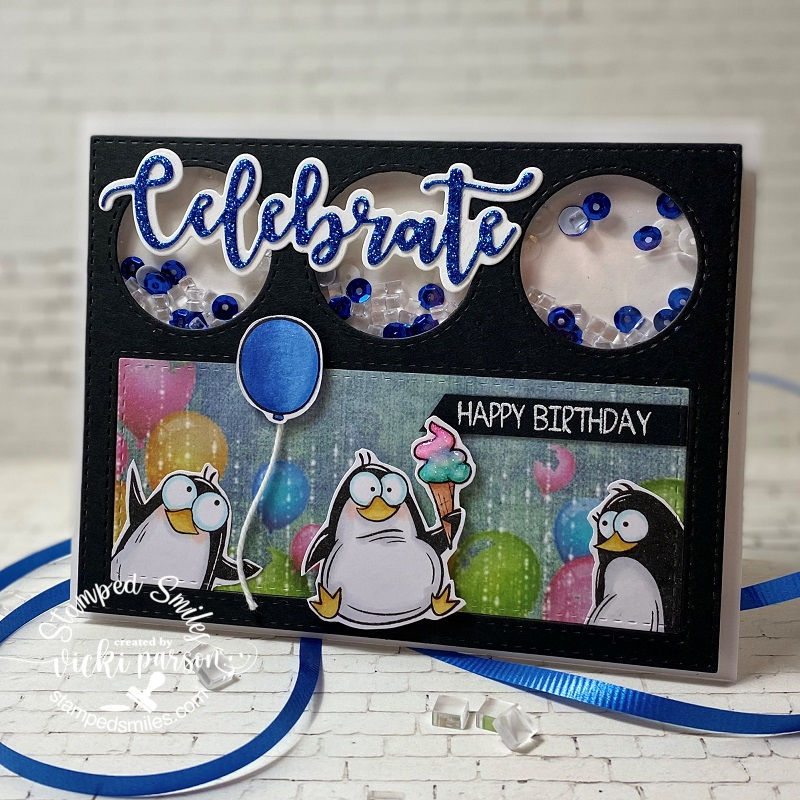
The first challenge given was a tic-tac-toe challenge. I did 3 down: birthday, heat embossing and circles for mine. Almost had 2 bingos…but didn’t quite work out! Aren’t those penguin eyeballs the best?! LOL! I needed to send out a birthday card to someone so this was great timing!
The background papers, cover die, sentiment die and the penguin stamps are all from Whimsy Stamps. I even put little ice cube confetti for my shaker card!
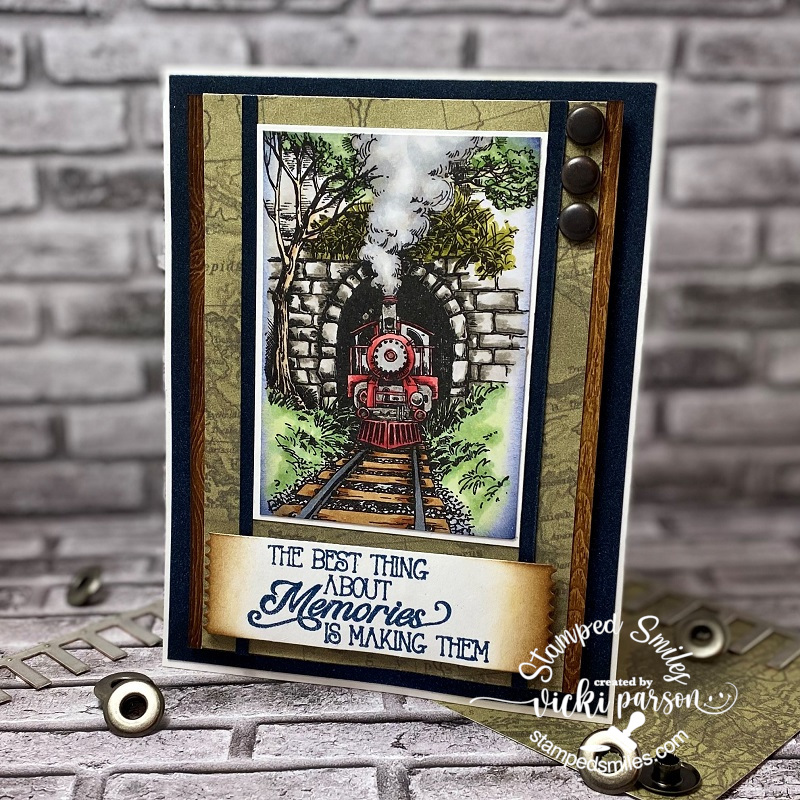
This card was made for the second challenge given during the event which was to use a sketch and a color palette using at least 2 of the colors given. This was my take on the sketch along with using blue, green and brown from the palette.
Most all of the items used on this design came from an older card kit from Whimsy Stamps. The stamp set is still available in the store called Enjoy the Journey. For the sentiment panel, I heat embossed a sentiment from this stamp set and then used the Slimline Postage die to cut along the edges of it.
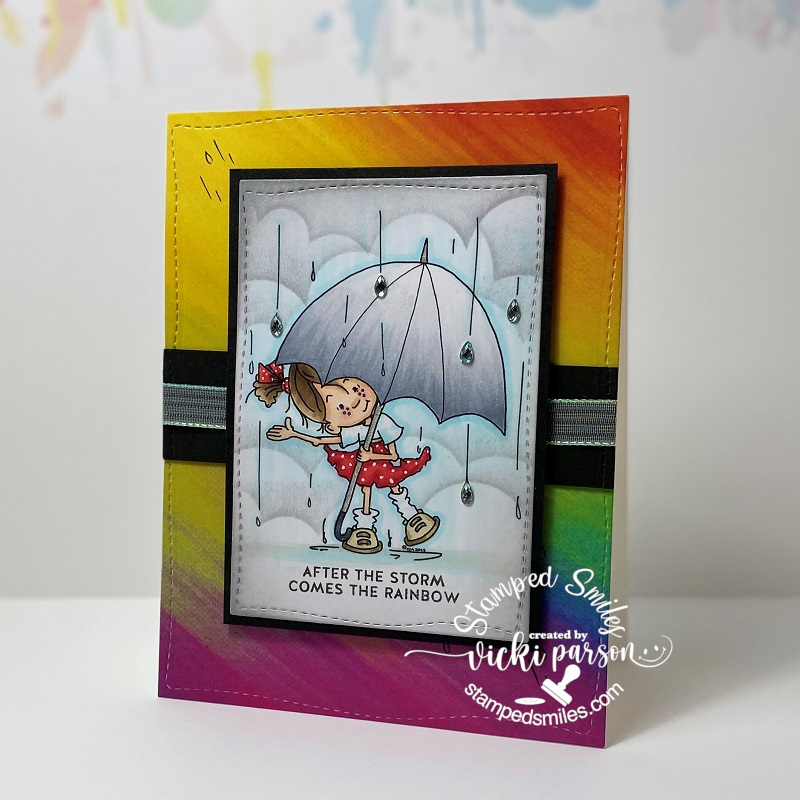
Tihs is the card that I created for the third challenge issued which was to follow a photo prompt with words: “When it rains, look for rainbows. When it’s dark, look for stars.” The first thing that came to my mind was these cool Rainbow Papers from Whimsy Stamps and so I’ve cut a panel out with an older Whimsy Stamps die along with the image panel.
This image is called Rainy Day Smiles by Sassy Cheryl’s which is what I had actually won as a prize from the event over the weekend for one of the games..so that was cool! I wanted to be sure to use it for one of my cards! I added some raindrop crystals on a few areas of the image too.
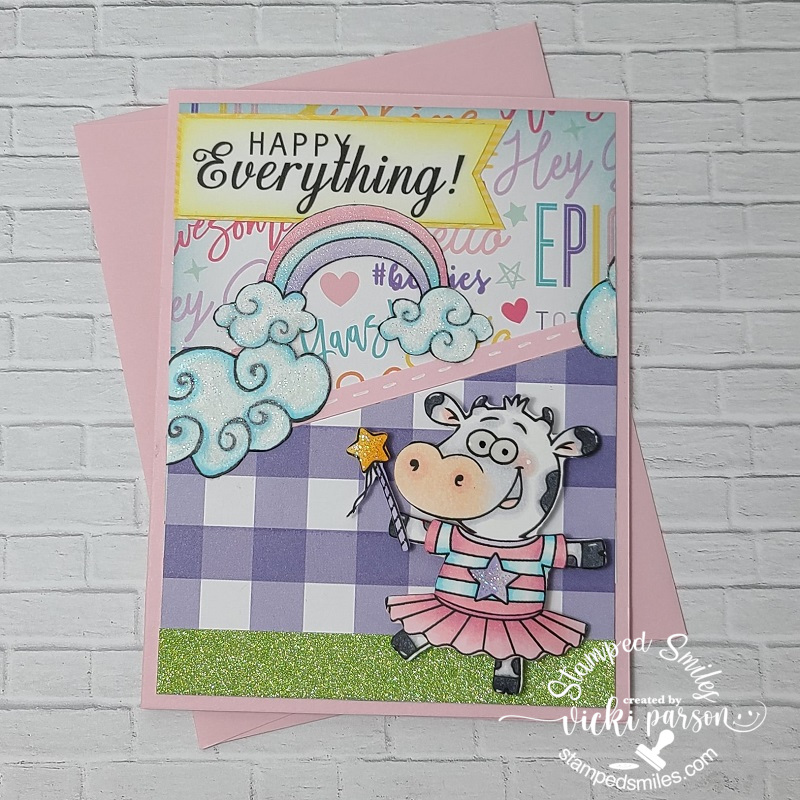
This card was made for the fourth challenge given which was simply to create a project with one of the digital freebie images that was given during the event.
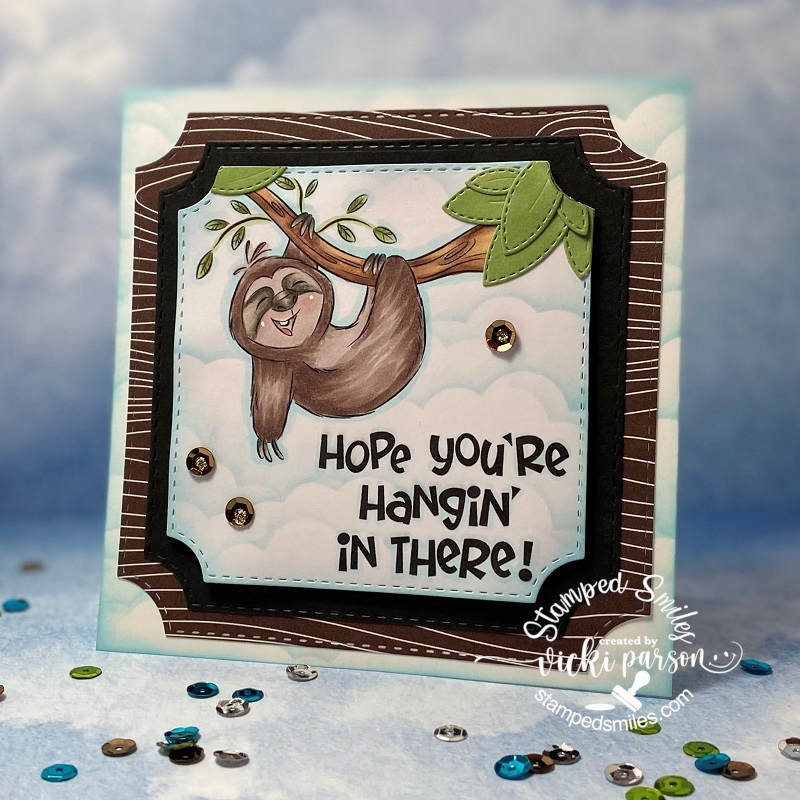
Facebook actually kicked me out of the event a few times for leaving too many comments! LOL! I was trying to participate in games and it told me that I was leaving too many comments! This was one of the cute freebie images that they gave at the event called Sloth. After all that happened…I felt that this little guy was laughing at me!🤣🤣🤣 So I wanted to laugh right along with him, and I printed him out, colored him with Copics and used the Whimsy Stamps Notched Square dies and layered him over some papers from my stash and attached to a 5″ square card base that I stenciled some clouds on along with the background of the image. I die cut some leaves from the Whimsy Stamps No-See All Seasons Tree die set to add to the top corners of the image panel.
Needless to say, I did “hang in there” right along with him!!😄
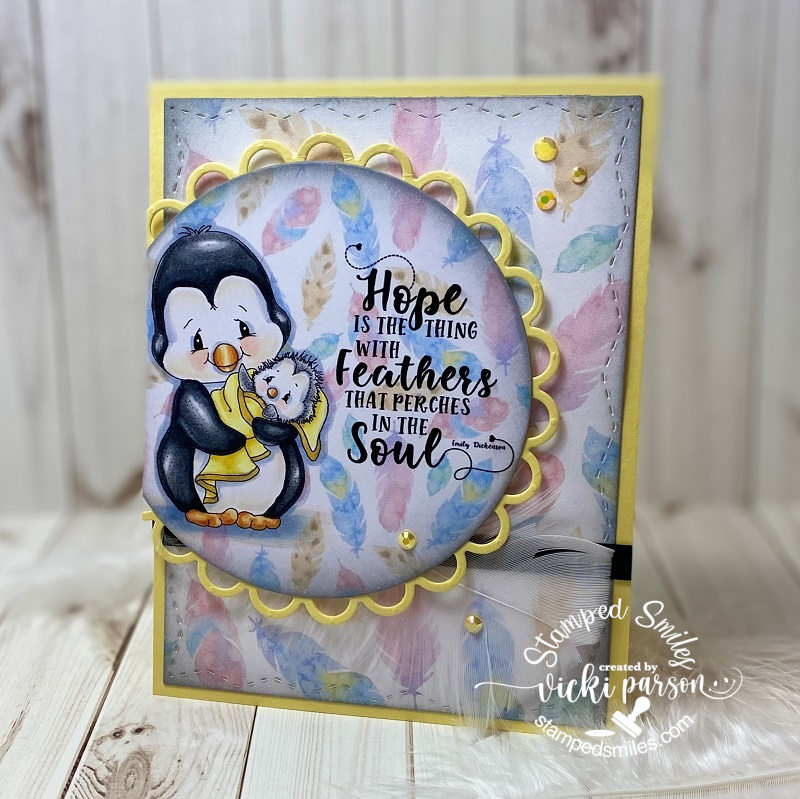
And last but not least, the fifth challenge was to make a project based on one of the video tutorials that was shown at the event. Of course, I’m always inspired by Crissy Armstrong and her coloring! This sweet little penguin called Penguin Momma was a freebie given during the event and I watched Crissy color this up and I tried my hand at her tips and tricks.
I printed out another piece of the feather background and cut it out with the Whimsy Stamps Zig Zag Stitched Rectangle dies and added my own white feather to the design. I sponged some grey ink around the edges of the printed papers and added some yellow crystals.
I had such fun creating these projects and pulling out my Whimsy Stamps stash for the challenges. And now I have a few cards for sending out to people that I already have in mind! Hope you’ve enjoyed my makes today and I’ll be seeing you again soon!! (The links in this post contain affiliate links if you want to purchase anything! Thank you!!)
Hello there friends! Hoping you had a wonderful weekend and a fabulous Mother’s Day as well! I had a wonderful day with flowers delivered to me and wonderful phone messages.
Today I wanted to share a couple of cards that I had made participating in the “Spring Card Camp” classes from Online Card Classes. (It started April 11 and ran through the end of April.) Although we are now on a separate Part 2 Spring Card Camp, I have enjoyed the classes each day and I thought I’d just take my time and enjoy everything. So there may be posts spread across time as I go. I just like to take my time and actually enjoy the process rather than hurry up and run right through it. I feel this helps me to fully understand what I’m doing and what products I’ve used, take notes, etc.
The first class was taught from Jennifer McGuire as she showed us how to use a stamp and create our own embossing folder to make an impression with it!! Something that I had not heard of before, so this was fun to try out:
So the idea of each class is to pretty much get a “two for one” type of design and stretch your supplies and design concept so that it makes it easier to create multiple cards at a time, which is really great right now as I seem to be making more cards and donating extra cards that I normally wouldn’t be doing at this time of the year. (I also actually thought this could be applied towards Christmas making time as well…which I will be keeping in mind!)
I started with this panel first as this was my piece that created the faux embossng folder:
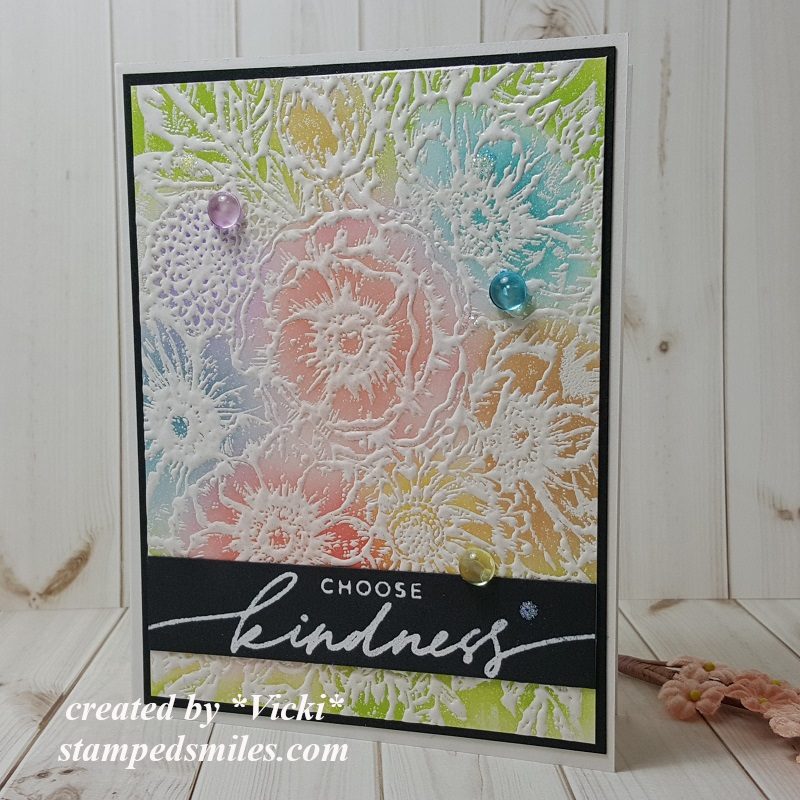
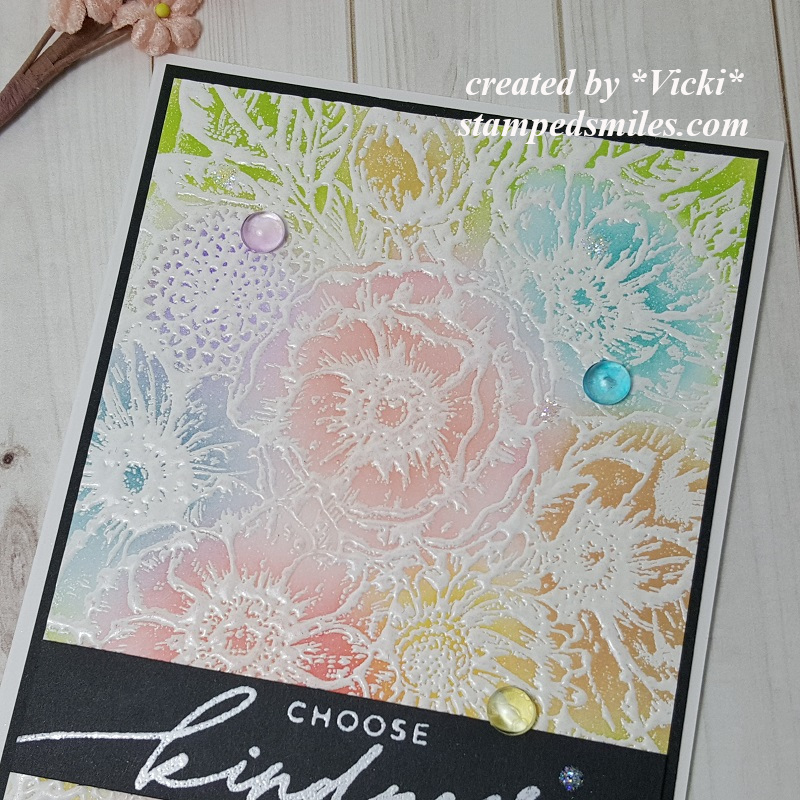
I decided to use this gorgeous large image from the Kind Floral stamp set to create my “faux embossing” piece with. This image was heat set several times with white EP. All of the cards I made including the sentiments were used with this same stamp set.
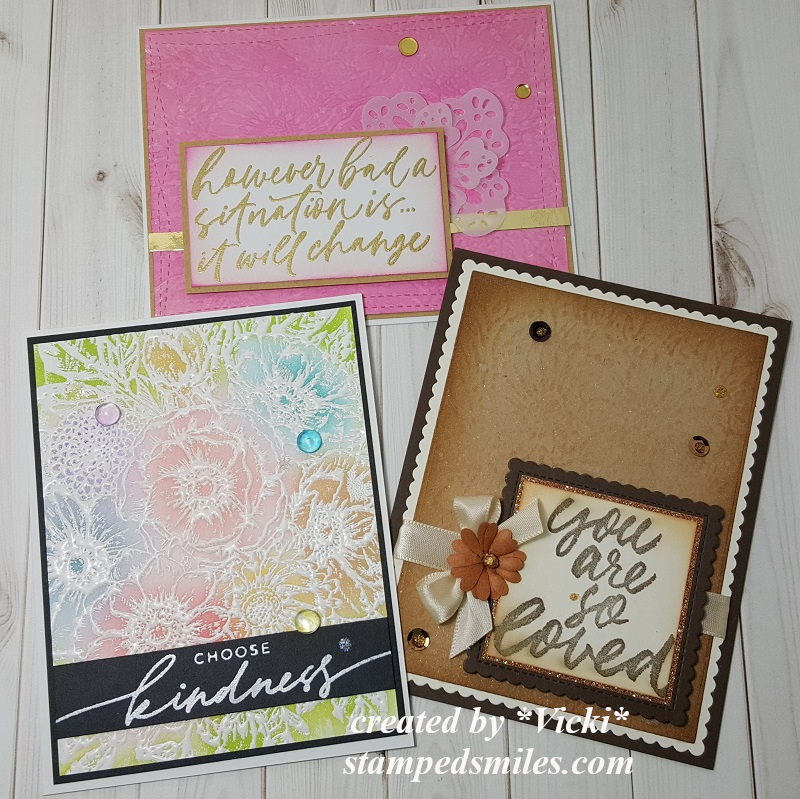
After using it for my “faux embossing” on my other cards shown below, I went back to it and finished it on a card by using some blending brushes and ink to color in the panel. I took a strip of black cardstock and white heat embossed the sentiment over it and then layered it onto a white A2 side folding card base. I finished it off with some colored bubble drops and Stickles glitter drops.
Here’s a closer view of the white heat embossing I did on this panel with the image. It’s very thick as I had to build up layers to create a faux embossing folder to get a good impression with it. (See below)
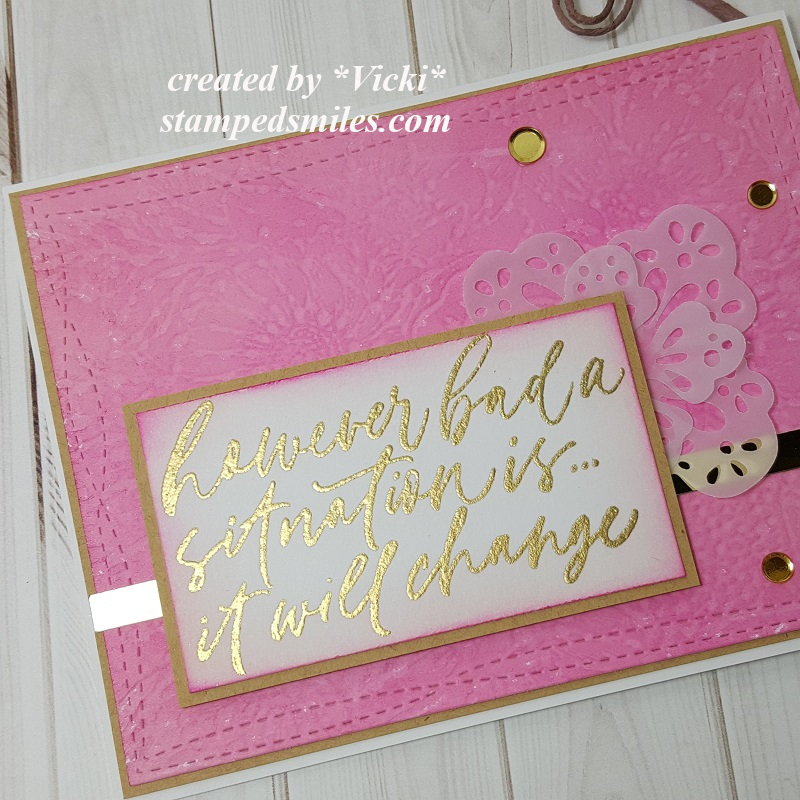
For my first card using the “Faux Embossing” piece, I took a sheet of pink cardstock and made the impression into it. You can see it in the background. For this panel I used the negative side of it and then sponged some darker pink ink over top of it so that you can really see the impression from the image. I used a Wonky Stitched Rectangle die to cut it out with and layered it over a piece of kraft Cardstock. This was attached to a top folded A2 sized white card base.
I took another sentiment from the same stamp set as above and heat embossed it with Gilded EP. I sponged some more pink ink around the edges of this panel and layered it over another piece of kraft CS. I popped it up with foam tape over some die cut flowers from vellum along with a strip of gold mirror cardstock and finished it off with some gold sequins.
Here’s a closer view at the texture in the background from the faux embossed piece.
I thought this gave a subtle but soft and pretty look to the design. Also, that sentiment could not be at a more perfect time right now, don’t you think?
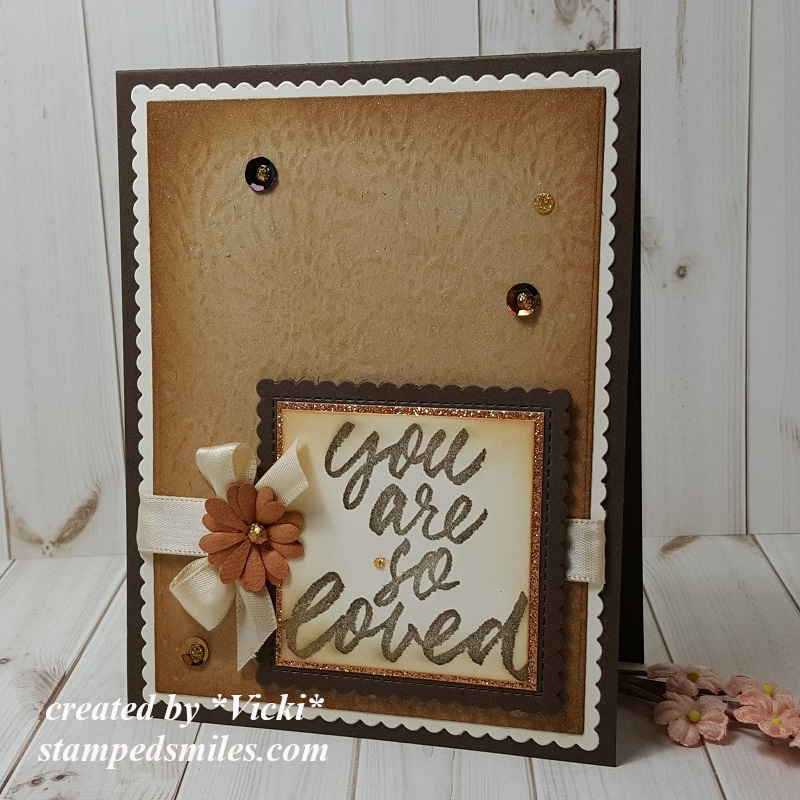
And for my last card, I made the faux embossed background using some more kraft CS. This image I used the positive side and ran some distress ink over the raised areas to bring it out more. I took a darker brown ink to go around the edges.
I stamped a sentiment from the same stamp set with brown ink, layered with some Copper Glitter paper and then cut a piece of Macchiato CS from a scalloped stitched square die that was also used for the A2 Sized top folding card base, and popped up the sentiment panel with foam tape.
I layered the embossed background piece over a vanilla cardstock layer that was cut with a scalloped stitched rectangle die and then I wrapped some silk ribbon with a bow around it before placing the sentiment panel over it. I attached the flower and the sequins to the design and finished it off with some Nuvo Honey Gold Glitter Drops.
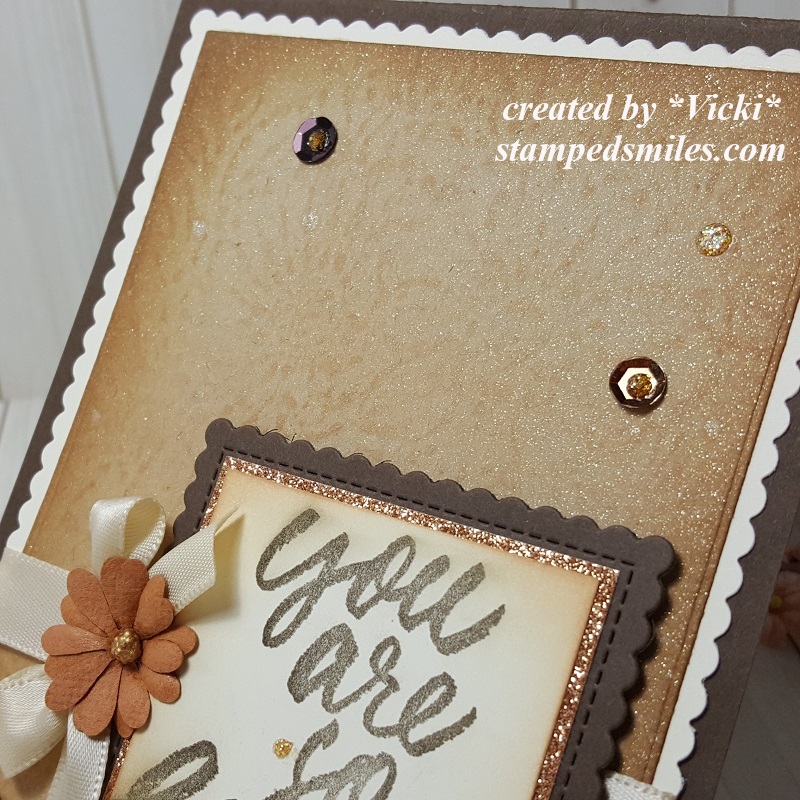
Here’s a closer look at not only the texture from the embossed background piece, but I also took some Shimmer Spray and covered the background with it. You can sort of see the beautiful shimmer over it…and it really looks incredible in person.
Hope you’ve enjoyed what I’ve learned and created for class! Thanks for dropping in with me today! There will be more things I have to share with you coming up, so I’ll see you soon!!
Hello friends! Happy Tuesday and I hope you’re having a wonderful week so far! I actually can’t believe that September is already flying through this quickly!
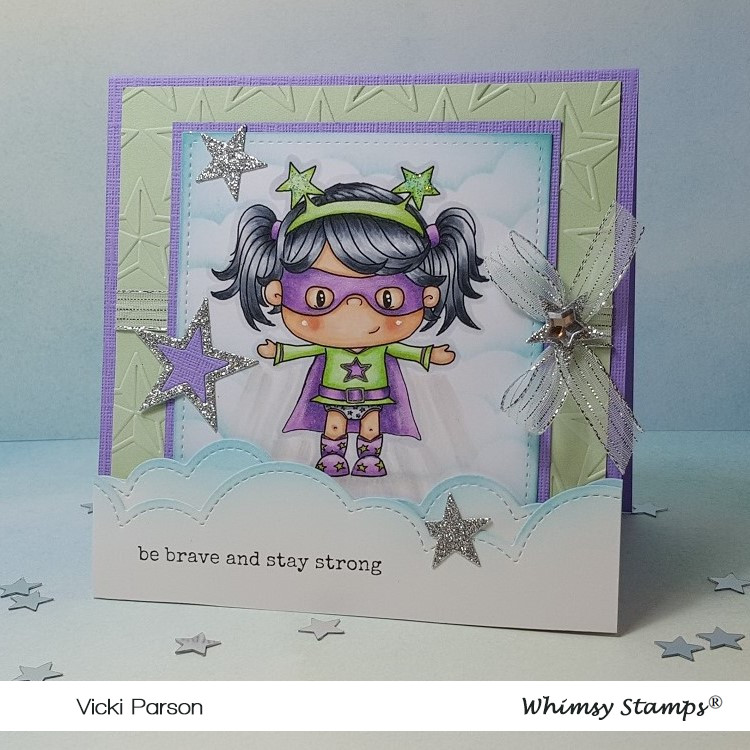
Speaking of “flying”, I have this really cute card to share with you using another Whimsy Stamps image:
This little digital cutie is called Starla from Whimsy Stamps. She has her arms out and so I thought it would be cute to have her appear as if she’s smiling while flying up through the clouds at us! I also thought this would be a really nice encouragement card for a child and I’ll be sending it out to hopefully share some smiles.
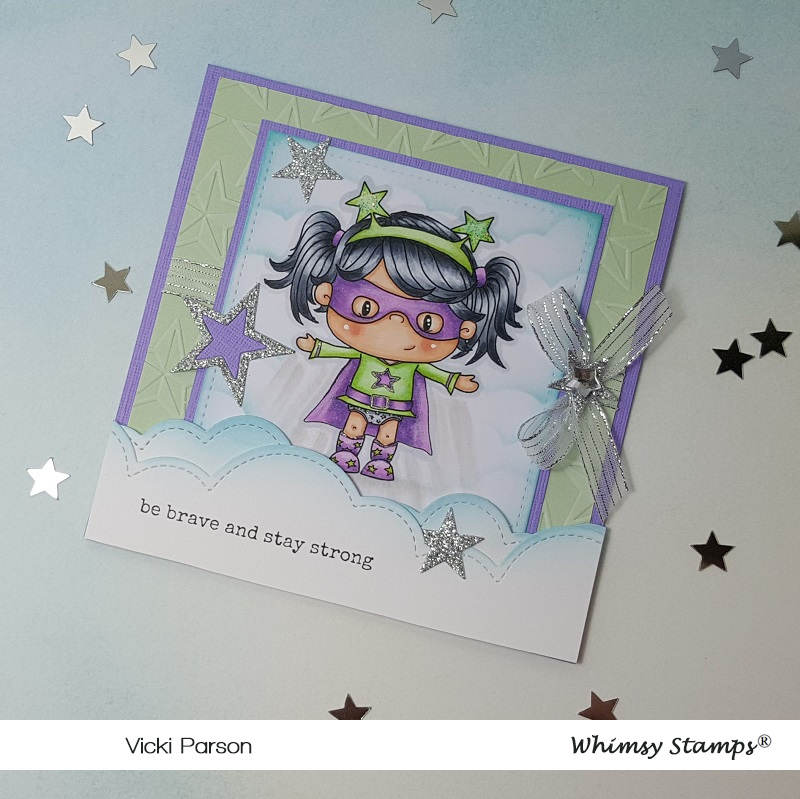
I stenciled some clouds in behind her, cut the image out with a stitched square die and layered a piece of purple cardstock behind her. I ran a piece of green colored cardstock through a star embossing folder, wrapped a silver ribbon around it and then attached it to a purple 5″ square top folding card base.
I die cut some stitched cloud borders for the bottom of the card design but sponged them with some Broken China Distress Ink before attaching them with foam tape. I also die cut some stars to add for accents on the design with both silver glitter stock and a piece of purple to paper piece in the center of one of the silver outline stars. I also added a rhinestone star to the center of the bow.
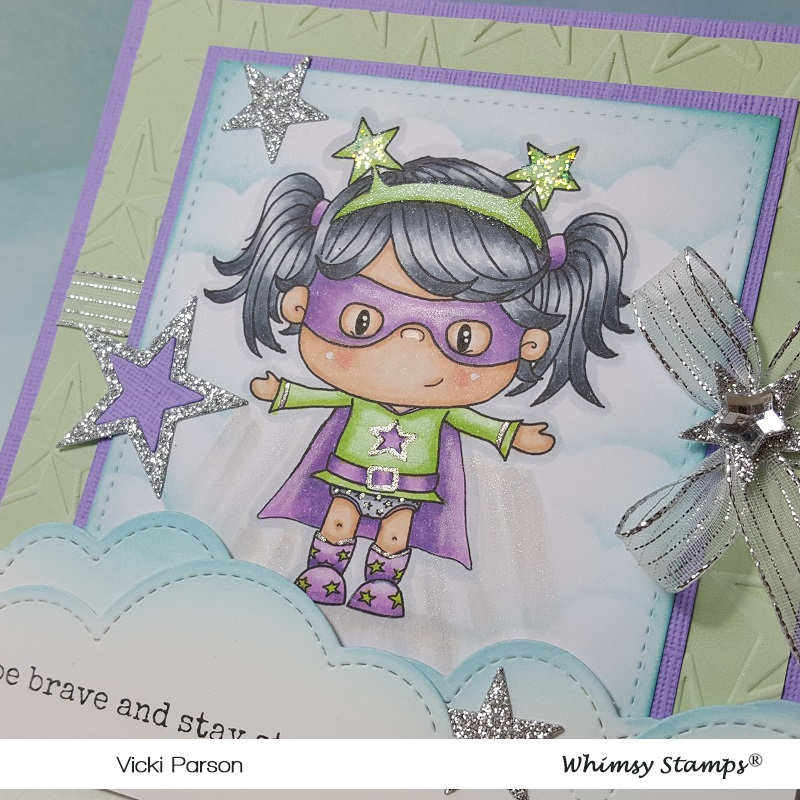
Here’s a closer look at Starla with the coloring I’ve done on her. I’ve colored her up with Copic markers and added some details with gel pens. I’ve also covered her headband with a glitter brush pen and also added some extra glitter over the stars at the top of her head band. You can also see where I’ve added some “strokes” to show that she’s zooming through the clouds. I also covered that area with a bit of shimmer with the glitter brush pen as well. The “little girl” in me had to color some purple!
The sentiment at the bottom was stamped with a sentiment from my stash with some black ink.
I hope you’ve enjoyed my card today and it’s brought you a smile or inspired you in some way! Thanks so much for stopping in! See you soon!