Hey friends! Hope you’ve had a wonderful weekend and will be enjoying the first ‘official’ day of Autumn tomorrow!🍂 Yay! I know that this is my most favorite time of the year and today it seems like it has finally cooled off a bit which is very welcoming to give the air condition a break! Decorating for Fall/Halloween is also a favorite thing I like to do along with being outside…so I’ll be doing that this week and weekend for sure!
Today I have some creations that I’ve been working on. The first one comes from a challenge that I wanted to enter along with breaking out a new stamp set, but excited about using an older embossing folder and some paper that has been in my stash for far too long:
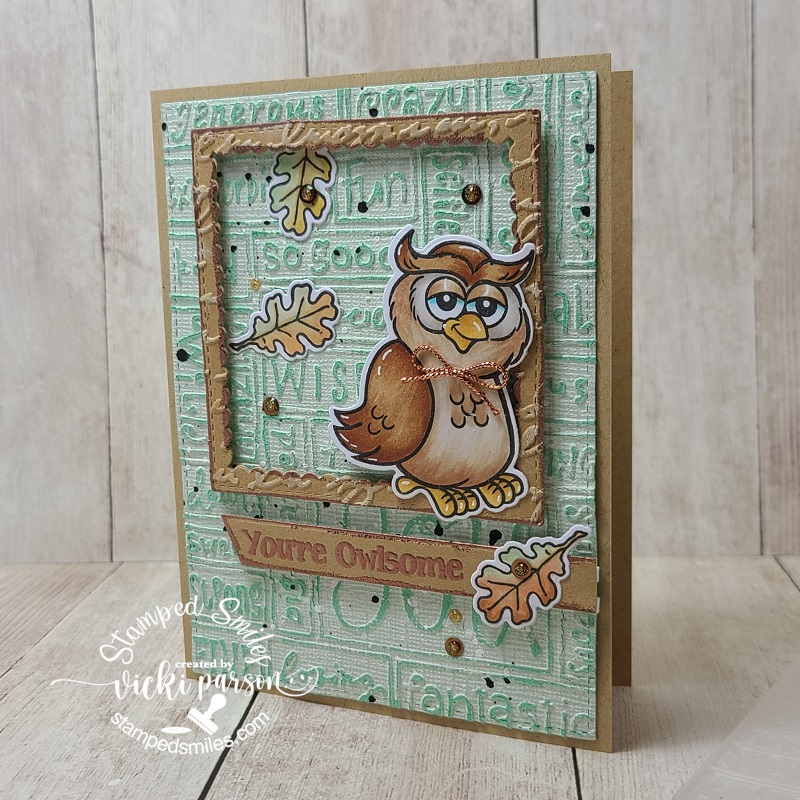
He even looks like a wise old owl…and I thought he would be cute with a little bow around his neck too! This is not a ‘new’ stamp set from Inky Stamper, but it’s the first time I’ve broken out to use this Owl stamp set! Their challenge issued this month was “embossing” and so I pulled out a VERY old embossing folder (remember the Cuttlebug days?! LOL) I think it was one of my very first ones! Plus, I pulled out some Coordination’s textured and colored cardstock. It is weathered looking, but when you sand over it, the color comes out underneath…really cool stuff that I haven’t used very much! You can get the coordinating dies for this ‘Owl’ set which also cuts out the owl and the leaf in the set. I’ve colored them up with Copic markers and used the die to cut them out with.
For the embossing folder card front, I took a piece of the Coordination’s paper, die cut it out and then ran that piece through the selected embossing folder and then sanded over it with a sanding block. I also die cut a frame the same color as the card base and took a separate embossing folder from Stampin’ Up! to go over that with and sanded it a bit as well before popping it up on the card front.
Before placing all of the elements on the card front, I decided to add some white and black paint splatters over the background. I also copper heat embossed the sentiment underneath the owl, die cut the strip and popped it up with one of the leaves over top. (You can also see along the edges that I’ve heat embossed too!) I popped up the owl but left him grounded to the frame and then finished it with copper sequins filled with glitter drops. The copper twine bow was a last element decision. LOL🦉
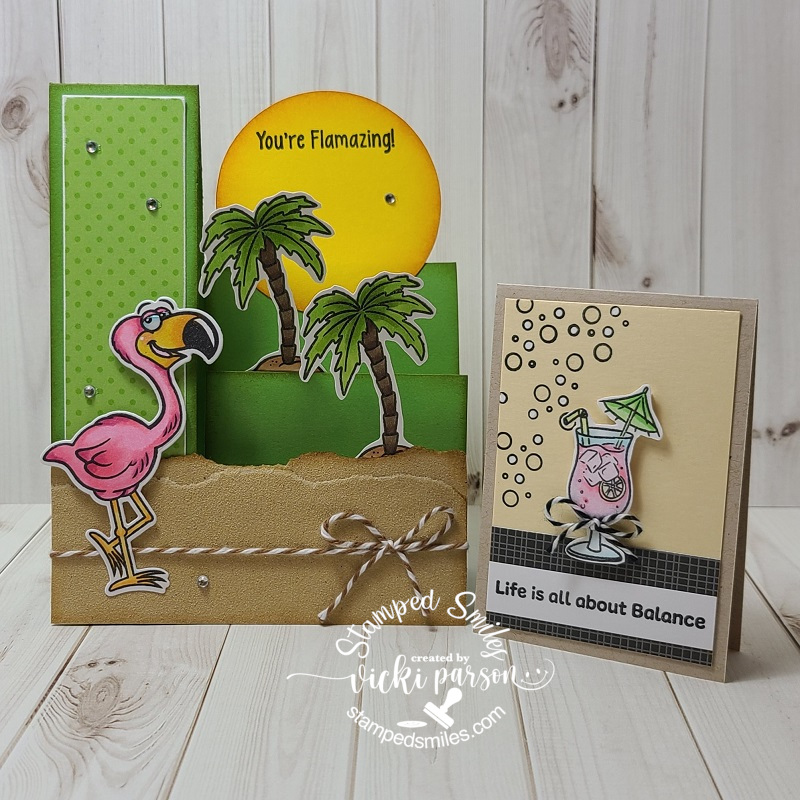
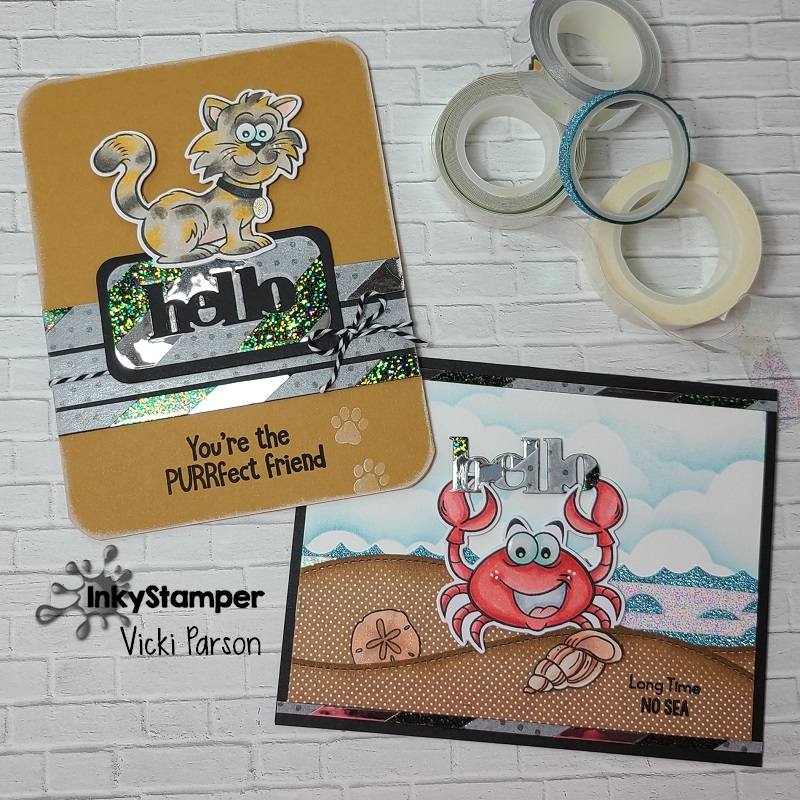
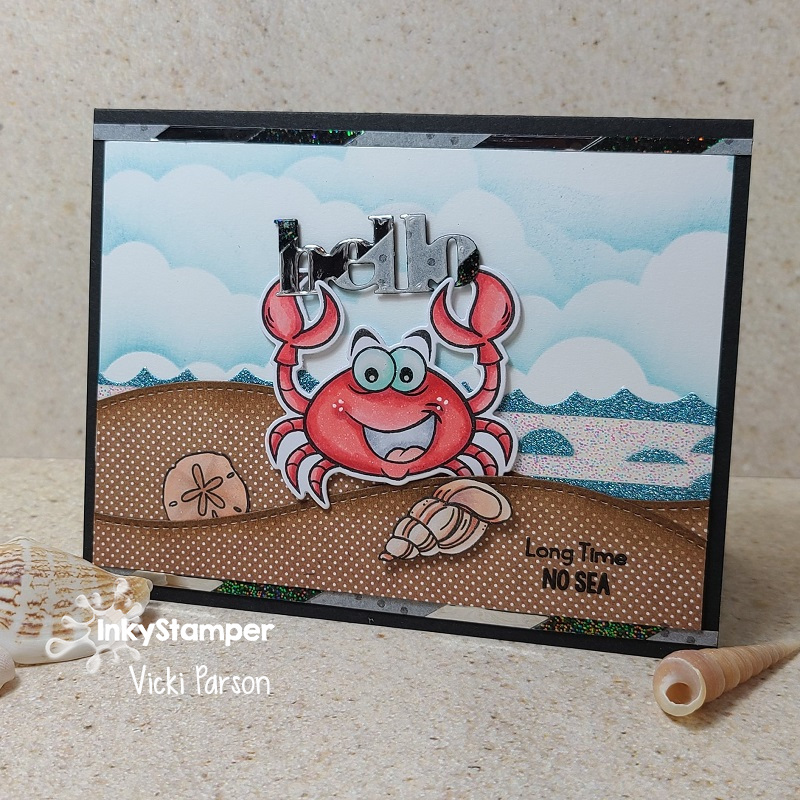
Speaking of sanding, it reminded me of this class I took with Inky Stamper making these cards. (couple weeks ago)
Anyway, the sanding reminded me of this class because at the bottom of the card, the kit included sandpaper for the beach. Really love the look it gave to the design with the texture and tiny bit of sparkle in it!

And the same day I had the class above, I had this class from Craft Fancy during their OOAK event. These were made from their “Alcohol Pearls Butterfly card kit” (I think they have some left in store if interested). The kit came with one alcohol ink color in Celestial Pearls, which is beautiful, but I decided to also add some copper metallic from my stash for another bit of color. I also went on my own a bit with the white heat embossed sentiments at the bottom. I really had fun playing with the alcohol backgrounds and being able to cut them out in one pass for different looks.
I thought this set of four cards would be perfect to add to my donation box to The Butterfly Project in support of domestic violence. So, I was able to send off a batch of cards for that this past week too.
Hope you’ve enjoyed my mixed collection of projects here and I’m sure I’ll have more fun things coming soon! Thank you for stopping in!
Challenges I’d like to enter for OWL CARD only:
- Inky Stamper Inkspirations FB Sept Challenge – Embossing (heat or dry)
- Let’s Squash It! – embossing folder (Cuttlebug & SU! used on mine) with letters or #s and sand it
- Pammie’s Inky Pinkies – Anything Goes
- Lil’ Patch of Crafty Friends – Anything Goes
- Allsorts – ‘real’ animal/creature
- My Time to Craft – embossing (heat/dry)
- Splitcoaststampers – SC871 Wednesday Sketch