Fussy Cut Falling Flowers for Fall

Hello friends!  Happy weekend!  I’m actually excited about it being the weekend!  This weekend is a nice long holiday weekend so I can spend time with hubby!  Yay!  However, I won’t be resting on my blog as there are lots of fun things going on since it’s the start of a new month!  So be sure to keep stopping by to see what’s going on!  🙂

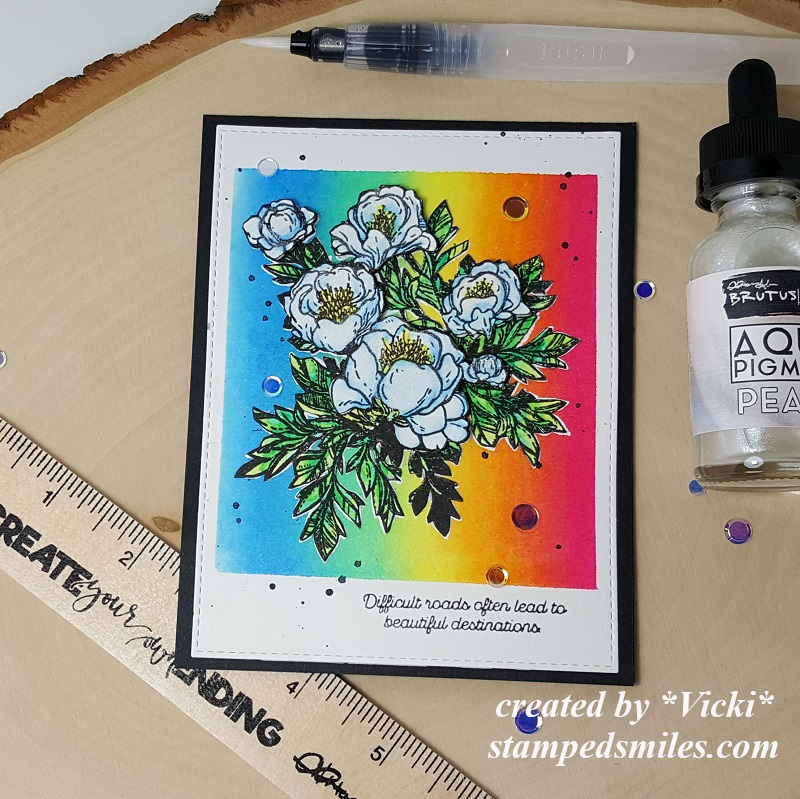
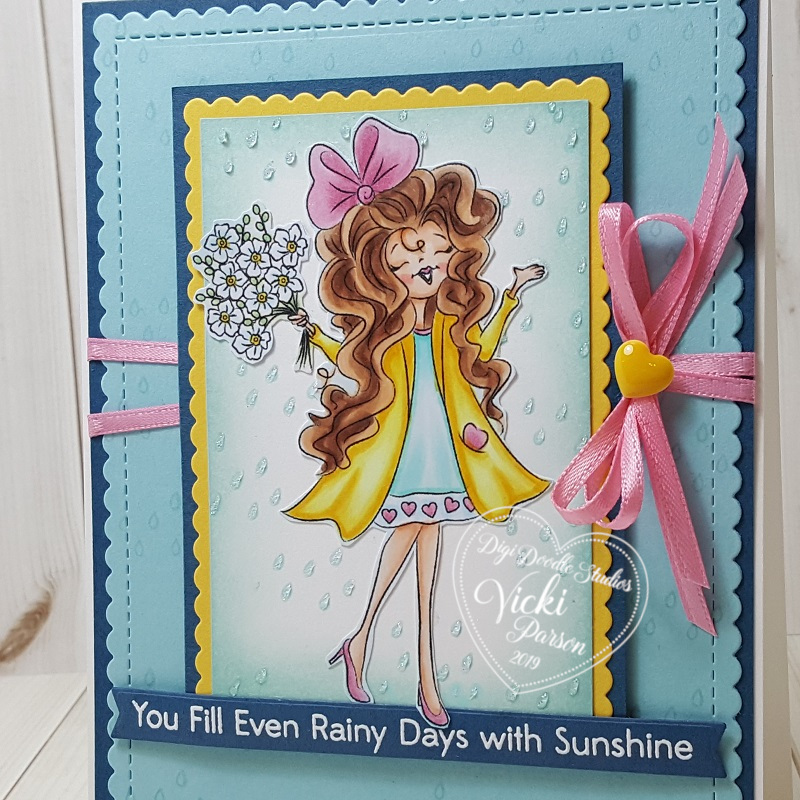
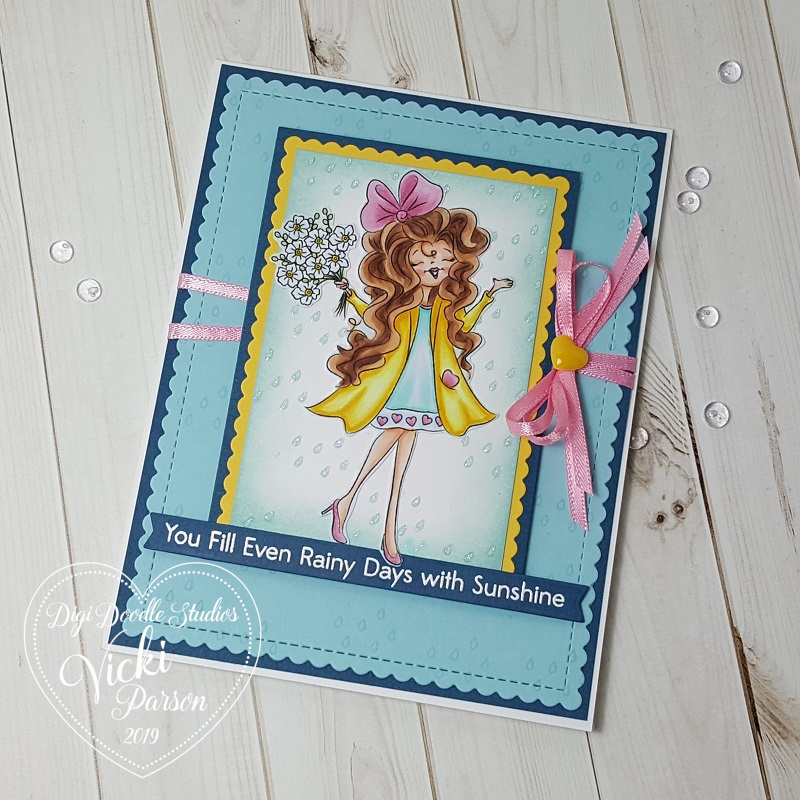
Today I took out some flowers and fussy cut them and colored them in happy Fall like colors.

Vicki-BM-InkedFallFlowers

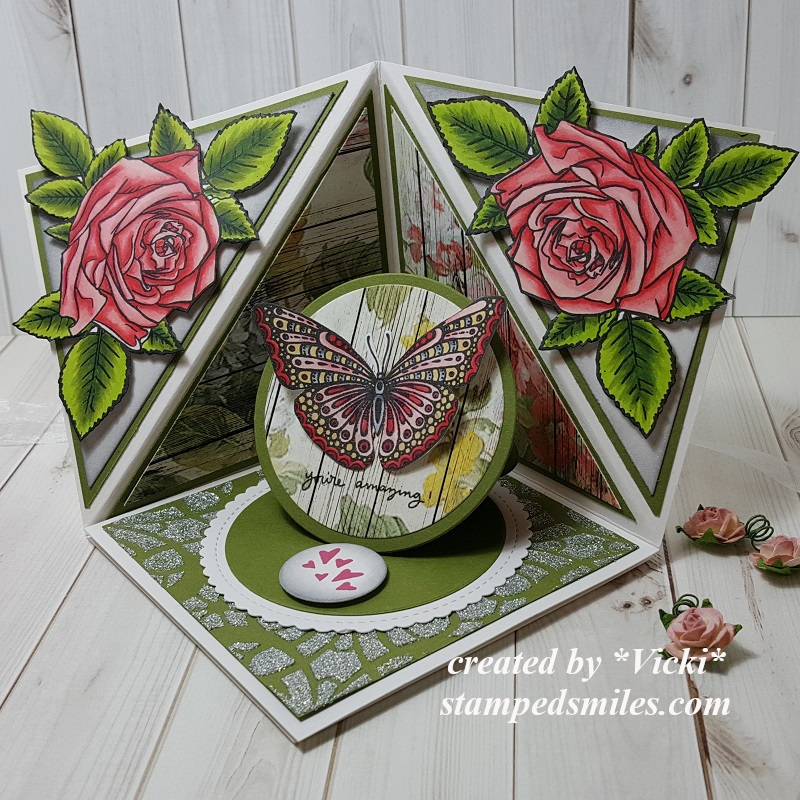
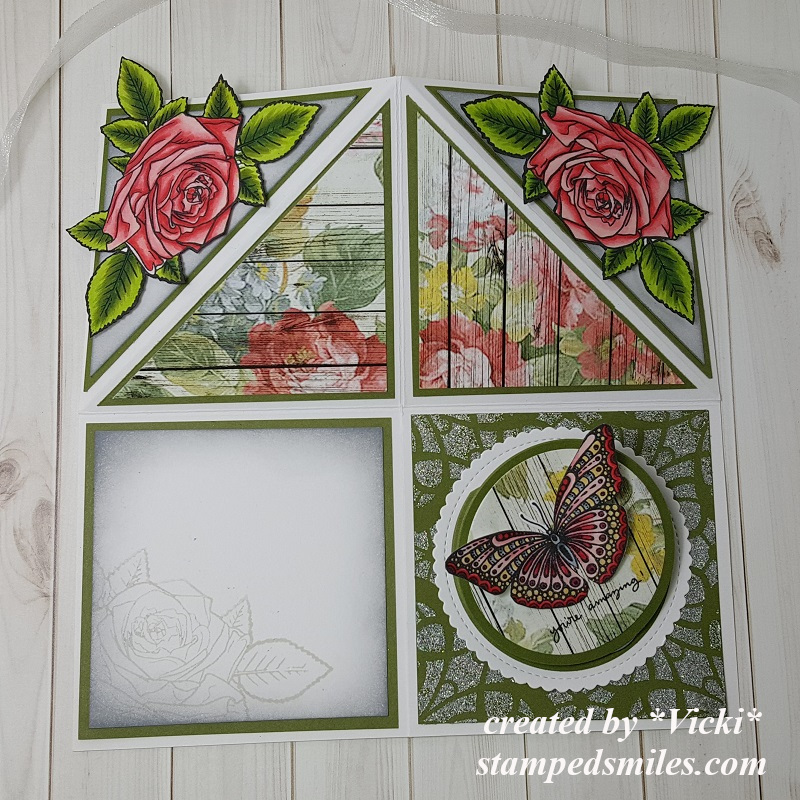
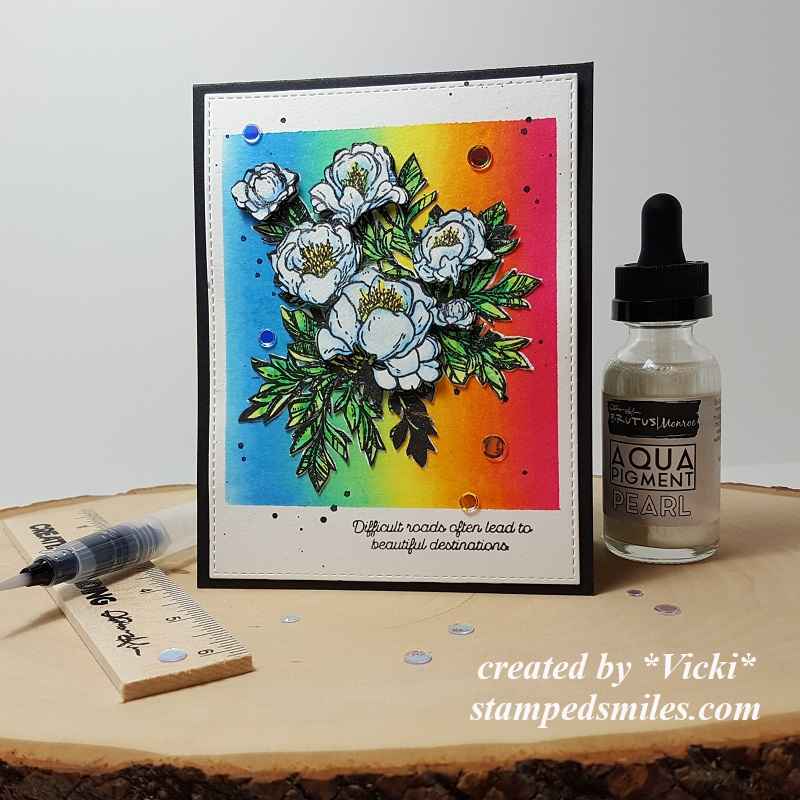
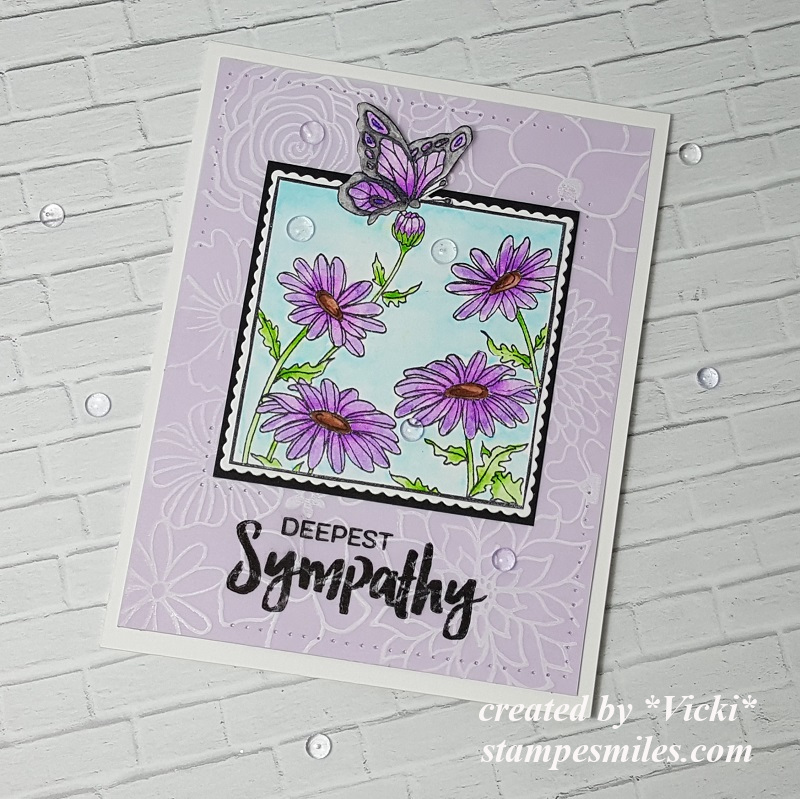
I’ve taken this Flowers stamp set and settled on about 3 different sized floral images to work with along with a couple of leaves.  I’ve colored them with Copic markers and then cut them out with my scissors…I set them aside.

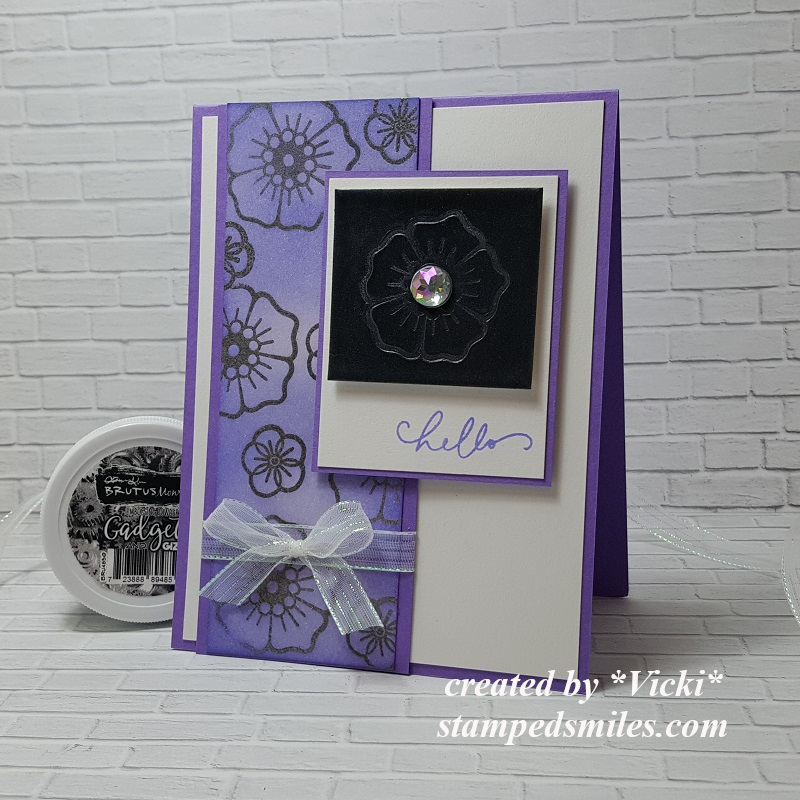
I took a piece of white cardstock along with some masking paper and began working in the flowers for the background with Black Ink.  I made a mask for them as a went along and worked my way up.  After I was done, I took an ink foam blending tool and some soft blue Ink to sponge around the top and side of the panel.  I attached the flowers on with glue and some foam tape.  (I used thicker foam tape for the largest flower.)

For the banner, I heat embossed the sentiment from a Sentiment stamp set  over some Black cardstock with white EP and cut it into a banner and attached it to the card.  Lastly, I attached the sequins and then added some gold glitter to the centers.

I attached the white floral panel over a piece of yellow cardstock and then mounted that over an A2 sized top folding black cardstock base.

Vicki-BM-InkedFallFlowers-close

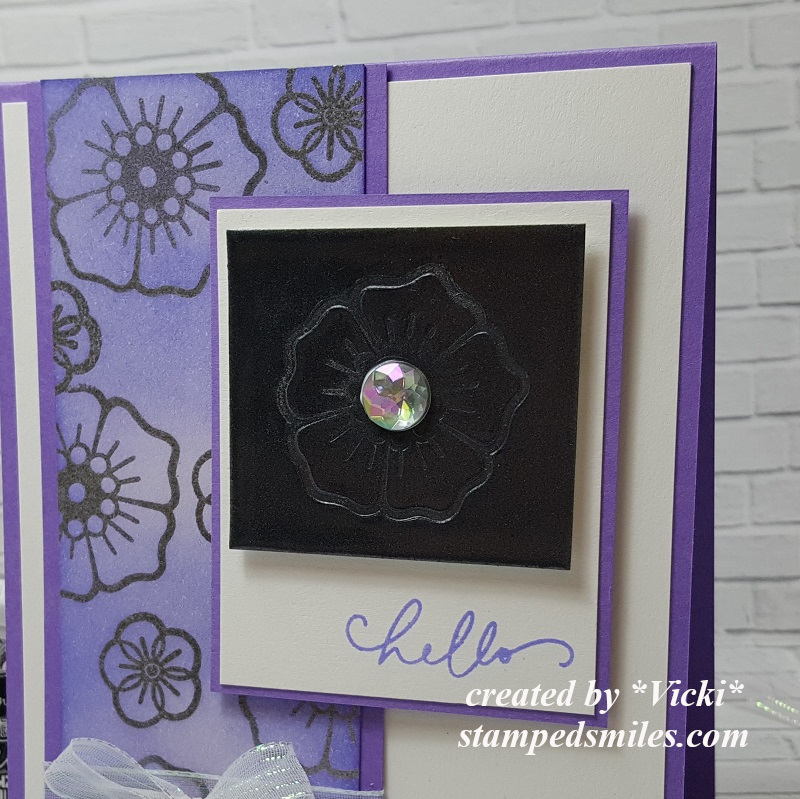
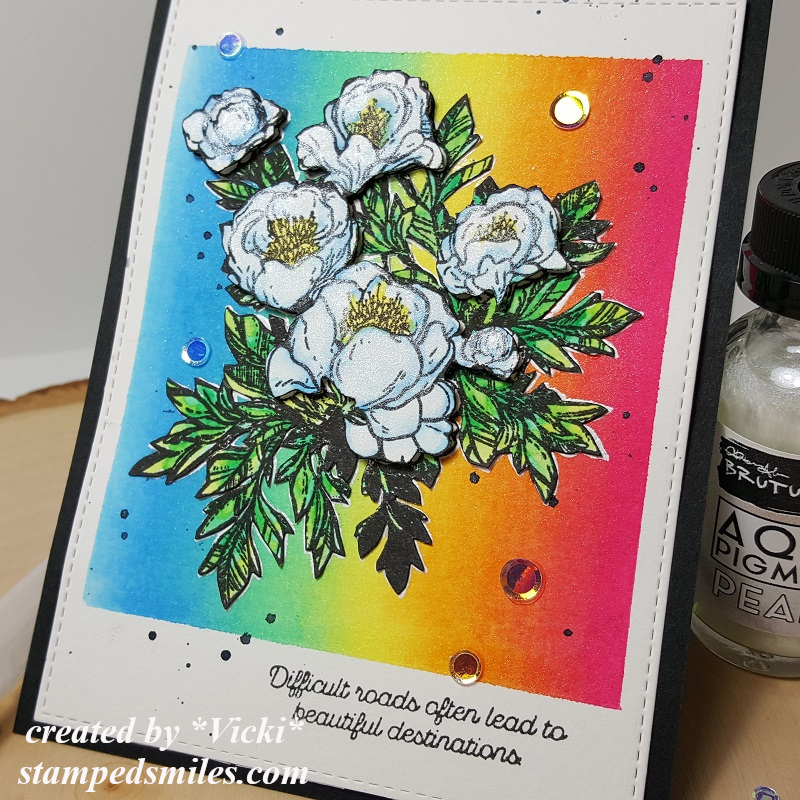
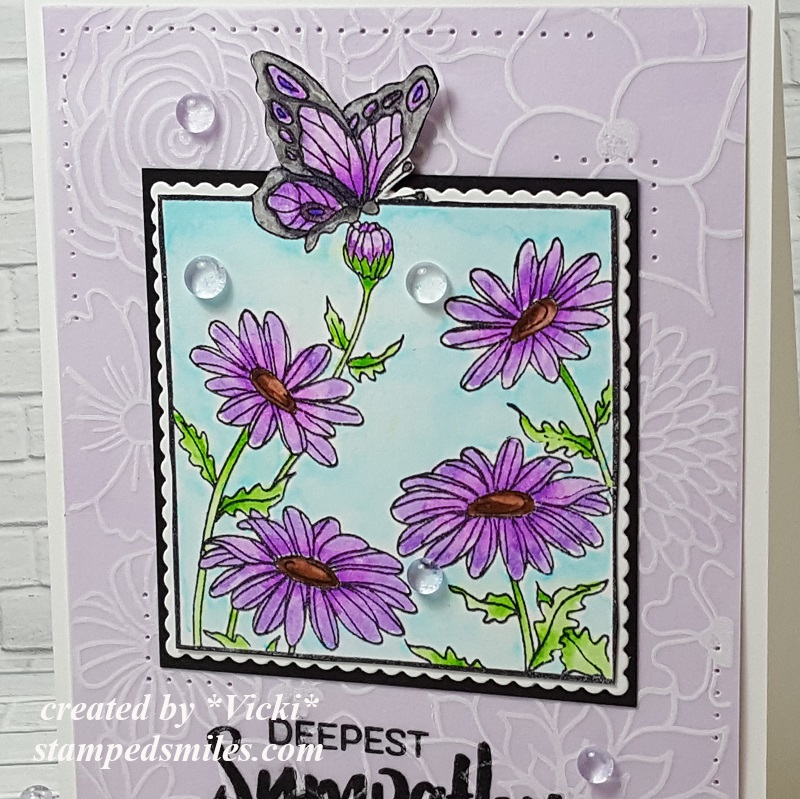
Here’s closer look at the flowers and how I’ve colored them in.

You can better see the sequins that I’ve used.  I actually had one of them laying on my table while I was assembling this card and thought the color matched up nicely with it.  Otherwise, I would’ve never thought to get those out to use on this particular card!  You never know what could be lurking on your table un-used! LOL!

Vicki-BM-InkedFallFlowers-flat

I hope you’ve enjoyed my card today!  🙂

Enjoy your weekend and I’ll see you tomorrow!!

Challenges I’d like to enter this card for:

  1.  Inkspirational – photo challenge
  2. Addicted to Stamps and More – Anything Goes
  3. The House That Stamps Built – A2819 Anything Goes
  4. Simon Says Stamp Wednesday – Anything Goes
  5. Creative Knockouts – Something To Say

Floral Watercolor Foiled Hello

Hello friends!

Here’s what I made for today:

Vicki-BMhop-Aug28ATG

I’ve been wanting to do some coloring… so I got out several of my Aqua Pigments and Watercolor Brushes and went to town with one of these floral panels!  What I love about these card panels is not only are they all gorgeous, but I love that the lines on the images are a bit raised as if embossed which helps with the watercolor process.

Vicki-BMhop-Aug28-panels

As you can see, I’ve only used half of my card panel cut diagonally on my card.  So after coloring up the panel, I thought it was a nice way to cut the panel in half and then still have another panel left over to create another card with later!    So there’s a tip for extended more life out of your card panels!

Vicki-BMhop-Aug28-ATG-close

Here’s a closer view of my watercolor and the pretty shimmer from the Aqua Pigments!  So as you can see, I also did some foiling!  I wasn’t sure if these panels would foil correctly or not, but as you can see only a portion of the image foiled.  I was fine with that as it still adds a pretty sparkle to my card.

I did take the “hello” die and cut that from cardstock and then added some glue over it with the Deco Foil adhesive pen and then foiled over it in my laminator with some Deco Foil Rose Gold Transfer Sheets.  Love the look of the foiling and how it turned out!

Vicki-BMhop-Aug28ATG-flat

For my card, I attached the watercolor cut panel over a piece of black cardstock that I also cut diagonally with the panel and then attached it over a piece of very heavyweight white cardstock.  Then I attached my foil die cut sentiment across the card and added some Acrylic Bubbles randomly over the card. I finished it with some Nuvo Dew Drop accents as well.

I hope you’ve enjoyed my card today!  I appreciate you stopping by!

Challenges for my card:

  1.  Simon Says Stamp Wednesday – Clean and Simple
  2. Allsorts – Feminine
  3. Pammie’s Inky Pinkies – PIP1934 Anything Goes

Triangle Corner Pop Up Card + video tutorial!

Today I’m sharing the Triangle Corner Pop Up Card.  I have actually received several messages and comments that people wanted to see a video tutorial on how to make one.  So I thought I would come up with a version that I could share to show the many different variations that you can come up with and the fun you can have with it!

Vcki-BMBeHappy-TriCornerPop-opened

This style is a much more elegant approach which is much different than a past creation I put together.  I love that you can change the look and have fun playing with different stamps and elements to fit inside the design!

For this one, I have taken the Rose and Butterfly stamp sets to stamp and Copic color.  I fussy cut out the images on my design.  I’ve used Jurassic 100# and White 100# cardstock.  The decorative paper is from the Rustic Florals paper pad.  I stenciled the bottom of the Jurassic panel with a stencil using some Unicorn Horn Glitter Glaze.  Both of the rose images along with the small heart circle on the easel card were popped up with some foam tape.

For the circle easel design, I’ve cut out a scallop circle with the white cardstock in the size that I thought would fit within the design.  Then cut the body of the card with other circle dies in the Jurassic cardstock and then the front with some more of that Rustic Florals paper that I’ve used in the background.  The sentiment below the butterfly and the hearts on the small circle were stamped from same stamp set.  All of the white panels (with the exception of the scallop circle) was ink foam blending with some grey distress ink.  To keep the card “locked” in this position, I’ve used the Mini Disc Magnets.

If you are interested in learning how to create one of these cards for yourself, then please be sure to check out my video below.  CLICK HERE to view on You Tube.

These cards can look really intimidating, but once you see the measurements of how to put one together, they’re really easy and fun to make!

Vicki-BMBeHappy-TriCornerPop-unfolded

Here’s what the card looks like completely opened up.  You can see on the left bottom panel that I’ve taken that rose from the stamp set again and stamped it in the corner with some grey ink after ink foam blending around the edges of it.  This will be the area that I’m leaving for a personal message.

To fold it down to a 4″ square card that’s close you will start by folding down on the top and then fold it over from the right side to the left.  This will completely close it up.

Vicki-BMBeHappy-TriCornerPop-front

Here you can see that the card is completely closed to a 4″ square size minus the rose leaves sticking out which I don’t mind.

I took another panel of the Jurassic cardstock for the front of the card and sponged around the edges of it with the white Ink and then also stamped the rose again in the corner of it.  Because I had several dimensional and extra layers on this card, I had to use a ribbon to tie it together to help it stay closed up.  You might need an envelope that is slightly larger than an A2 envelope, but if you use less layers and dimension, it should fit in an A2 size envelope.

Hope you’ve enjoyed my interactive card and tutorial today!  Thanks so much for dropping in with me! 

Challenges I’d like to enter this card for:

  1.  Cardz 4 Galz – #103 Wings
  2. Crafty Cardmakers – It’s a Bug’s Life
  3. Through the Craftroom Door – Anything Goes
  4. Try it On Tuesday – In my Garden there is….

Faux Metal Technique + video

Hello friends!!  I’m so excited to share with you this fun technique that’s not new, but a cool look to try with your embossing powders!

Vicki-BMHOP-subscriptions

I really love how this one tuned out!  I have used the “Faux Metal” technique on my card along with the “emboss resist” technique.

In order to share the steps of this card, I’ve made video so you can see how I incorporated these techniques into my design.  CLICK HERE to watch on You Tube or check it out below:

Vicki-BMHOP-subscriptions-close

Here’s a closer view of the impressed flower into the embossed panel.  It’s fun to run your fingers over the flower.  I happened to have found the perfect accent for the center of the flower too!  I think it really picks up the pretty colors in the card.

Vicki-BMHOP-subscriptions-flat

I hope you’ve enjoyed my card today!  Thanks for dropping by!

Challenges I’d like to enter this card for:

  1.  Rainbow Card – Passion for Purple
  2. Crafty Friends – Lace/Ribbon

Conservatory of Quotes + video!

I had SO MUCH FUN with my creation today and I can’t wait to share it with you…

*To check out the full details on how I put together this card and how I created the rainbow background, be sure to check out this video!  (CLICK HERE to view it on You Tube.)

Vicki-Brutus Monroe-ConservatoryofQuotes-JuneGDT

One of my most favorite products is watercolor and all of the really cool affects you can get with them!  This is what I have used throughout the card here from the background to coloring the floral image.

Speaking of floral image, isn’t it gorgeous?!  It not only has this gorgeous floral image, but it has some really awesome quotes to go with it!

For my card, I first started by masking off an area with some purple tape on some paper that was large enough for my floral image.  Then I made the background with some help from a ruler and baby wipes.  I used a stitched rectangle die, added the sentiment at the bottom of my rainbow panel and made some splatters.  I mounted this piece onto an A2 sized top folding black cardstock.

Vicki-Brutus Monroe-ConservatoryofQuotes-JuneGDT-close

For the image, I had actually started out doing this card in one direction and then totally went a different way.  But the image was stamped with black ink a couple of times over the paper and colored with Aqua Pigments using a water brush.  I cut an entire image of one and attached it over the rainbow background with liquid glue and then I fussy cut just the flowers and popped them up with foam tape over the full image.  I added some of that gorgeous shimmer with the Aqua Pigment and then finished off the design by adding some clear sequins over it.

Vicki-Brutus Monroe-ConservatoryofQuotes-JuneGDT-flat

I hope you’ve enjoyed my card today as I had so much fun making it!  I can’t wait to create another project to share with you!

Challenges I’d like to enter this card for:

  1.  Stamping Sensations – Show Your True Colors
  2. Get Creative – Anything Goes with optional twist: Favorite color combo
  3. Through the Craft Room Door – Anything Goes
  4. Artistic Inspiration – Anything Goes
  5. Crafting By Designs – Anything Goes
  6. Alphabet Challenge – “F” is for Flowers
  7. Simply Create Too – Anything Goes with optional twist:  Lots of flowers
  8. Rainbow Card Challenge – Neon Rainbow

Guest Designing for Digi Doodle!

Hello friends!  I’m back today to share some fun news with you!!!!

I’m very excited to finally be able to share with you that I’m guest designing for

Digi Doodle Stamps!

Today, I’m sharing my first card for them with this really adorable image:

Vicki-DDLovesMeNot-June7

I have used the Loves Me Loves Me Not digital stamp to create my card.

What I had in mind when making this card was all of that crazy rain we were having this past month and how it seemed to never end.  I also loved the flowers she was holding because my daisies came up in my back yard and they really make me happy seeing them bloom.  So I combined this image with some rainfall in the background and took away the petals from the image to make it appear as if she’s holding out her hand in the rain!  🙂  Hubby has been taking extra great care of me while all of this rain was happening around us and I think this would be a special card for someone who always seems to bring out that happy sunshine no matter the weather!  (His favorite color is blue!)  Wink wink

Vicki-DDLovesMeNot-June7-close

Here’s a closer view of the coloring I’ve done on her with Copics.  For the background, I’ve taken a white panel and stamped some rain drops from another stamp set in my stash.  I fussy cut out my colored image and attached her over top of that rain panel.  I took some Nuvo Glitter Drops and added them over the rain drops in the background behind her.  I also white heat embossed the sentiment (From MFT) and cut it out with a banner die and slipped that under her foot when placing it on my card.

It’s hard to tell in the photo, but I’ve covered her bow and top of her hair with a glitter pen to make it look like she’s been wet in the rain.

Vicki-DDLovesMeNot-June7-flat

For the rest of my card, I’ve added the raindrop background light blue stitched scallop card panel over a dark blue layer and attached some pink ribbon around them.  I’ve added the bow to the side and then attached a yellow enamel heart over that.  These panels were mounted over an A2 sized white top folding card base.

Lastly, I’ve added the image panel and mounted it over the yellow scalloped panel and another piece of dark blue cardstock that was attached with foam tape.

I hope that you’ve enjoyed my card today and it brought you a smile!  Thank you so much for stopping by with me today!  I will be having another really super fun post to share with you tomorrow, be sure to stop by!

Challenges:

  1.  Love to Scrap – Anything Goes
  2. Creative Craft Cottage – Eileen’s Anything Goes (Digi Doodle is sponsoring!)
  3. Pammie’s Inky Pinkies – PIP1922 Anything Goes
  4. The Paper Girls – Top 5 Faves (Coloring, sparkle, hearts, ribbon, flowers)
  5. Watercooler Wednesday – WWC224Anything Goes Feminine
  6. Crafting with an Attitude – Anything Goes

Thinking of You with Fleur

Hello friends!  I hope that you had a lovely weekend!  Here we are with the last week of May already and Summer is showing itself in many ways right now.  I do love seeing the flowers everyone has been sharing posts of with their yards full of blooms coming up everywhere!

Today I have this card using a cute Whimsy Stamps Digital stamp:

Vicki-Fleur-May28

This cutie was released this month by CC Designs called “Fleur“.

I just love the ring of flowers in her hair!  I’ve actually printed her out twice so that I could cut a few extra flowers to add to the accents of my design!

For my card, I’ve taken a panel from the Rustic Woods and Brick digital papers and used that for the background of my design.  I took a marker and added some dash marks for a stitch look.  I added this piece to a 5″ square top folding suede card base which I sponged around the edges with some white ink.  I did the same for the die cut fence panels and the circle layer behind the image.

I’ve taken a piece of decorative paper from my stash and sponged some ink around it and also wrapped some organdy ribbon around it before attaching to the card front base.  I then die cut some grass to go over my fence border.  My image was cut with a stitched circle die and sponged around the edges with the same ink as the decorative paper.  This was layered over top of the suede circle panel, and these were popped up with some craft foam.  I’ve added the bow and the cut-out flowers from the extra printed out image and then I’ve added a flower gem in the center of the bow.  Each flower including the ones on the image were filled with some Nuvo Honey Gold Glitter Drops.  I stamped a sentiment from the Whimsy Stamps Everyday Mini Sentiments clear stamp set with the same suede color ink.

Vicki-Fleur-May28-close

Here’s a closer look at the coloring on this image.  I’ve used the following Copic colors to color her in with:

  • Hair – Y00 (used for base), Y11, YR21, YR24, YR27
  • Skin – E21, E11, E00, E000, R20
  • Outfit/Shoes – E89, E87, E84, E81
  • Flowers – BG000, BG10
  • White gel pen used for cheeks and around hair flowers.
  • Ground/shadow – C1, E0000

You can also see the details from the Nuvo Glitter Drops that I’ve used in the center of the flowers including the one in the center of the bow.

Vicki-Fleur-May28-flat

Thanks so much for stopping by!  I enjoy reading your thoughts! 🙂  See you soon!

Challenges:

  1.  Little Red Wagon – Flower Frenzy #498
  2. The House That Stamps Built – M2219 Anything Goes
  3. Pammies Inky Pinkies – PIP1921 Anything Goes
  4. Crafting From the Heart – Anything Goes

Tie a Bow for Cute Card Thursday

Hello friends!  Here we are at another Thursday already!  Where does this time thing go?!  I’m trying to embrace Spring for as long as possible.

Today starts a new challenge over at Cute Card Thursday and this week we’d like to see your “Tie a Bow” creations!  I am a huge fan of ribbon and have WAY too much that I could never possibly use it all in my life time!  LOL!  How about you?  Do you have a big ribbon stash too?

Vicki-CCT581-ADU

So does it feel like we are at the salon?  She’s fashioning her “new do” which I think would be so fun to go have a spa day with mom or your favorite female person, right?!

The sponsor for this week’s challenge over at Cute Card Thursday is All Dressed Up Stamps and I have used this cute image from the store called “New Hair Do” for my card today.  Now although she does already have a bow tied to her hair, I thought this was a good opportunity for me to pull out some of my ribbon and actually tie a bow!  I thought this image would make for a wonderful feminine/Mother’s Day card too.

I started out by white heat embossing a piece of purple cardstock with a Simon Says Stamp Background stamp called Flower Explosion.  The sentiment on the black banner was also white heat embossed and placed over the design right above the “mom” sentiment that was die cut with silver mirror cardstock.  I layered the purple embossed panel over a piece of black cardstock.

I ran a piece of white organdy ribbon around the two layers and then added the oval cut image panels onto the card front.  I added the tied bow with the organdy ribbon off to the right side and then layered another bow I tied with some silver cord and then topped that with a pearl accent.  All of these layered were attached to a 5″ square white top folding card base.

Vicki-CCT581-ADU-close

Here’s a closer look at the coloring of the image.  I’ve used Copic markers to color her in with and brushed some Wink of Stella over her bow.  (Which is hard to see of course!)  I’ve also taken some tiny pearls and randomly added them to her hair.

The ovals were cut out with the Tonic Studios Basic Oval dies and then I also sponged some Tumbled Glass distress ink around the edges of the scallop image panel before attaching it to the black oval panel.

Vicki-CCT581-ADU-flat

By the way, I have chosen the color theme purple for my card today as it’s my favorite color.  I have actually used many of my favorite items for this card, so I hope you’ve enjoyed it too!  (Purple, ribbon, metallic, heat embossing, die cut sentiment, Copic coloring, pearls, florals, background stamps…I have too many favorites! LOL!)   Do you have lots of favorites too?

Thanks for dropping in!

Challenges:

  1.  All Dressed Up Challenge – (April) Anything Goes + ADU image
  2. All Dressed Up Facebook Challenge – ADU image + use favorite color(s) (purple)
  3. Always Fun – #109 Female/Mom
  4. Crafting By Designs – Girls
  5. Simon Says Stamp Wednesday – For a Special Lady
  6. The House That Stamps Built – Tic Tac Toe M819

Happy Spring With Beautiful Blooms

Hello friends!  Just popping by to wish you all a wonderful weekend and to share a “Happy Spring” card to make you smile:

Vicki-BM-Beautiful Blooms

So, for my card, I started with the glitter embossed panel from the kit and took the Sea Glass ink pad that came with the kit and ink blended over this panel.  I cut it down and then die cut a scallop piece of the purple cardstock from the kit and then attached it to an A2 sized top folding white piece of cardstock.

Although I really liked the sentiments from this stamp set, I wanted it to be Spring-like, so I took a sentiment from a different stamp set and stamped it with black ink over a piece of vellum and then clear heat embossed it.  I cut the strip into a banner and then ran it through my Xyron machine to get it sticky and attached to the bottom of the card front.

Lastly, I’ve attached the image with foam tape over the card front panel and then glued a bow made with some of the ribbon from the kit.  I then attached some purple-colored gems, also from the kit, randomly over the front.

Vicki-BM-Beautiful Blooms-close

Here’s a closer view of the watercolor I’ve done over this image.  First, I’ve heat embossed the image and used the Aqua Pigments to color it in.   I’ve slightly tilted it so you can see the pretty shimmer that these Aqua Pigments give to the look of it!  The regular colors don’t shimmer, but the metallic do shimmer beautifully! I then glued the bow of the wreath image and popped up the wreath to place on the front of the card.

Vicki-BM-Beautiful Blooms-flat

Hope you’ve enjoyed my card today and I wish you all a very happy Easter!  Thanks so much for stopping in!  See you soon!

Challenges:

  1.  Through the Craft Room Door – Anything Goes
  2.  Try it On Tuesday – Springtime
  3. Addicted to Stamps & More! – Make Your Mark
  4. Daring Cardmakers – Blooming Wonderful
  5. My Time to Craft – Spring Flowers

Coming Up Flowers at Cute Card Thursday

Hello friends!  Welcome to Thursday!  We are already near Easter this weekend and it’s a great time to be thinking about flowers!  This is the new challenge this week over at Cute Card Thursday, so I hope you can join in the floral fun with us!

I decided to pull out some stamps that I received a few months ago by Repeat Impressions from a challenge win because they are ALL floral themed and I thought it would be perfect to work with for the challenge:

Vicki-CCT578-Flowers

To help with my design, I’ve used the tic-tac-toe board from the Repeat Impressions challenge.  I have used the Flower Power Background stamp and stamped it with white ink over a piece of vellum and then mounted it over a light purple piece of cardstock so that it was a bit more subtle looking, but yet still had the floral pattern.

I’ve also taken one of the stamps from the Beautiful Days Collection called “Daisies & Butterfly” and stamped it with waterproof ink over a piece of Bristol smooth watercolor cardstock.  After coloring it, I fussy cut the image and then die cut a scallop square layer to place behind it and then cut another layer of black cardstock to layer behind that.  I thought it really brought out the details of the image.  The butterfly was popped up with some foam squares.

Lastly, I’ve stamped a sentiment, did some paper piercing with a tool pick around the corners of the vellum layer and around the image layer.  All of these layers were mounted over an A2 sized top folding white card base.  I then took some clear “dew drops” and attached them over the front of the card.

Vicki-CCT578-flowers-close

Here’s a closer view of the watercolor I’ve done on the image.  I’ve used my Zig Clean Color Real Brush Markers and occasional help with a water brush to blend or soften up the colors as needed.  Hard to see, of course, but I’ve taken a glitter brush pen and went over the wings on the butterfly.  You can also see the details of the paper piercing that I’ve done on the vellum.

Vicki-CCT578-flowers-flat

I noticed that after I had stamped the sentiment with black ink, the white ink from the vellum showed through a bit.  I was going to layer something over it, but decided that I actually liked it that way, so left it.

I’m always out of sympathy cards when I need one, so this will be a nice one to have on hand for that.  Thanks so much for stopping in and I’ll see you again tomorrow!! 🙂

Challenges for this card:

  1.  Repeat Impressions – A1019 Tic-Tac-Toe
  2. Just Us Girls – Off the Edge
  3. Allsorts – Blossoms, Butterflies and/or Bugs
  4. The Creative Crafters – Anything Goes
  5. Simon Says Stamp Monday – Beautiful Blooms