It’s a Fairytale/Storybook Time at Sparkles Monthly

Hello friends and Happy Father’s Day to all of those in the U.S. that celebrate this day!  Our usual is to cook out on the grill and spend time together.  So I hope whatever your plans are, you have a great day!  (I made a card for hubby, but forgot to take a photo…so I’ll share later.)

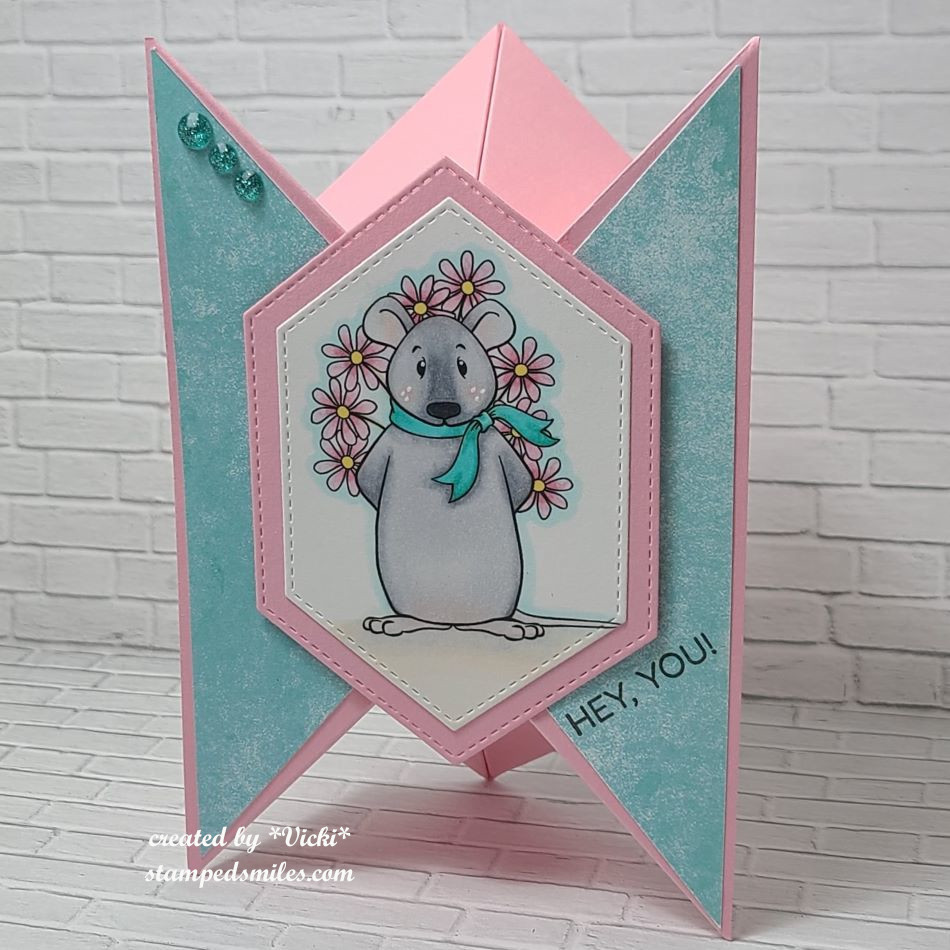
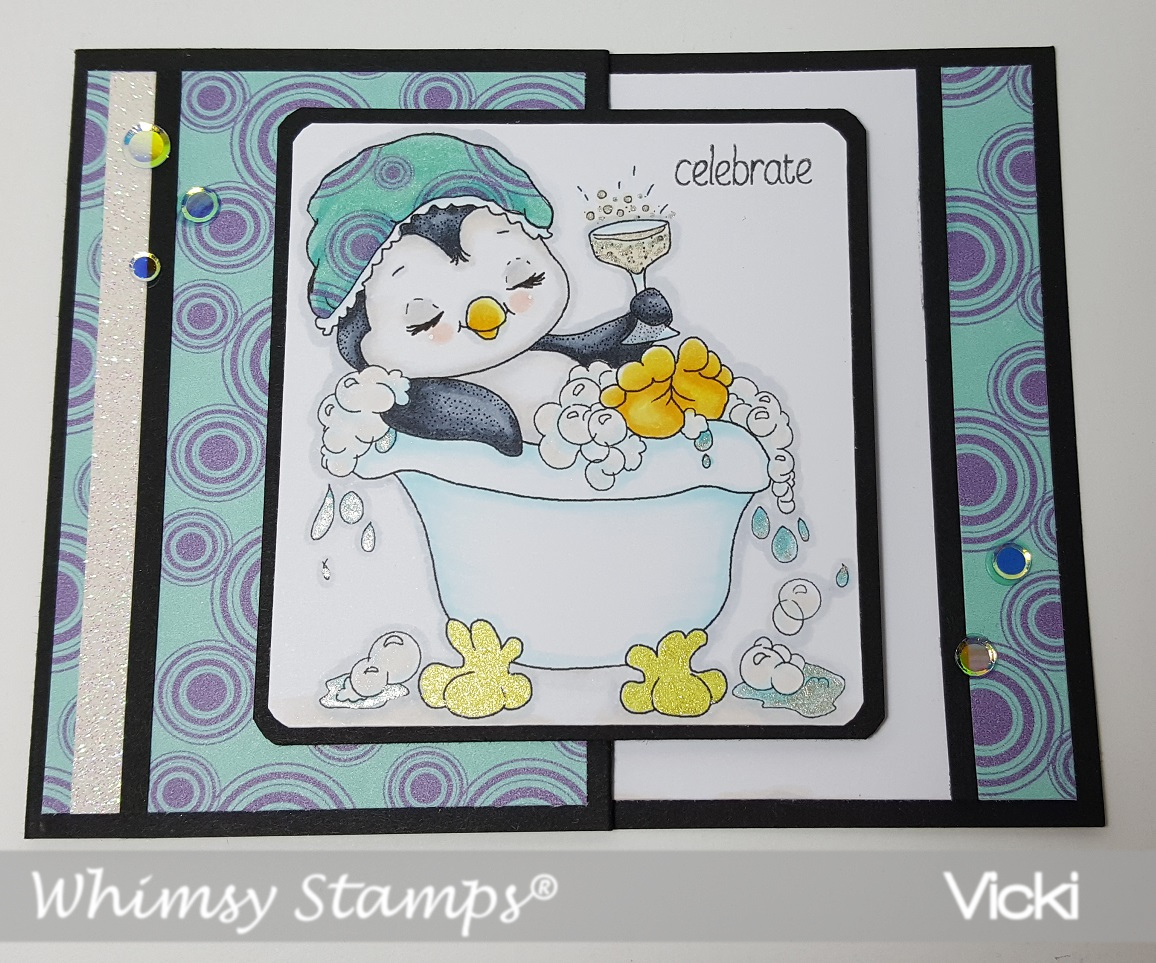
I’m stopping by today to share that we have a new challenge over at Sparkles Monthly and we have the theme of “Fairytale/Storybook  this month.  Would love to see your take with this theme on your projects, so I hope you’ll join us.  Here’s what I came up with: 

Since, I had lots of “Winnie the Pooh” on my mind with the baby shower, I thought it would be appropriate to create something using the stash that I already had out and was thinking of when this challenge theme came time to do!  I think most of us grew up with this storybook and know who this is!  And I had purchased some of these items from Echo Park several months ago, so it was great to be using more of it up!

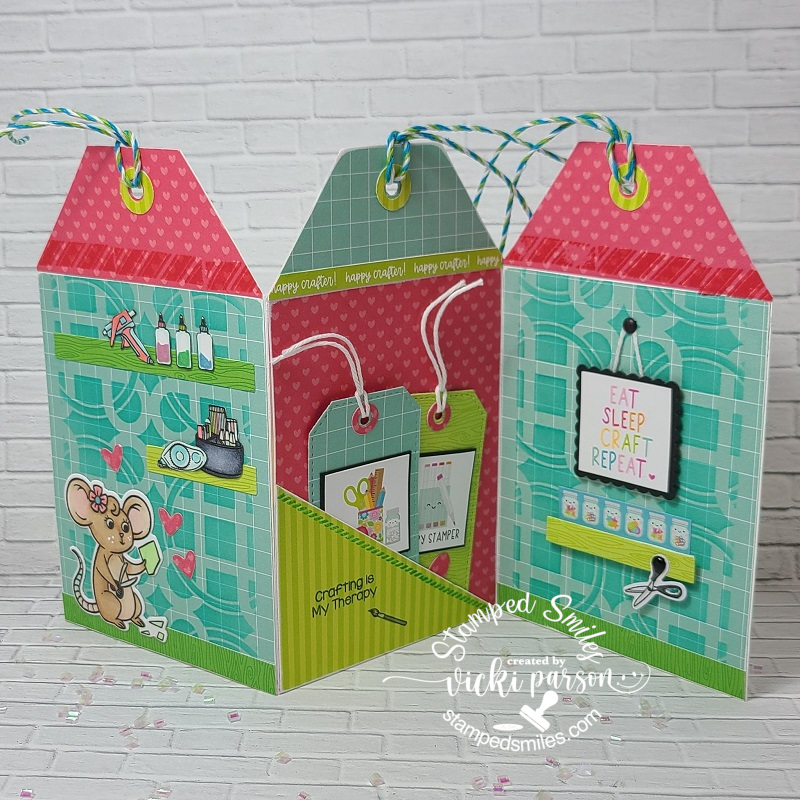
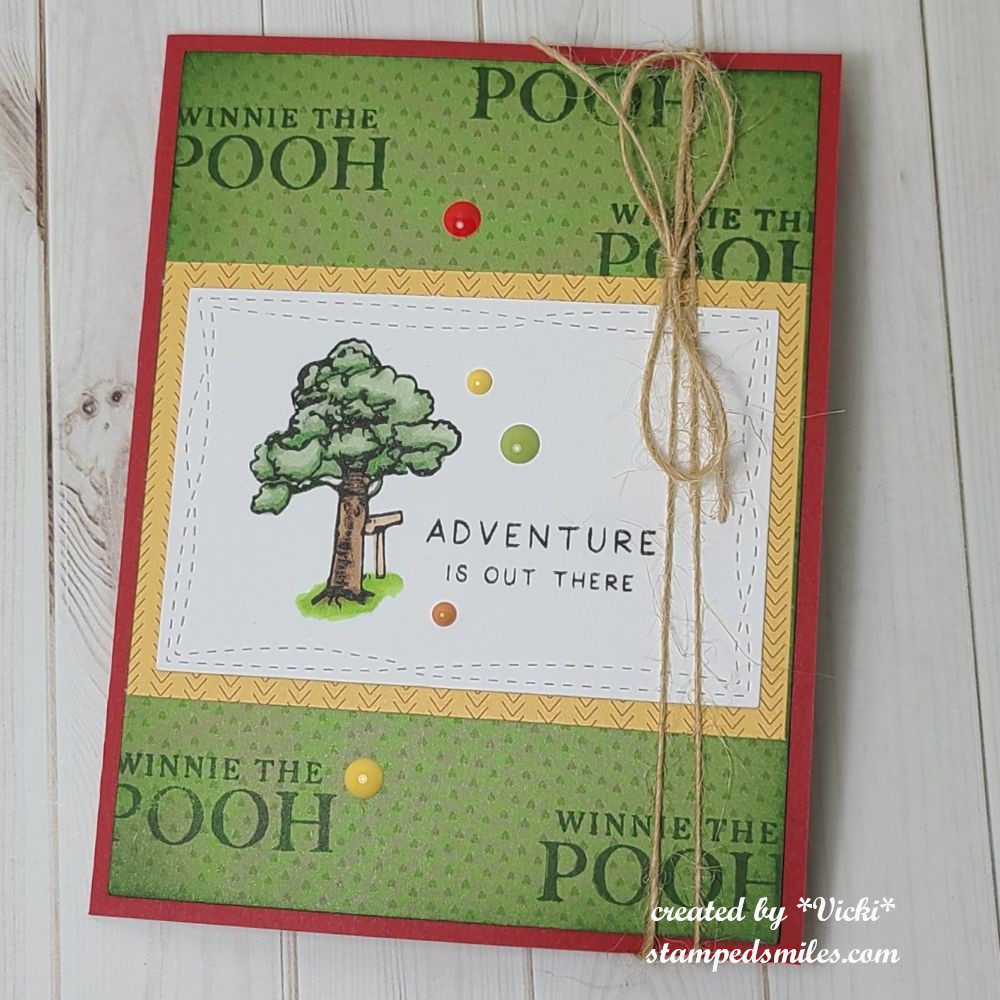
FRONT of CARD:  It doesn’t really look to appealing on the front, but I thought I’d share what I did anyway.  I used a stamp set from Echo Park and stamped the tree (and colored it) with the sentiment on the white panel and die cut it out.  I also used some of the Winnie the Pooh papers and layered behind it.  The green paper was stamped with the sentiment from the stamp set.  I added some matching enamel dots all over it.

Since this is a special Fun Fold design, I needed to help it stay closed, so I tied some twine around the right side of the card.

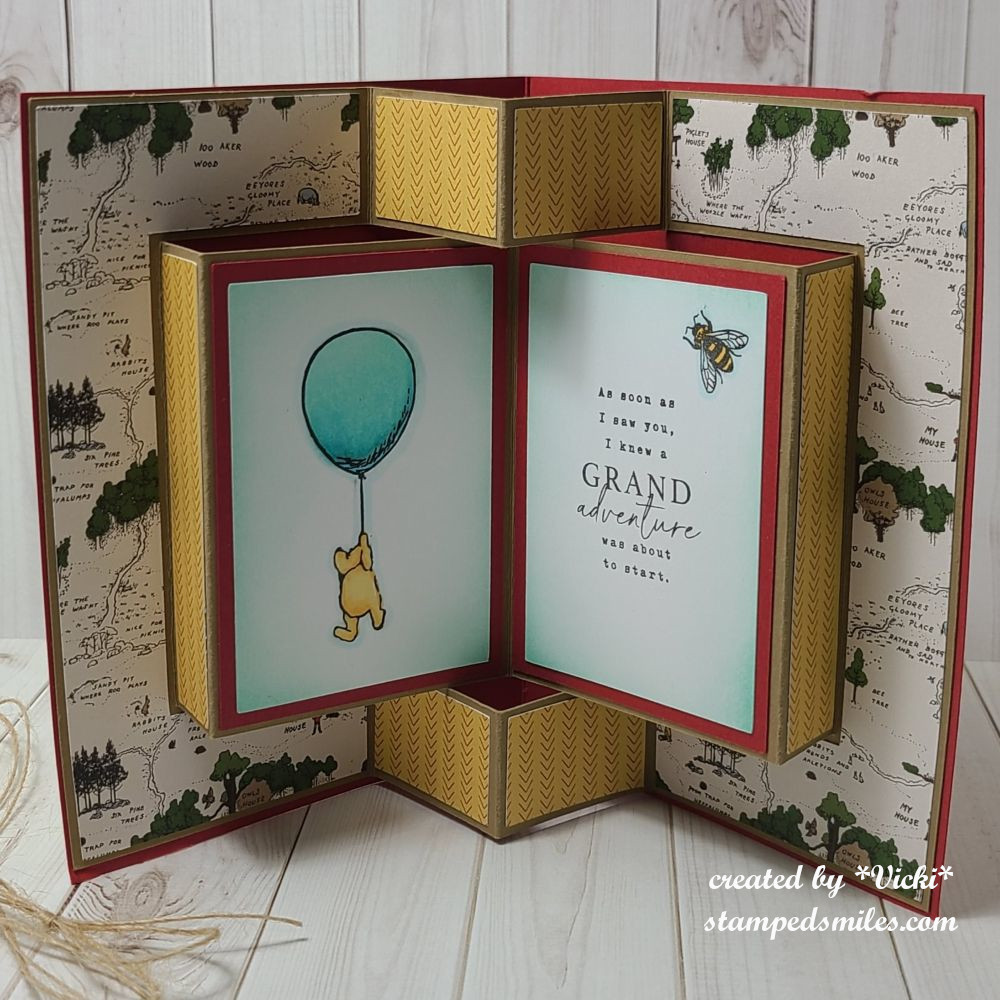
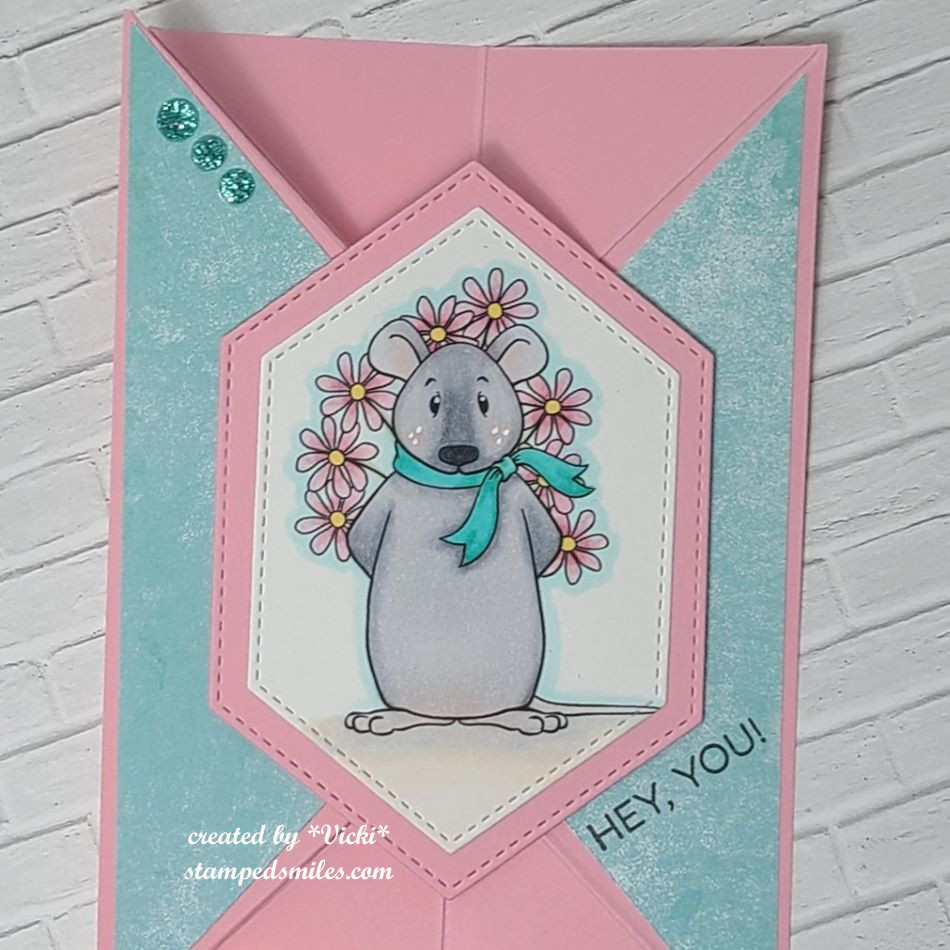
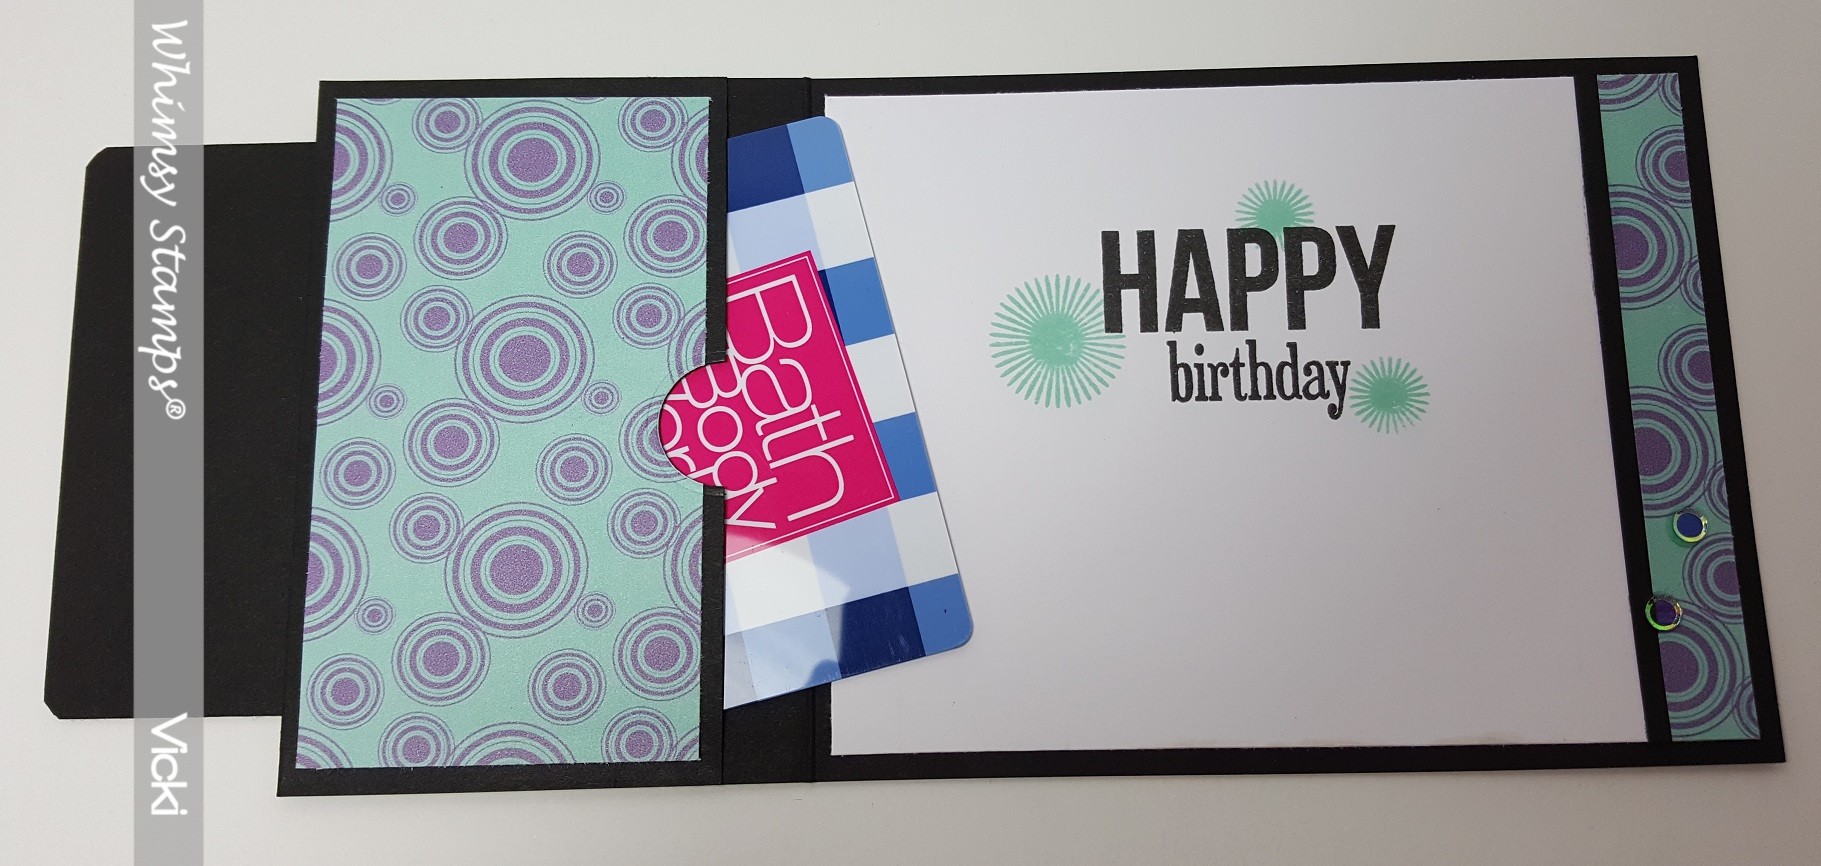
When you open the card, this is what the inside looks like!  You see the center fold pops out like a book!  So this is called a “Fun Fold Book Card” and the design was cut out with my Cricut machine using the papers and stamps from Echo Park Designs.  This way I knew it would all match up on the design.  I did stamp the Pooh with balloon and the other side with the sentiment and bee were also stamped.  I blended some blue ink around the edges.

I thought this would be such a cute card for a kid!

Thank you so much for stopping in today and I hope you like my fun fold card!  Please stop by the challenge blog to see more inspiration and join in to play!  See you soon!

Challenges:

  1. Creative Fingers Anything Goes
  2. Crafts Galore Encore Anything Goes
  3. Aud Sentiments Fun Fold &/or Summer Sentiment
  4. Creative Creases Anything Goes with fun fold card

Tricorn Fold Cuteness

Hello friends!  I hope that you’re having a wonderful week so far!  We have officially started Spring over my way and now I’m just waiting for the weather to warm up to match it.  I’m looking forward to being outside with the flowers!

Speaking of flowers, I saw this really cute image over at Beccy’s Place and wanted to play along, so I printed it out and colored it, but didn’t quite know what I wanted to do with it until I saw Beccy’s tutorial – Tricorn Fold Card: (click name for her tutorial)

Isn’t this so fun!?  I thought it was such a unique design that stands up, but also folds flat for a 4×6 card size.  I usually make an A2 (5.5″x4.25″) card size, but I can also easily create my own envelope for any size too.  It was a bit tricky at first and I messed it up because I put the scores going in the opposite direction, so I had to start over.  I wasn’t confident enough to figure out the mat layers of all the angles, so I just added some pattern papers to the largest two panels and then placed blank white on the back of the card for a message.

I also found a stitched hexagon layering die in my stash that worked out for the design which is what I used to cut out my colored mouse and layer behind him.  I found a sentiment that worked well for the space I had on my card and then finished it with a couple of teal rhinestones I had laying on my table.  It was fun to create, and it will also be great to send out too!

Here’s a closer view of the colored image that I’ve done using Copic markers.  I did add a few white dots to his cheeks with a white gel pen as well as the center of his eyes.

I have my card lying flat so you can see that it will fit inside an envelope for mailing.  It does spring back up, but I think that’s what will be great for a recipient to pull out of the envelope to see that the card stands up by itself.

Thanks for dropping in today and I hope you’ve enjoyed my card!

Challenges:

  1. Beccy’s Place – March Monthly Challenge optional Bingo (Not sure if the flowers in the image qualify, but if it does then I used the center across row)
  2. Crafty Catz – Anything Goes #667
  3. Crafty Animals – Anything Goes + animal #81
  4. Critter Crazy – Anything Goes featuring animal #84
  5. Creative Creases – Anything Goes with Fun Fold #78
  6. Creative Inspirations – Anything Goes
  7. The Crafty Addicts – Anything Goes
  8. Lil’ Patch of Crafty Friends – Anything Goes #226
  9. Crafty Calendar – More Than One Fold

Playing with Roulette and Colors

Hello friends!  Hope your week is getting off to a great start.  I can’t believe that January is over and we’re starting a new winter month already, but at the same time I’m already feeling like this cold weather can move along faster to Spring!

Today I have a couple of creations that I’ve made using those Inky Stamper products and playing a little “Craft Roulette” too!  Chelsea was on Craft Roulette and if you’ve never seen it play out in action, take a look at the You Tube channel to see what it’s about!  She was on episode #146 and here’s my card that I’ve made with her perimeters:

I had so much fun with this and I’ve never made a tag shaped accordion card before, but it was stuck in my head to give it a try and pull out the Inky Stamper Craft Room set to create it.  The “Roulette Wheel” spun on: Double Tags, shelf/shelves, 2 shades of green and something in the background.

The two shades of green were easy with using the Doodlebug Paper Packs and adding in a few other greens to the coloring.  I’ve also made two tags and placed them inside the pocket area in the middle of the accordion design.  I used a stencil in the background of the other two panels and of course I added some crafty goodies to the shelves in Rosie’s craft room!  The accordion card was easier than I had anticipated and just made a mini slim line size design by cutting off the edges to create the tag shape.  The hole and reinforcers were made using punches and dies.  You can see that I’ve colored up, cut out “Rosie” in her craft room where she is cutting her design going through her creative head!

When it’s all folded up and closed, this is what the card looks like.  I could always add a sentiment on the back, but I thought this would be fun to send to a fellow crafter for sure!  I just wish my shelves looked this organized!  And I always try to use another thing from my stash as I pulled out lots of twine that gets thrown in a bin, so it was nice to use for the tops of each tag area. (Maybe on the back of the card, the crafter can add items to use up on their next project and display it! LOL)


And here’s another card that I’ve done for the January challenge on the Inky Stamper Inkspiration FB Group which was to use: Black, white plus one other color:

I decided to pull out the Grasshopper set and make everything in the background black and white, but just color the grasshopper in green.  All of the elements including the sentiment came from the same stamp set.  I splattered some black paint over the background and the images were colored with some cool gray Copic markers.  I white heat embossed the sentiment over black and cut it out with a banner die.

Behind the white panel, I took a piece of the black floral paper from the Doodlebug Floral & Graph Paper Pad and attached that to a white top folding A2 card base.  It was a fun and easy card to put together!

Thanks so much for “hopping” over here today!  Hope you’ve been inspired or smiled!😊

Challenges:

  1. Cardz 4 Galz – Shaped Card (top card-tag shaped)
  2. Creative Fingers – Anything Goes
  3. Passion for Markers – use die cuts (both cards use dies and are colored with Copics)
  4. Creatalicious – Anything Goes optional love &/or hearts (top card has hearts)
  5. Papercraft – Anything Goes
  6. Sparkles Monthly – Friendship (both cards evoke friendship to me!)

Splish Splash New Design Team FUN!

Hello friends!  I am VERY excited to share my first post with you today as a new design team member for the Whimsy Stamps Digital Design Team!  Woot!! Woot!

For those of you that have followed along with me for a while on my other blog know that I have previously worked with them as a DT member for other positions on the team over a period of several years.  This is simply because I adore Whimsy Stamps along with the owner and several others involved with this company.  I just love the images and working with them.  What better way to enjoy creating and coloring with the products than being apart of the team!  I’d like to share my creation today with this new image that was released at the beginning of this month:

Vicki-WS-Aug-week2

I find these penguins from Crissy Armstrong in the store absolutely adorable!  They all make me smile, but how fun is this cute Penguin Bubble Bath image! 🙂  The image was colored with my Copic markers as well as certain areas with gel pens and then I brushed over the shower cap and bubbles with a clear glitter shimmer brush pen.  I also decided to do a little paper piecing with her shower cap using the August release digital papers called Wonky Circles.

Vicki-WS-Week2Aug-close

Of course, there is so much sparkly goodness on this card that it’s hard to capture in just one photo, so I tried to angle it a bit to give you another view from the sparkly gel pens on the bubbly drink, water and claw feet on the tub.  The shimmer brush pen details can be found on her shower cap as well as the bubbles.  And if that wasn’t enough sparkle, I’ve added a strip of glitter paper along the left side of the image and then finished it off with some Studio Katia Crystal Clear Confetti sequins.

The sentiment I’ve used in the upper right corner of the image panel comes from a Whimsy Stamps clear stamp set called Everyday Mini Sentiments.

I wanted to create a special birthday card with this image in mind, so that when you lift up the penguin image, the card opens up like this….

Vicki-WS-Aug-week2-inside

I’ve taken more of these Wonky Circles digital papers and used them for the inside of my card design and created a pocket for a gift card to fit inside.  I thought a Bath & Body Works gift certificate would be fun to use with this image! LOL!

For the inside sentiment, I’ve used the Whimsy Stamps Happy Everything Clear stamp set.  I stamped the sentiment in black ink and then added the circle elements with some ink to coordinate with the paper.

Here are some challenges I’d like to enter this card for:

  1.  2 Crafty Critter Crazies – Anything Goes with a critter.
  2. Aud Sentiments – For the Girls + sentiment
  3. Craft Rocket – Anything Goes
  4. Seize the Birthday – with toppings of “water!”
  5. Crafting with an Attitude – Anything Goes