Guest Designer for Addicted To Stamps & More – Any Occasion

Hello friends!  Hope you’re having a great week so far and have been enjoying the September month!  I look forward to the Autumn Season and all of the beautiful changes it brings!  Today, I have a fun post to share with you!

Super excited to have won a guest design spot over at the Addicted to Stamps and More Challenge blog!  Have loved playing along with the challenges over there for years!  A few years back I had been on the DT for a bit which was really fun too!

They have fun challenges every other week with a select set of 5 categories/themes that alternate for each challenge which makes it nice so that you can plan your creations according to each one!  So, the category/theme for this challenge happens to be “Any Occasion.

This turned out to be a really great category to work with because my husband came to me and said one of his friends that he used to work with broke his leg.  So he’d asked me to make an “interactive” get well card for him:

The first thing that came to mind for this was the cute Lawn Fawn stamp set “Get Well Before n Afters” along with the “Magic Picture Changer” die set.  Once you’ve made one of these picture changers, it’s not hard at all and it’s really fun to see it change.  I had made a card a couple of years ago for someone else with this set and it was a really fun card to make! So I grabbed the items and started with the scene for the background.

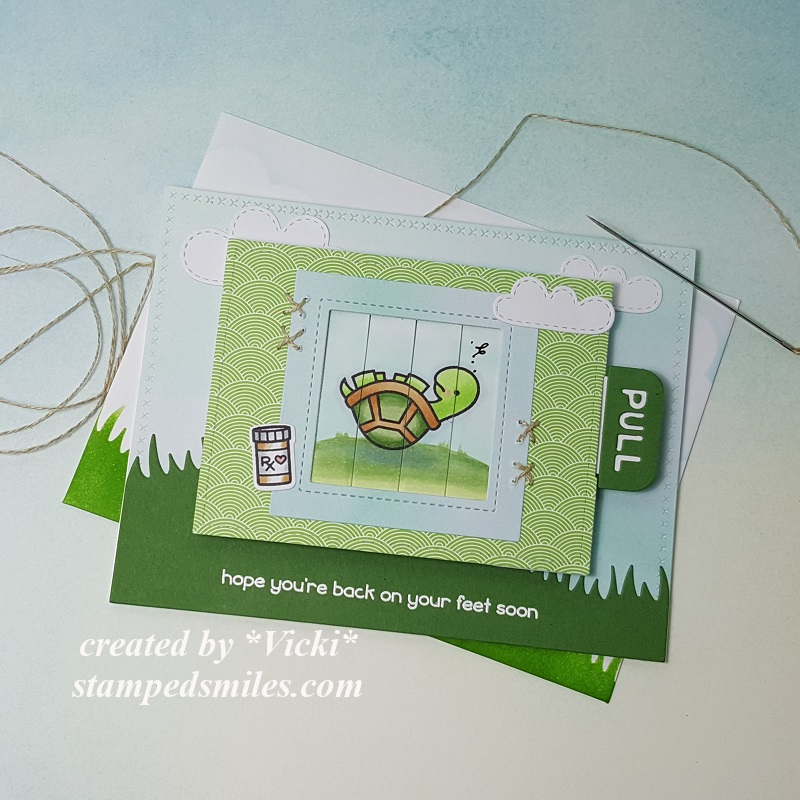
As you can see, there’s not much showing once you place the pull tab picture changer layer over it.  So I just sponged some clouds over the white background and die cut a grass border for the bottom section of the card.  I also white heat embossed the sentiment at the bottom of the grass section, but waited until the picture changer area was done so that I could use that for placement of the sentiment.  I also added one of the band-aids for decoration to the right of it.

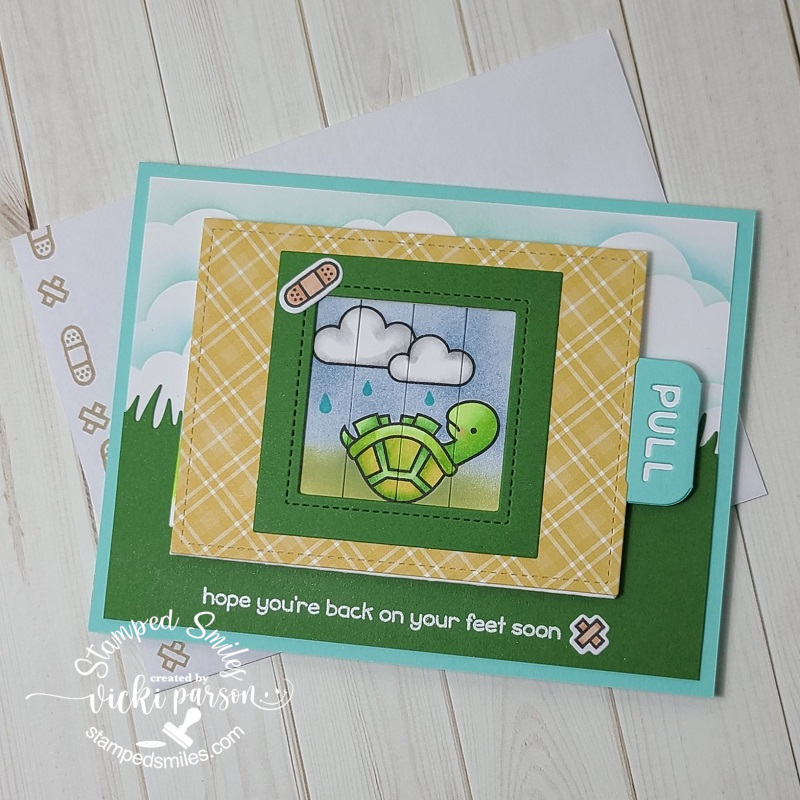
I wanted a tiny scene inside of the picture changers with the cute turtle.  If you’re familiar with the stamp set, then you know there is a turtle on his back not feeling well and then there’s also a “healthy turtle” image too.  So for the “sick turtle” I sponged the sky and grass behind him and the stamped clouds by using masks I cut out from the images.  I then colored him up with Copics.

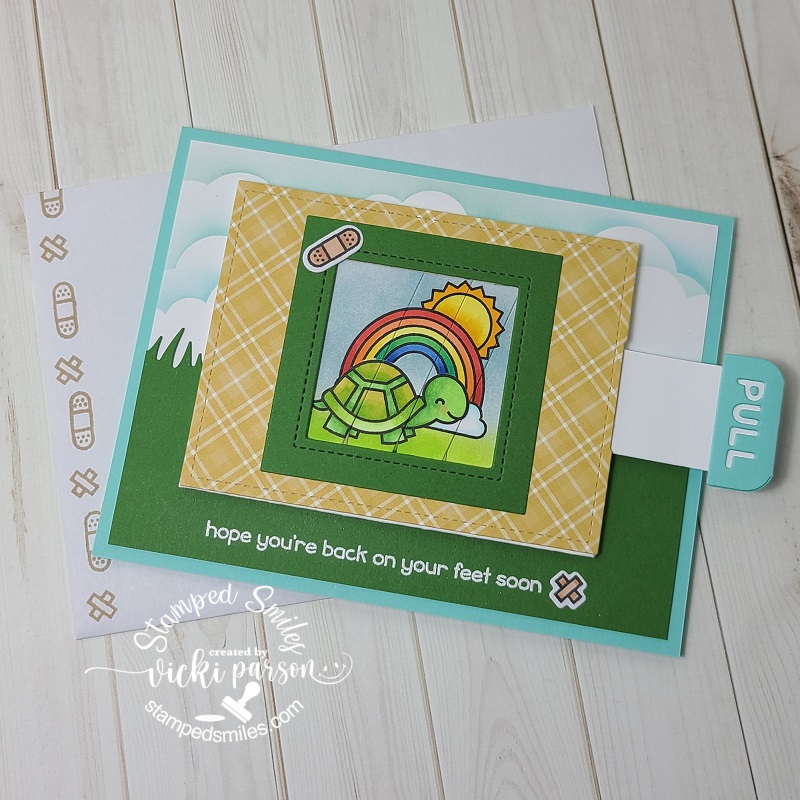
And then of course when you pull on the slider tab, the picture changes and you see the “healthy turtle” with the sun and rainbow instead of the clouds and rain.  LOL, I colored the images with Copics again and made masks for the images so that I could sponge over them for the sky and ground.

I popped up the picture changer section with foam tape over my background panel and then layered it over a top folding A2 sized card base so that there’s message inside too.  Lastly, I’ve added another band-aid image on the green frame and stamped some band-aids on the envelope for mailing too.

It’s certainly no fun to be laid up with a broken leg, so maybe this will help cheer him up!

I hope you’ve enjoyed my card today!  Please stop on over at the Addicted to Stamps and More Challenge Blog to check out the inspiration and come play along with us!

Thanks so much for stopping in!

Challenges I’d like to enter this card in:

  1.  Crafty Animals – Anything Goes featuring an animal.
  2. 2 Crafty Critter Crazies – Anything Goes featuring an animal (last challenge-closing)
  3. Colour Crazy Craft – Anything Goes with coloring (turtled colored with Copic markers)
  4. Watercooler Wednesday – All About Occasions
  5. Happy Little Stampers – Anything Goes with Dies
  6. Creative Fingers – Anything Goes

In Stitches for Cute Card Thursday

Hello friends!  Wow, this week has really been flying by!  I seem to think this almost every week, but I know when the weather starts getting warm, I seem to get more busy outside and perhaps that’s why with the weather being so nice, warm and sunny.  I am enjoying it!

Today starts a brand new challenge over at Cute Card Thursday this week and the theme is “Stitching (faux or real)“.  There are all types of ways to incorporate stitching into your paper crafting and I enjoy adding it to my creations.  So here’s how I’ve added it to my card for today.  I thought this would be such a cute idea for a get well card.

Vicki-CCT582

To make the slider for my card design, I have used the Lawn Fawn Magic Picture Changer and the Magic Picture Changer Add-On dies.  It looks pretty intimidating, but it actually wasn’t that bad to put together as the measuring and cutting is done with the die.  I’ve used the adorable Get Well Before ‘n Afters stamp set to create this and I know I’ll be making another one with the whale to make another card as I’m in need of one.  The turtles were colored with Copic markers and I’ve used them to also create the grass and sky background behind the turtle as he needed something to “ground” him and not be up in the air.  I took a water-proof pen and added a scribble above his head as he’s not happy being up-side-down!

I’ve cut the “add-on” pieces and the background of the card with the Lawn Fawn Watercolor Wishes and Really Rainbow paper packs.  But before attaching the “add-on” papers to the turtle frame, I took a needle and some linen thread and added a few cross-stitch marks around the blue frame.  I’ve also cut a few clouds from a retired LF die set and added the die cut “bottle” that I colored from the same “Get Well” stamp set.

Before I attached the turtle mechanism onto the card, I also die cut a strip of grass with the Grassy Hillside Pop-Up Add-On die in some green cardstock.  I then took one of the sentiments from the same “Get Well” stamp set and white heat embossed it at the bottom of this piece.  The turtle mechanism was popped up over the card front base with some foam tape which was all mounted to an A2 sized top folding card base.

I thought it would be fun to decorate the envelope too, so I die cut a piece of the grass again and used it as a stencil to sponge in some grass along the bottom of the envelope and then I also stenciled some clouds over it.

Vicki-CCT582-A

And here’s what the turtle looks like when you pull the tab out.  He is much happier now that he’s back on his feet again!  I think I played with this card and pulled that tab to watch that turtle get on his feet over and over! LOL!  I hope it will have the same effect on the person who receives it too!

Vicki-CCT582-close

Here’s a closer view of the coloring that I’ve done.  It was a small image and so I’ve kept the coloring pretty simple.  For the “happy” turtle I’ve made a few clouds in the sky.  To make the slider part work, you don’t want to add anything other than the coloring so that it slides smoothly.

Vicki-CCT582-flat

Here you can sort of get a better look at the coordinating envelope that I’ve made to go with the card.  Although I have made some hand stitched marks on my card, the dies themselves already have lots of cool stitch details in them when you cut it out, so I think it just helped add to the design.  This card is going to a male, so I didn’t want to create anything that was too over done.  I think this might bring a smile, what do you think?

P.S.  If you remembered my post the other day, I shared a photo of the Robin’s nest with one egg in it.  Well, since I’ve last checked, there are a couple more in there now:

3 robin eggs

Every time we go out there, the mother watches for us to leave as she wants to sit on her eggs!  This is why we can’t get a photo of her actually sitting on it.  But we will see if anything happens in a few weeks! 🙂

Thanks so much for dropping by today!  I hope you are enjoying your week and I’ll see you soon!!

Challenges:

  1.  Sweet Stampers – Animals
  2. Pammies Inky Pinkies – PIP1919 Anything Goes
  3. Crafting From the Heart – Anything Goes
  4. A Bit More Time to Craft – Anything Goes
  5. Simon Says Stamp Wednesday – Stitches
  6. Watercooler Wednesday – masculine anything goes WWC221