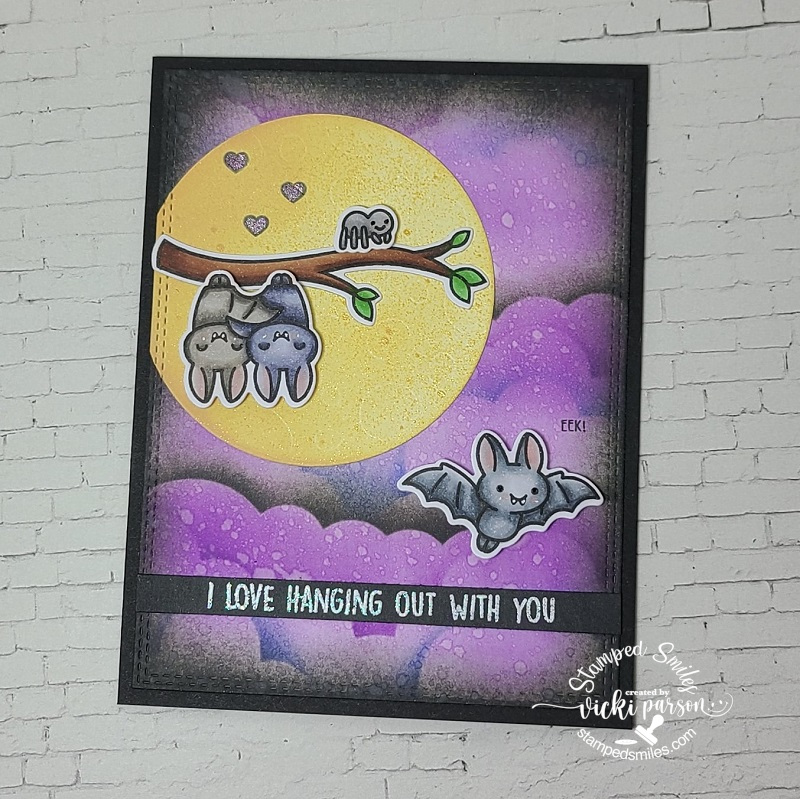
Hello friends! I wanted to share the anniversary card I made for hubby this year. Now that I’m posting this (without him knowing), I think I made a bat style card last year too! It just happens to fit with this time of the year and we got married close to Halloween…so it works, right?!😉 I’m just thankful that we BOTH like Halloween!
So, I fell in love with these cute cuddly bats (Yep, I said that!) from Lawn Fawn called Fangtastic Friends. I stamped, colored and die cut out the images that I wanted before I started to work on the background.
For the background, I pulled out a cloud stenciled and mixed purple, black and blue oxide inks to blend in a night sky. I spritzed it with water for the water droplets. I then die cut the full moon from the LF Full Moon die set and then used some Distress Mica Stain Harvest Moon and sprayed over it, so it has a bit of a shimmer to it. I placed it where I wanted to go over my sky background and then cut them both out with a double-stitched rectangle die and attached the panel to a side folding A2 black card base. (The sentiment strip was added before attaching)
The sentiment was heat embossed over a black strip of cardstock using some white glitter embossing powder.
I attached this strip at the bottom of the sky panel and cut off each end. I added the rest of the elements and images to my scene and stamped the “eek!” by the bat on the right and a couple of hearts on the moon above the hanging couple. I added some shimmer to the hearts with a purple glitter gel pen.
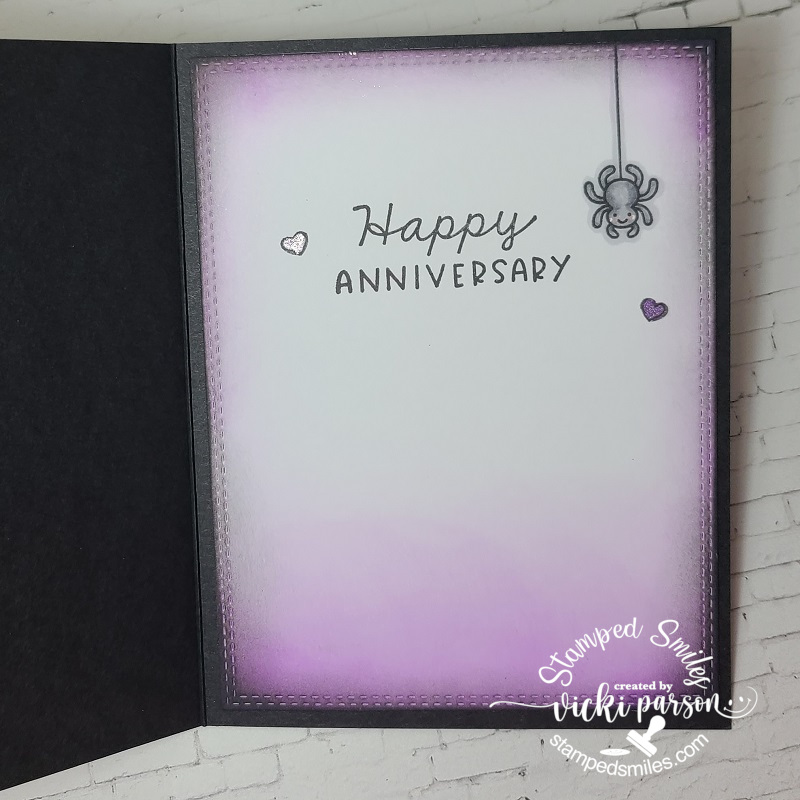
I thought I would share the inside of the card with the stamped hanging spider, the sentiment and the hearts I stamped around it with some more of the purple glitter gel pen coloring. I also used some purple and black distress oxide inks to blend around the edges of my white inside panel which was also cut out with the double-stitched rectangle die.
I certainly do love hanging out with my husband, but hopefully not in the manner on the card!😅
We’re enjoying time together right now as this has been scheduled to post, so I hope you enjoy and thanks for dropping in! I’ll see you soon!
Autumn is always a favorite time of the year with the changing of the Season: cooler temps, pretty colors and being able to go out enjoy all of nature with its bounty and beauty. There’s also nothing better than freshly picked apples from the orchid too! It’s something that I love to do with my husband every year at our local orchid.
So, when Lawn Fawncame out with this adorable set along with a free craft-a-long class, I knew I wanted to participate!
This is the first card we created using the LF Apple-solutely Awesome stamp set and dies. For the class, we actually stamped, colored and cut out all of the images that we would be using for both of these cards. I think the fun thing about this set is arranging the images to figure out where you want to place them for your scene. Since it was a class and I didn’t have to think too much, I decided to just follow along with what I had and just enjoy the process.
I didn’t have the stencil set that they used for the class, so I had this Pink & Main Leafy Stencil that I thought would work out fine and I just blended different colors with some Oxide inks. The white panel was cut with the LF Small Stitched Rectangle dies, popped up over the stenciled leaf panel and the sentiment was stamped at the bottom before attaching the images.
I’ve already sent this card to someone that gifted us some homemade applesauce…YUM! (Already gone!)
And here’s the second card we created for the class using the same stamp set and stitched rectangle dies. I had fun with that “cider jug” and adding a bit of sparkle to the contents inside with my glitter brush pen.
For the sentiment, I die cut it out with some LF Woodgrain Cardstock and ink blended some brown Oxide ink at the bottom of the die cut. I used some foam strips to pop it up over the panel. The white panel was done the same as the above card. I used the same stencil as the above card as well but only kept the yellow tones for this one as it seemed too busy with all that was going on with the card.
So, although this was a class that I mainly followed along with except for a few minor changes, I had fun making these while getting into the Fall spirit! I hope you’ve enjoyed them as well! Thanks for stopping in!
Hey there friends! Hope you’re having a wonderful week so far! We’re getting closer and closer to Halloween already!🎃 I haven’t made as many Halloween makes as I usually do, but as the day gets closer I’ve been more in the mood to pull out some things to have fun with my stash and my thoughts turned to “Grumpy”.
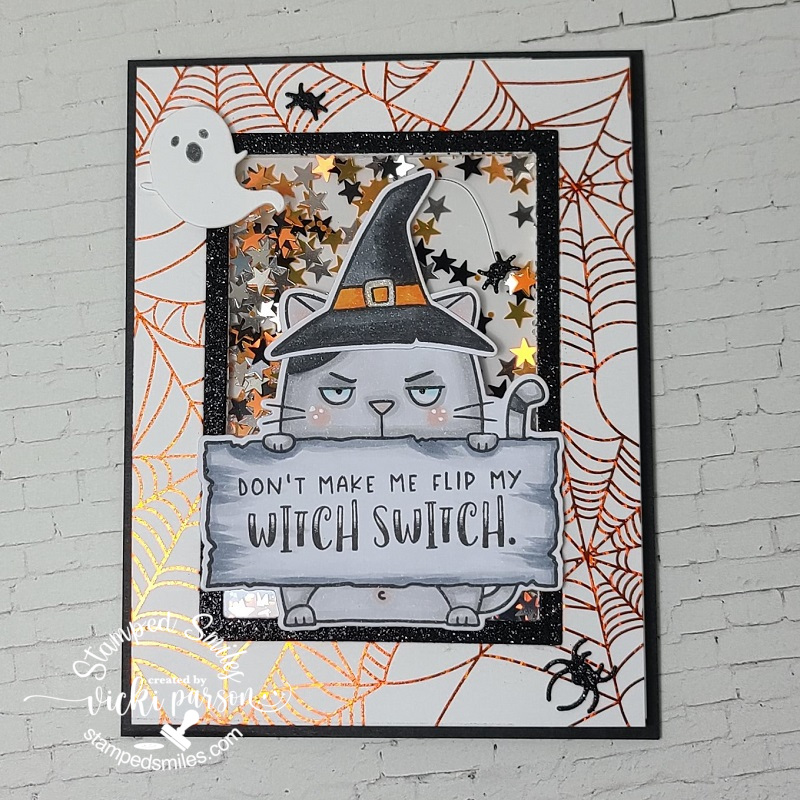
If you’re not familiar with “Grumpy”, this is the Big Grumpy Cat from Taylored Expressions. I absolutely love the “Grumpy” and “Grumplings” line and I don’t pull them out as much as I’d like to. Since it’s closer to Halloween, I’ve also pulled out the Big Grumpy-Halloween accessory set to go along with him too! (The only thing I used from this set was the witch hat and the sentiment.) I’ve stamped, colored and cut out each of these items for my card.
The #TEMakerChallenge has the theme this month of using Oreo & Sugar Cube with the option of adding any other pop of color. I’ve decided to pop in an orange color for mine. The theme was also “Sparkle & Shine” through foiling, heat-embossing, glitter paste or sparkly cardstock.
So, for the “Sparkle & Shine” I’ve taken a Foil-It Spiderweb panel and foiled some orange Deco Foil over it. I then took one of the Frame in Frame 3 dies to cut out the middle of this panel, added some acetate over the opening and made it into a shaker panel. I die cut the same frame as well as the Little Bits-Spiders die from some black Glitter Cardstock. I attached these pieces onto the web panel along with adding the Grumpy Cat with his hat string and extra spider attached to him over the acetate. I attached double-sided foam around the opening and added some “shaker stars” in the colors orange, black and silver. And lastly, I thought it would be fun to pop up a left-over ghost I had from a previous project at the top! (I think the ghost is in fear of the “witch switch”!) 😂
I also have another “grumpy” card to share…
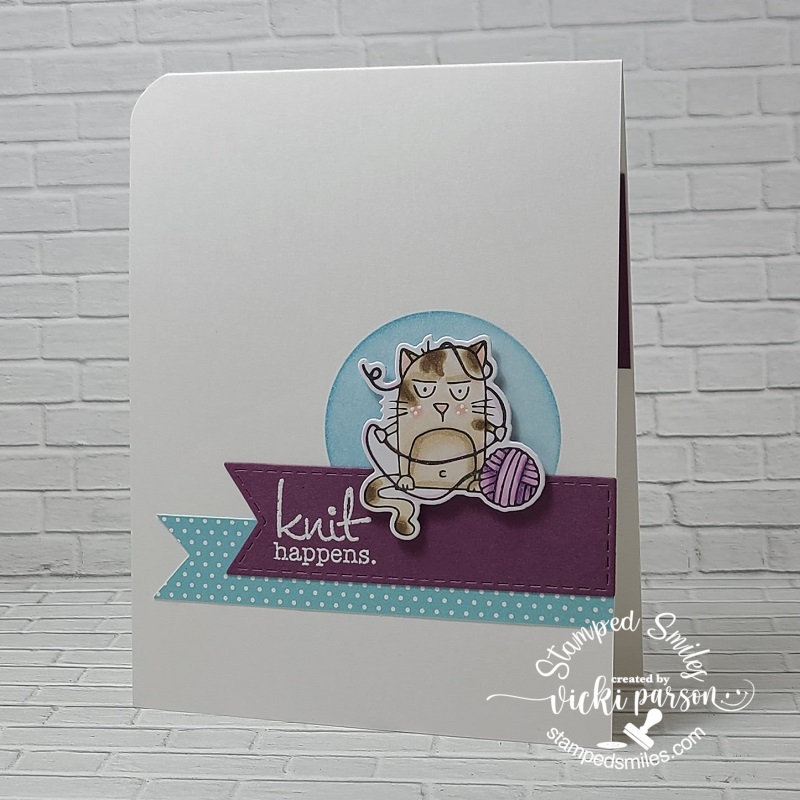
So this card was made to send a smile to a friend. I’ve used a cat for this one as well from the Taylored Expressions “Grouchy Grumplings” set which I don’t believe is available in the store any longer.
I kept it a simple card by stamping, coloring and cutting out the grumpy. I ink blended a circle that fit him with blue ink, white heat embossed the sentiment and cut it out from the TE Stitched Banner Stacklets. I popped grumpy with foam tape over the sentiment banner and circle. I also used some TE decorative papers from my stash and cut out a banner with it using my scissors. A corner chomper was used to round the top left corner of the card to finish it off.
I hope you’ve enjoyed my “Grumpy” projects today and have been inspired in some way! Really appreciate you stopping in!
Hello friends! Lots of fun crafty things happen during the month of October with the start of World Card Making Day to kick us off, then there’s the changing seasons with Fall, then Halloween with the treats which then turns into the Holidays of Thanksgiving and Christmas! I have taken the time to participate in some fun challenges and classes this month with some Inky Stamper inspiration for today’s post.
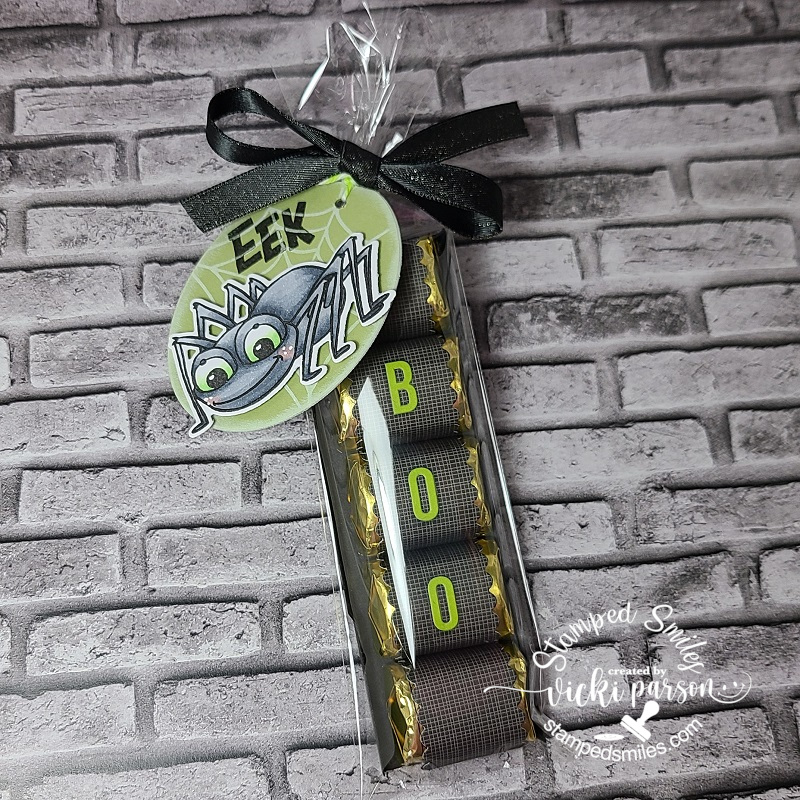
Although it says “EEK” next to the spider, I think he’s a cute one and not one to run away from! This cute spider comes from the Inky Stamper Spider stamp set that I’ve used on the tag for my Hershey Nugget treat holder. (I made this for the October challenge in the Inky Stamper Inkspiration FB Group with the theme of “Treat Holder”.) I’ve stamped and colored the spider with Copic markers, used the coordinating die to cut him out and pop him over the green oval tag with the spider web and EEK stamped over it. I’ve used the green colored markers to his eyes to match my project.
For the treat package, I’ve used the Inky Stamper Scallop Candy Wrappers die cut out from some black Doodlebug Gingham/Linen paper to wrap around the candies. I made a “holder” for the nuggets with regular black cardstock and scored each side 1/4″ for a container to hold the nuggets in place. I used some stickers from my stash to add the “B-O-O” letters and then slid the container into an Inky Stamper Hershey Bag that was gathered and tied up at the top with a piece of Doodlebug Limeade Twine. I punched a hole in my spider tag/gift card and threaded the twine through it to wrap around the treat and then took a piece of black ribbon to tie a bow around it all. These were so fun and easy to make!
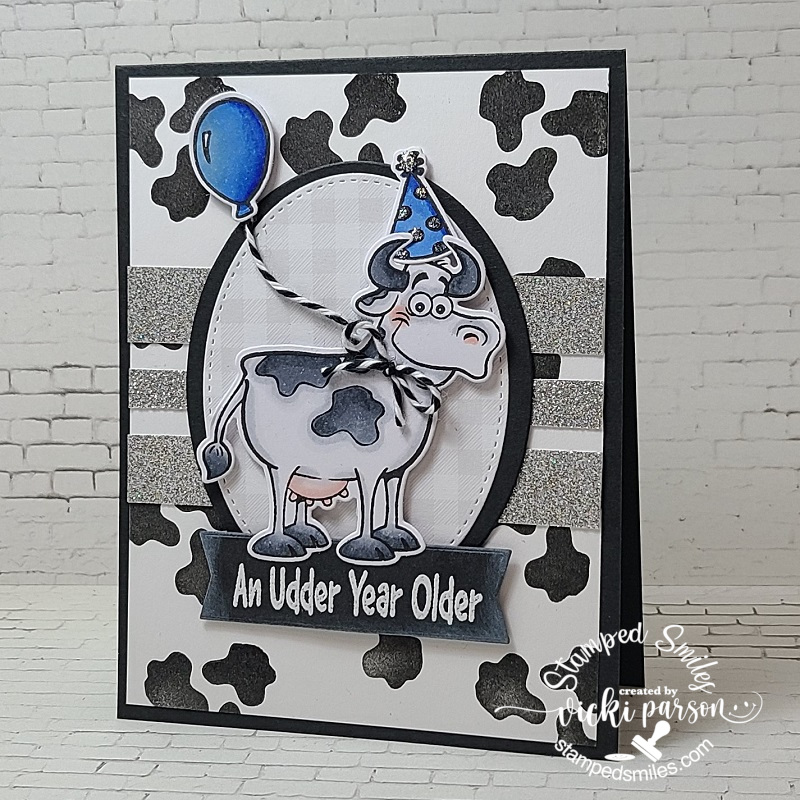
Another thing I did was participate in the World Card Making Day Challenge in the Inky Stamper Inkspiration Group. The challenge was to create a card using a sketch that was given and turn in by a certain time frame. This was my take on the sketch using the Inky Stamper Cow stamp set.
I used the “cow pattern” image from the stamp to create my background, white heat embossed the sentiment strip over black cardstock and sponged white around the edges of the banner. I popped it up with foam tape, stamped, colored and popped up the cow image over the banner as well. I also used the Inky Stamper Bunny set for the balloon image and the Inky Stamper Goat set for the party hat over the cow’s head. The balloon string was attached behind the cow and then I made a bow for around the cow’s neck with the Doodlebug Beetle Black Twine. To make my card fit with the sketch, I added some silver glitter cardstock strips behind the oval layers. I also added some silver Stickles glitter over the party hat to bring in the silver as well. So glad I ended up playing as I was picked to win a gift certificate!
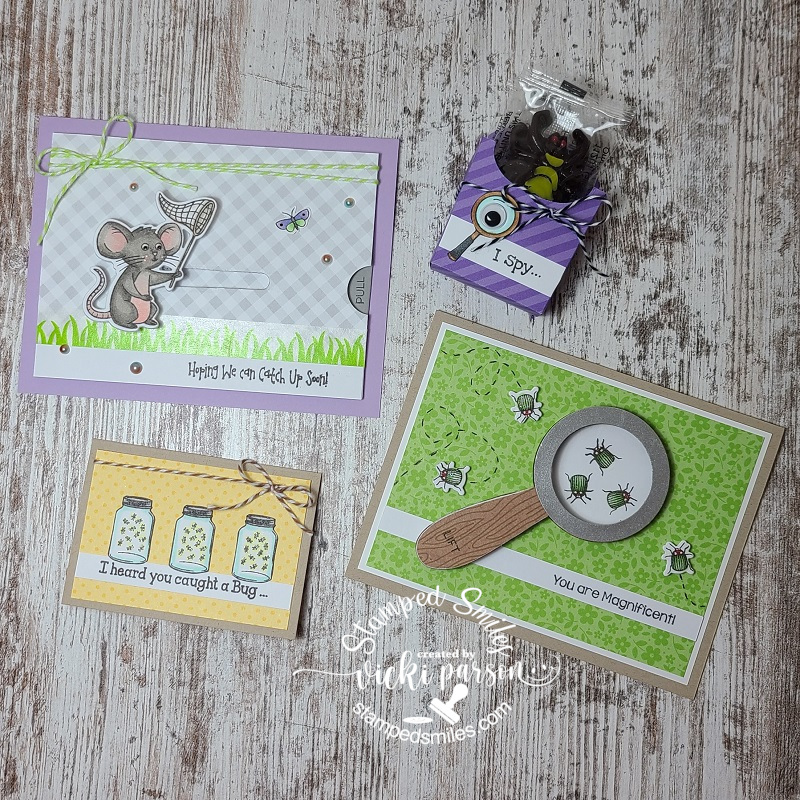
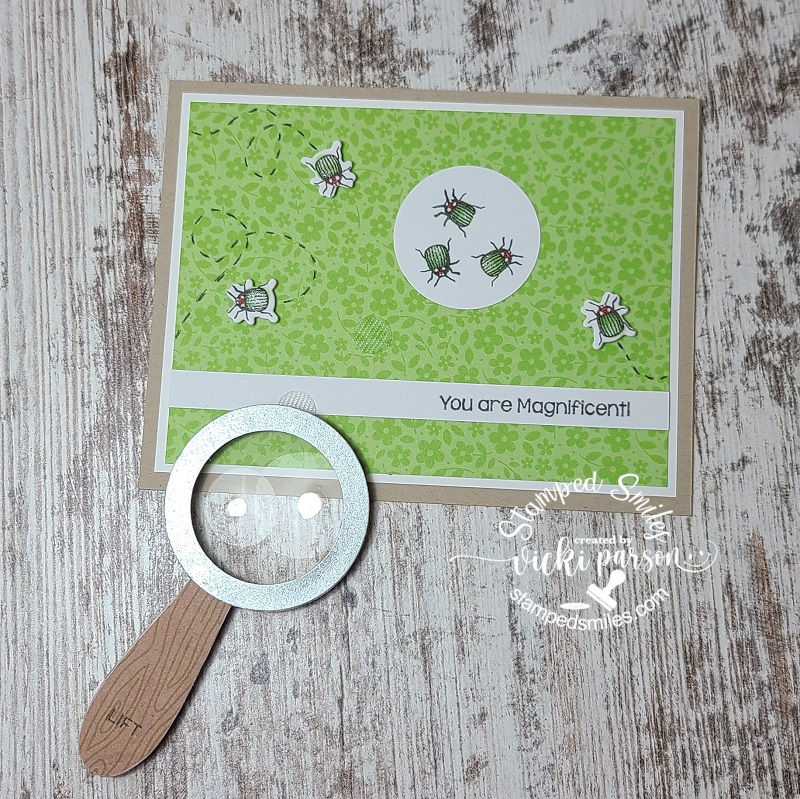
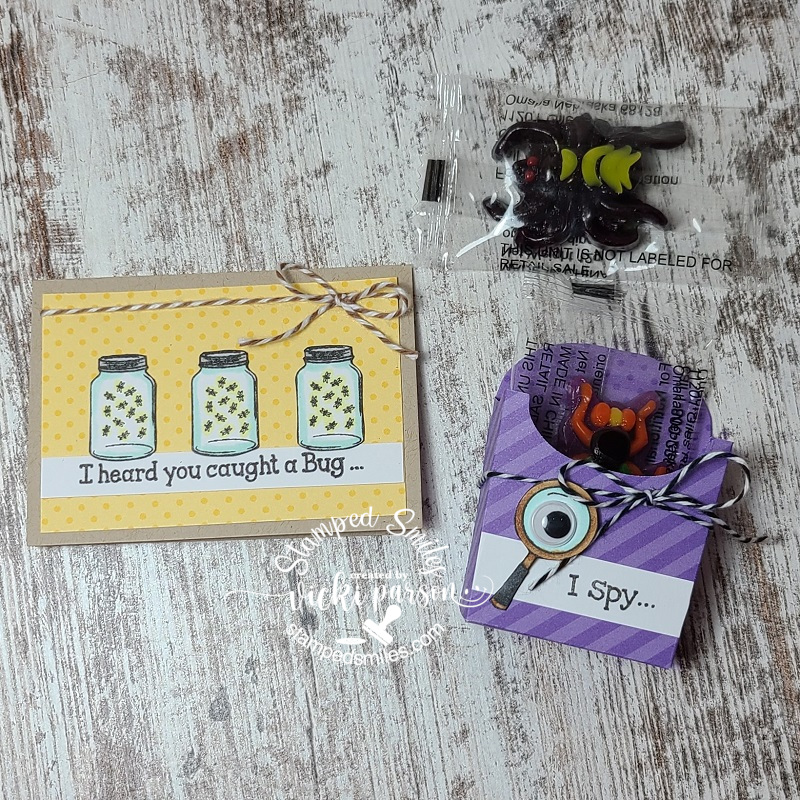
I also participated in a “game night” class making these fun projects all made with the Inky Stamper Bug Catcher set. This class was a kit and all of the pre-cut items were included. I already had the stamp set so I didn’t need to purchase that with it. Even the candy spiders and magnifier came with it all! I had fun putting it all together and I really liked the versatility of the projects we did.
If you’re on my website, just click on the photos below to take a closer look at each project.
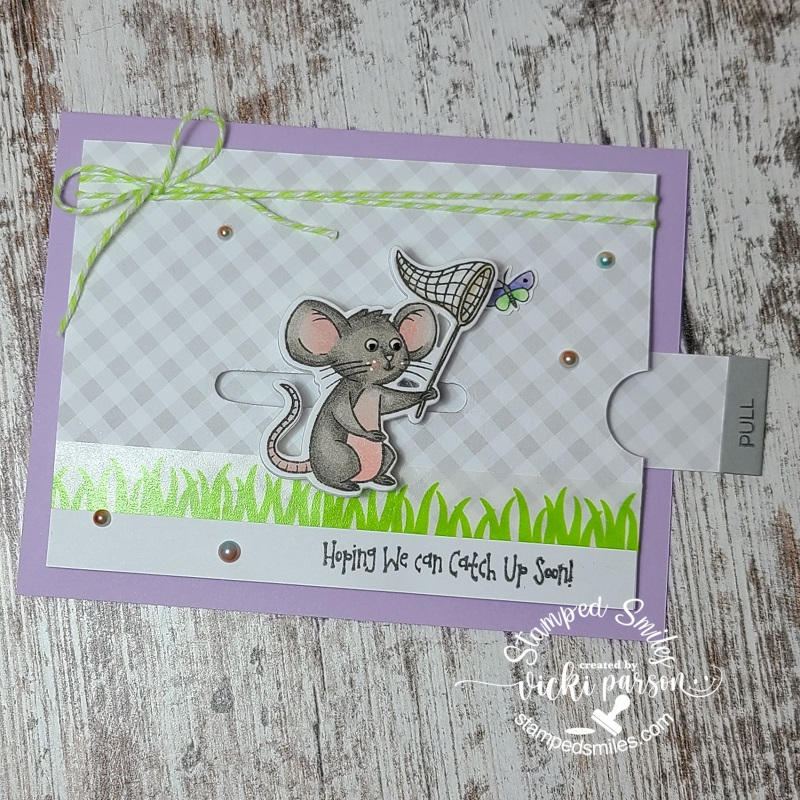
When you pull the slider tab the mouse moves over to catch the butterfly!The magnifier is attached with Velcro dots from card! It works!Mini card and treat box with candy spiders inside!
Hope you’ve enjoyed the projects that I’ve made and been inspired in some way! Thanks so much for stopping in!
Challenges:
Two Old Bats – Anything Goes Halloween (spider treat)
Hello friends! The weather has been really nice over my way so I’ve been taking advantage of it by enjoying the outdoors before it starts changing into more chilly temperatures. All of the prize winners have contacted me and the packages have all been sent out. I have received notice that the U.S. winners have gotten their packages and hopefully the overseas will be arriving soon. My thoughts are also with those that were affected from Storm Ian and hope for healing and recovery as soon as possible.
Although it’s been a while since I last posted, I have been working on some things for SWAPs and a few other cards that I had created as well to share with you.
please click on the photos below to see them close-up
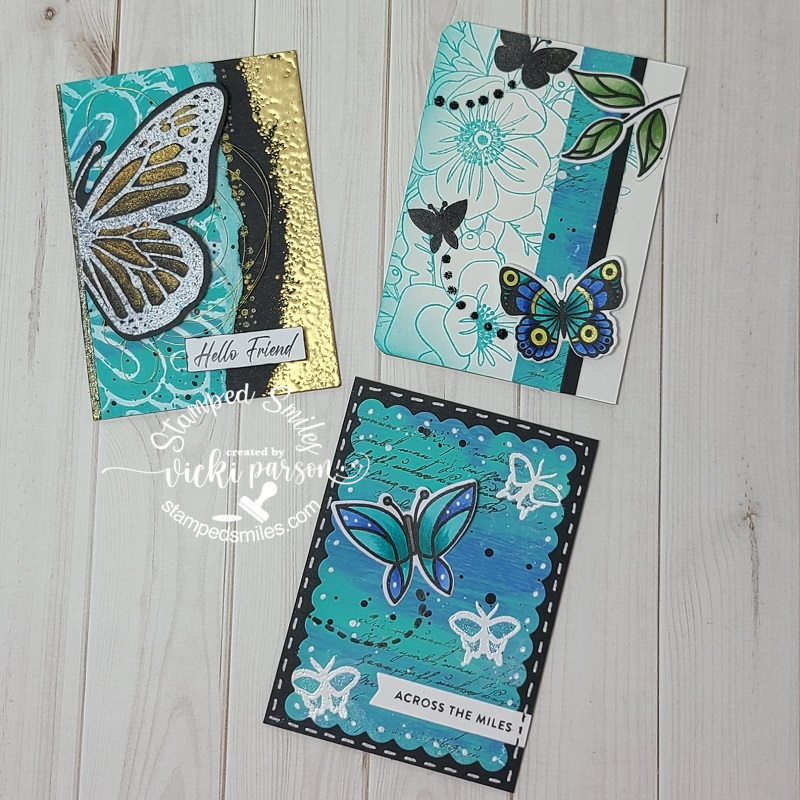
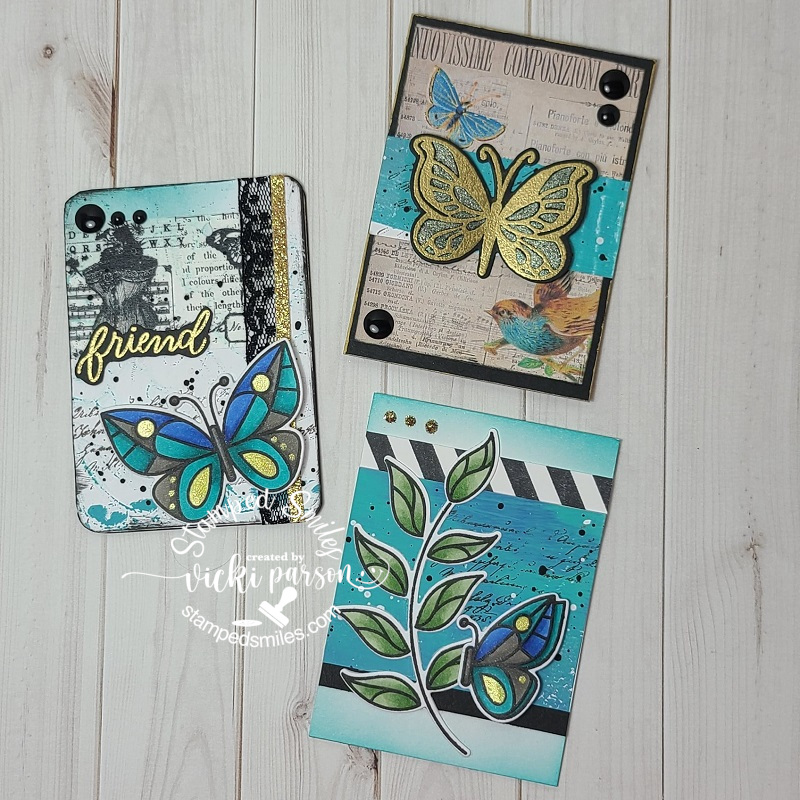
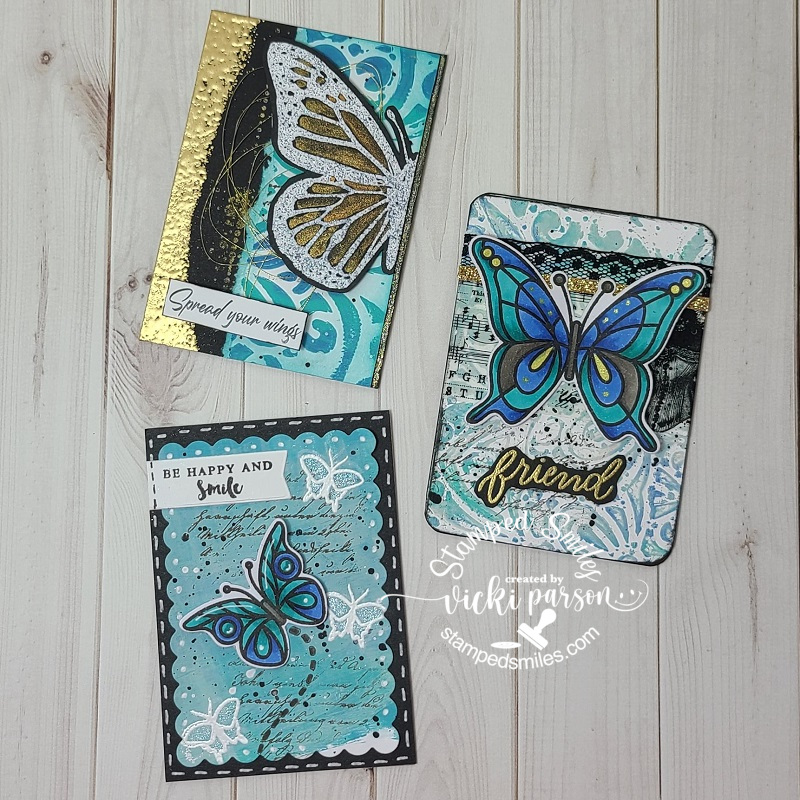
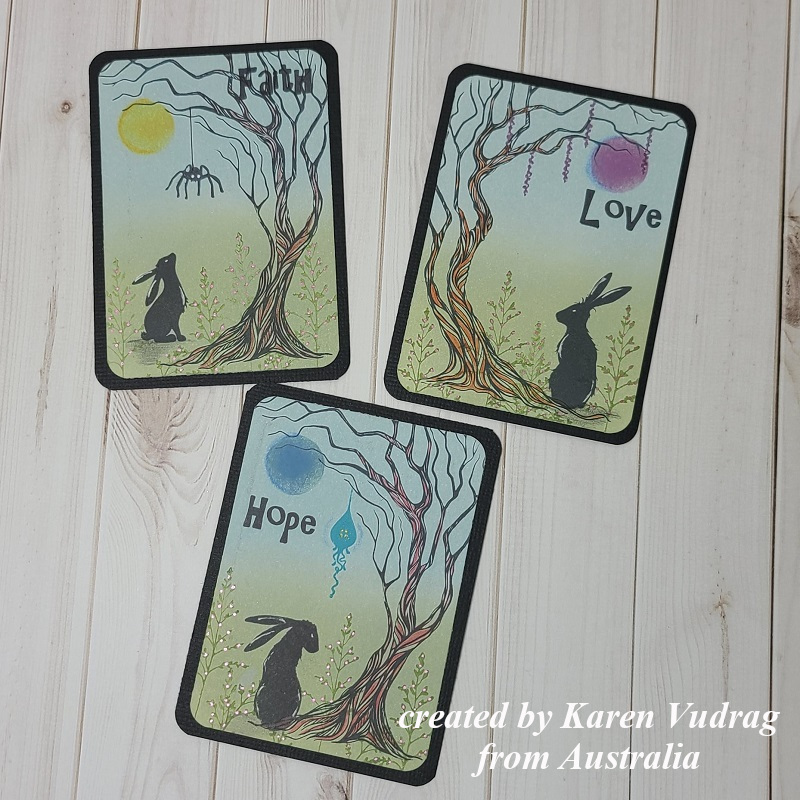
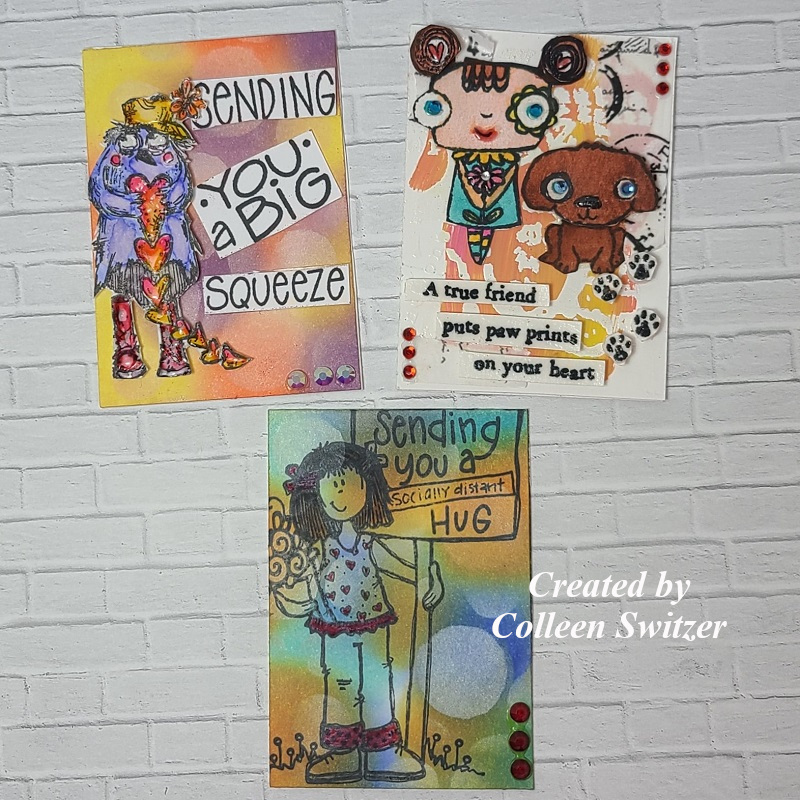
Within a FB Group that I’m in, we could choose to join an ATC SWAP with the theme of “Friendship” and these are the cards that I had created. I swapped with two others and then kept one set of three for myself. I was excited because this is the first ATCs I’ve sent overseas and really enjoyed making the collection. I thought the butterfly theme with similar colors would work keeping the “Friendship” in mind…
And then below are the set of ATCs I’ve received from my SWAP partners in return. The first lady sent her ATCs from Australia and the other lady was from the UK I believe. Love them and was excited to receive them to add to my book.
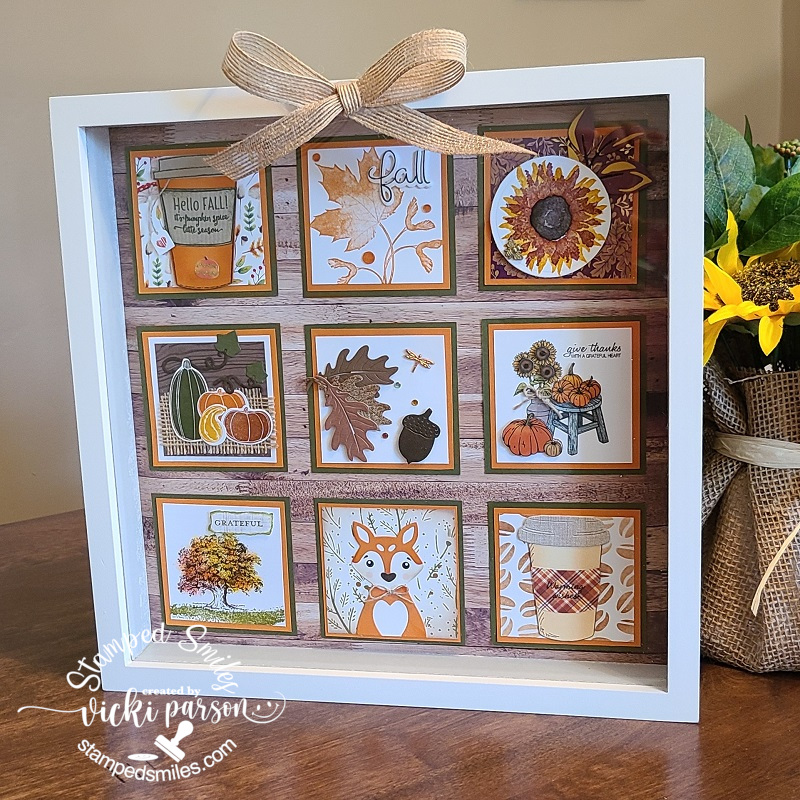
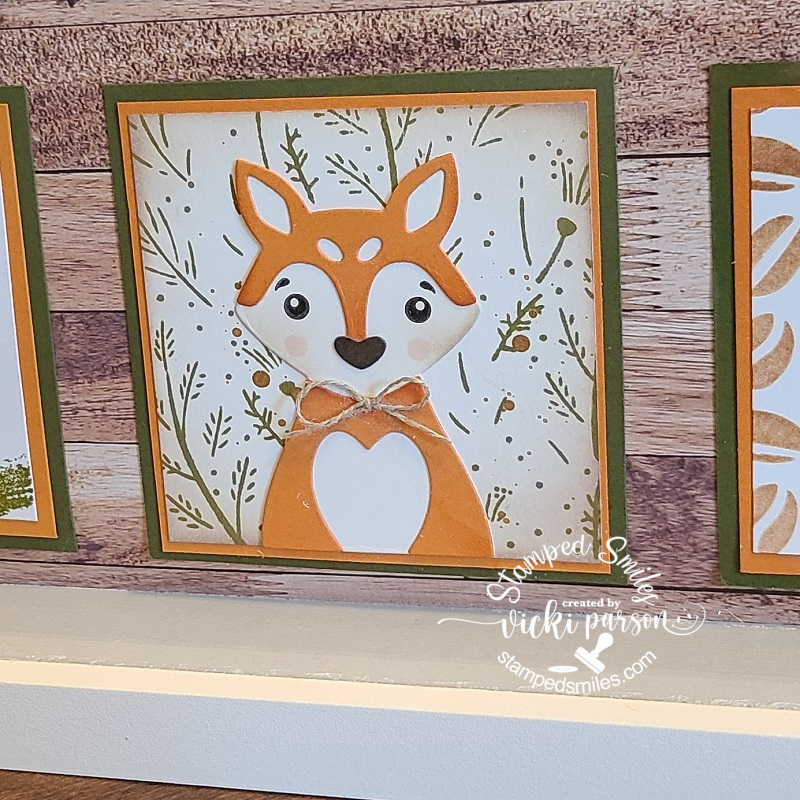
I was also involved in another “StampedSampler SWAP” making those squares like I had done with my Summer one if you remember that with my friends Patti, Shirley and Donna. This time our squares were the theme of Autumn/Fall using the Stampin’ Up! colors Pumpkin Pie and Mossy Meadow. It’s so fun to see them come in and then put it all together in the frame! Here’s how mine finished out:
For my Sampler frame, I used some different colored woodgrain pattern paper to attach the squares to and this frame is a bit different than my Summer Sampler (Check it out in THIS POST if you want to see that one.) It can stand on a table surface or you can hang it up. I also decided to add a burlap bow at the top of the frame using a hot glue gun.
This is the Sampler Square that I had made using the adorable fox from the Taylored Expressions Woodland Squad Die & Clear Stamp Combo set. The background was stamped with the TE Four Seasons Stamp & Stencil Combo set using ONLY the background stamp in one color. I then using some gold acrylic paint to splatter over it. I also added a twine bow to the fox. I believe we’re going to be doing another one for Winter too…stay tuned!
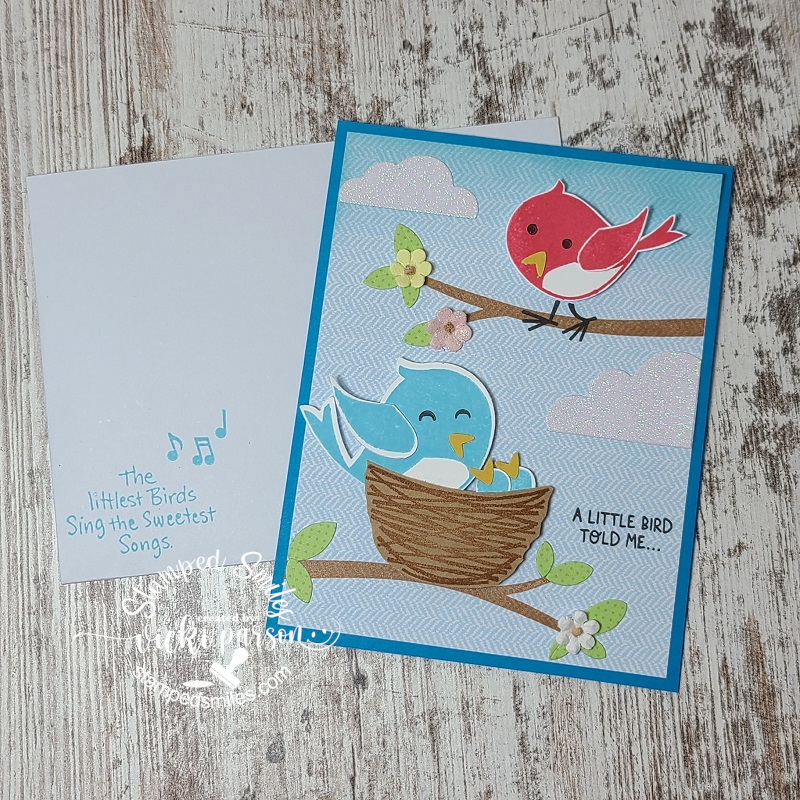
My friend Patti had also sent me an extra card kit from one of her classes along with her SWAP square, which I thought was so nice…so I had some fun putting it together as I don’t have this set which I believe is a Stampin’ Up! one.
The card kit had all of the pieces in it along with the stamped birds cut out, the stamped branches and sentiments (even on the included envelope) along with cut glitter clouds and flowers! There was a sheet with photo and instructions so I just followed along except I die cut some leaves for the branches from a piece of scrap green paper I had. Now I have a cute little birthday card ready to send out, so thank you for the fun Patti!😉
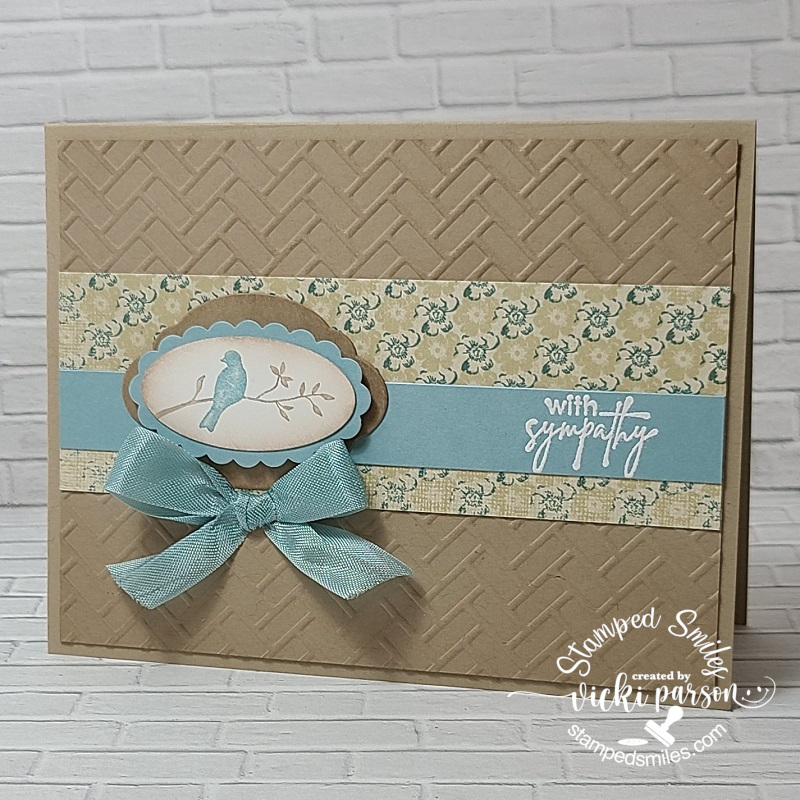
And speaking of birds and Stampin’ Up!, I had to make a sympathy card for someone that lost their pet bird. I was looking through my stash and found an older Stampin’ Up! set with a bird silhouette which I thought would be good for a sympathy card like this. I was inspired to pull out more of my older Stampin’ Up! stash to use so I used some old punches, ribbon and paper for my card as well.
I hope you’ve enjoyed the inspiration today and I thank you so much for stopping in! If you have any questions about my post, please let me know. Have a great day and see you soon!
Hello friends! Welcome to September! Really hope that you’ve had a wonderful Labor Day weekend and have had a great start to the month so far! I’m still trying to get my MOJO in gear as I really love this time of the year with all of the wonderful Autumn things happening both outside AND in the crafty world too! Really love when it starts up, but as it gets closer to the end of the year…I’m ready to skip right over it! LOL!
Today I have a fun post to share with some projects I made with several Inky Stamperproducts! They have a FB challenge to participate in every month and so I thought I’d share what I came up with. (Check it out and play along if you have any Inky Stamper stamps!) *Check out the store as well because there is a brand-new release that just came out!
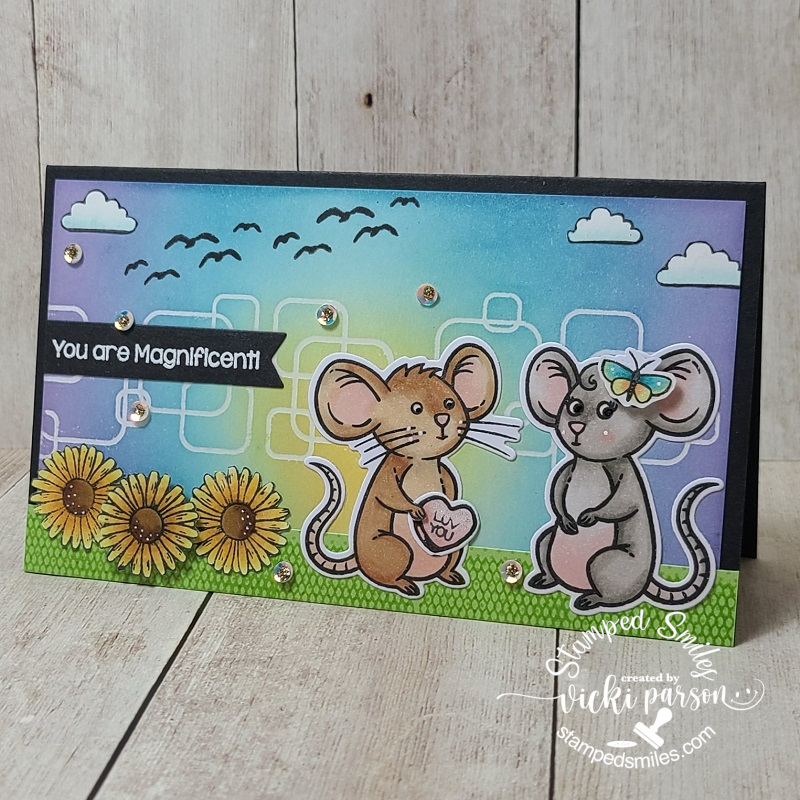
This was a fun little scene to create on a mini slimline card! So, the Inky Stamper Inkspiration FB Group challenge THIS month (Sept) is to use more than just one Inky Stamper stamp set on one design. I really liked this challenge because it got me thinking of what to use and pull out several different images and actually use them! Looking forward to seeing what other people come up with too! So, for my scene, I’ve actually pulled out EIGHT different stamp sets!!!😮
To start with the background, I pulled out the *Housefly set with the squares image to clear heat emboss the background and then ink blend over top for an “emboss resist” technique. I took the *Rainy Day set and stamped the rainbow/cloud image and fussy cut the clouds to add on the background sky. For the “flying birds” and the “pattern” at the bottom over the green strip, I’ve used the *Pelican set. Of course, the main characters are different sets from *Rosie Solo and *Ralph Solo. For Rosie’s “hair”, I stamped the butterfly from the *Bug Catcher set to color and fussy cut it out which was then popped up over the flower she originally has. I also used this same set to white heat emboss the sentiment. For Ralph, I pulled out the *Snail set to stamp and color a heart which he is holding. I just made a slit around Ralph’s “hand” to help him hold the heart. And lastly, I pulled out the *Bee set to stamp, color and fussy cut the flower image. I cut off the stem and just attached the flowers with one of them popped up with foam tape. Lastly, I’ve added some sparkle to the butterfly on Rosie and the heart with Ralph using my glitter brush pen. I then added some sequins from the Fall Flowers sequins mix and filled the centers with some Stickles.
So, did I, do it? Did you count out the eight different sets? I think this mouse couple is too cute…and no… they aren’t the “real” mice, these are the good ones to have! 😁
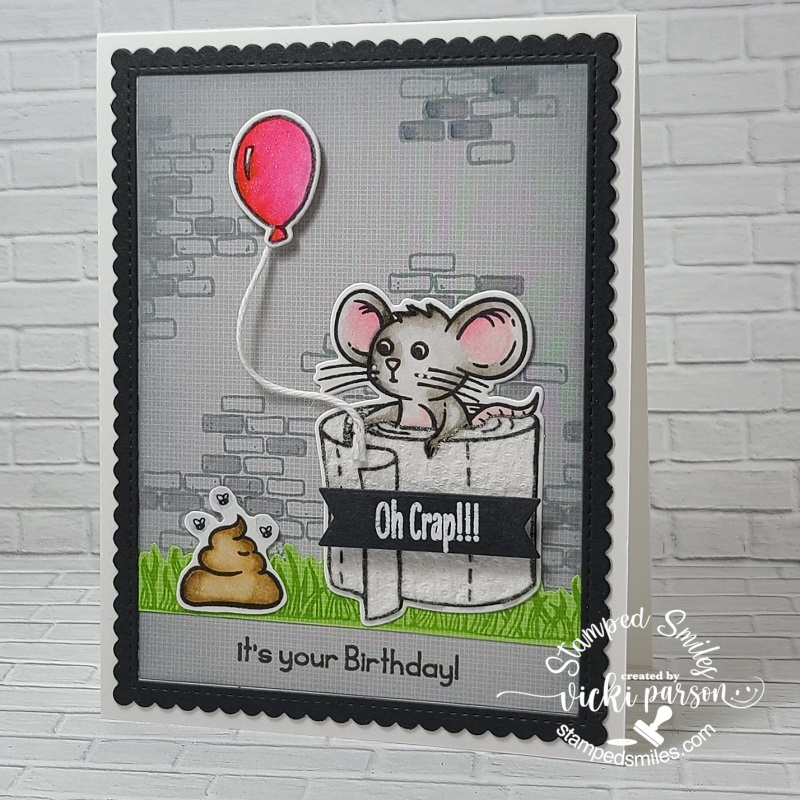
Ralph is showing up again! I needed to make a humorous birthday card for my son and I’m sure he’ll get a kick out it! 😂 This is actually the first card I made for this month’s Inky Stamper Inkspiration FB Group challenge, but I didn’t use eight different sets like I did on the one above, I only used four different sets. However, I used REAL TP!
The background was created using some of the Doodlebug Gingham/Linen paper which the “bricks” image was stamped over with grey ink from the *Goat set. I also used this same set to stamp the “grass” border towards the bottom with another strip of green from the same Doodlebug paper pack. I just fussy cut the top of the grass strip to attach over the grey brick background. Of course, the Ralph inside the TP roll came from the *TP set along with the “pile of poo”💩 and the “Oh Crap!!!” sentiment that was white heat embossed over a black banner and popped up with foam tape. The balloon image came from the *Bunny set. I decided to attach a piece of the white Doodlebug twine and pop up the balloon with foam tape. I attached the other end to Ralph’s “hand”. Lastly, the fourth set I used was the sentiment at the bottom from the *Iguana set. (For that sentiment, I only used a portion of it from the stamp.) So that makes FOUR sets used!
The images on this card were colored using my CC Real Brush markers, I stamped the Ralph image again over the TP… yep, stamped directly onto the TP and fussy cut it out to paper piece over the image. Gives it the REAL look and feel of TP! 😉 I have die cut a black scallop frame to go around the scene and lastly, I’ve added some sparkle to the balloon and the tiny flies around the “poo” with a glitter brush pen. I didn’t want to add too much as this is a masculine style birthday card.
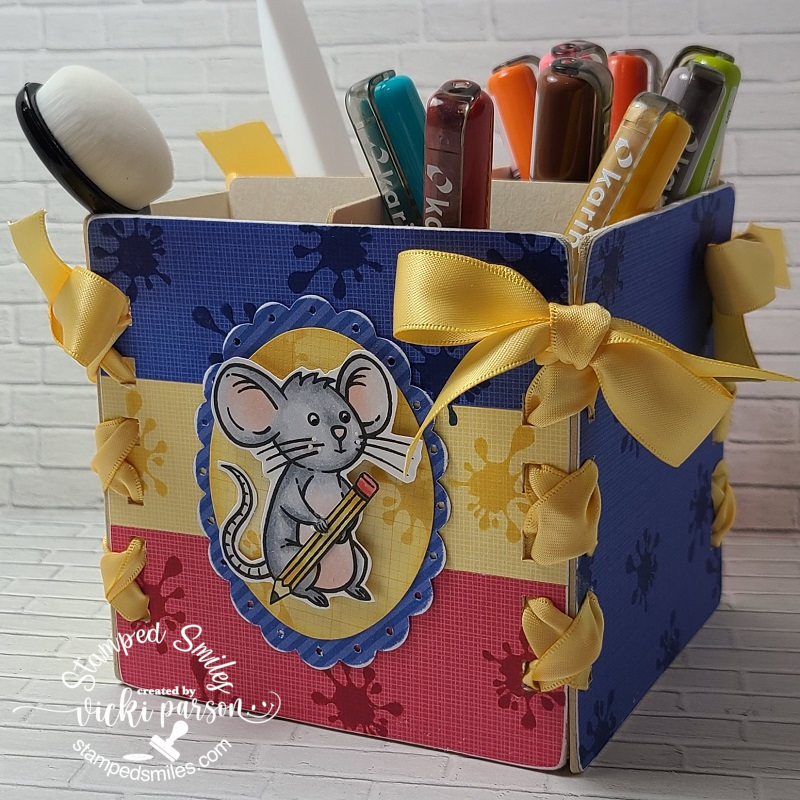
And then I have one last project to share that I actually made for last month’s challenge that I “squeaked” in just in time too! (See what I did there?!😂) Ralph is just so popular today! I had a plastic bag sitting around on my table that I kept moving out of my way and it was frustrating me, so I made this “container” to hold some crafty things to sit on my table! It’s actually a REALLY old tutorial from Splitcoast Stampers using chipboard coasters! I have SO MANY of those coasters and I was happy to use some up. CHECK OUT THE TUTORIAL HERE (P.S. The tutorial is actually done up by Taylor from Taylored Expressions, before her store years! That’s how old it is!)
The challenge last month was to use primary colors on your project which are the red, blue and yellow colors. Not realizing what the challenge would be for THIS month, it would actually fit in with that too! I used THREE different sets for this project. Again, I’ve used the *Ralph Solo set that was colored up and fussy cut out as this was done before the new die came out for him! (see top card) I took out several of the different Doodlebug papers to cover my chipboard coaster panels being mindful of the Primary Color challenge. Rather than leave the papers as is, I decided to pull out the *Inky Greetings set to stamp the splatter image in the coordinating colors with the papers. I also decided Ralph needed to be holding a pencil, so I pulled out the *Owl set and stamped, colored and fussy cut the pencil image which was added to Ralph’s “hand” by making a small slit for him to hold it.
I was happy to pull out some of my old punches to create the backdrop for “pencil holding Ralph” as well as using up those old coasters and some more papers and ribbon from my stash! (I’m really hoping to be doing more of this often!)
I know this was a long-worded post, but hope you enjoyed the projects and got some smiles too! Thanks for catching up with me today! See you soon!
Hello friends! It’s been a minute or two since my last posting as I had been sick and then totally lost my “MOJO” during that point! So I was trying to get it going again with a few Halloween projects! I have been playing with some new Taylored Expressions goodies and I thought it would be fun to give away some TE stuff as well!😀 Stay tuned to the end of this post!
click on the photos below to enlarge them if you’re on my website:
Now how cute are all of these critters, ghouls and creeps?! As you may remember from my last post, I had been having so much fun creating with the Taylored Expressions Create-in-Quads stencils, so I had my play with the Halloween Create-in-Quads with the makes above! I stenciled some black, candy corn, plum punch and lime zest colors, plus I went over the lime zest with some glow-in-the-dark glitter paste. The stencil quads make two A2 sized backgrounds as well as the cat and witch cauldron too! There is also coordinating dies to cut out the cat and witch that I used to cut out for the second set of cards. For all of the cards, I’ve used the TE Frame in Frame 3 dies (free from an order a while back) that was cut with some black cardstock. I’ve also used the TE Simple Strips-Halloween stamped and heat embossed with some black glitter EP and cut out with the TE Asymmetrical Simple Strips Die for each card.
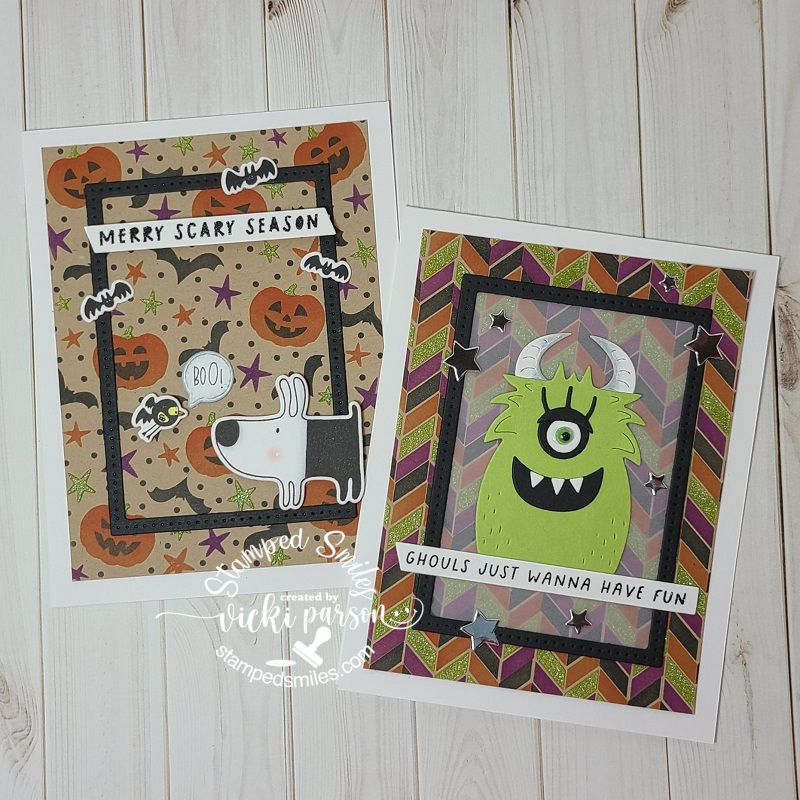
The set of cards on the left were created with the stenciled backgrounds and then with the black frames, I’ve added a character from a “free with purchase” Gus & Gertie Halloween stamp set. The bird saying “boo” is in a bat costume. 😅 I popped up the sentiment strip, bird and dog with foam tape. I die cut the “boo” sentiment with a speech bubble die from my stash. The ghoul card was made with the awesome TE Monster Squad die set. I placed a piece of vellum behind the black frame, so the ghoul stood out a bit more, die cut my pieces as I wanted and attached it right above the sentiment strip. I added a green googly eye as well as a few die cut stars from silver metallic cardstock.
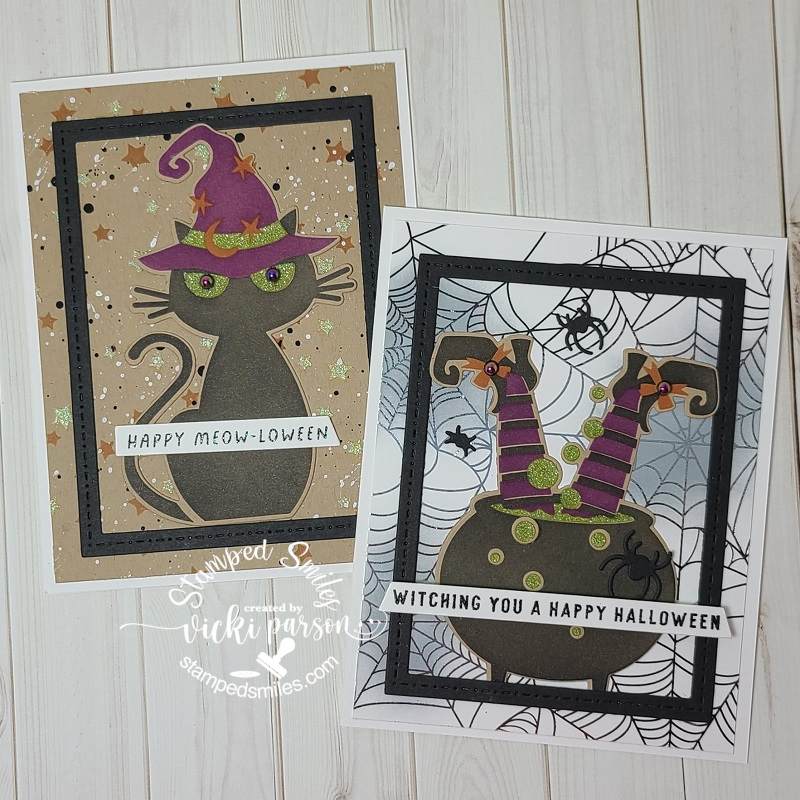
The set of cards on the right was put together with a couple of different unique backgrounds. On the black cat card, I used the TE Superstar Rotating Stencil and stenciled once with candy corn and only rotated once using the glow-in-the-dark glitter paste again. I finished it by splattering black and white paint over it. Topped it off with the black frame, the kitty and sentiment strip. I also used some Cosmic Drip Drops for kitty’s eyes. (These were also used on the bows of the witch’s shoes too!) For the witch background, I silver foiled one of the TE Foil It-Spiderweb panels and then ink blended some grey ink over a couple of the webs. I then added the black frame, the witch and the sentiment strip. Lastly, I added a couple of spiders cut out with the TE Little Bits-Spiders die set.
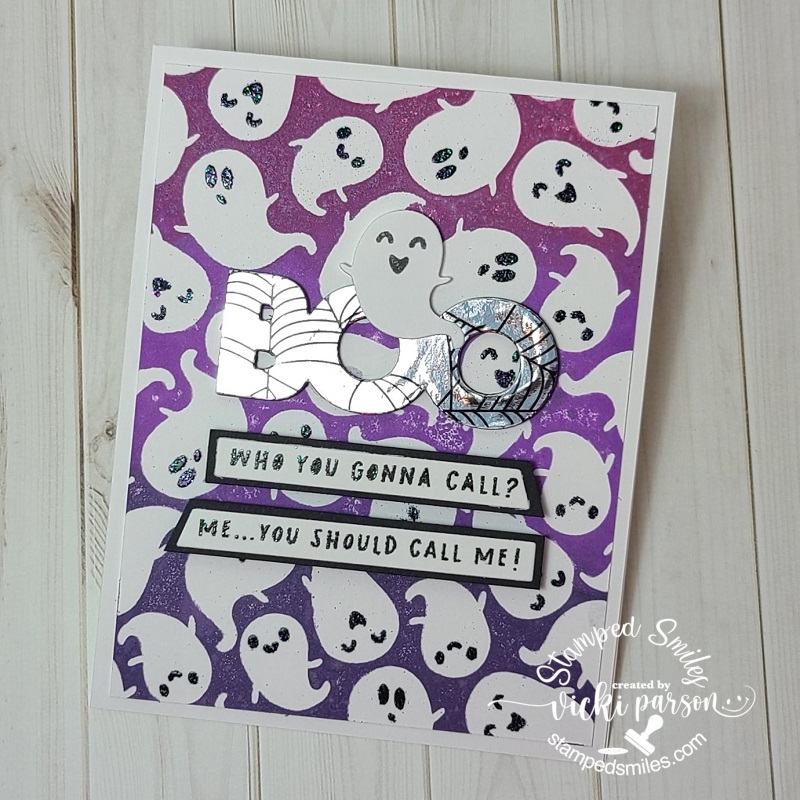
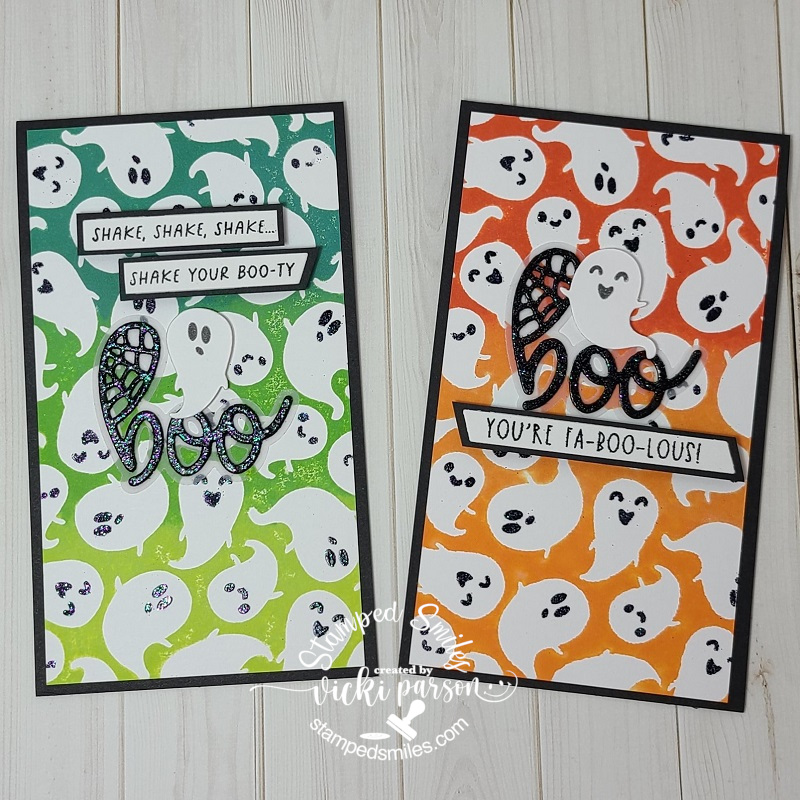
These ghosts make me smile every time I see them with those faces! 👻 For these set of cards, I pulled out the TE G-G-G-Ghost Stamp & Stencil Combo. I didn’t used any TE inks but pulled out my oxide inks for an ombre looking color to make these different backgrounds. The stencil was used for the faces by heat embossing some black glitter EP over VersaMark ink through the stencil. The purple is A2 sized and the set of cards on the right as mini slim cards. I continued using my sentiment strips that were previously used on the card sets above, but with these I’ve added a black layer that I just cut from cardstock. I’ve also used TE Ghost Gang Die & Clear Combo set to cut out the ghosts popped up around the sentiments and stamped their faces.
For the purple ghost card, I used the silver foil negative from the “witch spiderweb background” card and foiled a cut out TE On the Block-Boo Shadow die which was popped up with several layers of die cut black ones. I popped up the die cut ghost over the foiled “boo” as well as the sentiment strips.
For the set of mini slim cards, I did pretty much the same style as the purple, but for the “boo” sentiment I used the TE Boo Script + Backer and die cut 2 of the sentiments with black cardstock and then heat embossed it with the black glitter EP. I placed it over the vellum die cut backer and attached to the card front. I popped up the ghosts and the sentiment strips with foam tape.
**GIVE AWAY!!!**
(CLOSED)
So, because I’ve placed some TE orders, I have gotten multiple sets (duplicates) of goodies!! If you or someone you know would like to get one of these stamp sets, please let me know in the comments below! (Which one(s) you want!) I have FOUR large rubber stamps to give away!! Check it out….
Click on each photo below to enlarge if you’re on my website!
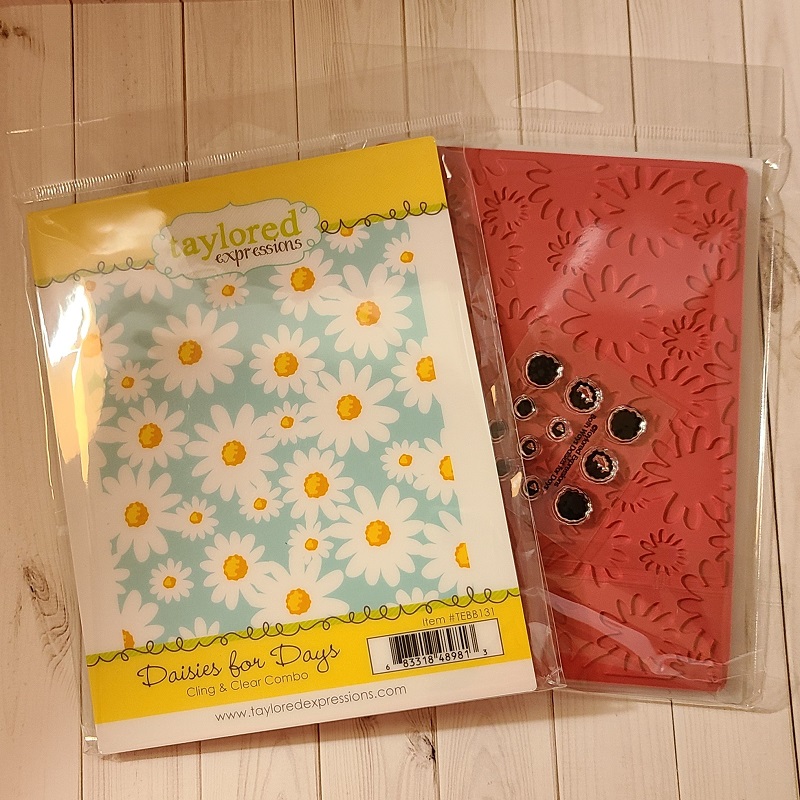
I have TWO of these sets to give away!!
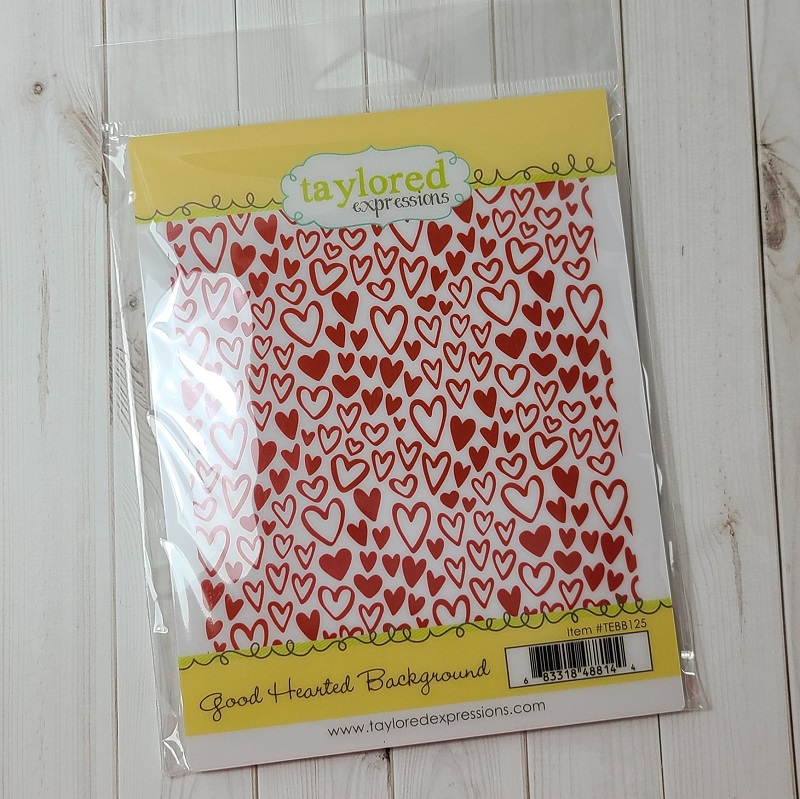
These are all background A2 sized rubber stamps. The last stamp photographed is “Winter Village Background” which measures approx. 6.25″ x 2.5″ in size. I have TWO of the “Daises for Days” to give out. (See the photo where it shows the clear stamp set included for stamping the flower centers.) The “Good Hearted Background” stamp is perfect for almost any occasion just by adding a quick sentiment with it! I also have a little “extra” to go along with each one of these to accompany the package too!
If you click on the names in orange above, you can see some examples using them on the TE website for ideas!
Just leave me a comment below if you’re interested in my give away and tell me which one(s) you’re interested in by September 22nd, 2022 which is the first day of Fall for us here in the U.S. This will give everyone time to see the post and tell a friend that might be interested too! – CLOSED!!!
Thanks so much for stopping by and sharing your support and inspiration with me as it helps keep me going! 😉
Happy August friends! This Summer has really flown right by me this year, how about you? Before you know it we’ll be getting ready for all things Fall…which is my favorite time of the year!🍂 I haven’t been feeling well for the last several days and haven’t done much crafting, but I do have some sets of cards that I’ve made sometime during these Summer months, but haven’t posted, so I’d like to share them with you today.
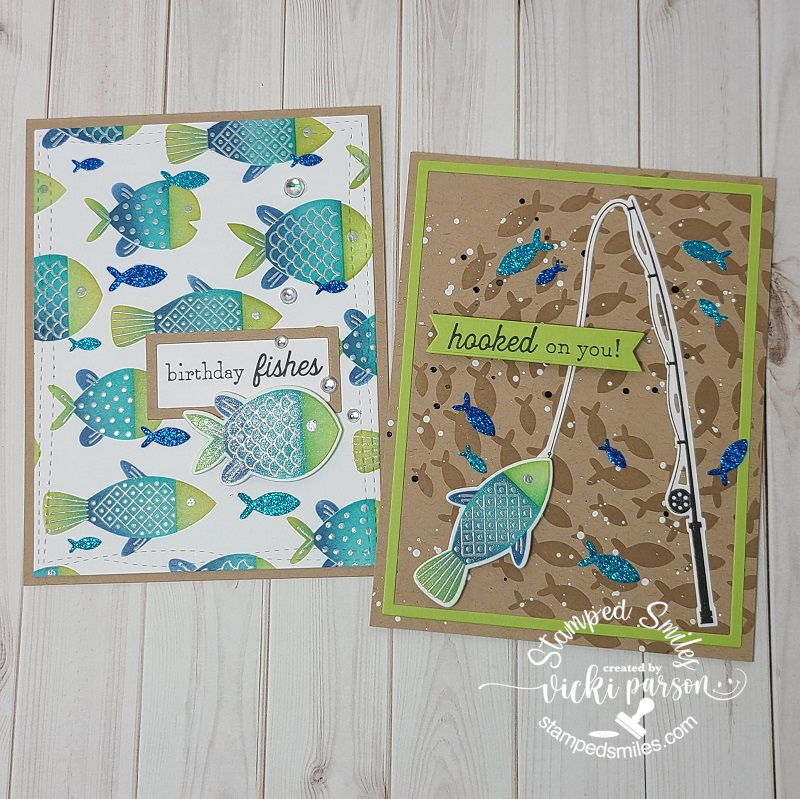
Taylored Expression had released an adorable collection of fish themed products this Summer that I thought would be so fun for several different occasions, and not just for those that like to fish, but for anyone for any occasion too!
The first white background card on the left was created with the TE Hook, Line & Sinker Stamp & Stencil Combo. The stencil is really nice to create different effects in an easy way without lots of coloring. I like that the TE Hook, Line & Sinker Dies cut out some of the mass-produced stenciled fish background too! (I saved one for the other card as well and still had a few more left over for another project.) After I created a couple of the stenciled fish backgrounds, I cut out a panel with a wonky stitched rectangle die and placed it over a Kraft A2 card base. I added some TE Drip Drops for the “bubbles” on the extra fish and you can see that I’ve covered the body of this fish with a glitter brush pen.
The second card on the right was created with the TE Just Keep Swimming Stencil with Toffee Ink color for a watermark look. I splattered some white and black paint over the background. The fishing pool as well as the sentiments for both cards came from the TE Reely Great Stamp & Die Combo. (It includes the fishing pool die cut with it.) You will also notice the tiny little sparkly fish on both of the cards which were cut from the TE Little Bits-Fish die with some blue and turquoise glitter cardstock. The ‘frame’ around the sentiment on the first card as well as the green frame for the second card were extra pieces in my stash previously cut out with the TE A2 Thin Frame Cutting Plate. (I save the extras to use for other projects.)
Of course, I didn’t “invent the wheel” on these as it was simple by following along with the TE “Hugs & Fishes Craft-a-Long Class” which I got for free with my stamp/combo purchase when it came out. I tweaked it slightly, but sometimes it’s nice to just create and follow along without having to think about what to do with it. 😁
This next set of cards was actually pretty fun and easy to put together:
Continuing on with more Taylored Expressions products, I’ve used the TE Create-in-Quads Hexagon Layering Stencil Set. Taylor had recently come with this series sometime last year I believe, and they seem to go over pretty well. (I think I had previously made Christmas cards and some Mother’s Day type of cards earlier this Spring with other “Create-in-Quads” sets.) It seems like a lot, but when you see how easy it is to knock out four cards at once…which I did with Christmas last year…it’s such a time saver with wonderful results!
All of these cards were finished off with the TE Oh No You Didn’t stamp set & dies (love this set)! A couple of the cards use the TE Simple Strips-Snarky stamp set that were white heat embossed and cut out. The other cards have sentiments that were foiled from the TE Simple Strips In Reverse-Everyday Occasions and die cut. And of course, I didn’t want to waste too much of the foiled panels, so I again took my TE A2 Thin Frame Cutting Plate to cut a couple of the frames with it. I also stamped out a couple of extra stars here and there from another TE stamp set, but I can’t remember which one I used. (I think it was from a previous card kit I have that’s no longer available…but any star will do!)
And again, no need to reinvent the wheel as I believe this was another class I received for free from a purchase. You can check out the Create-in-Quads Hexagon Craft-a-Long Class if you’re interested in it. I think I changed up the colors and details a bit for mine, but very similar in style.
**👀 Be on the look-out for another TE project set from me using another Create-in-Quads I recently got and can’t wait to use! I’m also going to have some things to give away too! STAY TUNED!!!
I had also attended a class from Riley and Company sometime this Summer as well:
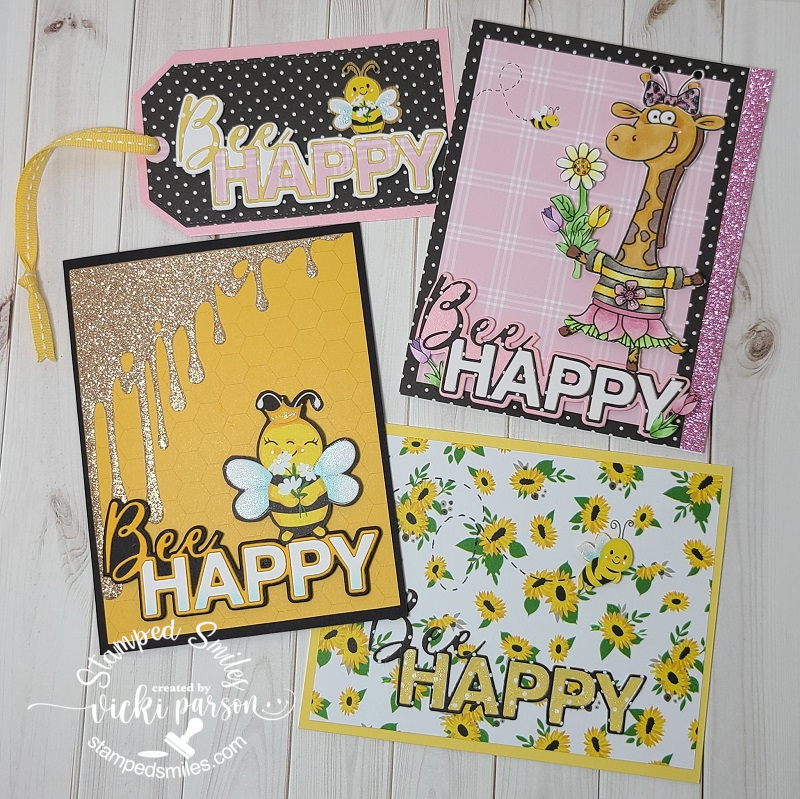
I have loved that little Riley moose character for years, but Tanya (owner) does several of these on-line class events and she comes out with some really cute class kits. This kit had everything you need to make the projects and this one also included the sentiment die as well as a full 6×6 packet of papers in the coordinating theme.
For my projects, the giraffe was the only pre-cut image to color. All of the other bee images came from the papers that were included with the kit that you were to fussy cut from. Since the sentiment die was also included, I die cut all of those pieces for my card too. I decided to step-up my cards with some glitter cardstock along the edge of the giraffe card and then I die cut the “gold glitter honey drip” on that card from the Riley and Company Corner Goo Die. I also added little details like the “flying trail” of the bee with a marker and using a glitter brush pen on the bee wings.
Hope you’ve enjoyed my Summer Session Sets today and have been inspired or brought a smile! Thank you so kindly for your time to stop in and have a look! I really appreciate it!
Hello friends! I hope you’re having a great week! We got a tiny break from the hot weather, so I had to spend the last few days enjoying it and was happy to get away from being indoors! Now as the temps climb back up, it’s time to get busy and craft some more!😃
As promised, I’m catching up with my postings to share the wedding invites, thank you cards and special wedding card I made from my son’s June wedding. I made them a few months back, obviously, but I thought it would be nice to condense it altogether here in one posting.
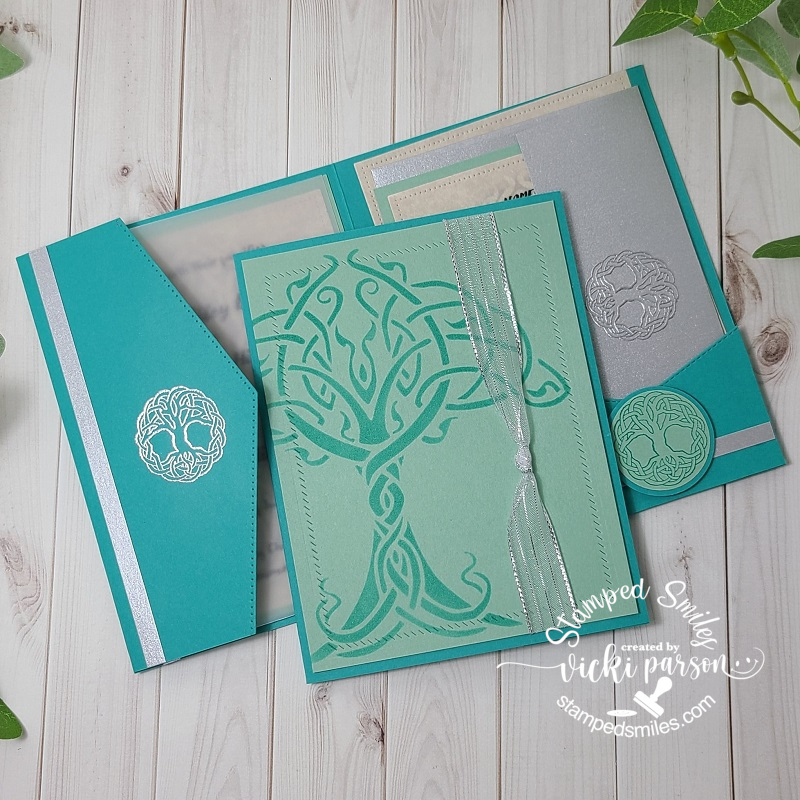
The couple had asked for me to make their invites for them and of course it was a great honor to be able to do that for them. I was given a photo of an image and was educated about the “Tree of Life” to incorporate that into a design as well as a sample of some color shades. Making a total of 50, here’s what I came up with:
I was able to find some similar Stampin’ Up! colors that closely resembled the samples given and come up with Bermuda Bay and Mint Macaron for the design. I wanted both the ink and cardstock colors and worked it out from there.
For the base of the design, I’ve used the darker Bermuda Bay and on the front panel, I used a piece of Mint Macaron with a stenciled “tree of life” over top of it with Bermuda Bay ink. I actually found a fairly inexpensive stencil on Amazon and thought it looked very similar to the image I was given and thought it would be perfect for the front with a partial side off the edge. I never inked up 50 panels before, but this stencil certainly got a workout! I was thinking it needed a bit more to it than just the stenciling, but I didn’t want to do too much with having 50 to make! I took the Taylored Expressions Diagonal Stitched Rectangle die to impress a design around the edge, wrapped silver ribbon around the front with the knot and layered it over the front of the invite.
So being happy with that, the hardest task was to figure out the inside details….
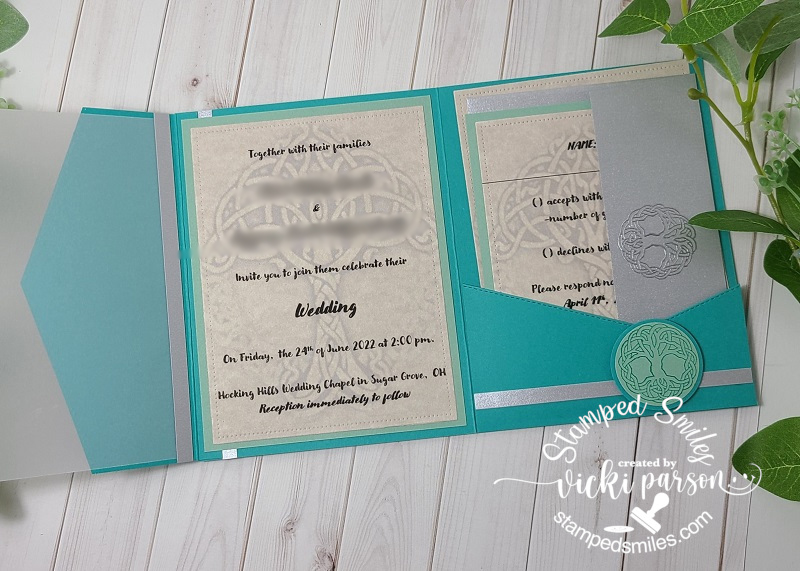
I wanted to make the inside a portfolio style with a pocket containing the wedding details as well as the RSVP/envelope inside and then the actual “announcement” on the other side. As I was piecing it together, I thought a decorative flap with some vellum would be pretty over the announcement too.
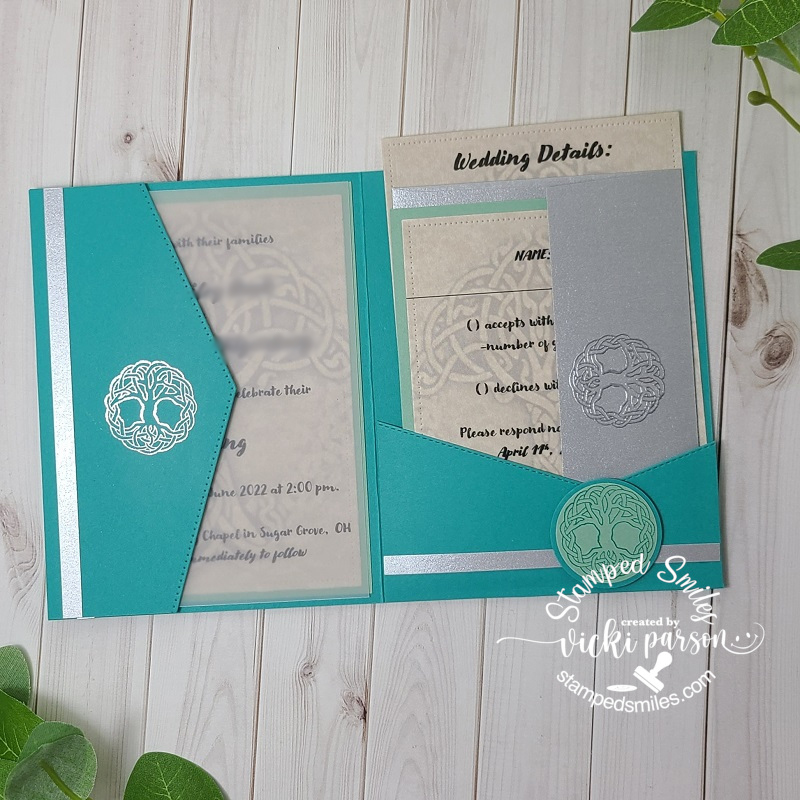
I’ve used the Stampin’ Up! Basic Borders die set to die cut the pocket front as well as the vellum flap on the left side. I had to adhere two Bermuda Bay card panels together and cut out the areas I didn’t need. (I ended up using the left over pieces to punch out a circle layer. To add a bit more of a decorative detail, I cut strips of silver cardstock as well as silver heat emboss the “tree of life” circle stamp. (I was happy to also find this really inexpensive rubber stamp image for a couple of dollars to use for this too!) For the image on the pocket area, it was stamped with Bermuda Bay over the Mint Macaron cardstock, layered with that left over Bermuda Bay circle punched pieces and popped up with foam squares over the silver strip. I was happy with how the portfolio design was working.
And now once you open up the vellum flap on the left side, you will see the announcement portion. The silver strips were strategically placed to cover up where all of the layers are glued/attached together, but still looks like it “belongs” there. The image that was given to me via digital photo was used at the “back drop” behind the wording. It was a very bright image that I altered on my computer and muted it down so that it was faded in the background, but yet still clearly visible on the design. I thought it worked out nicely and still coordinated with the stenciled area on the front.
Because this invite was so thick in nature, I didn’t want to add more layers of cardstock, so I used a thinner parchment style copy paper as everything was printed out from the computer anyway. The parchment made it feel a bit more professional I thought. I die cut ALL of the printed parchment pieces with a Lawn Fawn RETIRED Small Dotted Rectangle dies. (I thought the “small dots” went with the SU! edges I used on the flaps.) I placed the announcement over a piece of Mint Macaron and then layered it inside the card. I layered the RSVP card over a piece of Mint Macaron and the “wedding details” card was left on its own.
Finally, you can see that on the silver envelope flaps, I silver heat embossed the image. This was also done for the larger silver envelopes for the whole invite to fit in as well. I even used the “Tree of Life” computer generated image to create some address sticker labels for them and give them extras ones to use.
Of course, after the wedding, you need to send out the thank you cards, so I also made 50 of those….
I really didn’t want to event a new wheel with it, so I had plenty of cardstock colors and just repeated the same design on the front as I did with the invites except for this one, I used the Taylored Expressions On Occasion stamps. I stamped them out with the Bermuda Bay over the Mint Macaron cardstock, cut it out with the coordinating dies and popped it up with foam tape over the silver ribbon. Stenciling another 50 panels with this same stencil gave it another work out yet!
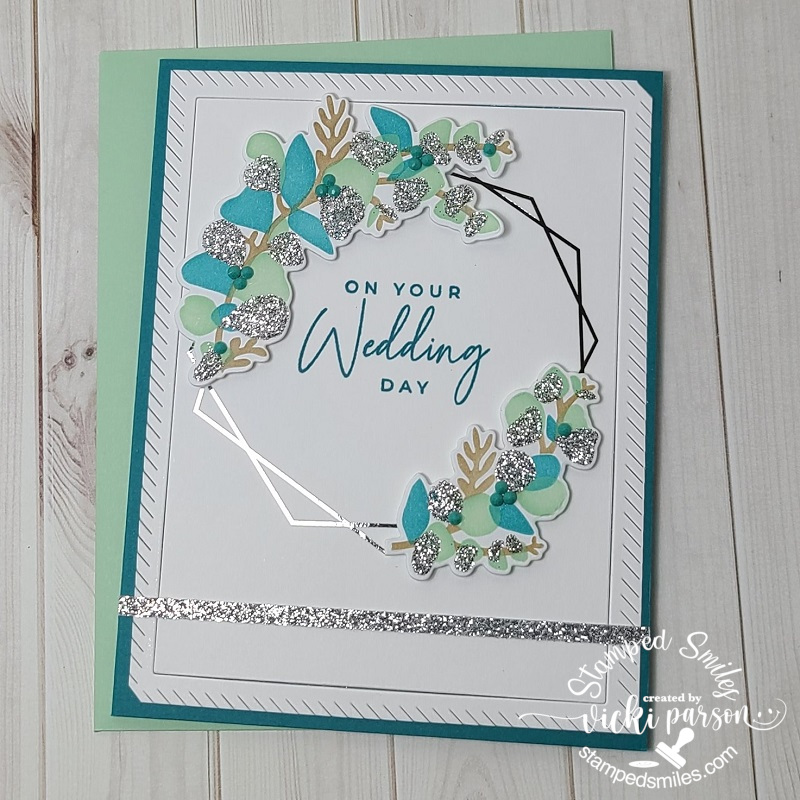
So, for the actual day of their wedding, this is the card I made FOR the couple. I was able to get a little more “intense” with this one as it was only ONE card!
I was so excited when I saw this stunning card kit come out from Taylored Expressions called “Modern Eucalyptus” (no longer available) and I thought it was the perfect colors to create something with for their wedding. The white panel was silver foiled and then I stenciled the colors of the wreath pieces, stenciled some silver paste, die cut them out and popped them up over the foiled wreath. I stamped the sentiment in the center, added some TE Tiny Diamonds to some areas and cut a strip of silver glitter cardstock to go across the bottom.
Around the edge of the panel, I used a free gift that I got with purchasing items and tried it out and on my panel without realizing that it cut the center. I went ahead and attached it down anyway as I liked the decorative look to it. I had a matching envelope and off we went to the wedding!!!!!
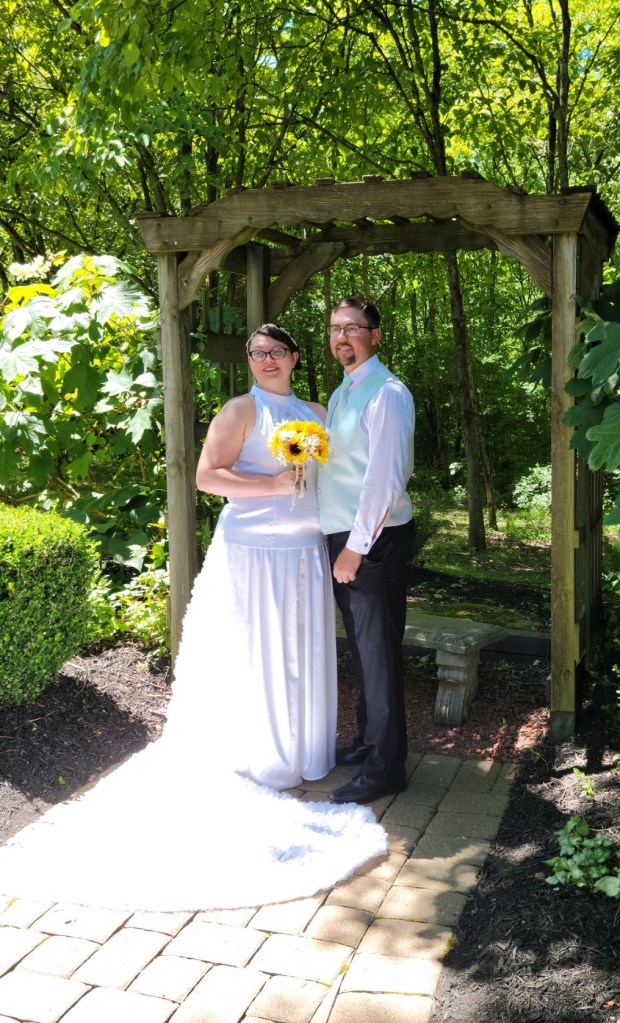
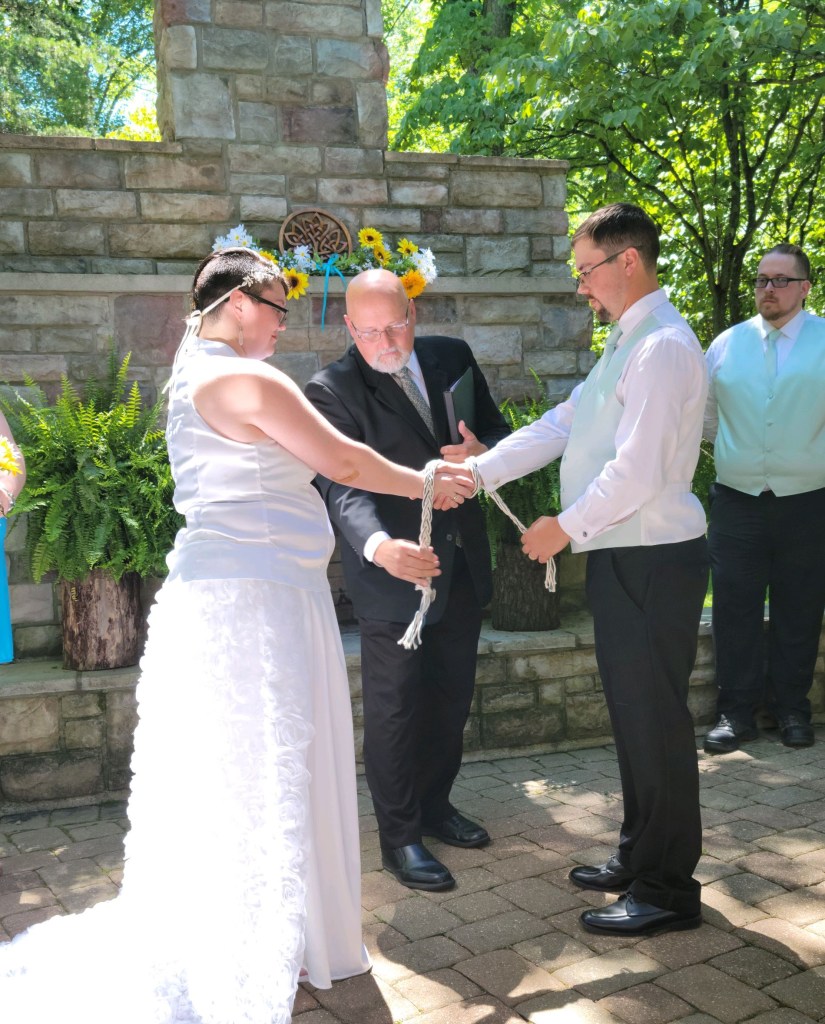
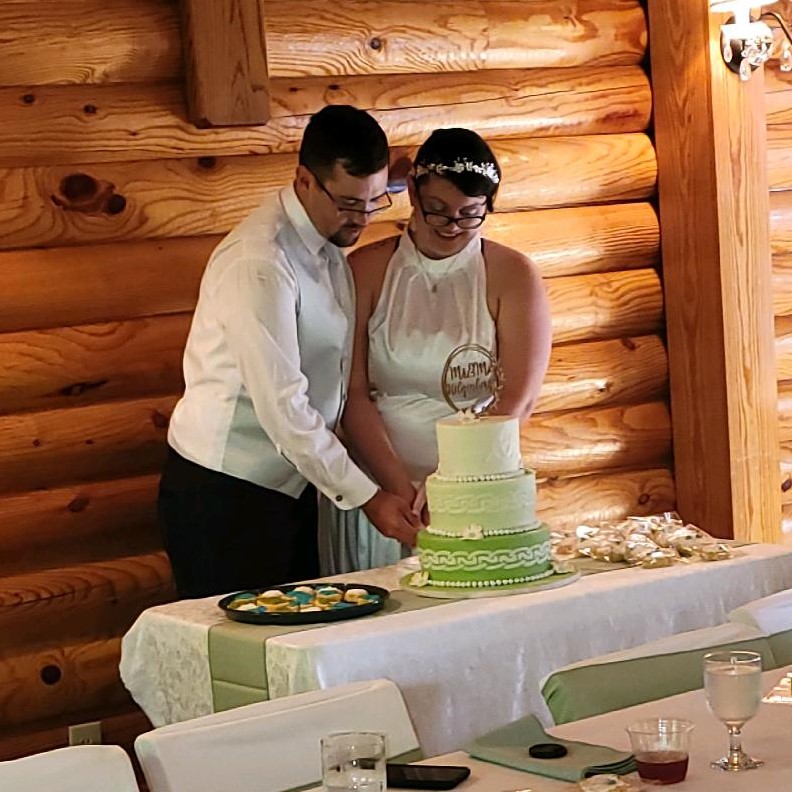
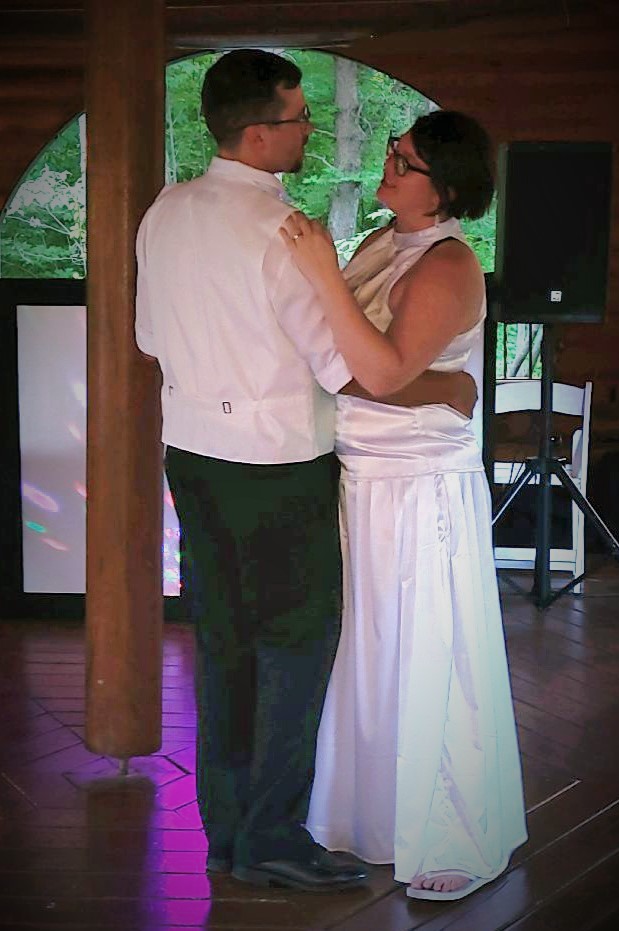
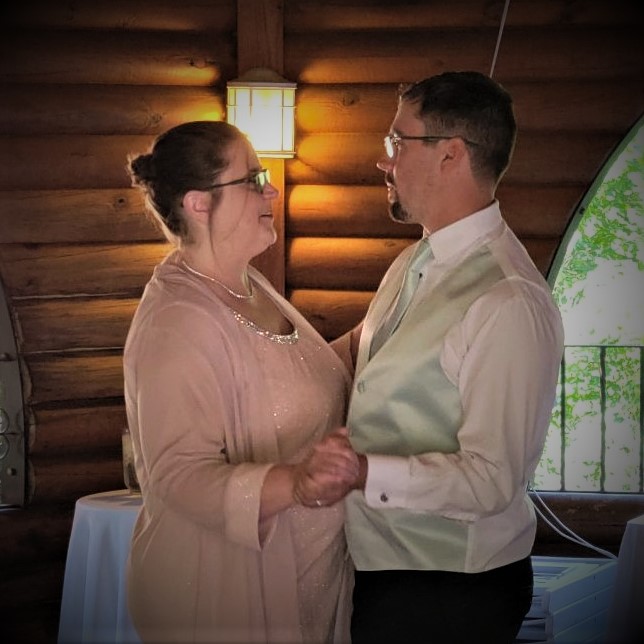
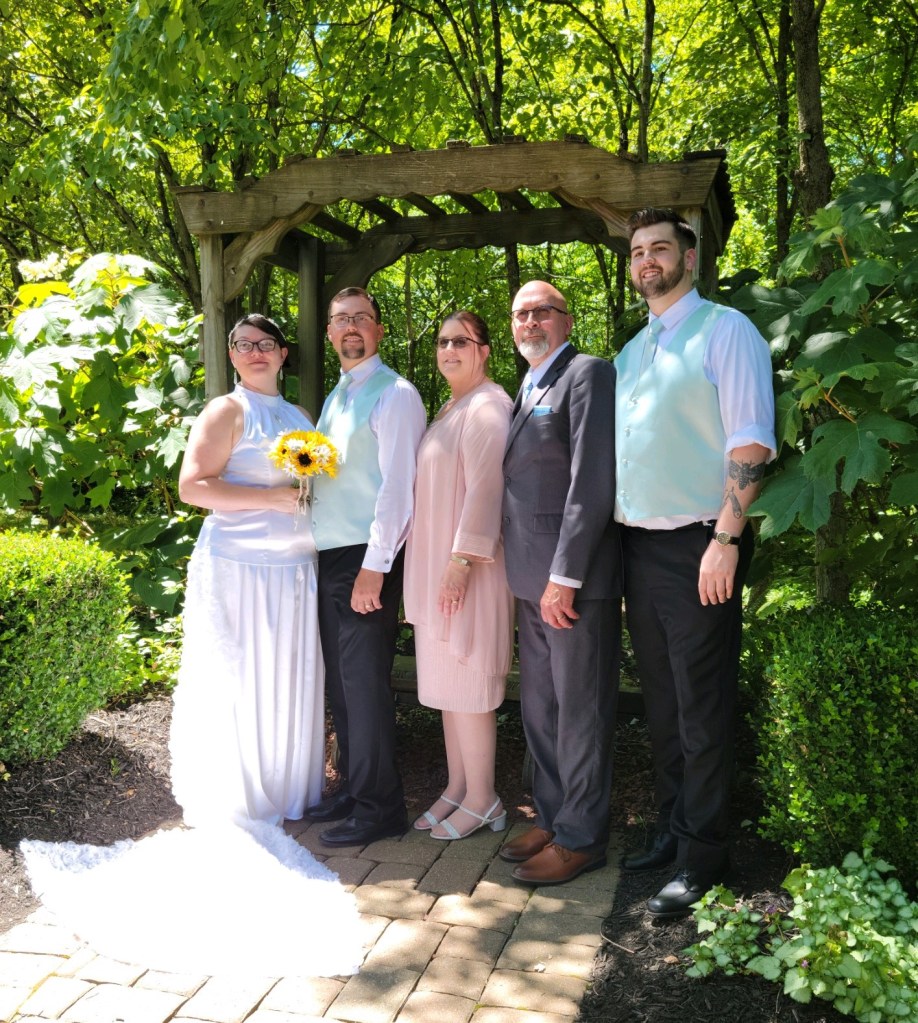
The couple was married in Hocking Hills (Ohio State Park area) and it was absolutely beautiful over there! The venue they used only had a certain capacity limit and so this is why there were only 50 invitations that went out. It was a very nice private wedding with everything done and organized for them. I do not have any professional photos of the wedding as of yet, but I had to rely on my husband for taking a few photos on his phone and then handing the phone to someone for photos as well…my dress didn’t allow me for handy phone carrying. LOL But here a just a few photos (not professional) of the wedding.
As being a first time “mom of the groom”, it is quite an experience and very emotional especially when my son picks out a song for our dance with a song I used to sing to him as a baby in my belly! We both had tears!! LOL It was such a joyous occasion and I’m thrilled to welcome our new family into our lives for years to come! May they always feel the joy and love together for ever after!
Hope you’ve enjoyed my wedding post today and have been inspired in some way to brighten your day. I thank you so much for taking the time to stop in and say hello! It means so much to me! See you soon!
Challenges:
Crafty Friends – Embossing Wet/Dry (heat embossed on invites)
Happy weekend! It’s very hot here today as we are under a heat advisory! So thought it was best to stay indoors and keep working on my “catch-up” posts! This one is a bit different than my usual papercrafting posts, but it’s my finished projects from the crafting retreat I had with friends right before the wedding and why I was so busy! But first, I’d like to share a fun “thank you” card I made for my friend that hosted it all:
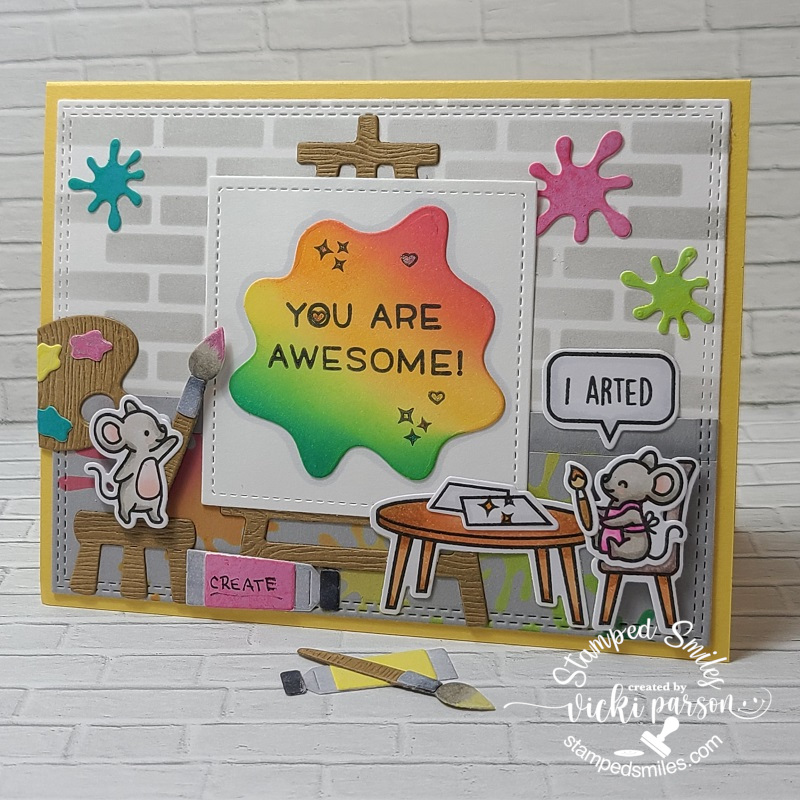
And as you know from my last post, I was on a Lawn Fawn fever mode, so this was also made for my friend that hosted the fun “Painting Divas” retreat for us! This ADORABLE set called Just Add Glitter was a perfect set to use to create a card for the theme as well as those products to accompany it with the Art Supplies dies, Canvas and Easel as well as the Paint Splatter Background Stencil too!
For the background, I created a scene with a brick stencil from my stash that I’ve had for years which was blended on with some grey ink. The bottom solid grey portion of the scene I used that paint splatter stencil and some Distress Oxide colors and blended in over it. By using the oxide inks, the colors showed up better over the grey.
I used these same colors of Oxide inks to sponge over the die cut pieces from the Art Supplies dies as well as the “masterpiece” splatter on the “canvas” and the brick wall splatters. I’ve used some LF Woodgrain paper to cut out portions of the “wooden” pieces and the rest of the pieces were cut from white cardstock and then just colored with Copic markers. I arranged the scene to make it fit the way I wanted and then attached it down with some of the pieces being popped up with foam tape. (The sentiment on the rainbow canvas blob was from a freebie stamp the company is famous for adding to your order.) I had fun making this one and I chuckle at the “I arted” sentiment! 😅
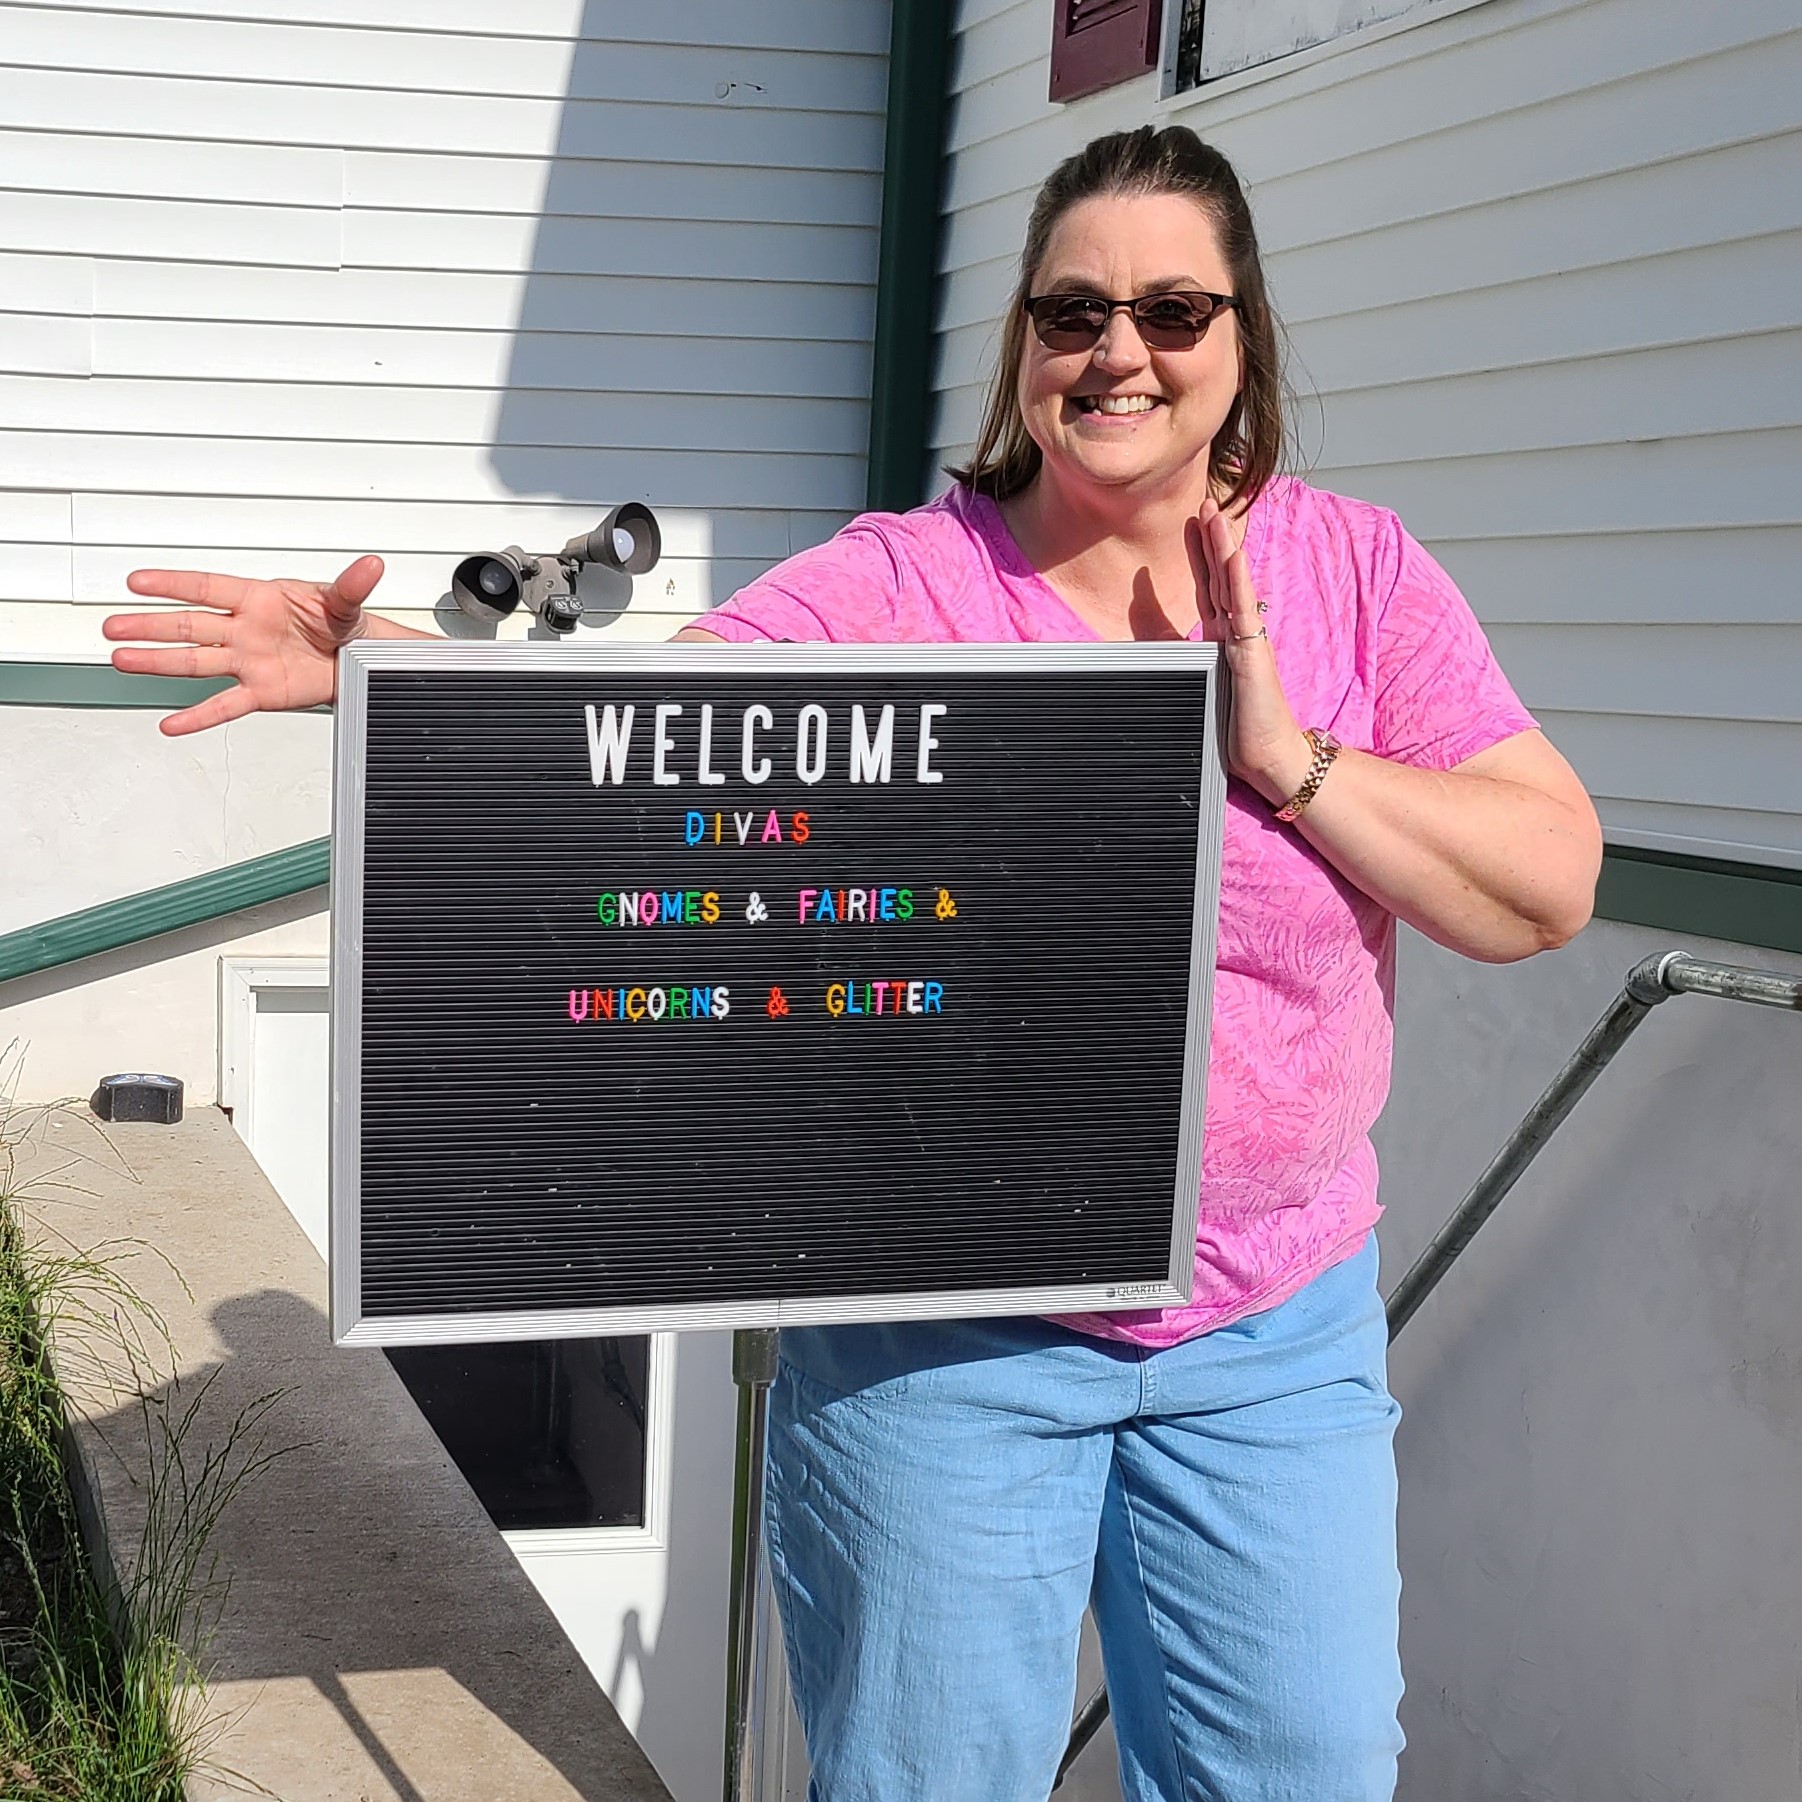
For the “Painting Divas” Retreat, we had projects with different teachers and of course you probably recall the Mixed Media birdhouse I did from my past blog post. CLICK HERE TO VIEW POST The theme was on that cute little sign as we arrived…”Gnomes & Fairies & Unicorns & Glitter”…how fun is that?!! We were to create a decorated gift bag to bring with us using the theme and enter for a contest…but totally forgot to bring mine back home for a photo to show! LOL (I am hoping that we get together to share some photos as I wish I had taken more than what I did!)
I took a quick photo with birdhouses everyone finished for my class, and it was so fun to see everyone’s interpretation of how they made their own. I enjoyed seeing what everyone did! (I think two of these are missing in this photo.)
Now, I am not an avid decorative painter and don’t spend a whole lot of time doing it, but a couple of girls at this retreat are, and have been doing it for many years! (even longer than I have been a paper crafter…which is a LONG time! LOL) So I have had the privilege of learning a bit about it. I’m glad to have this time to share something together and doing when we can. I appreciate it and the memories that are made. 🥰
Below is my gallery of projects that I did for each class. I did this in order of when each class was taught. If you’re directly on my website, just click on each photo to enlarge it and also see the description of what the dimensions and types of surfaces that were used. All were hand painted by me using acrylic paints.
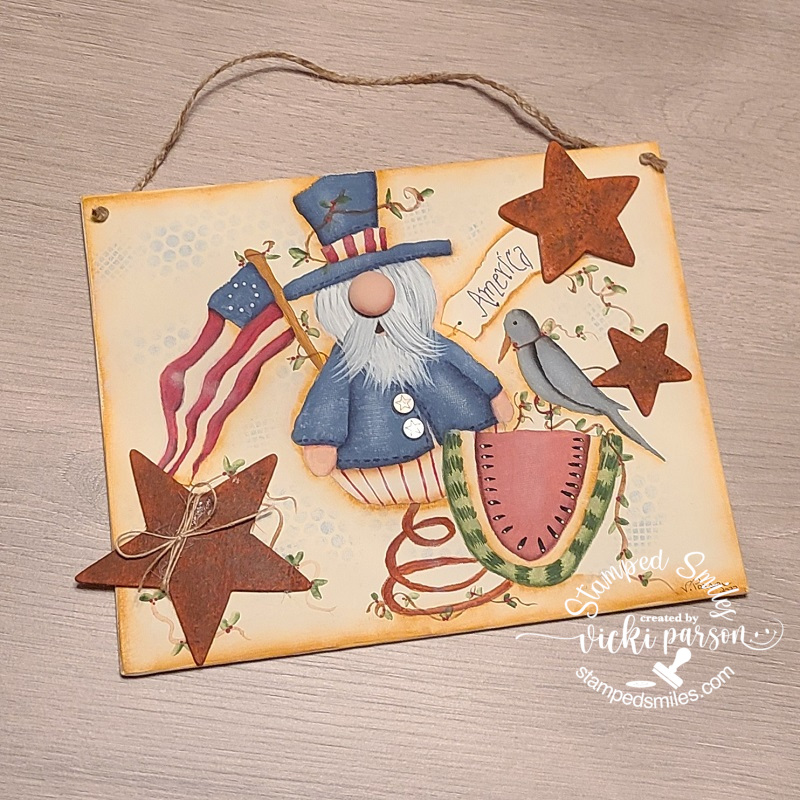
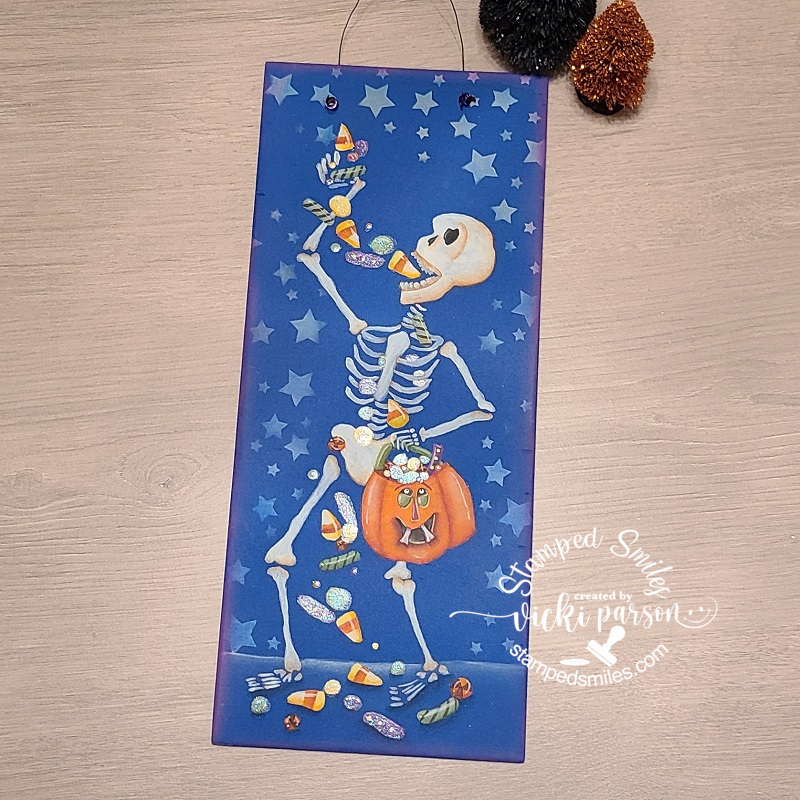
Painted over a canvas board measuring 8″ x 10″ with addition of 3 stars, buttons and knob for nose. You could make a face or paint a gnome, so of course I painted a gnome for mine. I went on my own and added twine to the star…not sure I like it.Painted over a 6″ x 14″ thin wood board. I love Halloween so this was a fun one. It came prepped base coated with the blue background. Stars were stenciled with dry brushing. I added some glitter paint on some of the candies after I sealed it.I zoomed in for a closer look at the pumpkin and some of the candy as it’s hard to see from a distance.Painted over a stretch canvas in 10″ x10″ size pre base coated with black paint. The snowflakes were stenciled with dry brushing and glitter paint was added over the green and red areas. Gold Drip Drops were added to elf and Rhinestones to a few of the larger snowflakes. There was also some splattering done over entire piece.This is a cute “photo holder tag” from an 8″ x 5″ thin wood board. I painted over white and then washed with some black for a shiplap look. Wrapped around burlap ribbon plus other ribbons/twine. I added my own decoration at the bottom and popped in a photo.
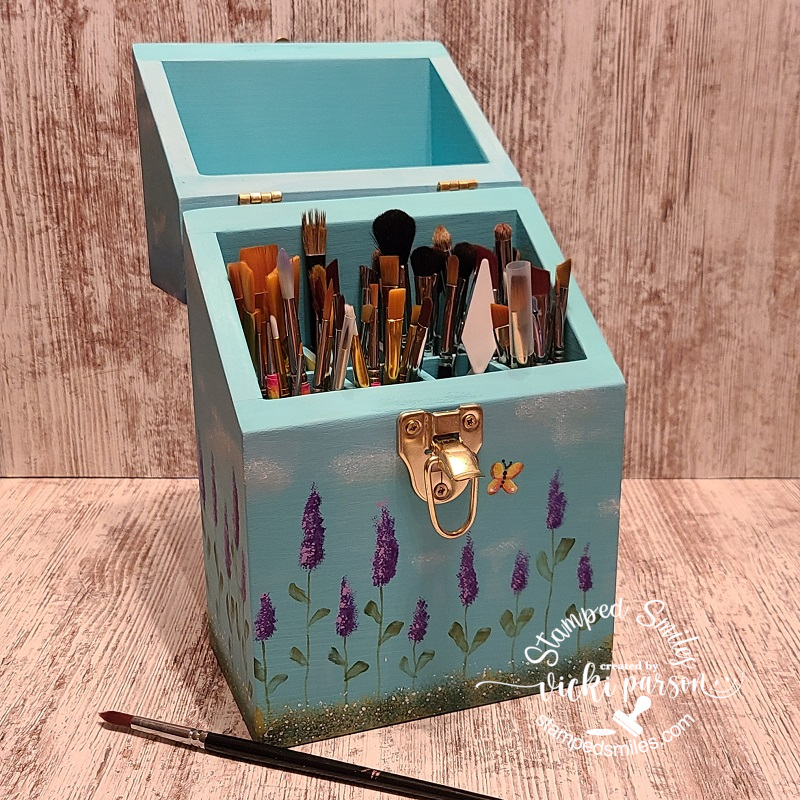
I have one last project to share which is something I recently finished up before this painting retreat, but it had been sitting around the last few years as an un-finished box not being used.
A few years back, I had gone to a paint convention and purchased this brush box that was hand-made by an older gentleman and vendor at this place. I started it quite a while back and finished up the top portion of the box doing some ombre painting. I added the wooden lettering on the front and some glitter paint to the lettering after it was sealed.
And here’s what the inside of the box looks like with all of my brushes stored in it. (Well most of them anyway! LOL) What I like is that there are separate compartments so that I can organize the different types/styles of brushes in each. The brushes are protected and dust-free. The dimensions of this brush box are 11″ x 7″ x 4″ deep all made with wood. The hardware was removed and then replaced after painting and sealing.
Like I mentioned, I don’t always do decorative painting like this, but since it’s already part of my life and I have accumulated things related to it, I will probably do some things here and there. It’s like a mixed media thing for me as I don’t always do that, but sometimes I enjoy getting things out for something different. I like many different crafts which makes this all so fun for me. It’s nice to have a variety of interests to keep enthusiasm going!
How about you? Do you have interests in other things besides paper crafts?
Stay COOL and safe out there today friends…how do you like to keep cool?
Thanks so much for joining me today and I hope you were inspired in some way on your visit!