Special Silver Wedding

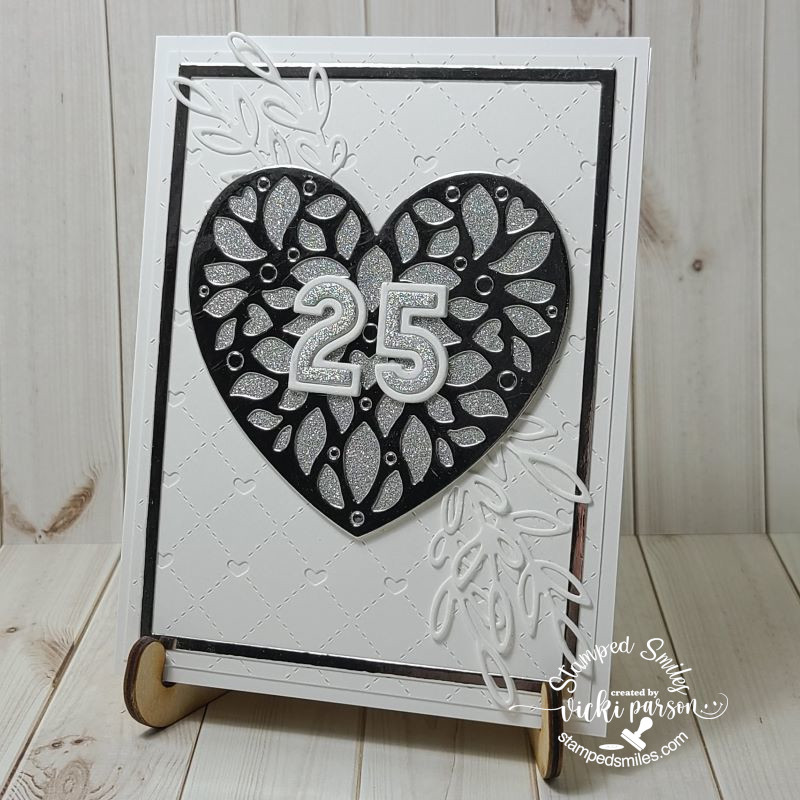
Hello friends!  Hope you’re having a great week so far!  Now that I’m back from a very short break, I wanted to share a special anniversary card that I made for a couple celebrating their 25th:

I always think these are so fun to make with die-cutting and layers.  There was no stamping involved except for the inside you can see in the photo below.

All products I’ve used are from Taylored Expressions.  The gorgeous heart came from the Forever Love Die Set cut out with both glitter and mirror silver cardstock.  I left those circle dots inside the heart because I liked them better intact.  The number were cut from the TE Cap It Off Numbers die set in white and silver glitter.  (I just attached them over the heart.)  Underneath the heart layers, I’ve cut out white sprigs from the TE Subtle Sprigs die set and tucked them underneath.

For the background layers:  I’ve cut out a panel that went through the TE Stitched with Love Cutting Plate and layered that over an A2 side folding white card base.  To help bring out the silver, I’ve also cut a frame piece from the TE A2 Thin Frame Cutting Plate in the size I wanted to add detail to the design.

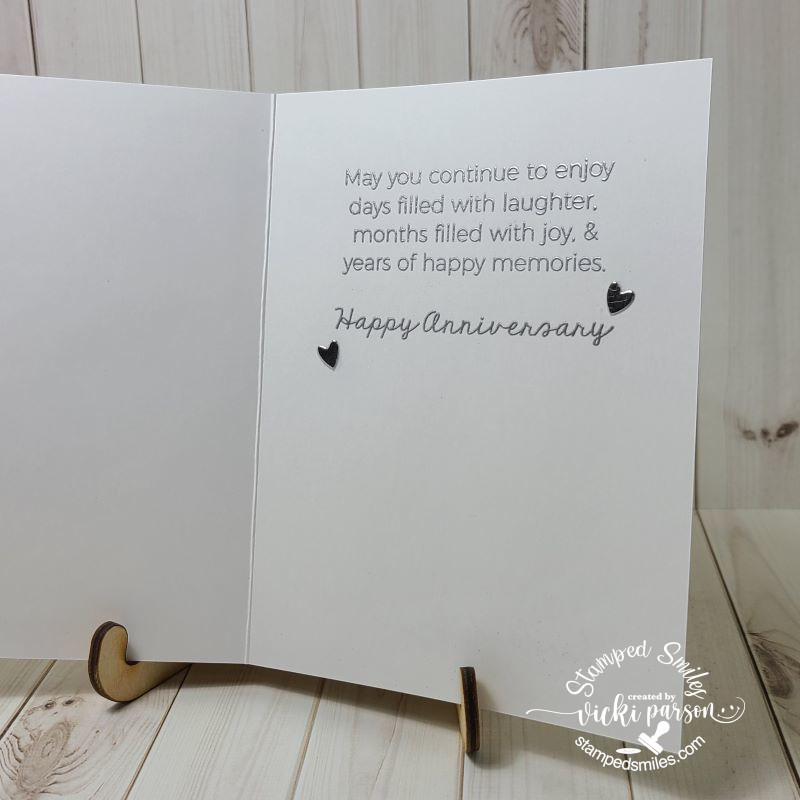
This is the inside of the card where I have silver heat embossed the sentiment from the TE The Inside Scoop-Anniversary stamp set.  I took a couple of the silver mirror hearts that were cut from the larger heart on the front of the card and attached them to the inside.

Hope that you’ve enjoyed my card today or been inspired!  Thanks so much for stopping by!

Challenges:

  1. CRAFT – Wedding/anniversary (cutting it close!)
  2. The Divas That Cut…Paper – Layers/Layer Dies (The heart is a layer die)
  3. Lil’ Patch of Crafty Friends – Anything Goes
  4. Pammie’s Inky Pinkies – Anything Goes

Cute Card Thursday is Sentimental

Hello friends!  Hope you’re having a great week so far!

Today starts a brand new challenge over at Cute Card Thursday and the theme for this week is “Sentimental“.  We look forward to seeing your interpretation with your creations for this challenge!

Here’s how I’ve interpretated the challenge this week:

Vicki-CCT601-Sentimental

I really love sentiment stamps and sometimes they just seem to get used when you need to add a sentiment with your design.  I actually like to use them as not only the focal point of a design, but I like to also use them for backgrounds!

For my card today, I have used an older Simon Says Stamp card kit. (Nov 2016)  I really loved the font and the wording in this set and the different sizes that you can mix together.  The images are from the SSS Thankful Heart stamp set.

I started by stamping two of the images from the set with white ink over the A2 sized top folding card base and then added some papers from the card kit on the bottom portion.  I took a piece of white twine around the center of the card and added a button and bow.

The heart was die cut from a piece of cardstock from the kit with a stitched heart die and then I white heat embossed the sentiment and added some craft foam behind it before attaching it to the card.  I’ve also added a couple of hearts that were cut from white cardstock.

Very simple card, but a good one to have on hand for someone!  I hope you’ve enjoyed it and please be sure to join along with us this week!

Thanks so much for stopping in and I’ll see you soon!

Challenges:

  1.  Double D – Focus on the Sentiment
  2. Aud Sentiments – Anything Goes + Sentiment
  3. Retro Rubber – rrcb120 – Anything Goes + stamps older than 1 year (circa 2016)
  4. Shopping Our Stash – embossing
  5. Sweet Stampers – Use a Sentiment
  6. Simon Says Stamp Wednesday – Anything Goes

What’s New at Cute Card Thursday

Hello friends!  It’s Thursday time again and we have a new challenge for you over at Cute Card Thursday today!  The challenge for this week is…..”What’s New?

And remember these challenge themes are always your own interpretation!  Here’s what I’ve created for it:

vicki-cct564-adu-new

I thought this image was so TWEET!! 🙂  It is a “new to me” image from our sponsor this week by All Dressed Up Stamps called Home Sweet Home.  I thought this would be such a nice card for someone with a “new home”.

It was also nice to be able to use some older items from my stash as well!  I have colored up the image and used a heart die to cut it out with.  I’ve also sponged some color around the edges and added some stitching details with a marker.  For the patterned papers in the background, I’ve used a paper piercer tool and made stitch marks over the holes with a white gel pen.  I layered it onto a piece of white cardstock which I then layered onto a piece of 5″x5″ Sahara Sand top folding card base.  BEFORE attaching my white layer onto the base, I’ve added some twine around it.

I cut out a smaller heart from the die set I’ve used from some craft foam and attached it to the image heart panel and placed it over the twine on the front.  Lastly, I’ve added the wood veneer bird cage and flowers and twine bow.

vicki-cct564-adu-close

Taking a closer look at the image, you can see that I’ve used various colors of Copics to color it in with.  I went around the images with a W0 which matched up nicely with the colors of the main card panel.  You can also see places where I’ve added a bit of sparkle from some colored gel pens and extra “dots” around the image with a white gel pen.  It was actually a really simple and fun image to color!

vicki-cct564-adu-flat

Thanks so much for stopping by today and I wish you a wonderful day!

Challenges I’d like to enter for this card:

  1.  CRAFT – New (year/job/baby, etc.) – for me:  new home and new stash
  2. All Dressed Up Stamps challenge – Anything Goes + ADU image
  3. Cardz 4 Galz – New Year/New Stash (image and hearts dies)
  4. Alphabet Challenge – ‘U’ is for ‘Use Some Stitching:  faux or real’
  5. Crafting From the Heart – Anything Goes
  6. Try it On Tuesday – Something old/something new (new image/wood veneer, new home and old papers, old flowers, old tools!)
  7. Words 2 Craft By – HOPE (W2CB61):  “Hope is the thing with feathers that perches in the soul & sings the tunes without the words & never stops at all.” ~ Emily Dickenson                     Absolutely LOVE that!!

Feeling Young at Heart

Hello friends!  Stopping in to share another guest design creation that I’ve made!   Here’s another I’ve made using the very sweet digital set Doctor at Heart:

Vicki-SnSNov-YoungatHeart

Isn’t this image darling?!  My first thought on this set was to try and go a little “vintage” with my design.  I opened up a Word doc. to insert the image and sentiment and sized and arranged it how I wanted it to look.  I printed it out on some cream-colored card stock and then cut it out with the Tonic Studios Follow Your Heart die using the frame portion only.

I wasn’t sure I wanted the image to look “vintage” so in asking hubby, he told me that I needed to color him up with blue shorts, brown/tan shoes, orange top and blond hair!  He was very specific about that!! LOL!  So I colored this cute image up with my Copic markers and gave some “outlining” shadows around the sentiment too.  I took a gel Stardust Pen and colored in the ‘metal parts’ of the stethoscope and then added some Nuvo Crystal Drops Morning Dew (Gloss-clear) to the heart circle the boy is holding and let it dry.  I then used some distress inks and sponged around the edges of the heart image panel and spritzed it with water, waited a few seconds and dabbed it up with a paper towel.  I love the watermark look it gives to add that vintage flair and tie it all in together.

Vicki-SnSNov-YoungatHeart3

So when you tilt the card, you notice that the background looks like I’ve used some special glitter paper, but I did NOT!  I made my own glitter paper for the background!  I took another piece of black cardstock and covered the entire panel with VersaMark Ink and sprinkled it with some Black Magic embossing powder. Stunning sparkle!

Vicki-SnSNov-YoungatHeart2

For the look on the ribbon, I took some cream-colored seam binding ribbon and sprayed it with some water and rubbed it in some ink that I smeared onto my TH Glass Media Mat and crinkled it up and then let it dry.  I wrapped it around the embossed glitter background panel and added a bow with a button and natural twine for the center of it.  I mounted this glitter panel onto a 5 1/2″ squared cream-colored card base that I’ve ink blended around the edges in the same colors that I’ve used on the heart.  The heart image panel was then popped up over the ribbon strip and glitter background with craft foam and then the seam binding bow was attached along the edge of the heart.

Vicki-SnSNov-YoungatHeart1

For the corners of my card, I had a very old corner punch that I punched out from black card stock and attached them to the corners of the card.  I then used the  Nuvo Crystal Drops Ripened Pumpkin to add some “dot” in the middle of each punched corner piece to finish it off.  I think that the tiny bit of orange color ties in nicely with the glitter background and his orange shirt.

I really hope that you’ve enjoyed my fun ‘vintage charm’ creation as well!  Thanks so much for stopping in today and I’ll see you soon!

Challenges I’d like o enter my card for:

  1.  Little Red Wagon – “Remember When” (used Crystal Nuvo Drops – Rippened Pumpkin – meant to be for Halloween)
  2. Crafty Creations – Anything Goes
  3. The Creatie Crafters – Anything Goes
  4. Fussy and Fancy Friday – Anything Goes