Rose Heart Card

Hello friends!  I’m back again to share my Rose Heart card!  I’m still “in the mood for love”, so here’s what I’ve got for you today:

vicki-roseheart-card-project1

I absolutely love this new Rose Heart stamp set!  It’s a wonderful layering stamp set, and I can see so many creative possibilities with it!  I really hope to get some time to play with it some more!

I thought this stamp set had an elegant Vintage feel to it and I wanted to create with it in that way.  There are lots of fun heat embossing, ink blending and layering going on in this design.

Thanks so much for stopping in today!  I appreciate your time and comments very much! 🙂

Challenges I’d like to enter my card for:

  1.  QKR Stampede – Anything Goes #329
  2. Simply Create Too – Anything Goes/No Twist
  3. Allsorts – Hearts and Flowers
  4. Happy Little Stampers Mixed Media – Layers
  5. Pammies Inky Pinkies (PIP1901) – Anything Goes

Spread Love at Whimsy Stamps

Hello friends!  Hope you all had a wonderful weekend!  Although it’s supposed to be VERY cold in January over my way, it has actually reached warm enough temperatures that we can cook out on the grill! I’ll take it for now as I don’t think it will last!

Have you been over to see the Digital January release at Whimsy Stamps yet?  There are SO MANY really fun and adorable images to color along with a couple of fun digital papers to help you finish up your cards!  Since Valentine’s Day is coming near, I decided to make a card with that in mind:

vicki-spreadlove-ca-jan8

I have used this darling Spread Love digital stamp by Crissy Armstrong.  I just adore her wings and “heart antlers” sprinkling hearts everywhere! 🙂

I have colored her up in Copic markers in the following:

  1.  Dress, shoes and a couple of the hearts – R85, R83, R81
  2. Heart on dress, heart antlers and other hearts – R24, R22, R21
  3. Wings – R00, BG000
  4. Hair – E27, E25, E23, E21
  5. Skin – E11, E00, E000, R20, R00 (cheeks)
  6. Around image – B000, E0000

I’ve also taken a cloud stencil to add some clouds in the background with an ink blender foam tool and Tumbled Glass Distress Ink.  I then embossed the sentiment from the Whimsy Stamps Snow Flurry clear stamp set with some gold embossing powder.  I went around the edges of the image panel and added a few “dots” around the hearts with the Nuvo Honey Gold Glitter Drops.

For the background of the card, I’ve used the new Hearts a Flutter Digital Papers and cut out a piece with the Whimsy Stamps Hand Stitched Nested Rectangles die.  I then trimmed this piece at an angle and attached it to a strip of this white punched border that I’ve made.  I’ve also cut out a piece of pink cardstock with the same die and trimmed this out an angle as well.  Both of these pieces were attached to an A2 sized white top folding card base.  The image panel was attached over a piece of craft foam and mounted to the front of the card along with the gold ribbon.

vicki-spreadlove-ca-jan8-close

Taking a closer view of this image, you can see on the wings that I’ve added some shimmer to them with a Wink of Stella clear glitter brush pen.  You can also see where I’ve taken a gold gel pen and went over the swirls in her dress as well as the “heart antler stems” on her head.  I always love to add little details like on my coloring and I hope you’ve enjoyed it today as well!

Thanks so much for dropping in and I’ll see you soon!

Challenges I’d like to enter this card for:

  1.  Creative Inspirations – Anything Goes
  2. Crafting by Designs – Anything Goes
  3. As You Like It – Anything Goes/Show Your Style
  4. Crafting With an Attitude – Anything Goes
  5. Daisy Chain – Add Some Sparkle

I Woof You!

Hello friends!!  Sheesh!  It’s almost Christmas!  How did it get here SO fast?!  Today I am actually preparing for my own family dinner gathering, so I will be very busy with cooking and spending time with my family today.  But I have scheduled a post to share with you using a darling Puppy Love digital stamp:

Vicki-SnS-Puppy Love-

I thought this little pup was SO CUTE!  I love the little shirt with the hearts on it!  So, if you are moving past your Christmas creations now, here’s some inspiration to share with a Valentine/Love theme! 🙂

For the image, I’ve printed it out and added the sentiment from the digital set underneath him.  I’ve used a scallop rectangle die to make an “Out of the Box” technique by cutting out the top of the heart balloon.  I colored the image with Copics.  I layered the image panel onto a piece of Chrome Silver Mirror Cardstock.

For the red layer behind that, I’ve taken a larger piece of white cardstock and added some 1/2″ Tear Tape around the edges.  I then used a larger sized scalloped rectangle die to cut it out with.  I peeled the release paper and added the Cherry Sparkle Flocking.  I’ve also added this to the tiny hearts on the shirt as well as the Pink Spirit Flocking but using the Nuvo Precision Glue Pen for the adhesive.  I’ve attached all of these layers onto a white A2 sized top folding card base.

Vicki-SnS-Puppy Love4

Upon a closer look at the image, you can see where I’ve added the flocking on the hearts in his shirt as well as the flocking at the top over the scallop rectangle panel.

For the balloons, I have covered them with some Nuvo Crystal Drops Morning Dew.  It dries clear, but while it was still wet, I’ve sprinkled on some Ultrafine Waterscape Glitter very carefully and lightly and let it dry.  I think it adds a bit more sparkle to the shiny balloons!  After it dried, I used some silver ribbon to make bows and then attached them with some glue.  I also decided to add some more of the Crystal Drops on his nose!

Vicki-SnS-Puppy Love6

I love how this turned out with the flocking and glittery shine!  Hope you’ve enjoyed my card too!!  I thank you so much for stopping in today and I wanted to take the time here to wish you all a VERY HAPPY HOLIDAY SEASON!!!   See you soon!

Challenges I’d like to enter:

  1.  Pammie’s Inky Pinkies (PIP1850) – Anything Goes
  2. Crafting From the Heart – Anything Goes
  3. Watercooler Wednesday (WWC201) – Anything Goes
  4. Crafty Gals Corner – Anything Goes
  5. As You Like It – Anything Goes – Your Style

The Feeling of Happy Mail

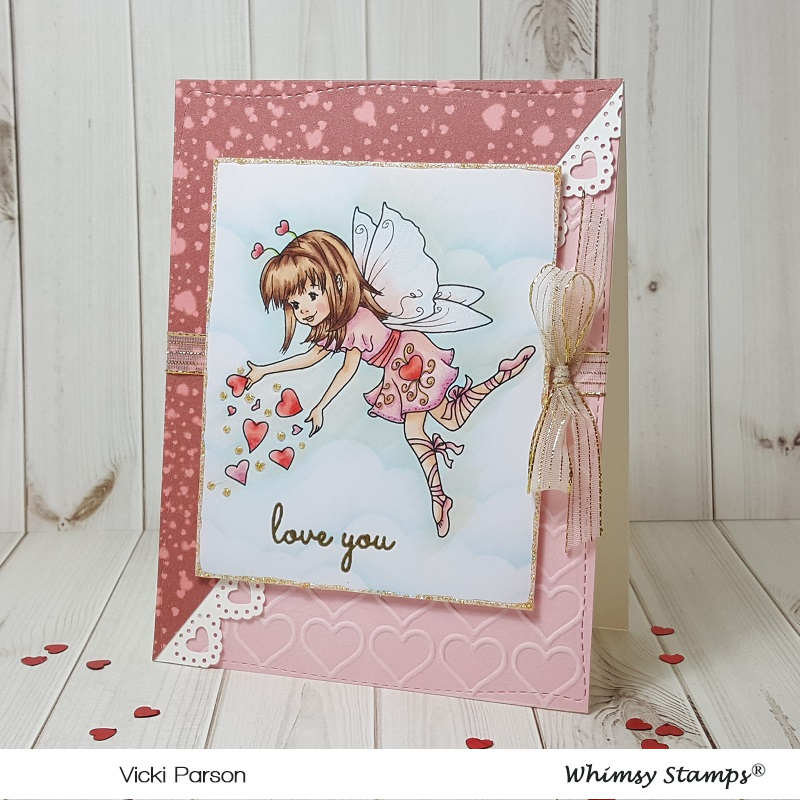
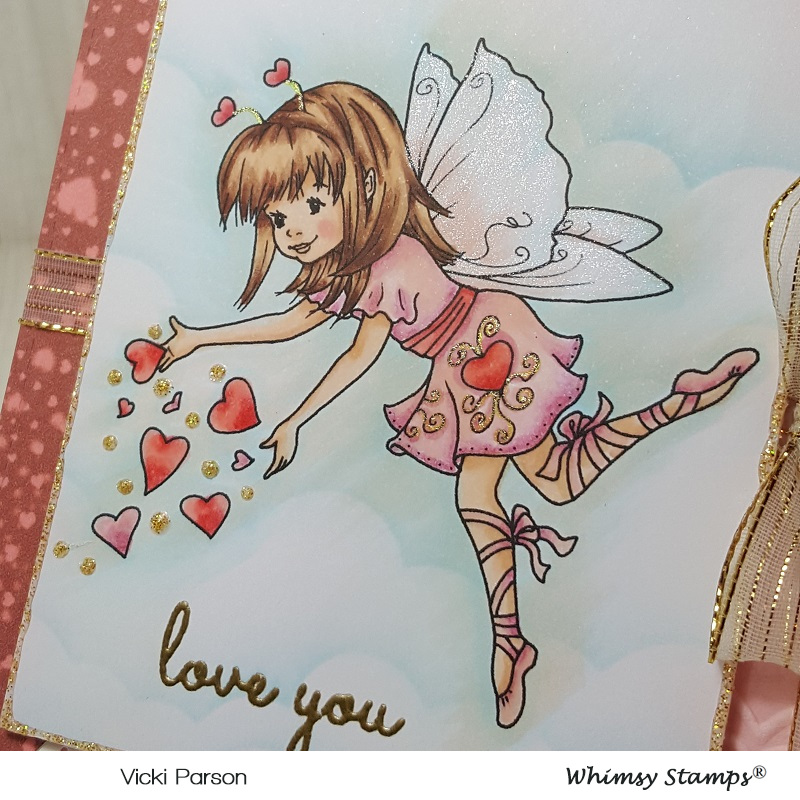
Hello friends!  Back with you again today to share another Whimsy Stamps digital “pretty”!  If you missed my Guest Design post for the Retro Rubber Challenge Blog, please click on the link or scroll down below this post. – thank you

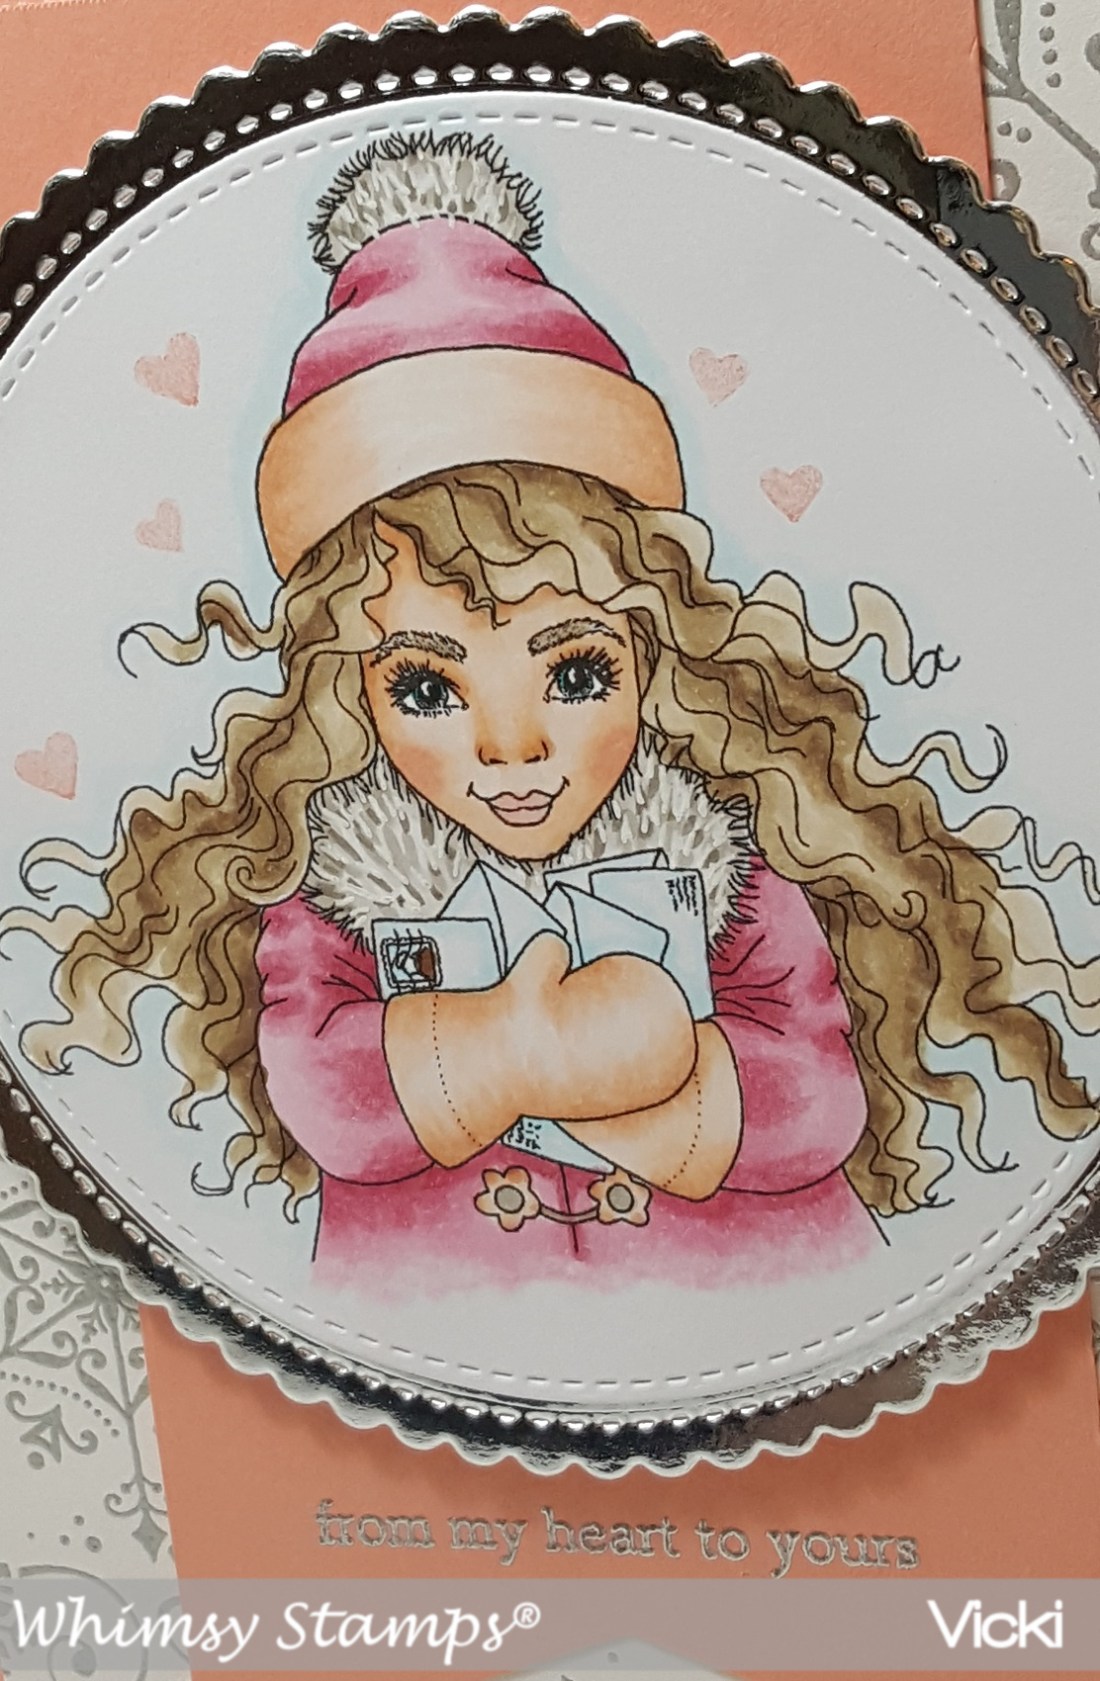
You all know the feeling you get when you receive “happy mail” from the mailbox, and I think this cute image on my card today really sums up that feeling:

Vicki-WS-Pretty Girl Happy Mail- Oct 9

I have used the brand-new October digital stamp from Whimsy Stamps called “Pretty Girl Happy Mail” on my card today.  Oh those curly locks are adorable!

I have colored her in with my Copic markers in the following:

  1.  Coat/hat (darker tone) – R85, R83, R81 and for trimming – E11, E00, E000 (also coat fasteners)
  2. Coat/hat (fur) – W5, W3, W1 and highlighted with white gel pen flicks.
  3. Hair – E47, E43, E42 (eyebrows too)
  4. Skin – E21, E11, E00, E000, R20, R00 (eyes BG49)
  5. Mail – B00, B000 (unsure of tiny bit of color on postage stamp or coat fastener centers and string)

I then took a retired Whimsy Stamps clear set called “Handmade From Me” which had a couple of tiny solid hearts in it, and I took some pink colored ink to stamp a few hearts around the girl.  She really loves all her mail after all! 🙂

I cut her out with a stitched circle die and then mounted her over a piece of silver foil cardstock cut with a scallop stitched circle die.  I have used the same stamp set that I’ve mentioned above to heat emboss the sentiment with silver EP and cut it out with a banner die cut.  This is the same-colored cardstock I’ve used for the A2 sized top folding card base too.

The snowflake paper is from my stash and some I’ve been hoarding because I love it so much, but the snowflakes on it are silver metallic and have the texture on it as if it was heat embossed.  I placed this panel over my card base, attached the banner and then added the circle image panel over top of that including some craft foam to raise it up slightly over the design.

I was thinking that this image would work for either Christmas, winter or Valentine’s Day.  Yes, I know, I said the V word already!! Oops!

Vicki-WS-Pretty Girl Happy Mail-Oct 9-close

Here’s a closer view of the coloring that I’ve done on her as well as the heat embossing.  Had so much fun coloring her up.  I think she especially looks wonderful on such a simple style design!

Thanks so much for stopping in and sharing your thoughts with me!  I appreciate that so much!  See you soon!

Challenges:

  1.  Creative Fingers – Anything Goes
  2. QKR Stampede – Anything Goes #316
  3. Crafty Friends – Use more than 1 die (I’ve used 3)
  4. Stamp & Fun = Creativity – Die cuts
  5. Crafting From the Heart – Anything Goes