Hello friends! Hope you’re enjoying your week so far. We’ve been having some really hot and dry days lately, so I’m trying to get some motivation going and have some play time for crafting!
I have not played along before, but I decided to grab this fun digital freebie from the Beccy’s Place Challenge and have a go at it because it really made me laugh when I saw it!
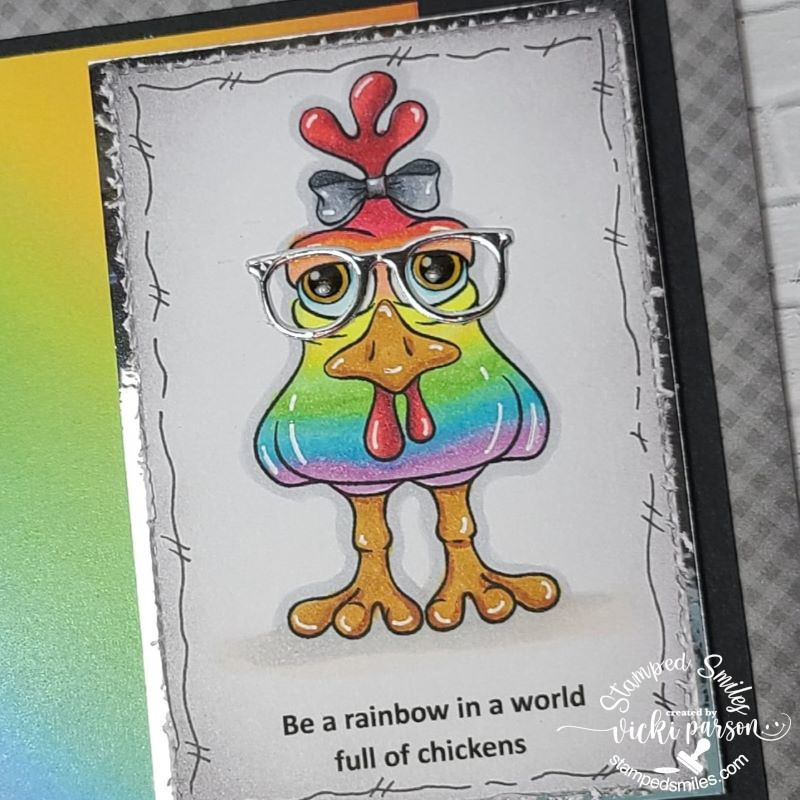
Isn’t this such a fun image?! There was an option of different pre-colored images, but I decided to print out the lined image to color in. I colored the chicken in rainbow and then added a pair of die cut glasses in silver mirror cardstock that I had on hand. (I already had the glasses cut out from another card I made that was laying out on my desk, so when coloring this image, I thought it would be fun to add!)
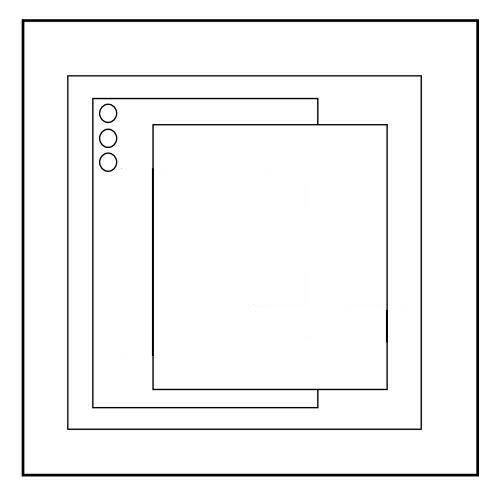
The layout came from a sketch challenge that she’s also sponsoring. (see challenge list below) I thought that I was going to leave it as just black and white to make the rainbow chicken stand out, but I found some fun rainbow papers and decided to add one panel to go with the chicken. I came up with and typed out the sentiment underneath the image and printed them both together.
For another part of Beccy’s challenge, there is an optional theme she included which was “doodling”. So I took a white gel pen and added some lines for highlights on the chicken. I’ve also taken a black marker pen to make some squiggle lines around the image panel too. I blended some grey ink around the edges and then used a distress tool for the distressed edges.
After adding the glasses, I covered the eyeballs with some crystal effects for shine.
And this one has been sent off to hopefully make someone smile! I hope you like it too!
Thanks so much for dropping in and I’ll see you again on Saturday for another AJ page!
Hello friends!! I sure hope you’ve all had a wonderful Christmas! I am sure looking forward to starting a New Year as well! Moving on to positive things for sure! 😀
**Needed to apologize for anyone who subscribes to my blog via e-mail and couldn’t get the link to work from my last post. I don’t know what happened, but it got “wonky” when I scheduled it. CLICK HERE for the link to that post if you didn’t get a chance to view it.** THANK YOU!
Although I’m finished with sending out my Christmas cards, I still enjoy creating for Christmas and can ALWAYS get a good start on Christmas cards for the next year too, so that’s what this fun “Bugaboo Holiday Chaos” challenge event has allotted me to do and have some fun! So, this post will finish up the last of my projects for that event before the deadline is up! (To see the first 3 challenge projects, I made CLICK HERE for that post.)
Here are my projects to finish up the challenges:
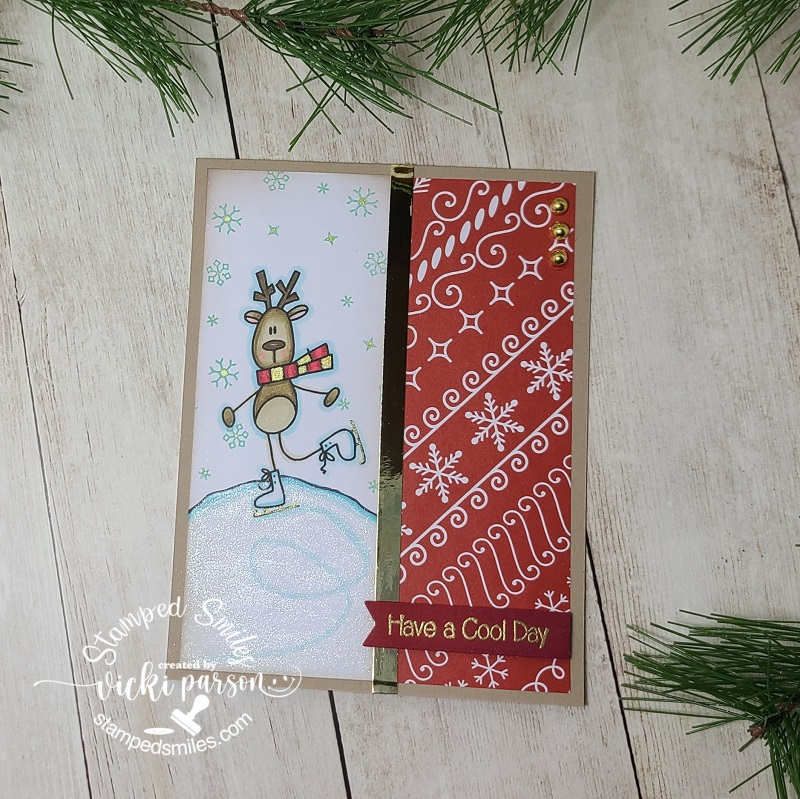
This card was made for the Holiday Chaos Bingo Challenge on Day 4. There was also this really adorable freebie up that day, so I wanted to be sure to grab it while it was available. This is the Kidz Reindeer image and I enjoyed coloring him up for my card here. For the Bingo, I used the middle row across, but could also have used the first row down or first square diagonal too. (See photo below)
I happened to have some Christmas Lights pattern paper with some of the green lightbulbs foiled on it. I thought the green shimmer ribbon would go well with that and break up the “busy-ness” of it! I took a Christmas Lights die from Lawn Fawn to attach across the card and image panel and then white heat embossed a sentiment at the bottom. I’ve used some glitter for the snow around the image and then I’ve covered all the Christmas Lights with glossy accents.
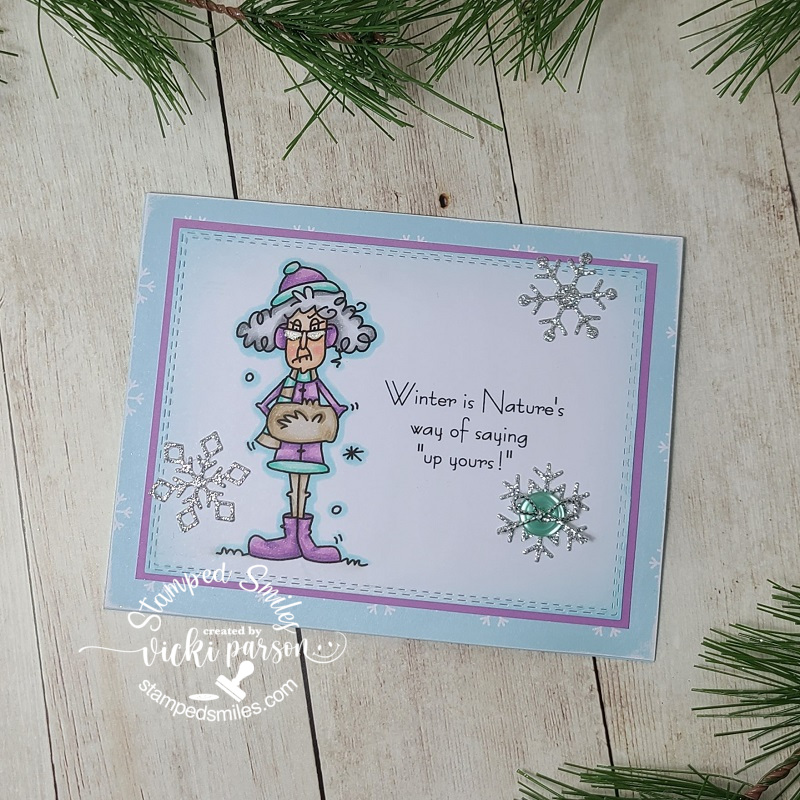
If you know Bugaboo Stamps, then you got to love Stella! 😂 This was made for Day 5 Holiday Chaos with the theme “Make Us Laugh”. So of course, my mind went to Stella, and I thought this Stella Calendar November was a good one for a laugh about now as we were just hit with a winter storm with snow and ice.
Found some snowflake papers and paired her with some purple colors along with just adding some silver glitter snowflakes to the design. I added a button in the center of one of them and attached a sliver bow over top.
Stella’s glasses were colored in with a gel pen for the shine.
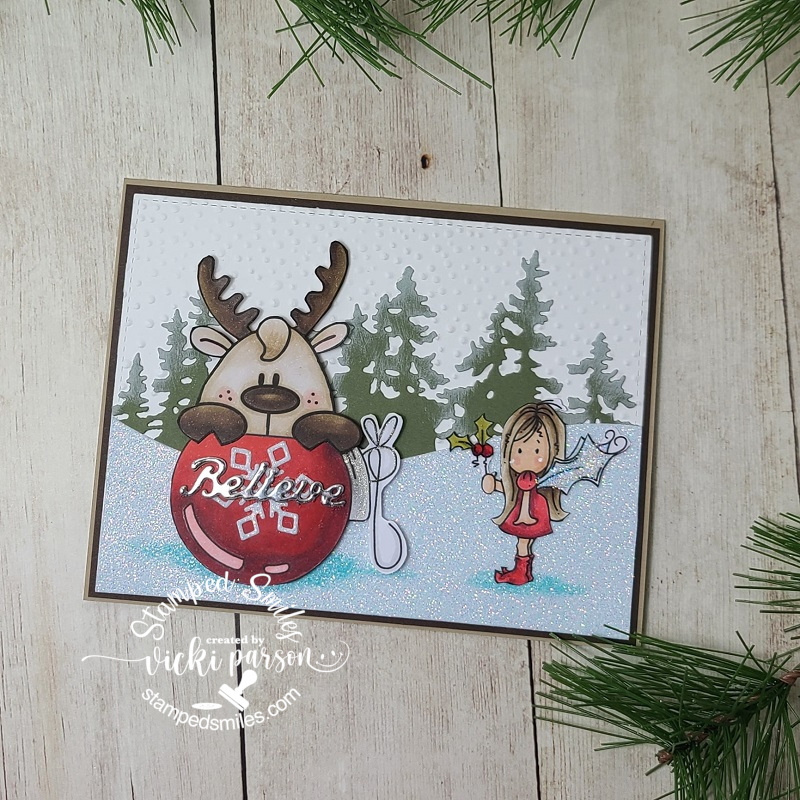
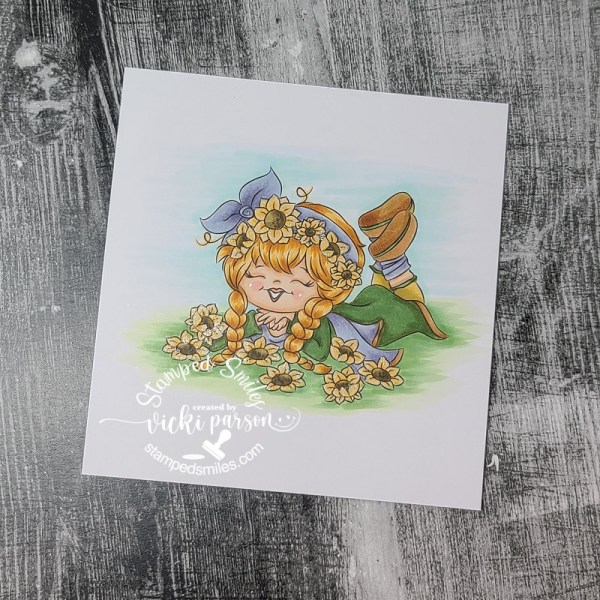
This card was created for Day 6 Photo Inspired Challenge. I thought it was such a darling photo and I noticed that the deer in the photo was so large compared to that little girl and so I was trying to capture that detail about with the photo by making the Bugaboo Ornament Element and this cute moose that was actually part of a tag image that I fussy cut out and attached him to the ornament. (I can’t find the moose I used in the store.) I die cut a snowflake and the “believe” word to attach over top of the ornament. I then took the sweet Bugaboo Ava Mistletoe Fairy that I’ve colored and fussy cut out in a smaller size to place on my scene.
The scene was created with some white Glitterstock that was die cut with a hillside border die with some die cut pines behind it. I also used an embossing folder for the snowfall in the background. I colored the snow with a Copic marker under the images before I attached them to the scene.
And this card was made for the final Day 7 color combo challenge. Plus, there was this really fun and cute freebie during the event that I grabbed up again before it expired, but it’s the Bugaboo AKV Reindeer Skate image. I colored him up and even created an “ice rink” for him with a pen and then used a Copic marker to make a “skating trail” inside the rink and then I covered the entire area with a glitter pen for shimmer. I also stamped some snowflakes above him and dotted the centers with a gold gel pen which was also used to color part of his scarf with.
I added some papers to the opposite side of the image panel and lined the center between with gold foil paper. I also gold heat embossed a sentiment over a red banner at the bottom and attached three gold accents at the top too. The base of the card is kraft. Hopefully I have met all the challenges. 😉
Thank you SO MUCH for joining me here today friends! I will be back with just one more project for tomorrow as I need to meet another deadline for a challenge…so I’ll see you again soon!
Hello my crafty friends!! Today is Halloween and I thought it would be a great time to share several Halloween themed creations that I had made during theWhimsy StampsVirtual Retreat! I’m actually STILL working on the project kits because there were SO MANY of them and I’m such a slow crafter there was no way that I could’ve done them within that weekend time frame! It sure was so much fun and so many treats along with it! So happy that I decided to join the virtual event! I encourage everyone to join the next!!
So what I decided to do was to go through all of my 23 kits and pick out the Halloween themed ones to get them finished up before Halloween so that I would have them to share and give out! Enjoy the spooky creative fun:
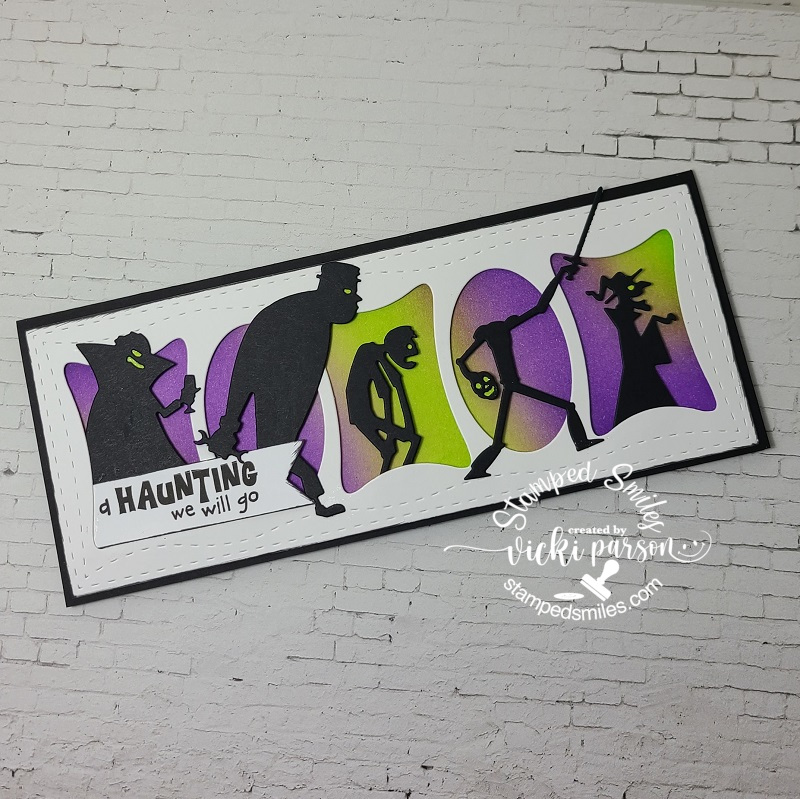
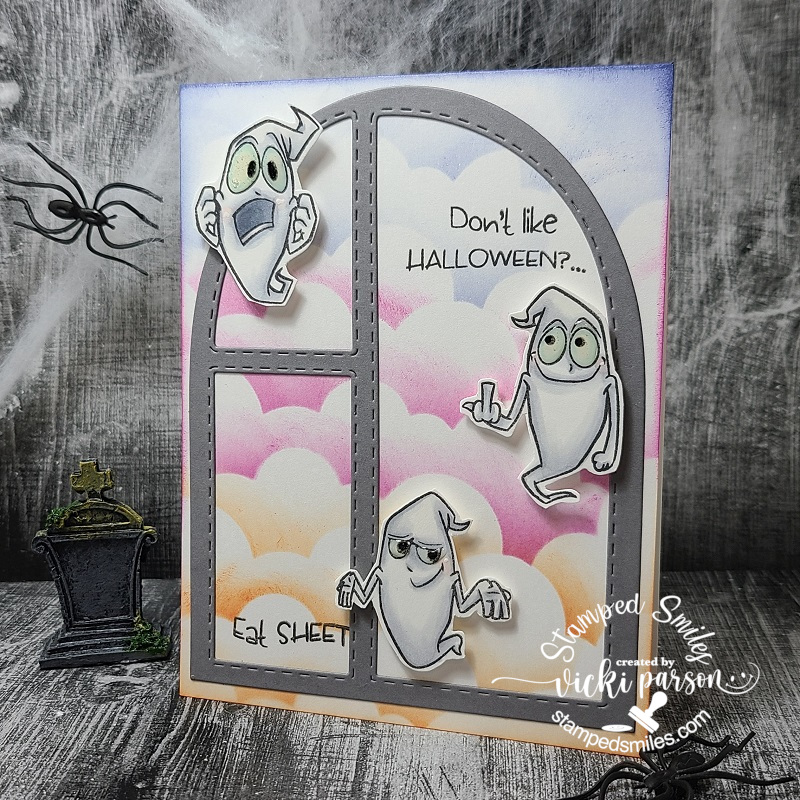
Kit 1 – spooky green behind the eyes! Slimline design
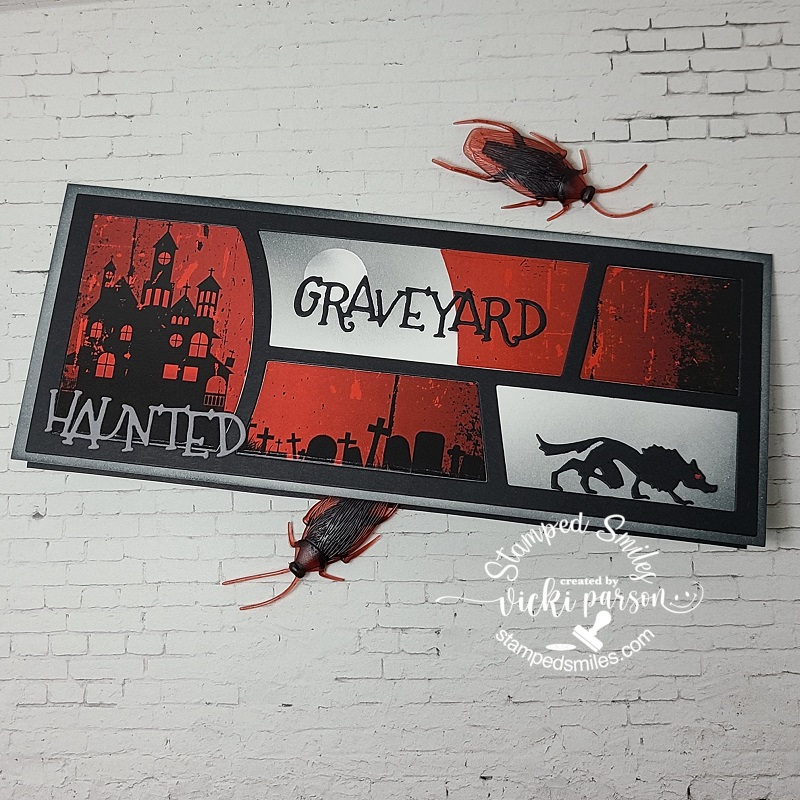
Kit 2 – Slimline design with a spooky graveyard! The cockroach bugs were a nice little “surprise gift” from our lovely instructor for the first two kits! LOL
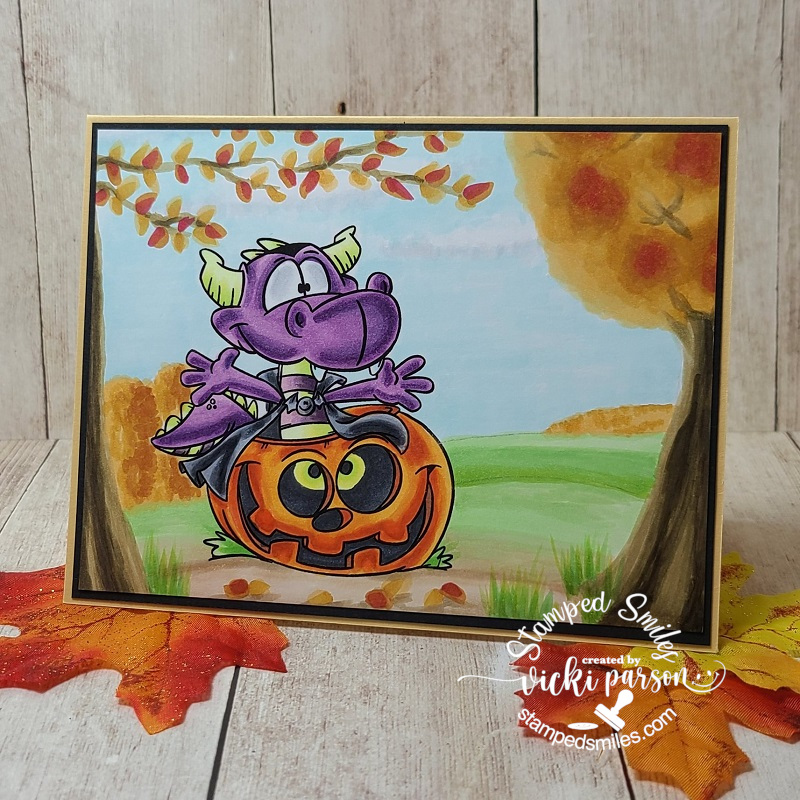
Kit 5 – All Copic coloring and something brand new to me was coloring a scene freehand! So scary!! But I made it!
Kit 7 – a slimline die used two different ways…LOVED the ink blending!
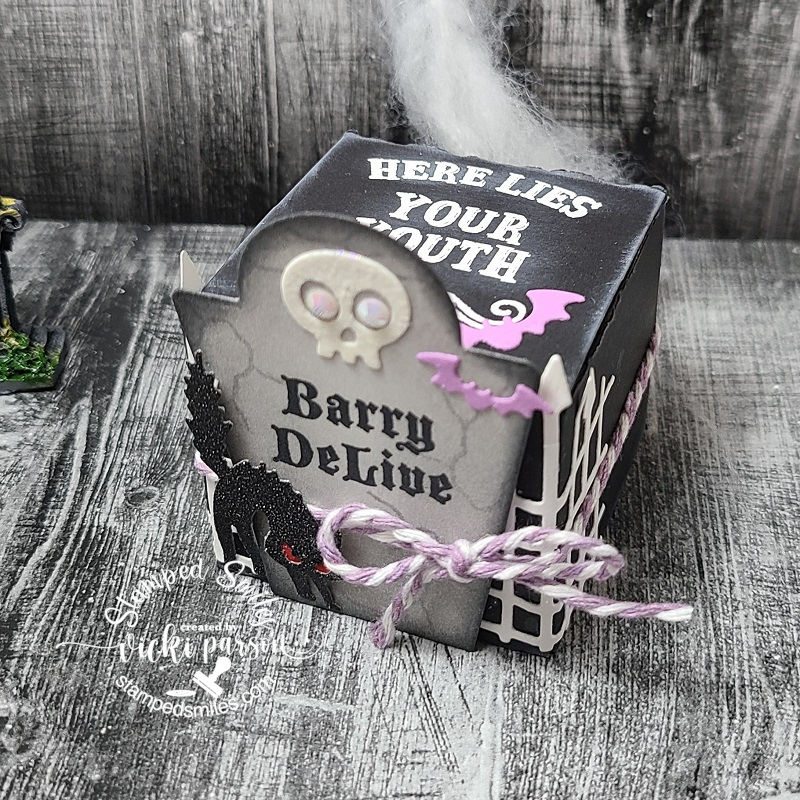
Kit 10 – Cutest little treat box! Added crystal eyeballs to my skull and sparkled it up with sparkly clear EP. I’ve rubbed white ink around the black edges.
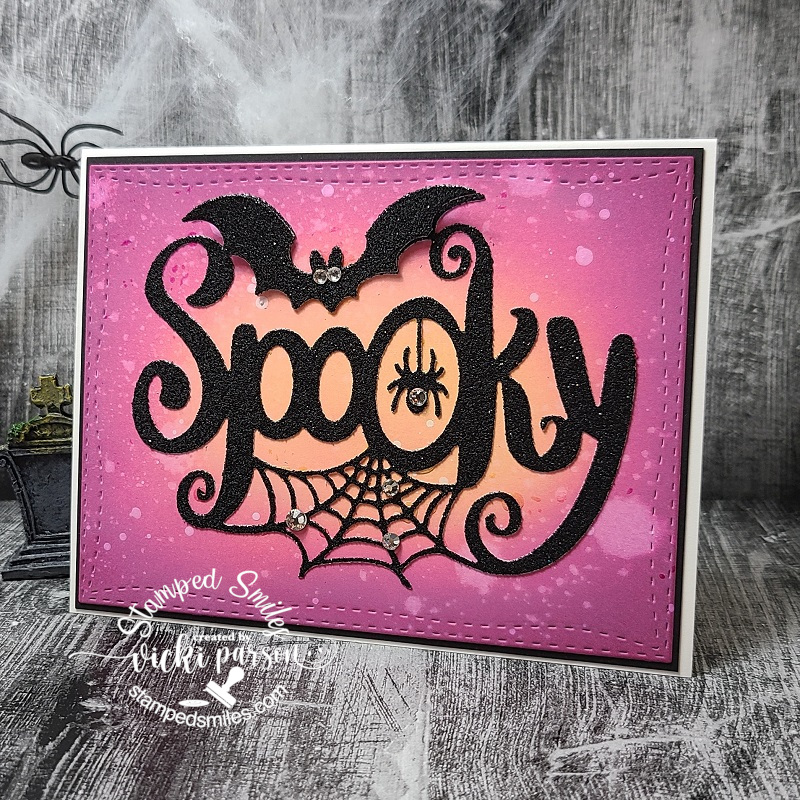
Kit 11 – The ink blending on this was awesome too! I have so many new combos now! The black sparkly die cut is my fave!
Kit 16 – Last but not least, this really adorable card made me giggle the whole time! I’ve added some glossy accents to the eyeballs.
So there are still SO many more kits left to do and I look forward to crafting them and sharing more with you as I go too! Obviously these kits were created and put together by the talented group of people for Whimsy Stamps, so they’re the ones that get the credit for the creativity on these, and therefore, I won’t enter these into any challenges.
Hope you’ve enjoyed my share from the retreat and I’ll be sharing more soon!
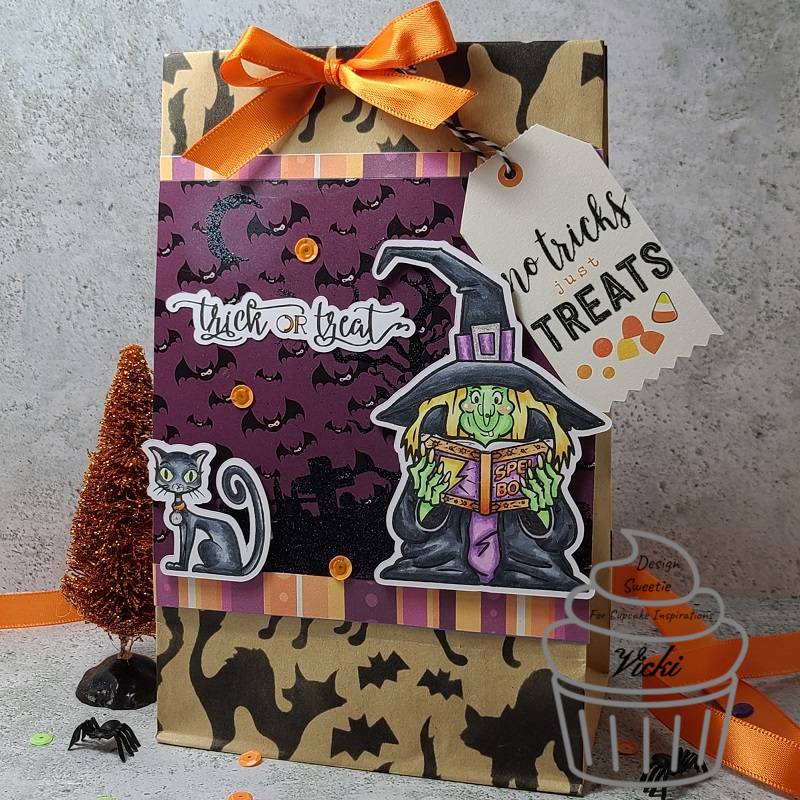
I used the stencil from the kit to ink over the stencil from the kit and then added the fun stamped and colored elements over the pattern paper from the kit. I used the spooky graveyard stamp and heat embossed it over the pattern paper with Raven Sparkle EP including the moon image at the top left.
I even used the ribbon and sequins from the kit to decorate with and then added a tag from my stash to tie on the bow.
This is the little poem that I’ve attached to the back of the bag that was a fun little print out from Brutus Monroe as well as the colorful strips that I’ve used on the top and bottom portions of the image panel on the front of the treat bag. I thought they were fun little elements to add and give out to my goblins this year! LOL!
Hope you’ve enjoyed my Halloween projects and thanks so much for dropping in!
Hello friends! I’m so excited to be sharing a special collaboration blog hop with my fellow crafty friends collab FB group as we share our own personal progression on how practice over time can help to increase your confidence and skills within your crafting journey.
So please grab your favorite beverage and join us in this fun and informative blog hop that shows how “the power of practice” can be utilized in your own crafting! (highlights are done in red.)
I would like to start off by stating each person’s experience is their own journey and will run on it’s own pace which is something that we all need to be aware of and patient with. Some particular skills will take much longer to grasp than others and you need to take it easy on yourself without harsh judgement. Just enjoy the process and have fun with it! (That was and still is the hardest thing for me to learn.)
Although I’ve been paper crafting for the last 20 years or so, I’ve been involved in several different crafts throughout my entire childhood or since I could hold a crayon in my hand! My grandmother as well as my mother has passed down their experience with crafts which I learned from and picked up many others along the way including what I love today. So some things I do may already come naturally for me without recognizing where it came from because it was taught to me long ago. There are some things, however, that I’ve had to spend the time learning.
Now taking classes aren’t the ONLY way to learn something for sure! Good ole “Trial and Error” are great for learning and gaining personal experience from…which I tend to learn the most from actually!😁 Another thing that helps is new tools/products to help make the process easier or look more “finished” or “professional” in nature. When I first started with my stamps, there was not a common heat tool for instance. I had to heat emboss over a stove! So times have changed as well as techniques and inspiration. Inspiration is EVERYWHERE over the Internet too! Many people have so many clever ideas…I wish I could keep up with them all! Some things may not be of interest to you and others may intrigue or intimidate you. Find what interests you the MOST..at the time…and work on it because you will love learning about it which means you will gain more knowledge from it. You don’t have to share with others what you do as long as YOU enjoy what you’re doing. Do what feels right to you and your journey. It’s never about others, it’s about YOU!
I feel like I could write an entire book on just this matter, but since this is a visual craft, it’s better to “see” with your eyes sometimes or show how things can come together…or not!🤨
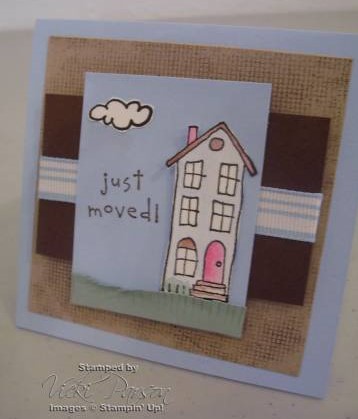
I’m starting with a photo of a card I had made back in 2007 when I had already been a year into having a blog and was still a Stampin’ Up! demonstrator at the time. Even the technology of simply taking a photograph has improved tremendously over the years…
I no longer have most of the products used here and I had to lift the photo from my Splitcoaststampers gallery as they have stored my oldest photos I have anywhere. This was the first place that I shared anything I made online. (There are 124 pages of my gallery and if you look through, you will see the progression over time.)
Now I could really criticize myself and pick this all apart, but it was part of my process at the time. And at that time, I was happy with it. It looks like I’ve colored with ink pads and a blender pen, cut out the images with scissors as well as cut fringes of the grass border. (tools have improved since and many purchases have been made as well!😊) As we move forward, I can share how I updated that design today:
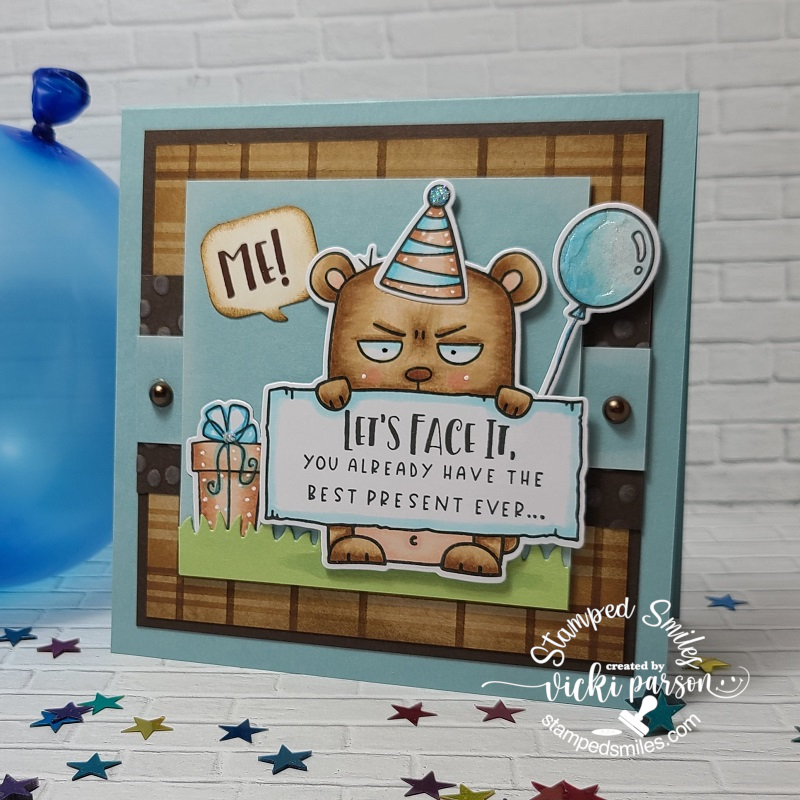
What I have decided to do was to take the photo of the older card above and make an updated version of the same design, but with the mindset and techniques that I’ve learned since. You can see that my coloring has improved as well as the different tools and items that have been updated to help with my design execution. I still used similar colors, similar layout design as well as coloring an image, but just maybe updated the look from the practicing of not just the coloring over time, but the practice of just cutting the layers and putting things together as compared to years past. Just meerily putting together card after card has helped me with the practice and made me better aware. So you can see how just putting together a card in general, with practice, can help improve skills!
Another tip I find helpful is to join your fellow crafty friends in groups and collaborations like this blog hop as well as other groups which is what I’ve also made this card for, called “The Crafty Chefs“, where we take turns coming up with a new “recipe” to follow each month. There’s no pressure, just a group of friends coming together, learning from each other through challenges, and inspiring one another as we enjoy our love of crafting! For me, this is a huge deal. Check out the link above if you’re interested in joining with us! It’s still fun to craft, but it’s even better when it’s shared with someone. So here’s the September Crafty Chef’s recipe that our head chef Linda has come up with for us to use.
(I have used ALL of the “must do” items and then added a couple of pearls from the “can do” items.)
I have found that within the last several years, many people enjoy watching video tutorials on You Tube..which makes sense because seeing someone actually doing something or putting something together is a better way to learn rather than just seeing a finished photo of a project. So to see how I’ve made my latest card for my son’s birthday, check it out below or CLICK HERE to view on my You Tube channel:
Hopefully through the video you were able to learn a few things that you can incorporate into your own card making. Sometimes we can improve upon ourselves by even trying to recreate something we’ve done in the past and add some new things you’ve learned along the way. It’s a great way to see how far you’ve come along and not be so critical of yourself to remind you that you are always learning, as I still am right now as well.
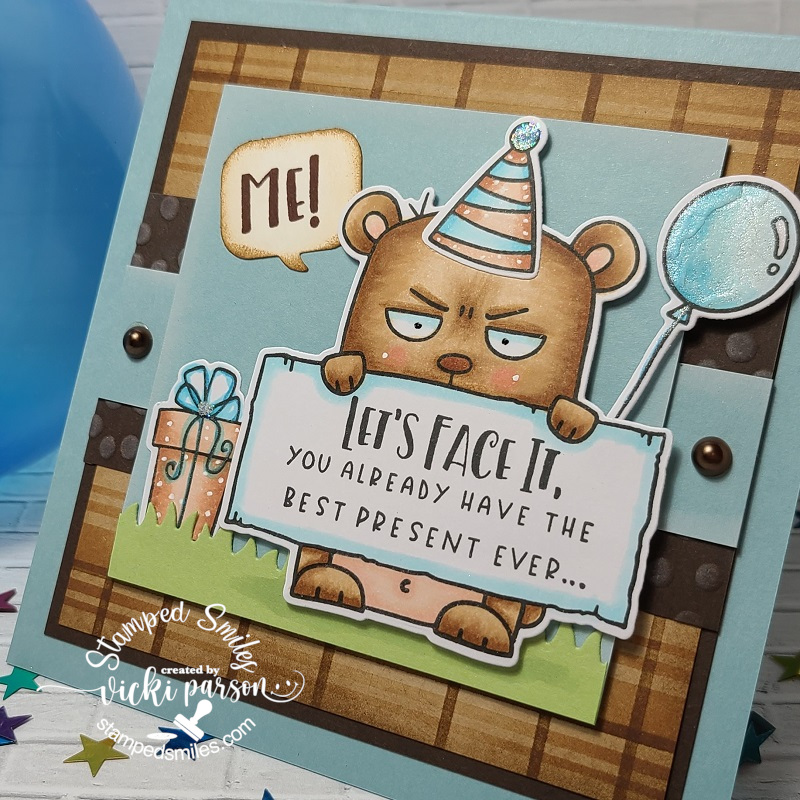
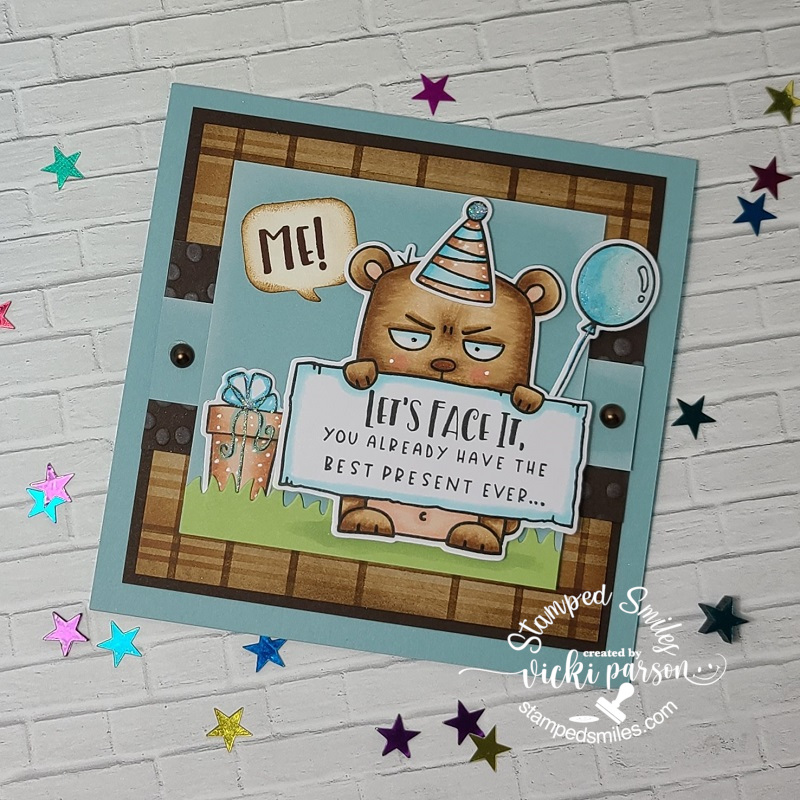
I have to chuckle at this card for my son’s birthday as he is a fun-loving jokester that will appreciate this along with the fact that it’s a bear image. He was nicknamed “Bear” in his school years, so I thought these Big Grumpy products from Taylored Expressions would work perfectly for this! I’ve also used the Big Grumpy Birthday stamps to go with him along with the other products used in my video above.
For the sparkle, I’ve taken some Stickles Star Dust glitter and added to the birthday hat as well as the center of the bow in the present. I used a glitter brush pen over the balloon and bow. I added dots to his cheeks, hat and the present with a white gel pen. I forgot to mention in the video that I’ve added a couple of brown pearls to the blue strip so that I added something from the “can do” list for the Crafty Chefs recipe!😉
I really hope that this post was helpful as well as enjoyable for you and that you received some benefit for taking the time to read over it. I know that I will be looking forward to seeing what my other crafty friends have to share and inspire me with! I think there is something to learn from everyone no matter how long you’ve been doing it.
The power of practice simply means, to me, being able to refine your skills into something that you want to be better at, take in more information or take it to the limits of your ability. This is done by repeating often and over time to increase or add to your knowledge of what you’re trying to improve upon. If we are not trying new things, then we are not learning or growing as individuals.
Thanks so much for stopping by my friends and I’ll be seeing you again soon!
Hey there friends! We’re now at the half-way mark of our wonderful “Birthday Celebration” challenge over at {Cupcake Inspirations}!
Have you been adding your birthday/celebration themed creations to the gallery yet for your chance to win a prize from one of the amazing sponsors we’ve enjoyed sharing the inspiration with?! If you haven’t, we hope you will be able to join in the fun with us as we’re really loving the wonderful projects we’ve been seeing so far!
Today I thought it would be fun to create a unique card with my friends for {Cupcake Inspirations} as well as another of an old favorite from our sponsor Riley and Company that was also featured for yesterday! I have loved this adorable moose for many years and so I couldn’t help but use another image to create something for a little chuckle….
I had so much fun with this easy to make card! I’ve used my Cricut Explore to print out and cut the shape of the cupcake. I actually did this twice so that I could make a folding card with the shaped design. I made a score mark on the bottom cupcake along the left side and glued it together so that it would open up on the right side.
I’ve taken this really adorable Riley and Company “Or Bust” stamp that I’ve had for a few years and stamped and colored him up. Since the space above the “or bust” words is empty, I filled it with a sentiment from a MFT set that was perfect! 😂 I then fussy cut him out and popped him up with foam tape over the card.
I used a gold metallic gel pen to color the frame of the sign he’s holding, wrapped some gold metallic ribbon around the cupcake with a bow and a cupcake button in the center and then finished it off with some glitter over the sprinkles on the top of the cupcake.
Hope that you’ve enjoyed my fun little shaped card today! Thanks for dropping in and I’ll see you on Day 10 for more inspiration with another sponsor!
Challenges:
Cut It Up – #207 Old School + die cut (Have had this Riley for years! Used Cricut)
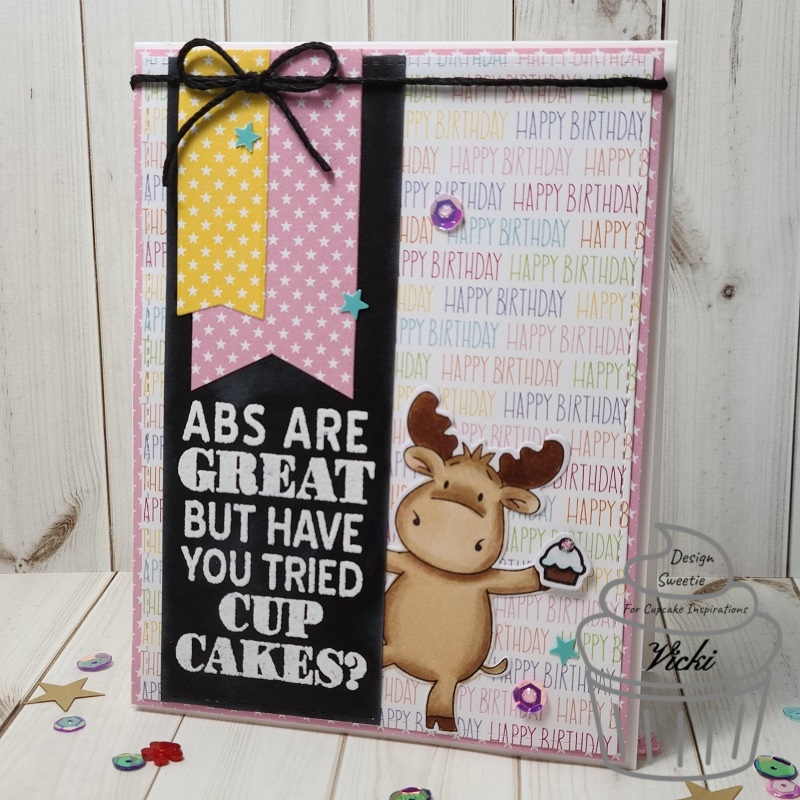
We are rolling now! We are on day 7 of celebrating over at {Cupcake Inspirations} with another feature of sponsors for our 500th “birthday celebration” challenge!! Super cool!!
Today, we are highlighting Riley and Company – Please check out the challenge blog for more details about this sponsor.
I have loved this little moose for many years and have collected some stamps from them over the years including some recent ones and I always get a chuckle from either the moose or the “Funny Bone” sentiments! So I had to help with featuring this sponsor:
I had to combine this funny sentiment with the cupcake theme and I thought it would be so fun to have little Riley peeking out from the edge holding a cupcake!😂
I took one of the images from the Basic Dress Up Riley, colored him with Copics and cut him out with coordinating dies. The sentiment was white heat embossed over a strip of black that I added Riley partially to the back of before attaching it to the background paper. I’ve also added a couple of banners and tied some black twine around the top of the card. I used a cupcake image from my stash, colored and cut it out and popped it up with a foam dot over Riley’s hand.
I finished the card with some sequins and some clear glitter Stickles.
Hope you’ve enjoyed my inspiration card for today’s sponsor and be sure to play along with us soon! Thanks so much for dropping by and I’ll see you again tomorrow!
Hey there friends! Ever have one of those days where you were up late or you got up in the middle of the night and then realized you weren’t sure if you got any sleep at all? Sometimes I have days and then forget to do something and then I’m thinking about it all night only to realize that I’ve spent my time thinking about it and not sleeping when I could’ve just got up and done it!😂
This post is sort of a representation of that issue! Not only did I forget or run out of time to get my post ready, but it’s also THE last day of the month to get these projects finished for the challenges they were intended for! Story of my life!
Oh my gosh this is too funny!!🤣 A few months back I had spent some time at the Taylored Expressions store and had a laugh at some of the sentiments that I didn’t realize were in the store and decided that they would make some great cards to send out and they go well with those Grumplings stamps too! I also wanted to participate in the #TEMAKER challenge before it ends, so I enjoyed putting this one together!
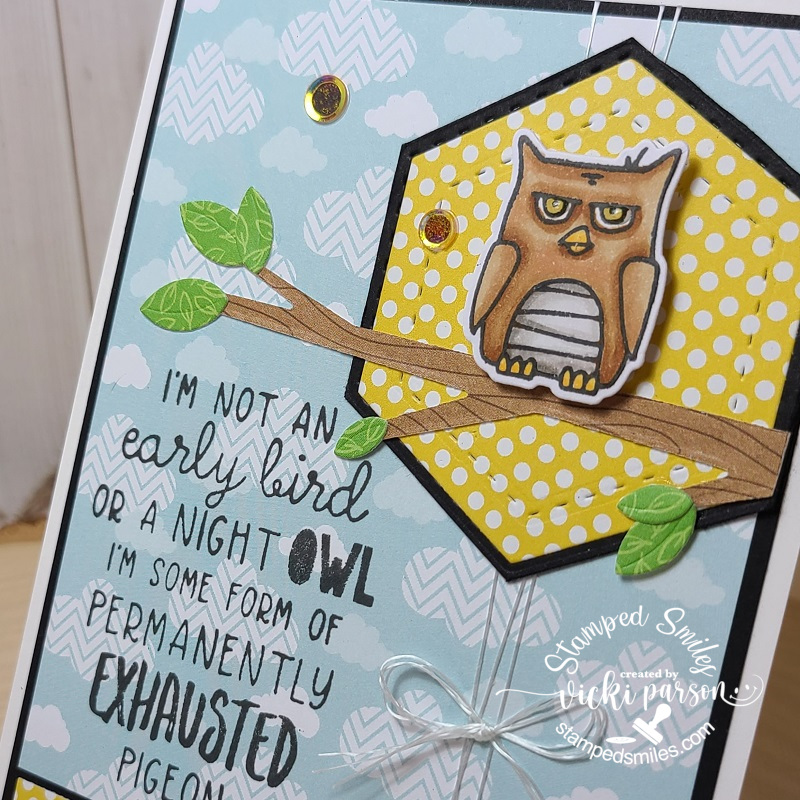
Believe it or not, I had a sample of dental floss in my purse and decided to pull some out and use it for this card! LOL! It meets the challenge which is to use something from your purse or junk drawer! I just tied it around the card front! I used some dies from my stash for the tree branch and the hexagon shape. The papers comes from Taylored Expressions along with the Grouchy Grumplings II stamp set (owl) that I cut out with the coordinating die and popped him up with foam tape over the branch. The hilarious sentiment comes from the Pitch Black stamp set and I know I’ll be using some of those others on more cards soon! Tee hee! I also found some fun yellow sequins laying on my desk and added them to finish it off!
Here’s a closer view of the “bird” and how I’ve colored him up with my copic markers. I’ve used the TE papers to cut out the pieces in the branch as well as the background and hexagon shapes. If you look at the “bird’s” eyes, you can see where I’ve added some glossy accents. He does look a bit tired!!
The reason for the strip at the bottom actually came from a mistake in calculating measurements for my card panel, so I just added a strip that I cut out from the hexagon die and used it as part of the design. Sometimes there are ways to fix mistakes, so never think you’ve ruined something!
I hope you’ve gotten a chuckle from my card today as it has made me laugh!!😆 Thanks so much for dropping in today as I really appreciate your support and thoughts here!
P.S. I have been busy “behind the scenes” doing various different things and haven’t shared them as of yet in my posts, but here’s a little look at what I’ve been doing lately:
I also haven’t shared my latest masculine cards, so I’ll be sharing those soon as well as other things I’m working on too! Just getting things sorted out and taking the time to do it is all!
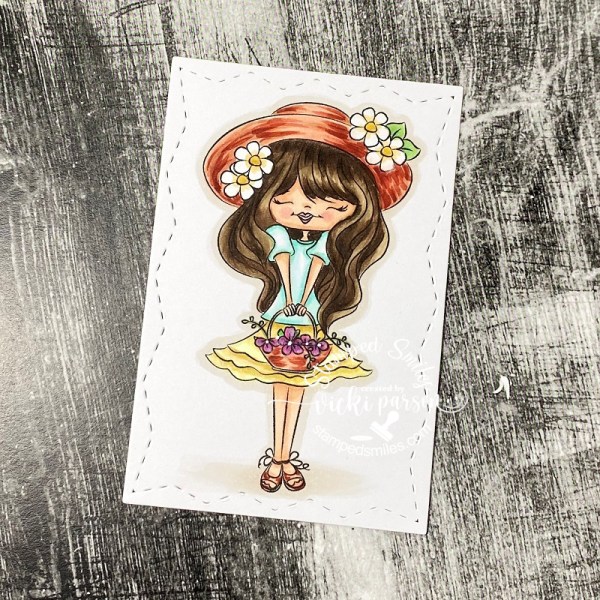
Hello friends! Are you enjoying your month of June so far? Wow, did it get warm the last few days over my way! Thought it would be a good time to cool down and not “be crabby”! LOL!
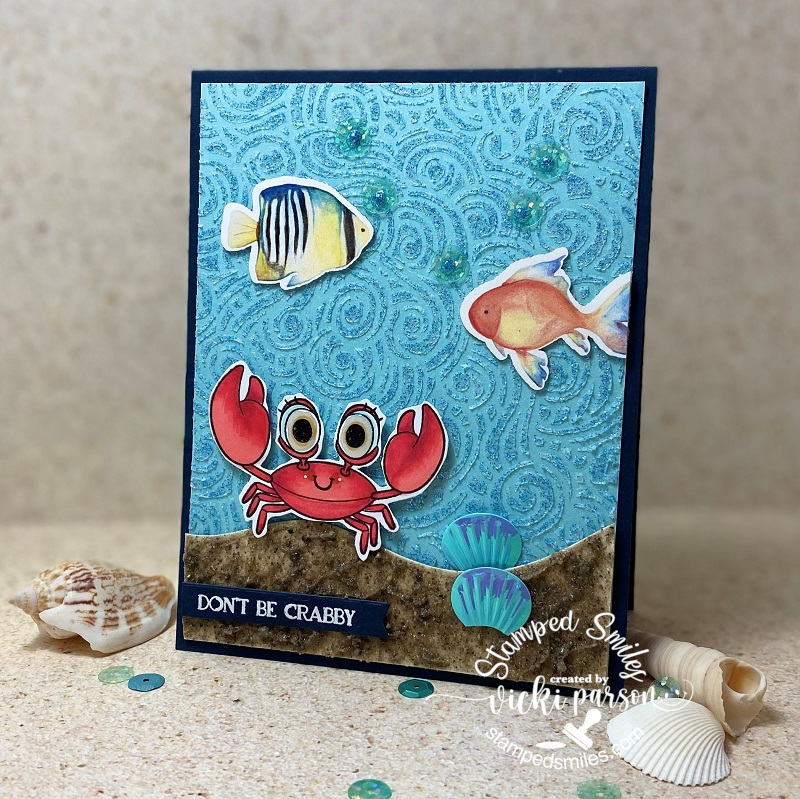
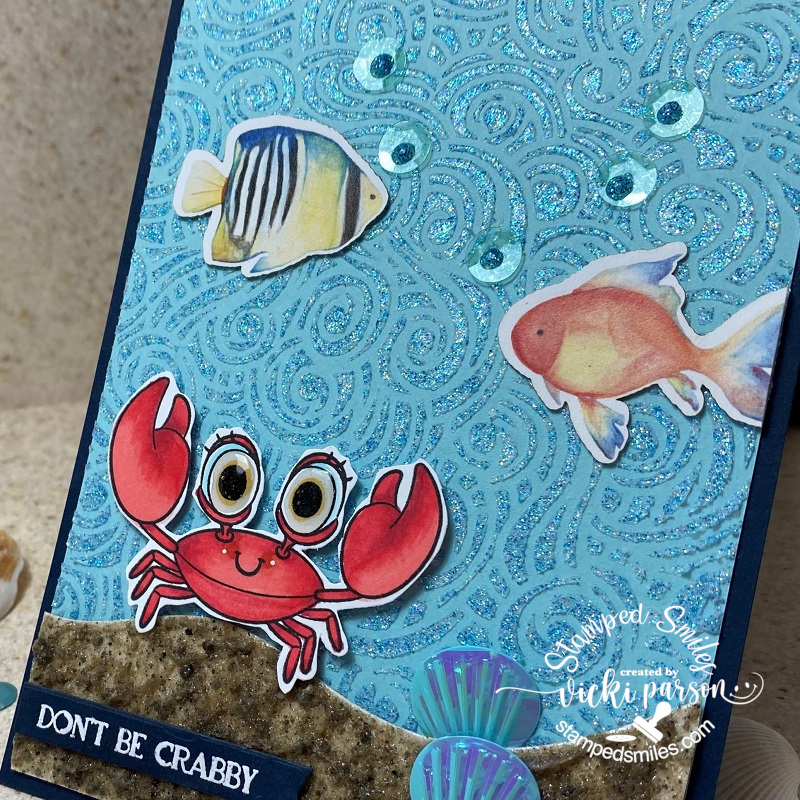
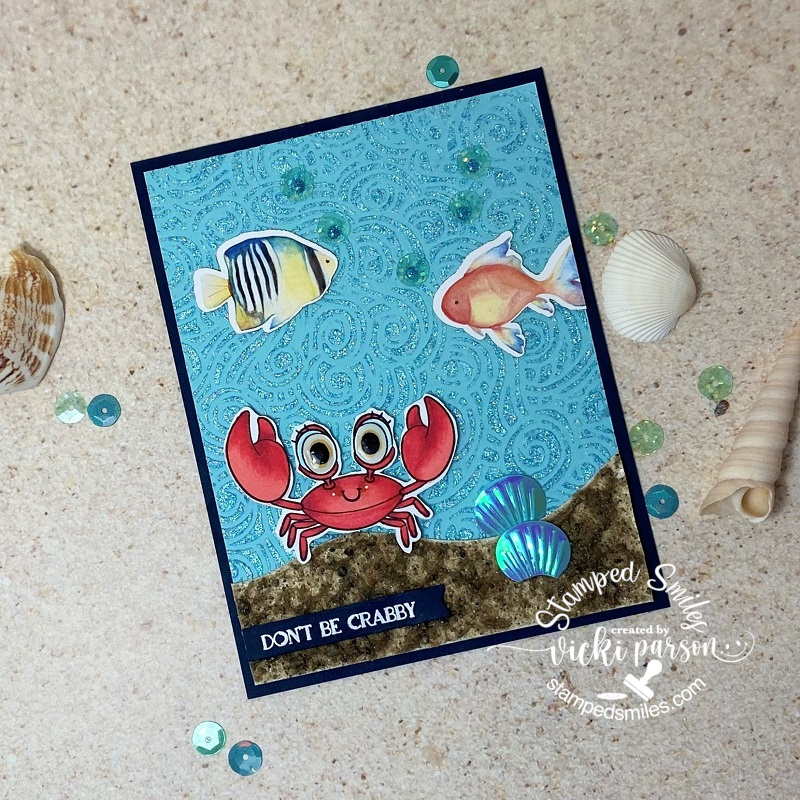
How cute is this smiling little guy/gal?! This is Crabby and I’ve colored it up with Copics and fussy cut it out with my scissors.
I’ve decided to make a fun underwater scene with him using the Tangled Waves stencil and going over it with some sparkly Glitter Glaze. I stenciled this over some of the Sea cardstock. For the bottom portion of the ocean floor, I’ve die cut a wavy border strip and covered it with some “Sand Paste” which is very textured and thick. I think it took almost 2 days to dry completely, but I really put it on thick. I think it makes such an amazing texture and it’s flexible too!
I’ve attached it over the glitter glaze background, white heat embossed the sentiment from the crab set with the White EP over a piece of Midnight cardstock which is what I also used for the card base and cut a banner with it to glue over the sand.
I attached the crab over the sand and also some seashell sequins and tropical fish cut outs from a past card kit to help finish the underwater scene.
Here’s a closer look at the stenciled background with the glitter glaze over it as well as the sequins I added above the fish to give the appearance of “bubbles”. I used some Dazzling Blue Nuvo Glitter Drops in the center of each one and I’ve also covered the crab’s eyeballs with some Glossy Accents.
It was such a fun and simple design to create, it only required some patience for a little drying time is all. Plus, this really makes me smile anyway!😉 Hopefully the recipient will think so too!
Thanks so much for dropping by today and I hope you’ve enjoyed my card or been inspired in some way! I’ll SEA you again soon!!
As You Like It – Scenes or Not? Why? (I love making scenes because you can place different images together how you want to arrange them and create depth or personalize it to make it unique!)
Craft Rocket – #71 embossing wet/dry (heat and paste)
LOL! Hey friends! Did I grab your attention with my title today?!
Today starts a brand new challenge over at Cute Card Thursday and it’s an easy ‘ANYTHING GOES!’ Since it’s the first Thursday of the month, we are being sponsored by Whimsy Stamps! Yay! So please be sure to remember to add whatever creation you’re working on over in our gallery this week!
*News update: This will be my last challenge as a design team member for Cute Card Thursday. I have really loved being apart of the team and the wonderful ladies over there for over a year and a half. I wish them all well. I’m sure I’ll be playing along in future challenges of course!*
Here’s the card I made with products from our sponsor:
BWHAA!! HA! HA! Yep, I’m most positive it’s probably been that cold out over my way! LOL! It’s supposed to get down to the teens next week! Brr!
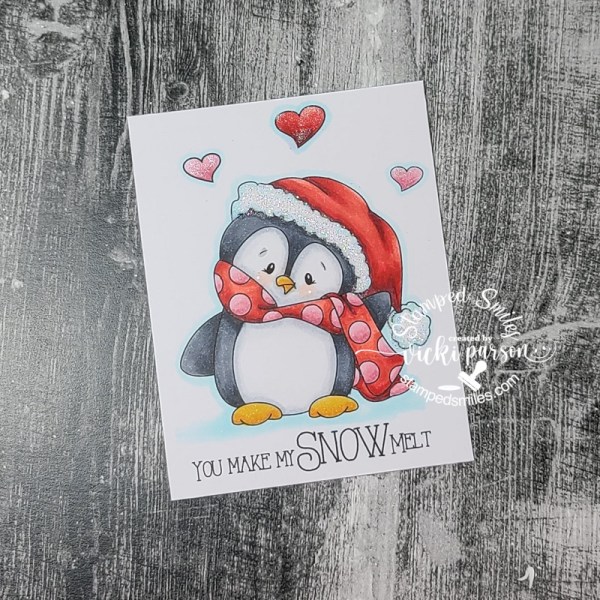
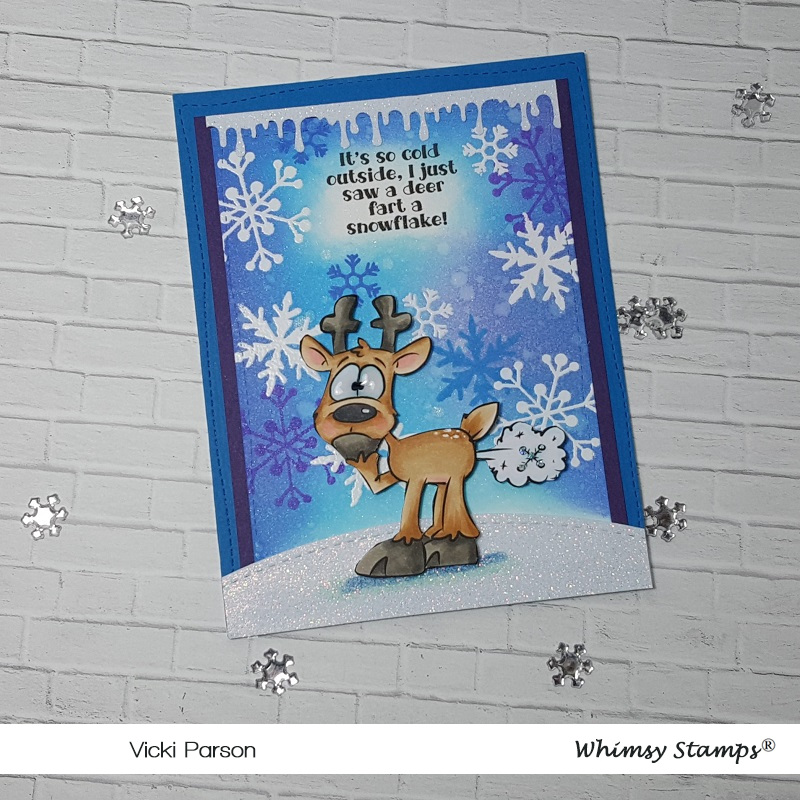
This hilarious digital image is called Reindeer Farts by Dustin Pike from Whimsy Stamps. It comes with the sentiment which I wouldn’t want it without that! LOL! This image was released back in October, but with all of the Halloween going on, it sort of didn’t get a good “spotlight” on it, so I thought now would be a good time to pull it out and perhaps send it out to my brother for Christmas…which he’ll get a kick out of! 🙂
I started out with a white cardstock panel cut with a stitched rectangle die with the printed out sentiment at the top of it. I pulled out the Whimsy Stamps Snow Flurry clear stamp set and white heat embossed some snowflakes in the background. I ink blended some Distress Oxide Inks over top of them in the colors: Salty Ocean, Wilted Violet, Mermaid Lagoon and Blueprint Sketch. I spritzed some water over it, dapped it with a paper towel and once completely dry, I stamped out some more snowflakes in a few of the Distress Oxide Inks over that to give it a little depth. The ink marks left over the white snowflakes were easily wiped away because the heat embossing resists the inks. I covered this entire panel with a Shimmer Spray. (You can see it in the photo below!)
I layered this piece onto a purple cardstock base and then layered it over a blue piece of cardstock cut from a stitched A2 sized rectangle die which was then mounted over a top folding A2 sized white card base.
I’ve used some White Glitterstock and cut a “snow hill” for the deer with a stitched hillside border die and glued that to cover the entire bottom of the card. I also took another strip of that Glitterstock and used my MS goo border punch to create the small border above the sentiment, which generates a more “cold feeling” to the card.
I’ve printed out the deer image with Copic Blending Card, colored it up with Copics and then fussy cut it out…including the “fart cloud” and popped it up over the snowy hill with some foam tape.
Before attaching it to the glittery snow hill, I took a couple of Copic markers to create a bit of shading for the deer standing on the snow. I also took a white gel pen and added some dot markings on the back of the deer.
You can also see where I’ve added some glossy accents to his eyeballs and I even took some Star dust glitter and added it to the snowflake in the “fart cloud”.
Well I hope you got a giggle from my card today! LOL! This will be a fun one to send along!
Thanks so much for stopping in today and I’ll see you soon!
Challenges:
Creatalicious – #176 Anything Goes with optional Winter
Hello friends! It’s “release week” for September over at Whimsy Stamps!
I’d like to share with you a really fun “steampunk” style card today:
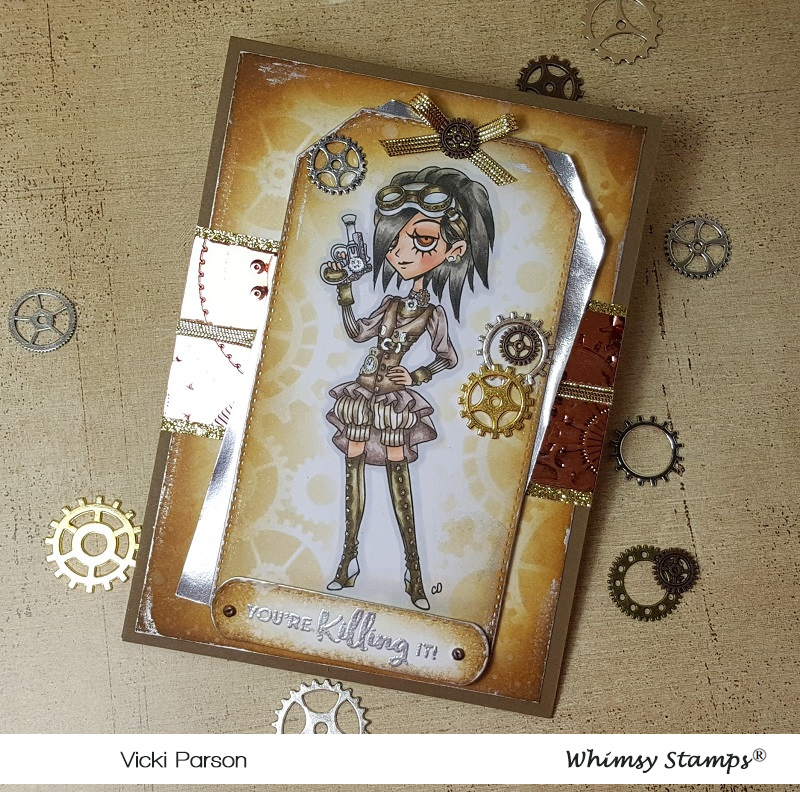
Oh this was so fun to create! When you check out the line of September’s Digital Stamps in the store, you will see a new line of “steampunk” style images that came out. The one I’m using here is called Steampunk Lilith. I thought she looked awesome with her little attitude carrying her gun there! LOL!
I started with a white piece of cardstock and pulled out a steampunk style stencil and inked some distress colors over it along with the image tag panel and then sponged around the edges of them as well. (Both of the tag panels are popped up with craft foam over the card base.) Before attaching these panels, I took some silver paste and rubbed it around the edges after distressing them.
I die cut a piece of silver foil with the same tag die cut and then I took an embossing folder and embossed a piece of copper foil. I mounted this piece onto a piece of gold glitter cardstock and wrapped a gold ribbon around it and attached it to the base of the card. I also used this same ribbon for the bow at the top of the tag image.
I found a sentiment to go with the image that I silver heat embossed and then cut out with the Whimsy Stamps Quick Strips die. After I sponged around it, I added some metal brads to each end and then popped it up with foam tape under the image.
All of these layers were attached to a suede colored top folding card base. Since the image printed out a little taller than most of my digital images tend to, I made my card base 4.25″ x 6″ in size. I have an envelope maker, so I can create the size I need.
Lastly, I’ve glued on some metal gears including the one in the center of the gold bow.
Here’s a closer look at the image and how I’ve colored her up using a combination of Copic markers and gel pens. You can sort of see the areas that I’ve colored up with gel pens that have the shine on them. You can also see how shinny the metallic papers look as well as the embossed sentiment. The embossing folder I used for the Copper strip comes from a Tim Holtz Texture Fades EF.
Hope you’ve enjoyed my card today and got inspired in some way! Thanks so much for dropping in! I’ll see you again soon!
As You Like It – Favorite Way to Add Text and Why? (I like to either stamp or heat emboss a sentiment and then die cut/cut it out, this way I can decide where I want to add it and if I like it well enough to add it…then I don’t have to.)