Retirement Time and More Whimsy Stamp Workshop Retreat Projects

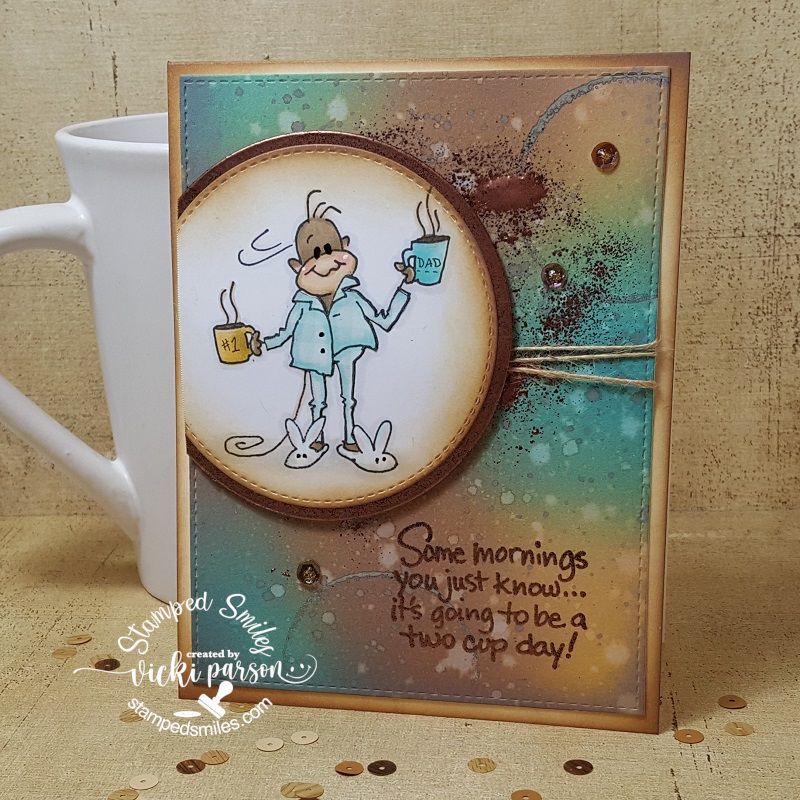
Hello there friends!  It’s hard to believe that we’ve made it to November and rounding the corner to end 2020!  It’s been a very strange year all the way around, but I have to say that it’s a bitter sweet day today as hubby will have his last day of work on his 40 year career as an electrician.  So today I’m dedicating my post to him:

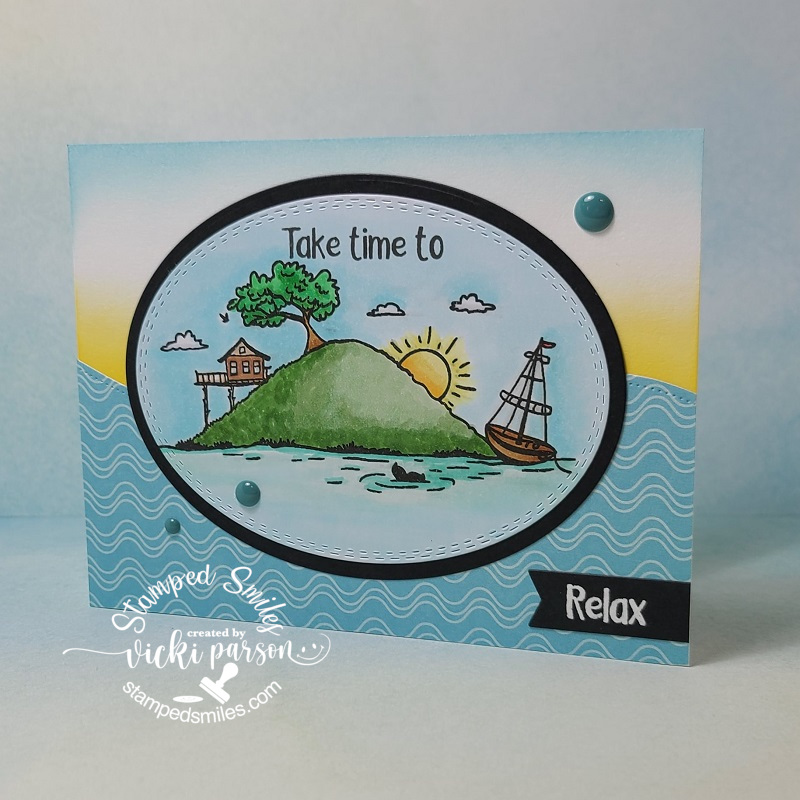
This would be a perfect situation for my hubby and something he talked about all the time…which was to go out to the lake, relax, enjoy some fishing time on a boat including staying in a cabin.  Sure look forward to spending some time with him doing just that next year too!⛵🌅  He is a hard worker and certainly deserves it.

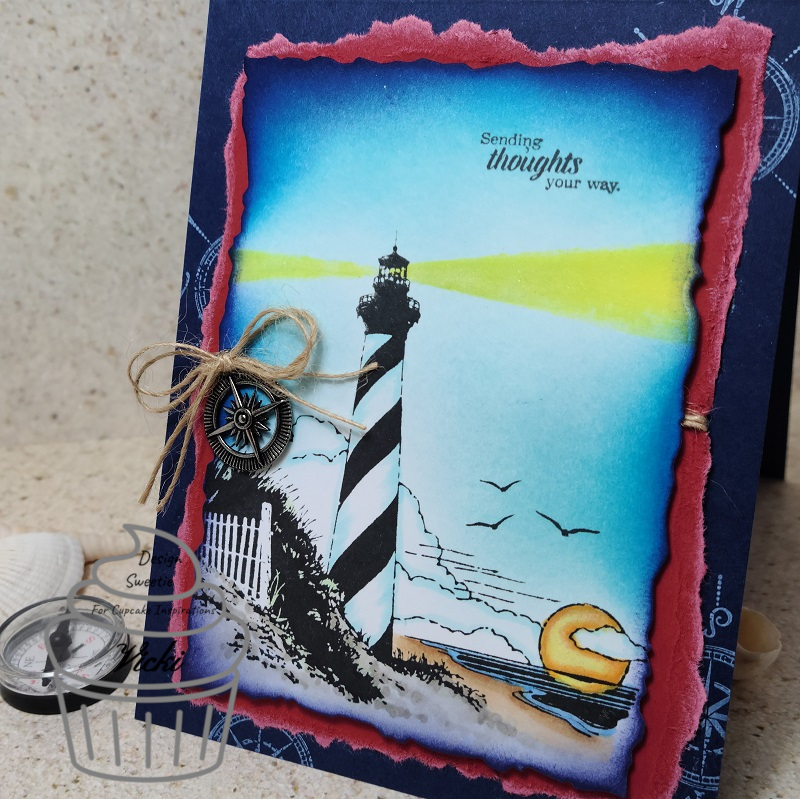
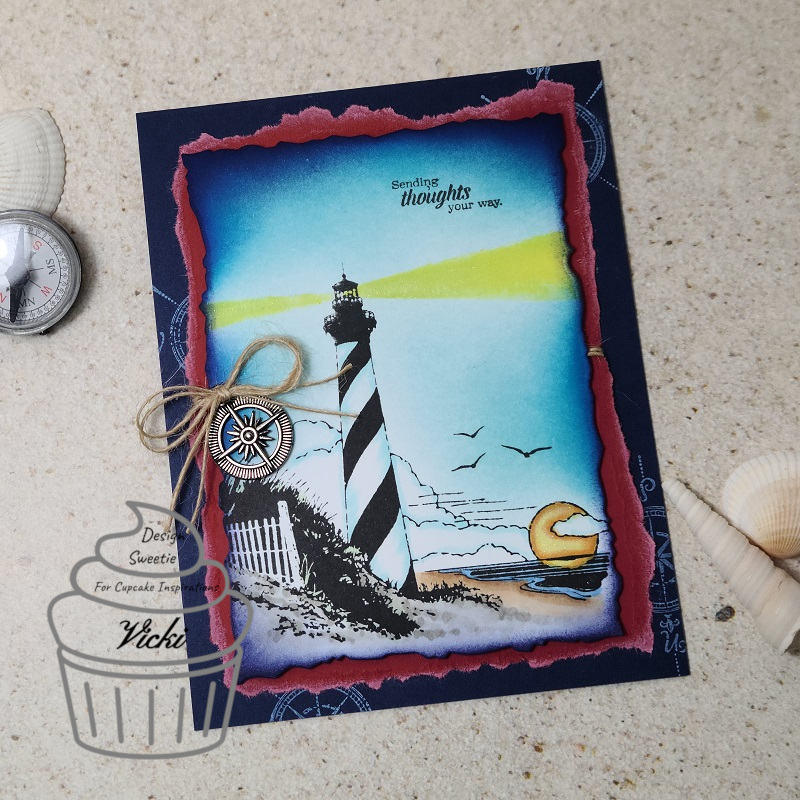
The stamp set that I’ve used for this card was a perfect scene image from Whimsy Stamps called Happy Place.  I colored it up with Copic markers and cut it out with an oval die and layered another oval piece from black cardstock.

I found some papers in my stash that I thought would be perfect with this, so I’ve used the Whimsy Stamps Pierced Border Trio Dies to cut it with to fit half-way on my A2 white side folding card base.  Before attaching the piece down over the base, I took some Mustard Seed Oxide Ink and sponged across the middle of it and then used some Tumbled Glass Oxide Ink slightly at the top.  I then attached all piece including the image panel.

I took the sentiment from the Happy Place stamp set and stamped one of the sentiments at the top of the oval panel and then I white heat embossed the “relax” sentiment over black cardstock and cut it out with the Whimsy Stamps Quick Strips die set, glued it along the edge and trimmed off the excess.  Lastly, I’ve added some Whimsy Stamps It’s a Party Enamel Dots.

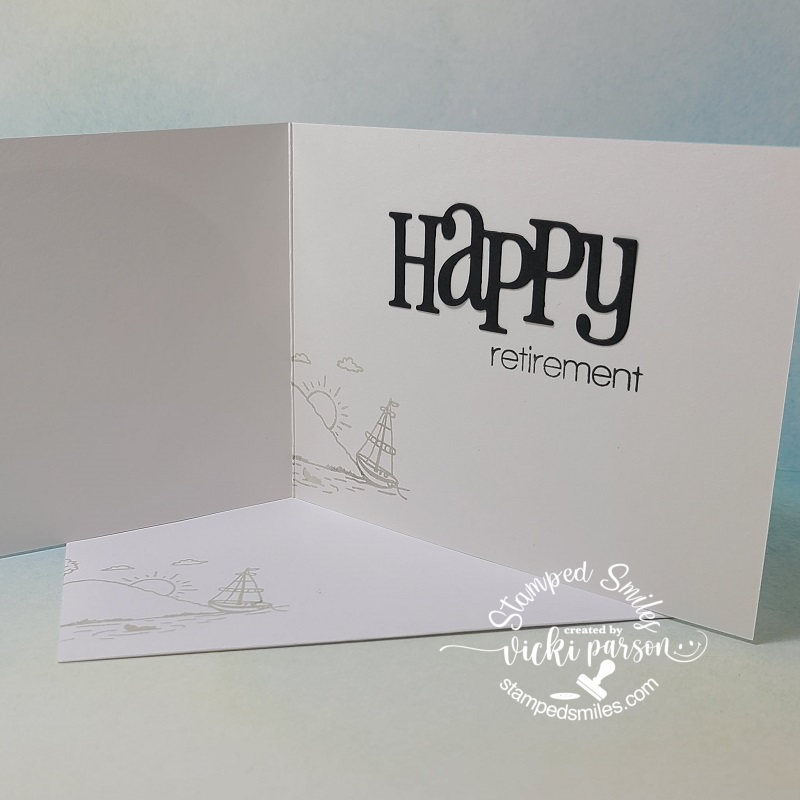
Then of course I wanted to share the inside of the card which you can see that I’ve used the same image from the stamp set from the front of the card and just stamped that in a lighter grey ink color.  I masked off the edge of the inside of the card so it didn’t stamp completely.  I also used it in the same way on the envelope as well.

For the greeting, I took the Whimsy Stamps Happy Large Word Die and cut it out with some black cardstock and then attached it with liquid glue.  I stamped the “retirement” greeting right underneath it from the Whimsy Stamps Happy Sayings stamp set with black ink.

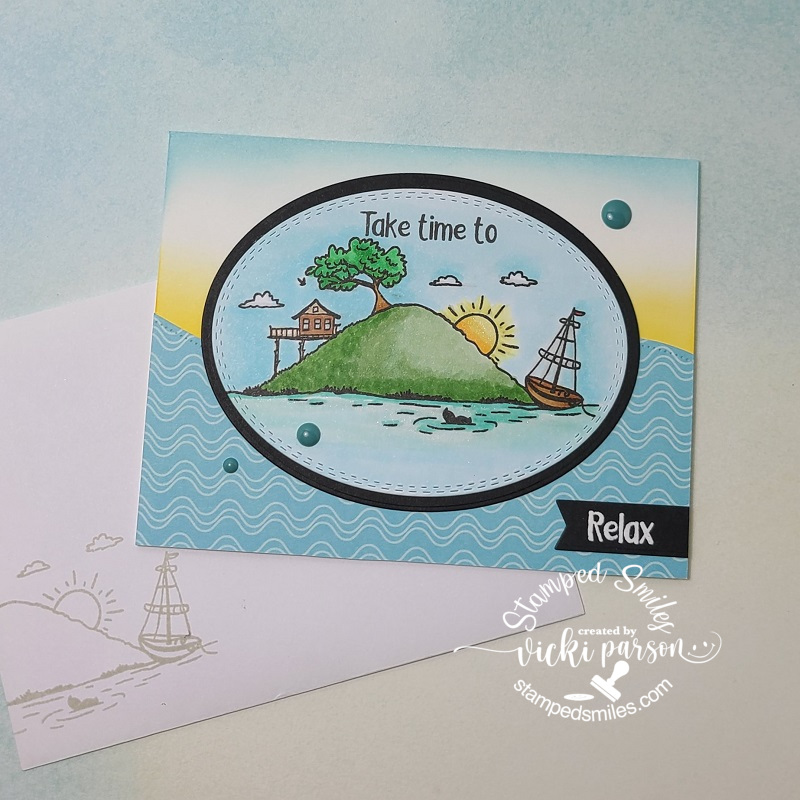
It may be hard to tell in the photo above, but I’ve also taken a glitter brush pen and went over the sun as well as the water for some added sparkle.

This card was actually fun to put together and I was thinking about the future and all the things we had talked about the last few years and getting ready for this day.  Things are a bit different than we had envisioned of course, but we will have “our time” for sure.  We’re so excited about it!

This card is being handed to him this morning while we have our coffee before he leaves for work on his last day!😀


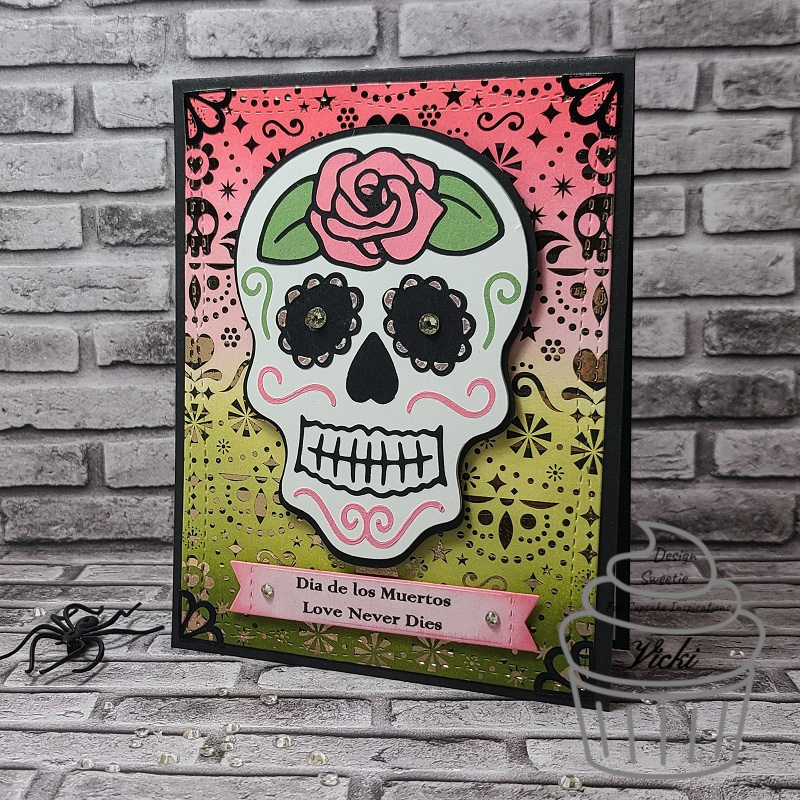
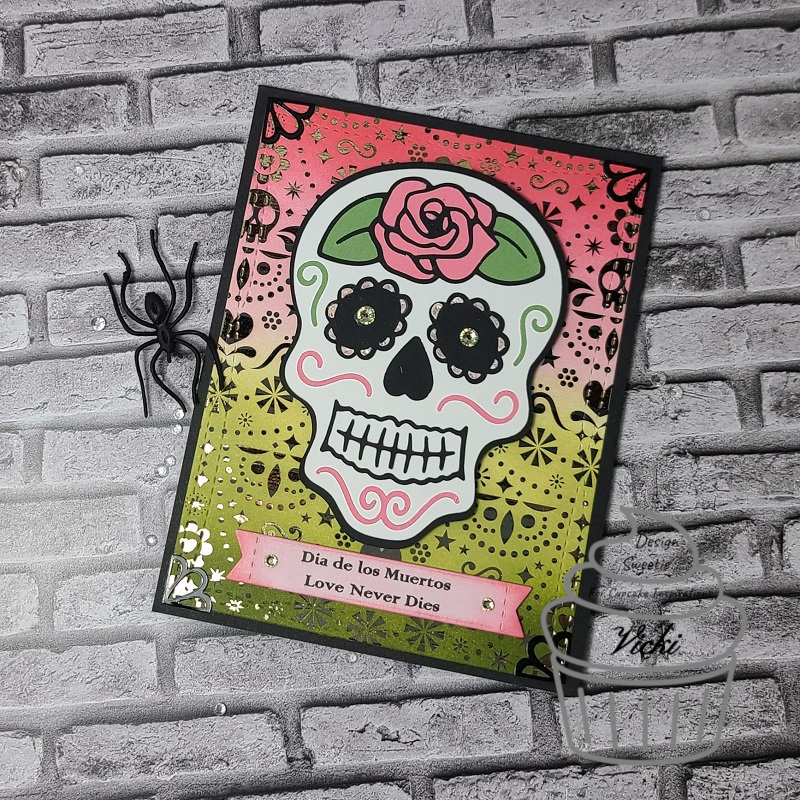
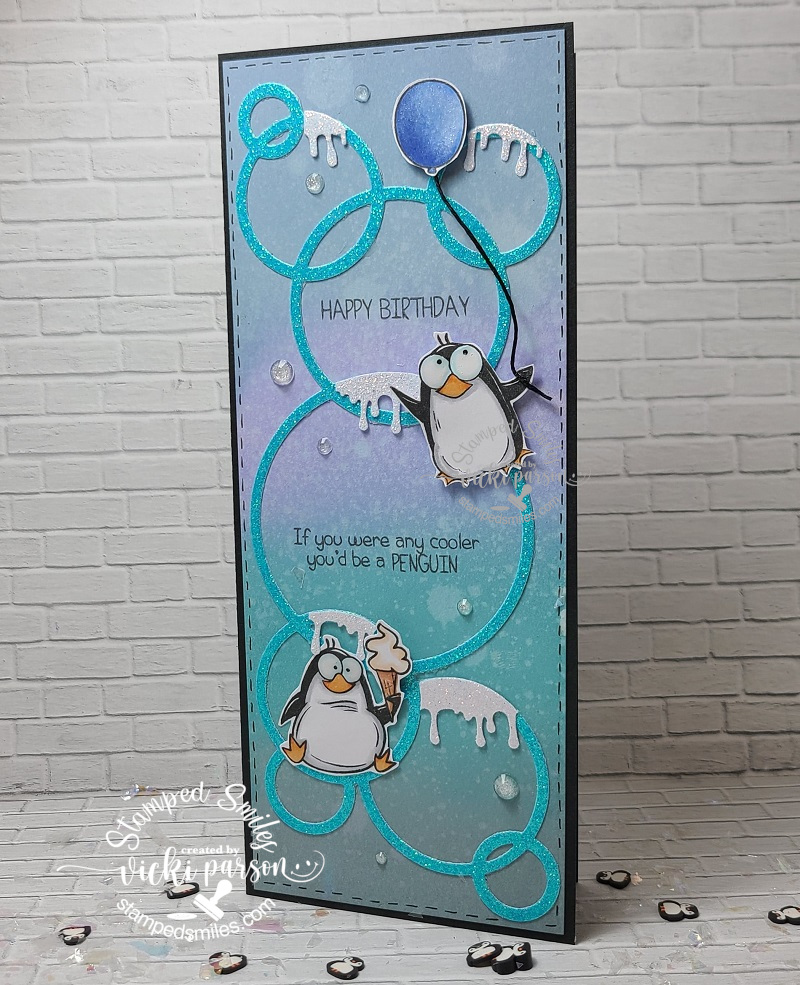
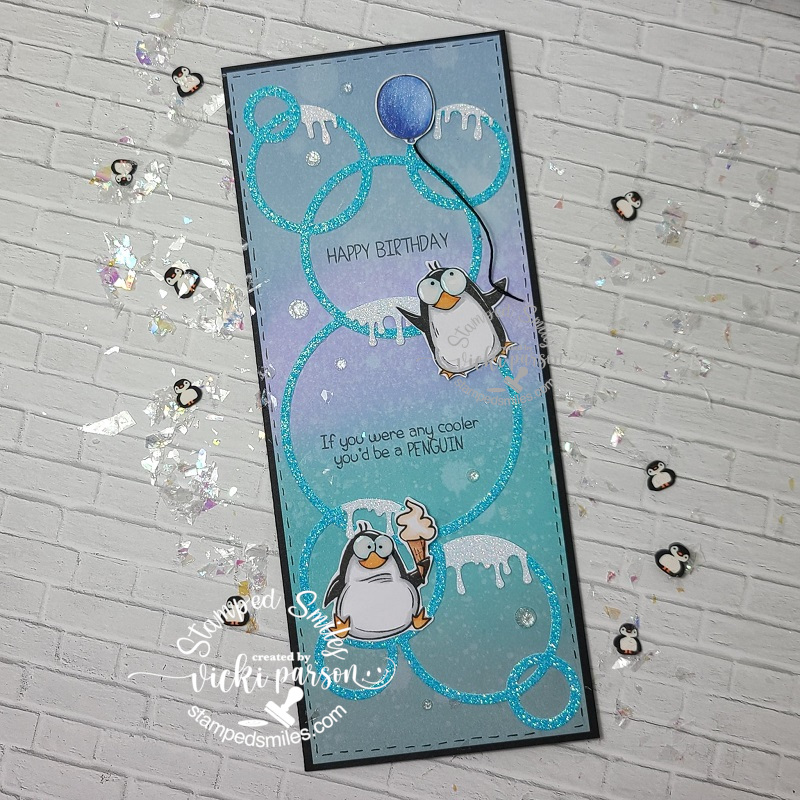
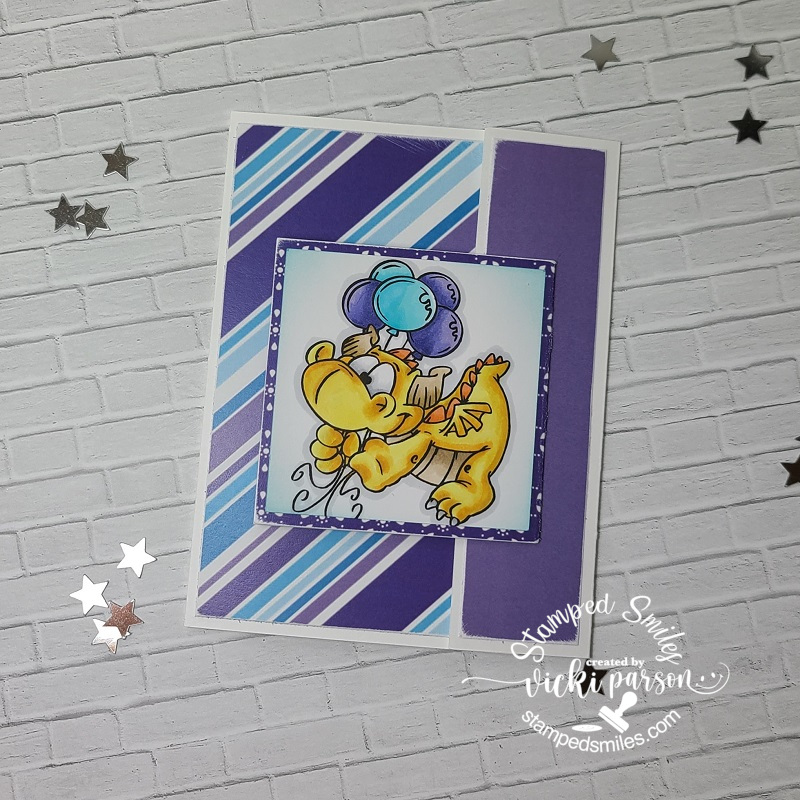
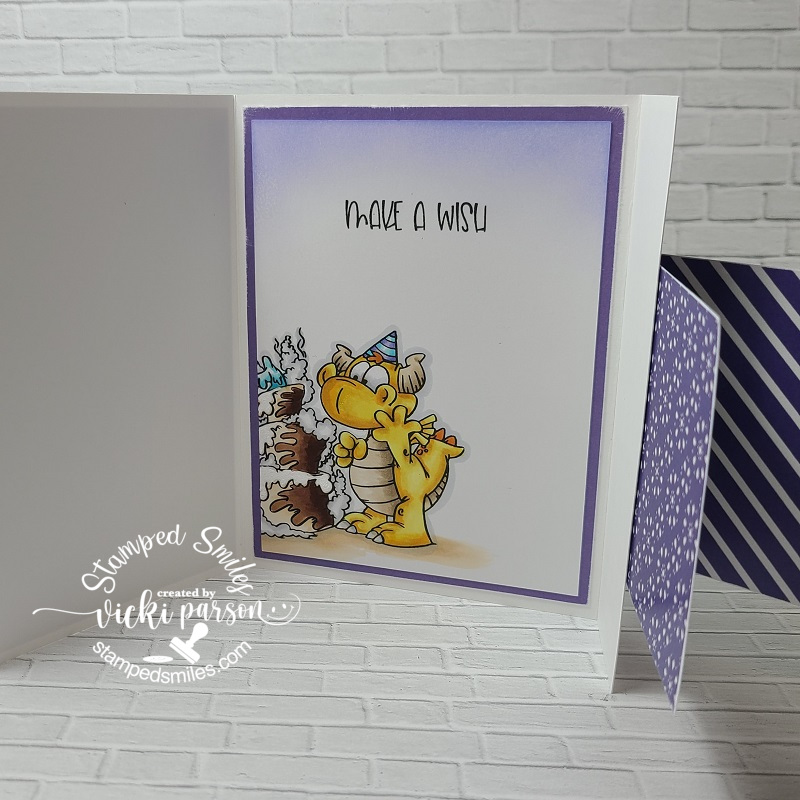
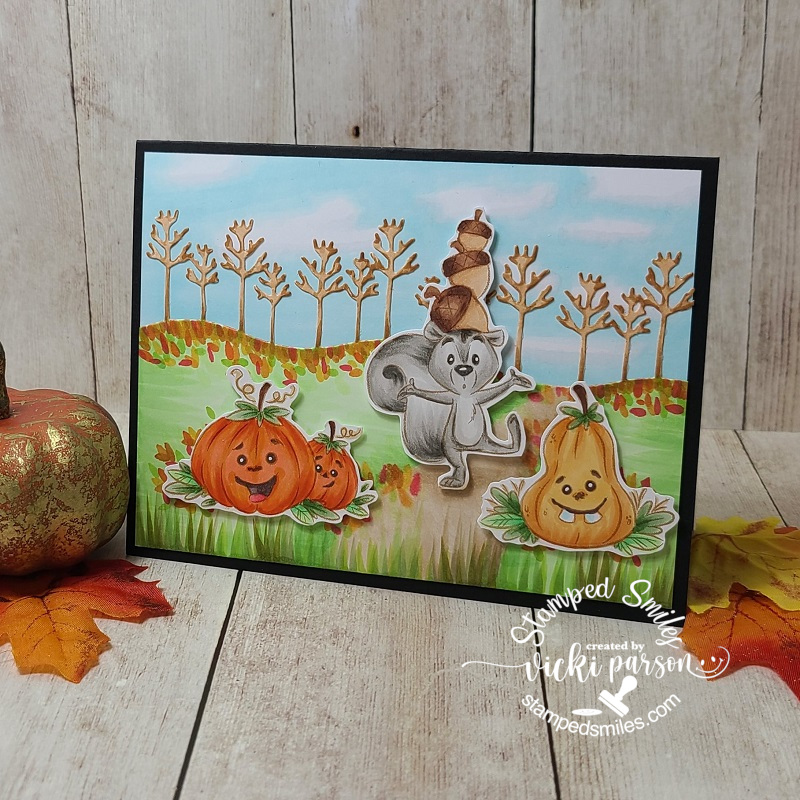
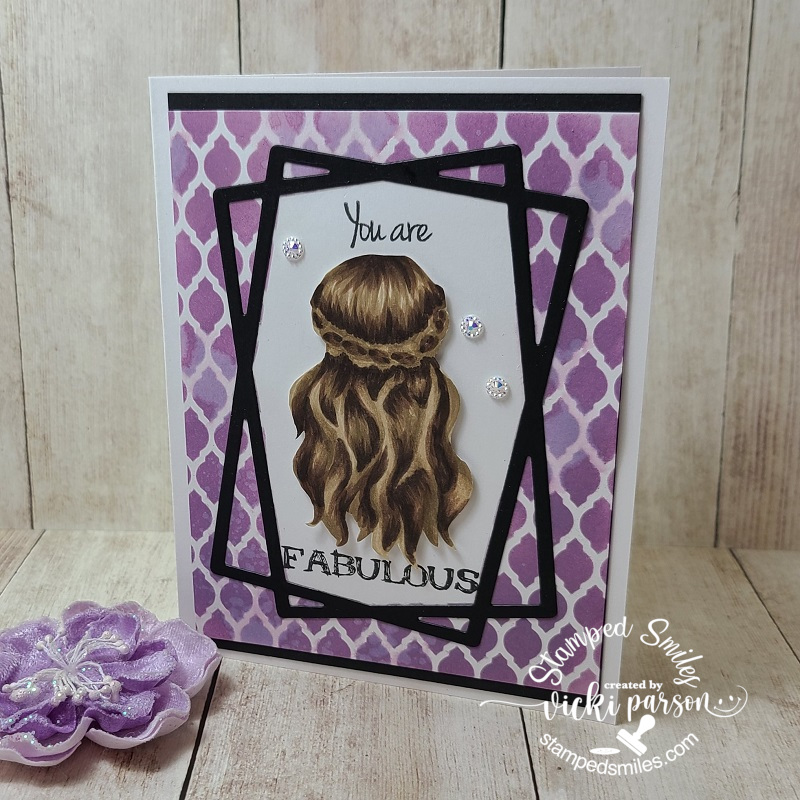
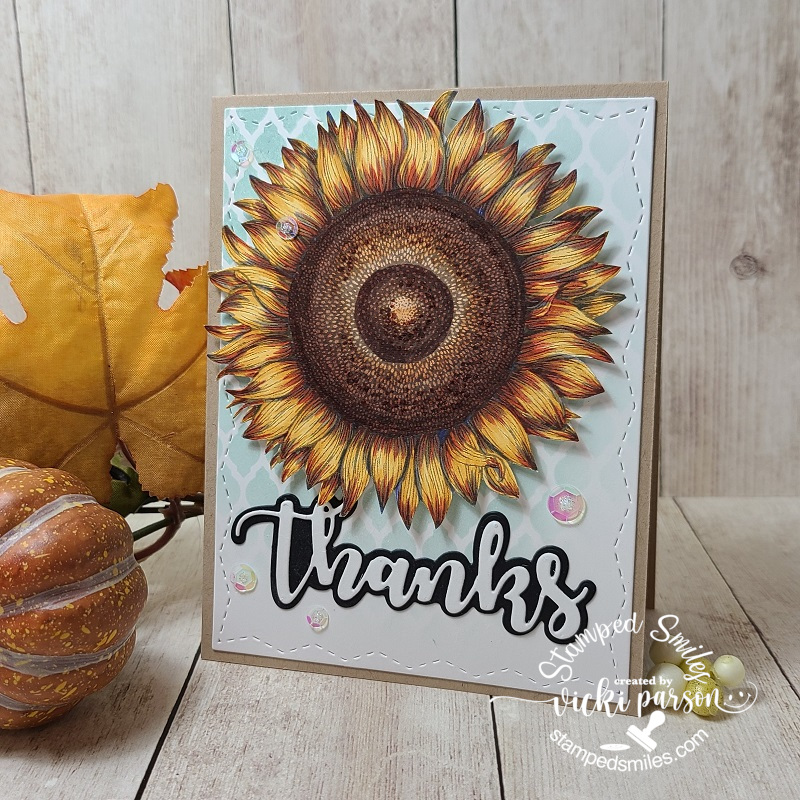
And now I also have some more finished kits that I’ve been working on since the Whimsy Stamps Virtual Workshop Weekend!  I’m still really enjoying finishing them up and still have MANY more to do!  I’m so amazed at how much we received and very happy that there were several Christmas projects which I’ll be working on next!  For now…here’s more of the finished kits:

This was for kit 12 and I LOVED the cute dragon in the purples! This card is going to my youngest grandchild as she is my “PURPLE girl”!!
This is the INSIDE of Kit 12. It was a really cool “FUN FOLD” design! I put my image off to the edge so I had room to write a message.
This was for Kit 6 and the entire scene was made using Copic coloring including the sky background! The squirrel and pumpkins were popped up with foam tape.
This was for kit 21 and my first time practicing with no-line coloring!
This was for kit 22. This mega large sunflower is gorgeous! Loved coloring and fussy cutting it out!

I hope you’ve enjoyed my projects and post today!  I sure have been having fun just playing and trying out different things with my cards.  I do look forward to finishing up these kits as we get near the Christmas time!  So be watching for more of those!

Thanks for dropping in with me today and I’ll see you again soon!

Challenges: (For Retirement Card ONLY)

  1. Colour Crazy Craft – Anything Goes + coloring
  2. A Perfect Time to Craft – Anything Goes Nov
  3. A Bit More Time to Craft – Anything Goes
  4. Crafts Galore Encore – Anything Goes Nov
  5. Love to Craft – LTCCB52 Anything Goes Nov
  6. QKR Stampede – #407 Anything Goes
  7. Lil Patch of Crafty Friends – #145 Anything Goes
  8. The Corrosive Challenge – #11Nov Anything Goes
  9. Pammie’s Inky Pinkies – PIP2044 Anything Goes

Dia de los Muertos with Monsters/Ghouls for {Cupcake Inspirations} Reminder

Hello there friends!  I hope that you’ve had a wonderful Halloween weekend!  It always go by so fast for me which is why I’m so happy that there is STILL one more week left for our {Cupcake Inspirations} Challenge with the theme “Monster/Ghouls“!  (This can be interpreted in several different ways…not just for Halloween!)

So I hope that you will be able to share something for our current challenge before it ends this week!  We look forward to seeing your makes!

Now, I realize that Halloween day is past us, BUT…my sister-in-law celebrates her Mexican tradition of Dia de los Muertos which is “Day of the Dead” and it starts on Halloween at midnight and ends November 2nd.  So I thought I would share this fun “ghoul” card representing the Holiday that I’ve made for her:

I don’t own any “sugar skull” type of stamps, but I have seen some and think they’re really cool looking!  I did have this stunning card panel from a past card Kit that is printed on toner ink so that you can foil over it.

I started by ink blending over it with Worn Lipstick, Spun Sugar, Shabby Shutters and Peeled Paint Distress inks and then I took some Rose Gold Deco Foil and ran it through my laminator to get that pretty foiled background.  I then cut it out with the MFT Wonky Stitched Rectangle die and mounted it over an A2 sized top folding black card base. 

For the Sugar Skull, I cut it out with my Cricut Explore machine in the several different colors and paper pieced it onto the white skull using a piece of sticker sheet behind it.  It was popped up over the card with foam tape.

I printed out the words on my computer and die cut it out with a MFT border die and sponged around it with some Worn Lipstick and Spun Sugar inks that I’ve popped up over the card with foam tape.  Lastly, I added some rhinestones on each side as well as the eyeballs.

I also forgot that I used some black detail stickers in the corners of the design.  I’ve added some to the inside and then printed out a Spanish poem relating to the Holiday.

Thanks so much for dropping by today friends and I’ll be seeing you soon!💀

Challenges:

  1.  Crafty Cardmakers – “Things that go BUMP in the Night” (sadly closing blog.  Best wishes)
  2. Aud Sentiments Anything Goes + sentiment
  3. Krafty Chicks – #531 Anything Goes (Happy 10th birthday!)
  4. Cute Card Thursday – #658 Sparkles
  5. Creative Fingers – #196 Anything Goes

Birthday Penguin Slimline🐧

Hello friends!  There are SO many things going on this month and I’m having such a hard time keeping up with all of it!  After having some computer issues and trying to figure out what’s going on…I realized how far behind I am with my crafting!  I have waaay too many new things I want to play with too!  Really hate it when that happens!🤨😅  Totally missed out on World Card Making Day this year…however…

..before the WCMD “Inspired By” challenge ends over on the Whimsy Stamps Inspiration Blog, I wanted to be sure to play along which is using one of the design team’s projects for inspiration to create your own project:

I have made this fun slimline card using the Whimsy Stamps Penguin Poop stamp set along with the Whimsy Stamps Slimline Connected Bubbles die for my card today.  I am a huge penguin fan and these guys crack me up so much!

I wanted to keep the colors in a cool tone.  Over a piece of Bristol Smooth watercolor paper, I’ve cut it down to fit over a black side folding 3.5″ x 8.5″ slimline card base.  (I use the 8.5″ measurement because I find the size easier to use with a piece of 8.5″ x 11″ cardstock.  Then I only need to cut at 7″ on the long (11″) side and score in half at 3.5″ on this same side.  I am then left with another piece for layering over the slimline card if I choose.)  It’s easier to remember also…which is something good for me right now! LOL!  I digress…

I’ve used the Pink and Main blender brushes to ink blend Weathered Wood, Shaded Lilac, Broken China and Stormy Sky Distress Oxide inks for the background and then I used a water spritzer to make the droplet pattern over it.

I’ve cut the Slimline Connected Bubbles die from some Brutus Monroe Mermaid Glitterstock and glued it over the ink blended background.  I had a left over border of a punched out goo drip from white glitterstock, so I used the die to cut out pieces to glue over top of some of the circles from the die.  I stamped the sentiments inside a couple of the circles where I wanted with black ink and then used some foam dots to pop out the stamped and fussy cut penguins.

Lastly, I’ve taken a black marker to make some stitch marks along the edges of the ink blended panel and glued on some clear sparkling crystals.

Here’s closer view of one of the penguins.  It was very easy to grab a couple of Copic markers to color them in with and they were pretty easy to cut out along with the balloon.  I’ve used a black twine to connect the backside of the balloon and added a dab of glue to the penguin’s hand.

I used a glitter brush pen over the balloon and then added some glossy accents to both of the penguin’s big eyeballs.

This was such a fun card to create and it will be perfect for a winter birthday I will have coming up soon!🥳  The way I’ve been crafting behind, this will help out to have ready on hand when I need it!

Thanks so much for stopping in today friends!  I hope you’ve enjoyed my slimline card and that it has brought you a smile!  I’ll be seeing you again soon!

Challenges:

  1. Whimsy Stamps Inspirations – WCMD Inspired By challenge (Bev’s card)
  2. Shopping Our Stash – #430 On Trend Slimline
  3. Crafty Animals – #43 Anything Goes + animal
  4. 2 Crafty Critter Crazies – #43 Anything Goes + animal
  5. Moving Along with the Times – #123 Animals and/or Birds
  6. Cute Card Thursday – #654 Anything Goes
  7. Craft Rocket – #75 Add Sparkle
  8. 613 Avenue Create – Anything Goes optional winged things

Color Challenge Reminder for {Cupcake Inspirations} – Hugs Enclosed

Hello friends! I hope that you’ve had a great weekend! The weather has really started to cool down over the weekend and I can feel the Autumn breeze in the air right now!

I’m swinging in today to remind you about our current color combo challenge over at {Cupcake Inspirations} and the second card I’ve made using the colors GREEN, PINK and LIME:

If you remember my card from last week, I had so much fun blending the green ink colors on the grass, I thought I’d continue with another panel of the ink blending on this background too!  I also spritzed it with water and then once it was dry, I stamped the images from a Simon Says Stamp Crafty Friend stamp set with black ink.  I’ve used the stamp set throughout the card with the cut out scissors and envelope accents and the strip across the pink piece too.

I did white heat emboss the sentiment from the stamp set over the black strip on the heart.  I used just a set of Hero Arts Inifinity Heart dies to cut out the pink heart and another will vellum behind the heart and pink strip.  The pink heart was popped up with craft foam and so was that little envelope over top of it.  I did run the pink die cut heart through a Tim Holtz embossing folder and rubbed some white ink over it.

The blended ink and stamped background was cut out with a stitched rectangle die and layered over a black and then a green panel, which was then layered over top of an A2 sized top folding white card base.  I finished the card with some pink die cut hearts and some Studio Katia Cupid’s Kiss Crystals. (So happy to have again pulled out an older card kit!)

Here’s a closer look at the images on my card.  I just fussy cut the envelope and scissors WITH my scissors.😂  For the open areas in the handle of the scissors, I just took a small hand held circle punch to create the circle openings.

I have taken one of the pink hearts that I die cut for my background and used one over the tiny envelope on the heart.  The crystals add a nice bit of sparkle to the design too.

I think this will be a nice card to send out to one of my crafty friends!  I think maybe we could all use a crafty hug right now so maybe this will help!  Thanks so much for stopping in today and I’ll see you again soon!

Challenges:

  1.  A Bit More Time to Craft Anything Goes
  2. QKR Stampede – #404 Anything Goes
  3. Creatalicious – #195 Anything Goes optional: use a punch
  4. Aud Sentiments – Anything Goes + Sentiment
  5. Creative Knockouts – #368 Anything Goes
  6. Creative Fingers – #193 Anything Goes

Pink & Main Video Hop with Hello Autumn Slimline

Hello friends!  I hope you’ve had a fantastic week!  It seems like this month is flying by!

I’m excited to share with you a fun video hop collaboration with Pink and Main on my You Tube Channel today! (Be sure to check it out on MY VIDEO because there is a giveaway and you’ll need to leave comments on the videos to be entered to win!)  So head on over to see the wonderful inspiration with the Pink and Main products going on!

Here’s the fun Autumn themed slimline card I’ve made for the video hop today:

So Pink and Main has come out with some fabulous new products which I’ve used for my card here and I’ve added some fun techniques to use with some of those products as well!

The background was really fun to create using the Pink & Main Blending Brushes along with the new Crackling Campfire Distress Oxide Ink color that just came out!  I’ve also used the wonderful Leafy Stencil from Pink & Main over the background too.  The cups and leaves were also colored using the oxide inks and a waterbrush which you can see in my video as well as how I’ve inked and cut out the one image backwards so I have two cups with the handles in opposite directions on my design here. 

You can check out how I’ve put this design together and the techniques I’ve used in this video below, or to leave a comment and see the link to the next person in the video hop, CLICK HERE to go to the video on You Tube.

I absolutely fell in love with that Need to Venti stamp set and coordinating dies!  I loved that older Christmas Mugs stamps they had previously came out, but Autumn is awesome to add to my collection because it’s my favorite time of the year!  So be sure to check out how to stretch out the use of this set in video above!

The Blessings slimline die was so fun to use on my card too and I love that the frame cuts out separately from the center and there was room to layer behind it before attaching to your slimline card base.  The Brutus Monroe Copper Glitterstock was the perfect accent behind the scallop frame. That frame was cut out with several layers of cardstock and stacked together for thickness.

The same Copper Glitterstock was used to cut out the sentiment dies as well.  I’ve used some vellum to layer behind the Autumn sentiment, which the backing diecut was also included in this same slimeline die set!  The final measurement of my slimline card was a piece of brown cardstock measuring 8.5″ x 7″ and scored at 3.5″ in the center.  The finished card will fit inside a #10 envelope when closed.

Here’s a closer view of the details with my colored cups using the distress oxide inks and waterbrush.  I’ve also used the same Need to Venti stamp set and oxide ink colors to stamp the leaves and die cut them out to arrange over my scene as well.

I popped up the cups with foam squares and added some drops over the whip topping in the cups with some Nuvo Honey Gold Crystal Drops.

Hopefully you can see the pretty Autumn colors and dimension in the card.  I sure had lots of fun putting all of this together!

Thanks so much for dropping in today and I’ll be seeing you soon!

Challenges:

  1. Challenge Up Your Life – Autumn Mood 
  2. The Paper Funday – #21 Anything Goes optional:  Fall/Autumn
  3. Dream Valley – Embossing wet/dry (embossed cup images)
  4. The Sisterhood of Crafters – Autumn Inspiration
  5. CCEE Stampers – CCEE2037 Slimline Cards
  6. Not Just Cards – Anything Goes
  7. Crafting Happiness – Anything Goes
  8. Pammie’s Inky Pinkies – PIP2037 Anything Goes
  9. Simon Says Stamp Monday – Frame It

Color Combo for {Cupcake Inspirations}

Hello friends!  I hope that you’ve had a very pleasant weekend!  I enjoyed spending some time visiting with my son for his birthday as I haven’t seen him for a while, so it was nice to laugh with him.  If you haven’t checked out the card I made for his birthday, check out my last post for the blog hop along with a video I shared!


Today starts a brand new challenge over at the {Cupcake Inspirations} challenge blog!  We are Playing with a fun color combination this time using the colors: Lime, Pink and Green It’s not only a yummy cupcake, but yummy colors too!  Looking forward to seeing what everyone comes up with!

Here’s my take with the colors for my first card for the challenge:

For some reason, the first thing I thought of was gnomes!  So I grabbed this really adorable Gnome Matter What clear stamp set from Whimsy Stamps and colored up that gnome and frog pair!  I fussy cut them out and made a grassy hill for them to sit on by ink blending a panel that was spritzed with water and then cutting it out with a mushroom border die from Lawn Fawn.

I also used the Lawn Fawn Watercolor Wishes paper pack in the pink shade for the background behind the grassy hill which I stamped the sentiment over and gently rubbed some more pink pastel over it.

The entire panel was cut out with my fave Wonky Stitched Rectangle die from MFT and layered over a bright pink A2 sized top folding card base.

A closer look at the images, you can see how I’ve got them colored up with Copics, but I’ve also added the usual details to the images with a white gel pen for the gnome’s cheeks and flower center.  I went over the flower with a glitter brush pen.  I’ve also added some dots to his shirt with a metallic green gel pen and then went over his buckle with a gold gel pen.

I’ve just attached the gnome with liquid glue, but I’ve used foam tape to pop up the frog pair and then I’ve added some more dots with the white and green metallic gel pens and then went over their eyes with glossy accents for shine.

I think maybe this is a fantastic message for all of us right now.  That gnome looks pretty chill!😉

Thanks for joining me today friends and I’ll be seeing you soon!

Challenges:

  1.  Love to Scrap – LTSCB137 Anything Goes September
  2. Crafty Catz – #518 Anything Goes optional:  gems and/or glitter
  3. Creative Craft Cottage – Include an animal (frogs)
  4. Colour Crazy Craft – Anything Goes + coloring

{Cupcake Inspirations} Bithday Celebration Day 12 -Party Ending Soon!

Here we are friends!  This is my final day of inspiration to share with you on Day 12 of the special celebration over at {Cupcake Inspirations} for our 500th “birthday celebration” challenge!!  WHAT A PARTY IT HAS BEEN!! WOW!🧁🎉

Today, we are highlighting with our last but not least sponsor Inky Stamper – Please check out the challenge blog for more details about this sponsor.

The DT was generously given a stamp and die set to use for our creations:

Vicki-CIC500-Day12-InkyStamper

I have used this Oh so adorable Cupcake stamp and die set for my 4.5″ square card design.  So I thought it would be fun to create a fun little scene where you have the mouse coming out of his little “mouse hole” in the wall where he discovers this delicious looking cupcake with the sprinkles falling about! 😂

I started by masking off the middle of the square panel and created the “floor” by ink blending from the middle out.  I then moved my masking by covering that area up and used the negative from an oval die cut area to ink blend the “mouse hole” on the scene.  Lastly, I wanted it to look like a “wall”, so I just took a brick stencil and inked over it to go around the “mouse hole”

I stamped, colored and die cut the image and then popped him up with foam tape over the scene and stamped the sentiment underneath him.  I just glued on the sprinkles for the card.  I mounted the image panel over a die cut scallop square and then added a strip of sparkle washi tape over the card base.  (The scallop square panel was popped up with some craft foam.)  Hard to see in the photo, but I’ve brushed some glitter over the cupcake frosting!

Thank you so much for joining me here every day to check out the inspiration I’ve made from each of our sponsors.  I’m so glad that you took the time to celebrate right along with us!   I’ll be seeing you soon!

Challenges:

  1. The House That Stamps Built – A2620 Anything Goes
  2. Simon Says Stamp Wednesday – Anything Goes
  3. Cute Card Thursday – Inky! (used distress inks, masking and stencils for background)
  4. Creative Knockouts – #365 Anything Goes

Finishing Up Summer School With Cupcake Creations!🧁

Hello friends!  Hope you’ve had a great week!  Wow…it’s Finally Friday!  I’ve been SO busy “behind the scenes” and I will be getting to all of that later on, but I needed to squeak in with the final creations for the MFT Summer School!

I finished up Day 2 with my “smile rainbow” and now for Day 3, they’re asking for a “symmetry” style of creation.  I was told that basically it’s something that if you were to split it in half, it would be exactly the same on the other half…so this is what I thought of:

Vicki-MFTSummerSchool-Day3Symmetry

I was so excited about getting the My Favorite Things Cupcakes card kit, so I was determined that I was going to pull it out and use it for the rest of my Summer School cards! LOL!  It’s such a cute set with the dies and sentiment stamps!  I really had fun!

I used some papers from the kit and sponged ink around the edges of everything pretty much.  I just used the two cupcakes side by side for the symmetry class.  I just have opposite colors of sprinkles.  I added the red cherry on top, covered with the glitter brush pen and then some glossy accents.  (The glossy accents really got a work out!😮)

Vicki-MFTSummerSchool-Day4Ombre

So Day 4 class was “ombre” and that pretty much called to me to use the stencil from the card kit (sprinkles in background) and then I just heat embossed white over white and then used inks for the emboss resist technique moving the colors from lightest to darkest to get that classical “ombre effect”.  I also added a die cut cupcake that I used the same ink effect over it.  I die cut the words from the kit with the dark papers I used for the base of the card.  I finished with some sparkly crystal accents to finish it off!

Vicki-MFTSummerSchool-Day5WhiteSpace

And last but certainly not least was Day 5 “White Space” class.  I don’t often make cards like this, but I honestly love those CAS style cards, but I always want to “teeter” on the fine line between CAS and not…so I always think I’m not doing CAS.  I’m just not comfortable with the “CAS” definition or “rules” of what is or isn’t CAS.  I just feel happiest doing whatever happens to work out in my plan for a design…that’s pretty much it!    Be happy and you’re good!

I used this class to also follow along with the MFT sketch challenge going on as it looked like it was a good sketch for making a “white space” design.

I started by masking off the square and sponging lightly around it, I white heat embossed the sentiment over a black strip and added some silver ink over the stencil again and then attached the cupcake over top with the papers…and added the cherry on top with glossy accents too!

I finished it off with another little flag die from the kit and some silver sequins!  I like how it turned out!  I think I deserve a cupcake after all the creations I made!!😋

I hope you’ve enjoyed my creations today and I really appreciate you stopping in to see what’s going today!  Have a fabulous weekend!

Challenges:

  1.  MFT Summer School– Day 3 Symmetry
  2. MFT Summer School – Day 4 Ombre
  3. MFT Summer School – Day 5 White Space
  4. My Favorite Things – Wednesday Sketch Challenge MFTWSC502 (my last card and I flipped the sketch on the side)
  5.  Crafty Creations – #412 August Anything Goes
  6. Craft Rocket – #73 Birthday
  7. Creative Fingers – #191 Anything Goes
  8. Arty Divas – Bonus Birthday Challenge
  9. Crafty Friends Anything Goes

Nautical for {Cupcake Inspirations}⚓

Hello friends!  Happy August!  Really hope you’ve had a nice weekend!

Today starts a brand new challenge over at {Cupcake Inspirations} and the theme this time is “Nautical”!

I love the nautical theme and looking through my stash, I came across this older stamp set that someone had gifted to me and I thought I’d pull it out to play with:

Vicki-CIC499-nautical

This image is from Inkadinkadoo called “Down by the Seaside” that I’ve inked up in black ink over a piece of white cardstock.  I used some masking tape to mask off the areas around the lighthouse to make the “light beams” and then used my ink blending tool to go around the edges with blue inks with the darkest color closest to the edges.

I’ve die cut it out with a Taylored Expressions Frayed Edge Stacklets dies and then I popped it up with foam tape over a hand ripped red piece of cardstock that was sponged around the edges with white ink.  Before attaching the top layer over the red, I’ve added some twine around it and made a bow with a compass charm (by Tim Holtz) attached over top of the image panel.

These layers were attached to an A2 top folding Navy card base that I’ve stamped a compass image from a Stampin’ Up! stamp set called “Wherever You Go” with white ink.  I’ve also used a sentiment from this same stamp set and stamped it over the image panel in the top right corner with black ink.

Vicki-CIC499-nautical-close

Here’s a closer look at the image where you can see the sponging I’ve done on the background.  The rest of the image was colored in with Copic markers in certain areas.  I didn’t want to use too much color as I didn’t think it really needed it.

Hard to tell in the photo, but I’ve covered the water, sun and lighthouse “light beams” with a glitter brush pen.  You really notice it IRL when you pick it up and move it around and see the sparkle.

Vicki-CIC499-nautical-flat

I hope that you’ve been inspired with my creation today!

Thanks so much for stopping in and I’ll be seeing you soon!😉

Challenges:

  1.  Arty Divas – #27 Anything Goes
  2. Watercooler Wednesday – WWC282 Anything Goes
  3. Simon Says Stamp Wednesday– Anything Goes
  4. Krafty Chicks– #518 Anything Goes
  5. Creative Knockouts – Tic-Tac-Toe #361 (I used bottom row across: distressing, sentiment, twine)

Caffeinated Changito☕

Hello there friends! Really hope that you have enjoyed your long Memorial weekend! The weather finally turned warm and once it turned warm, it REALLY turned warm and humid over my way! So we were able to plant some flowers in our garden pots outside and enjoy some cookout time too!

I noticed that the “Spring/Summer Coffee Lovers Blog Hop” had started up this weekend and I thought it would be a great opportunity to pull out some old stamps and have some fun with it while making a masculine card for the up-coming Father’s Day holiday too:

Does anyone remember these cute little “Changito” stamps back in the day?! I have used the Changito Coffee stamp (only found this one online) and the sentiment to go with it too! I actually bought these wood mounted rubber stamps years ago at a convention I had went to and have kept them hoarded like my other old stamps. LOL!

I stamped the image on Copic blending card and then again on some blue gingham background paper for paper piecing his PJs in! For the sentiment, I heat embossed it over my background with some appropriately named “Coffee” EP which has a metallic copper with some brown speckling in it…very cool. the store is no longer active that it came from.

For the background of this card, I had some fun playing with my Oxide Distress Inks in Vintage Photo, Broken China, Scattered Straw and touches of Espresso. I sprayed and dried layers as I went. I even took the bottom of a jar I had laying on my table to ink up some Espresso ink to make the “ring” marks over the background. I also took some more of that “Coffee” EP and sprinkled some over the background for even more distressing.

I wrapped some twine around it and attached it to an A2 sized white card base that I sponged around the edges with some Vintage Photo ink.

Here you can see a better look at the image and how I’ve got him colored up with Copic markers. You can barely see the gingham pattern in his paper pieced PJs, but I thought it was cute! I also took a black Copic liner and drew lettering on the coffee cups. I added just a hint of sparkle over the coffee inside the cups with a Spectrum Noir glitter brush pen. I also took a black gel pen to dot his eyeballs, the buttons on his PJs as well as dot the bunny slipper eyes. I think that little detail really makes his pop more with a bit of character.

The image was cut out with a stitched circle die and then I also cut out an additional circle to mat behind him, which I took a VersaMark ink pad and then used the “Coffee” EP to heat set along the edges of it so it has the same look and texture as the background and sentiment. This was attached over the background with twine.

Lastly, I’ve taken some brown colored sequins from my stash and attached them to the background and filled the centers with some Nuvo Honey Gold Glitter Drops.

Hope you’ve enjoyed my masculine and quirky card for today! Thanks so much for dropping in and I’ll be seeing you again soon!!😉

Challenges:

  1. Spring/Summer 2020 Coffee Lovers Blog Hop – Coffee/Tea/Cocoa Related Project

2. Addicted to Stamps and More – #391 Anything Goes

3. Cute Card Thursday – #635 Critters

4. Creative Knockouts – #351 Embossing Delight (wet or dry)

5. QKR Stampede – #399 Anything Goes

6. Simon Says Stamp Monday – “Going Around in Circles”

7. Pammie’s Inky Pinkies – PIP2021 Anything Goes

8. Die Cut Divas – Make it a Beverage + die cut/embossing folder