It’s Never Too Latte For a Friend

Hello friends!  Hope that your week has been going great so far and you’re getting ready for Thanksgiving Day for my friends in the U.S. that celebrate.  So since Christmas is coming up quickly, I thought it would be fun to share a couple of little gifts for a friend you might like to share coffee/cocoa with:

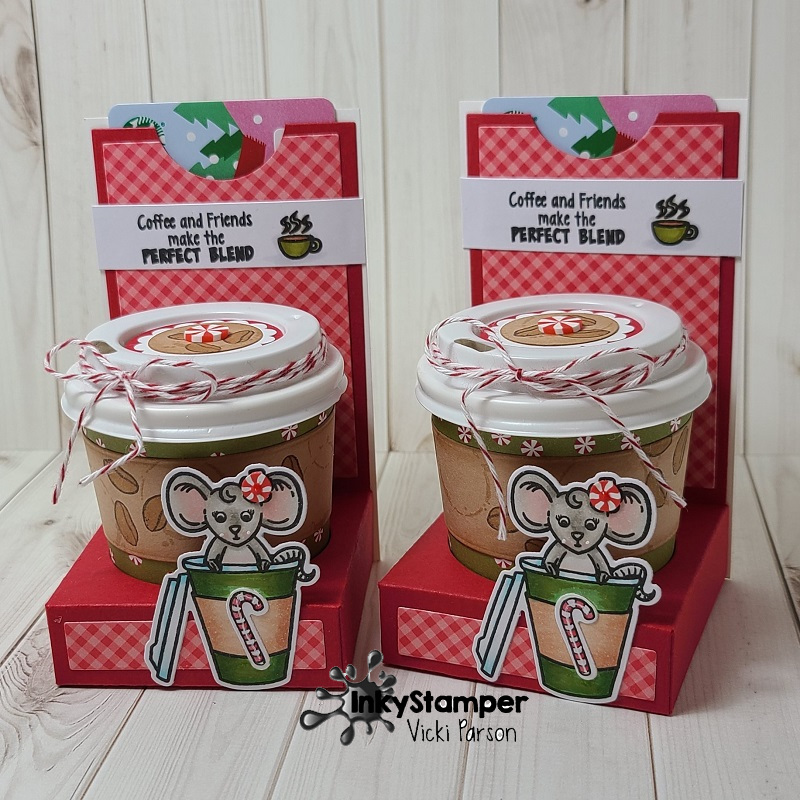
Aren’t these little mini coffee cups with the gift card holder so fun?!  I had fun making and gifting them!  Of course, I love coffee, but if your friend would rather do a cocoa, that will work for this too!  I’ve used this adorable Inky Stamper Latte stamp set to create my project here with that adorable “Rosie” character popping out of the cup.  I colored and cut her out with the coordinating die.  For the “candy cane” image on the front of Rosie’s cup, as well as the “coffee ring stain” image on the coffee cup sleeve, I used the Inky Stamper Warm Beverages stamp set to accompany my design.  (There are some great cocoa images in there to trade off for the coffee too!)

This little mini coffee to go cups were found on Amazon (4 oz cups pack of 50 with lids) and there are tons of videos on You Tube on how to construct the holder for these.  I sort of tweaked mine from a die set that I’ve had for years, but there’s no reason to buy a die if you can create without an additional purchase.  I’ve added an additional backing with a pocket and thumb opening to hold a Starbucks gift card in.

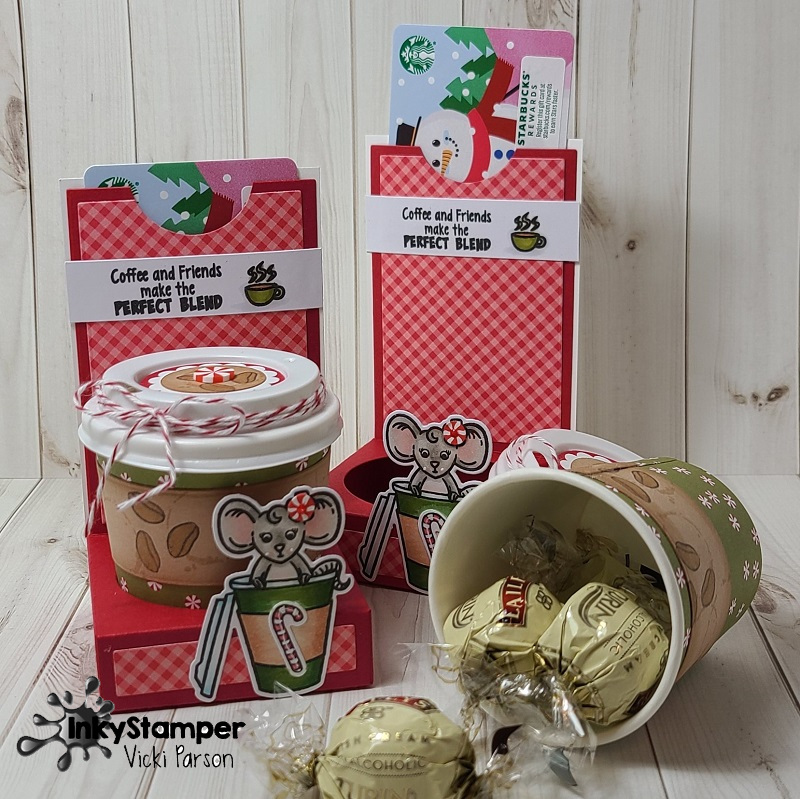
And then when you open the coffee cup, there is a great place to add some extra treats inside!  I chose to add some Bailey’s chocolate truffle candy inside of these cups.  You can also see how I decorated the cups with papers that has peppermint candies on them as well as the top of the lid, the cup sleeves with stamping and the red twine wrapped around the lid as well.  The little peppermints that I’ve added on the top of the lid as well as on Rosie’s head came from the Inky Stamper Christmas Candy Mix…love that container!  The Doodlebug red Gingham/Linen papers come from the Inky Stamper store as well.

And since the lid on the cup was not as secure as I would’ve liked it to be, I decided to wrap the entire thing inside of a gusseted cello bag and tie it up with some more of the red twine, which also made it look like a gift wrapped present too!

I hope you’ve enjoyed my project(s) today and have been inspired to create a fun gift for Christmas too!  Thanks so much for stopping in and have yourself a very grateful Thanksgiving Day!🦃

Challenges:

  1. Double D – Hot Beverages
  2. Sparkles Monthly – Dies and/or Punches (both used!)
  3. Creative Knockouts – Anything Goes
  4. Colour Crazy Craft – Anything Goes + coloring
  5. Crafty Catz – Anything Goes optional Christmas
  6. Creative Fingers – Anything Goes

Fall is Here with Craft Show Projects

Hello friends!  I was really hoping to post this yesterday, but hubby was around and I was trying to get many different things done at once.  As you might guess, I am frantically running around trying to get a good start and handle on getting items made up for my up-coming craft table!  I will have more on that below, but first, I’d like to share a card I made for the Lawn Fawnatics challenge before it expires too! LOL

Vicki-LawnFawn-FallisHere

As you may have seen in my past posting, I had gotten MANY Lawn Fawn items recently as I just adore Fall/Halloween and of course Christmas soon to follow!  It’s hard resist so many cool things that come out each year!  (If I worked myself ahead of time, then I would be less frantic and be able to actually slowly enjoy my new items!  LOL)

So for this card, I have used the fun Thanks a Latte stamp set as well as the Forest Feast stamp set for accents and sentiment.  I’ve stamped the tree stump in brown ink at the bottom of a vanilla panel that I’ve cut out using the LF Cross-Stitched rectangle die.  I also used a cloud stencil to sponge in some clouds in the background behind the stump.  I’ve stamped and colored with my Copic markers the other elements of the design and cut them out with the coordinating dies and arranged them on the stump panel.  I stamped the sentiment under the cup on a strip of vellum with chocolate ink and then heat embossed it with clear glitter EP and wrapped it around the card base with the plaid paper as well as the twine with the white heat embossed sentiment that was cut from brown cardstock with a banner die strip.  Lastly, I’ve added some shimmer over the liquid contents in cup as well as the leaves.

challenges:

  1.  Lawn Fawnatics – Mood Board

2.  City Crafter – Fall Colors

3.  Sketch Saturday – sketch 531

4.  Words 2 Craft By (W2CB57) – “Life starts all over again when it gets crisp in the Fall” – F. Scott Fitzgerald

5.  Simon Says Stamp Wednesday – “Pop It Up” (Popped up cup, leaves and whipped topping)

6.  Aud Sentiments – Fall + a sentiment


Now I’d like to share something that I’ve been working on for my up-coming craft show next month.  It’s coming quickly and I have many things to get ready for it.  I’ve not made these before for purchase, but I find that I am always in need of them and use them every year, so I thought these would be a fun way for someone to present a gift:

Vicki-ShakerGiftCardHolders-CraftShow

These are my “Shaker Gift Card Holders”.   I had made one in a previous post that I did earlier this year, but you may already be familiar with my “Shaker Money Holders” which I did a tutorial for on Splitcoaststampers.com a couple of years back.  CLICK HERE if you’d like to see that tutorial with a video I did.

As you can see, I’ve used the same Lawn Fawn stamp set that I’ve used on my card above as well as pulled in some other of those cute little images from other sets too!

I am going to be burning the midnight oil for a while, so I will probably have to wait to share more photos after my craft show finishes up, but I will take photos as I create so that I can also keep track of what I’ve made and how it all went over.

Hope you’ve enjoyed my post this evening and I’ll see you again soon!