Good evening friends! Tomorrow is about “LOVE” for Valentine’s Day! I hope that whatever you’re doing that you spend it with those that you love or at least tell someone how much they mean to you! I have a special post this evening that is dedicated or inspired by love. ❤️
First up is my art journal page with the prompt/theme of “LIGHT/KEEPING IT LIGHT” that I’m guest hosting this month for the Art Journal Journey Challenge. It’s been so fun to see all of the wonderful art created so far!
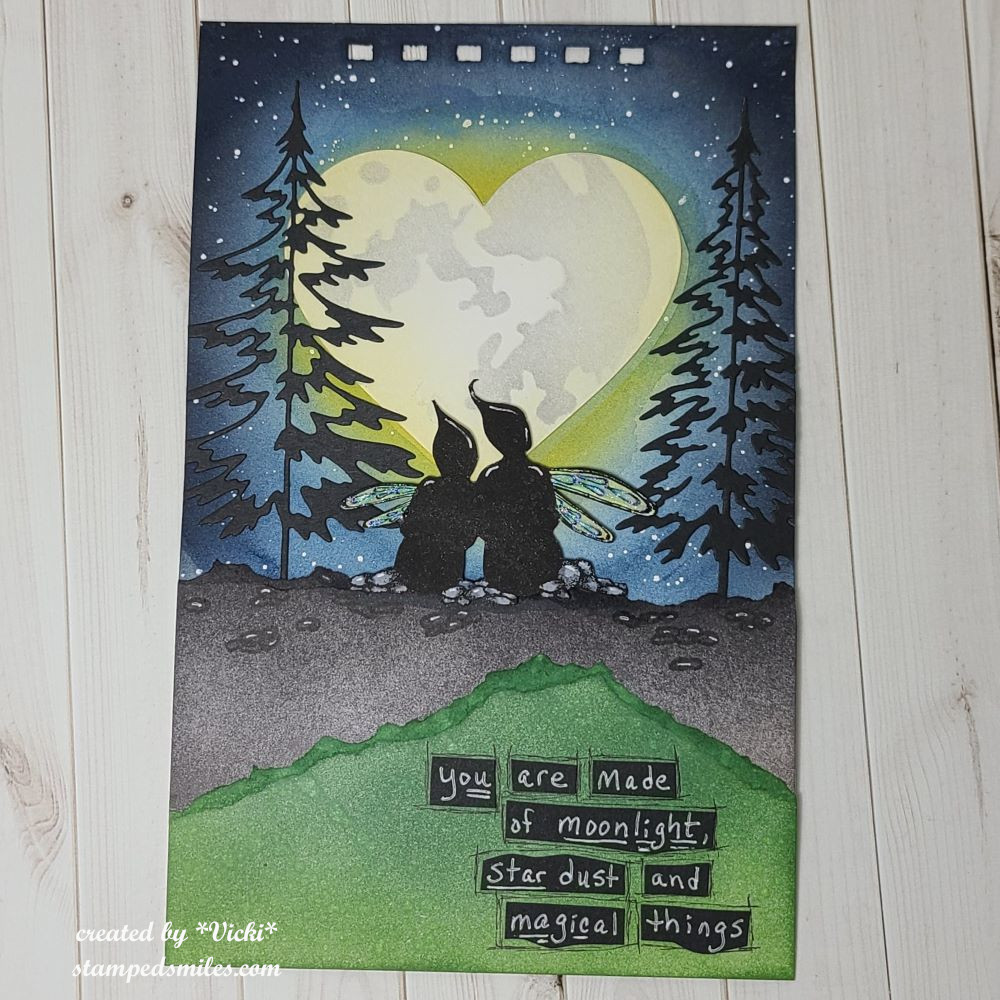
This page was inspired by not just the “light” prompt for the challenge, but it was also inspired by the love of my life. We have spent many moons together and have enjoyed our time in the moonlight as we both love nature and have spent some time traveling and seeing some beautiful things. I’m so thankful to have had these special memories with him.
For the background: I started with a 5.5″x8.5″ watercolor with pre-punched holes at the top with my Zutter machine. I used my watercolor to create the blue sky background with an idea of where I was going to place the moon. I left that area to watercolor in the yellow rather than the blue. I then used some white opaque copic watered down and splattered over top for stars. The “moon” was die cut in white with a heart shaped die and I added a moon stencil over top to make it look like a heart shaped moon and glued it in the center of the watercolor background.
The bottom portion was made with just ripping some cardstock and ink blending one with the greens and one with greys and black. I die cut the trees in black and glued them in place and then added the ripped layers over top.
I stamped the Lavinia Stamps “Star Gazers” stamp in black in and fussy cut it out. I colored the rocks they were sitting on as well as their wings and popped them up on the grey ripped border. I also hand drew more rocks around them and used a white gel pen to highlight. I added some glitter to the wings. Lastly, I wrote over black cardstock with a white gel pen, cut them out and attached to the ripped green border. I then used a black pen to doodle around the words.
Next up are a few Valentine cards that I’ve made. I’m actually really bummed because I would’ve shared another two cards that I made, but I forgot to take photos of them before I sent them out! I used a pizza theme and they were so fun!
This first one is for my husband and I’ve used the Craft Roulette #201 parameters to create it:
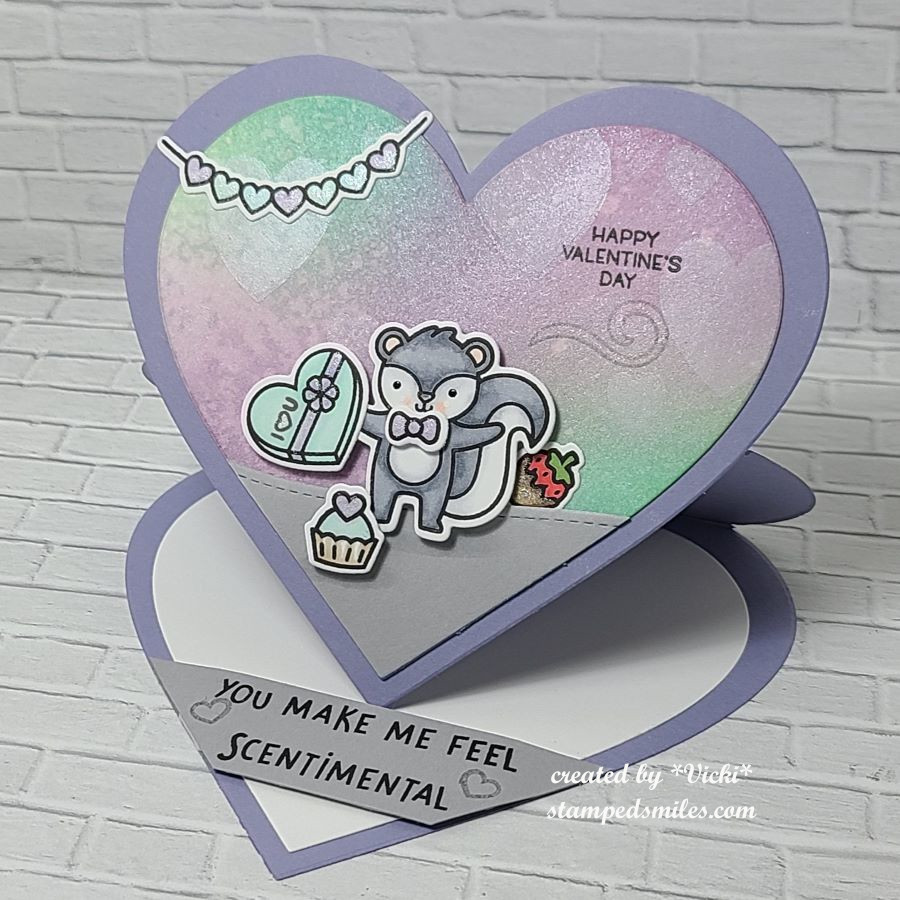
We had to make an easel card, so I decided to make a heart shaped one. I’ve used the cute skunk from Lawn Fawn with all of the “sweets”. (which was also one of the parameters) My husband loves his sweets! I also had to use “quiet” colors and some sort of bokeh, so I’ve made a bokeh background and used a solid heart stamp in white over the blended colors. It reminds me of those conversation hearts. This skunk makes me smile!
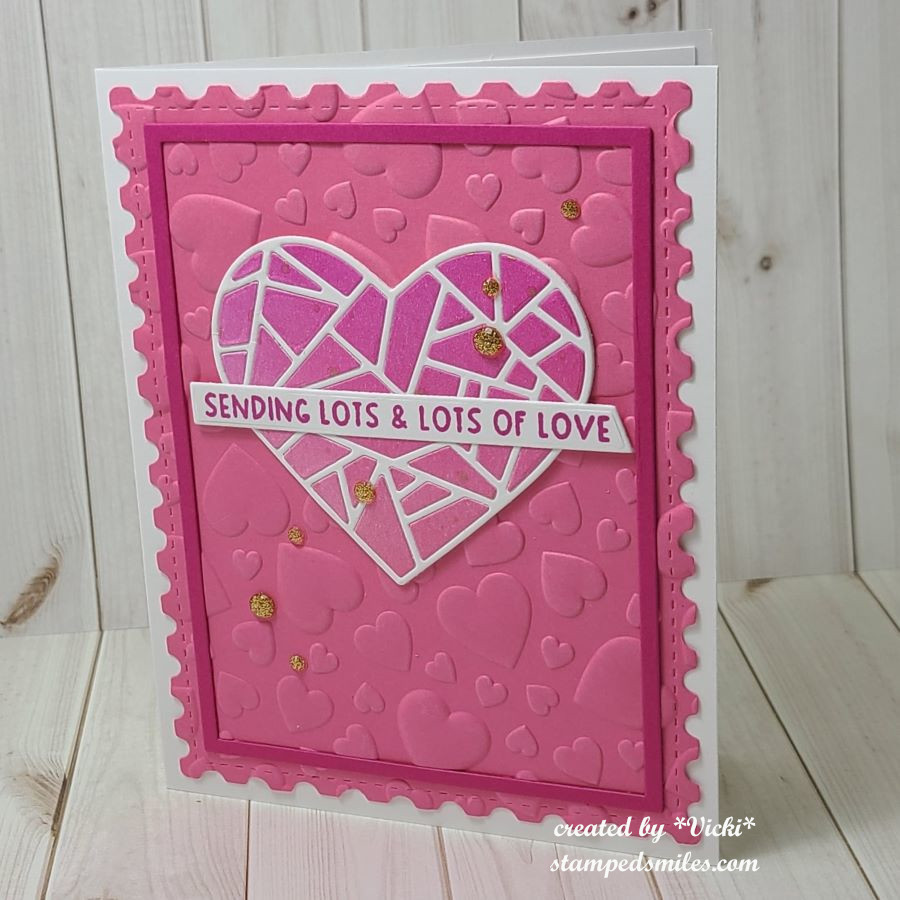
This is another fun card that I’ve made for a friend! I couldn’t wait to use this fun mosaic heart from Taylored Expressions. It came as a freebie for a limited time with a Valentine release. I like that it comes with the solid heart backer which makes putting it together easier. I ink blended a panel in two shades of pink and then die cut the heart with the pieces. I used the frame cut in white and then popped in the ink blended pieces inside the frame.
The embossed heart background was made after cutting out a piece of Bubblegum cardstock with the postage rectangle die. I stamped and die cut the sentiment over top of the heart and added some gold rhinestones.
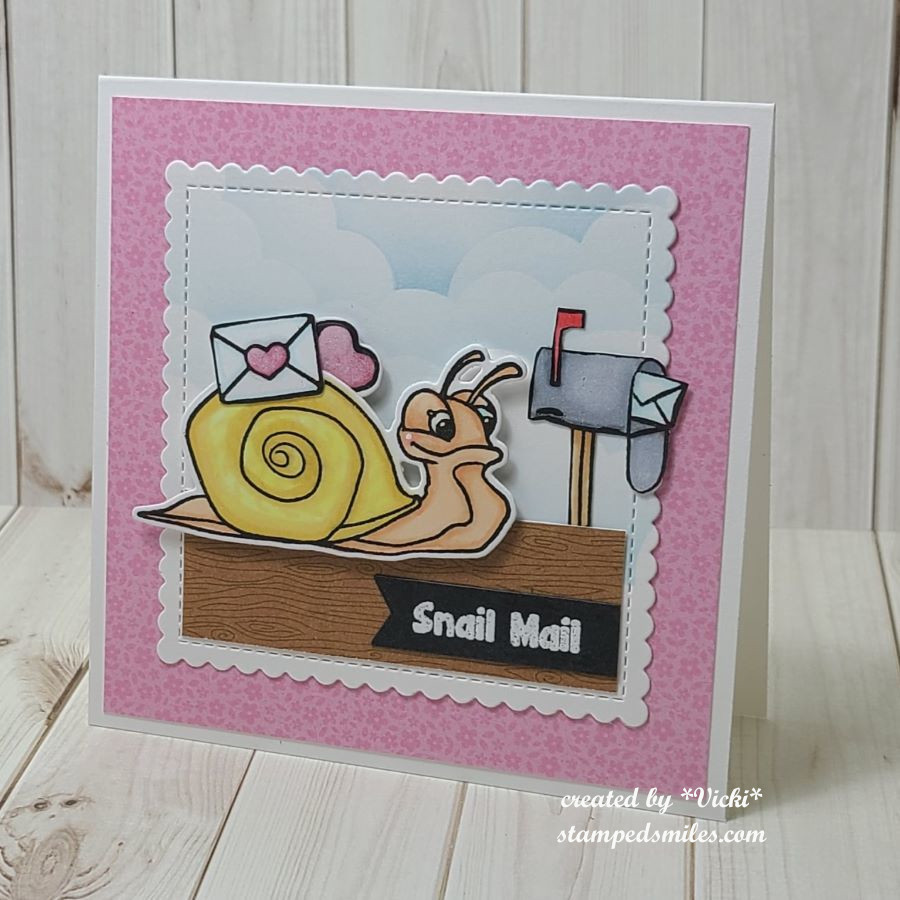
And this card was done for the Inky Stamper FB challenge which was to create a square card. I have made this one 4.25″ square and used the cute Snail stamp set along with some Doodlebug papers which you can also find in their store.
I just stamped, colored and cut out the images, added a border at the bottom and cut out a scallop square in white and stenciled some clouds at the top. More pink papers onto a white square card base and called it done! There’s nothing better than getting snail mail!
- I hope you’ve enjoyed my heart-filled post today and you’ve been inspired in some way! Thanks so much for stopping in and I’ll see you again on Thursday for a new challenge to try! Happy Valentine’s Day!
Challenges:
- Art Journal Journey – LIGHT/KEEPING IT LIGHT (art journal page only)
- Crafty Animals – #80 Anything Goes + animal (skunk card)
- Critter Crazy – #83 Anything Goes + critter (snail card)
- Pearly Sparkles – #92 Love/Have a Heart (skunk card)
- Creative Knockouts – #514 Love/Valentine’s Day (skunk card)
- A Place to Start – Monochrome (mosaic heart card – pink)
- Aud Sentiments – #310 Dies/Love/Wed/Anniversary + sentiment (skunk card)
- Creative Inspirations – For Someone You Love/Special Friend (mosaic heart card)
- The Male Room – Valentine/Use a Heart (skunk card)

- Crafty Catz – Anything Goes optional: Valentine/Love (snail card)