Challenge Up Your Life-Fun in the Sun

Happy June 1st friends!  This month will bring us into the Summer months which means it’s time for all of those fun outdoor activities!  I’m also getting ready for lots of things going on this month including my son’s wedding!  So I know I’ll be busy!  How about you?

This is my last time to be joining the “Challenge Up Your Life” challenge blog as a guest designer.  I’ve had a great time with them as a guest for the past three challenges and appreciate being asked!  Today their new monthly challenge for June is “Fun in the Sun“.  Hope you can share your lovely creations with us this month!  (Check out the challenge blog for details and inspiration!)  And here’s my take on this theme:

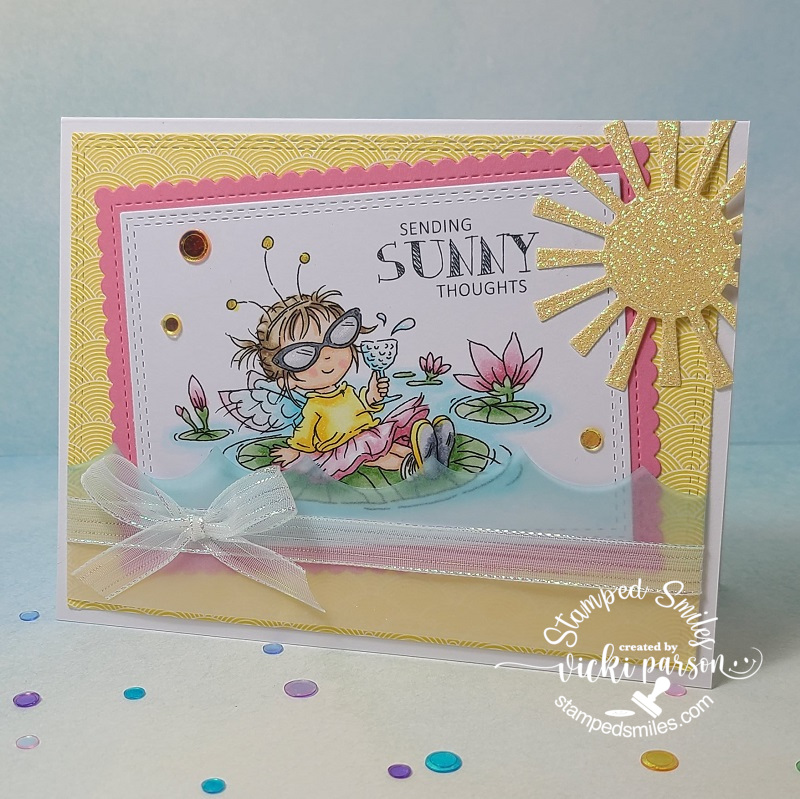
What could be more fun than a cute little fairy sipping a drink floating on a lily pad?!  Love those shades too!

There happened to be a good sale on a few digital stamps from LOTV recently and so I snatched a few and this was one of them that I fell in love with.  This one is called Water Lily, of course.  (The sentiment also came from the same company.)  She looked like she was having some “fun in the sun” for sure, so I colored her up with my Copic markers and die cut the panel out with a stitched rectangle die.  I’ve also used a scalloped stitched die to cut out a piece of pink cardstock to go with some of the colors in the image.

For the background papers, I’ve found some great *yellow rainbow paper from Lawn Fawn and then I used a *sun die from My Favorite Things and cut out with some yellow glitter cardstock. (*These items have retired) I took a wave die from Lawn Fawn and cut out a strip from vellum and used my blue marker to add some color towards the top of the waves.  To attach the strip, I wrapped it around the layers and glued it from behind.  I then added the ribbon with the bow and attached these layers to an A2 top folding white card base.

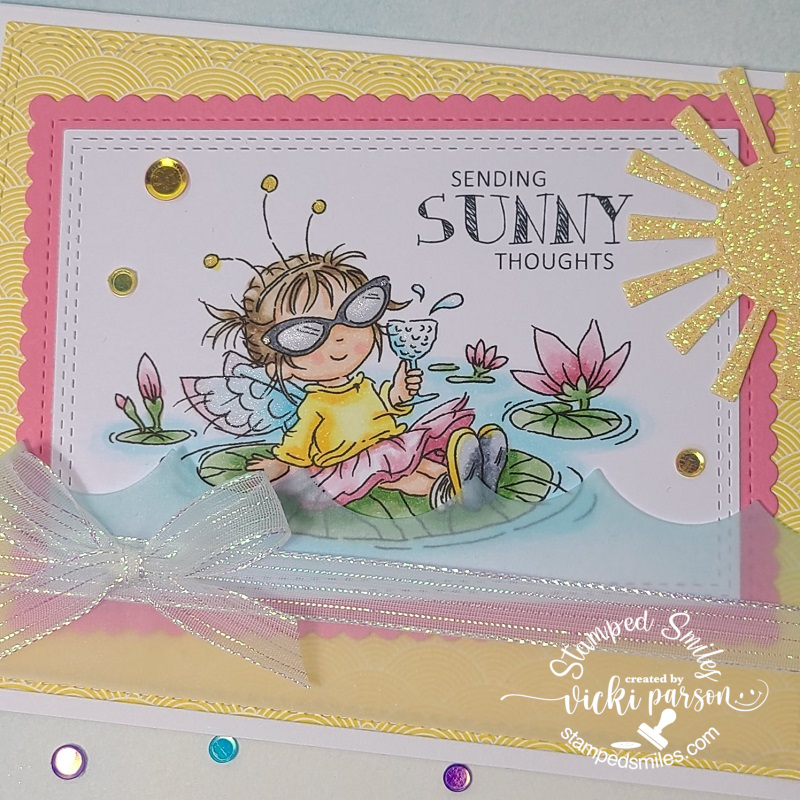
Here’s a closer look at the image with the coloring I’ve done.  I’ve used a gold gel pen to color in her head band and then a silver one to color in the little “dots” on the ends of her glasses.  I used a glitter brush pen over her sunglass lenses as well as her wings.

I finished the card off with a few colorful sequins.

So does that look like something you’d be having some “Fun in the Sun” with?!  I know I sure would!😎

I sure hope to see you playing along with us this month with your creations!  I also hope that you’ve enjoyed my inspiration as guest designer for these challenges the last few months.  Thanks for your support friends!

Challenges:

  1. Creative Knockouts – For the Kids
  2. Colour Crazy Craft – Anything Goes with coloring
  3. Crafty Catz – Anything Goes optional “All About the Girls”
  4. Creative Fingers – Anything Goes
  5. Allsorts – Anything BUT birthdays
  6. Everybody Art – Glitter and/or Pearls
  7. Creatalicious – Anything Goes optional: lots of bling/glitter
  8. Creative Moments – Summer is Here

Hello! Welcome to 2022!

Hello friends!  I hope you are all doing well and looking forward to a promising year this go around!  I sure am!  I know it’s been a while since I’ve posted, but I was having a bit of a hard time with having lost my “MOJO” for a period, feeling really down and not myself at all.  Christmas came and then on top of it, I’ve gotten sick.  I am starting to feel a bit better now, so I decided that the only way to get through all of this is by doing what I’ve always felt to be therapeutic, which is to keep on creating!  I just need to get back into the mindset of it again is all, but I do enjoy it when I’m creating as I’m sure my fellow crafty friends can relate to!😉  Appreciate your kindness to me always.

Since I really haven’t created much lately other than Christmas cards (as you can see from my previous post below), I’m going to share some projects that I had done at the end of last year including some commissioned cards I was asked to do:

Last month was a birthday card for my dad, so I’ve pulled out a special birthday kit that came out sometime last year from Simon Says Stamp.  Everything I’ve used on the card including the embossing folder, stamps, sentiment strips and paper all came from the kit.  It may be hard to see in the photo, but I’ve foiled over the “super happy” sentiment strip that was included with the kit and glued it over top of the cake slice.

I’ve added some glitter over the candle flame, the yellow stars and the inside of the white embossed “birthday” strip under the cake slice.  I pulled out the blue colors from the striped paper to color the image with using Copic markers and die cut it out to glue over top of the sentiment strip and embossed oval layer.

And speaking of birthdays, I was commissioned to do a 50th birthday card for a guy that is a professional painter and enjoys grilling outdoors.  The first image that came to my mind was this really cute LOTV image.  I printed him out and thought it would be fun to incorporate the birthday number above “the painter” to make it look like he’s in the process of doing it while the paint is dripping everywhere.  So while the boy painter was printed out, I stamped and embossed the numbers above him.

My husband had the idea of the little grill along the edge going “up in smoke”.  So I created a “ground” area for the ladder and the grill to be on.  I stamped the grill image, colored it in and then a liner pen to draw the line to establish the separation.  I then ripped the corner above the grill and sponged some Black Soot distress ink around the grill and corner edging.  I didn’t want the background to be white or black, so I dug out some brick style pattern paper to place behind that corner area before attaching it to the card base.  Hopefully there were some chuckles from it!

So for the inside of the card, I thought it would be fun to take this corner border die that I received from a Halloween class and make it look like the red paint drip continued on the inside.  Then I found this really funny sentiment to go along with the grilling bit too!  I also sponged some more of that Black Soot distress ink around the edges.

These were really fun cards to do and I enjoyed the coloring process so much!  I find that coloring images really helps me get through some creative blocks…even if it’s a simple image or something that I don’t use, so I’m thankful to at least to be able to do that.  Hopefully I can get back into what I enjoy doing here.

I know people sometimes struggle with masculine style cards, so here are a few examples of cards that I came up with for men.  Hope it helped with some ideas for you too!  Thanks for stopping by today and I’m glad you did!

Challenges:

  1. 613 Avenue Create – Anything Goes
  2. Stamping Sensations – Anything Goes with stamping + use a die (top card only)
  3. Lil’ Patch of Crafty Friends – #173 Anything Goes
  4. Pammie’s Inky Pinkies – Anything Goes

Essential Worker Chef

Hello friends! I hope that your week is finding you in a good place right now. Sometimes I feel a bit overwhelmed with things that are going on in the world, but I am so thankful that I have the crafty time to keep my mind creative and music to help alongside to keep on keeping on. This is one way that I know I can express myself in a postitive way and hopefully inspire someone too.

In my previous post, I had made several healthcare worker cards and I had made one for my son who is a mail carrier, but I was having a hard time finding an image for a food service worker. (check out that post HERE.) I asked if anyone knew of any images. Someone had reached out to me and shared a few images that were just too adorable and I couldn’t pass up on nabbing one for my other essential worker son:

Isn’t he just as cute as can be?! I’ve used the LOTV Pancake Day digi stamp for my card. It actually reminds me of my son making crepes for a restaurant that he used to work for. I was treated with a delicious pumpkin pecan cream crepe by him a few years back on my birthday! It was yummy!

As you can see, I’ve altered the image a bit to fit with the current covid-19 restrictions by giving him a make-shift face mask as well as coloring some plastic-style gloves on his hands. To make it even more personal, I decided to give him a couple of colored tattoos on his arms as my son has tattoos on his arms and dark brown hair.😁

For the card, I’ve used some Sidewalk cardstock from Brutus Monroe and used a Stampin’ Up! brick embossing folder over it and then sponged some distress ink around the edges. It was cut out with a stitched rectangle die. I added a strip of Prism paper and some silver metallic ribbon over it before attaching it to a top folding A2 sized black card base. I finished it off with some silver Glossy Dots from Pink and Main.

I colored the image with Copic markers and as mentioned above added the special coloring for the tattos and gloves for his hands. I’ve also covered the pan with a glitter brush pen.

To make the face mask, I took a Copic liner to draw in the lines for the cord around his ear and then I took a tiny piece of thin tissue style paper that was used between the packages of acetate sheets you buy. I wanted it because it was thin and I was able to create tiny folds and wrinkles in it…I just glued it over the area on his face and manipulated it before it completely dried.

I stamped the sentiment from a Lawn Fawn stamp set with black ink next to the image and then I used a stencil that was cut out by my mom, thanks mom, on her Cricut machine and inked it up with some red ink using a foam brush tool. I wasn’t very accurate with not covering the image, but thankfully the sand eraser helped out! I finished coloring up the “ground” area and sponged around the stitched square cut out of the image. I layered it onto another piece of black cardstock and popped it up over the card with craft foam.

I think this card turned out so cute and it’s on the way to him now! I think he’ll get a kick out of it and he’ll probably notice the extra personalized details I’ve added to it too!😂

I hope you have enjoyed my special essential worker card today and brought you a smile! Thank you so kindly for stopping in and I’ll see you again soon!✌

Challenges:

  1. Pearly Sparkles – #52 For the Boys/Men
  2. Love to Scrap – LTSCB134 For the Boys
  3. QKR Stampede – #400 Anything Goes
  4. Digi Choosday – Anything Goes + colored image
  5. Arty Divas – #23 Anything Goes
  6. The Paper Funday – #18 Anything Goes with twist: make it masculine
  7. Simon Say Stamp Wednesday – Masculine
  8. Unicorn – Masculine

Showered Love Engagement

Hello friends!  I hope that you and your loved ones are healthy.  I also hope that you are having some inspirational crafty fun during this time.  Crafting is a great way to create and send some smiles to someone as well!  Let’s keep those smiles going!! 

Today I have another card that I made for the same son that had his birthday from my last post.  He was also recently engaged and I’m so happy for them both!  Here’s the card that I sent to them:

Vicki-LOTVshowerlove

I had seen this image came out from Lilly of the Valley last month and just fell in love with it!  I knew it would be perfect to use for this occasion!  It’s called Showered With Love and I’ve printed it out, colored with Copic markers and then cut it out using the Whimsy Stamps Zig Zag Stitched Rectangles Die set and then layered it over some light blue card stock.

I popped up this image panel with craft foam over a piece of white cardstock that was die cut from a Lawn Fawn Fancy Scalloped Rectangle die and then layered over a piece of dark brown card stock.  I then attached these layers over another piece of light blue cardstock with the same Whimsy Stamps Zig Zag Stitched Rectangles Die set.

Before attaching the image layer onto the light blue panel, I took a sentiment from the Simon Says Stamp Tiny Words and white heat embossed it over a dark brown strip.  I also added some ribbon and lace around the light blue card front panel before attaching the popped up image panel.  Lastly, I’ve added some Nuvo rhinestone water droplets.

Vicki-LOTVshowerlove-close

Here’s a closer look at the coloring I’ve done on this couple.  I’ve tried to keep the hair color likeness to the real life individuals.   Hard to see in the photo of course, but I’ve covered the hearts with a glitter pen for shimmer and the trim on the umbrella as well as the center of the heart on the umbrella and part of the handle were colored in with a clear glitter pen which also gives a bit more shimmer to it.

Vicki-LOTVshowerlove-flat

For the inside of the card, I’ve added a computer generated sentiment that said “Congratulations!  Wishing you a love together that can outlast any type of weather.” and also created a pocket that held a gift card inside.

I hope you’ve enjoyed my card today and have been inspired in some way!  Thanks so much for dropping in today!  I appreciate you being here with me!  See you soon!

Challenges:

  1.  QKR Stampede – #389 Anything Goes
  2. A Bit More Time to Craft – #112 Anything Goes
  3. The Creative Crafters – #26 Anything Goes
  4. Createful Heart Design Challenge Blog – #18 Anything Goes
  5. Creatalicious – #183 Anything Goes with optional:  Layer it up
  6. Lil’ Patch of Crafty Friends – #128 Anything Goes
  7. Pammie’s Inky Pinkies – PIP2011 Anything Goes
  8. Arty Divas – #17 Anything Goes