YAY! I’m back…but a tad bit late for my monthly AJ post! (So sorry about that Carol!!) I’m trying to get back into crafting again as it feels like I’ve been away from it for a long time! It was a fun, crazy, beautiful time away and there a few photos below this post if you care to see….
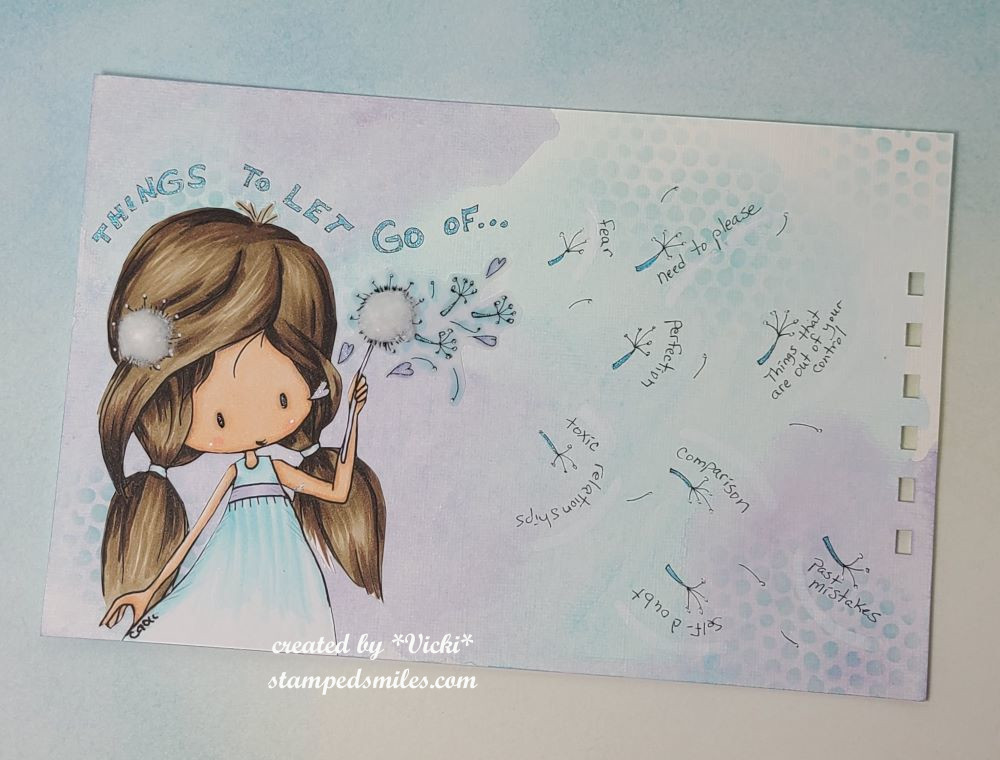
BUT FIRST, TODAY (BETTER LATE THAN NEVER)….is the monthly Art Journal Page collaboration with my crafty friend, Carol (from Crafty-Stamper)! We get creative trying to use up our never-ending stash piles along with a prompt for each month. I know she always has great inspiration to share, so please check out her blog too! Here’s my AJ page with the “SMASH OUR STASH” September prompt of “TEXTURE” (anything to create texture):
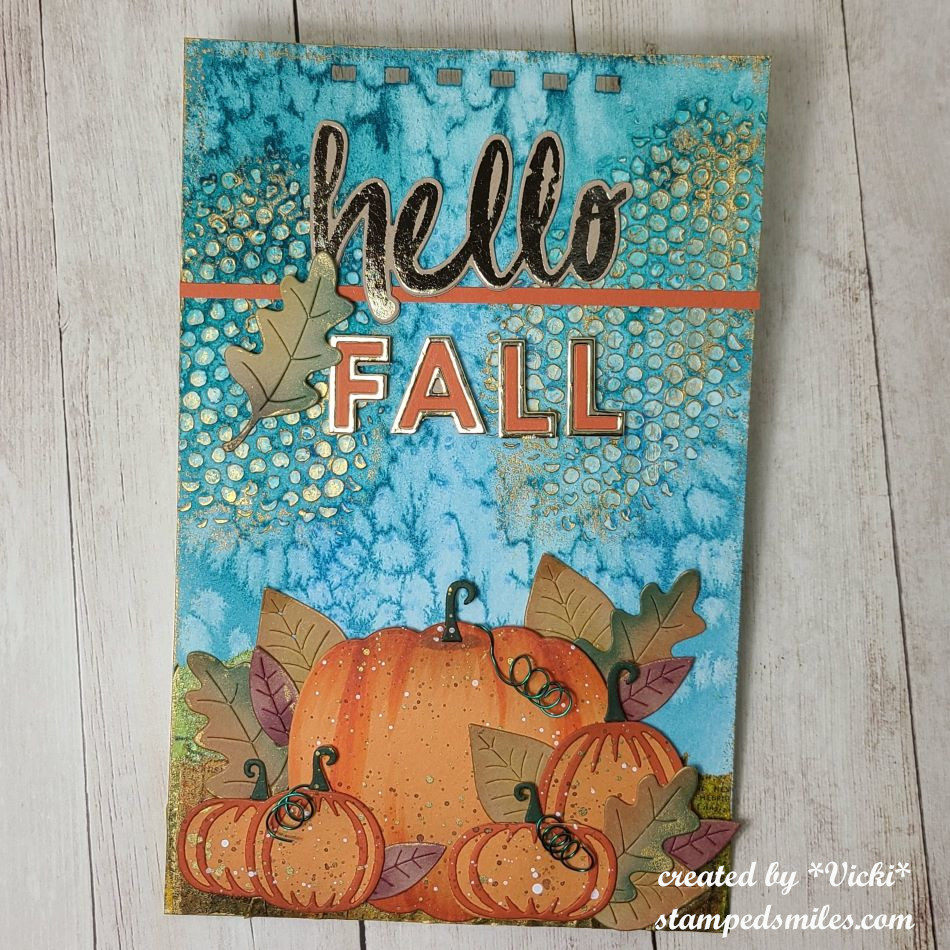
Texture is something that I really enjoy using, but sometimes when you’re making cards, you don’t always want that texture or bulk adding to your design because you want to be able to slide it into an envelope to mail out. Doing an art journal page with lots of texture and bulk is something I can do because it’s my own piece of art to keep and it’s fun to play with lots of media from my stash to create it!
For the background: I started with my usual 5.5″ x 8.5″ heavy weight watercolor panel with pre-punched holes at the top using my Bind-It-All machine. Starting with some media paste and my “go to” dotted stencil, this was a quick way to add texture to the background. I then pulled out some watercolor in blue tones and covered over the background with it and sprinkled some sea salt over it, let it dry completely and then brushed it off. This leaves some cool effects to the watercolor and it creates some texture as well!

Moving down the page, I have die cut lots of pumpkins and leaves! These are all die cut sets from Taylored Expressions that I’ve had in my stash for a few years now. All the pumpkins were cut from orange cardstock. For the largest pumpkin, I’ve used my Copic markers to give it some dimension/texture. The other pumpkins had another piece that I cut from a darker orange cardstock. The stems all cut from green cardstock. I decided to splatter some brown, gold and white paints all over them for even more texture. Before attaching the pumpkins, I used some printed tissue paper that was sprayed with color and scrunched up and attached to the bottom of the page with media paste. Lots of texture going on at the bottom here!
For the leaves, I die cut them out from kraft cardstock and ink blended over them in various fall colors. You will notice around the edges of the leaves as well as the textured paste background on the page, that I’ve used some gold wax and rubbed around the edges and over the texture. I then arranged all of the leaves and pumpkins at the bottom of the page with some popped up with foam tape. I’ve also taken some green wire and curled it to use for a couple of the pumpkins that were attached to the back of them.
Lastly, I’ve added the sentiments that were die cut, gold foiled and attached at the top along with the thin strip of orange cardstock. The “FALL” letters were popped up with foam tape as well as a portion of the leaf on the side of it.
- Really hope you’ve enjoyed my art journal page today! It was fun getting messy and playing around with crafting again! I really missed doing it!
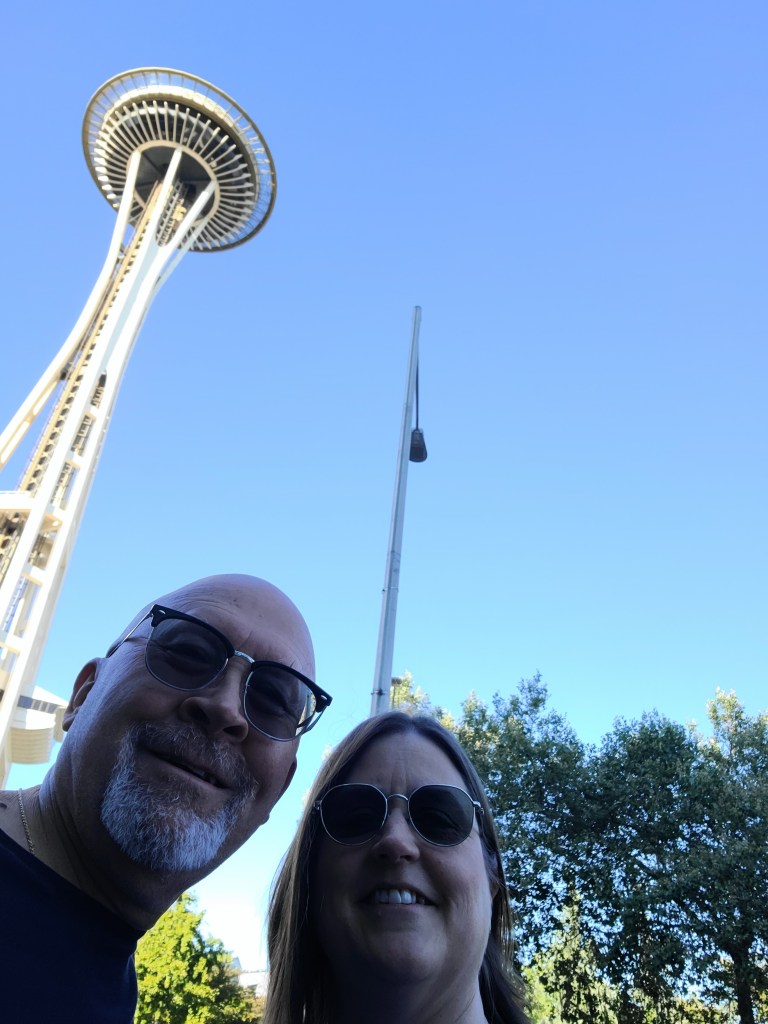
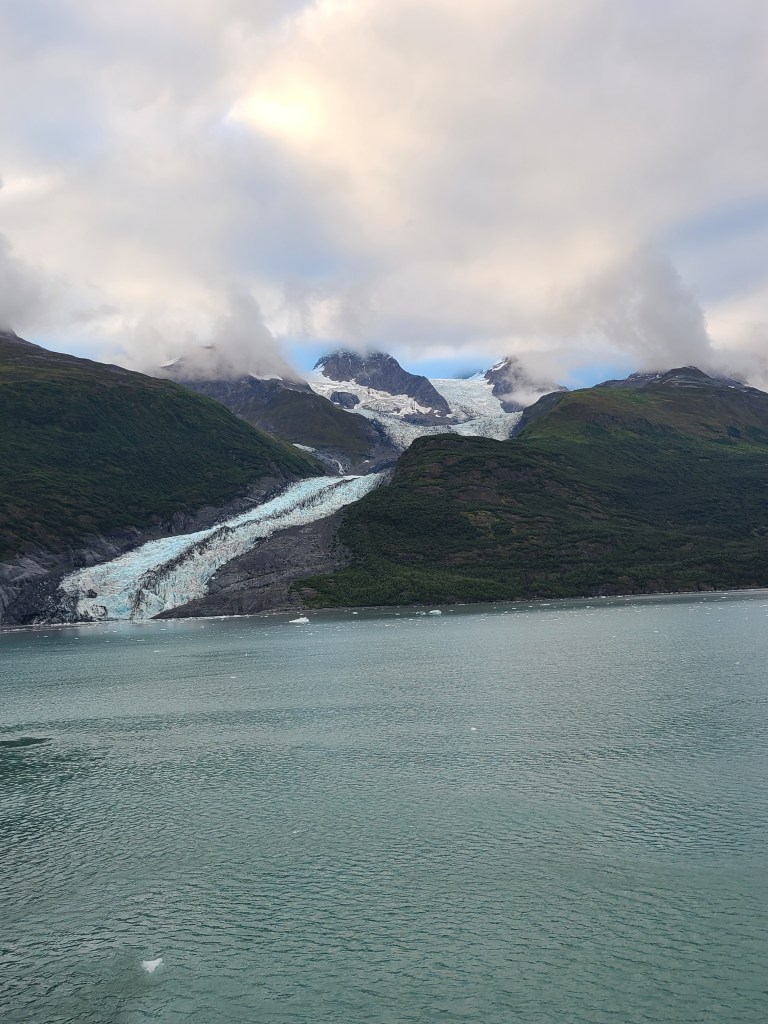
Here are just a couple of photos to share on our time away. We started by flying to Seattle as we’ve never been and visited the Space Needle. We took a bus to Canada where we boarded a Cruise ship that took us into Alaska to see the glaciers! We sailed for a week, but went further up to Denali Park in Alaska where we stayed an additional week and made our way back home. This was certainly a once in a lifetime experience that we’ll never forget! The photos look nowhere close to how gorgeous it was to see in person.

While we were traveling on our way back home, it seems that one of our pieces of luggage decided to take a trip to Mexico! So once we figured all that out, got our luggage back and tons of laundry, cleaning, groceries to get, done….I had an appointment to get an impacted tooth removed the other day! Been feeling a little overwhelmed, but starting to get better!
THANK YOU SO MUCH FOR YOUR KIND SUPPORT, COMMENTS AND COMING TO VISIT ME HERE! I’VE MISSED CRAFTING AND CATCHING UP WITH ALL OF YOU! HOPE YOU ENJOY YOUR WEEKEND AND SEE YOU SOON!!
Challenges:
Art Journal Journey – Anything Goes