Hello friends! I feel like the time keeps moving whether or not I do! At the last minute before getting something done, I finally started this page! Once I got going, it was fun to just play around to see what happens!
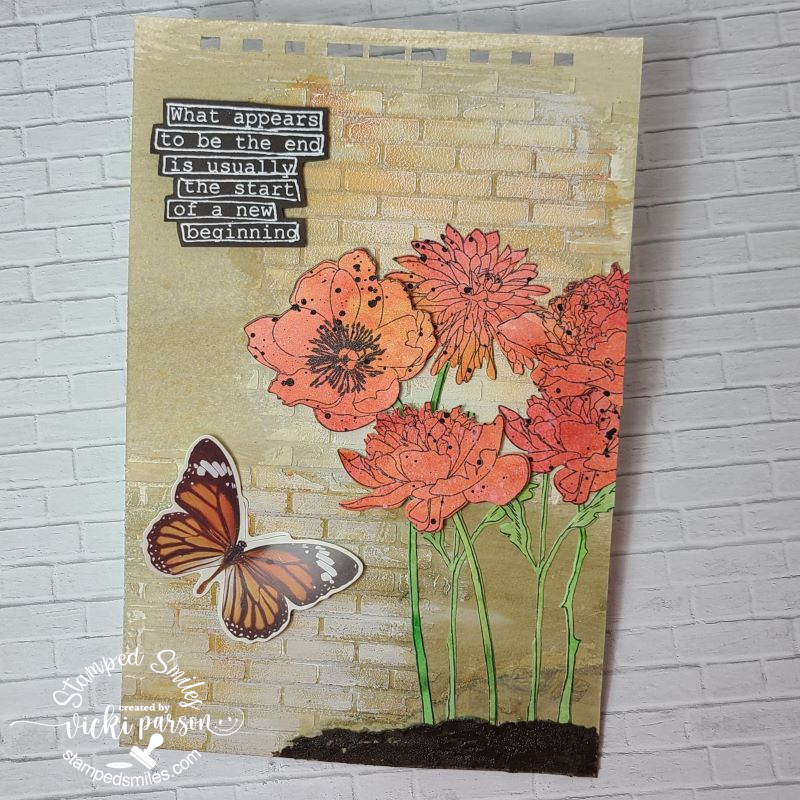
It’s time for the monthly Art Journal Page collaboration with my crafty friend, Carol (from Crafty-Stamper)! We get creative trying to use up our never-ending stash piles along with a prompt for each month. I know she will have some wonderful inspiration to share, so please check out her blog too! Here’s my AJ page with the “SMASH OUR STASH” May prompt of “FLOWERS”.
I noticed looking back on my AJ pages that I rarely use flowers on them unless it’s already apart of some papers that I’m using. So this was a good challenge for me and it was fun to pull out these Tim Holtz “Flower Garden” stamps and dies from my collection to use for this one.
For the background: I started with my 9″x6″ pre-punched holes of Canson 140# cold press watercolor and used a brick stencil and model paste. I covered the entire page with some linen and umber paints mixed together. I dabbed a bit of orange and spritzed it with water for a rust look. I then went over that with a dry brush effect with some light ivory paint to bring out the texture of the brick pattern.
The flowers and stems were stamped over a watercolor Bristol that I previously made and splattered with chocolate paint. I also covered the die cut flowers with shimmer spray. (Not sure if you can catch that in the photo.) All of the stems were glued, and the flowers were glued with some being popped with foam tape. I covered the bottom area over the stems with grit paste and then went over it with brown paint to give the appearance of dirt.
I took a Dylusions stamp and white heat embossed it over chocolate cardstock for the sentiment, hand cut it and popped up with foam tape at the top of the page. I added a butterfly from a Tim Holtz ephemera pack.
Hope you’ve enjoyed my AJ page today! Thanks for dropping in and checking it out!
Hello friends and welcome to May! I’m happy to see this month come with all of the beautiful Spring things that pop out like the flowers and sun with the warmer temps! I look forward to going out and working in the yard soon! Hope that you’ve had a wonderful week and look forward to a great weekend! I’m getting ready for a fun crafty retreat and I’m really looking forward to crafting with friends!
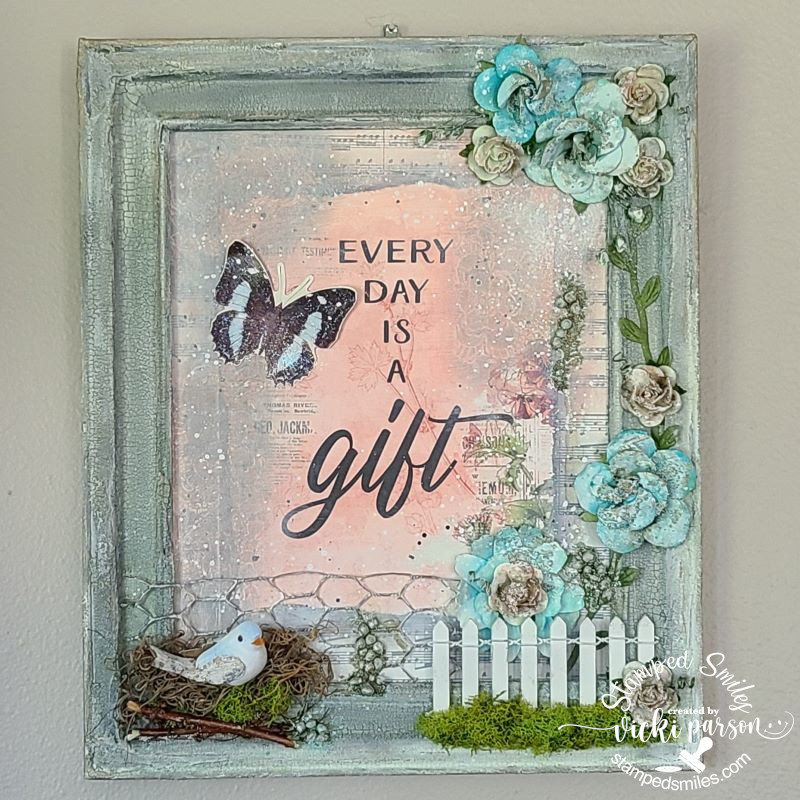
I’m super excited to be a guest for this month’s challenge over at the Creative Artiste Mixed Media Challenge! If you’ve been around, then you know how I enjoy creating a few mixed media projects once in a while besides my Art Journaling that I do each month. The theme is always “Anything Goes” with Mixed Media, so this time, I decided to make some altered art with an old frame:
I thought this would be a perfect item to alter with a Spring theme in mind. I know the frame “looks old”, but it was actually a really old wooden frame that was stained/varnished about 30 years ago! I’ve sanded, painted, added some crackling paste, and painted over it some more to give it a Vintage “falling apart” look. I like the texture and the crackling from the paste that came out in it. The total frame size is about 9″x13″ and it’s shown hanging on my wall.
The center of the frame was done using a piece of cardboard sized to fit inside the frame. (I threw out the glass front as I didn’t have a need for it.) I had some papers that I thought was so pretty along with the sentiment. The sentiment was way too large for a card and I thought it would work great for this project. Of course, the size of the paper wasn’t quite large enough, so I worked on collaging some musical papers around the edges for a border. I also went over it with a floral stencil and paste, paint splatters and waterproof ink before inserting behind the frame.
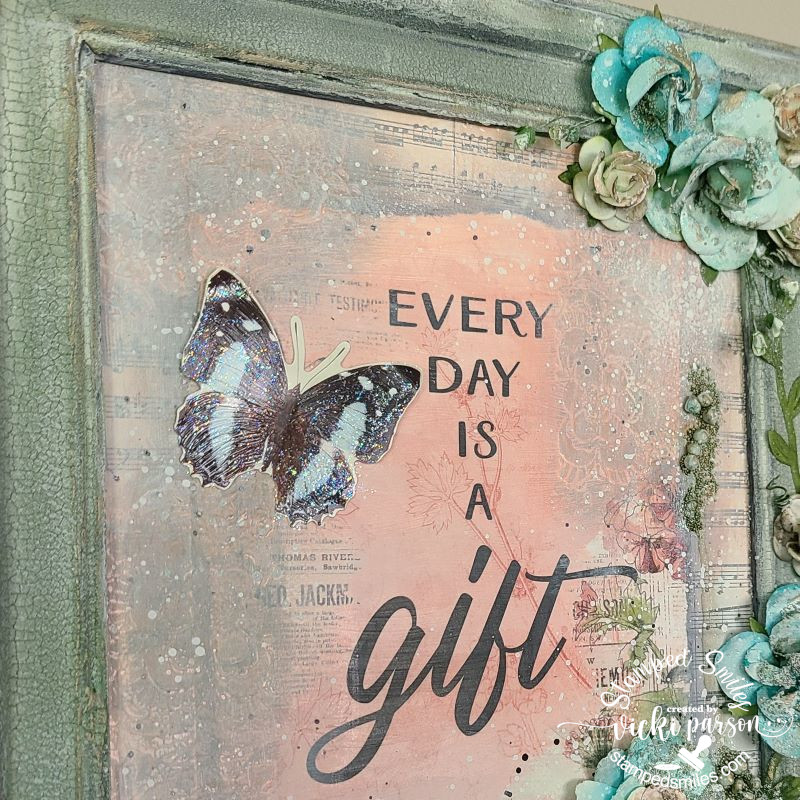
Here’s a closer look at the top of the frame where you can see that I’ve added a butterfly ephemera that was painted with some clear glitter paint and attached next to the sentiment with glue and foam dots on the wings.
I have tons of flowers in my stash, so I’ve created an arrangement along the frame with a vine and different sized flowers that I’ve added with twirled vines. I’ve used more paint and even some art stones around the flowers as well as various places over the background for texture and interest. More paints and metallic wax was used over all of these places to keep the Vintage feel to the design. I tried to keep them coordinated with the papers in the background. (It’s weird how the colors vary so much when you take a photo compared to what it looks in person. The top frame photo looks more blue, but it’s actually more this muted green color.)
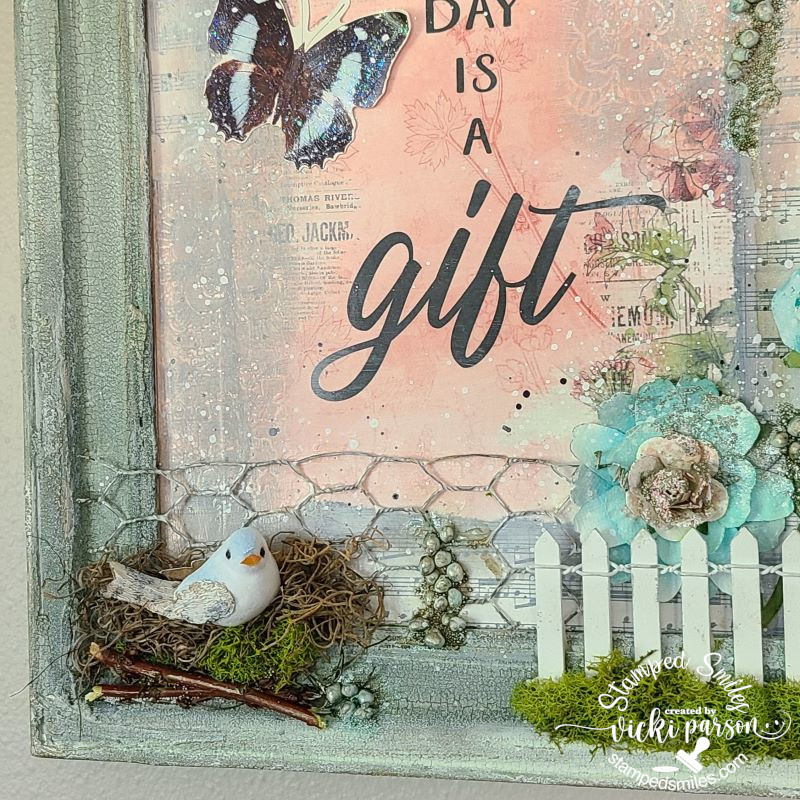
And as you scroll down to the bottom of the frame, you see I have this 3D arrangement with the painted chicken wire against the back panel with the papers. (the flowers were added on top of that.) On the bottom left you see I’ve made a “nest” for my bird with Spanish moss and even added a couple of twigs from my backyard underneath it. I’ve also added a pinch of green moss in there which is also what I’ve used over top of the white picket fence section to the bottom right. It actually sticks out in front of the flowers.
You can also see where I’ve added some more art stones and paints. I’ve finished the whole design with some Finnabair white gold metallic wax. This is hard to capture unless you get really close, but it adds a wonderful detail that brings out lots of the texture in your finished piece.
I really enjoyed creating this altered frame while I was thinking about Spring coming to life outside! It was also fun to be able to find something I’ve had for so many years and give it some new life! I hope you’ve enjoyed it as well and I look forward to seeing what mixed media art you make this month for the challenge!
Hello friends! I can’t believe that it’s already at the end of the month! I feel like this month went by very quickly, but as the weather gets warmer, it seems the more I want to be out. Spring is always a great time to start seeing those pretty flowers which also means more weeds to pull too!
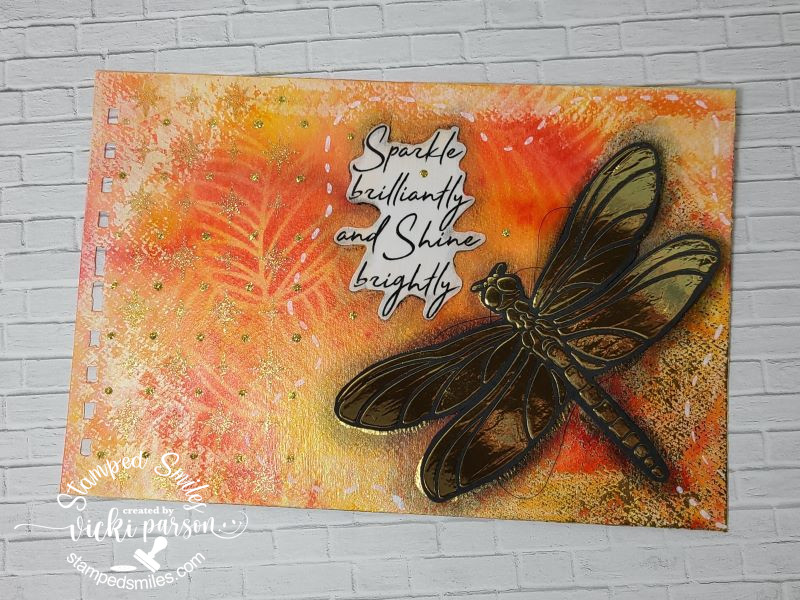
It’s time for the monthly Art Journal Page collaboration with my crafty friend, Carol (from Crafty-Stamper)! We get creative trying to use up our never-ending stash piles along with a prompt for each month. I know she will have some wonderful inspiration to share, so please check out her blog too! Here’s my AJ page with the “SMASH OUR STASH” April prompt of “SHINNY/SPARKLY” :
I am a sucker for anything that shines or sparkles! So of course I had so many things to choose from in my stash to play with! I really had loads of fun making this one and the photos do not look quite as “wow” as it does in person of course, but you can probably guess what it may seem like once you know all what I’ve done.
For the background: I used my normal pre-punched holes on a 6″x9″ watercolor paper and covered it with water spritzing and Brushos Crystal Color media in lemon, orange and brilliant red. Once dried, I went around the edges with a scrapper and white gesso. (I didn’t use a ton of it, just enough to make a scant frame. Once that was dried, I took a leafy stencil with coordinating colored Distress Oxide inks and sponged over the page randomly. I then spritzed with large water drops, once dry, I sprayed the whole page with shimmer spray.
On the dragonfly, you can see directly on the page a bit of a shinny gold shadow under the wings. I have this dragonfly stencil that I used Deco Stencil Paste over that when dry, you can foil over it. I did that directly on the page where I wanted the dragonfly and then again on a black piece of cardstock that was cut out. I added some black string (This was a stray piece of string from a project that I did not use, so I decided to re-use it for this project) around the dragonfly, glued the center down over top the one on the page and then used black foam tape over the wings to give them a bit of a lift. Before gluing down the cut out dragonfly, I used a gray Big Brush marker to create more shadows around it. I also used a white Big Brush marker to create the dash lines around the page.
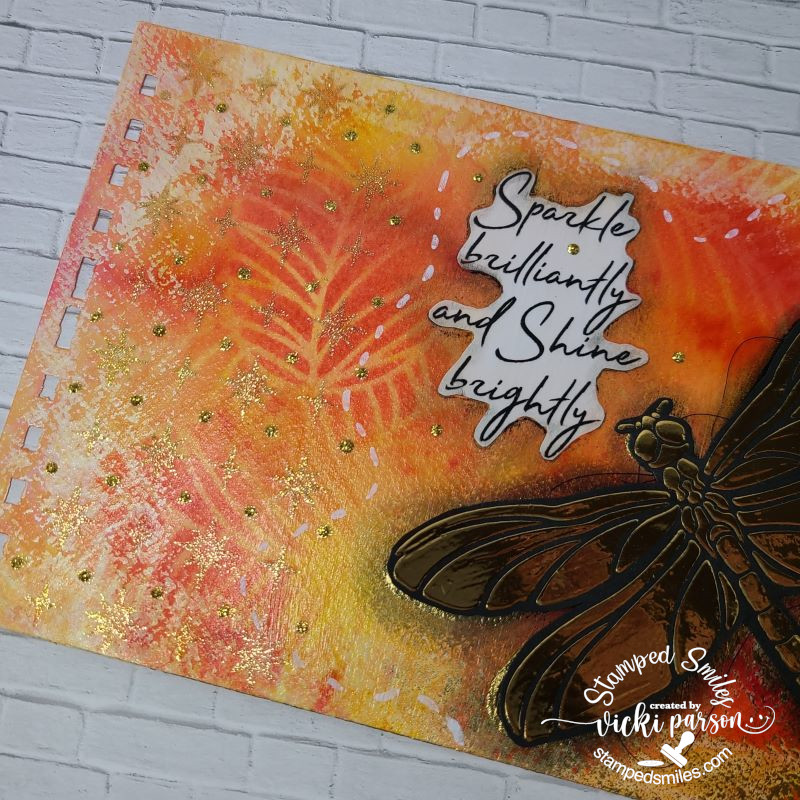
The sentiment was a piece that was cut out from a magazine that I recycled to use for this page and attached it with media paste. I used the grey Big Brush marker to add some shadows around it as well.
On the left side of the page, you can see some gold sparkles which were created with another Tim Holtz Christmas stencil that I had which looked like fun sparkle images. I used some gold glitter paste to go over that and then I took some gold Stickles glue to add some details with dots in various places.
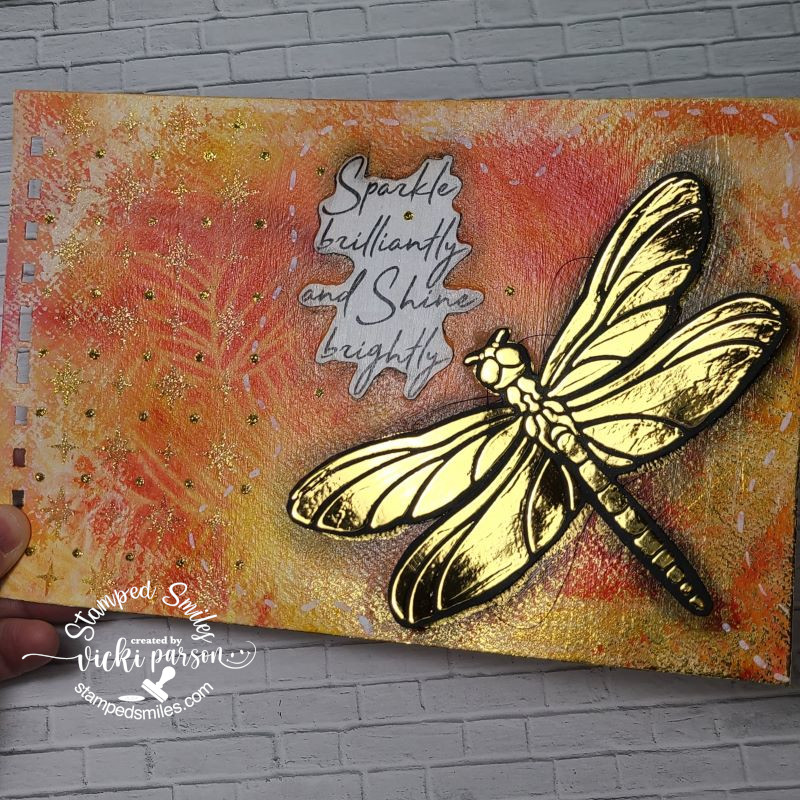
And this is just one more photo of trying to capture that shine and sparkle:
Perhaps you can see more of the shine and sparkles in there. I just had to move the page around in the light to get it in just the “right spot” to capture it better, so pardon my fingers in there.
Really hope you’ve enjoyed my AJ page today and gotten some inspiration! Thanks so much for stopping in! I’ll be seeing you again soon!
Hello friends! Officially Spring has sprung, but I’m seeing some possible snow still in the forecast! BLAH! I sure how as we finish up this month, that April will be a little kinder to us over here. With all of this weird weather in all different directions, I do hope that you’re staying safe and enjoying some craft time!
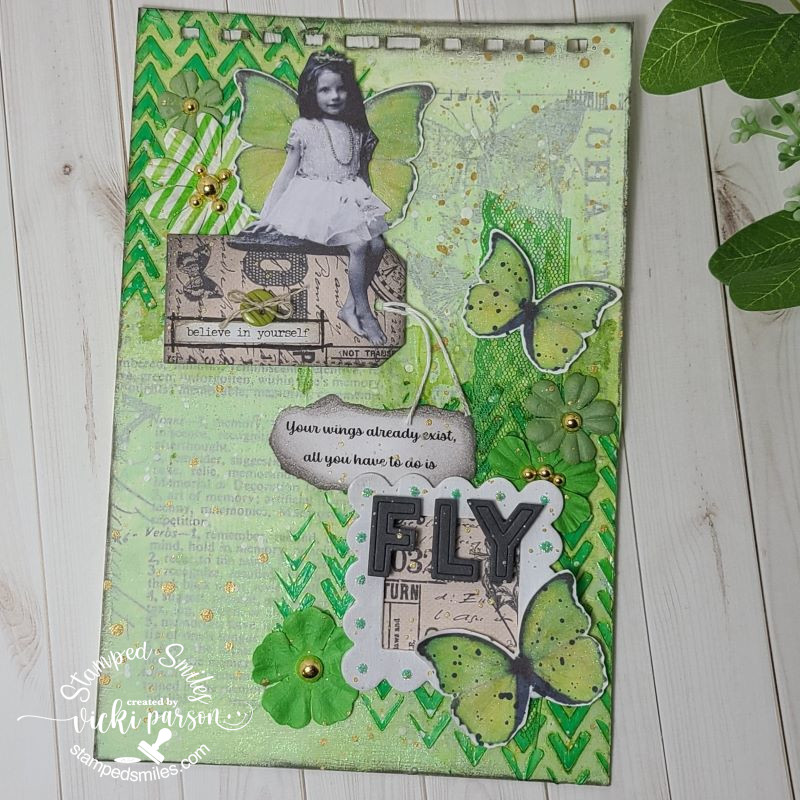
Speaking of craft time- If you’re not familiar, I post an AJ page each month along with my crafty friend, Carol (from Crafty-Stamper), as we get creative trying to use up our never-ending stash piles! We use a prompt each month and post them. I know she will have wonderful inspiration to share, so please check out her blog for an AJ page too! Here’s my AJ page for this month with the “SMASH OUR STASH” March prompt of “Find something/anything GREEN to use on your page” :
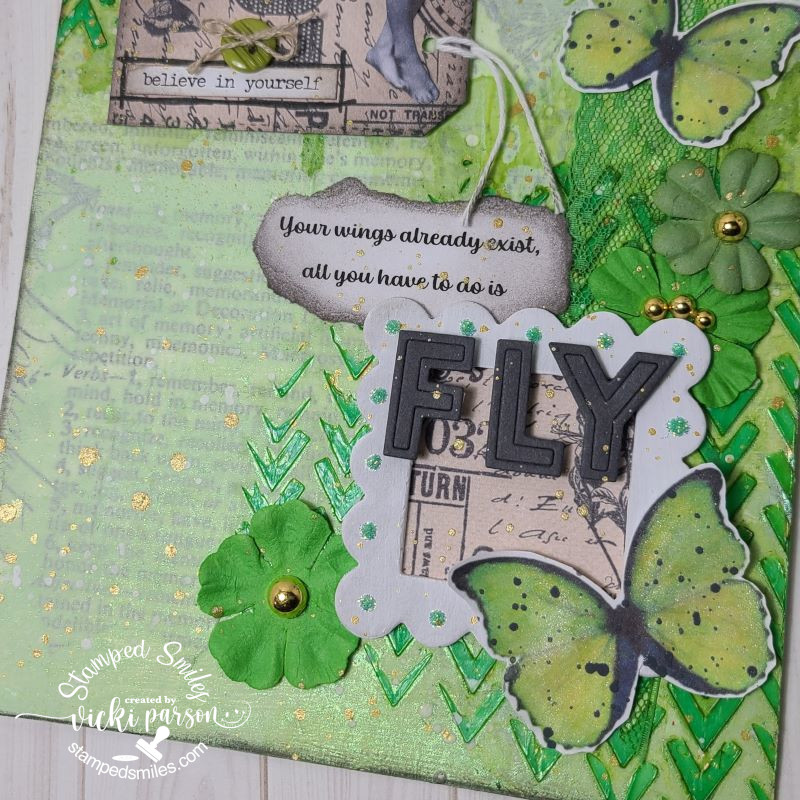
Thinking that I was REALLY in the mood to start seeing some green, I started digging through my stash and found SO MANY green things! I didn’t realize that all you really need is a color to have so many different items to pull from! I’m happy with all of the green items I found as I used several of them for my layout here. I’ve got green paint, texture paste, metallic spray, flowers, lace, button, butterfly ephemera and green glitter Stickles! I’m thinking I don’t use green enough, so I went with a monochromatic page.
For the background: I started with some printed vellum attached with collage medium and went over top with a soft green layer. I used an old stencil and went over the two corners with green paste. I then sprayed some green metallic over those two colors and moved it around with water until dry. I splattered some white ink over top and set to dry.
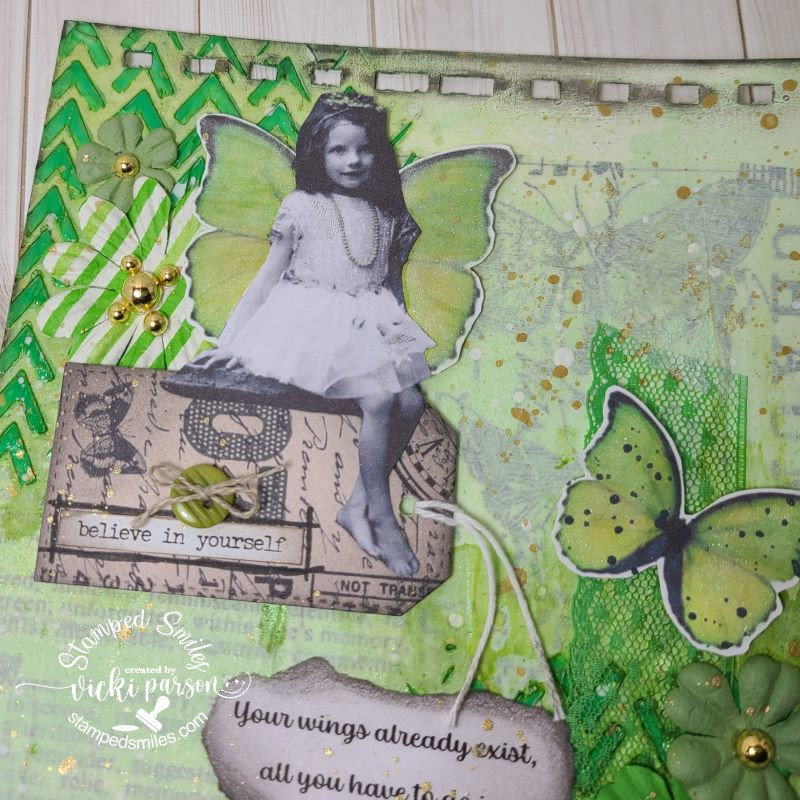
I added green lace on the right bottom along with my scallop chipboard square that I painted white and added some papers behind it. I used those same papers to die cut a tag at the top and glued the fairy along with butterfly wings behind her over it. I added the sentiment sticker that was lined out with a black marker and button over it and attached a string to the hole. This was popped up with foam tape as well as the “FLY” die cut letters inside the white frame. The ripped sentiment was computer generated and sponged with grey ink and tucked behind the white frame. I added some green Stickles glitter to each scallop and tucked some green flowers with gold enamel dots in the center. I also tucked more of those behind the fairy too.
I covered the butterfly wings with a glitter brush pen and then splattered some grey ink over top of the wings before attaching them to the page with glue and foam tape… and before attaching the butterflies to the page, I covered up the fairy with a piece of scrap paper and used some gold paint to splatter over the page…and I called it done!
I enjoyed making this page with all of those GREEN things from my stash! I hope you’ve enjoyed it too! Thanks so much for dropping in and have a great weekend!
Hello friends! It seems like this month went by really fast! Hope you’re having a great and productive month! It’s now time for this month’s Art Journal page…really fun one today!
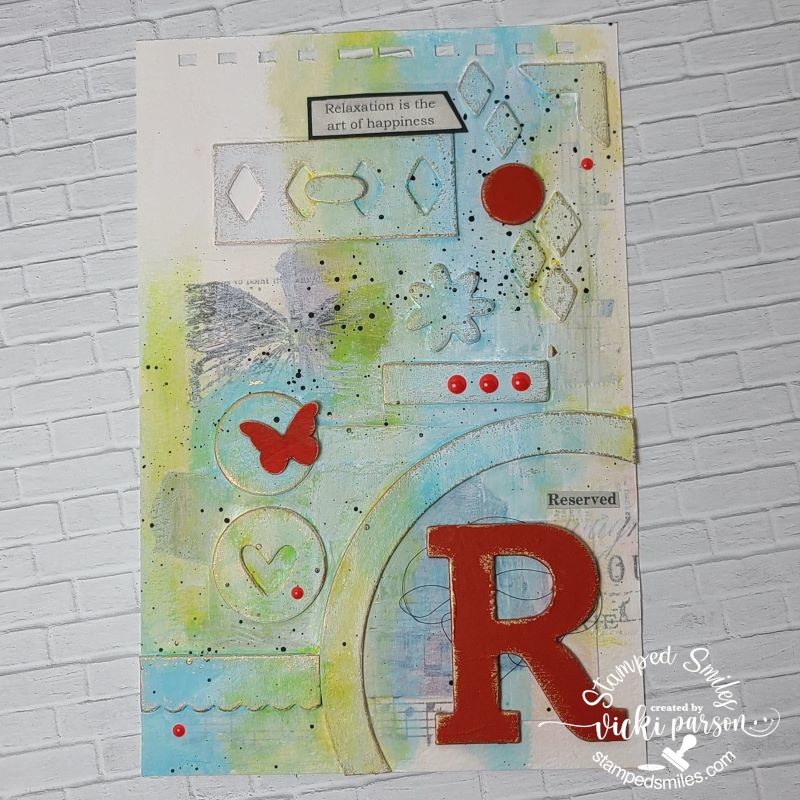
If you’re not familiar, I post an AJ page each month along with my crafty friend, Carol (from Crafty-Stamper), as we get creative trying to use up our never-ending stash piles! We use a prompt each month and post them. I know she will have some great inspiration, so please check out her blog for an AJ page too! Here’s my AJ page for this month with the “SMASH OUR STASH” February prompt of “Wooden Pieces/Chipboard” :
Do you have tons of chipboard pieces laying around? I have several stacks of them that have been around for quite a while and I thought that I would just pull them out to start using some up here with this month’s prompt. These are old Stampin’ Up! chipboard pieces that they used to sell and I was taught that you don’t throw any of them away…well I think they meant that you should use them, though!😆
For the background: I started with my usual 6″x9″ watercolor paper with the holes pre-punched at the top. I used some torn pieces of scraps and vellum that I had laying around and randomly covered the blank page using collage medium. I took the chipboard pieces and glued them in random areas too. I then covered it over with some white gesso paint that was slightly watered down so that some of the background elements still showed through.
The next step was to add some colors with some Finnebair Impasto paint in Mediterranean and Lemon Peel. When these two colors mix together, they make a beautiful green. They are actually really bright colors, so I toned it down a bit with more white paint until I got the look I wanted. I finished it with black paint splattering.
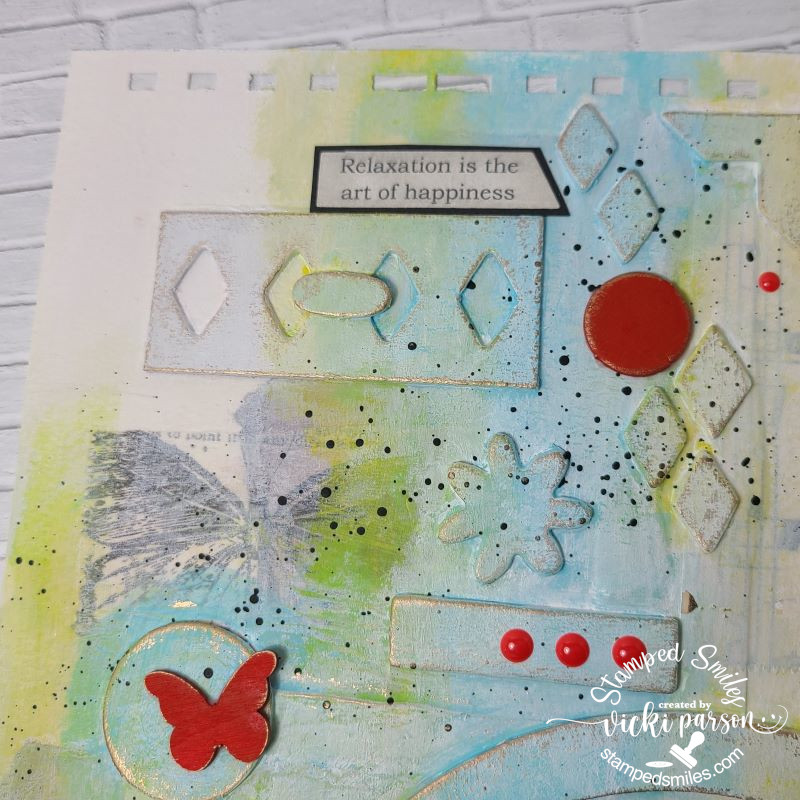
Here’s a closer view of the top of the page with the collage and chipboard texture. After painting up the background, I also took a few pieces of chipboard along with a wooden butterfly and painted those elements in red. I thought it would be fun to give the page a pop of bright red to contrast the muted background. The red painted elements were added after the background was finished.
The sentiment at the top was computer generated and sponged over with some Pumice Stone Distress Oxide ink and layered over a piece of black cardstock and then attached to the page.
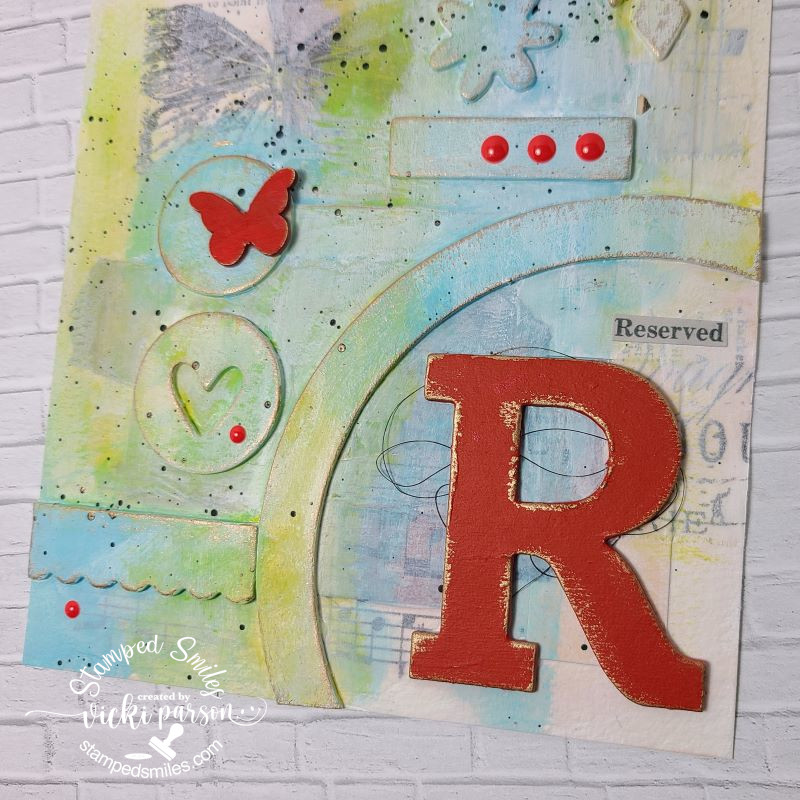
Then here’s a closer view of the bottom of the page. The “Reserved” is from a Tim Holtz sticker book.
Behind the red chipboard ‘R’, I added some black string. You will also notice that I’ve used some Finnebair Aged Gold metallic wax to go around the edges of the raised up edges to give them a bit of dimension. I finished it up with a few red enamel dots.
I had fun with this one and I hope you’ve enjoyed it as well! Thanks for dropping in today!
Hello there friends! Hope that you’ve been having a great month so far to start off your year! I’m so relieved that I’ve gotten my sound up and running on the computer now! Also…today I’m very happy to be continuing on with making my monthly art journal pages (plus using my stash!) and to be continuing the partnership with my sweet crafty friend, Carol! I always love to see how each of us interprets the monthly stash themes.
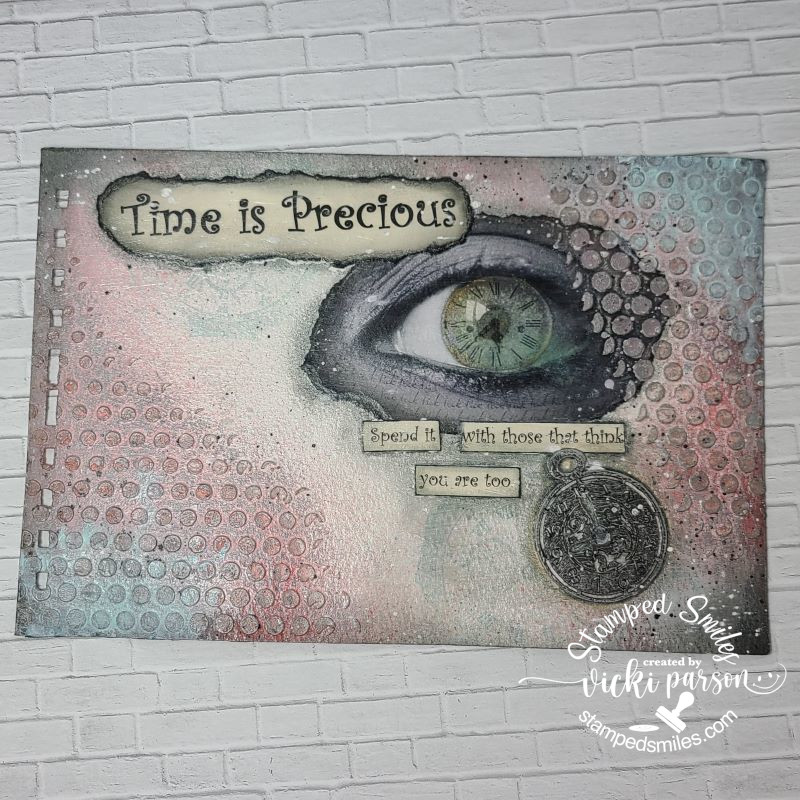
If you’re not familiar, I post an AJ page each month along with my crafty friend, Carol (from Crafty-Stamper), as we get creative trying to use up our never-ending stash piles! We use a prompt each month and post them. I know she will have some great inspiration, so please check out her blog for an AJ page too! Here’s my first Art Journal inspiration for 2023 with the “SMASH OUR STASH” January prompt of “Sprays/Stains/Paints” :
So this one is a bit different for me, but I wanted to try out a “minimalistic” style and very soft with the colors that’s almost pale. Not sure I achieved what I was thinking, but fun to try anyway.
Background: With the prompt in mind, I had no problem pulling out a few Distress Spray Stains that I have so many of but hardly use. So I started the background with a stencil and added some texture paste to the two opposite corners over a gesso painted 6″x9″ 140# cold press paper pre-punched with holes for book. I then took the spray stains and went over the two opposite corners with them.
I found a cool photo online of the eye with the clock. The outside of the eye has repetitive “tick tock” wording over it. Before attaching this photo and the wording elements, I stamped a very large pocket watch image (Whimsy Stamps retired) with Speckled Egg Distress Oxide ink. Since the sprays and ink are water based media, I covered the page with Distress Micro Glaze to make it permanent before adding some collage medium to attach the other elements. I also used a Big Brush marker to go around the edges for shadows. The pocket watch detail is a laser cut chipboard that was sprayed with black distress spray.
I took some more paint to add to the colored sprayed edges along with some black and white paints to randomly splatter over the entire page. Lastly I took some silver metallic rub to go over the raised areas and make them stand out a bit. The page has a sheen to it because I went over it with a coat of collage medium.
I hope you’ve gotten some inspiration today and thank you for stopping in!
It is here! The end of 2022 has arrived weather you are ready for it or not! I know as I’ve gotten older the time seems to pass more and more quickly. Each year I usually go through all of the things that I didn’t have time to do. This year I’m going to look at all of things that I DID do instead! I look forward to a wonderful year ahead and I hope you are as well!
For this entire year, I’ve had such a wonderful time creating my AJ pages at the end of each month with my crafty friend, Carol (from Crafty-Stamper)! Thanks SO MUCH to her for the wonderful inspiration and joining in the venture with me! I know she’ll have something wonderful, so please check out her blog for an AJ page too! We’ve gotten creative by using up our never-ending stash piles! (I look forward to doing this for another year each month in 2023 and I’ll hope you’ll be here too!) Here’s my final Art Journal inspiration for 2022 with the “SMASH OUR STASH” December prompt of “Oldest Stash” :
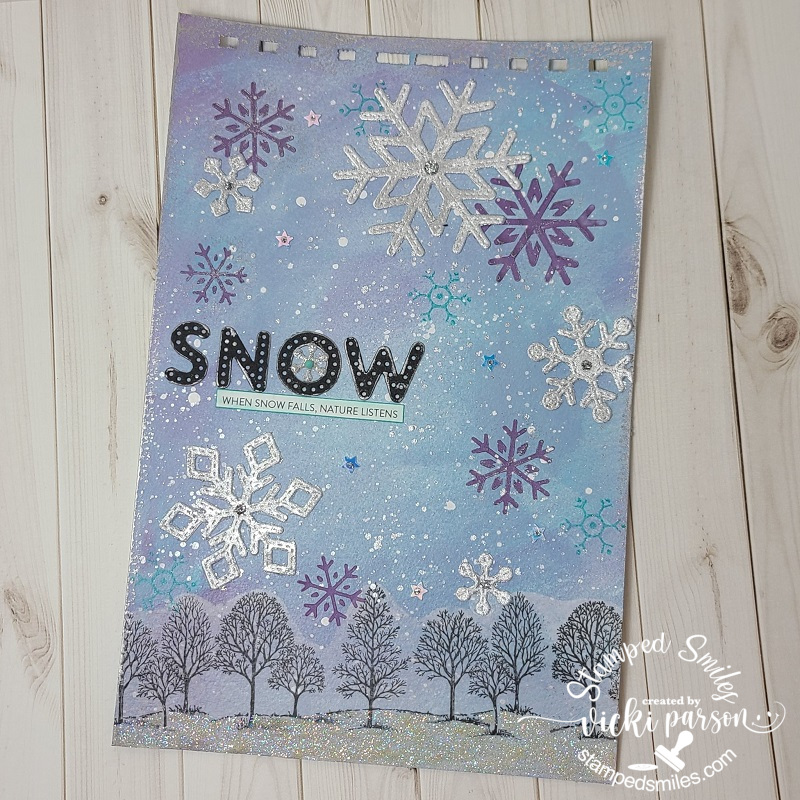
It’s a bit challenging for me to FIND my “oldest stash” as I’ve been a bit of a collector over the years. So I’ve pulled out a very old, but favorite stamp set of mine from Stampin’ Up! called “Lovely as a Tree” from 2001. The container broke when I opened it up to take a stamp out! LOL I’ve also pulled out my Pearl Ex powders and some gilding flakes from my older media stash. It’s a good thing that powders don’t go bad otherwise I wouldn’t have been able to use them!🙄
For the Background – I’ve used some mix of paints and splattered some white paint over it for the snow. The trees at the bottom were stamped over vellum and then I cut it out and attached that to the bottom of the page so that they were a nice vibrant black as I didn’t think they would stamp over the paint very well. I did take a snowflake stamp (not too old) and stamped a few randomly over the background in teal ink. (water-proof)
For the Pearl Ex Powders – I mixed some Misty Lavender Pearl Ex with embossing paste and used a snowflake stencil to randomly add this to the background.
For the Gilding Flakes – I die cut some snowflakes with double sided adhesive sheets will make the front sticky. This made it so I could rub in the gilding flakes over them. They did turn out very pretty!
The “SNOW” letters were die cut and I found a neat winter clipping from my sentiment stash to add below it after I sponged some teal ink around it. I also die cut another tiny snowflake in the center of the ‘O’ with glitter cardstock and attached a tiny teal rhinestone in the center of it. I rubbed some silver wax around the letters and around the edges of the page. Lastly, I’ve added some star sequins and filled the centers of those and the gilded snowflakes with some silver Stickles. I covered the bottom of the page under the trees with glue and covered it with sparkly glitter.
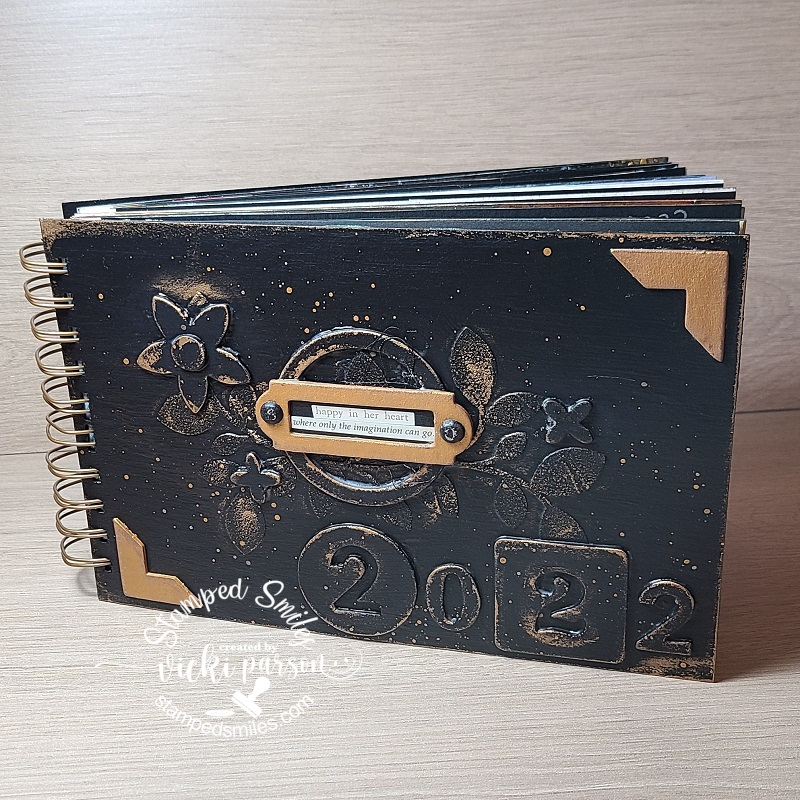
So I thought that since I’ve done an AJ page every month this year that not only did I need to close up the year, but I also needed to close the book to all the AJ pages I made from 2022 by finally finishing up a book to put them all in!
I made the covers with some chipboard along with some “old” chipboard pieces from my stash and did some painting with a bit of mixed media gold wax and stenciling. I wanted to be sure to add the year to the front and a little quote from my sticker book that says: “happy in her heart where only the imagination can go”
I fit all of the AJ pages completed this year along with a few extras that were created from before with unknown dates, added the front and back covers and used my Zutter Bind-it-All machine to add the spiral wire for a book. (This was the reason all of my pages had the pre-punched holes in them when I posted each month.)
That finishes up the 2022 year on my blog. I hope you’ve enjoyed my posts weather it’s for inspiration or just a smile. Either way, I’m so thankful that you have joined me this past year and your friendships. I look forward to a productive and crafty year ahead in 2023!
Hello friends! Hope that you’re having a wonderful weekend and I can’t believe we’re looking at the end of November already as well as almost the end of the year too! Since I’ve been doing most of my post this month with guesting for Inky Stamper, it’s time to change it up a bit.
At the end of the month, I do an Art Journal page and collaboration with my crafty friend, Carol (from Crafty-Stamper), so please check out her blog for her AJ page too! We’re trying to get creative by using up our never-ending stash piles! So here’s my Art Journal inspiration with the “SMASH OUR STASH” November prompt of “washi tape/stickers/border stickers, etc” :
So with the Smash our stash theme, I went through and pulled out so many stickers in my collection…and then realized that I’ve had some of these things for such a long time! I couldn’t use them all, but I made something work with a fun Christmas theme in mind.
For the background: I started out with my pre-punched holes at the top of my 140# cold press paper sized 6″x9″ and covered the bottom portion of the page with some Tim Holtz Christmas themed washi tape. I thought it was a bit too bright and went over it with some white paint and a brayer. I also took a collage paper of Christmas music sheet paper and stamped a couple of different images over it to further the collaged background. I also covered this area with a thin layer of mixed media silver paint.
I die cut a pine tree and sponged some inks around the edges and turned that as well as the die cut sparkle snowflakes into stickers using my Xron machine. I stamped the two deer in black ink and heat embossed over it a clear EP. I then took a Tim Holtz stencil and used some sparkle texture paste over it for snow. (Before I attached the larger snowflake stickers.) I also splattered the page with some white paint too…lots of snowfall going on!
For the wording: I had some black thickers (as they call them, which are thick foam letter stickers) for the “PEACE” and then the other words are stickers from my stash. The heart is from the thicker sheet too. I took some silver rubbing paste with my finger and went along the edges of the page as well as the thicker letters to add some interest. Lastly: I made a “snow ground” for the deer by applying some glue and covering it with some glitter crystals. I also added some black gem stickers to the center of each snowflake sticker.
I hope you’ve enjoyed my art journal page today and have been inspired in some way. Thanks for much for stopping in and I’ll see you soon!
Challenges:
Art Journal Journey – Collage Fodder and/or Food and Drink (collage fodder here)
Happy weekend! Where in the world did July go?! I can’t believe we are at the end of the month already. It’s really been a busy Summer this year and I know that Autumn is a favorite season of mine which will be busy as well, but that’s all a good thing.
It’s now that time for a monthly Art Journal page and collaboration with my crafty friend, Carol (from Crafty-Stamper), so please check out her blog for more inspiration too! We’re trying to get creative by using up our never-ending stash piles! So here’s my Art Journal inspiration with the “SMASH OUR STASH” July prompt of: “decorative papers/collections/kits, etc” :
OK, I don’t really know how much of a “challenge” it is to use decorative papers on anything…but I have such a HUGE stash of papers and I’m always trying to find different ways of using it up instead of always hoarding it! The papers I’ve used on this page are exactly that…I hoarded it! It’s just too awesome NOT to use! I purchased this pack of Stamperia Sir Vagabond 8×8 papers when they came out and haven’t even touched it! Now is the time!
I used my traditional 6×9 size with the holes pre-punched at the top to fit with the book I’m making. I ran out of my usual 140# watercolor paper, so I’ve switched to another pad from my stash which is Strathmore Acrylic paper…very thick and made to use with paints. (I like the canvas texture it has.)
For the background: I started with some old paint from my stash and brush blended the different colors. I didn’t want them to be too bright which I thought would take away from the paper images. After it dried, I covered the entire page with some Tim Holtz Postage Tissue Wrap. I thought it ‘stood out’ too much, so I painted over it again using the same paint colors.
For the Journal Prompt with the papers: I cut out pieces with scissors that had interesting images I wanted to use like the circle map, the “Vintage Travel” strip, the hot air balloon with train, the “mountains” at the bottom, the circled compass, the sentiment and then I ‘ripped; a piece for the top of the page and then re-punched the holes. The compass circle, hot air balloon/train and ripped newspaper edge was sponged around the edges with Toffee ink.
Before placing the cut paper images, I decided to add a fun textural window image. I stamped the window with chocolate colored pigment ink and heat embossed it with clear embossing powder.
Collage Medium was used to attach all of the different paper images except the balloon/train, compass and sentiment. I used Pitt Big Brush Markers to go around these collaged images for some shadowing. I then used some white and chocolate paints to create splatters over the page being careful to cover up the window area.
Before attaching the sentiment strip and the compass, I used some Aged Brass Metallic Wax to go around the edges. I also used this around my entire page and over the shutters on the window. I attached the sentiment strip and the metal cogs with 3D Matte Gel and then used foam squares to pop up the compass and balloon/train.
– Really fun AJ page to create and I hope that you’ve enjoyed it too! Thanks so much for stopping in today!
Happy weekend! It’s very hot here today as we are under a heat advisory! So thought it was best to stay indoors and keep working on my “catch-up” posts! This one is a bit different than my usual papercrafting posts, but it’s my finished projects from the crafting retreat I had with friends right before the wedding and why I was so busy! But first, I’d like to share a fun “thank you” card I made for my friend that hosted it all:
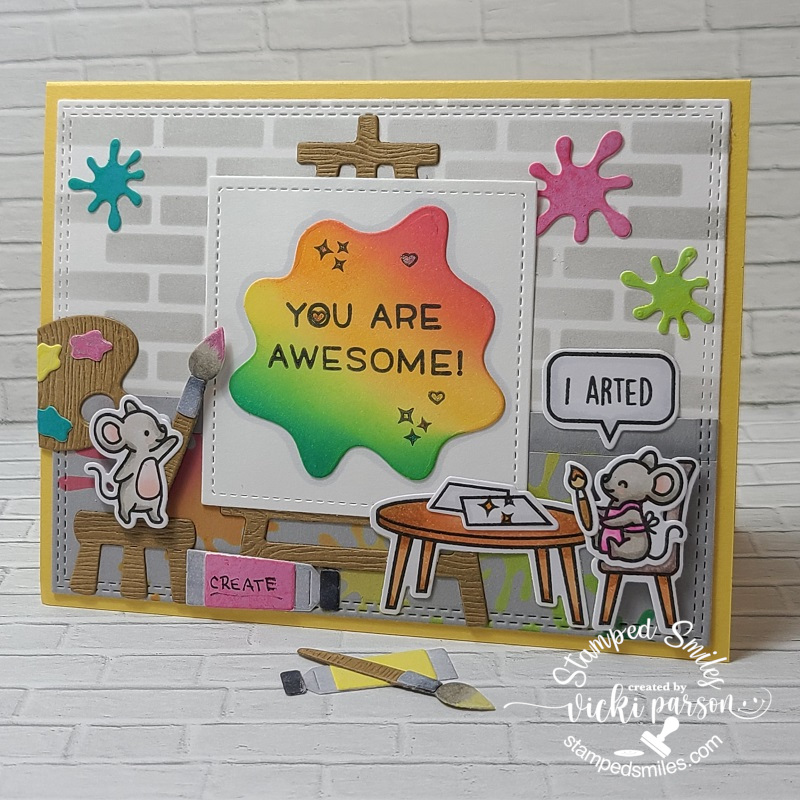
And as you know from my last post, I was on a Lawn Fawn fever mode, so this was also made for my friend that hosted the fun “Painting Divas” retreat for us! This ADORABLE set called Just Add Glitter was a perfect set to use to create a card for the theme as well as those products to accompany it with the Art Supplies dies, Canvas and Easel as well as the Paint Splatter Background Stencil too!
For the background, I created a scene with a brick stencil from my stash that I’ve had for years which was blended on with some grey ink. The bottom solid grey portion of the scene I used that paint splatter stencil and some Distress Oxide colors and blended in over it. By using the oxide inks, the colors showed up better over the grey.
I used these same colors of Oxide inks to sponge over the die cut pieces from the Art Supplies dies as well as the “masterpiece” splatter on the “canvas” and the brick wall splatters. I’ve used some LF Woodgrain paper to cut out portions of the “wooden” pieces and the rest of the pieces were cut from white cardstock and then just colored with Copic markers. I arranged the scene to make it fit the way I wanted and then attached it down with some of the pieces being popped up with foam tape. (The sentiment on the rainbow canvas blob was from a freebie stamp the company is famous for adding to your order.) I had fun making this one and I chuckle at the “I arted” sentiment! 😅
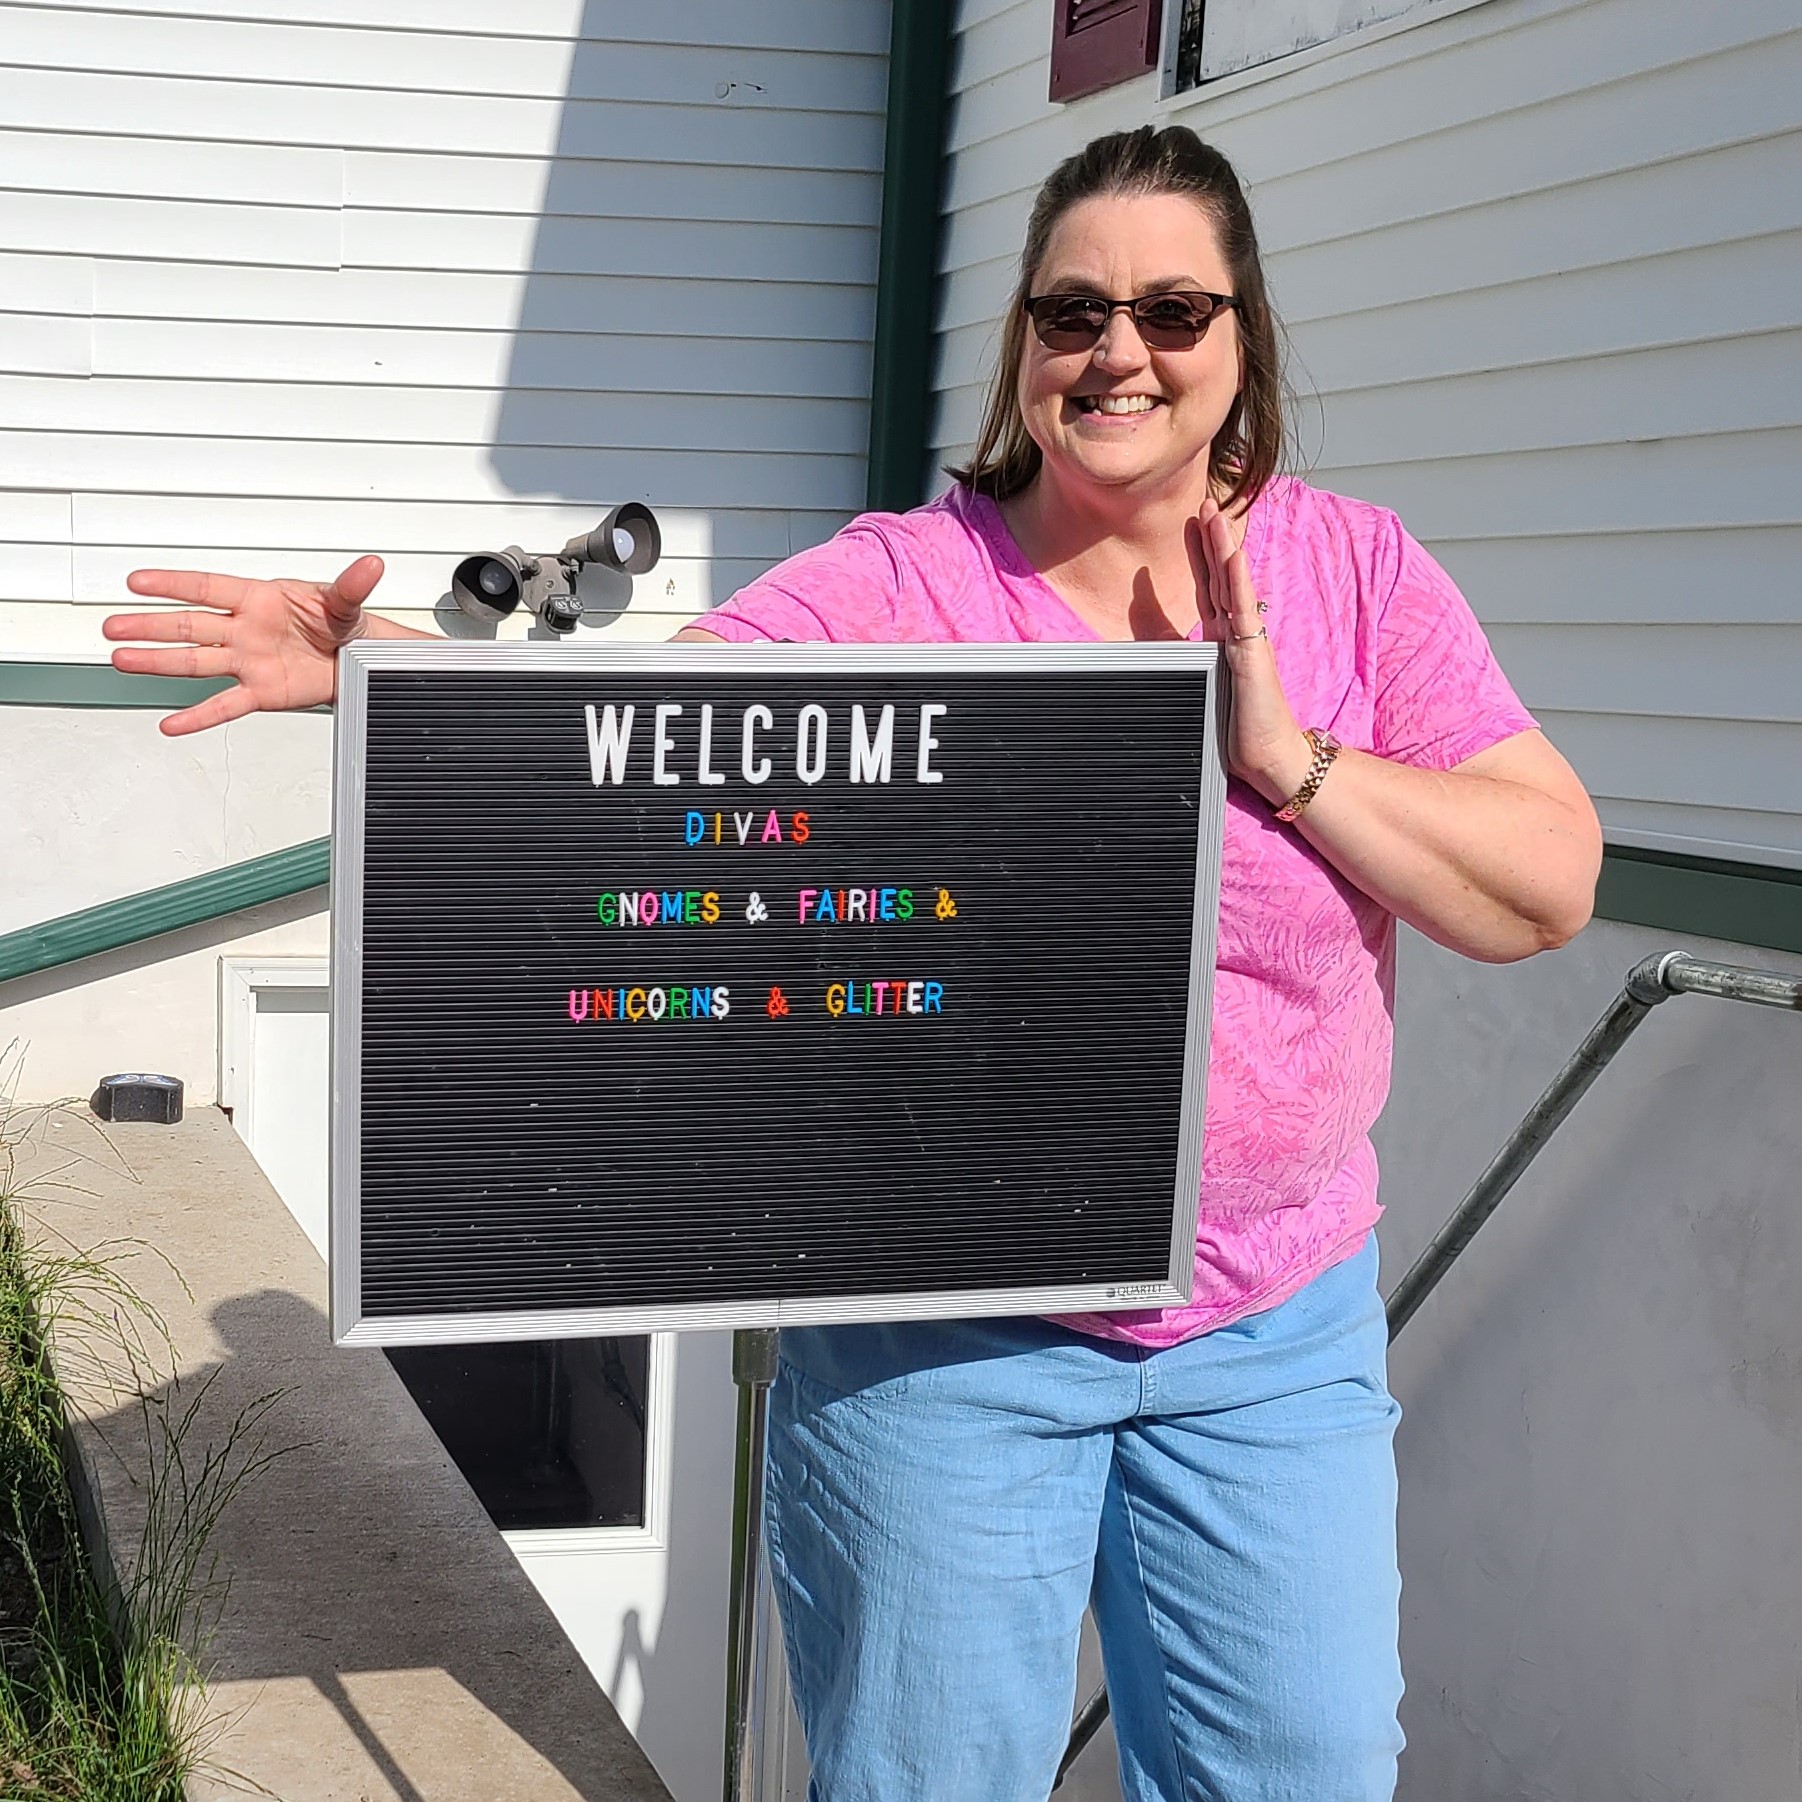
For the “Painting Divas” Retreat, we had projects with different teachers and of course you probably recall the Mixed Media birdhouse I did from my past blog post. CLICK HERE TO VIEW POST The theme was on that cute little sign as we arrived…”Gnomes & Fairies & Unicorns & Glitter”…how fun is that?!! We were to create a decorated gift bag to bring with us using the theme and enter for a contest…but totally forgot to bring mine back home for a photo to show! LOL (I am hoping that we get together to share some photos as I wish I had taken more than what I did!)
I took a quick photo with birdhouses everyone finished for my class, and it was so fun to see everyone’s interpretation of how they made their own. I enjoyed seeing what everyone did! (I think two of these are missing in this photo.)
Now, I am not an avid decorative painter and don’t spend a whole lot of time doing it, but a couple of girls at this retreat are, and have been doing it for many years! (even longer than I have been a paper crafter…which is a LONG time! LOL) So I have had the privilege of learning a bit about it. I’m glad to have this time to share something together and doing when we can. I appreciate it and the memories that are made. 🥰
Below is my gallery of projects that I did for each class. I did this in order of when each class was taught. If you’re directly on my website, just click on each photo to enlarge it and also see the description of what the dimensions and types of surfaces that were used. All were hand painted by me using acrylic paints.
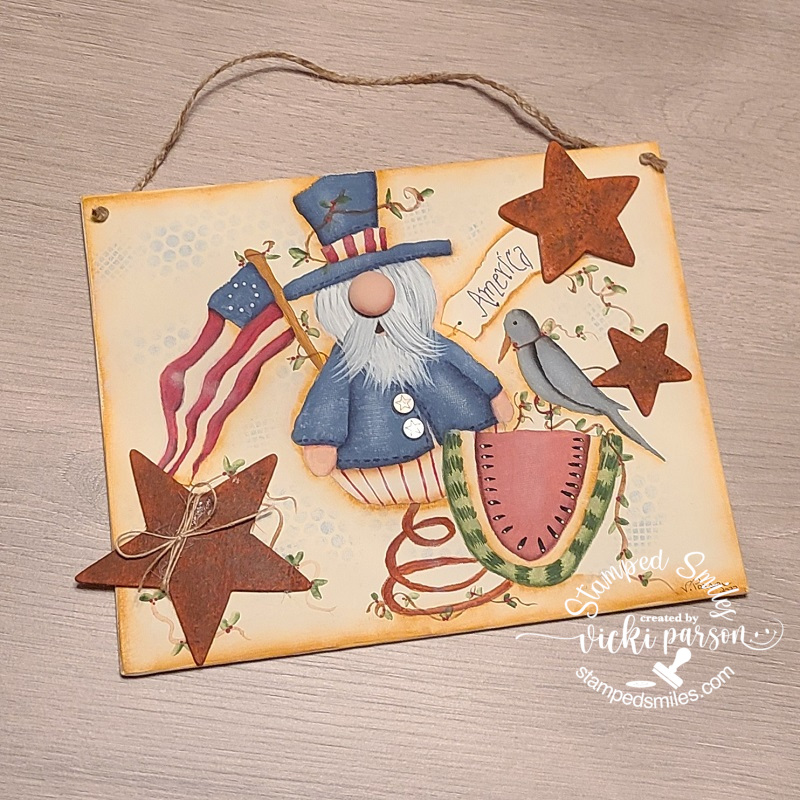
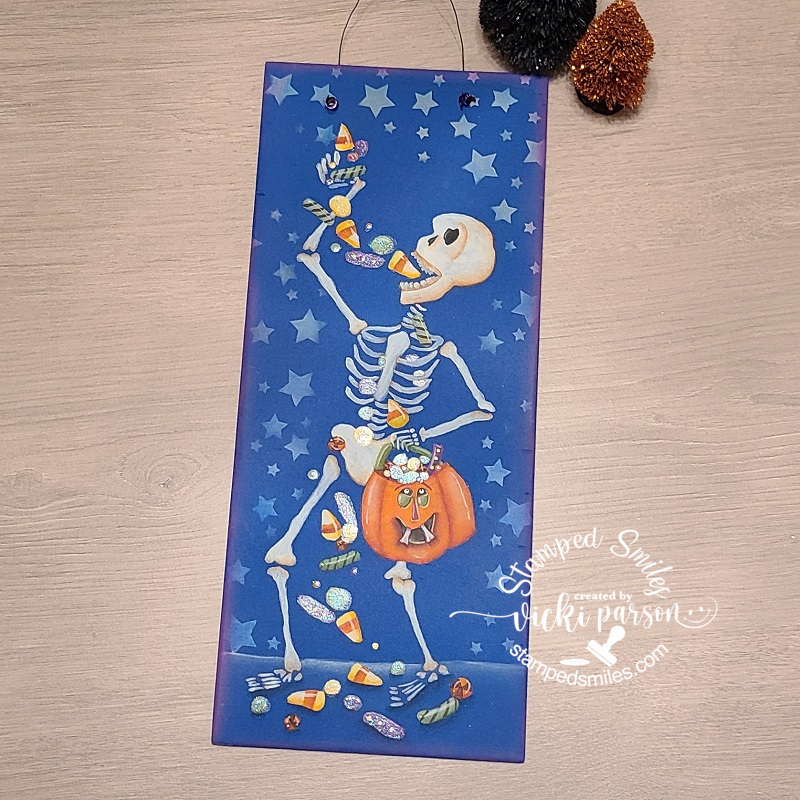
Painted over a canvas board measuring 8″ x 10″ with addition of 3 stars, buttons and knob for nose. You could make a face or paint a gnome, so of course I painted a gnome for mine. I went on my own and added twine to the star…not sure I like it.Painted over a 6″ x 14″ thin wood board. I love Halloween so this was a fun one. It came prepped base coated with the blue background. Stars were stenciled with dry brushing. I added some glitter paint on some of the candies after I sealed it.I zoomed in for a closer look at the pumpkin and some of the candy as it’s hard to see from a distance.Painted over a stretch canvas in 10″ x10″ size pre base coated with black paint. The snowflakes were stenciled with dry brushing and glitter paint was added over the green and red areas. Gold Drip Drops were added to elf and Rhinestones to a few of the larger snowflakes. There was also some splattering done over entire piece.This is a cute “photo holder tag” from an 8″ x 5″ thin wood board. I painted over white and then washed with some black for a shiplap look. Wrapped around burlap ribbon plus other ribbons/twine. I added my own decoration at the bottom and popped in a photo.
I have one last project to share which is something I recently finished up before this painting retreat, but it had been sitting around the last few years as an un-finished box not being used.
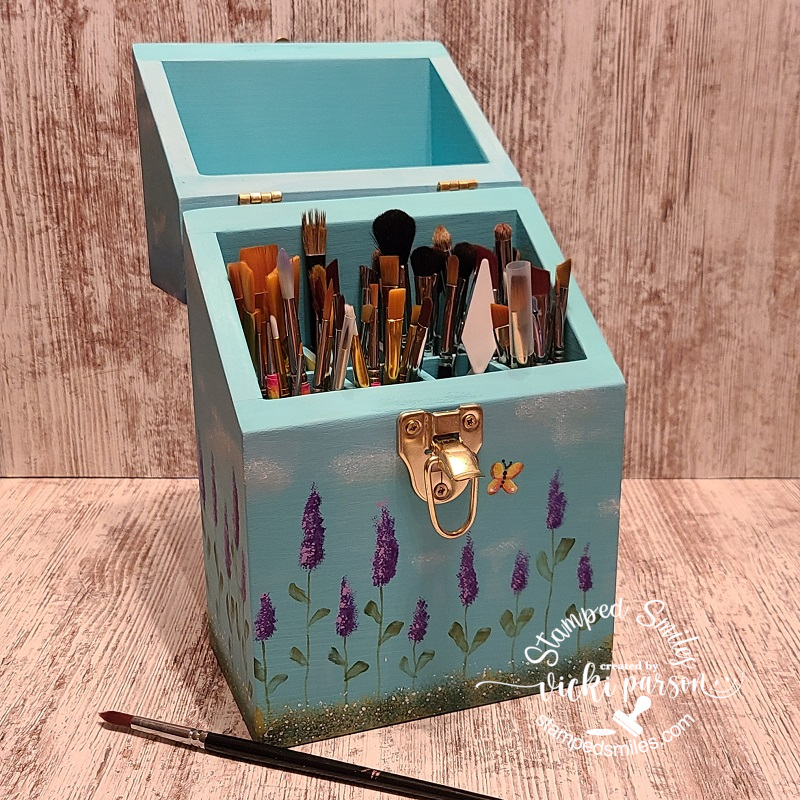
A few years back, I had gone to a paint convention and purchased this brush box that was hand-made by an older gentleman and vendor at this place. I started it quite a while back and finished up the top portion of the box doing some ombre painting. I added the wooden lettering on the front and some glitter paint to the lettering after it was sealed.
And here’s what the inside of the box looks like with all of my brushes stored in it. (Well most of them anyway! LOL) What I like is that there are separate compartments so that I can organize the different types/styles of brushes in each. The brushes are protected and dust-free. The dimensions of this brush box are 11″ x 7″ x 4″ deep all made with wood. The hardware was removed and then replaced after painting and sealing.
Like I mentioned, I don’t always do decorative painting like this, but since it’s already part of my life and I have accumulated things related to it, I will probably do some things here and there. It’s like a mixed media thing for me as I don’t always do that, but sometimes I enjoy getting things out for something different. I like many different crafts which makes this all so fun for me. It’s nice to have a variety of interests to keep enthusiasm going!
How about you? Do you have interests in other things besides paper crafts?
Stay COOL and safe out there today friends…how do you like to keep cool?
Thanks so much for joining me today and I hope you were inspired in some way on your visit!

 Here’s my AJ page for this month with the “SMASH OUR STASH” February prompt of “Wooden Pieces/Chipboard” :