Hello friends and happy Wednesday! Today starts a new challenge over at the Sparkles Monthly Challenge Blog and this time we would like to see your CAS (or “clean and simple”) creations! I hope you will hop on over to see the inspiration from the team and consider joining in the fun with us!
Here’s the DT creation that I’ve made for it:
Sometimes I feel that CAS can actually be even more difficult than regular cards and I struggle with thinking I’ve added too much, or it doesn’t look right. I think it’s more of me over-thinking something, though!
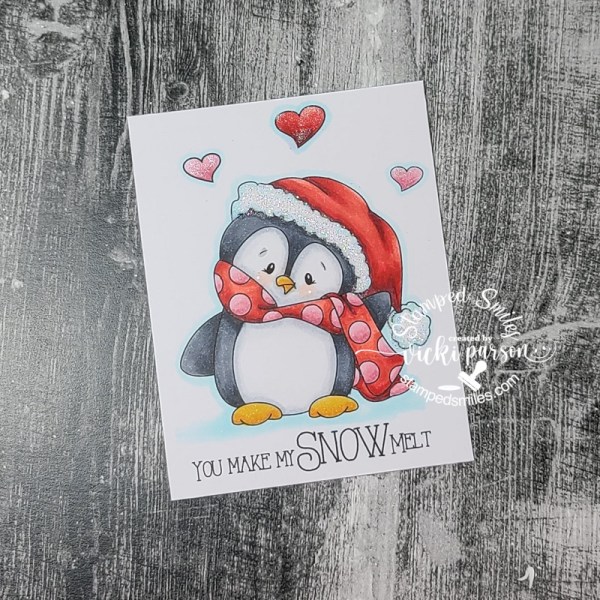
It was my son’s birthday yesterday and I thought this would be a great opportunity to make a card for him. He’s a postal carrier, so I thought this cute owl from the Lawn Fawn Special Delivery would work great for this. I started with the LF Stitched Cloud Backdrop and the LF Stitched Rectangle Frames dies to create the main focal panel. I lightly blended some blue ink in a circle before adding the Copic colored postal owl popped up with foam.
Over some red cardstock, I white heat embossed the sentiment. (I don’t remember which LF stamp set it came from) I die cut it with a banner die and popped it up over the cloud panel. I also had an extra die cut heart lying on my table, so I thought it would be great to add with the owl.
Thanks so much for stopping in today! Hope you’ve enjoyed my CAS card and have been inspired to join us this month with your take on the challenge too!
Hello friends and happy November! Really excited to share that I’ve been asked to a be guest designer this month for one of my favorite companies which is Inky Stamper! Yay!🎉 If you follow along with me, then you’ve probably already seen some of my creations using their products. Please be sure to click the badge below to be taken to the store! (The characters are so cute!) I will be adding this badge to the sidebar of my blog here so you can find it if you want to come back to it later.
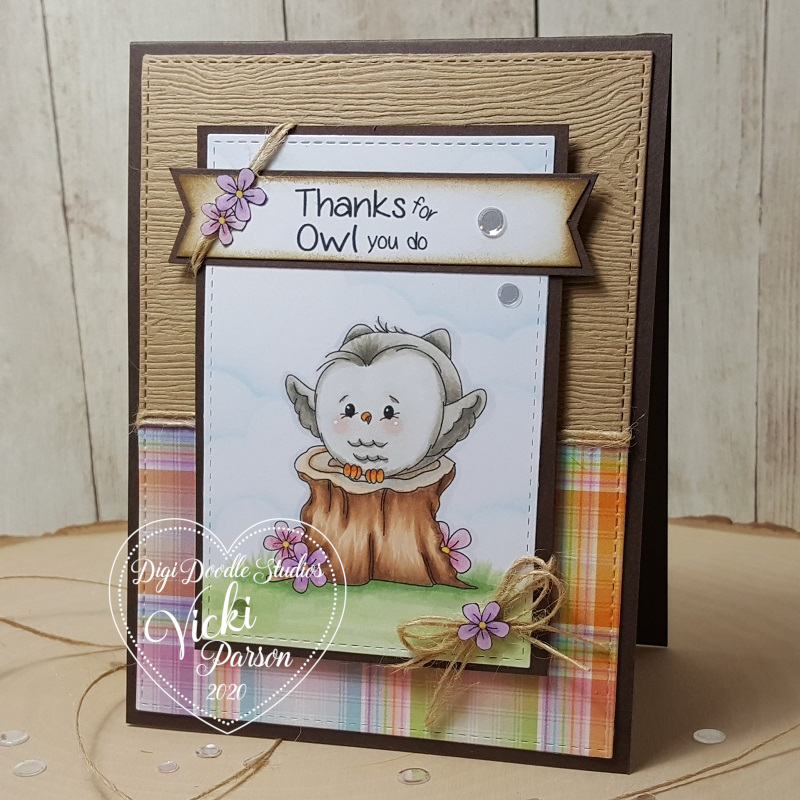
For my first project this month, I actually pulled out an older stamp set which I think is perfect for this time of year especially when you want to give “thanks” to those special people in your life.
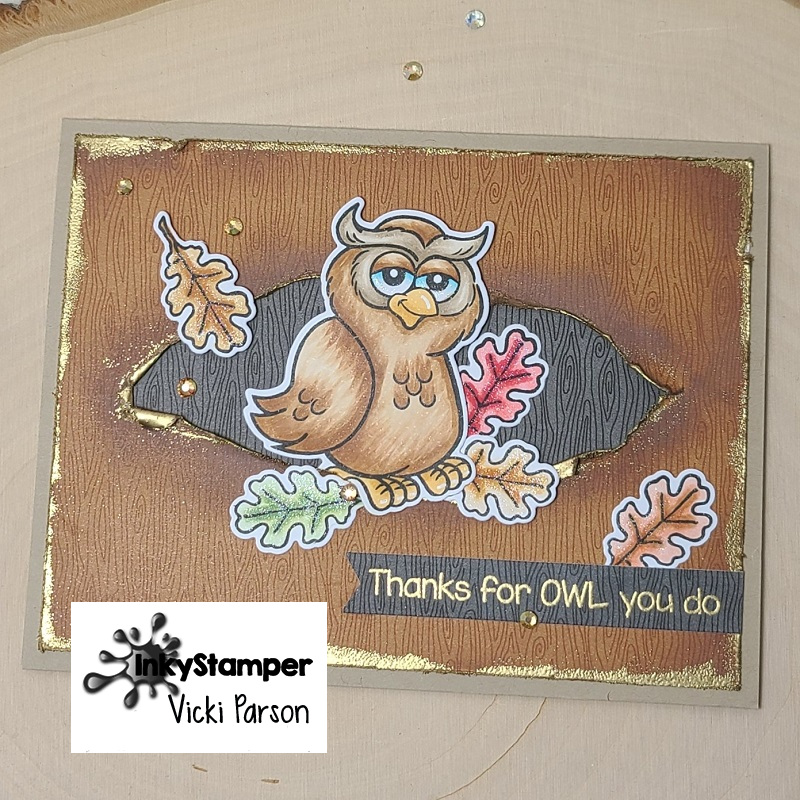
Isn’t this guy with his quirky face adorable?! I’ve used this fun Inky Stamper Owl stamp set with dies for this card. The punny sentiments that are always with these stamp sets make perfect options!
Have you seen the “Torn Window Card” technique around social media? I think you could probably find it just about anywhere and not sure where exactly it originated from, but I wanted to try it and give it my own spin by creating a torn hole with a slightly pulled around opening. Which I thought was a perfect “tree hole” for my quirky owl to pop out of! What’s fun is that you don’t need any special tools or die to do this…just rip it!
For my papers, I’ve used the Doodlebug Buffalo Check & Woodgrain 6×6 paper pad from Inky Stamper with the brown color for the outside “tree trunk” portion that I ripped the hole in the center for and then another piece of the woodgrain in black for behind the hole which makes it look like the inside of the “tree trunk”. Plus, I think it makes the owl stand out more. To rip the hole, I just cut through it with scissors and gauged what size to rip based on the owl image. I used some brown ink to sponge around the edges including around the “hole”. I then distressed the edges of the paper as well as lifted/curled the torn edges of the “hole” area. When I did that, it exposed the buffalo check pattern on the other side of the paper, so then I took my VersaMark ink pad to rub around the edges and gold heat embossed all the distressed edging. I also gold heat embossed the sentiment from the stamp set over some of the black woodgrain for the banner at the bottom.
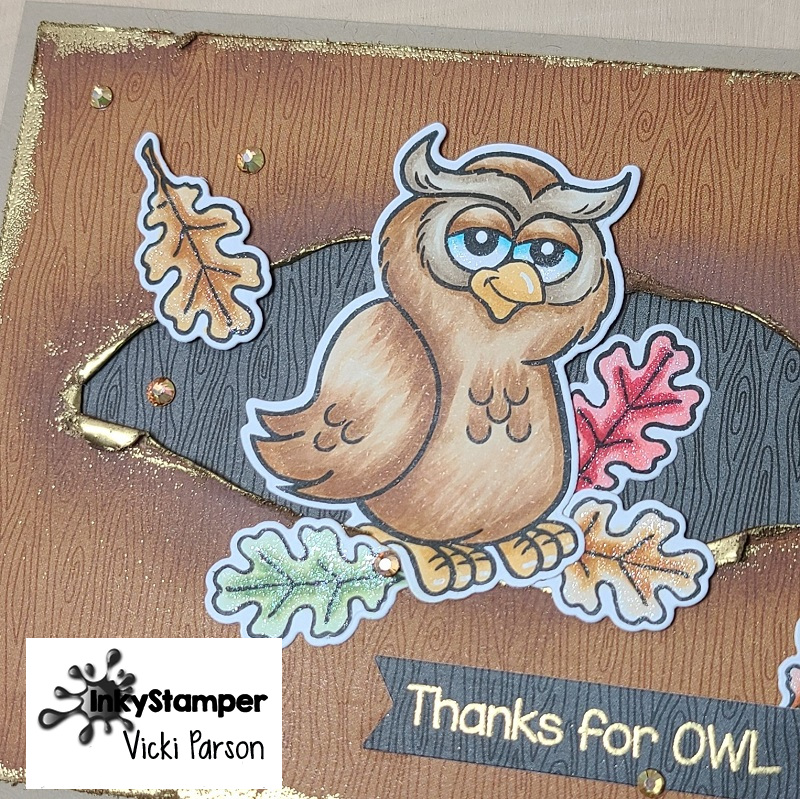
Here’s a closer look at the owl all colored up with Copic markers. I added a few white gel pen marks to his beak and feet. I also colored up several of the leaves with this set and die cut all the pieces to attach to the card. I glued the leaves around the owl and then for the owl, I glued the bottom of him over the leaves and then popped up his head with foam tape. I also used foam tape for the leaf to the left of the owl.
For a little extra sparkle, I painted on (using a brush) some Liquid Pixie Dust for the leaves and the owl’s eye whites. To finish it off, I added some Picket Fence Sands of Time-Gems. (These are a couple of my personal favorite extras!)
I hope you’ve enjoyed my ripped hole owl card today and have been inspired to doing some ripping of your own!
Thanks so much for stopping in and I’ll see you soon!
Hey friends! Hope you’ve had a wonderful weekend and will be enjoying the first ‘official’ day of Autumn tomorrow!🍂 Yay! I know that this is my most favorite time of the year and today it seems like it has finally cooled off a bit which is very welcoming to give the air condition a break! Decorating for Fall/Halloween is also a favorite thing I like to do along with being outside…so I’ll be doing that this week and weekend for sure!
Today I have some creations that I’ve been working on. The first one comes from a challenge that I wanted to enter along with breaking out a new stamp set, but excited about using an older embossing folder and some paper that has been in my stash for far too long:
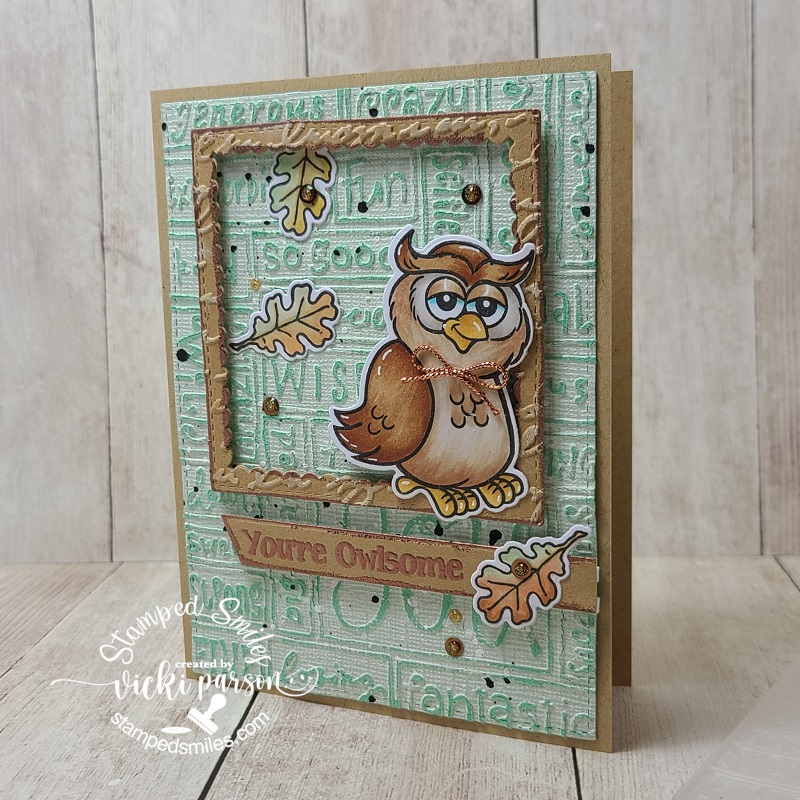
He even looks like a wise old owl…and I thought he would be cute with a little bow around his neck too! This is not a ‘new’ stamp set from Inky Stamper, but it’s the first time I’ve broken out to use this Owl stamp set! Their challenge issued this month was “embossing” and so I pulled out a VERY old embossing folder (remember the Cuttlebug days?! LOL) I think it was one of my very first ones! Plus, I pulled out some Coordination’s textured and colored cardstock. It is weathered looking, but when you sand over it, the color comes out underneath…really cool stuff that I haven’t used very much! You can get the coordinating dies for this ‘Owl’ set which also cuts out the owl and the leaf in the set. I’ve colored them up with Copic markers and used the die to cut them out with.
For the embossing folder card front, I took a piece of the Coordination’s paper, die cut it out and then ran that piece through the selected embossing folder and then sanded over it with a sanding block. I also die cut a frame the same color as the card base and took a separate embossing folder from Stampin’ Up! to go over that with and sanded it a bit as well before popping it up on the card front.
Before placing all of the elements on the card front, I decided to add some white and black paint splatters over the background. I also copper heat embossed the sentiment underneath the owl, die cut the strip and popped it up with one of the leaves over top. (You can also see along the edges that I’ve heat embossed too!) I popped up the owl but left him grounded to the frame and then finished it with copper sequins filled with glitter drops. The copper twine bow was a last element decision. LOL🦉
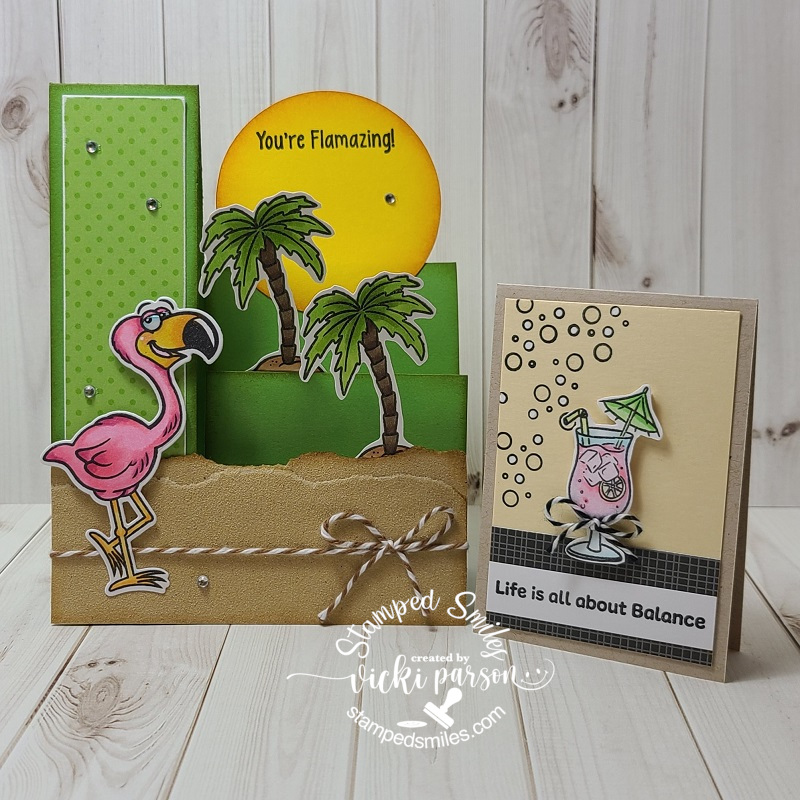
Speaking of sanding, it reminded me of this class I took with Inky Stamper making these cards. (couple weeks ago)
Anyway, the sanding reminded me of this class because at the bottom of the card, the kit included sandpaper for the beach. Really love the look it gave to the design with the texture and tiny bit of sparkle in it!
And the same day I had the class above, I had this class from Craft Fancy during their OOAK event. These were made from their “Alcohol Pearls Butterfly card kit” (I think they have some left in store if interested). The kit came with one alcohol ink color in Celestial Pearls, which is beautiful, but I decided to also add some copper metallic from my stash for another bit of color. I also went on my own a bit with the white heat embossed sentiments at the bottom. I really had fun playing with the alcohol backgrounds and being able to cut them out in one pass for different looks.
I thought this set of four cards would be perfect to add to my donation box to The Butterfly Project in support of domestic violence. So, I was able to send off a batch of cards for that this past week too.
Hope you’ve enjoyed my mixed collection of projects here and I’m sure I’ll have more fun things coming soon! Thank you for stopping in!
Hey there friends! Ever have one of those days where you were up late or you got up in the middle of the night and then realized you weren’t sure if you got any sleep at all? Sometimes I have days and then forget to do something and then I’m thinking about it all night only to realize that I’ve spent my time thinking about it and not sleeping when I could’ve just got up and done it!😂
This post is sort of a representation of that issue! Not only did I forget or run out of time to get my post ready, but it’s also THE last day of the month to get these projects finished for the challenges they were intended for! Story of my life!
Oh my gosh this is too funny!!🤣 A few months back I had spent some time at the Taylored Expressions store and had a laugh at some of the sentiments that I didn’t realize were in the store and decided that they would make some great cards to send out and they go well with those Grumplings stamps too! I also wanted to participate in the #TEMAKER challenge before it ends, so I enjoyed putting this one together!
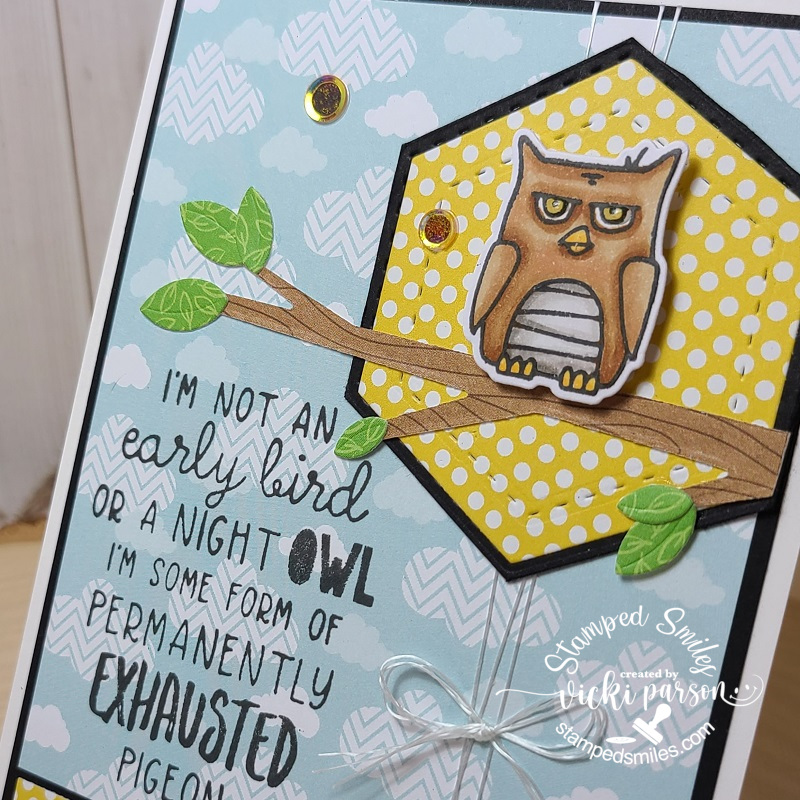
Believe it or not, I had a sample of dental floss in my purse and decided to pull some out and use it for this card! LOL! It meets the challenge which is to use something from your purse or junk drawer! I just tied it around the card front! I used some dies from my stash for the tree branch and the hexagon shape. The papers comes from Taylored Expressions along with the Grouchy Grumplings II stamp set (owl) that I cut out with the coordinating die and popped him up with foam tape over the branch. The hilarious sentiment comes from the Pitch Black stamp set and I know I’ll be using some of those others on more cards soon! Tee hee! I also found some fun yellow sequins laying on my desk and added them to finish it off!
Here’s a closer view of the “bird” and how I’ve colored him up with my copic markers. I’ve used the TE papers to cut out the pieces in the branch as well as the background and hexagon shapes. If you look at the “bird’s” eyes, you can see where I’ve added some glossy accents. He does look a bit tired!!
The reason for the strip at the bottom actually came from a mistake in calculating measurements for my card panel, so I just added a strip that I cut out from the hexagon die and used it as part of the design. Sometimes there are ways to fix mistakes, so never think you’ve ruined something!
I hope you’ve gotten a chuckle from my card today as it has made me laugh!!😆 Thanks so much for dropping in today as I really appreciate your support and thoughts here!
P.S. I have been busy “behind the scenes” doing various different things and haven’t shared them as of yet in my posts, but here’s a little look at what I’ve been doing lately:
I also haven’t shared my latest masculine cards, so I’ll be sharing those soon as well as other things I’m working on too! Just getting things sorted out and taking the time to do it is all!
Hello friends! We’re finally on the last Friday of February! Yay!
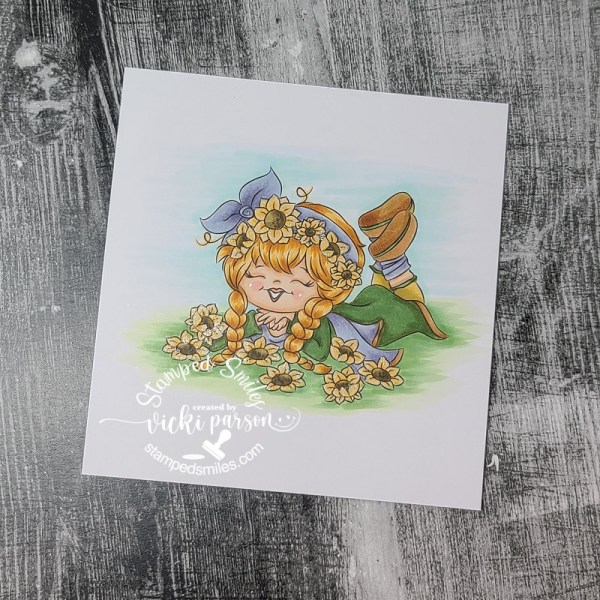
Although we’ve had snow in our forecast recently, I’m feeling Spring will be in the air soon and I really look forward to it along with all of the pretty flowers and green grass! So today, I’m sharing a card I’ve made using this adorable Pairables set from Digi Doodle Studios:
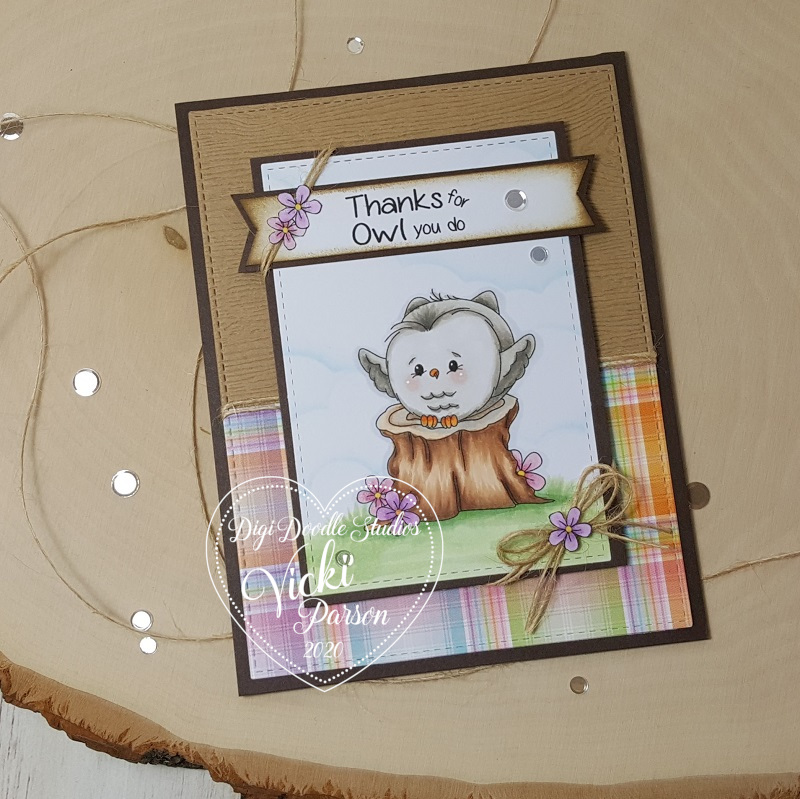
Isn’t this little owl the cutest?! I love how he has his little wings out for a hug! I’ve used several of the images from the “Owl-rageous” Pairables set to create the scene on my card. I have used Word.doc on my computer to arrange and size the different images where I wanted them for my scene and printed it out to color. I’ve also printed out the flower image from the set along with the sentiment separately to cut out for my design.
As you can see, I’ve taken the flower image and sized it differently and arranged it around the stump for the scene. I’ve also used it to cut it out separately to attach to the twine next to the sentiment as well as the twine bow at the bottom.
I’ve printed out the sentiment, cut it out and then cut the fish tails on each end and ink blended with brown ink around it. I’ve matted it with the same brown cardstock that I’ve layered the image panel on and it’s also the base of my top folding A2 sized card.
I’ve pulled out some textured woodgrain cardstock as well as the Spring Plaid papers from my Lawn Fawn stash. I thought the woodgrain and Spring-like colors worked well for this cute owl. I’ve finished it off with some clear sequins.
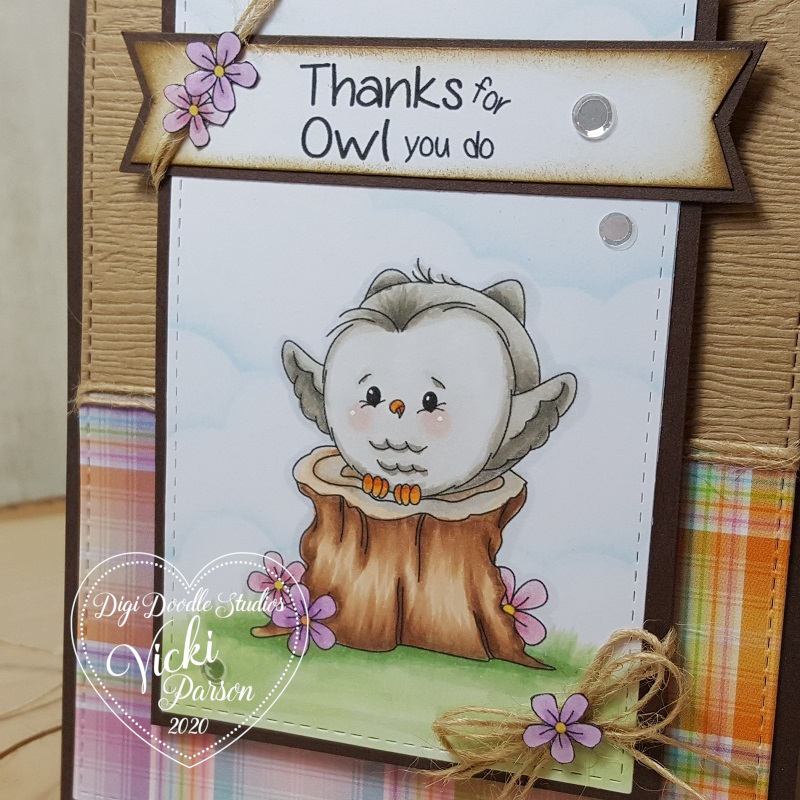
Here’s a closer look at the coloring I’ve done on this cutie! I’ve used the W tones to color him in and then the E20s to color the stump. I also end up going for the G24, G21 and G20 for coloring my grass. I love the bright Spring green it gives I think. I highlighted his cheeks and eyes with a white gel pen.
You can also see a subtle cloud line behind him. I’ve used the MFT Cloud Stencil with my ink blending tool and Tumbled Glass distress ink to create the background.
You can see that I’ve wrapped some twine around the center of the card where the two different papers meet as well as wrapped around each corner of the image panel. This is where I decided to add the cut out flowers on each end.
I feel like this owl with my arms open and ready to take in all of Spring when it comes and thank Mother Nature for bringing it around! LOL! How about you?
Thanks so much for stopping in today my friends! I’ll be seeing you soon! 🙂
Hello friends and welcome to the weekend! I hope you have some great plans ahead of you and have some fun!
Today I’d like to share this card I’ve made with a darling feathered cutie and the punnyness that goes along with him….
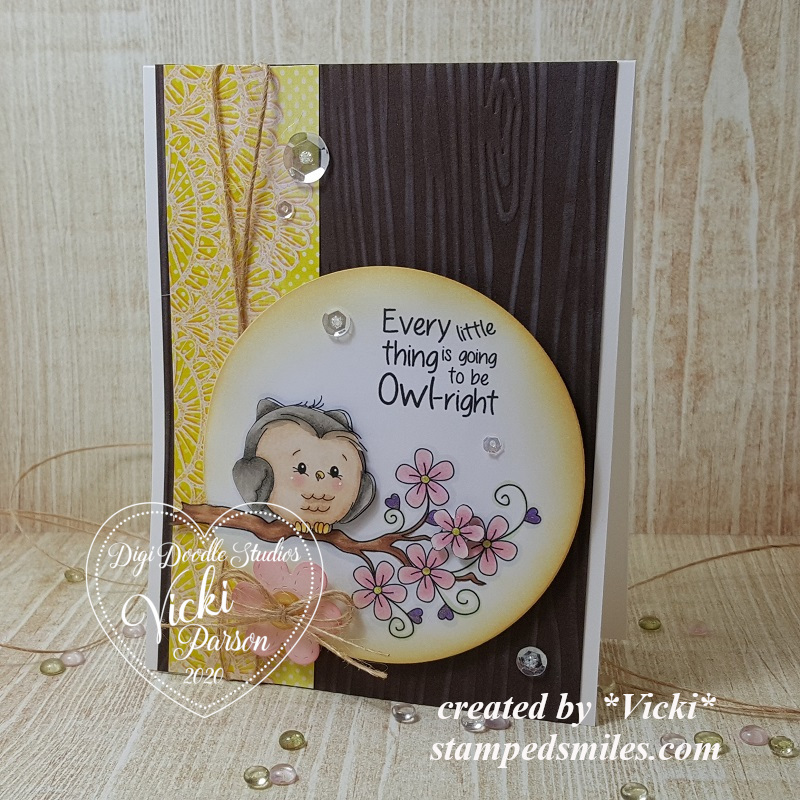
Isn’t this little guy the cutest owl you’ve seen? This image was actually created on my computer with the “Owl-rageous” Pairables digital stamp set from Digi Doodle Studios. The owl, the branch and the sentiment are all separate images, but I’ve pieced them together on my computer and printed it out to create this scene!
I’ve actually printed out an “extra” owl and flower to color in and pop up over the image for added dimension. I used the “out-of-the-box” technique to circle die cut out the image. The branch is sticking outside the circle.
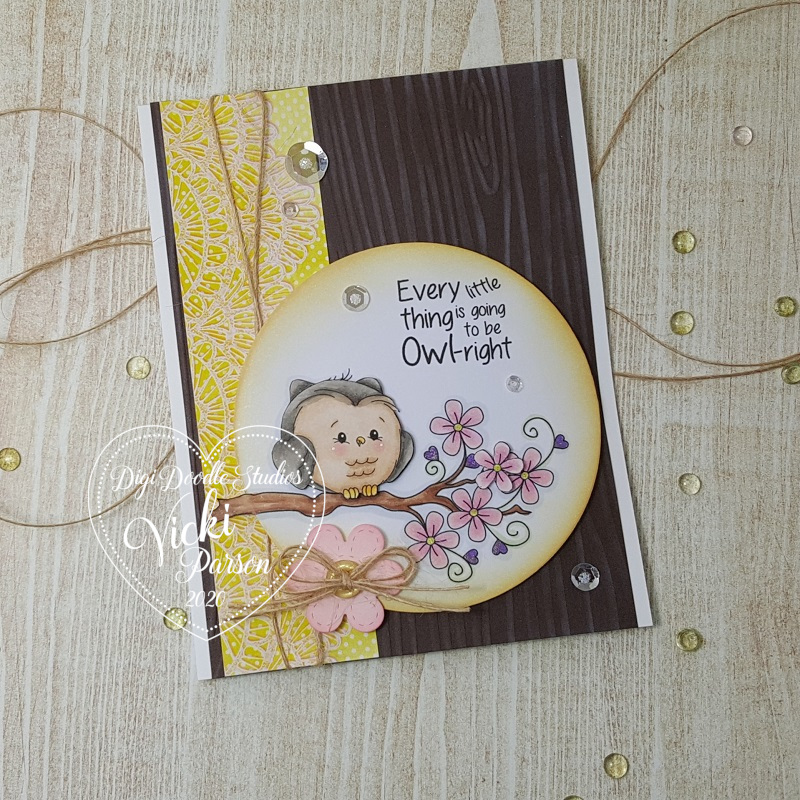
I’ve used a woodgrain embossing folder and rubbed some white ink over it and also added a strip of yellow paper from my stash wrapped in twine along the edge.
I die cut a flower and rubbed some pink ink over it, attached a button and twine bow over it to pop up over the owl panel. Then added some sequins filled with glitter glue in the centers.
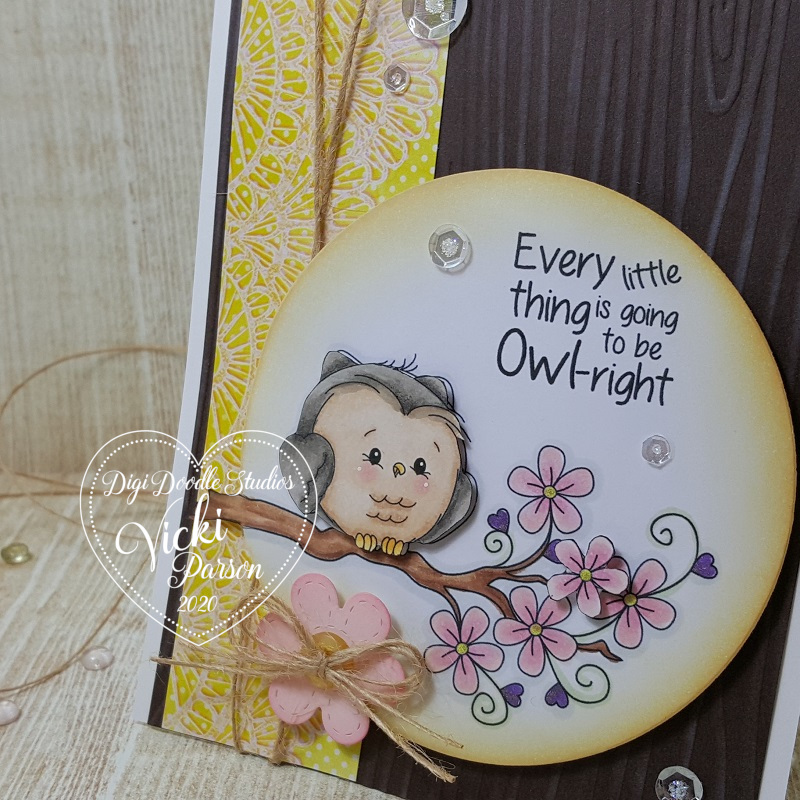
Here’s a closer look at the coloring I’ve done on the images. I’ve used a purple glitter gel pen for the tiny hearts on the branch and then a yellow glitter gel pen for the centers of the flowers. I’ve used some yellow ink to sponge around the circle panel.
This card actually has me longing for Spring to come with those flowers! He’s letting us know that everything is OWLright!! ha ha ha!! Hope you’ve enjoyed my creation today and I really appreciate you stopping in! See you soon!
Hello friends! I hope you’re having a wonderful week so far!
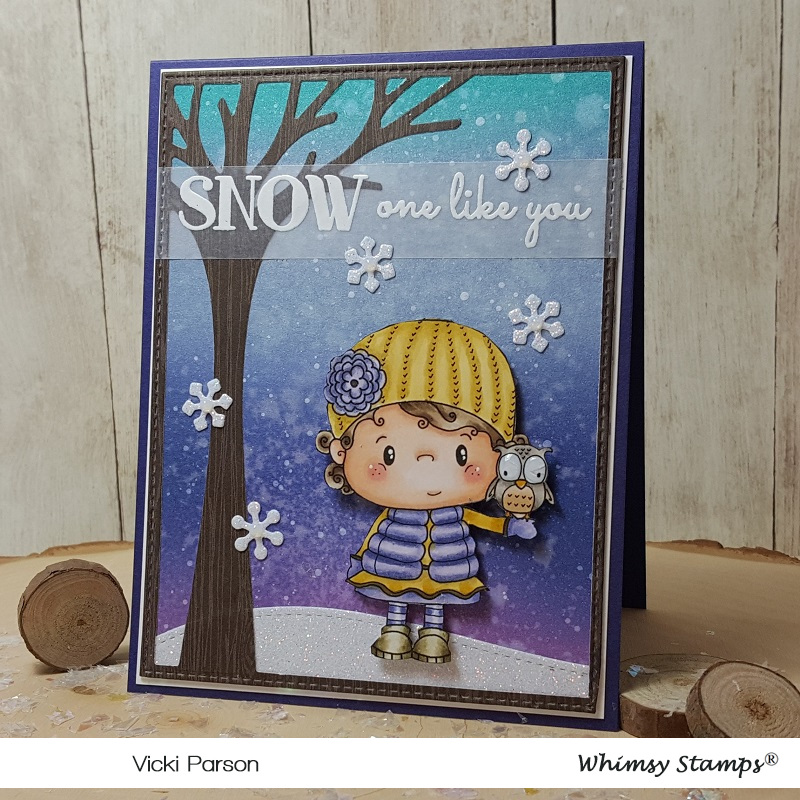
Today I have creation to share with you using this really sweet image from Whimsy Stamps:
I really adore this digital stamp that came out this month for Whimsy Stamps called Tawny. It’s one that I picked to make something with as it was a bit personal to me. That little owl with those big eyes is so sweet and really reminds me of my grandma who passed several years ago. She was an owl lover….so she’s like a sweet little angel with me here! There was SNOW one like her either!
To create my card, I started with some watercolor paper and Distress Oxide Inks in Seedless Preserves, Dusty Concord, Stormy Sky and Broken China (from bottom to top order.) I spritzed it with a water bottle and soaked it up with a paper towel. I then took some white paint watered down and splatter it with a fan brush over the panel. I also took some shimmer spray and covered the entire panel. You can see it better in the photo below.
I took a Lawn Fawn die to create the tree border with woodgrain paper and then die cut a snow border with glitter cardstock and glued it behind the frame. I also took the sentiment from the Whimsy Stamps Snow Flurry clear stamp set and white heat embossed it over a strip of vellum that I’ve attached over top of these layers (with the inked background also) by using my Xyron Sticker machine. These pieces were die cut with a stitched rectangle die, layered over a piece of white cardstock and then mounted onto a purple A2 sized top folding card base.
Lastly, I’ve added my image and some snowflakes that were cut out with some more glitter cardstock and each snowflake was dotted with some Nuvo White Blizzard Glitter drops.
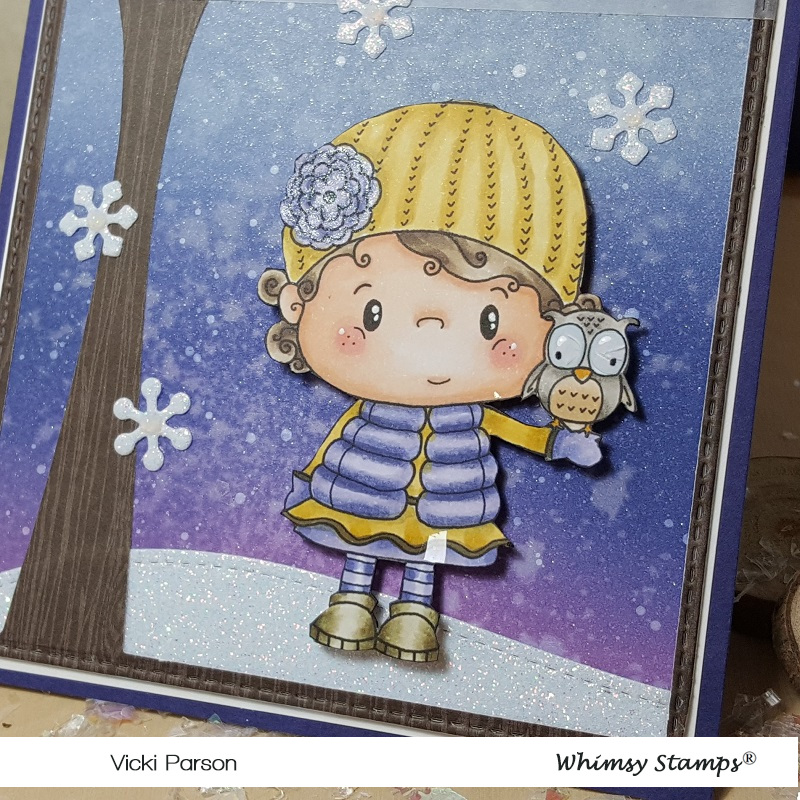
Here’s a closer view of the image and how I’ve got her colored up with Copic markers.
If you take a good look at the top portion of the background, you can sort of see the shimmer from the spray. It’s really sparkly in the light.
I accidentally got a piece of the “faux snow” photo prop on her skirt. LOL! I covered the flower on her hat with a glitter brush pen and I’ve used some Nuvo Morning Dew Crystal Drops over the owl’s eyes, but it cracked. I don’t like it as much as the glossy accents as it doesn’t crack so easily like this does.
She was fussy cut out and popped up over the snow border with foam dots.
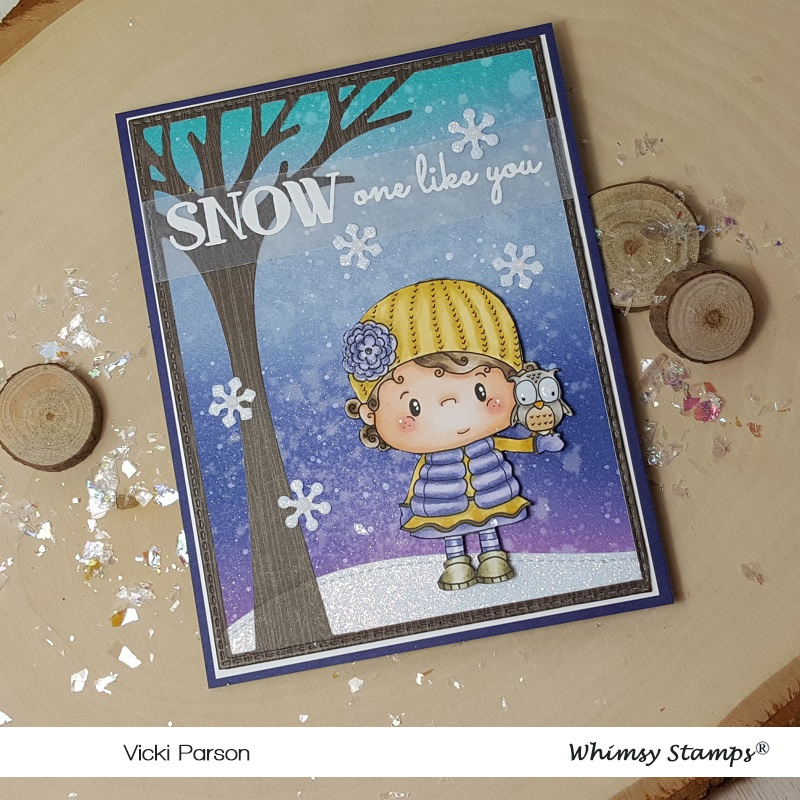
I really like how this one turned out with the colors and I hope you like it too! The inked snowy backgrounds are really fun to play with!
Thanks so much for dropping into today and I’ll see you again soon!