Hello friends! Welcome to March! Although it’s still cold and even some snow coming in our forecast, I know that warmer weather is coming soon along with those pretty flowers! I have a full weekend of crafting coming, so I’m prepared to get through this cold snap!
So, I have unfortunately had to make and send a couple of pet sympathy cards as I didn’t have any on hand. I decided that I needed to pull out a card kit from My Favorite Things called “Rainbow Bridge“, I think. It’s no longer available, but I know they have a few things in pet sympathy. I wanted to make sure that I still had some of these on hand when needed because I feel like these can be hard to make.
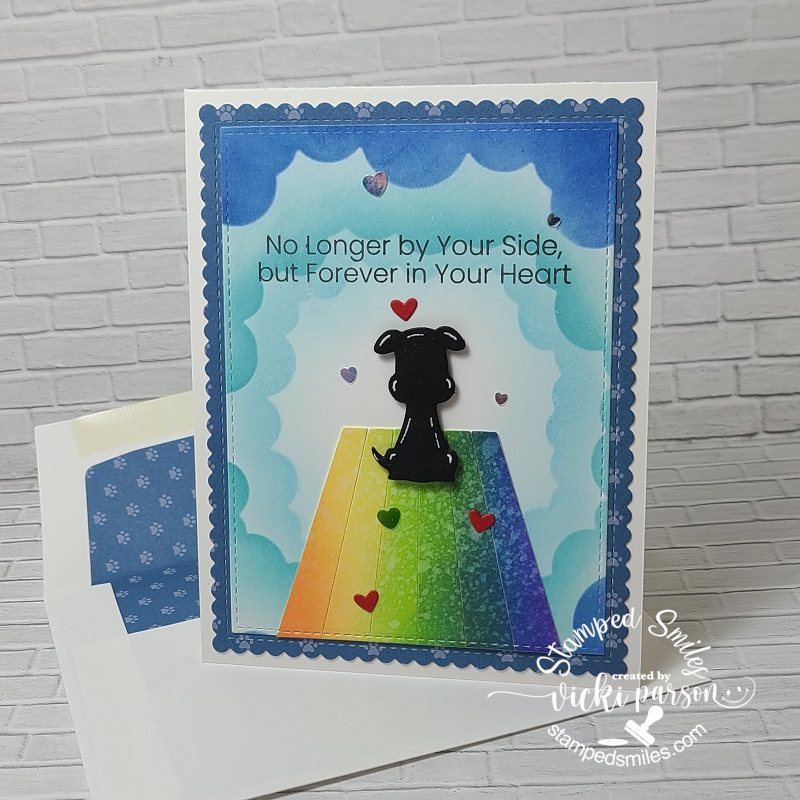
This card was made and sent out in January for someone who lost their precious fur friend. I thought the silhouette looked a similar shape to the photos I saw. I’ve used the stencil and dies that came with the kit along with some of the papers included in the kit with the paw prints. I’ve also used the same papers as a liner for the inside of the envelope that you can see in the photo.
I’ve ink blended some rainbow colors and then used the die set in the kit to make the rainbow bridge and added some hearts around the silhouette pup which was popped up over the rainbow bridge.
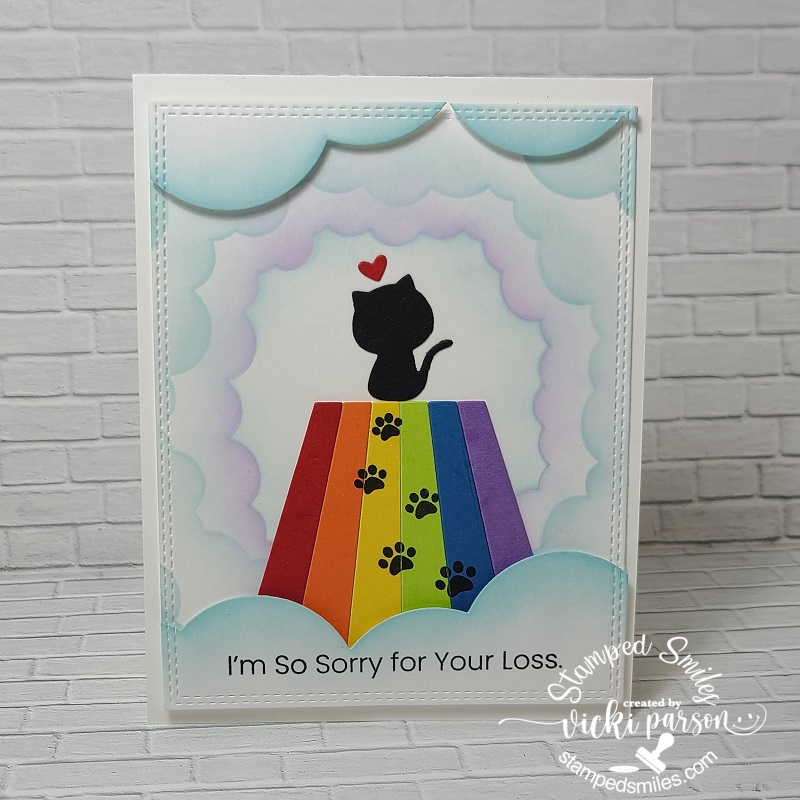
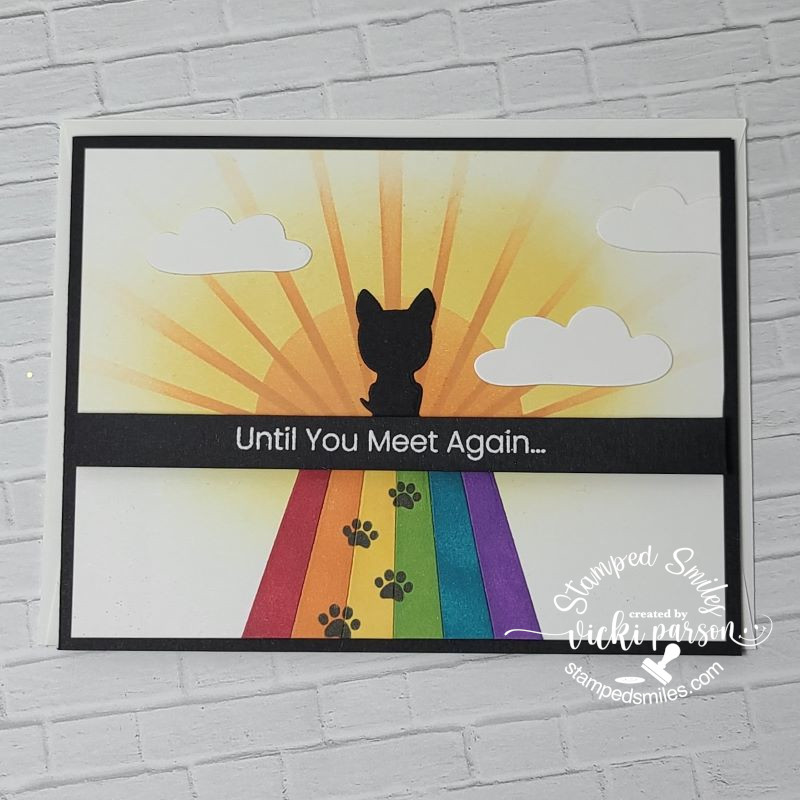
I also needed to make a kitty one and then just decided that I was going to use this card kit to make several of these different pet sympathy cards so that I had some on hand when needed. I thought that was a clever card kit and knew it would be very useful to create lots of pet sympathy cards with.
These are all in the gallery below, so if you’re on my website, just click on each photo to enlarge the size so you can see the details:
Sometimes it’s just good to sit down and craft to have some cards on hand that you know you’ll probably need at some point, but don’t want to hurry to try and put something together because you need it.
Hope you’ve gotten some inspiration in my post today or found some inspiration with it. Thanks so much for stopping in today!
Hello friends! It seems that I have went MIA on you, but I promise I’m still here! I’ve been really busy “Behind the Scenes” as they say and have many things going on at once that I’m trying to juggle, but I do have TONS of things to share that I’ve been doing and hope you enjoy seeing them! (LOTS of photos!)
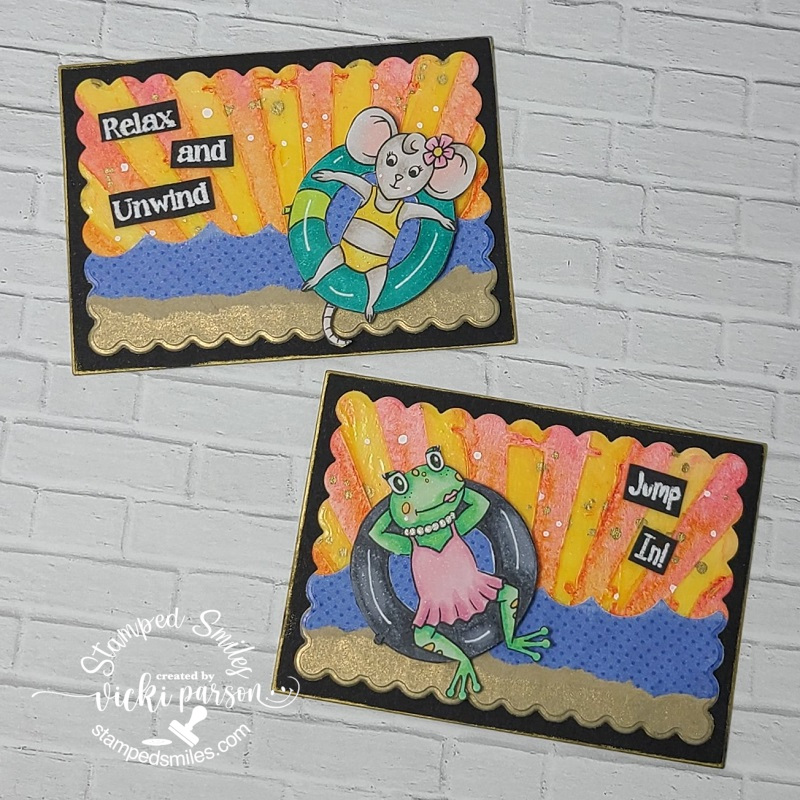
First up I have a couple of fun Summer themed ATC sized cards using some Inky Stamper sets called “Splash” and “Chaise Lounge“. (Still not wanting to warm up much for Spring…so I’m wishing for HOT summer now!😁) I made them for this month’s theme of “ATC sized or mini cards” challenge in their FB group. I started out with a sunray stencil and used some yellow glaze paste and once dried I added some watercolor over it which was resisted by the glaze which gave me this look for the background. I splattered it and then added some strips of blue dotted paper cut from a wave border and then I ripped a piece of gold at the bottom. I cut cut with a scallop die and layered over a black 2.5″x3.5″ piece of black cardstock folded in half and went around the edges with a gold ink pad.
I white heat embossed the sentiments from each stamp set and then cut portions of them out with my scissors to attach over the backgrounds. The images were colored with Copics, fussy cut out and popped up with foam tape over top.
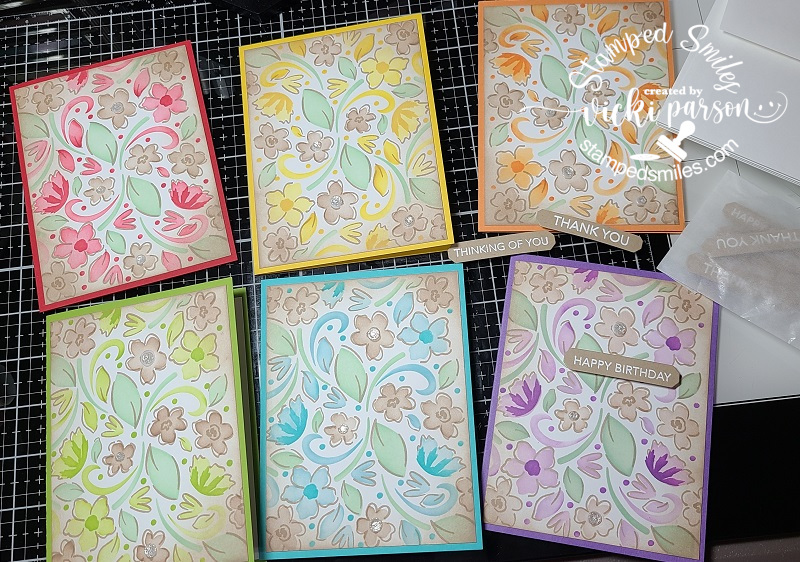
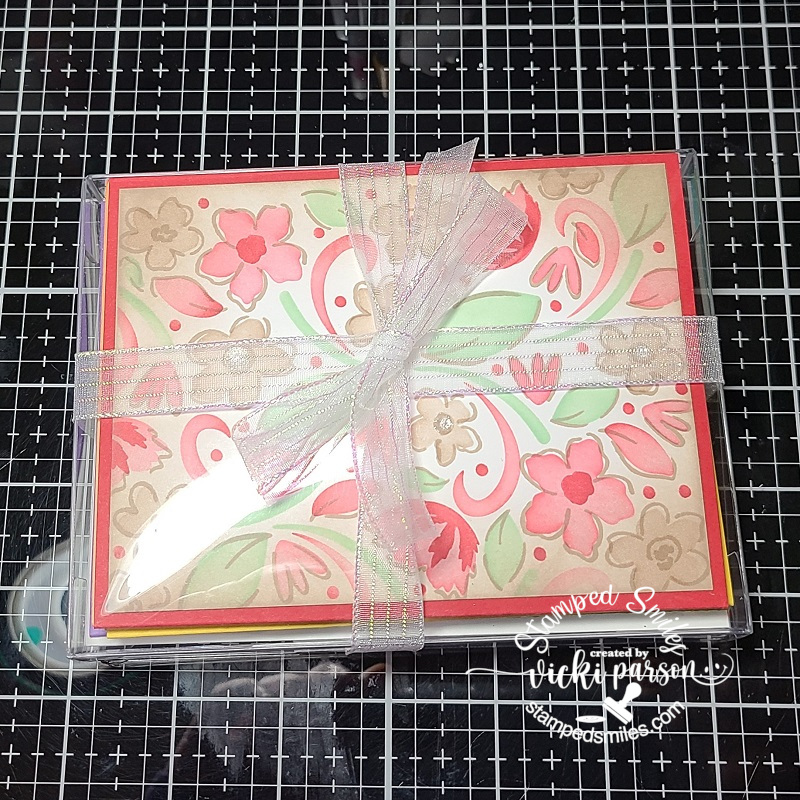
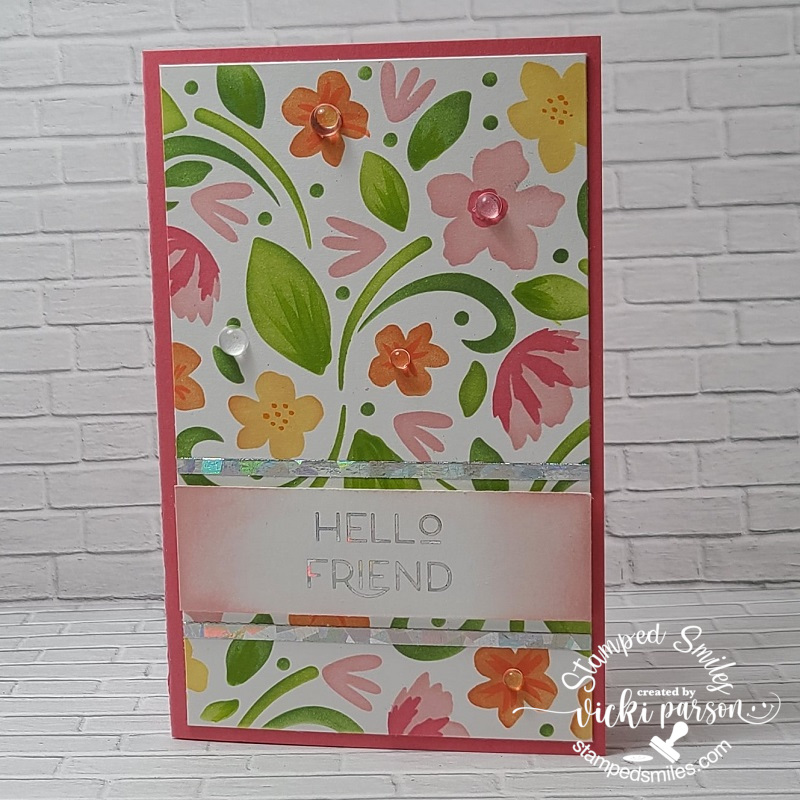
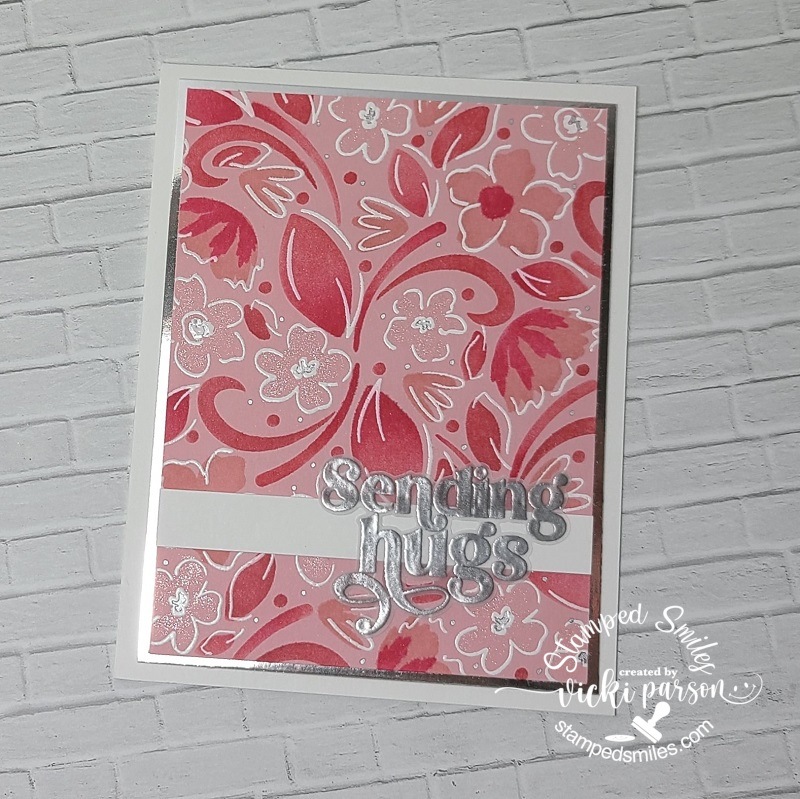
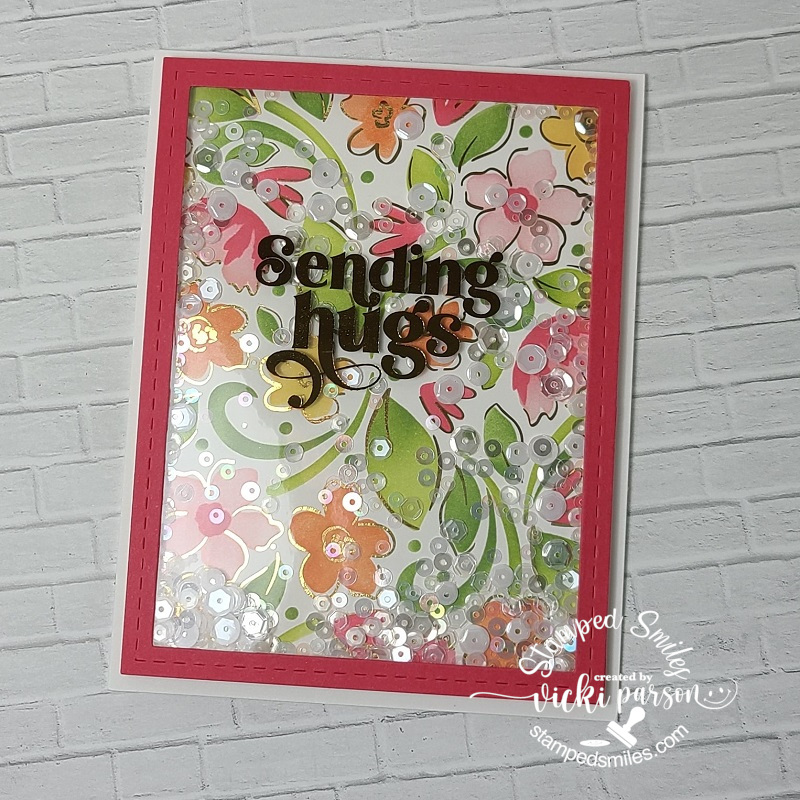
Next, I wanted to share a “Greeting Card Gift Set” that I have made and gave as a gift for someone. I used this wonderful product idea from Taylored Expressions called “Stamp & Give Card Kit 1” and it’s something that I had wanted to put together for a very long time on my own, but this product came along recently which pushed me into gear with no excuse of gathering things together on my own as this was already together for me. All I had to do was do the stamping and stenciling. I coordinated the colors with what was in the set. I like the fact that the recipient of this give set can choose which greeting they want to use for each card and the package of greetings are ready with a foam strip on the back of each one. For my designs, I’ve used the TE “Floral Flurry” Background stamp and stencils which I received from the “Stamp Joy Virtual Event” that I had attended. (not in store as it was exclusive for the event…photos at the bottom of post for that!) I’ve added 3 gems randomly to the fronts of each card.
With the kit, it comes with all of the envelopes, card bases, glassine bag to hold all of the sentiment strips, the card fronts and even the acetate box to put them all in. I just added some ribbon once I put all the cards inside. I certainly plan on doing some more of these greeting card gift sets soon! I think it’s always nice to have a set of themed cards all together and ready to go when you need to grab one quickly!
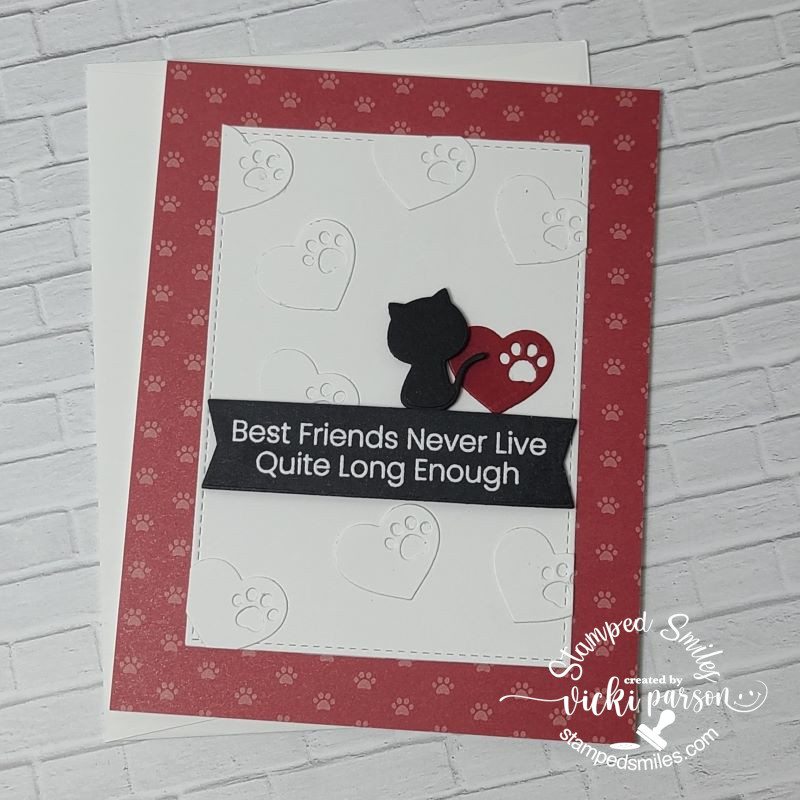
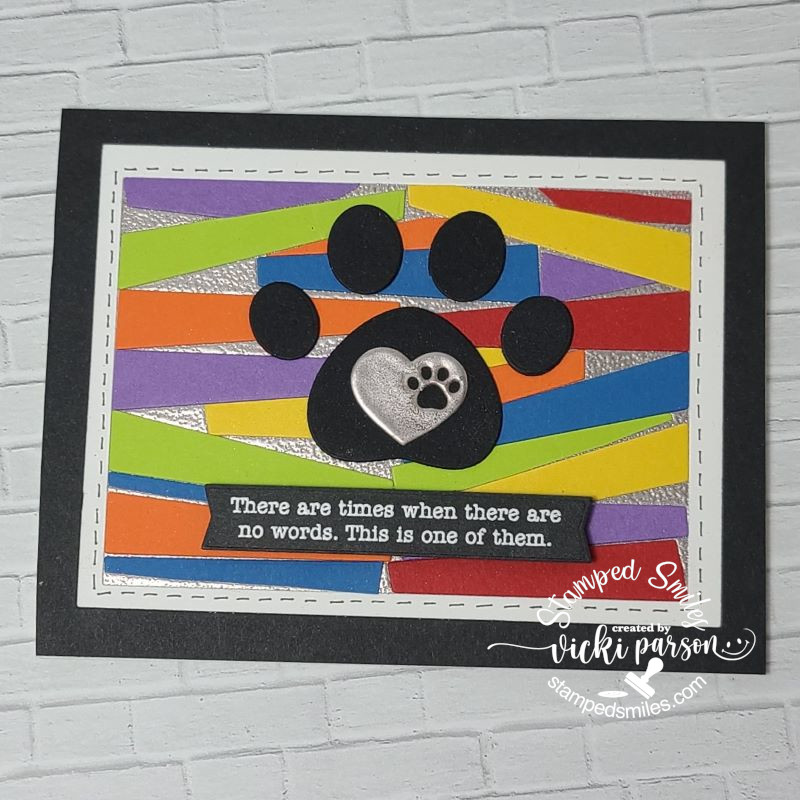
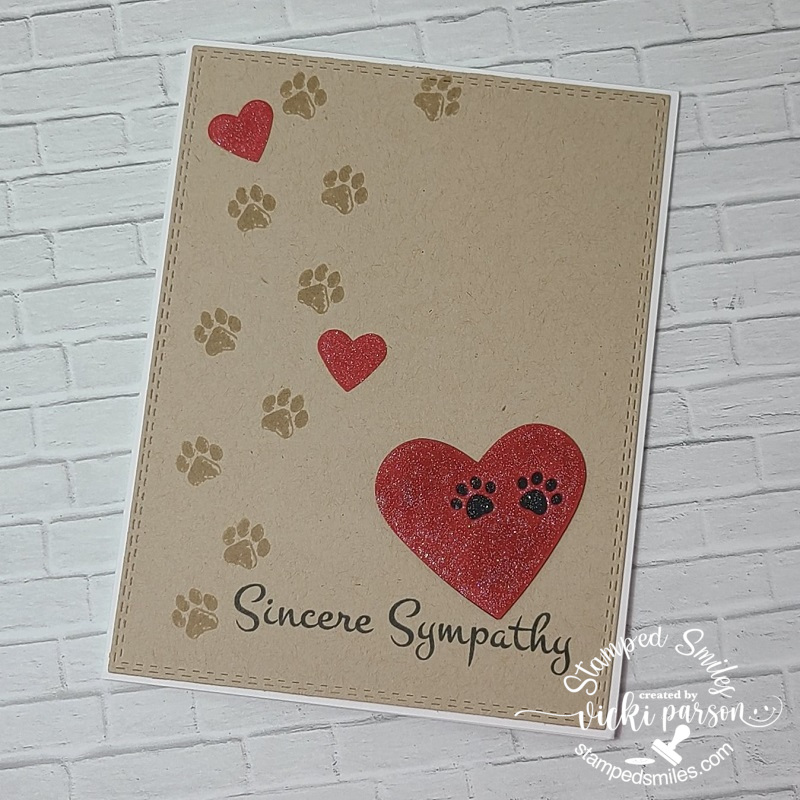
Unfortunately, next up I needed a pet sympathy card and I thought you could never go wrong with paw prints and hearts. I’ve kept this simple and pulled out some favorite Whimsy Stamps “Fill My Heart” and “Furever In Our Hearts” stamp sets for the paw prints and the sentiment. I’ve also used the My Favorite Things “Paw Prints Die-Namics” to die cut a couple of paw prints over the heart that I’ve punched out from red cardstock along with some smaller hearts above it.
I’ve used a glitter brush pen to make the hearts sparkly looking. This was all done over a kraft colored card front that was cut with a double-stitched rectangle die and placed over an A2 sized white card base.
I really need to get a set of pet sympathy going so that I already have them on hand as needed because it seems like I’ve sent many out and don’t have anymore…and I need another one already. I actually need to make sure I have several sympathy cards in general on hand, so I know I’ll be replenishing that soon too.
And lastly, I thought you might want to see all of the projects that I made during my classes and make-n-takes that I’ve done during the Taylored Expressions “Stamp Joy Spring Virtual Event” from last month…gosh, It’s been that long already and I’m just now posting them!🙄
The first four cards were from the classes on the first day (using the same product/style line), and the others are from the second day with all of the Make-n-Takes. If you’re visiting directly on my website, just click on each photo below and it will enlarge so you can see it better along with the typed details about it!
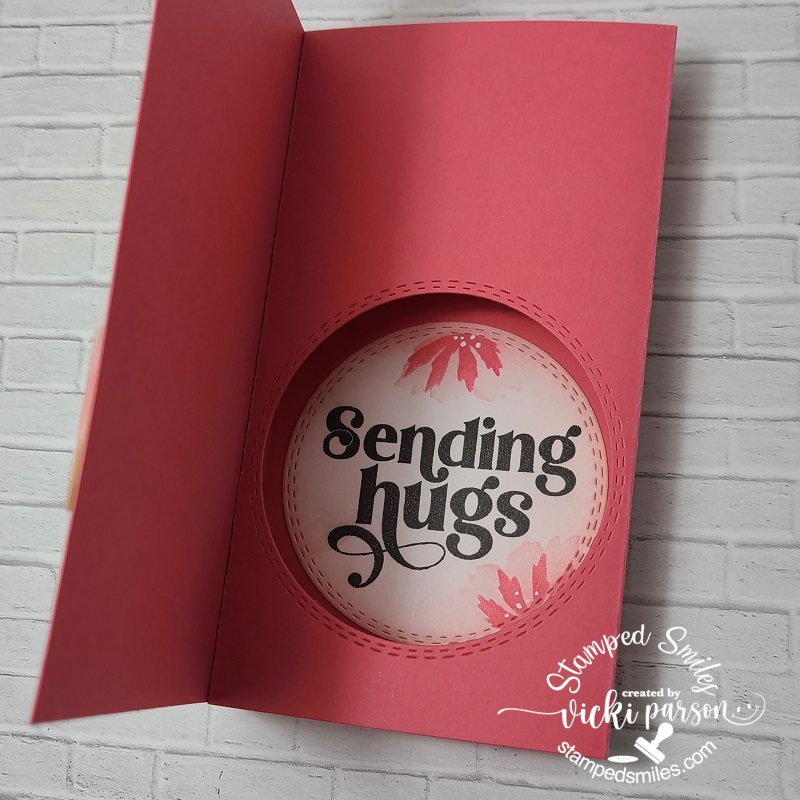
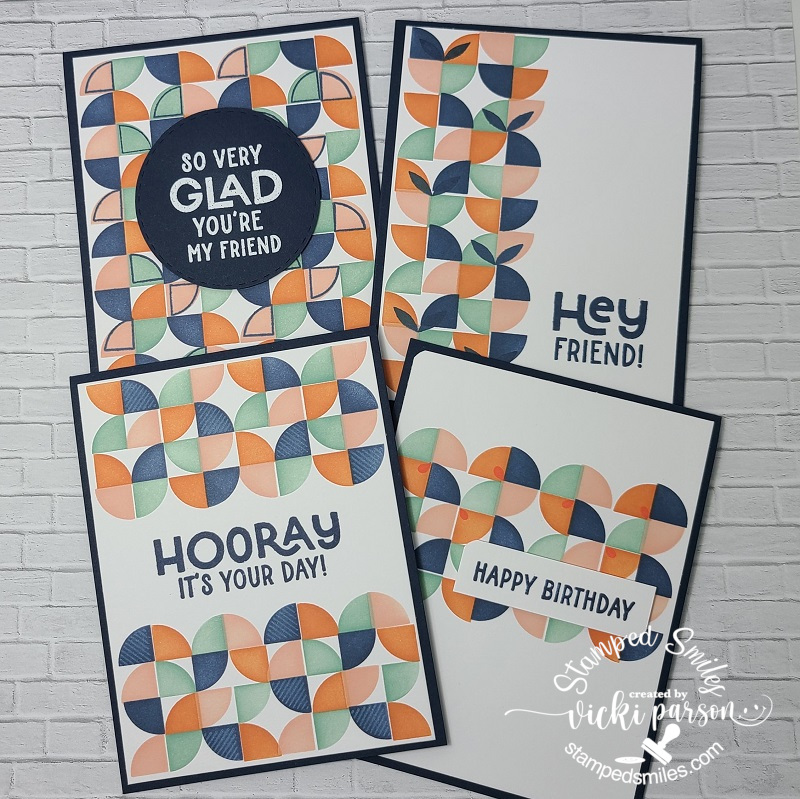
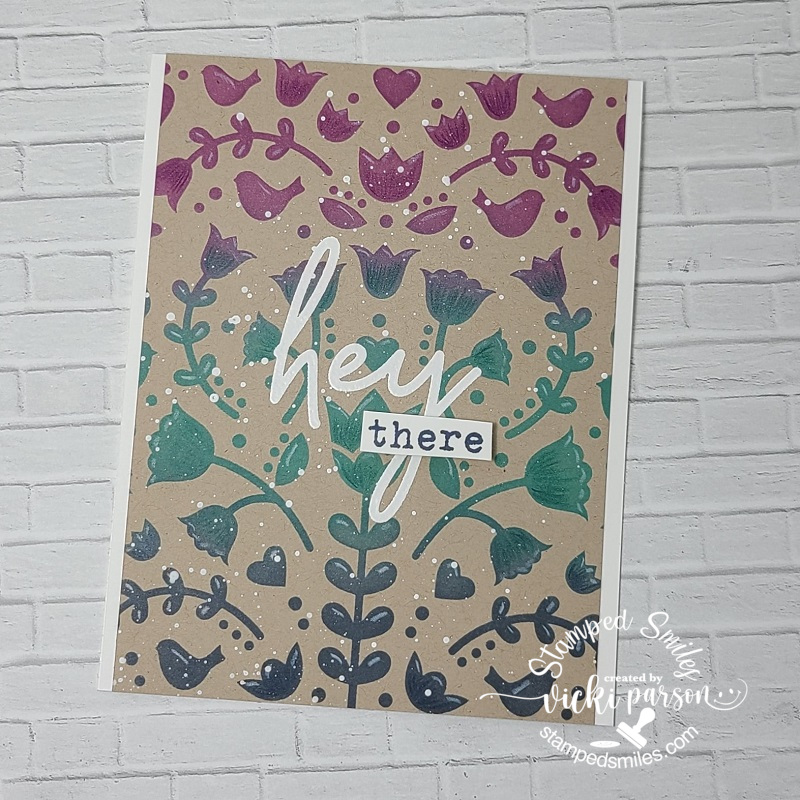
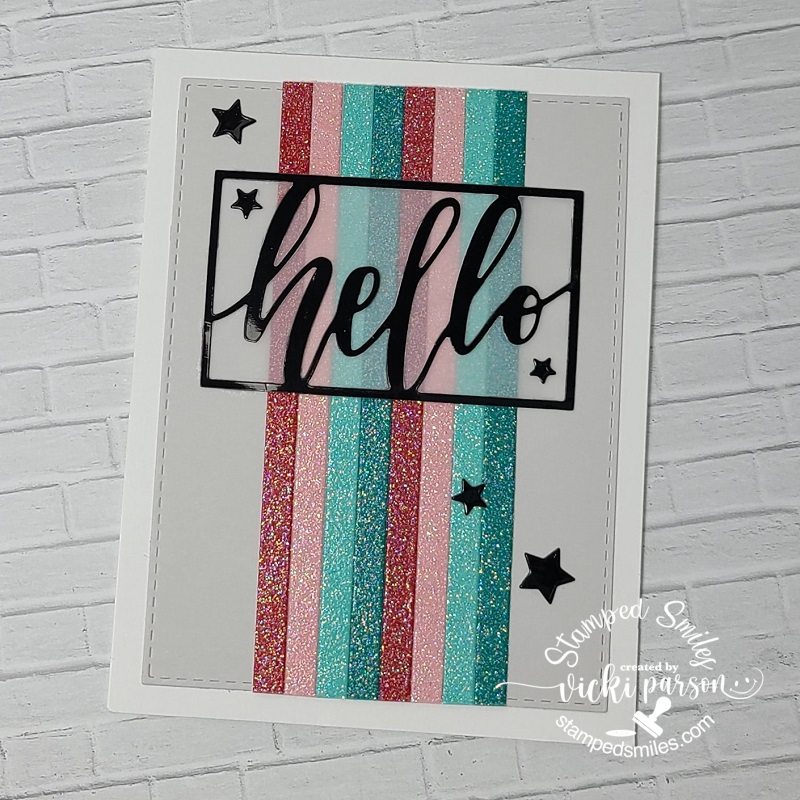
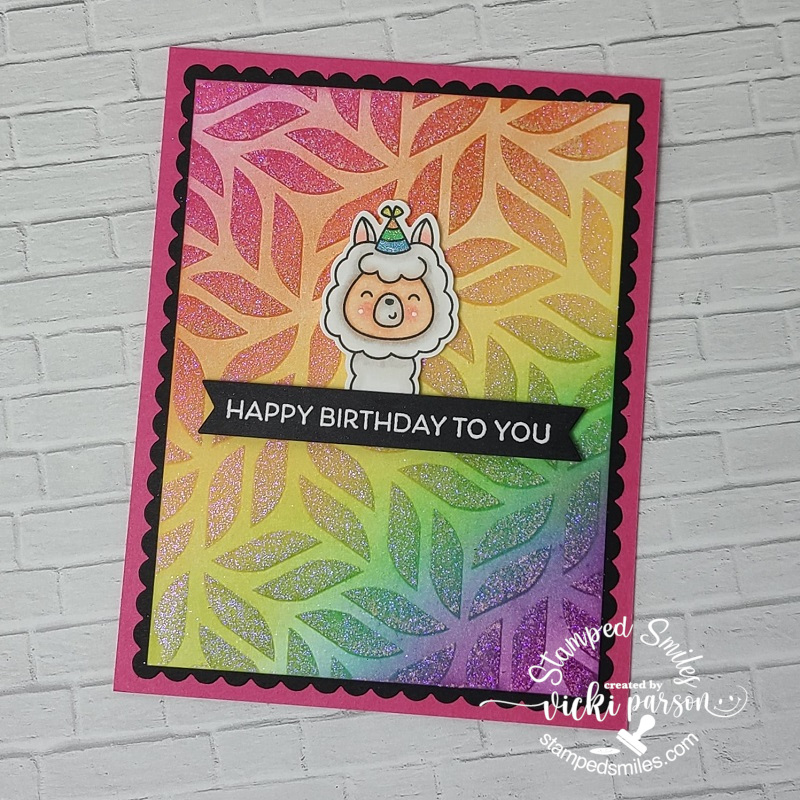
This is the first card in the TE Stamp Joy class series using the “Floral Flurry” products that I also used in the greeting card gift set above in the post. We used some markers on this for details and did some foiling. This is a “special” card….see next photo for the inside.This is a “view finder” style of card, but lays flat for mailing. It’s a mini slim sized card.Second card done with same floral products with some white and silver embossing details.The sentiment on the acetate panel was pre-printed for us and we laminated it along with the background floral panel with gold foil. We turned it into a shaker card.Last card for the classes was done over Toffee cardstock with some splattering details. I’ve used paint for mine.Card one of Make-n-Takes with ink blending and using pixie spray to foil…pretty shimmer!Make-n-Take 2 with a cool secret “ghosting effect” for a mini slim sized card!!Make-n-Take 3 was this set of four cards using a fun “Mod” Create-in-Quads Layering Stencil” and coordinating stamp set for sentiments and accents!Make-n-Take 4 was this cut mini slim sized card with highlight details using a white gel pen.Make-n-Take 5 with ink blended stencil background and adding details with colored pencils. I splattered with white paint.Make-n-Take 6 was one of my faves with the sparkly embossed strips in the middle and the black glossy die cut elements!Make-n-Take 7 was fun with the ink blending and adding glitter paste through stencil. The critter is too cute!
I’m really far behind in catching up with whatever the challenges currently are as well as seeing what’s going on with my fellow blogging friends, so I will get going as soon as I can!
Thanks so much for stopping in and I’ll see you soon!😘
Hello friends! I hope that you’re having a great start to your week and are staying safe and warm in your world.
Today I’m sharing a collection of creations that I never seem to have in my stash because it’s never really something that I think about when creating…and I always seem to be making them as needed rather than having a few on hand. Even though, a couple of these were needed, I decided to make duplicates to have on hand this time around.
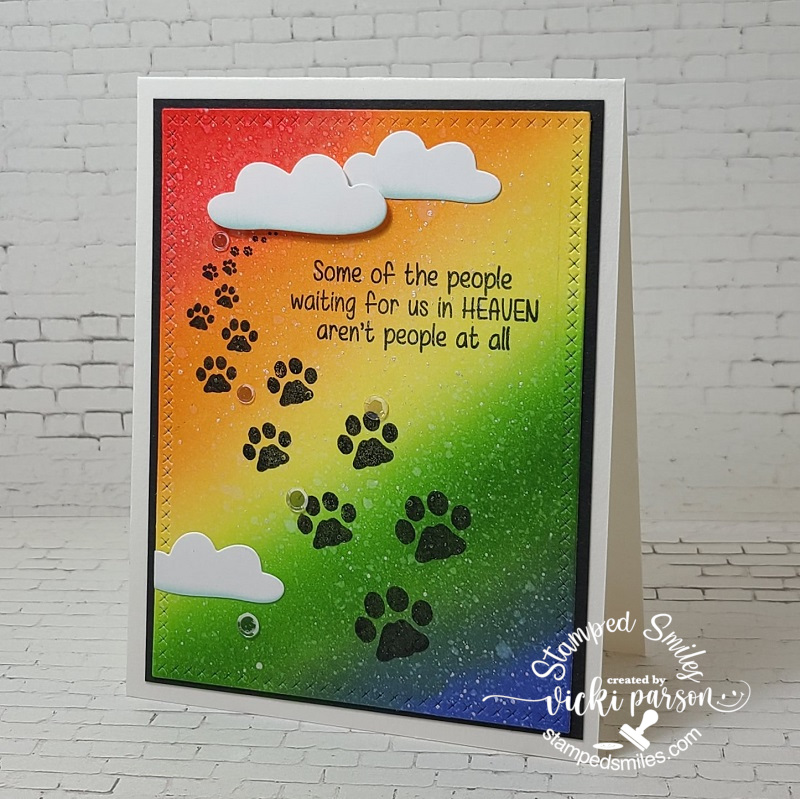
As you can see, this is a pet sympathy card I created, and one was needed to send to a friend that had recently lost her special companion. For anyone that has lost a pet knows how this feels and I wanted to be sure to send something special her way. It’s always great to have one on hand when needed.
I’ve used this wonderful stamp set from Whimsy Stamps called Furever in Our Hearts. I started by ink blending the background with distress inks in Candied Apple, Carved Pumpkin, Squeezed Lemonade, Mowed Lawn and Blueprint Sketch on a piece of Neenah Solar White. I sprayed the panel with water and used a towel to blot up the water droplets. I then took some white shimmer paint mixed with water and splattered it over top with a paint brush.
I cut out the panel with a Lawn Fawn Cross-stitched die. I used my Brilliance Black pigment ink to stamp the paw prints and sentiment over top of it so that it would show up over the background. I die cut a couple of clouds out (MFT I think) and lightly sponged the bottom of them and placed them over the areas I wanted with popping up the one cloud using foam tape at the top of the paw prints. I layered this panel onto a piece of black cardstock and then layered them both over a white A2 sized top folding card base. I finished it off with a few sparkling clear sequins.
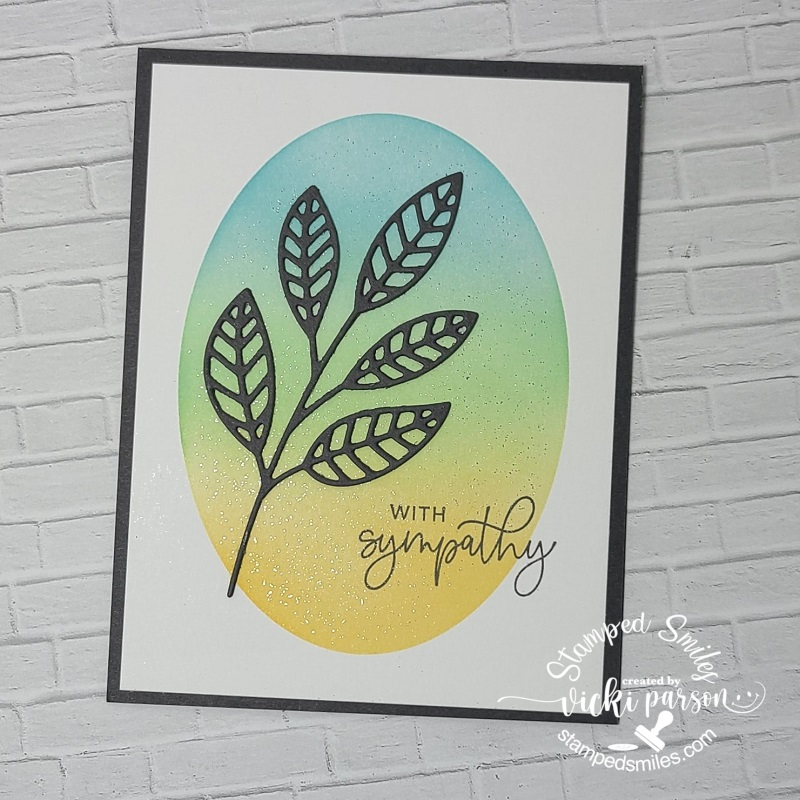
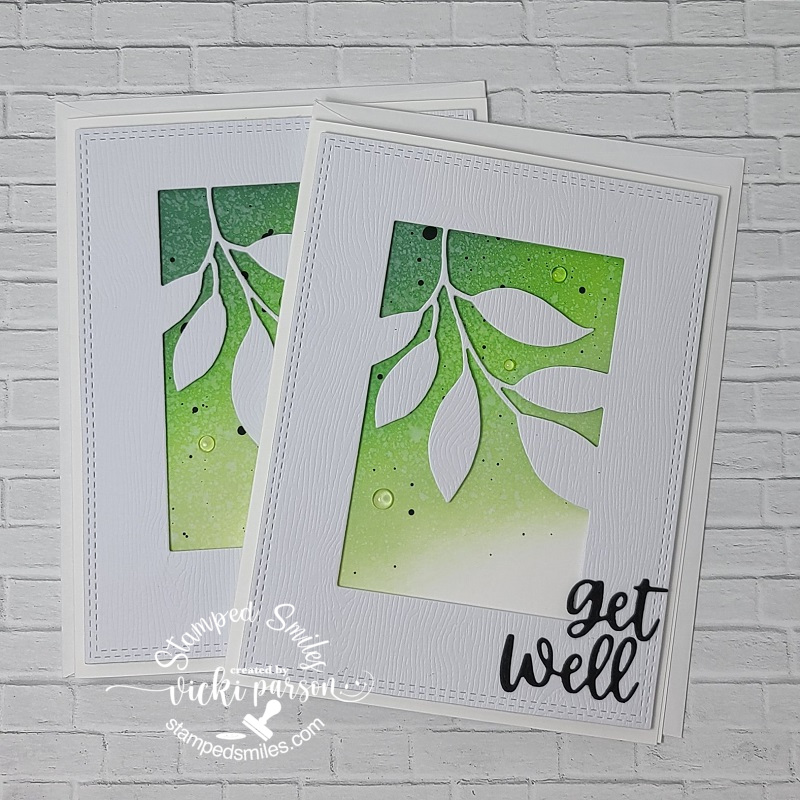
Another card that I needed was for someone that had recently been through a surgery, and I actually didn’t have any more “get well” in my stash… again, so I decided to create a duplicate of this one too. This set of cards along with the set of cards below actually were the results from the previous OOAK event I had attended, and these were part of a class I had taken. So, this class actually came in handy!
All of the papers including that beautiful die (from Memory Box-Verdant Leaf Collage), Get Well Soon die, and dewdrop water droplets came with the kit. I subtly changed up the design given for the class by adding black paint splatters and changing up the die cut lettering and the layering of the papers. I really liked doing more of that ink blending and then having it fade to the white for a soft look. The outside woodgrain frame was popped up with foam tape.
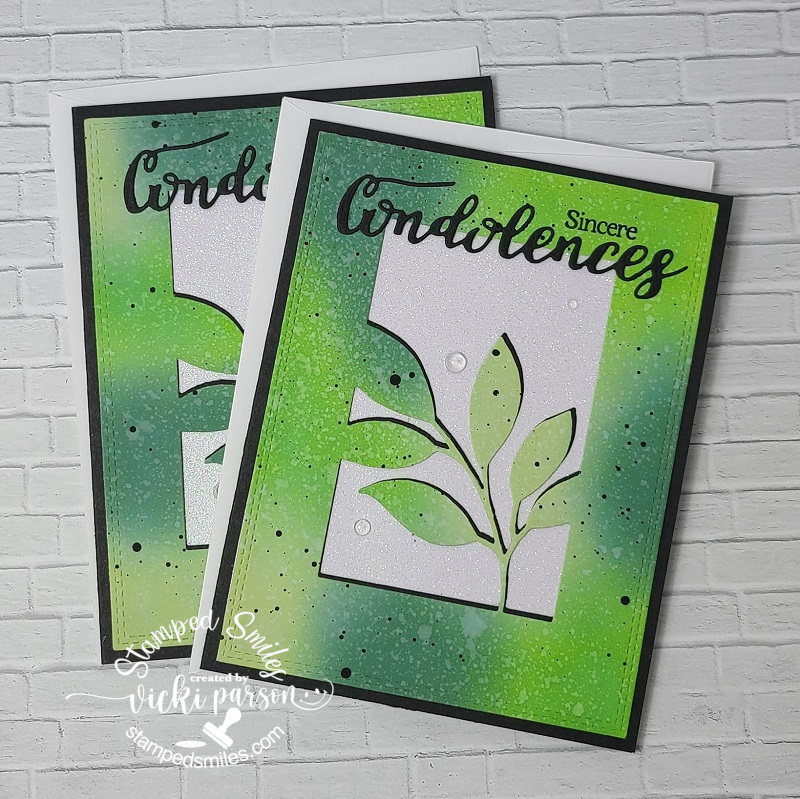
And here’s the second set of cards created within the same class using the same Memory Box die and ink blended colors. I changed up the layout with these as well by making the card base black (instead of white like shown in class) and instead of the sentiments used in class, I created my own version with the Whimsy Stamps Deepest Sympathy clear stamps and the WS Sympathy Heartfelt and Condolences die set. I also added the black paint splatters to the ink blended panels like on the set above.
I thought these sets made for some really nice cards to have on hand when needed. I’m not sure that I would’ve actually sat down to make up these types of cards in production if I hadn’t have taken the class, so I’m glad I did.
Thanks so much for stopping in today! Hope I have inspired your crafty inspiration in some way! I’ll be seeing you soon!