Making Masculine

Hey there friends!  I know that Father’s Day is well past us, but I wanted to share some cards I made with a masculine style that don’t necessarily have to be for Father’s Day, but for birthdays, signficant other, thank you, etc.

I have lots of males in my family that I need to have cards on hand for, so these will come in handy when I do need to grab one in the future for sure:

Vicki-MFTToolAround

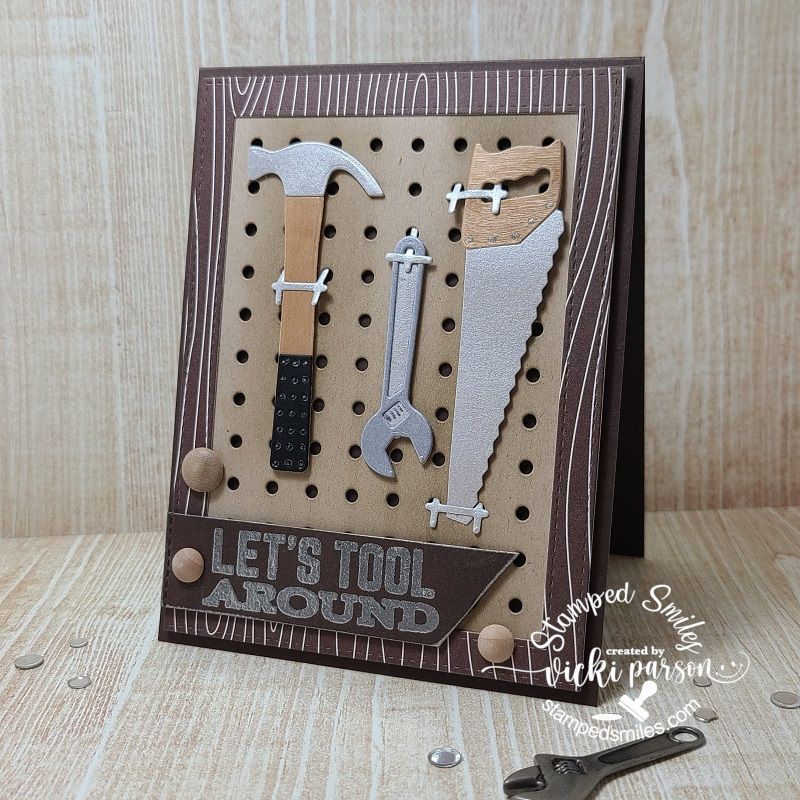
This is one that I made which can be suited for basically my hubby at some point! LOL!  The fun dies, and sentiment including the pattern paper all came from My Favorite Things.  I popped up the background over my brown card base, cut out the different tool pieces in wood paper, black paper and silver metallic paper.  (I later noticed that one of my metal peg pieces look “off” with the tool…and I’m sure my guy recpient will notice! LOL!)

I silver heat embossed the sentiment over the brown cardstock and cut out my own design with my scissors with it and then went over the edges with some silver ink.  I finished this off with some wooden dots I’ve had in my stash for a while.

Vicki-GrillMaster

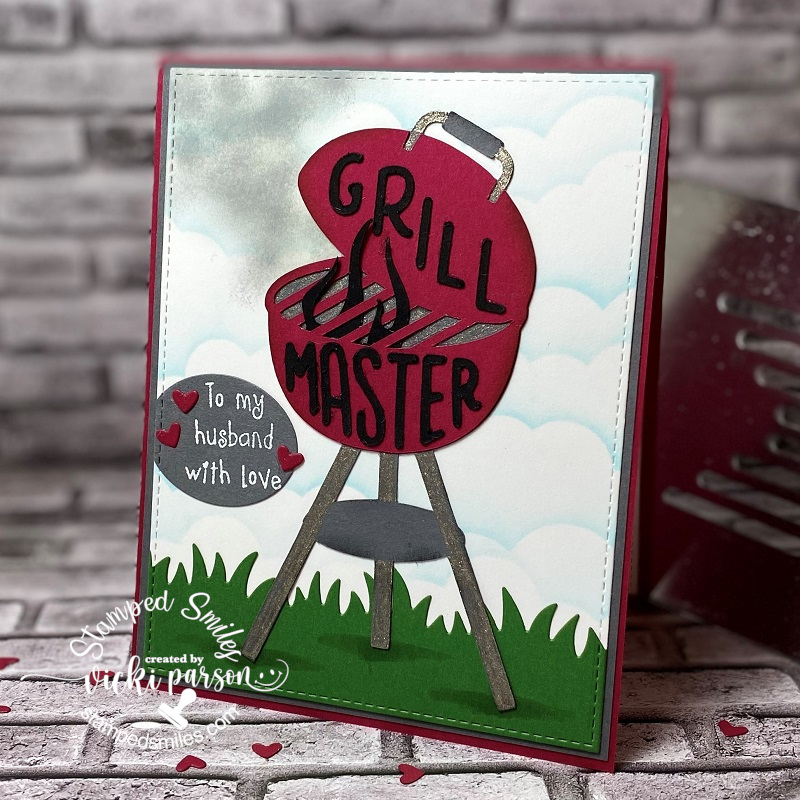
My next card was for my hubby and it was made for him for Father’s Day which is has already received.  He thought the added flames on the grill were pretty cool.  LOL!

I actually had another card that was “grill master”theme that I had made for my own dad, but of course forgot to take a photo of it before I gave it.  I did use the “left over” letters (the negatives) from his card, however, to place over top of the grill on this card which was cut out using my Cricut machine.

I sponged some clouds in the background of my card panel here and added some grey “smoke” clouds around the grill.  The flames were also the “negative” portion from my other card that was used to attach between the grill on this one.

I added details to the grill with a little bit of ink sponging along the edges as well as color portions of it with a glitter gel pen.  I die cut a border for the grass and added shadows with Copic markers.  I had stamped my original sentiment crooked, so I ended up white heat embossing it over the cardstock, cutting it out and placing it over my boo-boo!  I added some hearts around it as well.

Vicki-TE-plaidshirt

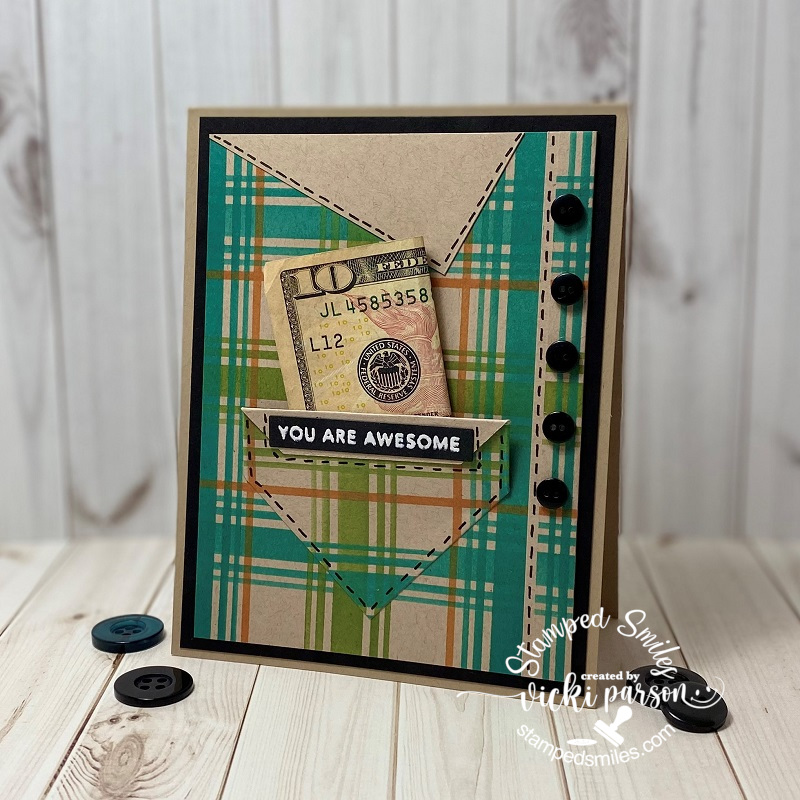
For my last card, I was wanting to try out the plaid stencil set that I got from Taylored Expressions and made a “shirt card” with it.  Really love that stencil BTW!  Very easy to create some fun and unique plaid designs with it!  I sponged mine over kraft cardstock.

I wasn’t sure what to do for the pocket because I don’t have any “pocket” type dies, so looking through my dies, I thought that this Labels Stacklets 10 would work for a pocket which was die cut from a plaid piece and then I folded the top portion over and just glued it along the edges so that I could actually use the pocket for something like sticking in some cash.

Lastly, I white heat embossed the sentiment from the Mini Strips-Life Saver and cut it out with the coordinating die to go over the pocket flap.  I cut an additional strip from the plaid to go along the edge and added a “collar” at the top.  Finished it off with drawing stitch lines and adding buttons.

—————————————————————————————————

These are all so different, but I sure had fun playing with different items in my stash and now have some masculine style cards ready to go as well!  I hope you’ve enjoyed them to or has given you some inspiration in some way!

Thanks for dropping in!  I have a post coming up with some really fun news so stay tuned in!!  I’ll be seeing you soon!

Challenges:

  1.  Sweet Stampin – Create Your Own Background (card #2 stenciled clouds card #3 stenciled plaid)
  2. Crafty Cardmakers – Create Your Own Background (same as above)
  3. Arty Divas – Anything Goes
  4. Double D – Stitches (faux, real or dies) top 2 card dies, last card faux
  5. A Perfect Time to Craft – Anything Goes
  6. Craft Rocket – For the Men/Boys

Happy Thanksgiving with Gold at Cute Card Thursday!

Happy Thanksgiving!  (For those that celebrate the Holiday)  I will be busy today visiting with my family and having dinner.  I look forward to seeing my boys as it’s been a few months without seeing them!  So it will be fun!

Today starts up a brand new challenge over at Cute Card Thursday and the theme for this week is “GOLD!”  Really fun and versatile metallic to use in your creations, so I look forward to seeing what everyone comes up with for this!

In conjunction with the Thanksgiving Holiday today, I thought my creation for this week’s challenge needed to reflect that:

Vicki-CCT610-BMGold

Since the main goal of the challenge is using gold, I kept the main focus on doing that, plus there are a couple of challenges going on that helped me figure out how to put it all together.  (see bottom of post for challenges.)

I have pulled out a stamp set called Plaid Tidings and used a plaid foilable toner sheet for the strip in the background.

I started out with an A2 sized top folding white card base and used a Darice embossing folder to emboss the leaves over the kraft background panel.  I took the toner printed plaid sheet and Gold Static Foil Transfer sheets and layered it over a piece of Bazzil Gold Mirror Cardstock and another piece of white cardstock.  I attached this to the embossed background.

For the background panel and the cut out leaves, I’ve used the “Kissing Technique” to add the plaid image over the leaves.  I sponged around this panel along with the leaves with some kraft colored ink and attached the white panel to another piece of the gold mirror cardstock.  I’ve added some gold ribbon around it and used some foam tape to pop it up a bit.

Vicki-CCT610-BMGold-close

Here’s a closer view at some of the details in my card design.  (You can better see the foiling done over the plaid with that Gold Static foil!)

For the sentiment, I heat embossed it over white cardstock with some Gilded Embossing Powder.  I die cut it out with a circle die and sponged some more kraft colored ink around this and then attached it to another circle layer of the gold mirror cardstock.

I attached this over the square leaves and ribbon panel and added a gold ribbon bow at the top of it.  To finish it off I added some gold sequins filled with Ranger Gold Stickles.

Vicki-CCT610-BMGold-flat

Hope you’ve enjoyed my GOLD Thanksgiving card today!  Be sure to stop by the Cute Card Thursday Challenge Blog and play along with us this week!  Looking forward to seeing all of that pretty gold in the gallery! 🙂

Have a beautiful day!  I’m thankful today for my wonderful family and lovely crafty friends that I have right here!  I appreciate you being here with me!

Challenges:

  1.  Try Stamping On Tuesday – TSOT436 sketchTSOT 436
  2. Daring Cardmakers – Natural, Gold and White
  3. Shopping Our Stash – SOS409 So Thankful
  4. Stamp, Ink, Paper– SIP206 ThankfulSIP-Challenge-206-Thankful-NEW-800
  5. Crafter’s Castle – Anything goes November
  6. Pammie’s Inky Pinkies – PIP1947 Anything Goes