Feeling Sentimental for Dare To Get Dirty

Hello again friends!  If you missed my previous post, be sure to check it out for details about a GIVEAWAY on my You Tube Channel!  You only have ONE week to enter it!

Today is my turn over at Splitcoaststampers “Dare to Get Dirty” Event to a host a challenge, so I wanted to share the creations that I’ve made for it.  Again, I can’t share the details of my challenge with you, but I can point in the direction of how to become a fan club member HERE.

Vicki-DTGD20basementstamper-words-shaker

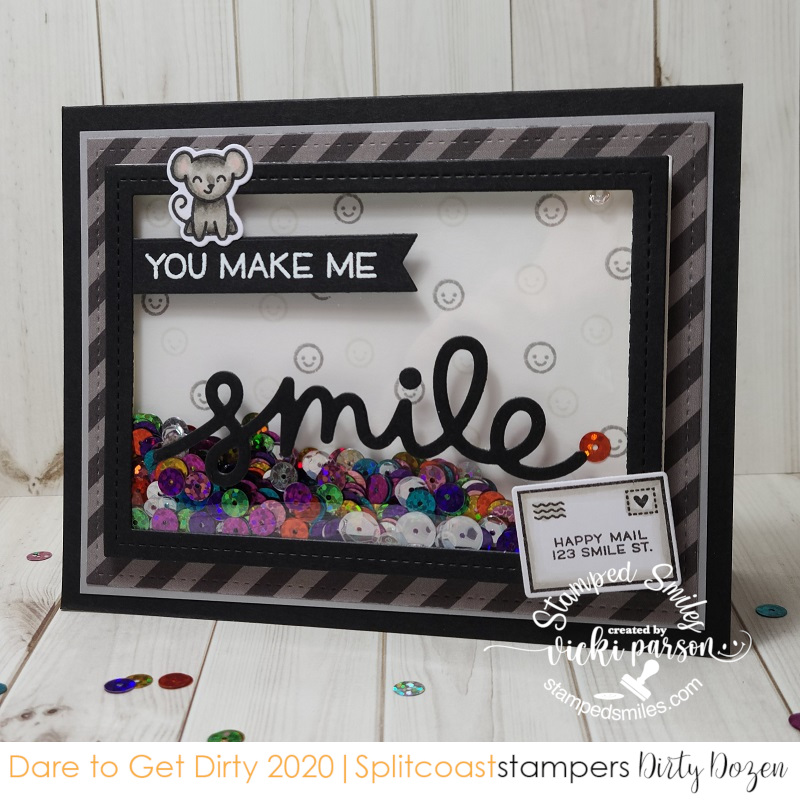
First up I have this shaker style card I made with some of my fave Lawn Fawn products!

I’ve colored up that sweet little mouse standing over the banner from the Wild For You stamp set and cut him out with the coordinating die.  The black banner he’s sitting on was white heat embossed from the Happy, Happy Happy stamp set.  I also used the tiny smile face from this set to randomly stamp the background inside my shaker frame.  I then used the envelope at the bottom from the Love Letters stamp set that was colored and cut out with the coordinating die. 

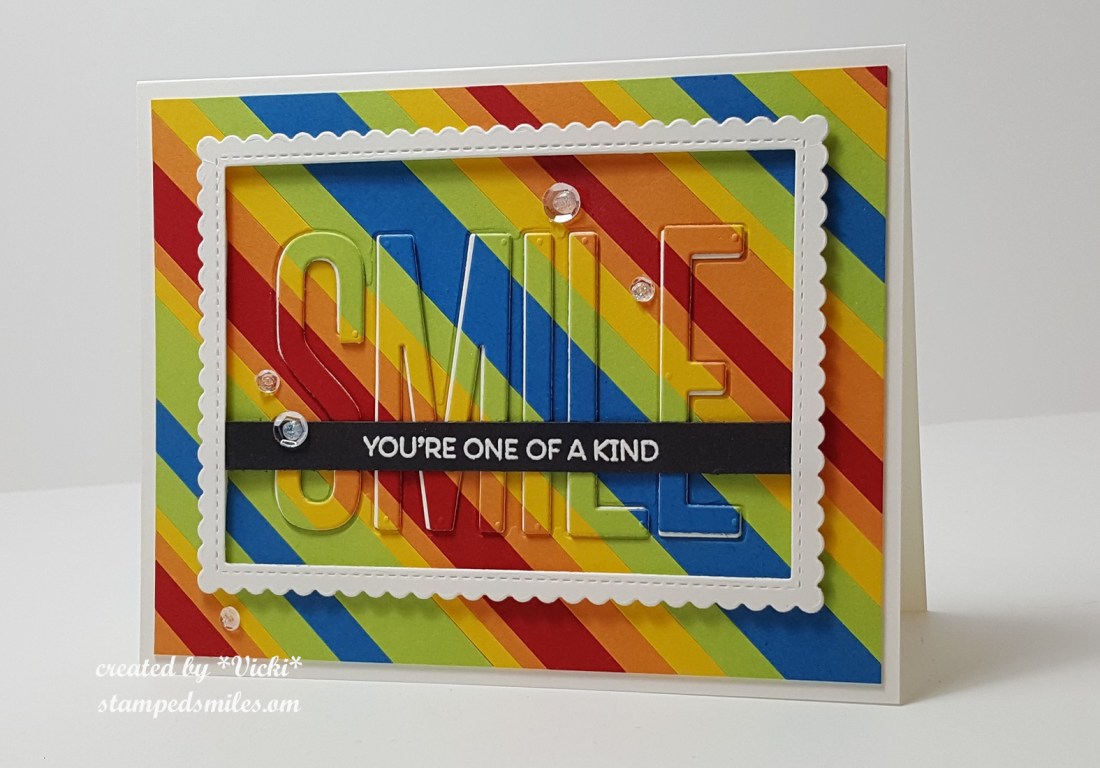
I’ve used some Stitched rectangle LF dies to create the shaker frame and the striped papers also come from some random LF papers in my stash.  I’ve used the  LF Scripty Smile die in black cardstock that I’ve attached over top of the acetate window area.

Vicki-DTGD20basementstamper-words-shaker-flat

Since the card was mainly black and white, I wanted to add a happy rainbow color which is where the shaker sequins came in.  I looked through my collection and found some Tie Dye Rainbow Sequins from Brutus Monroe.


Vicki-DTGD20basementstamper-wordsHUG

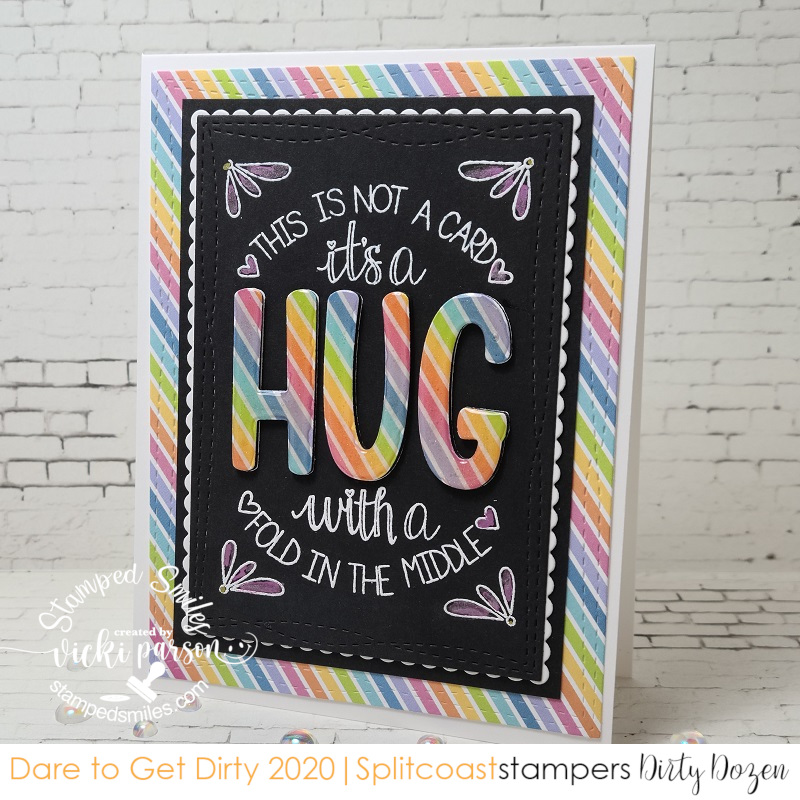
I guess I had rainbow colors in mind with my next card as well!  I absolutely LOVE this sentiment stamp from Trinity Stamps called Folded Hug.  I started by white heat embossing it over black cardstock and then I cut it out with my MFT Wonky Stitch Rectangle die and layered it over a white scallop rectangle layer and layered that again over a black piece of cardstock.  I also used the coordinating Sending Hugs die set to cut the “hug” letters out multiple times to raise them up over the image and then finished with the rainbow colors that I’ve used for the background of the card.

Vicki-DTGD20basementstamper-words-HUG-close

Upon a closer look at the image, you can see where I’ve colored in parts of the image with my Karin Brush Metallic pen set.  I think it showed up so pretty over the black cardstock.  I’ve also covered the rainbow letters with a glitter brush pen and then went over that with glossy accents.  I love how shinny the letters are IRL!

I hope you’ve enjoyed my share of creations during the Splitcoaststampers “Dare to Get Dirty” Event and has helped inspire you in some way!  I appreciate you stopping in!

Challenges:

  1. Lawn Fawnatics – Make the Sentiment the Star
  2. Aud Sentiments – Anything Goes + Sentiment 
  3. Inkspirational – Rain or Rainbows (second card)
  4. The Sisterhood of Crafters – Sentiment as Focal Point

Sparkly Rainbow Smile🌈

Hello there friends!  Just popping in here today to share a smile with you!

The MFT Summer School lessons continue with Day 2: RAINBOW!  For me, nothing says “smile” like a rainbow and we certainly need plenty of smiles these days!😀

Vicki-MFTsummerschool-day2rainbow

I wanted the rainbow on my card to really stand out, so I’ve used an older MFT background stamp no longer available called “Floral Fantasy” and stamped it with Steel Gray Ink over a piece of Grout Gray cardstock that was cut out with the Wonky Stitched Rectangle die.

I used the “End of the Rainbow” die no longer available, but similar to THIS ONE in the store, to cut through the background and then I used the different strips in the rainbow to die cut the different colors of glitter paper to fill it in with.  I used the Sunset and Mermaid glitter paper stacks for the strips.  I then took an older MFT SMILE die and die cut over top of the rainbow and stamped background.  I die cut the words again with Black Licorice cardstock and inlaid the letters over top of the background.  I mounted the background over an A2 sized top folding Black Licorice card base.

Lastly, I stamped the sentiment from the “All Smiles” stamp set (no longer available) over more of the Grout Gray cardstock and cut out with a banner die and popped it up underneath the die cut letters with foam tape.  I finished the card with some sparkling clear sequins.

Vicki-MFTsummerschool-day2rainbow-close

Here’s a closer look at the glittery rainbow that I’ve inlaid for the background as well as the “smile” letters too.  Hopefully, you can see from this angle how all of it is incorporated into the background of the design.  The only thing that I popped up was the sentiment banner.

Vicki-MFTsummerschool-day2rainbow-flat

I hope that you’ve enjoyed my card today and it helped bring a smile your way!  Thank you so much for taking the time to stop in today my friends!  I’ll see you soon!

Challenges:

  1.  MFT Summer School – Day 2 Rainbow (ROYGBIV)MFT_SummerSchool2020_Rainbow
  2. The Corrosive Challenge – #8 Anything Goes
  3. Pammie’s Inky Pinkies – PIP2031 Anything Goes
  4. Little Red Wagon– #561 Happy Days
  5. Aud Sentiments – #257 Anything Goes + a sentiment
  6. Creative Knockouts – #362 Sparkle & Shine
  7. Crafts Galore Encore– #78 August Anything Goes

I’ve Been Schooled!

Hello friends!  Hope you are doing well and are having a great week!

I took some time over the last few days to try and follow along with all of the videos and classes going on over the My Favorite Things blog as they are doing “Session 2 of their MFT Summer School“.  I don’t know about you, but I find that there is always something new to learn and dfferent things to try with crafting and I enjoy learning about it so that I can continue to improve in what I already enjoy doing.  Sometimes that self-doubt creeps into the skull to tell you that “you’re not good enough” and “give up”, etc.    The way for me to try and stomp out those feelings is to take classes and try something new.  I just want to enjoy the process and learning can help bring on more positive feelings.

Since there are SO MANY creations in this post, I won’t go into too many details other than share the links to the MFT Summer School links that I made each card for.  I hope you enjoy having a look at them:

Day 1 – Monochromatic (CAS)

Vicki-MFTcamp-monochromatic CAS

I used several colors of MFT purple (of course!) cardstock and stamped a background stamp with VersaMark over it.  I think the die I’ve used is from something retired.  Here’s the link to Day 1 – Monochromatic Class.

Day 2 – Focal Point

Vicki-MFTcamp-FocalPoint

Really had fun with this sweet little bear! 🙂  I loved the layout so much from class and decided to follow that for my card here.  The balloon and die cut sentiment actually have shimmer over them which doesn’t show in the photo very well.  Here’s the link for Day 2 – Focal Point Class.

Day 3 – Visual Triangle

Vicki-MFTcamp-VisualTriangle

This one took me quite a bit to put together.  I think maybe part of it was all of the coloring, but I was struggling a bit with the concept…I’m hoping this was how she was going with it.  3 long strips at the bottom, 3 images at the bottom and 3 images at the top.  The purple in the background was a watercolor wash like she showed in the video, but I didn’t heat emboss any image like she did.  Here’s the link for Day 3 – Visual Triangle class.

Day 4 – Rainbow

Vicki-MFTcamp-rainbows

I have done this before and I really like how you can use up your paper scraps in a colorful way.  I used the same frame die here in a similar manner as I did the card above this one.  I cut the sentiment several times before laying down the top one and then I slightly off centered it to show the white slightly behind it.  Here’s the link for Day 4 – Rainbow class.

Day 5 – Ombre

Vicki-MFTcamp-Ombre

And here I go with another purple card! LOL!  I actually remembered a fantastic video that I created this card based on a tutorial from Jennifer McGuire.  CLICK HERE for her video on ombre techniques.  Here’s the link for Day 5 – ombre class.

If you have any questions about these, please feel free to contact me or simply leave a comment below and I will be happy to reply.

Thanks so much for stopping by and I will see you again on Thursday for a new challenge! 🙂