Hey friends! I hope you’re having a great start to your week! I have been in the Christmas making card mode the last few days and just finished sending out over twenty cards I believe. I had previously made a few and already had those sent out over seas too. I actually still have just a couple more to make for a few people close to me and I’ll be finished.
So I thought since I’ve been doing Christmas makings, I’d share some things that I’ve been working on with you!

Here’s a fun “Snow Globe” shaped card that I had actually made for the Kit And Clowder Christmas card swap. I made it in November and had actually sent it out the last week of November. I just wanted to make sure she received it before I posted it anywhere and she did!
I have used this really sweet digital image from Whimsy Stamps called Snowman and Snowflakes by Crissy Armstrong. I had to make it a certain size so that it would fit with my “Snow Globe” design. So I’ve used a stitched die cut circle to cut it out with so that it could be placed on the inside of the card design.
If you would like to see how to put one of these shaped cards together for yourself, then you can check it out HERE on Splitcoast Stampers for the tutorial.
I’ve used some fun papers for the bottom and die cut a stitched scallop circle frame from some gold mirror cardstock and then used my MS “goo border punch” for the snow drip edge at the top. I even took some white Staz On ink and stamped a few snowflakes over top of the acetate piece on the front of the card. I added some gold ribbon and a holly sprig from Prima around the bottom.
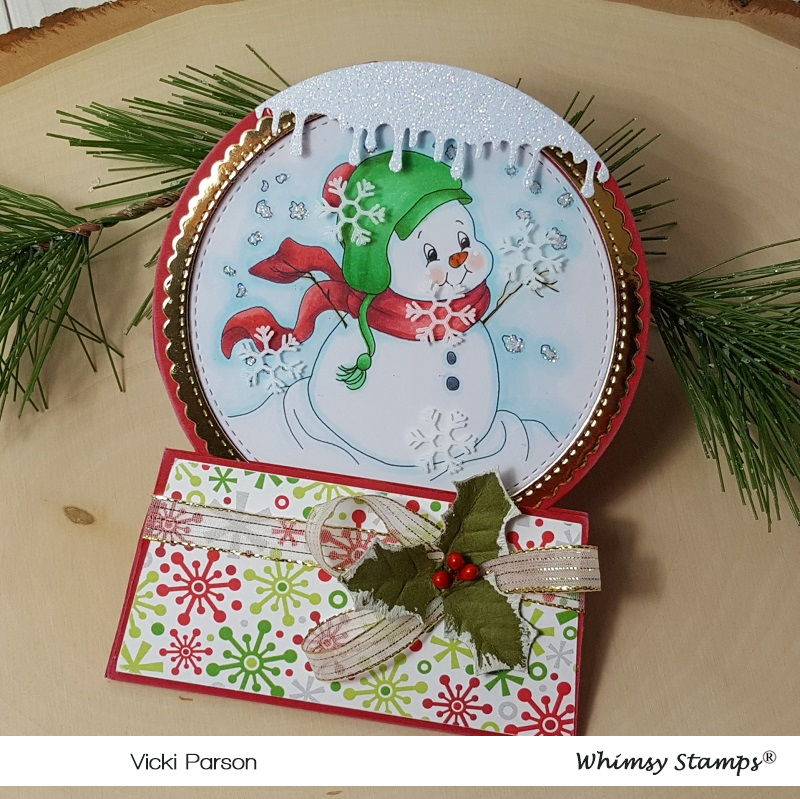
Here’s a closer view of the image and how I’ve got him all colored up with Copic markers. I’ve also taken a glue pen and added some extra glitter to the snowflakes around the image as well.

And when you open the inside of the “Snow Globe” card, this is what it looks like with the sentiment. I have used a retired Whimsy Stamps clear stamp set called “Christmas Greetings” to stamp both the “happy” sentiment in red ink as well as the snowflakes on the piece of acetate with White Staz On ink.
I then took the Whimsy Stamps Christmas Large Word die and cut it out with a piece of gold mirror cardstock and glued that to the inside bottom of the card. I also took some white ink and sponged around the edges of this entire inside.
I haven’t made one of these Snow Globe cards for quite a while, so that was fun to do! I hope that you’ve enjoyed it too! Thanks so much for stopping in today and I’ll see you again soon!
Challenges:
- Make My Monday – Anything Christmas
- Crafty Cardmakers – Christmas
- The Holly & Ivy Christmas – Anything Christmas
- Papercraft – Christmas
- Sweet Stampers – Anything Goes
- Try it On Tuesday – Christmas is Coming!
- Crafty Creations – #404 Anything Goes
- Cute Card Thursday – Anything Goes


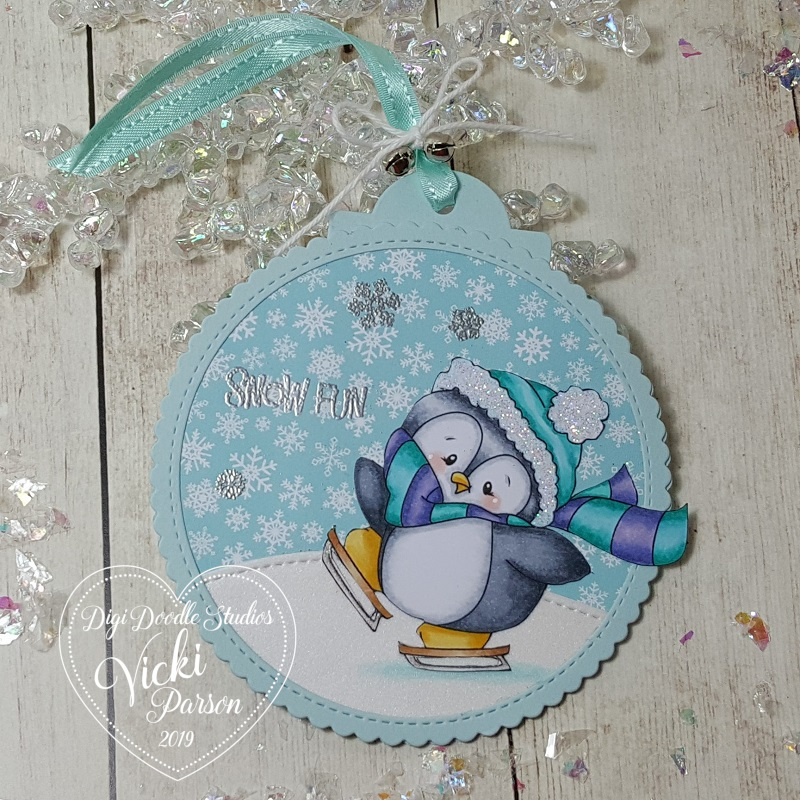
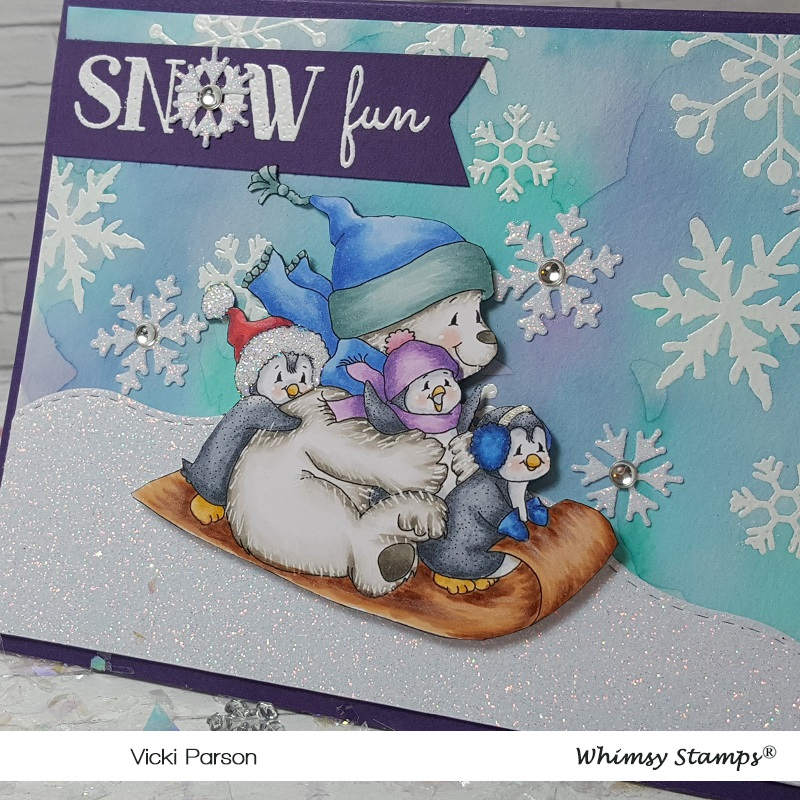
 Check out these adorable penguins having some fun doing winter activities! Penguins are probably one of the top animals that I love! I have SO many penguin stamps in my stash and seem to keep on collecting more of them…so of course I was super excited to be able to add this Wintertime Penguins Pairables set from Digi Doodle Studios to my collection as well! 🙂
 Here’s a closer view of the pink tag. For the digital image, I used Word on my computer to add the penguin and place it over one of the “ski” images from the set and enlarged it to make it look like a snow board instead of a ski! Then printed it out.