Christmas Cards, Projects and Cookies…ready for Santa!🎅

Hello friends!  We’re here!  We made it to Christmas Eve!😀  My cards have been sent out, my cookies are done and delivered as well as my other little gifts.  This is quite a long post, so grab your hot cocoa or whatever your favorite beverage is and a Christmas cookie or treat and let’s see what I’ve been doing this past week:

So, starting with my Christmas cards, I usually make around 40ish cards each year give-or-take and I only like to make a handful of them at a time for not only boredom of the same design, but for product depletion as well.

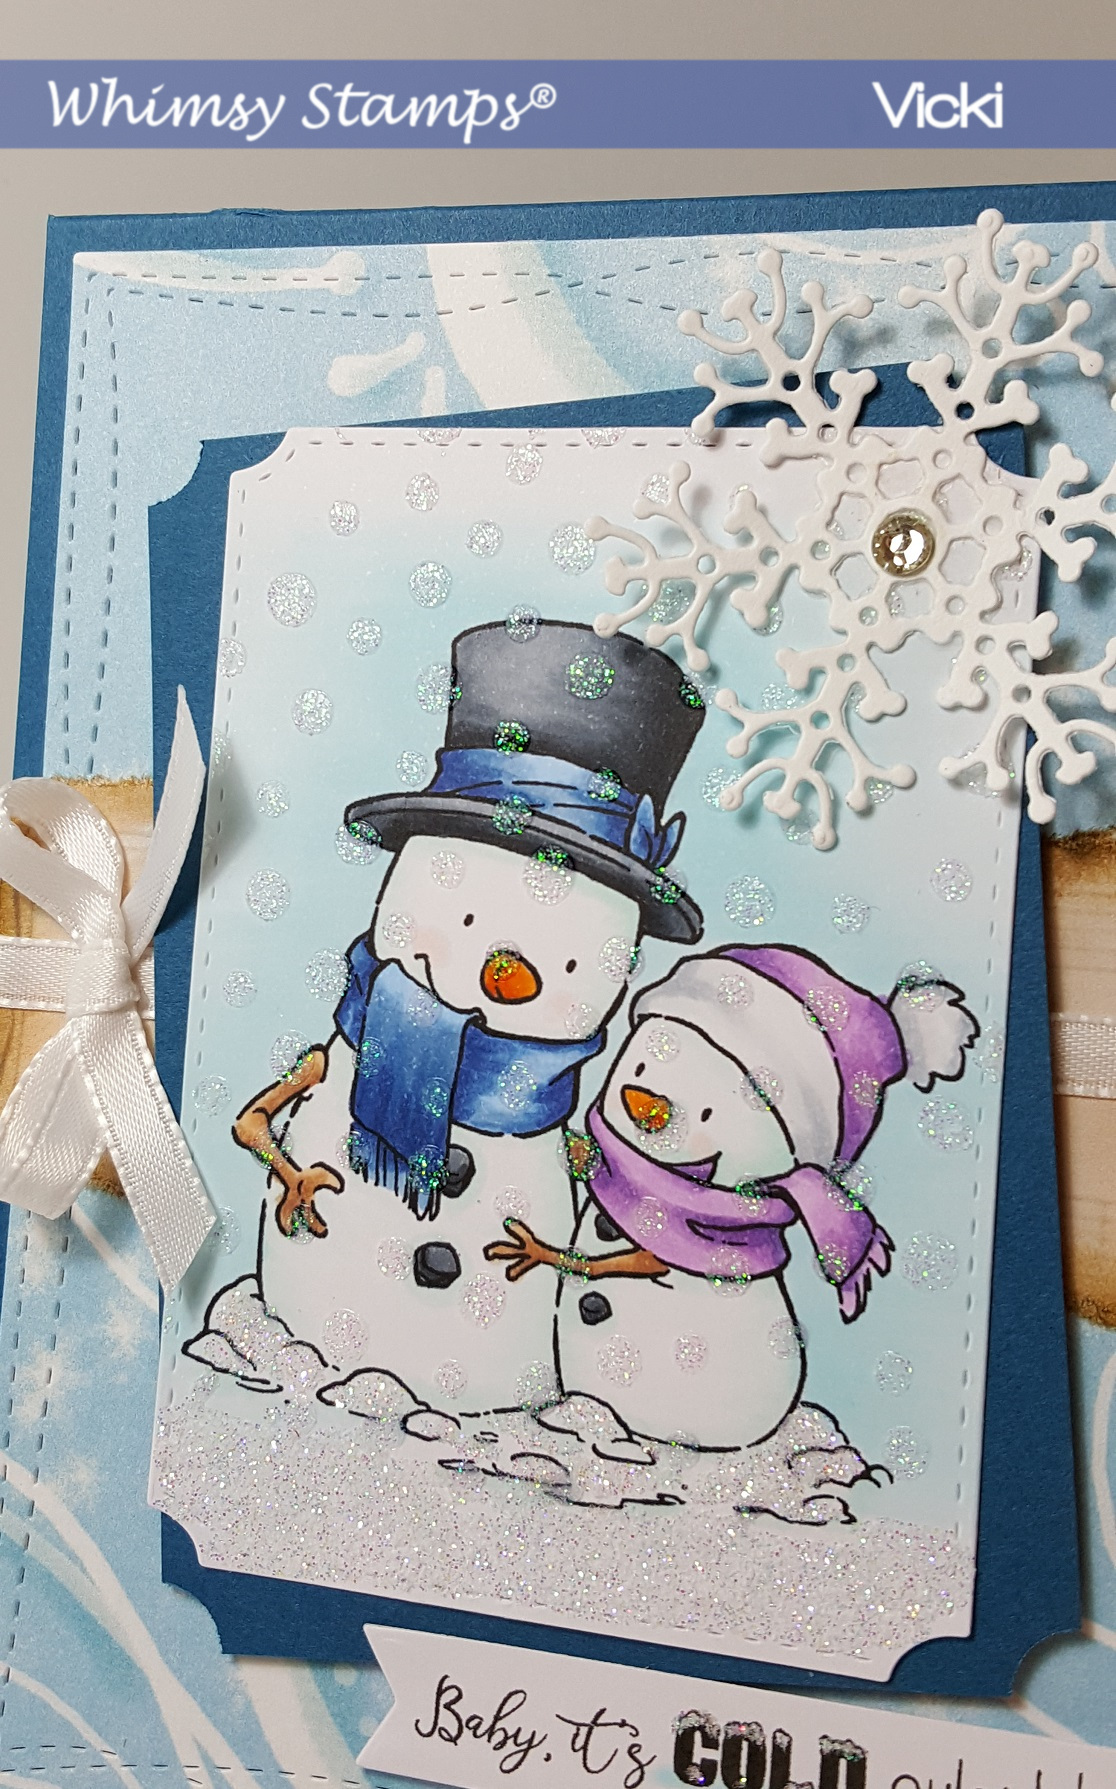
So back in July, I purchased this really adorable card kit from Taylored Expressions (included was the Frosty Background Cling and Clear Combo set + more.) that came with coordinated colored envelopes as well as the seals.  So, I made a set of four different colored designs in two of each one.  The snowmen were popped up with foam squares over the backgrounds and I added some fun Snowflake bits that were included with the kit as well.

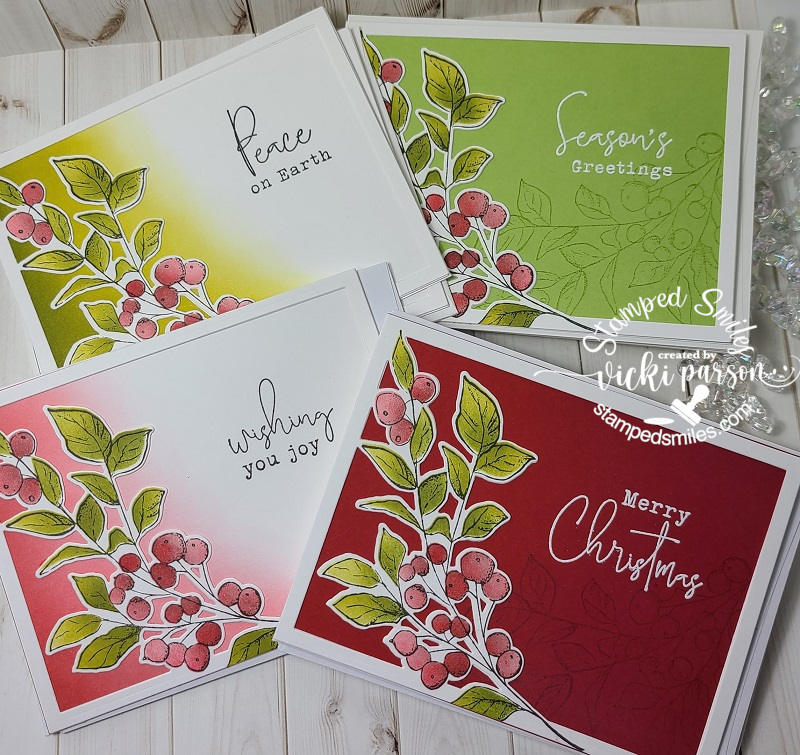
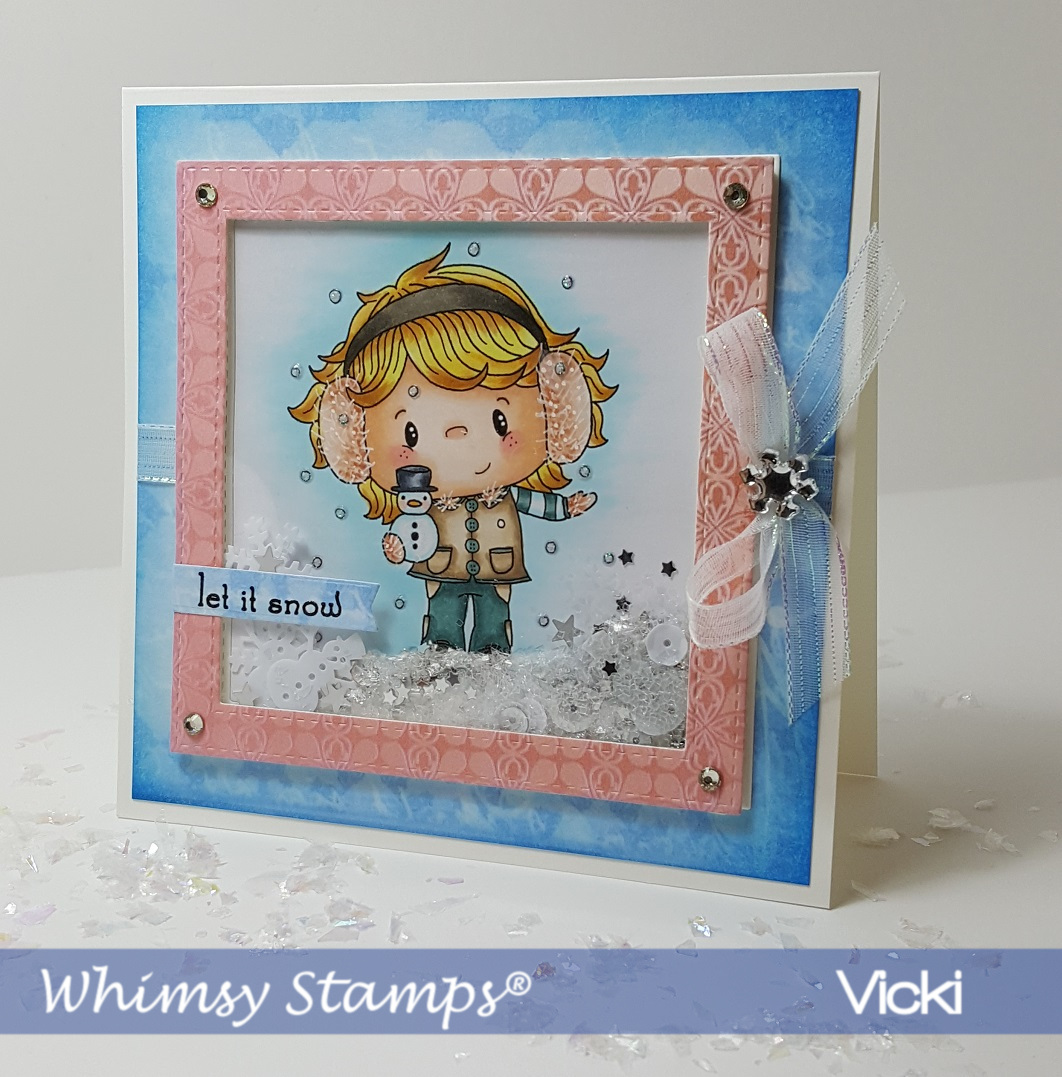
Next up is another set of cards I made using some more gorgeous products from Taylored Expressions.  I’ve used the Seasonal Sprig stamp and die combo along with the stencil to color them in with.  Some of these I ink blended the backgrounds, so I just used cardstock with a watermark effect and a white heat embossed sentiment.  I used the die to cut an extra frame behind the stamped one for added stability.  I made 4 of each design shown here for a total of 16.

I then made another set of four using the same products, but for these I gold heat embossed the image and sentiment and then used some watercolor for coloring it in with.  I also got some of these coordinating envelope seals to use on about 10 of the 16 cards.  (No longer available in store.)  I’ve also partially ink blended the background behind the frame on these as well.

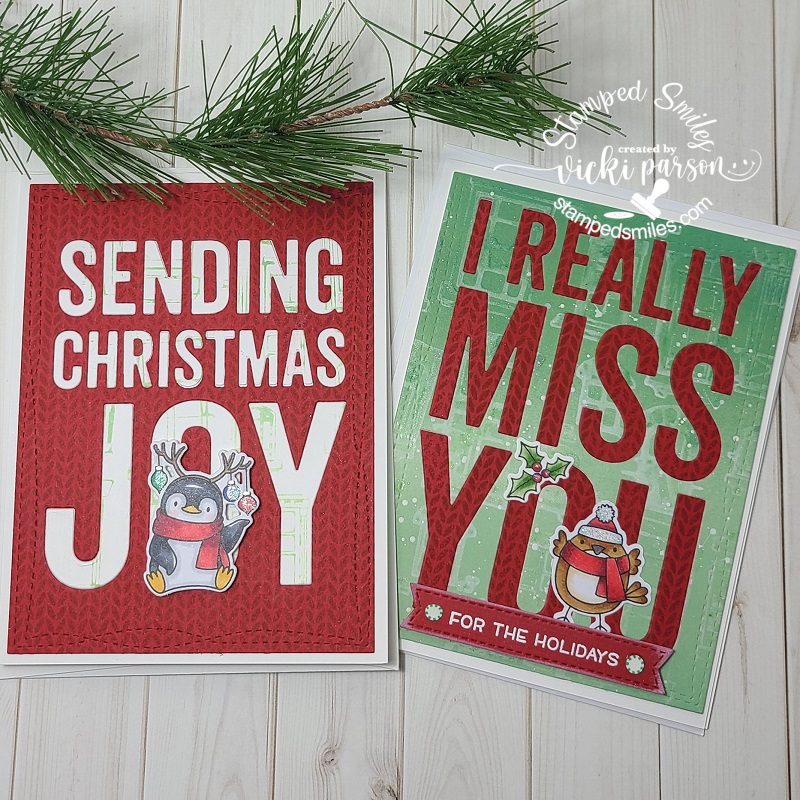
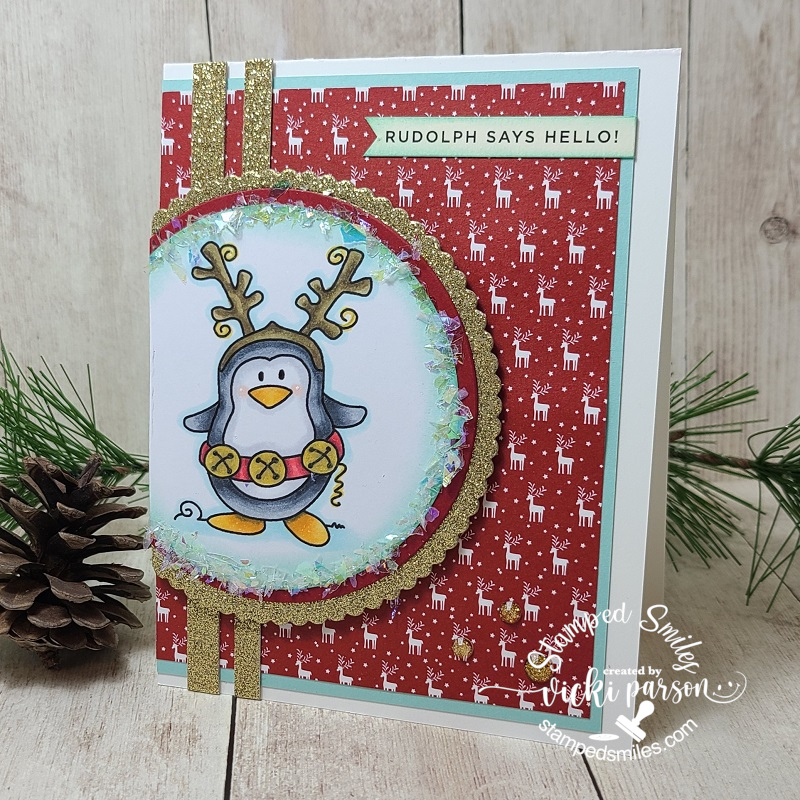
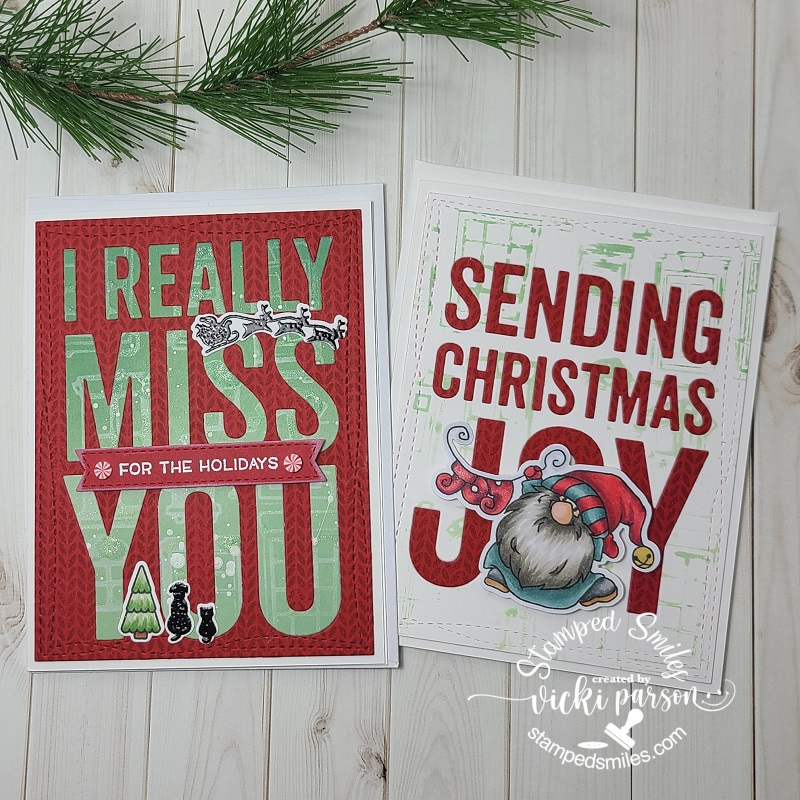
Here are some cards that I’ve actually made a total of 8 similar designs using the large wording background dies from My Favorite Things.  I’ve used the “Sending Christmas Joy” and “I Really Miss You” dies for all eight of these, but only after I stamped the backgrounds.  I used the MFT Knitted Sweater BG stamp and the Alley Cat BG stamp for a couple of backgrounds before I die cut them.  Then I used the die cut letters to place into the other backgrounds on the cards to get that look.  So it was like creating 2 cards with one cut and filling it all in.  (For the Alley Cat background stamp, I ink blended the background and stamped it as a watermark effect over it and then took the “left over” ink from that to stamp it again to create an additional BG.) I then cut out each of the panels with the MFT Wonky Stitched Rectangle die and placed over a white A2 sized side folding card base.  The penguin image is from the MFT Holiday Penguins set and the bird on the other one is from the MFT “Tweet Holidays” (Not found in store.)

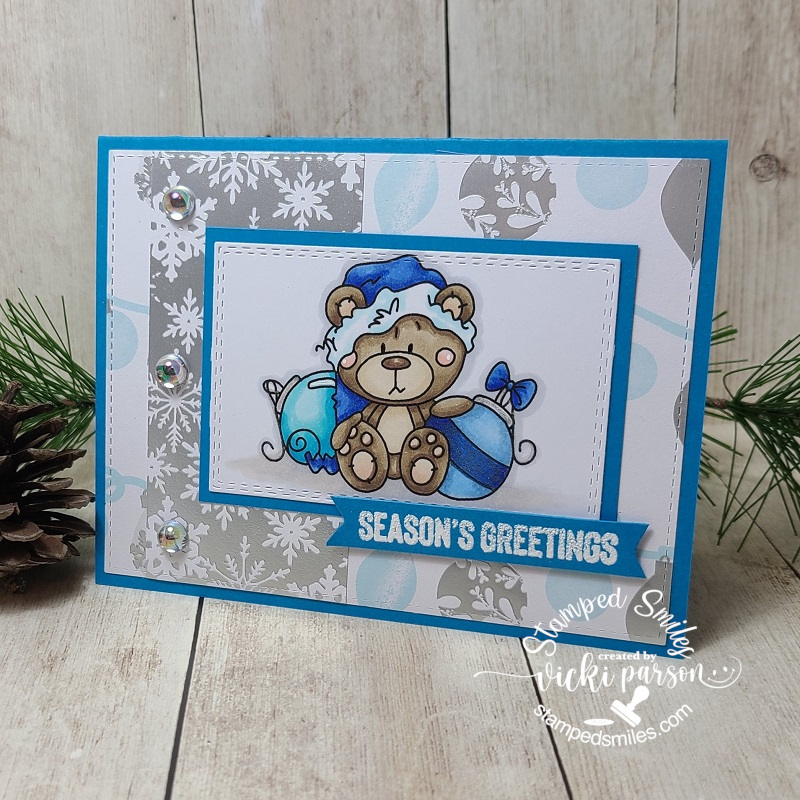
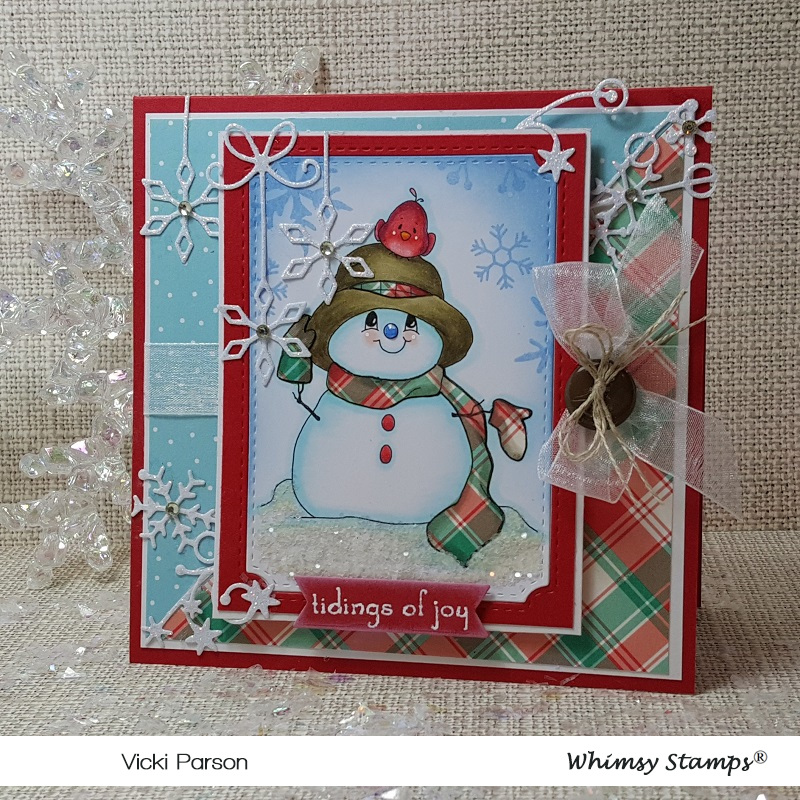
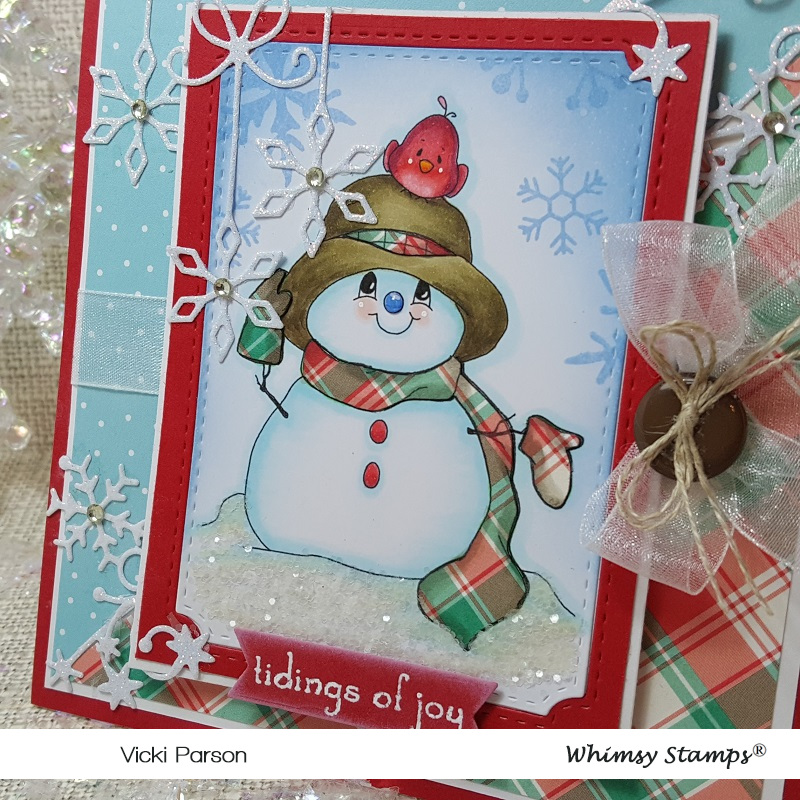
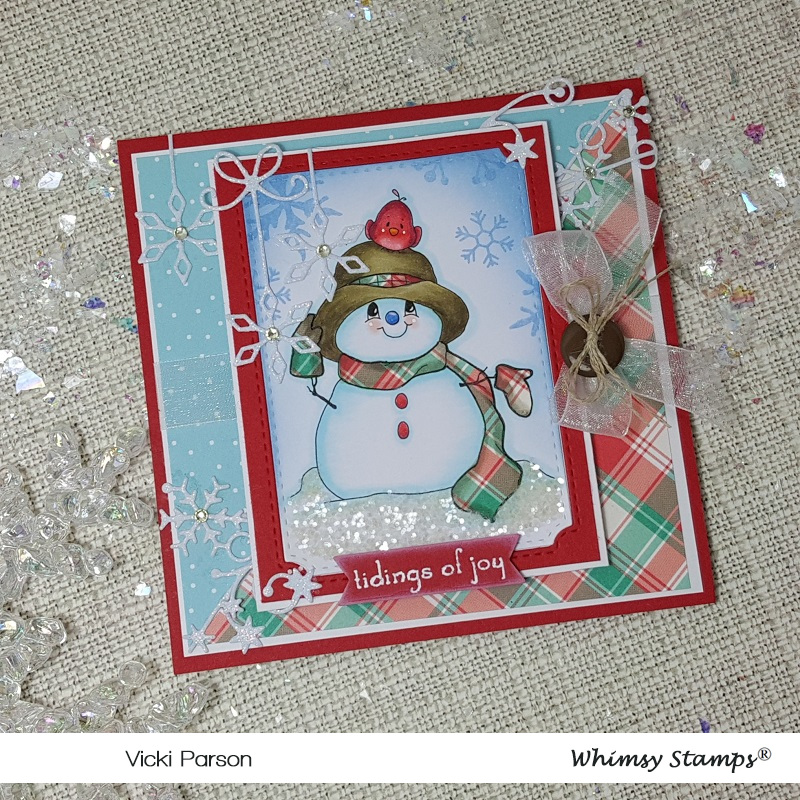
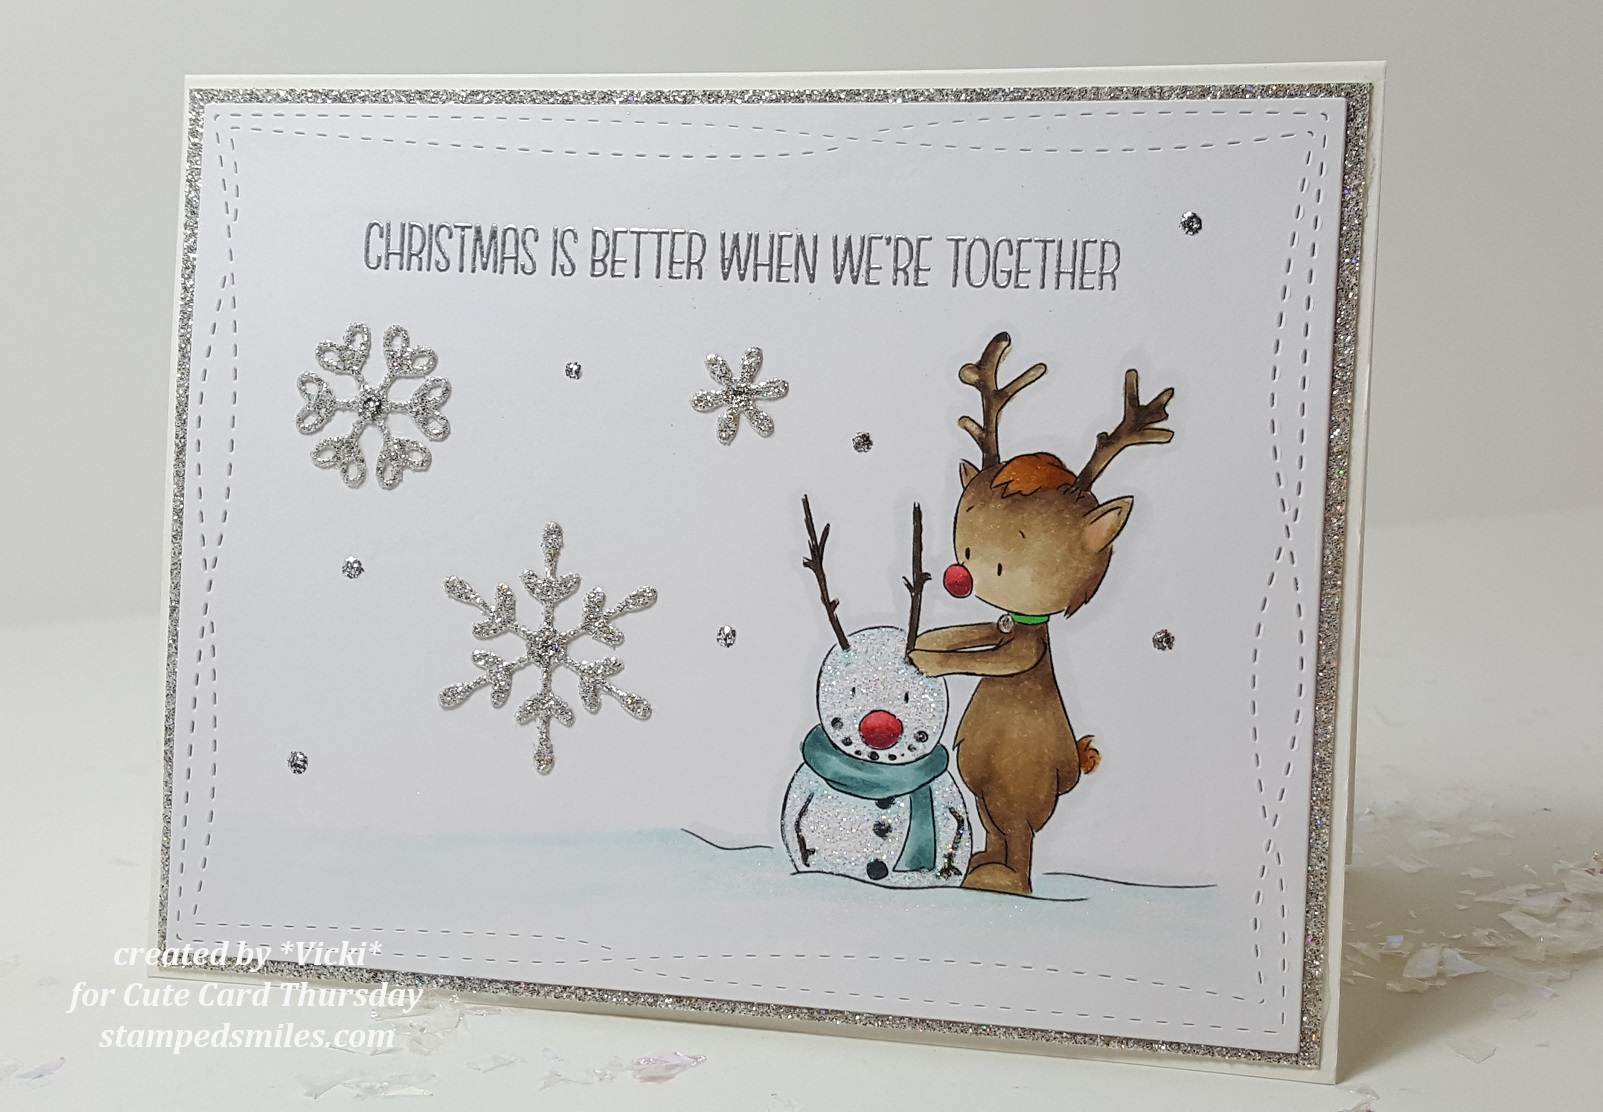
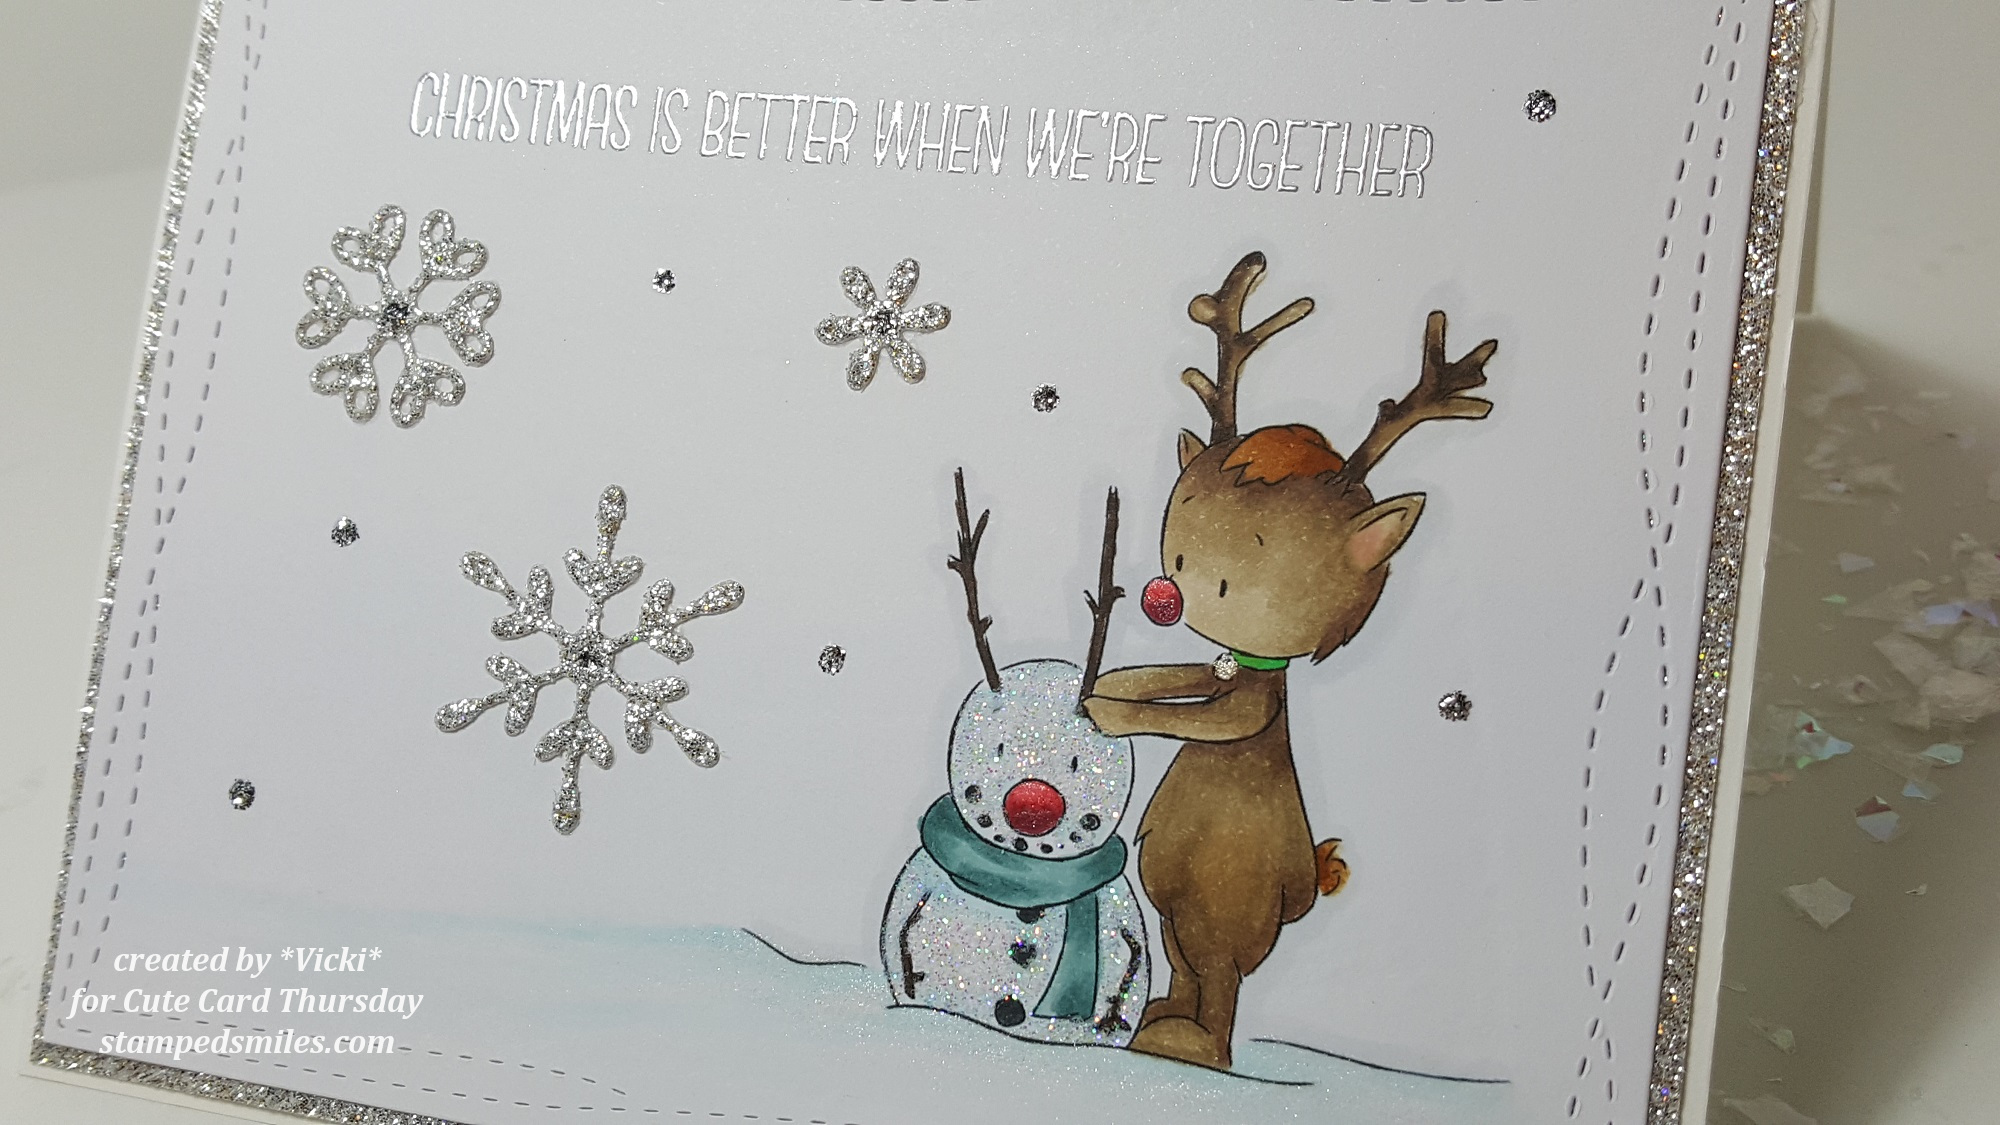
And then of course you don’t want to waste any backgrounds you’ve made, so you make more cards!  I’ve used a couple more images to personalize the design for people too.  I combined the sets Newton’s Nook Whispering Pines and the Lawn Fawn Winter Skies.  I think I took a set from them to create a sentiment to fit my cards as well. (not sure from which set.)

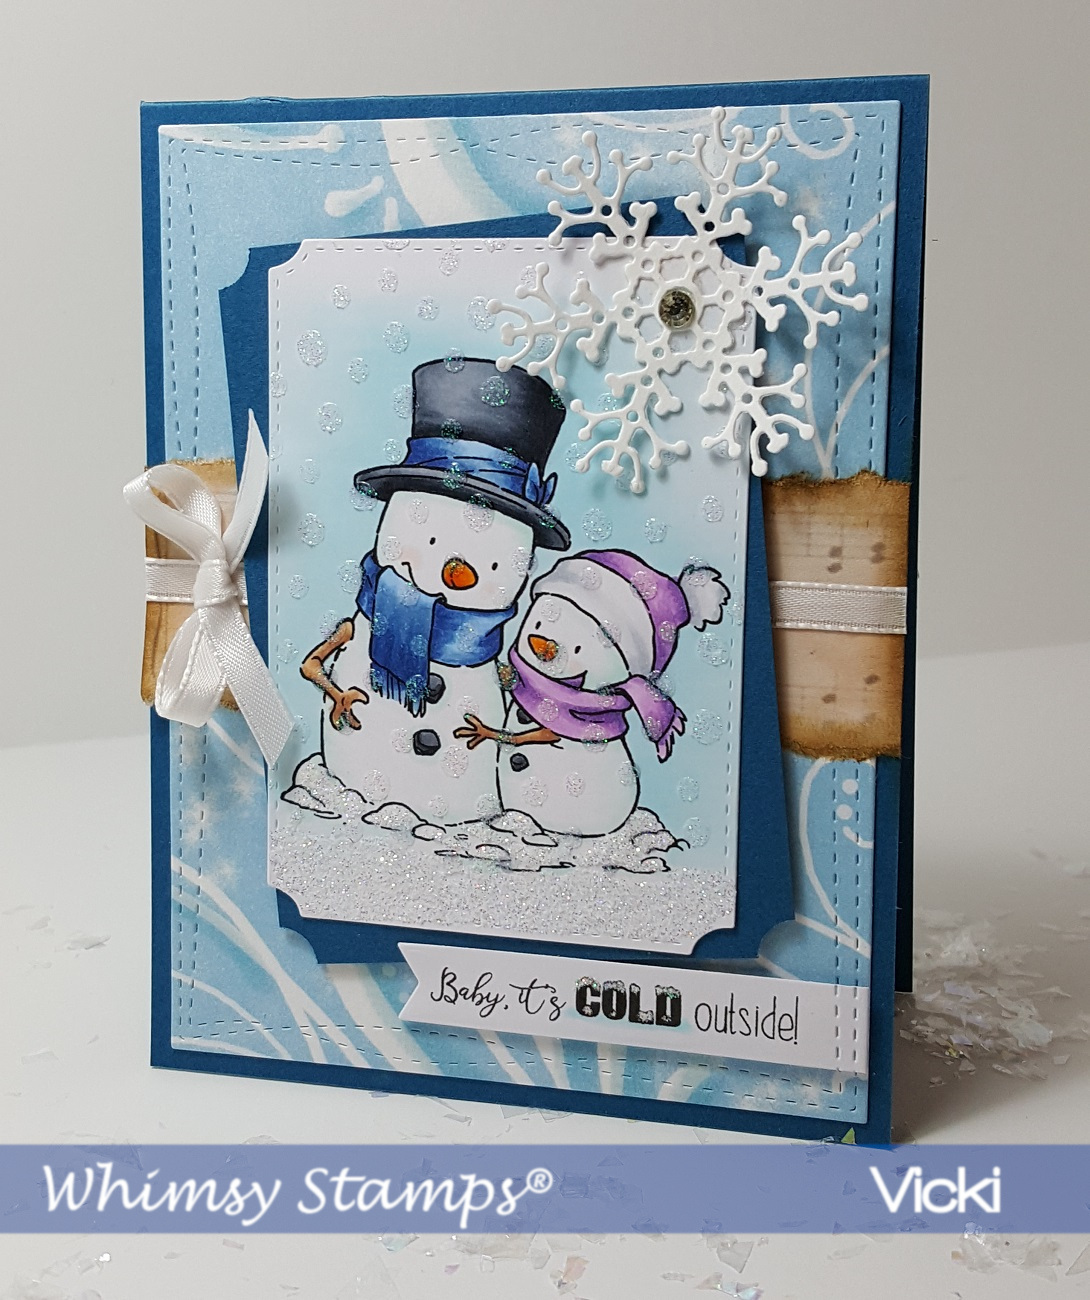
For the other card, I took this cute image from the Whimsy Stamps Gnome for Christmas stamp set, colored him up with my copics and cut him out with the coordinating die to pop him up over my card.

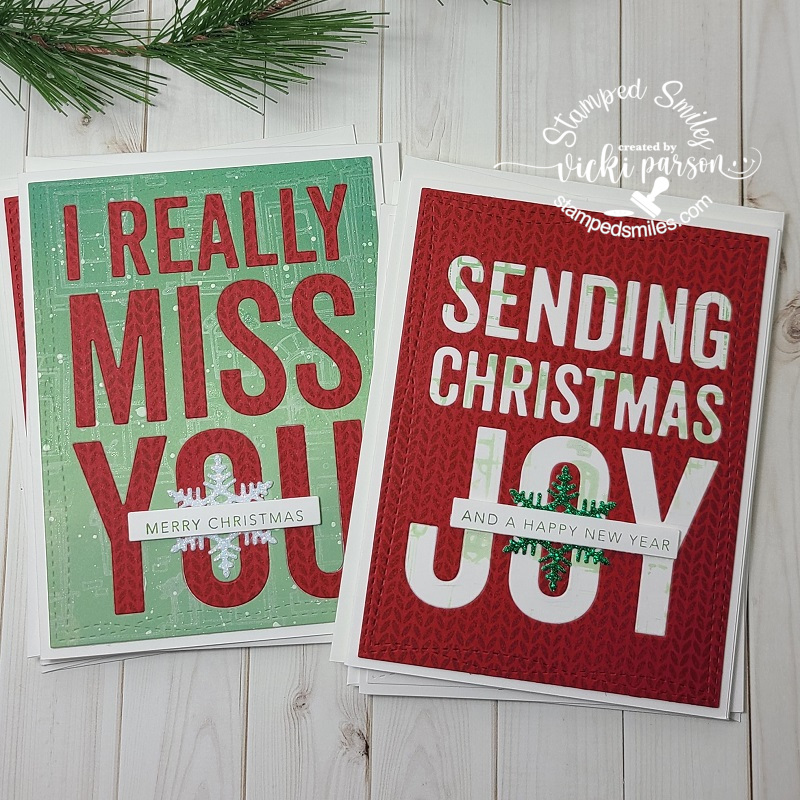
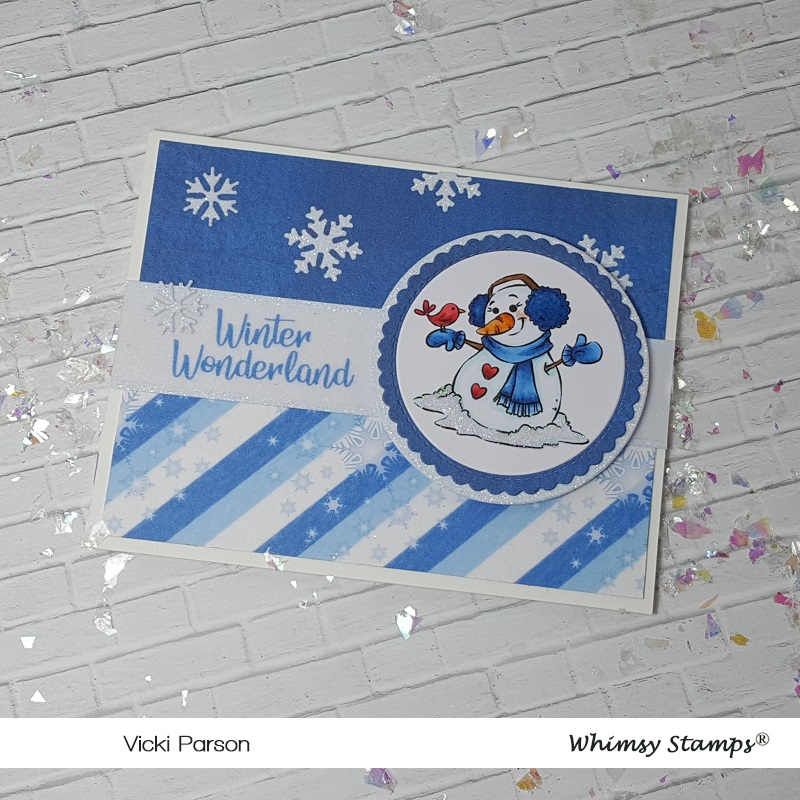
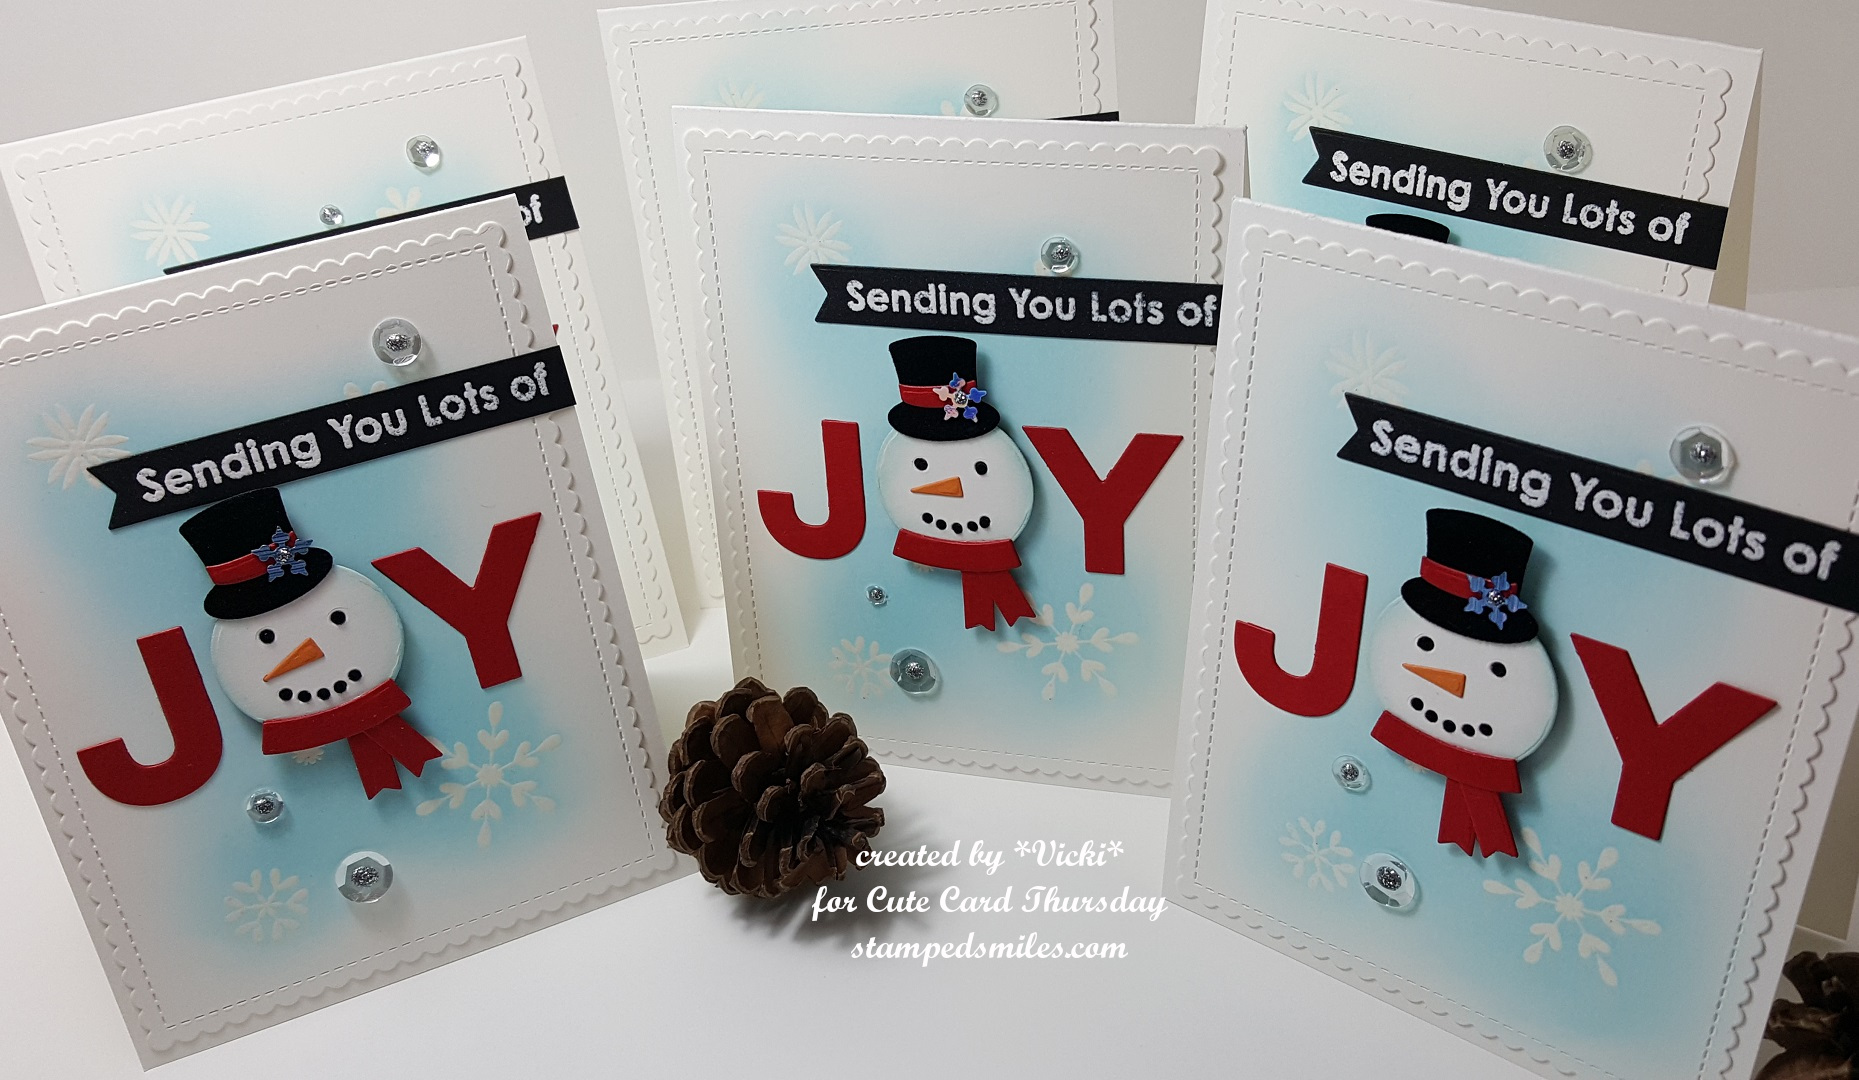
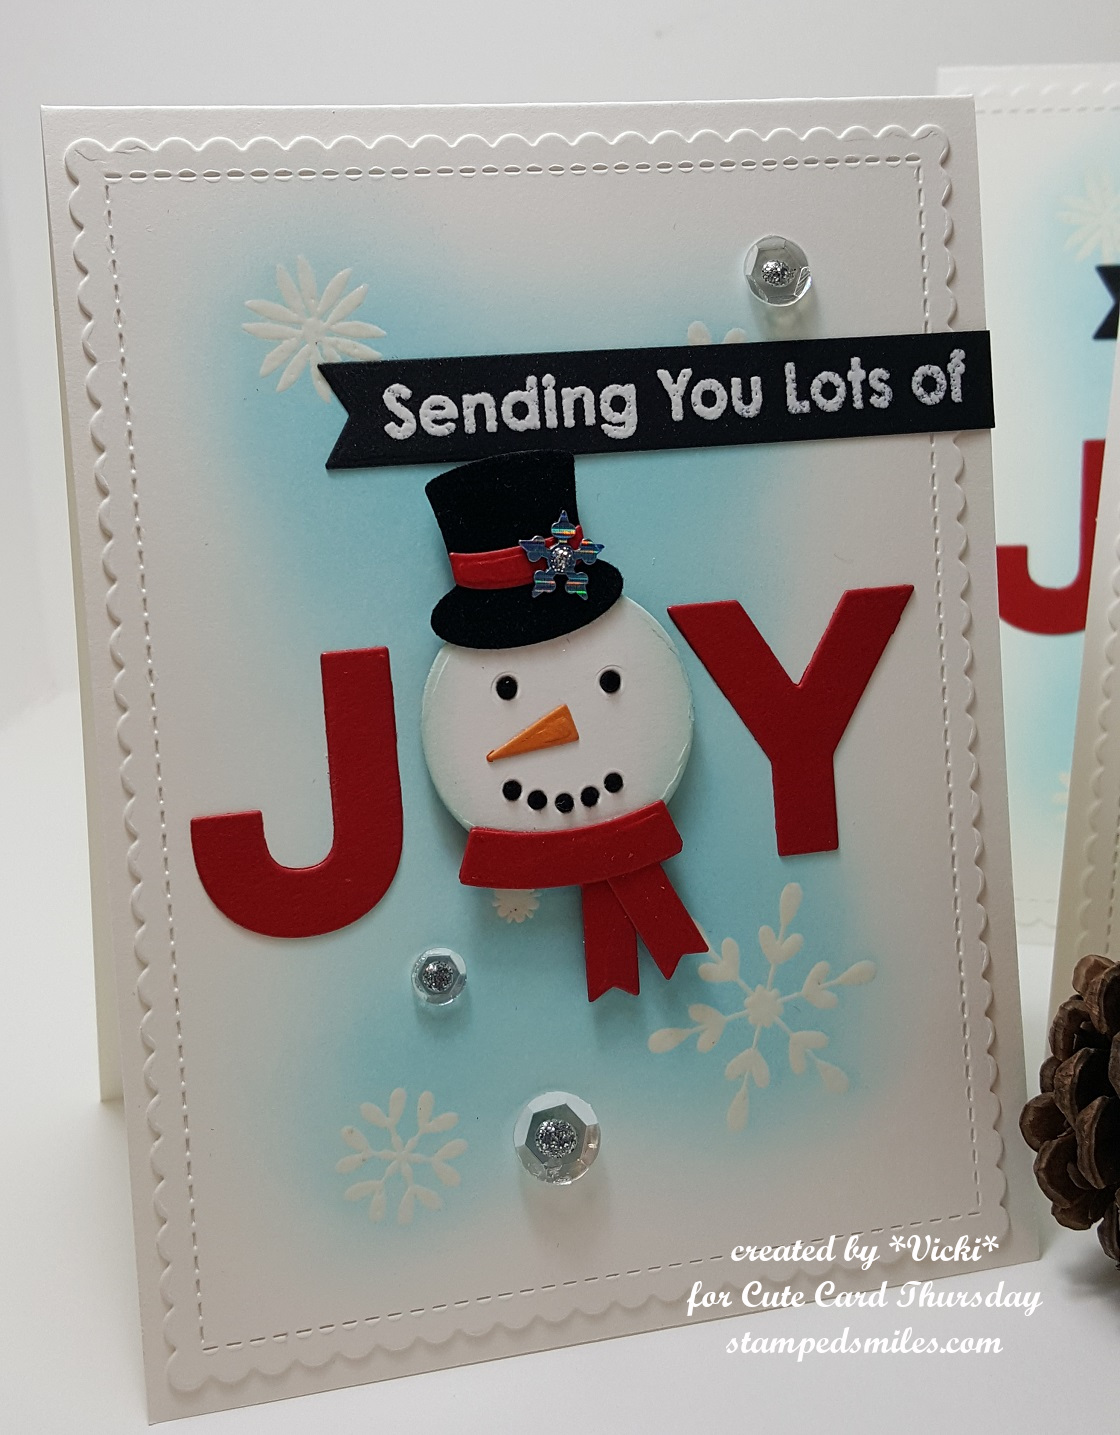
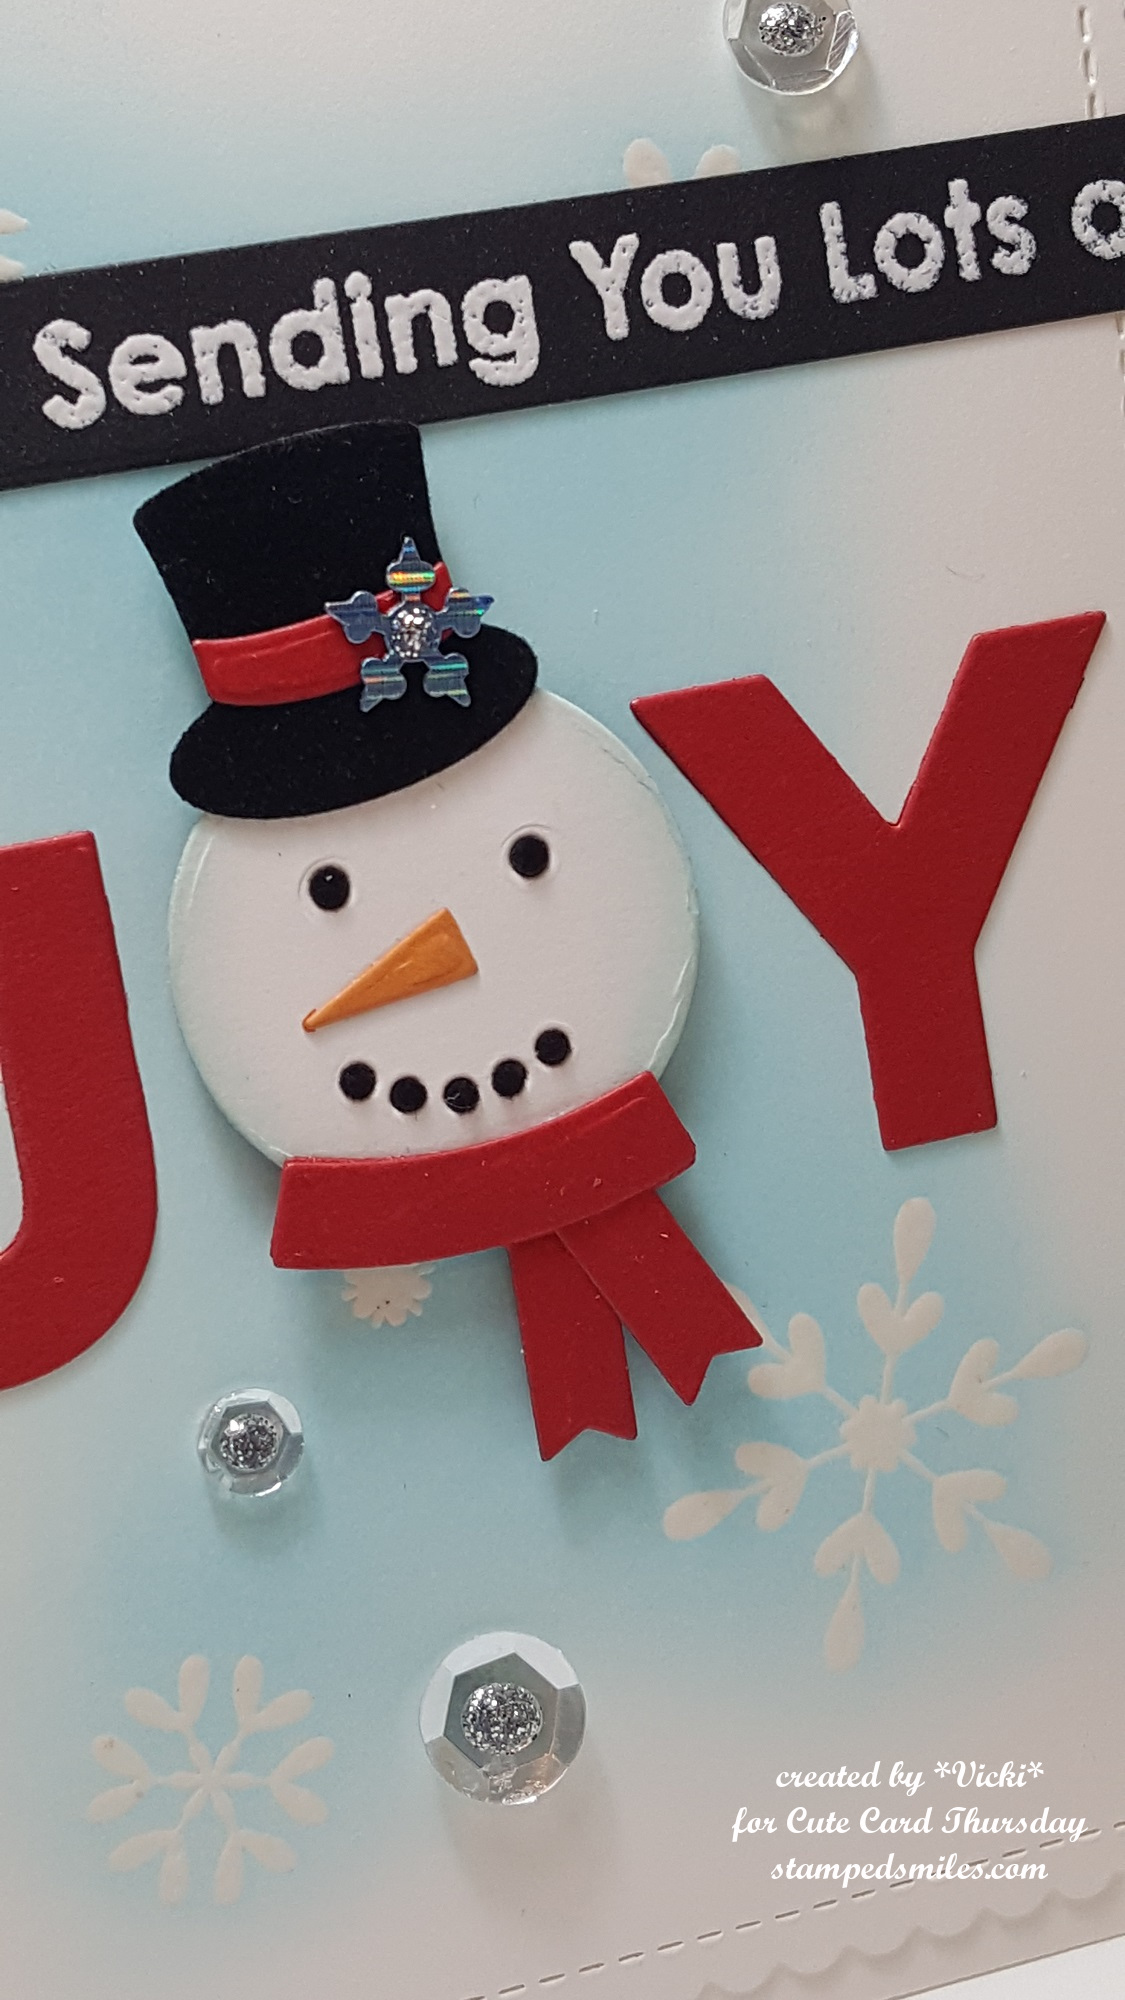
And then for these set of 4 cards, I’ve just die cut a snowflake from some glitter paper and glued in the center of the “O” on each design and popped up a sentiment over that with foam tape stamped and die cut from the Taylored Expressions Mini Strips – Holiday and Mini Strips die.

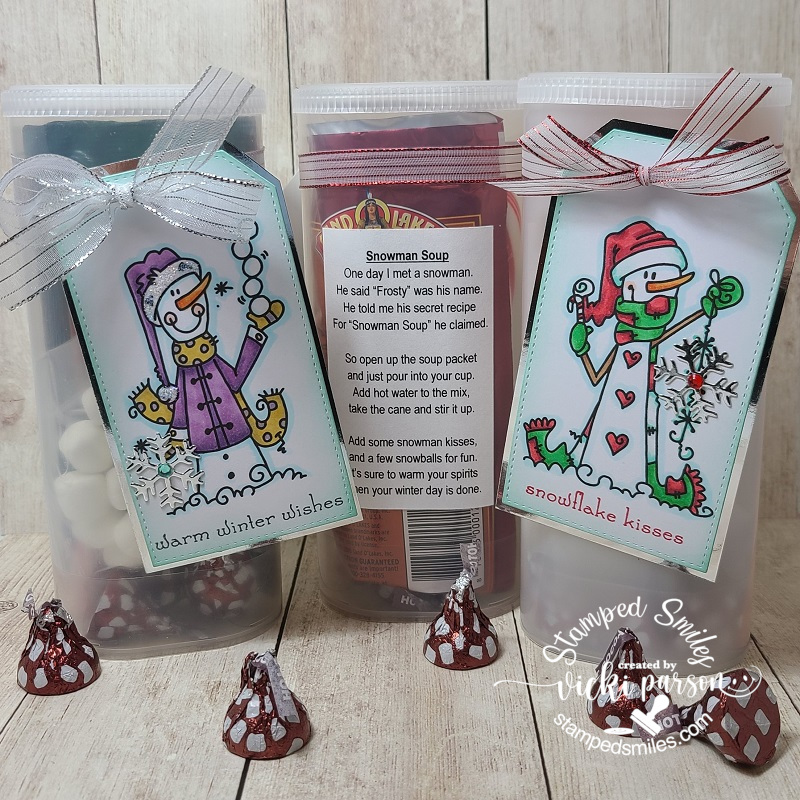
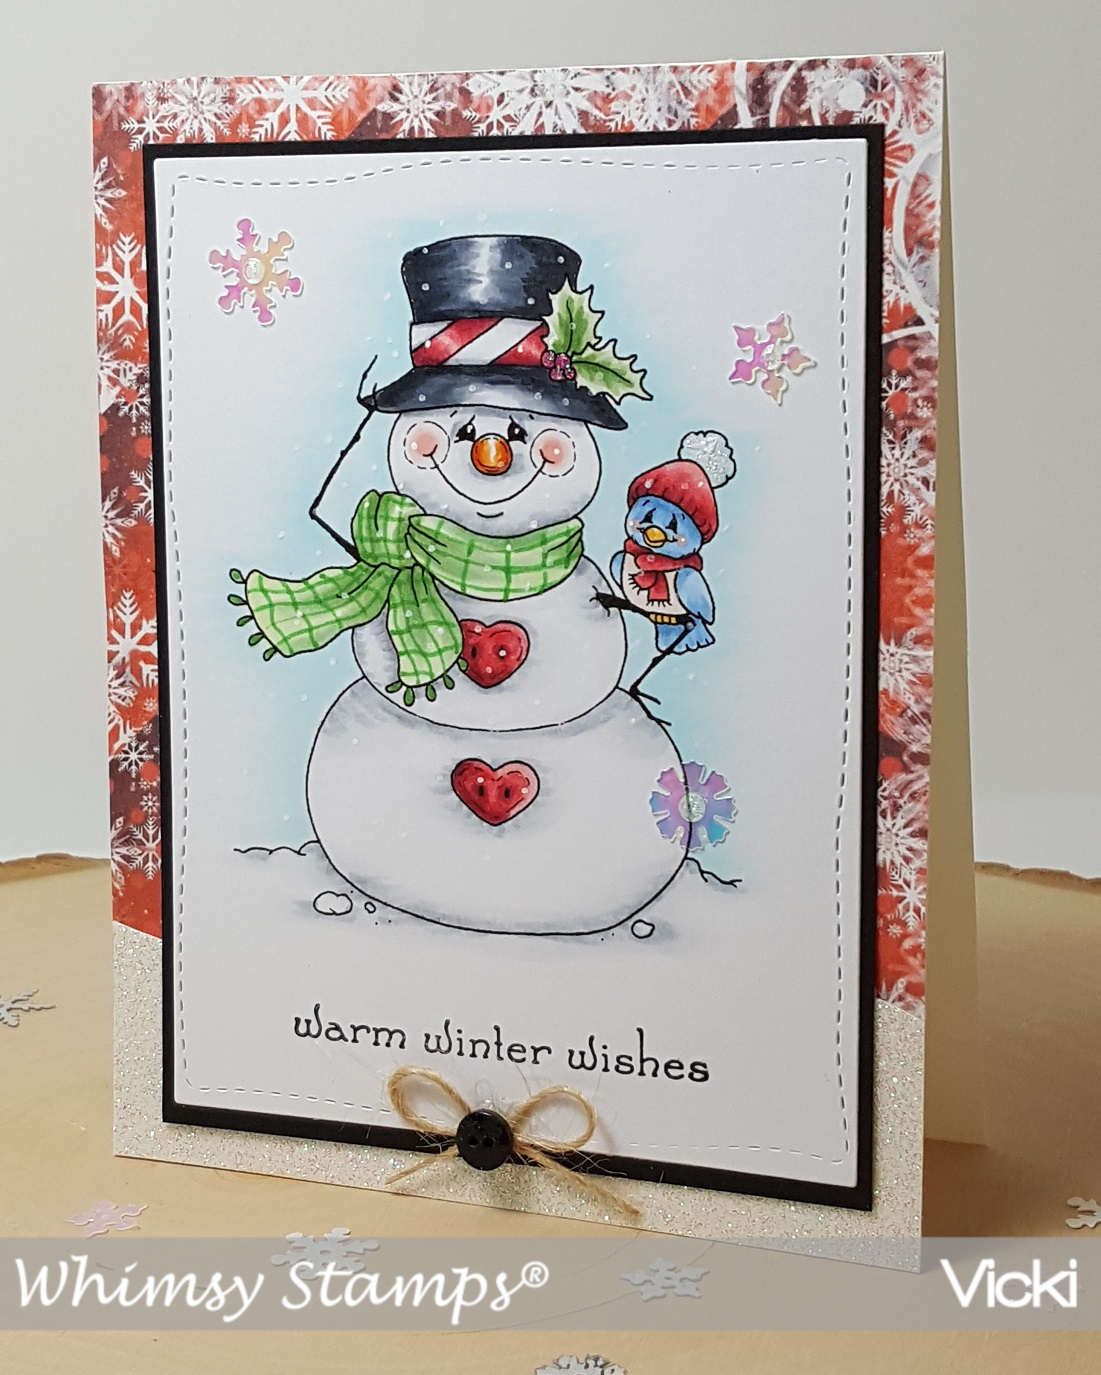
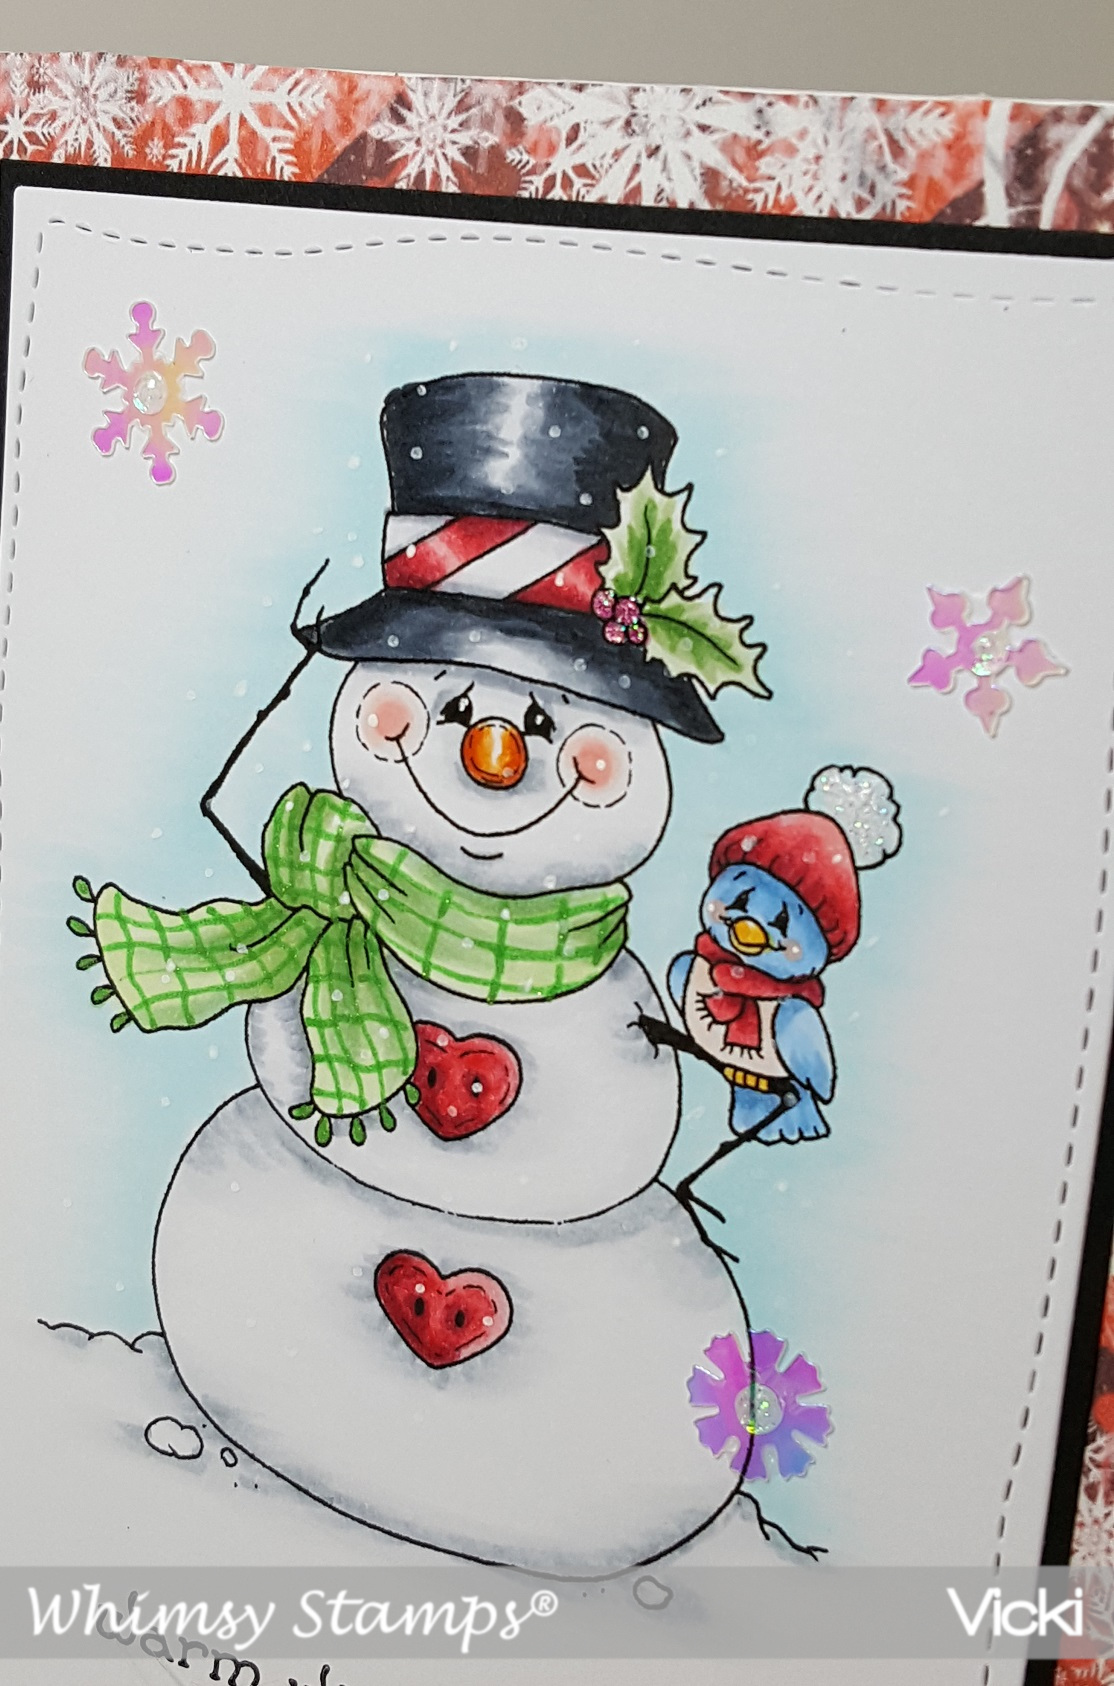
And as you remember in a previous post those “recycled Crystal Light containers” that I make, I made another set of three of them here.  This time, I’ve used this snowman stamp.  I just used my scissors to fussy cut those cute snowmen out as they were pretty simple to do and then I popped them up over an ink blended tag using the stencil over them.  I used coordinating cardstock and silver heat embossed the sentiment strip at the bottom and of course added my “snowman soup” poem on the back of the containers.  I’ve also added a layer of silver mirror cardstock behind the tags.

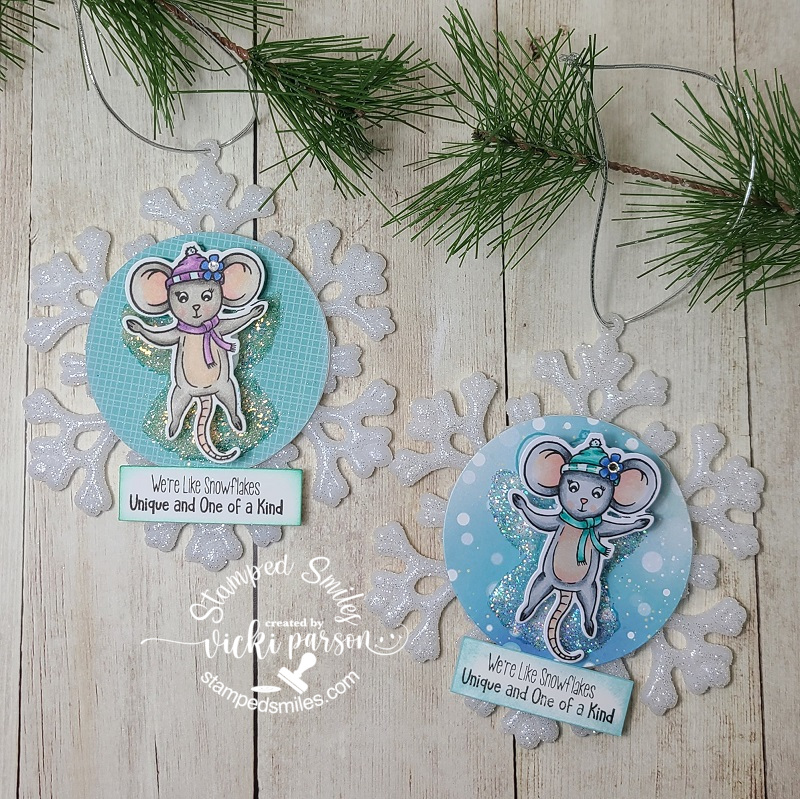
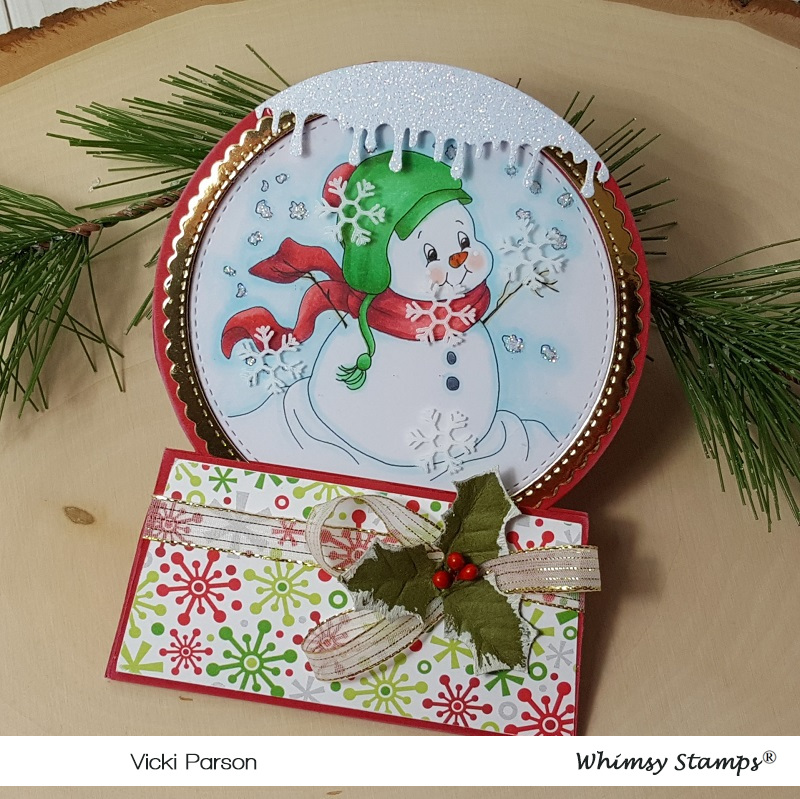
And I made a couple of these darling ornaments from a fairly “new to me” company that I was actually introduced to with product during my time as a {Cupcake Inspirations} sweetie DT when they sponsored a challenge a while back.  P.S.  There are a few more days left to enter their current challenge of “SNOWFLAKES” if you want to pop on over to join us too!!

But I was so taken with this darling image and kit from Inky Stampers from this Snow Much Fun Kit.  You get the snowflake ornament (with string), the stamp set and die, papers, wobbler, along with glitter to complete it too!  Well, I wanted to make more than one, so I grabbed another set of Snowflake Ornaments from the store and just added my own papers and glitter from my stash to make it.  

Whew!  I’m ready for that “Looong winter’s nap” now!!🥱 I hope you’ve enjoyed my post today and it has brought you some inspiration and/or a smile somehow!  I have received some beautiful Christmas cards and I so appreciate them and have them all displayed by being pinned around my garland in our pass-through in the living room/dining area.  I think after a bit of rest, I need to finish up my projects for the “Bugaboo Christmas Chaos” that I halted in the middle for to finish up Christmas projects….so I’ll be back soon with that.

In the meantime, I wish a MERRY CHRISTMAS TO ALL AND TO ALL A GOOD NIGHT!!🎅

“tis the Season for Holiday Chaos and Update on Christmas Cards for Danny🎅

Hello friends!  This is my second post for today, so please scroll down to see it or CLICK HERE for the {Cupcake Inspirations} Reminder post.

I have several creations to share with you today because while I’m working on trying to get some last-minute Christmas projects finished, I thought that I would join in the fun weeklong “Holiday Chaos” challenges over at the Catch the Bug Blog for Bugaboo Stamps.  I’ve caught up with all of the challenges up to today and then hopefully later this week I’ll be able to post the remainder of them:

This card is for the Day 1 challenge of “Reindeer Games”, so I had this really cute Bugaboo image called Little Penguin Reindeer and colored him up for my card.  I had these fun reindeer papers in my stash to pair with him and then found this fun sentiment strip to add with it as well.😂

I’ve used some gold glitter paper and added some gold glitter enamel dots in the corner.  The bells on the penguin’s waist were covered with a gold glitter pen and then I added some faux snowflakes along the circle image border too.

This next card was created for Day 2 Challenge of a sketch.  I’ve colored up this adorable Bugaboo image called Christmas Teddy 2 Ornaments all in blue colors!  Hard to tell in the photo, but I’ve used glitter gel pens to color in the stripe of the ornament and the silver tops.

I have been itching to pull out my Martha Stewart papers that have been lurking in my stash and I really love the colors in them along with the silver foil!  I white heat embossed the sentiment from the Brutus Monroe “Holiday Essentials” stamp set and cut it out as a banner with my scissors and popped it up over the card with foam tape.  I finished the design with some Drip Drops from Taylored Expressions.

And of course, here’s my project for today’s challenge Day 3 ABC/Anything but a Card.  I make these little “snowman soup” containers every year for my family and sometimes sneak in an extra “surprise” or 2 inside!  You may have recalled these on my blog before, but they’re just recycled Crystal Light containers and they fit the hot cocoa, candy cane, marshmallows and a few chocolate kisses all in there perfectly together.  I’ve decorated them in many different ways.  CLICK HERE to see a previous post that shows another way I’ve made them in the past.  This time, I just made tags to attach around the containers.  I have made another set of 3 of these containers (different images) that I will show in a future post too!

I’ve used these adorable snowmen from Bugaboo Stamps called “Snowman Snowflakes” (right) and “Snowman Snowballs” (left).  I colored them up with Copics and added a sentiment that was stamped at the bottom from Whimsy Stamps Holiday Mini Sentiments stamp set.

I’ve had this “snowman soup” poem for years and years and just printed it out on my computer and attached it to the back of the containers.  The top of the lids are also covered with pattern papers.  P.S.  If you haven’t tried the “Hot Cocoa Hershey Kisses”…oh my goodness they’re so good! 😋

UPDATE:

I also wanted to share an update on the “Christmas Cards for Danny” post you may remember that I posted about a few weeks back.  I’ve actually seen an update in my own hometown newspaper about all the cards he’s received and as of December 10th, he’s received 2,544 Christmas cards from ALL OVER THE WORLD! How cool is that?!   This really touches my heart and uplifts me about the kindness in the human spirit.  Thank you to those that took the time to send a Christmas card his way!  It’s really what Christmas is all about.

Challenges:

  1. Catch the Bug – Holiday Chaos Day 1: Reindeer Games (card 1)
  2. Catch the Bug – Holiday Chaos Day 2: Sketch (card 2)
  3. Catch the Bug – Holiday Chaos Day 3: ABC Anything but a Card (snowmen soup)
  4. Christmas Crafts All Year ‘Round – December Gifts/Containers (snowmen soup)
  5. 2 Crafty Critter Crazies – #45 Anything Goes + critter (card 2)
  6. Crafty Animals – #45 Anything Goes + animal (card 2)
  7. Daring Cardmakers – Animal Antics at Christmas (card 1)
  8. The Sisterhood of Crafters – Anything Christmas/Winter (snowmen soup)
  9. Crazy 4 Challenges – C4C565 past sketch from 2020 (I used sketch C4C553 for card 1)

Christmas Makes Countdown!

Hey friends!  I hope you’re having a great start to your week!  I have been in the Christmas making card mode the last few days and just finished sending out over twenty cards I believe.  I had previously made a few and already had those sent out over seas too.  I actually still have just a couple more to make for a few people close to me and I’ll be finished.

So I thought since I’ve been doing Christmas makings, I’d share some things that I’ve been working on with you!

Vicki-WS-snowglobe-KACCristmasswap

Here’s a fun “Snow Globe” shaped card that I had actually made for the Kit And Clowder Christmas card swap.  I made it in November and had actually sent it out the last week of November.  I just wanted to make sure she received it before I posted it anywhere and she did!

I have used this really sweet digital image from Whimsy Stamps called Snowman and Snowflakes by Crissy Armstrong.  I had to make it a certain size so that it would fit with my “Snow Globe” design.  So I’ve used a stitched die cut circle to cut it out with so that it could be placed on the inside of the card design.

If you would like to see how to put one of these shaped cards together for yourself, then you can check it out HERE on Splitcoast Stampers for the tutorial.

I’ve used some fun papers for the bottom and die cut a stitched scallop circle frame from some gold mirror cardstock and then used my MS “goo border punch” for the snow drip edge at the top.  I even took some white Staz On ink and stamped a few snowflakes over top of the acetate piece on the front of the card.  I added some gold ribbon and a holly sprig from Prima around the bottom.

Vicki-WS-snowglobe-KACChristmasswap-close

Here’s a closer view of the image and how I’ve got him all colored up with Copic markers.  I’ve also taken a glue pen and added some extra glitter to the snowflakes around the image as well.

Vicki-WS-snowglobe-KACChristmasswap-open

And when you open the inside of the “Snow Globe” card, this is what it looks like with the sentiment.  I have used a retired Whimsy Stamps clear stamp set called “Christmas Greetings” to stamp both the “happy” sentiment in red ink as well as the snowflakes on the piece of acetate with White Staz On ink.

I then took the Whimsy Stamps Christmas Large Word die and cut it out with a piece of gold mirror cardstock and glued that to the inside bottom of the card.  I also took some white ink and sponged around the edges of this entire inside.

I haven’t made one of these Snow Globe cards for quite a while, so that was fun to do!  I hope that you’ve enjoyed it too!  Thanks so much for stopping in today and I’ll see you again soon!

Challenges: 

  1.  Make My Monday – Anything Christmas
  2. Crafty Cardmakers – Christmas
  3. The Holly & Ivy Christmas – Anything Christmas
  4. Papercraft – Christmas
  5. Sweet Stampers – Anything Goes
  6. Try it On Tuesday – Christmas is Coming!
  7. Crafty Creations – #404 Anything Goes
  8. Cute Card Thursday – Anything Goes

I’ve Been Published!

Hey friends!  This is just a quick post to share my excitement with you about having a card I made for Whimsy Stamps published in the December 2019 “Handpicked” article on p. 38 of the Making Cards & Papercraft Magazine!

Vicki-published in Making Cards magazine

I would’ve shared this a bit sooner, but I wanted to take a photo of the issue in hand with me here.   The stamp set that I’ve used for my card is from the brand new December release at Whimsy Stamps called “Winter Wonderland“.  It’s a clear stamp set with lots of really sweet snowman images in it!  It’s one of my faves from the new release too!

Vicki-WSmagazine-WinterWonderland

Here’s a photo of it that I took myself before sending it along to the magazine back in October.  🙂

I won’t go into great detail about it, but I’ve also paired this with the Whimsy Stamps Winter’s Magic Blue Digital Papers Collection as well as the Whimsy Stamps No-See All Seasons Tree die set (snowflakes only die) for my card design.

If you get the magazine, then you can see below in the article how it was put together.

Vicki-WSmagazine-WinterWonderland-close

Here’s a closer view of the image and you can see the bits of glitter over it.

Vicki-WSmagazine-WinterWonderland-flat

This was just a really fun card to make and quite simple to put together too!  I really enjoyed it and how fun to get published with it as well!

Thanks so much for stopping in and letting me share my excitement with you!

P.S.  I have a spot along the sidebar of my blog where there will be a photo of the magazine to click on my blog post link in case you’re interested about my card.

Snowman’s Birdie Friend For Whimsy Stamps

Hello friends!  I really can’t believe how COLD it’s been our way especially for October!  We even have SNOW in the forecast!  Eeek!  Now that’s scary for Halloween!

So since Christmas is on the way, I suppose it’s a good time to get into the spirit of the cold with a cute little snowman and his friend from Whimsy Stamps:

Vicki-WSSnowmanBirdie-Oct29

This guy looks so happy that his bird friend found a place to rest on his hat! 🙂  This image is called Snowman’s Birdie Friend by Crissy Armstrong for Whimsy Stamps.

I wanted to make a nice little “snowy scene” for the image, so I took out the Whimsy Stamps Snow Flurry clear stamp set and stamped some of the snowflakes from the set around the top of the image panel.  I then die cut the image out along with creating a red “frame” with the Whimsy Stamps Notched Rectangles die set.  (To do this, I just glued the red frame made with the die onto a piece of white cardstock and then glued the image panel inside the red frame.  It’s the same size, so it fit into each other.)  At this point, I added some glue to the bottom area under the snowman and sprinkled on some chunky white glitter for the snow-covered ground.

Since I was following a card sketch (see challenges below), I took out some papers from my stash and cut them on a diagonal and attached them over a piece of white cardstock and then wrapped some white organdy ribbon around it before attaching it to the top folding red 5″ square card base.

I took the Whimsy Stamps Holiday Mini Sentiments clear stamp set and white heat embossed the sentiment over the red cardstock and cut it out with a banner die from my stash.  I popped this up with foam tape over the image panel.  I also had a snowflake die and a border snowflake die that I cut with some glitter cardstock and attached around the card design and added some rhinestones in different areas.  (I thought this helped add to the wintry scene of the image too.)

Lastly, I’ve added a brown button and natural twine over top of my white organdy bow.

Vicki-WSSnowmanBirdie-Oct29-close

Here’s a closer view of how I’ve colored in the image.  As you can see, I’ve done a bit of paper piecing on the image by taking the same paper from the right edge of the card design and using it for the scarf, mittens and hat band.  (I’ve used Copics to give it a bit of shading too, which you can see details below.)

Maybe a bit hard to tell in the photo, but I’ve added just a small dot of Glossy Accents to his blue nose.  There are also highlights with a white gel pen on his nose, cheeks and the bird’s cheeks.

Here’s the Copic markers I’ve used to color the image with:

  • Snowman’s Hat – E89, E87, E84
  • Bird & Buttons – E39, E37, E35, E32 (Y17 for beak)
  • Snowman’s nose – B26, B24 (R00, R000 for cheeks)
  • Snowman’s Shadows – B00, B000, B0000
  • Scarf and Mittens Shadows – W3, W1

Vicki-WSSnowmanBirdie-Oct29-flat

Hope you’ve enjoyed my card today and it has brought you joy in some way! 🙂  I sure had lots of fun putting it together!  Thanks so much for joining me today and I’ll see you soon!

Challenges:

  1.  Sketch Saturday – Sketch #587
  2. Crafty Creations – Anything Goes #401
  3. Jingle Belles – Rudolph and Friends
  4. Crafty Catz – Anything Goes
  5. Winter Wonderland – Merry and Bright
  6. QKR Stampede – Anything Goes #369

Anything Goes for Cute Card Thursday!

Hello there friends!  Have you been busy with your Christmas festivities?  I am doing a “run-run Rudolph” right now and trying to finish up my Christmas cards let alone some baking, preparing for a Christmas dinner and finish wrapping up presents!!   It is the fun of the Holiday Season and I enjoy spending time with my family, so I look forward to seeing them all!

It’s a new challenge today over at Cute Card Thursday!  Since it’s that time of year and busy, we made this any easy “ANYTHING GOES” challenge for you!!  We are looking forward to seeing what you’re making!

Since I am trying to finish up some Christmas cards, I thought I’d try and work on some doing “mass production” of a design.  I only do so many of these before I have to switch things up, but I thought these turned out pretty cute:

Vicki-CCT561-Snowman Joy-mass produce

I have used the My Favorite Things “Filled with Joy” card kit (sold out) to make these plus I have pulled out the MFT “Simply Snowflakes” stamp set (retired) to clear heat emboss the background and then rubbed some Tumbled Glass Distress Oxide ink over it.  The panel was cut out with the MFT Die-namics Blueprints 27 and the heat embossed sentiment strip was cut out with the MFT Die-namics Essential Fishtail Sentiment Strips.

Vicki-CCT561-Snowman Joy

Here you can see how I’ve pieced together the snowman.  The die in the card kit cuts out everything including the letters.  I’ve cut his top hat with some black felt paper that was also included in the kit and then I decided to cut out the snowman head so that I could cut out those tiny eyes and mouth with the felt paper as well!  So, if you happen to get this card from me, please be sure to rub your finger over the felt pieces in his hat and face!!  I very carefully and lovingly placed each tiny felt dot in!! 🙂  I think that the blue snowflake background really makes him stand out even more!

Vicki-CCT561-Snowman Joy-close

On an even closer look at the card, you can see that I’ve added a sequins snowflake to each snowman’s hat and then added some sequins to the card background.  I filled each one of these with some silver Stickles.  The snowman head was popped up with a foam circle and the rest is just glued down.

Thanks for dropping by and I’ll be back again soon!

Challenges I’d like to enter:

  1.  Daring Cardmakers – Snowflakes Falling
  2. A Bit More Time to Craft – Anything Goes
  3. Always Fun – Snowman
  4. The Creative Crafters – Anything Goes
  5. Double D – Let it Snow!

Whimsy Stamps New Release Snowman Couple

Hello friends!  I’m thinking after the several inches of snow we received last week; this is a really “time appropriate” creation to share with you!! LOL!  The first of the month is always a brand-new release for Whimsy Stamps.

Vicki-WS-SnowmanCouple-Dec3

For my card today, I’m using this darling new image called Snow Couple for my design!  Super quick and easy image to color up, so adding more details to it is always something fun! 🙂  I’ve taken the Whimsy Stamps Notched Rectangle dies to cut it out with.  I’ve also cut out a separate navy cardstock layer to mount behind it.

For my card front base, I’ve used the Whimsy Stamps Christmas Azure digital papers and cut it out with the Whimsy Stamps Hand Stitched Nested Rectangles die for the background and then mounted this over a navy A2 sized top folding card base.  Then I’ve also cut a strip of the musical papers from the Whimsy Stamps Christmas Traditions digital paper collection and then ripped each side of it.  I took some distress ink and sponged around the edges of it and mounted it over the card front base along with some white ribbon.

I took the image panel and navy layer and added some craft foam to the back of it and attached it to the front of my card base layer.  I took some more of the white ribbon and made a bow to attach to the side of the image panel.  I’ve also taken a sentiment from the Whimsy Stamps Penguin Christmas Sentiments 1 digital set and cut it out with a banner die that I then placed over the Hand Stitched Nested Rectangle die to make the stitch lines in it.  I then took some foam tape and attached it on the bottom corner.  For the sentiment, I’ve taken a Copic marker to go around the “cold” word and added some glitter for the snow details on it.

Lastly, I’ve taken an old Whimsy Stamps Snowflake die and cut out a piece from white card stock to attach at the top as an accent.  I put a rhinestone in the center of it.

Vicki-WS-SnowmanCouple-Dec3-close

For coloring up this image, I’ve used the following Copic markers:

  1.  Snowman top hat/coal buttons:  C8, C5, C3
  2. Snowmen bodies/arms:  BG000, R00 (cheeks), E33, E31 (arms), YR24, YR15 (noses)
  3. Snowman top hat trim/scarf:  B39, B37, B34
  4. Snowwoman hat/scarf:  V17, V15, V12, C1, C0
  5. Background Sky/Ground:  B01, B00, B000

After coloring this image, I’ve taken a snowflake stencil and then added some Nuvo Glimmer Paste Moonstone over top of it with a palette knife which created these cool glittery snowflakes over top of the image.  You can still see through to the image which is exactly what I was looking for.

I then took some glitter and added it to the ground, the snow around the snow couple as well as the letters on the word “cold” within the sentiment with both a Nuvo Medium Tip Glue Pen (for the ground), as well as a Nuvo Precision Glue Pen for the snow on the lettering.

Hope you’ve got inspired with my creation with the new Whimsy Stamps digital release this month!  Be sure to come back for more inspiration later on in the week!  Thanks for stopping by!

Here are some challenges that I’d like to enter my card for:

  1.  Try it On Tuesday – Winter Wonderland
  2. Crafty Catz – Anything Goes with optional twist:  Too cute
  3. A Perfect Time to Craft – Anything Goes
  4. Sisterhood of Snarky Stampers (SOSS124) – ‘W’ is for Winter
  5. That’s Crafty! – Winter Wonderland
  6. Stamps & Fun = Creativity – White/Blue

A Snowy Shaker

Hello friends!  I’m back again today to share a shaker card I’ve made using the CUTE digital stamp from Whimsy Stamps called “Snowy“!

Vicki-WS-Snowy Shaker-Nov25-blog

I had “snow” much fun making this shaker card!  Hope you’ve enjoyed it for inspiration as well!

Thanks so much for stopping in at my blog today!  I appreciate your kind thoughts and encouragement more than you know!  I’ll see you soon!

Challenges I’d like to enter this card for:

  1.  Simon Says Stamp Monday – “Let it Snow”
  2. Creative Moments – Anything Goes optional twist:  put sentiment on creation.
  3. Simon Says Stamp Wednesday – “Baby It’s Cold Outside!”
  4. Aud Sentiments – Winter or Christmas Sentiment
  5. Creative Knockouts – Snow Much Fun
  6. Winter Wonderland – Christmas or Winter Characters (people only)
  7. Crafty Catz – Anything Goes with optional twist:  “All Wrapped Up”

It Sparkles at Cute Card Thursday!

Hello friends!  Yes, that quick and we are ready for a new challenge over at Cute Card Thursday!  This is a really fun one too!  This week we’d love to see your “Sparkles” on your creations!  We look forward to seeing what you come up with for it!

Here’s the creation I made:

Vicki-CCT553-KC-Sparkles

I have used one of our sponsor’s image this week called Reindeer and Snowman from Kinda Cute Stamps.  Now how cute is that reindeer making a snow reindeer?!  I just had to give them both a red nose! 🙂

I printed out the image on white blending card and cut it out with a wonky stitched rectangle die, and then cut out some snowflakes with silver sparkle paper along with layering the image panel over some as well.  I took a sentiment from a new My Favorite Things stamp set and silver heat embossed it over the top of the image panel.  I’ve also dotted the center of the snowflakes along with making some additional dots with some silver Stickles.

Vicki-CCT553-KC-Sparkles1

Here’s a closer view of the image.  You can see where I’ve taken a glue pen and covered the snow-reindeer with loose glitter.  I’ve also taken a Spectrum Noir Glitter Brush Pen and covered the noses as well as the snow on the ground.  I used a glitter pen to color the charm on the reindeer’s collar.

Thanks for dropping in!  See you soon!

Challenges:

  1.  Jingle Belles – Animals (Christmas Flock)
  2. Christmas with the Cuties – Wrap Up Warm
  3. City Crafter – Silver Bells (lots of silver)
  4. Crafty Creations – Anything Goes
  5. Fab ‘n’ Funky – Christmas
  6. Watercooler Wednesdays (WWC193) – Holidays

Top O Morning Snowman Wishes

Hello friends!  Well, it’s certainly not morning, but maybe it is where you’re from or it’s morning when you see this post! 🙂

I have a really fun Whimsy Stamps digital image to share with you today appropriately named to coincide with my post title:

Vicki-Oct16

This really sweet, faced snowman is called Top O the Morning Snowman which is a digital image created by Crissy Armstrong for Whimsy Stamps.  I thought it was so cute with the little birdie joining him and his little heart buttons!  I had fun coloring him up!

I’ve colored him with Copics and cut it out using the Hand Stitched Nested Rectangles die and matted some black cardstock behind that panel.  I’ve also used the October Digital papers release called Christmas Red, Gold and Green and attached it to the front of an A2 sized white card base.  I then took the wavy die from the Pierced Border Trio dies and cut a piece of glitter cardstock to add at the bottom of the decorated digital paper panel.

I then added the snowman panel over top and then stamped the sentiment below the snowman with the Holiday Mini Sentiments stamp set.  I then added the twine bow and button as well as a few snowflake sequins and filled the centers with some Nuvo Crystal Drops to finish it off.

Here’s a closer view of the coloring:

Vicki-Oct16-close

I have used all Copic markers to color this image in the following colors:

  1.  Hat and Snowman body/snow:  C8, C5, C3, C1, C00
  2. Hat Band, buttons, bird hat/scarf:  R37, R35, R32
  3. Holly:  YG67, YG63, YG61, (hollies colored with pink glitter gel pen and covered with Nuvo Crystal Drops
  4. Snowman Scarf:  G24, G21, G20 + green glitter gel pen for lines and ends
  5. Snowman nose and cheeks:  R20, R00, R000, YR18, YR15, Y11
  6. Bird:  B34, B32, R00, E000, Y21, Y11

I’ve also used a white gel pen for the cheeks on both the snowman and bird as well at the eyes on the snowman and to randomly add some dots for falling snow effect.  I also went around the outside of the image with a B000 marker for a bit of sky behind him.

Thanks so much for stopping by today!  Hope you’ve enjoyed my card!  See you soon!

Challenges:

  1.  CRAFT – Christmas
  2. QKR Stampede – Anything Goes #317
  3. Allsorts – Christmas
  4. The Merry Christmas Challenge – Anything Christmas Goes
  5. The Creative Crafters – Anything Goes