Hello friends! I can’t believe that it’s already at the end of the month! I feel like this month went by very quickly, but as the weather gets warmer, it seems the more I want to be out. Spring is always a great time to start seeing those pretty flowers which also means more weeds to pull too!
It’s time for the monthly Art Journal Page collaboration with my crafty friend, Carol (from Crafty-Stamper)! We get creative trying to use up our never-ending stash piles along with a prompt for each month. I know she will have some wonderful inspiration to share, so please check out her blog too! Here’s my AJ page with the “SMASH OUR STASH” April prompt of “SHINNY/SPARKLY” :
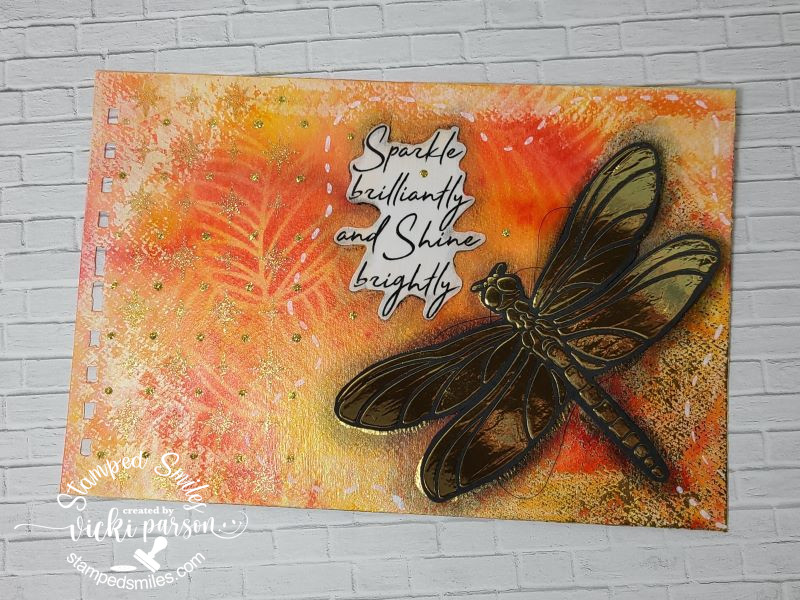
I am a sucker for anything that shines or sparkles! So of course I had so many things to choose from in my stash to play with! I really had loads of fun making this one and the photos do not look quite as “wow” as it does in person of course, but you can probably guess what it may seem like once you know all what I’ve done.
For the background: I used my normal pre-punched holes on a 6″x9″ watercolor paper and covered it with water spritzing and Brushos Crystal Color media in lemon, orange and brilliant red. Once dried, I went around the edges with a scrapper and white gesso. (I didn’t use a ton of it, just enough to make a scant frame. Once that was dried, I took a leafy stencil with coordinating colored Distress Oxide inks and sponged over the page randomly. I then spritzed with large water drops, once dry, I sprayed the whole page with shimmer spray.

On the dragonfly, you can see directly on the page a bit of a shinny gold shadow under the wings. I have this dragonfly stencil that I used Deco Stencil Paste over that when dry, you can foil over it. I did that directly on the page where I wanted the dragonfly and then again on a black piece of cardstock that was cut out. I added some black string (This was a stray piece of string from a project that I did not use, so I decided to re-use it for this project) around the dragonfly, glued the center down over top the one on the page and then used black foam tape over the wings to give them a bit of a lift. Before gluing down the cut out dragonfly, I used a gray Big Brush marker to create more shadows around it. I also used a white Big Brush marker to create the dash lines around the page.
The sentiment was a piece that was cut out from a magazine that I recycled to use for this page and attached it with media paste. I used the grey Big Brush marker to add some shadows around it as well.
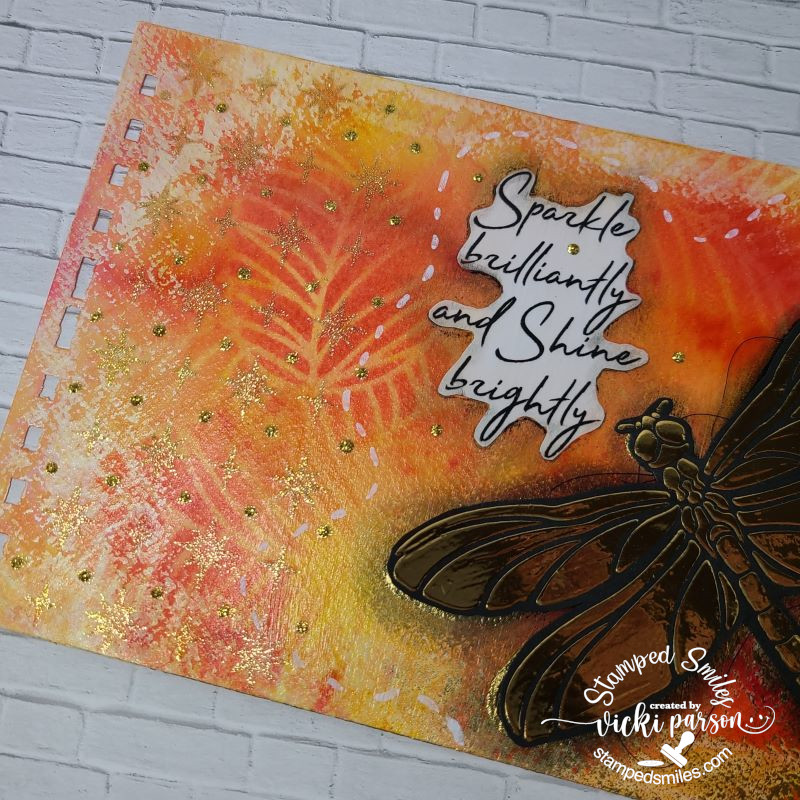
On the left side of the page, you can see some gold sparkles which were created with another Tim Holtz Christmas stencil that I had which looked like fun sparkle images. I used some gold glitter paste to go over that and then I took some gold Stickles glue to add some details with dots in various places.
And this is just one more photo of trying to capture that shine and sparkle:
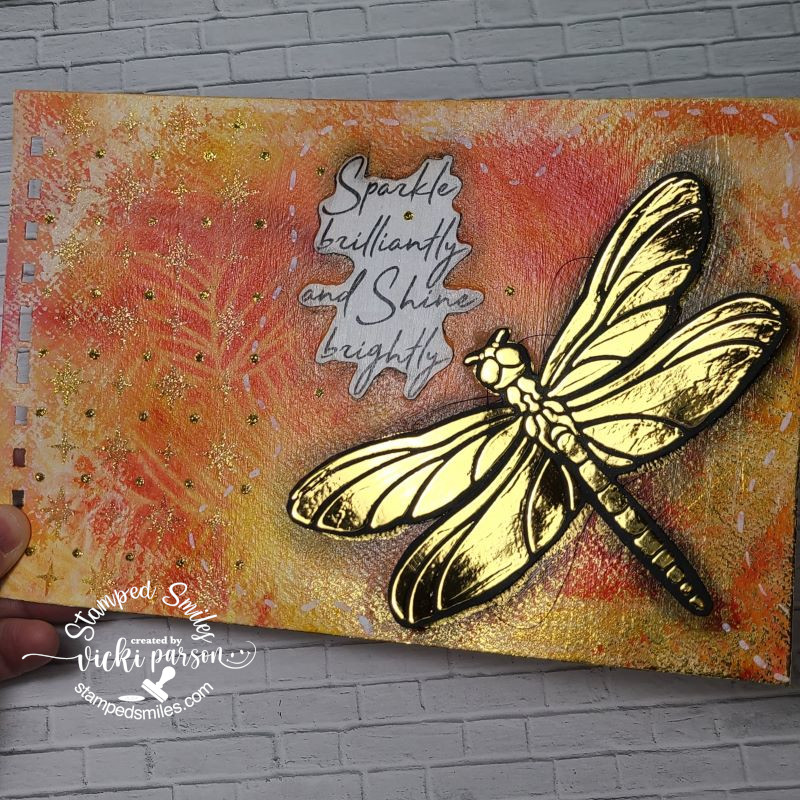
Perhaps you can see more of the shine and sparkles in there. I just had to move the page around in the light to get it in just the “right spot” to capture it better, so pardon my fingers in there.
Really hope you’ve enjoyed my AJ page today and gotten some inspiration! Thanks so much for stopping in! I’ll be seeing you again soon!
Challenges:
- Country View – Things with Wings
- Art Journal Journey – Recycle, Reuse, Repurpose (black string & sentiment)
- Creative Moments – Wings and Things
- Arty Divas – Anything Goes
- Crafting From the Heart – Anything Goes-no cards *First challenge*