A Cherry Hello and Catching Up!

Hello friends!  I hope that you’re enjoying your week so far!  Summer is now in full swing over my way and it certainly is feeling that way too!  

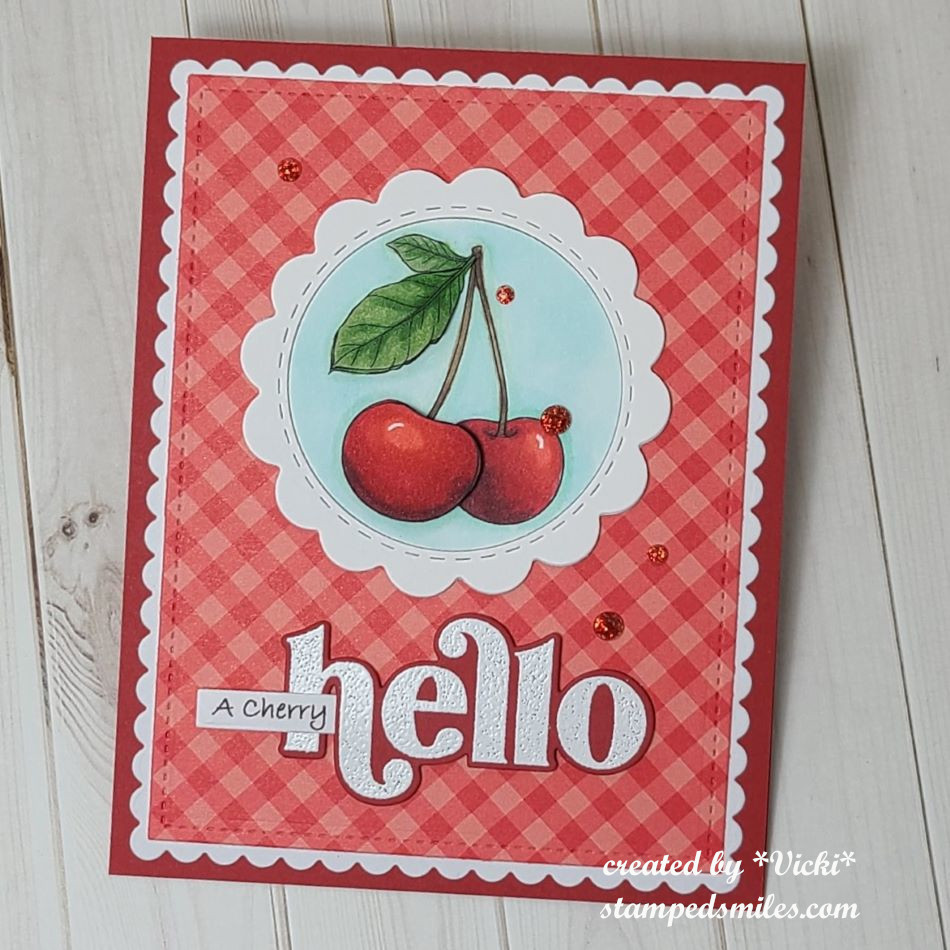
Where I live, June is also a time of year when the blooming cherry trees from May now turn into the cherries ready to be picked!  If you’ve never tried a cherry jam, I highly recommend it!  With the freebie image over at Beccy’s Place, it seemed like a great idea to make a card with it:

Without the sugar, cherries can be extremely tart and so it’s never something I would pick from a tree and eat especially with a pit in it!  I do love a good cherry pie though!

Coloring cherries is also fun!  I opted to use the non-colored version of the image and I printed it out twice because I cut out the front cherry and front leaf on the image to pop up with foam tape for dimension.  I used Copics to color it in along with the background circle it’s on.  I also added a white highlight with a gel pen.

I thought it would be fun to make a punny sentiment to print out “A Cherry” on my computer and then cut it out to weave into my white heat embossed “hello” cut from red cardstock.

I die cut the scallop circle which also cuts out the center that the cherry image is on.  I layered it onto the Doodlebug gingham paper and attached it to the white scallop rectangle that is all attached to a red A2 top folding card base.  I finished it with a couple of red rhinestones.


  • FOR THE CATCHING UP:  The last several months/year, it seemed like my blog posts were really random and sometimes I would go a few weeks before posting the next time.  I seem to struggle on and off with having no motivation to get crafting or even go into my craft room at all.  I know this happens from time to time, but it seemed to be up and down and all over the place which is why I took on joining a few challenge design teams.  It helped to get me a routine of at least getting motivated to get into my room on a regular basis anyway.  I didn’t want anything that was too strenuous, or I felt that I would give up completely.  This is also the reason why I do art journaling…it helped with “no pressure” on what I could create and use whatever I wanted.  After looking at things I’ve created, I still have things that I’ve made but never posted about!  So I thought I’d try to catch up with some of the things I’ve done and finally post it.  There will have to be some more posts to catch up with it too!

So here is the start of some of my catching up towards the end of last year…

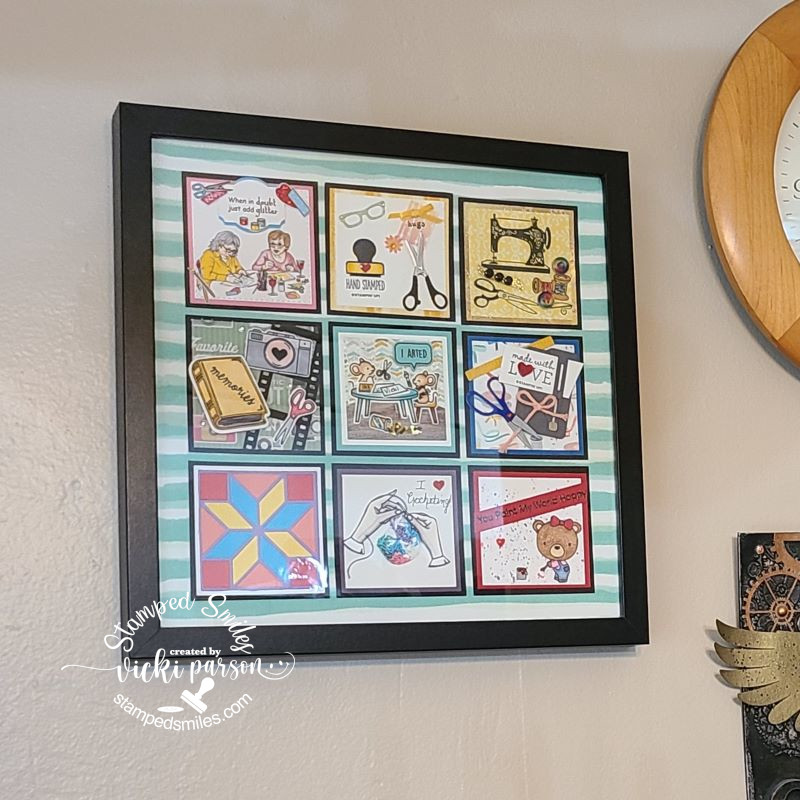
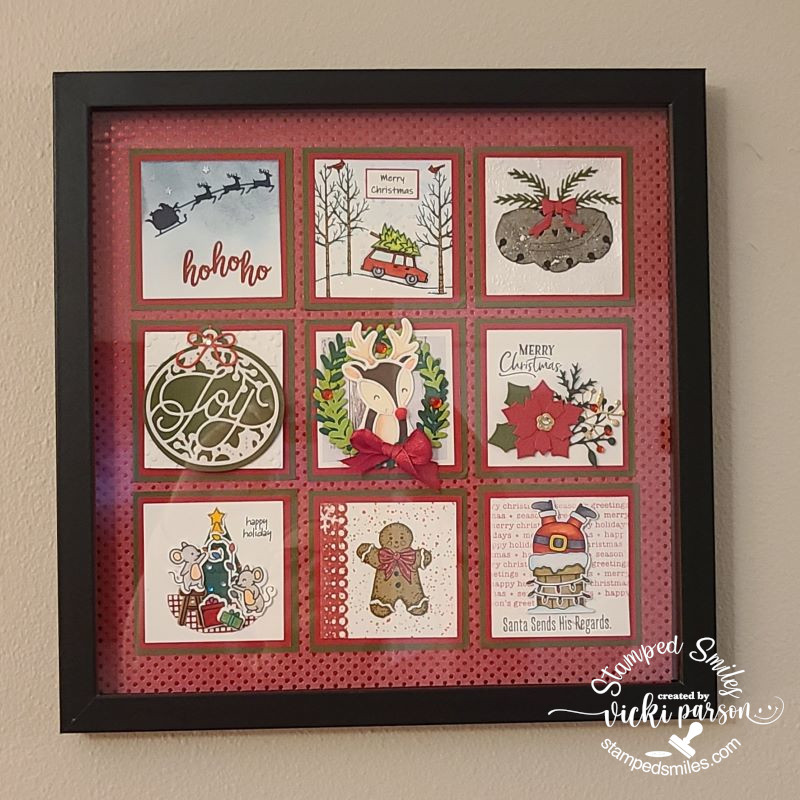
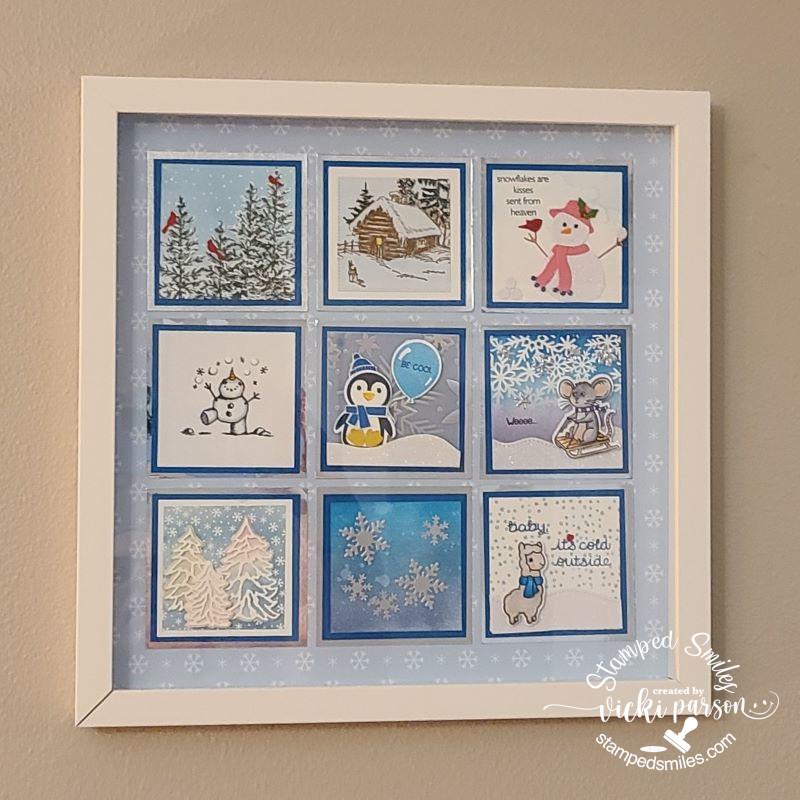
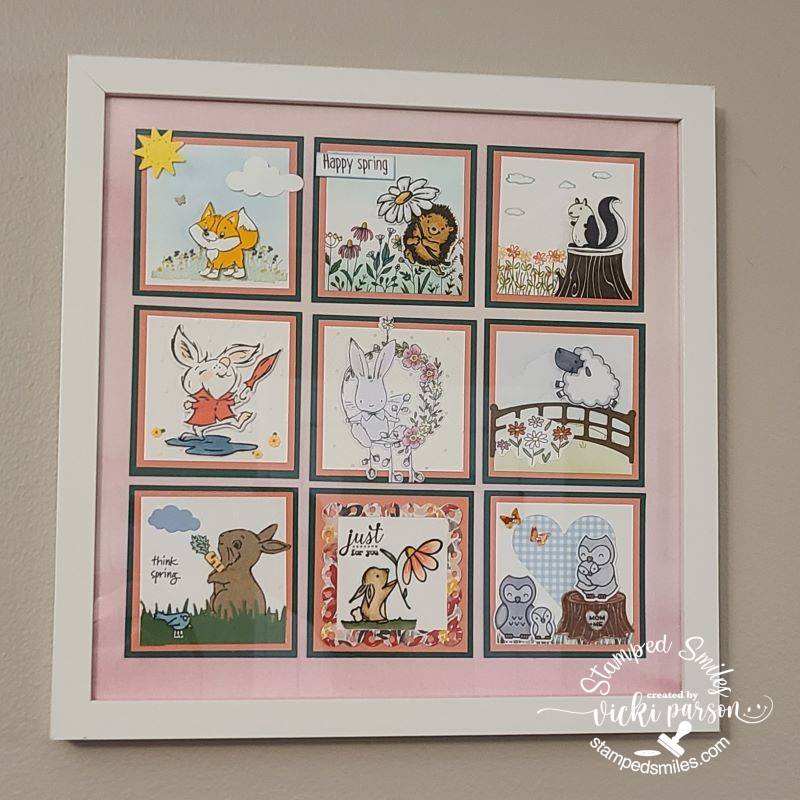
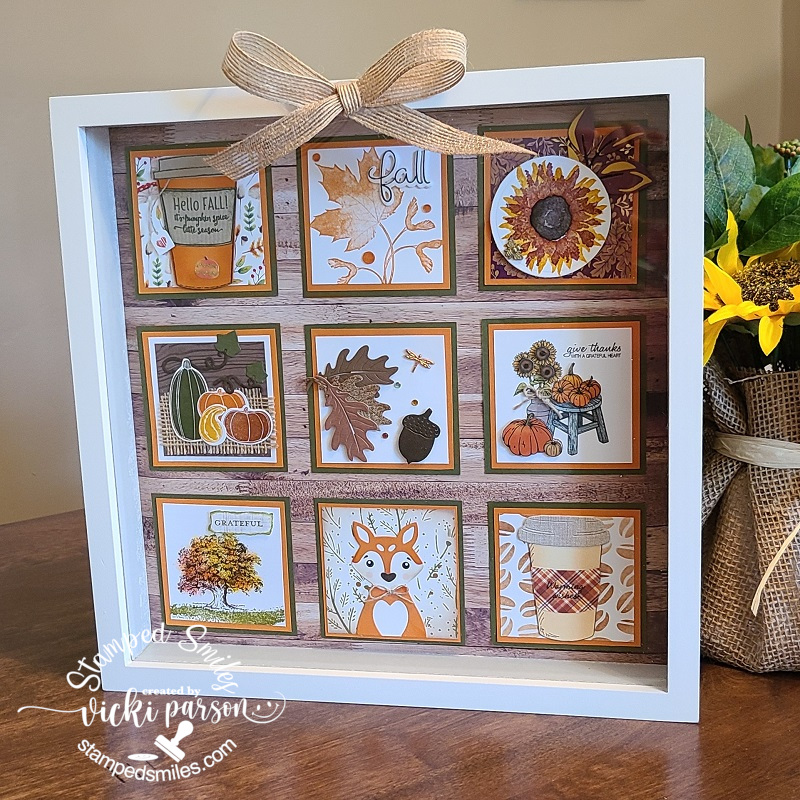
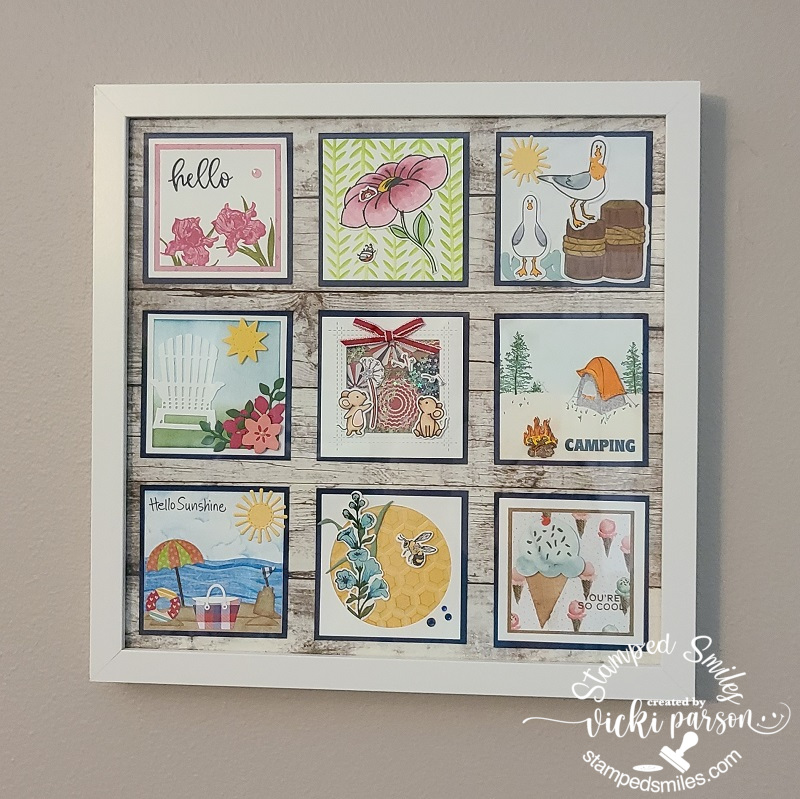
Do you remember the 12×12 Sampler SWAPS that I was doing with my blog buddy group? (Patti, Shirley and Donna) We would swap out the squares and then finish it ourselves by adding the background papers and placing into 12×12 shadow box frames.  We had completed one for each season, but for this last one we decided to make one about our “favorite craft”.  Here’s all of the squares that is still hanging up on my wall right above my computer and next to a clock and other craft items I made.  I enjoy looking at it and seeing all of  the squares from fellow crafting friends.  This was fun to participate in and it really helped me with struggling motivation as well, so I’m glad I did it!  Plus, it is cool to have it for inspiration in my room!

I actually had this done AND photographed last June!  I forgot to get it posted on my blog.🙄

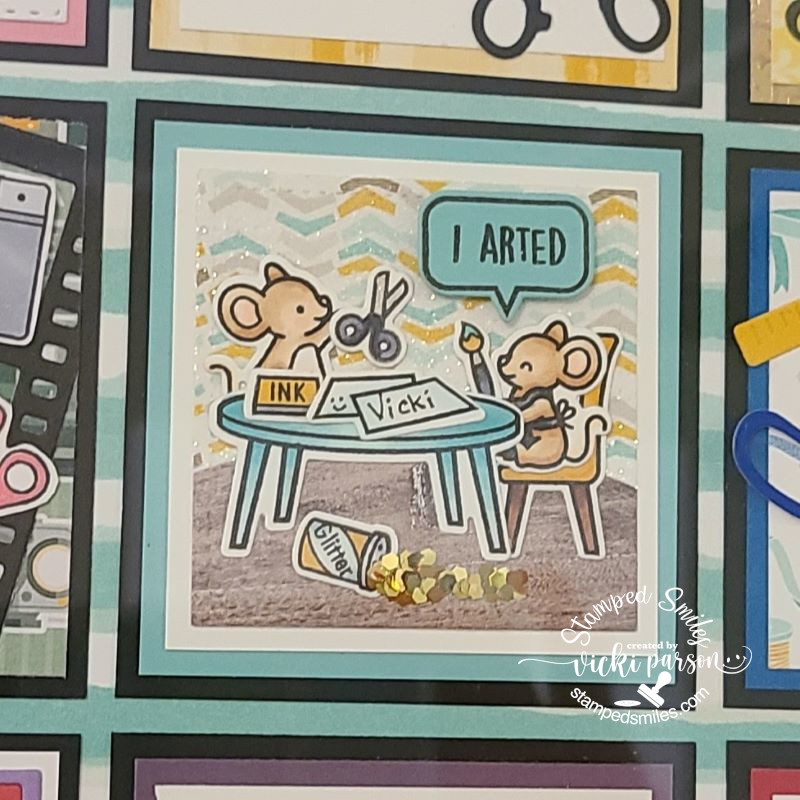
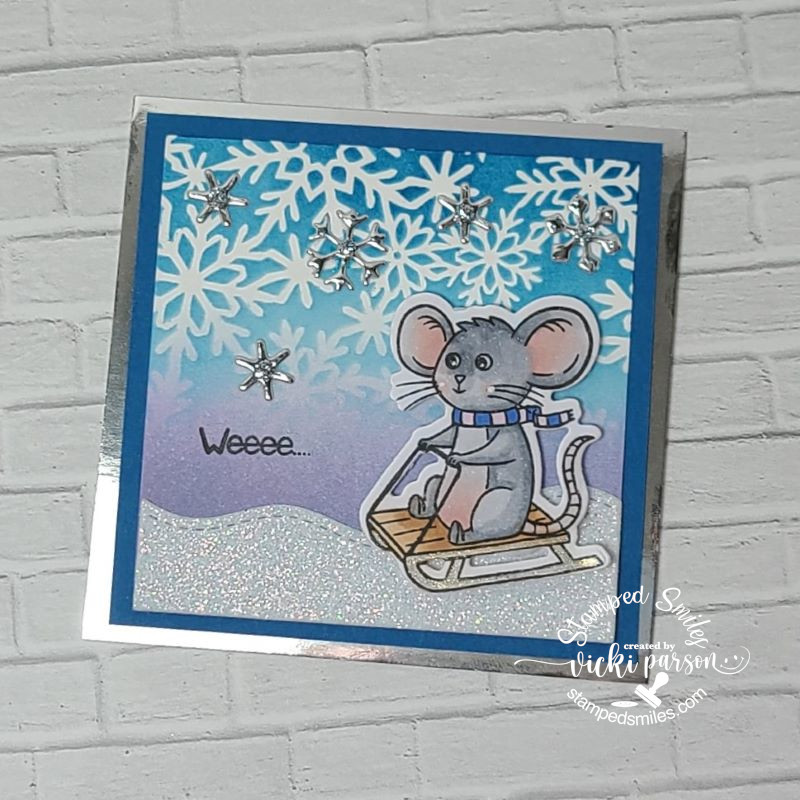
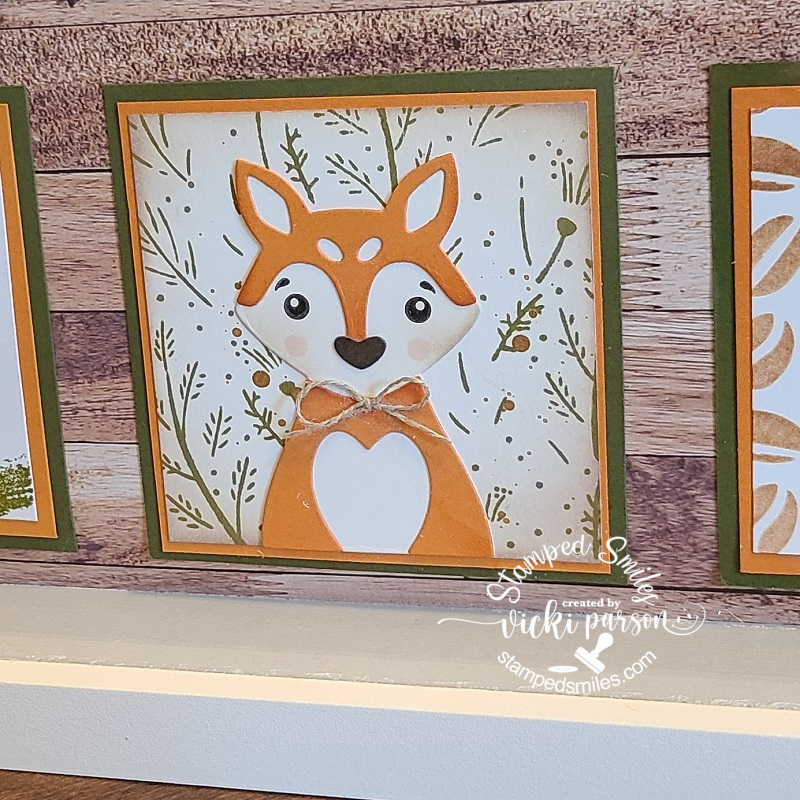
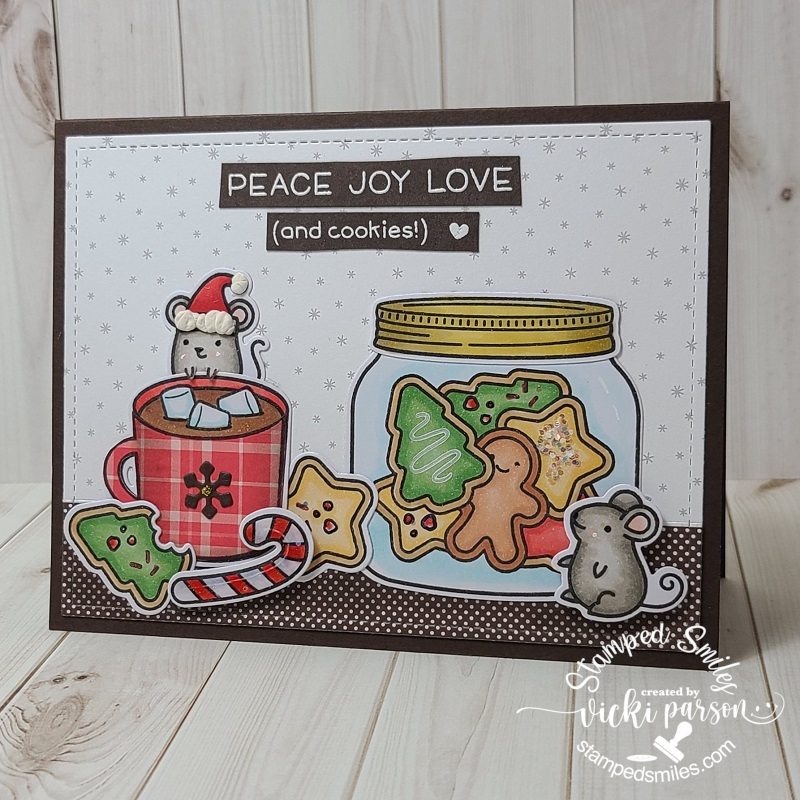
This is the square that I decided to do for this swap.  I do love lots of glitter, so of course there is glitter on the floor spilled over along with glitter on the “walls”.  If you don’t recognize these cute mice, they’re from Lawn Fawn Just Add Glitter stamp set.  For each square, I wrote each person’s name on the paper from the table.  Of course my name is on this one.


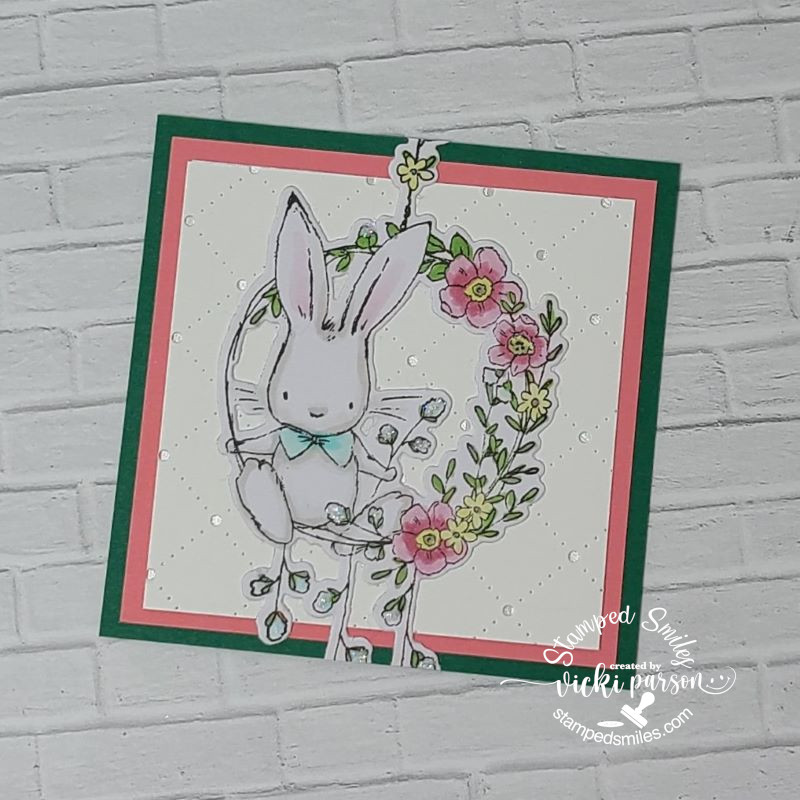
I was also asked to commission a card for someone’s very special birthday in November last year and forgot to post it as well:

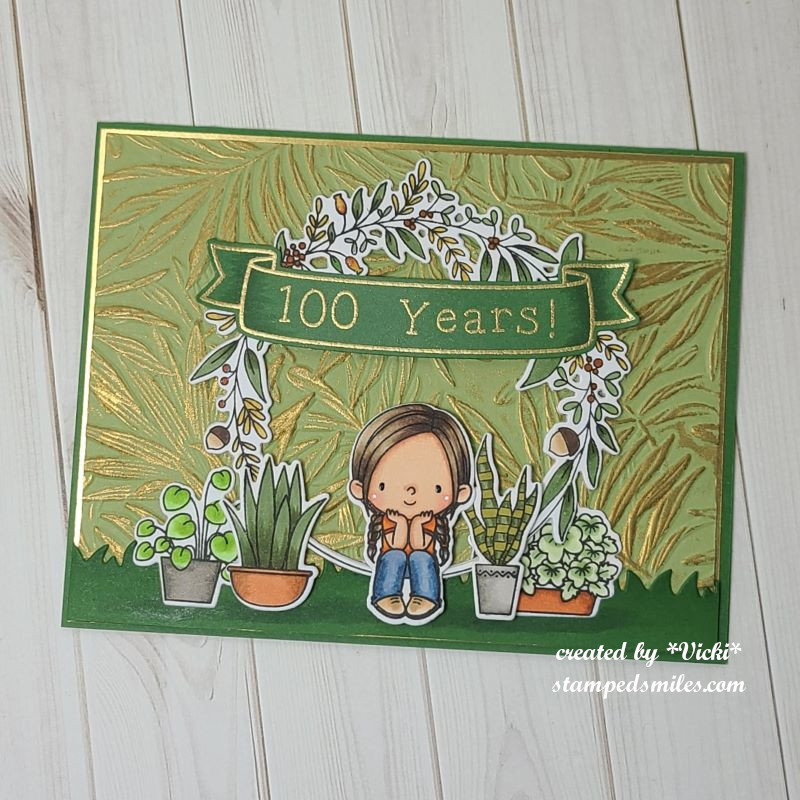
I thought this one turned out so cute!  I was told this card was to be for a special lady’s birthday who turned 100 and that she really liked plants.

Of course my first thought turned to plants and green colors.  Then I thought, I don’t think I have any “plant” style stamps!  The only thing that I thought of at the time was this darling My Favorite Things Sittin’ Pretty stamp set from my stash.  I also thought it would be fun to have a banner going across a wreath with the special number over it.  I found the My Favorite Things “Fall Wreath” stamp set (not in store) and the banner came from an older (retired) Lawn Fawn set.

I also had a fern embossing folder that I embossed over green cardstock and then rubbed some gold wax over it to bring it out.  I gold heat embossed the banner and popped it up over the wreath.  I was just going to place the colored plants around it, but decided it would be cute to add the girl sitting on the wreath.  She’s there to wish the special lady happy 100 with all of those plants around her!  I added a border of grass at the bottom to help ground everything, added some gold foil for a layer and attached it to a green A2 card base.

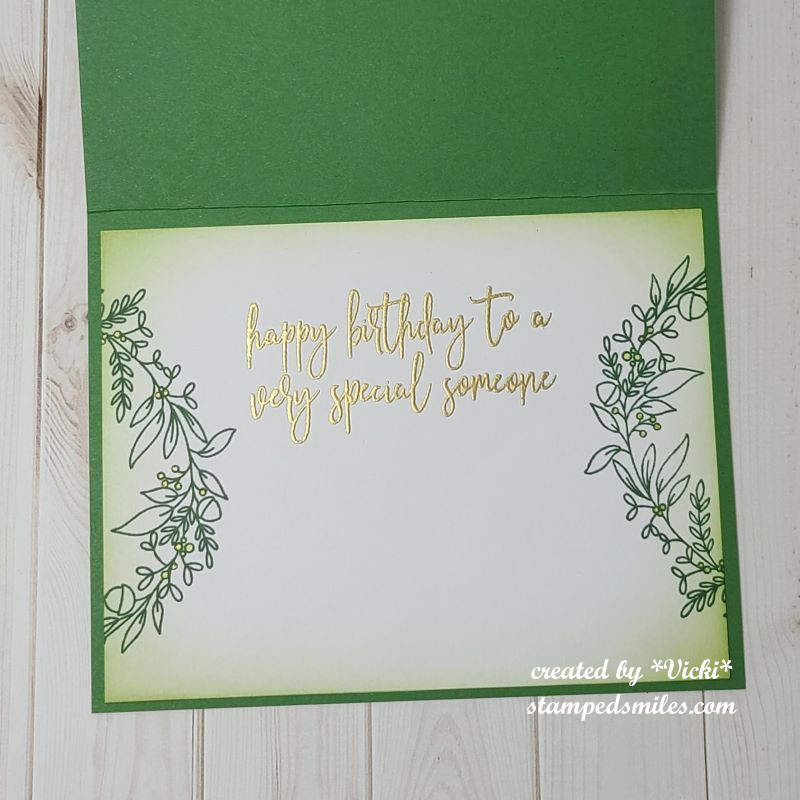
Here’s what I did for the inside of the card:  I stamped the wreath off the edge on each side of the panel with green ink and then sponged around the edges with the lighter green ink.  I gold heat embossed the sentiment.

  • I hope you’ve enjoyed my new “Cherry Hello” card today as well as the projects that I am catching up with posting about!  There will be more coming!

THANK YOU FOR STOPPING IN!  I’M GRATEFUL FOR YOUR TIME AND THOUGHTS!

Challenges: (For Cherry Hello card ONLY)

  1. Beccy’s Place – June Freebie image (THANK YOU!) optional: Food
  2. Pammie’s Inky Pinkies – PIP2425 Anything Goes
  3. Simon Says Stamp Wednesday – Emboss it (embossed hello)
  4. Alphabet – ‘F’ is for Fruit
  5. Ally’s Angels – Anything Goes
  6. Penny’s Paper Crafty – Anything Goes Using Paper

Class Fun & Square Samplers + Give Away

Happy April friends!  We have finished March already and onto Easter very quickly approaching!  I hope you’re enjoying all things Spring coming up your way!  We’ve had several storms and we’re in the tornado season as well, so I hope everyone is staying safe out there whatever the weather.  I do have some things that I had previously finished and wanted to share:

First, I wanted to share about the Virtual Stamp Joy Event by Taylored Expressions that I participated in a few weeks ago.  I always have so much fun and enjoy the motivation that it seems to generate!  I’m sharing them in the gallery below, so if you’re on my website post, then just click on each photo to enlarge it.

  • The first four photos were from a class using the same floral stamp set and the others are from the next day of make-n-take projects.  Please let me know if you have any questions about any of them!

The last set of four cards were a “mass production” using a background stamp in different colored cardstock panels and clear heat embossing over them.  The class sample had “hello” sentiment on each one, but I changed up the sentiments and have placed them in a card box to give them out with envelopes as a gift for someone.

Hope you’ve enjoyed the inspiration as much as I enjoyed putting them all together!


From the end of last year up until this last month, I didn’t have much time with the Holidays and everything going on, but as you may have seen in previous posts, I participate in a “square sampler swap” and when everyone sends out their squares, we then complete a home décor piece with all of the squares, so I thought I’d share mine finally completed:

  • CLICK PHOTOS BELOW TO ENLARGE

This was for the Christmas Sampler SWAP and you can see that I’ve used a black shadow box frame for my sampler and placed some red with red metallic dotted paper behind it.  The square on the right is the one that I made. (I’ve used My Favorite Things products for my square.)

This was for the Winter Sampler SWAP and I went with a white shadow box for this one.  I’ve placed some soft blue snowflake papers for behind my sampler as I thought it was soft enough to not look too busy.  The square on the right is the one that I made. (I’ve used Inky Stamper products for my square.)

And recently we finished up our Spring Animals Sampler SWAP that I used another white shadow box for the sampler.  I’ve added a piece of pink colored “Watercolor Wishes” paper from Lawn Fawn behind it.  It looks a little off in the photo, but it looks better IRL.  The square on the right is the one that I made.  (I used Taylored Expressions products for my square.)

Not sure if we’re doing any more or not, but I had so much fun making the squares to swap with friends!


Lastly, I have a fun little thing to give to whoever is interested in these Taylored Expressions dies + foil-it panels package. (It’s not sold in stores anywhere as it was a free gift with purchase) I have an extra and so I thought I’d give it away to someone!  Just leave me a comment below if you’re interested and I’ll pick someone from the comments.
Leave a comment below if you’re interested!

That’s all I have for today!  Thanks so much for stopping in!  I’ll be seeing you soon!

Friendly SWAPs

Hello friends!  The weather has been really nice over my way so I’ve been taking advantage of it by enjoying the outdoors before it starts changing into more chilly temperatures.  All of the prize winners have contacted me and the packages have all been sent out.  I have received notice that the U.S. winners have gotten their packages and hopefully the overseas will be arriving soon.  My thoughts are also with those that were affected from Storm Ian and hope for healing and recovery as soon as possible.

Although it’s been a while since I last posted, I have been working on some things for SWAPs and a few other cards that I had created as well to share with you.

  • please click on the photos below to see them close-up

Within a FB Group that I’m in, we could choose to join an ATC SWAP with the theme of “Friendship” and these are the cards that I had created.  I swapped with two others and then kept one set of three for myself.  I was excited because this is the first ATCs I’ve sent overseas and really enjoyed making the collection.  I thought the butterfly theme with similar colors would work keeping the “Friendship” in mind… 

And then below are the set of ATCs I’ve received from my SWAP partners in return.  The first lady sent her ATCs from Australia and the other lady was from the UK I believe.  Love them and was excited to receive them to add to my book.

I was also involved in another “Stamped Sampler SWAP” making those squares like I had done with my Summer one if you remember that with my friends Patti, Shirley and Donna.  This time our squares were the theme of Autumn/Fall using the Stampin’ Up! colors Pumpkin Pie and Mossy Meadow.  It’s so fun to see them come in and then put it all together in the frame!  Here’s how mine finished out:

For my Sampler frame, I used some different colored woodgrain pattern paper to attach the squares to and this frame is a bit different than my Summer Sampler (Check it out in THIS POST if you want to see that one.)  It can stand on a table surface or you can hang it up.  I also decided to add a burlap bow at the top of the frame using a hot glue gun.

This is the Sampler Square that I had made using the adorable fox from the Taylored Expressions Woodland Squad Die & Clear Stamp Combo set.  The background was stamped with the TE Four Seasons Stamp & Stencil Combo set using ONLY the background stamp in one color.  I then using some gold acrylic paint to splatter over it.  I also added a twine bow to the fox.  I believe we’re going to be doing another one for Winter too…stay tuned!

My friend Patti had also sent me an extra card kit from one of her classes along with her SWAP square, which I thought was so nice…so I had some fun putting it together as I don’t have this set which I believe is a Stampin’ Up! one.

The card kit had all of the pieces in it along with the stamped birds cut out, the stamped branches and sentiments (even on the included envelope) along with cut glitter clouds and flowers!  There was a sheet with photo and instructions so I just followed along except I die cut some leaves for the branches from a piece of scrap green paper I had.  Now I have a cute little birthday card ready to send out, so thank you for the fun Patti!😉

And speaking of birds and Stampin’ Up!, I had to make a sympathy card for someone that lost their pet bird.  I was looking through my stash and found an older Stampin’ Up! set with a bird silhouette which I thought would be good for a sympathy card like this.  I was inspired to pull out more of my older Stampin’ Up! stash to use so I used some old punches, ribbon and paper for my card as well.

I hope you’ve enjoyed the inspiration today and I thank you so much for stopping in!  If you have any questions about my post, please let me know.  Have a great day and see you soon!

Challenges:

  1. Lil’ Patch of Crafty Friends – Anything Goes (Bird sympathy card)
  2. The Corrosive – Anything Goes (Butterfly ATCs)
  3. Crafty Animals – Anything Goes + animal (Fox Square and/or Bird sympathy card)
  4. Fab ‘N’ Funky – Embossing wet/dry (Bird sympathy card)
  5. Creative Knockouts – Anything Goes (Butterfly ATCs)
  6. Sweet Stampin’ – Anything Goes EXCEPT birthday (Bird sympathy card)
  7. Ally’s Angels – Anything Goes (Butterfly ATCs)

Lawn Fawn Fever!

Hello friends!  I have LOTS to catch up on with all of the blogging of projects that I’ve been working on over the last few months, so I will probably share several projects within one post until I can get caught up!

I know that Christmas in July is going on everywhere right now, so I thought I’d share that along with a few other projects I had going on during my “Lawn Fawn Fever” episode!  I have loved their cute little critters for so long and hope you enjoy what I’ve made:

It’s been a while since I even played along with a Lawn Fawnatics challenge, so I decided to join this one which is asking to see your Lawn Fawn “Fun with Food” challenge projects.  What could be more fun than sharing Christmas cookies?!  I’m not sure I’d share any with mice…but these guys are too cute and add some more fun to the scene.  They’re a bit older and I know I’ve had the set for several years as it was one of the STAMPtember sets called “Merry Christmouse“.

I used some older Lawn Fawn papers from my stash to create the table and backdrop setting and then cut it out with the Lawn Fawn Outside In Rectangle dies.  I used the following sets which include the one mentioned above for my scene: How You Bean?, How You Bean? Christmas Cookie Add On, and Thanks a latte.  I Copic colored them and even added a few stamped images over the cookies including some Chunky Glitter

For the mouse hanging over the hot cocoa cup, I cut around his arms to fit over the cup.  I popped up the candy cane as well at the mouse next to the jar for depth on the scene.  I added some touches of glitter and then on the mouse Santa hat, I took some liquid applique and heated it up until it was puffy.  The sentiment was white heat embossed over the dark chocolate cardstock and then I just used my scissors to cut it out and attach at the top.  Really fun scene to create!

I also took part on Friday with the “Hive Five Kit” class they did using the adorable new Hive Five card kit they came out with recently. 

For the first card, I made my sentiment too high, so I had to “arrange it” how it worked for me, and I wanted it to be a birthday card instead.  The other project was just the hexagon tag.  I changed mine into a shaker and then added to a card.  I also added the speech bubble on this one.

The products included with the card kit were really fun and I’m glad I got it!

The majority of this card came from a fun little kit that my sweet blog friend Shirley gifted me included with a SWAP that I was in with her. (Details of that are below.)  Really love that she included the backdrop for the sky which worked out perfectly!  I actually already purchased this awesome Lawn Fawn Platform Pop-Up die along with the Platform Pop-Up Add-on and the Upon a Star stamp set and dies, but she was so very kind to have all of these pieces already stamped and cut out for me!  I just colored in the critters and the stars, added a few more here and there along with some glitter, white heat embossed the sentiment over the navy cardstock and put it together.

I hadn’t even broken out my Platform die at the time, so this was my first time putting one together!  It looks a little more intimidating than what it really is, so I had lots of fun with it!  Thanks so much for sharing the fun with me my friend!  I can’t wait to attempt another one soon! (Thanks for helping me with my addiction! 😁)

And as I had mentioned above, I was asked if I’d be interested in joining this “Summer Sampler SWAP” with my wonderful blog friends Patti, Shirley and Donna along with a few other ladies to take part with!  When it was described to me, I quickly realized that I had seen these 12″ x 12″ sized papercraft stamped samplers all over Pinterest.  Of course, I had thought to myself that would be fun to create and never did.

Each square is 3-1/4″ and we each were to use the same color for the back layer so it was all similar for the finished project to coordinate well.  So 9 of us created 9 squares, kept one for ourselves and then mailed out the others to each person in the swap.  Really fun to see everyone’s idea here with the theme of “SUMMER” too!  I love them all and thought how fun that each one is so different from the others!

This is my finished 12″ x 12″ shadow box framed piece with everyone’s squares that I’ve attached to a wood panel background paper.  I have it hanging on the wall.  I think this would be so fun for each season or even gifts!  Hope we can do another one!😉

And here’s the square that I did for the swap.  I zoomed in to take the photo and it’s behind the glass, so it’s not a real great look at it, but as you see, I’ve used Lawn Fawn again! LOL

I had some fun 4th of July papers and thought it would be neat to make somewhat of a shaker element with confetti stars.  I’ve used the Lawn Fawn Dandy Day Flip Flop set along with a mouse from the Bubbles of Joy set for the front of my square.  I was trying to give the impression that the mouse had a sparkler, and the sparks were flying while the other mouse was enjoying the show. I used glitter and die cut a star from silver glitter cardstock for the center of the dandelion.  I added a red bow at the top.  I thought with using a shadow box frame that the dimension wouldn’t be an issue and it wasn’t.  

There’s always something fun to keep me hopping, so I know you’ll see more soon including the wedding & painting class projects!  I promise I’ll get there!  Thanks for dropping by!!

Challenges:

  1. Lawn Fawnatics – Fun with Food (first card)
  2. Crafty Gals Corner – Christmas in July (first card)
  3. Krafty Chicks – Christmas (first card)
  4. CRAFT – Christmas (first card)
  5. Jingle Belles – BLING on the Holidays! (first card)
  6. Double Trouble – Christmas in July Thing 1, Thing 2 & Thing 3 (I’ve used old stamp sets, papers and added some fun bling on my cookies -plus added to the partner challenge in first card!)
  7. Alphabet – ‘H’ is for Holidays (first card)
  8. My Time to Craft – Christmas in July (first card)
  9. Papercraft – Christmas in July