A Vintage Love

Hello friends!  I hope you’re having a great week!  I must be really wishing for flowers as this seems to be my theme this week!…along with watercolor and heat embossing! LOL!

Today I wanted to share a card I’ve made for an anniversary:

Vicki-SSSBeMyValentine-Anniversary

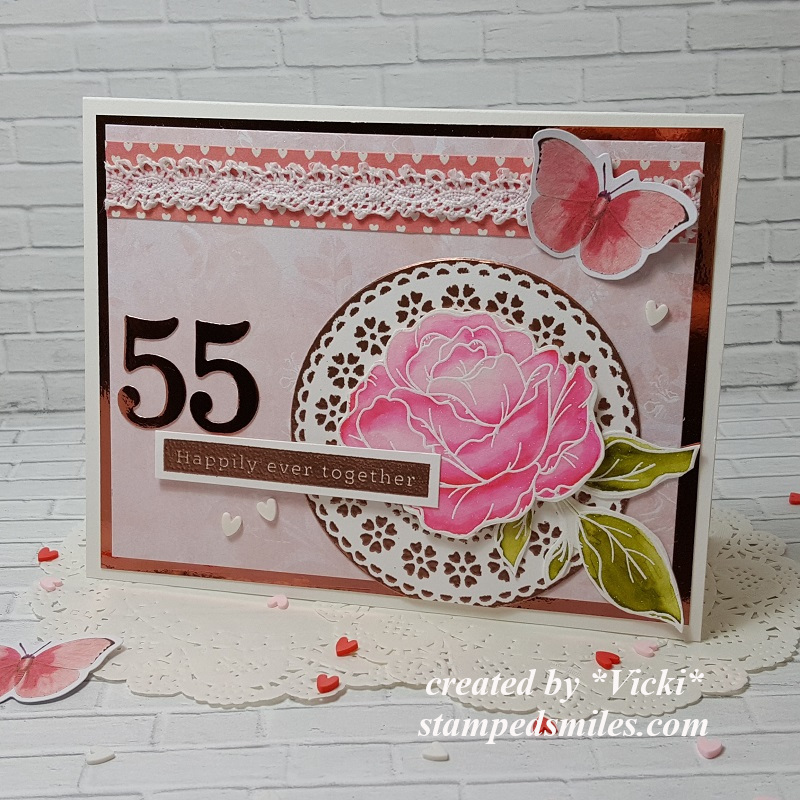
As you can see from the card itself, my parents have been married for 55 years.  So when I saw this Simon Says Stamp LE Valentine 2020 card kit, I knew that this would be a great way to start using the kit immediately!

I actually really didn’t know what direction I was going to go with this anniversary card and I just started pulling things out and switching different items to see what I wanted to do.  I sampled the stencil with the metallic paste from the kit and really liked it, but when I pulled out my copper metallic mirror cardstock, I decided to heat emboss over the stencil with the same copper EP that I used on the sentiment for this card.

I’ve also cut out the numbers with the copper metallic mirror cardstock along with the layer behind some of the papers from the card kit.  I’ve added another heart strip of the papers from the kit at the top and used one of the butterflies from the kit to go over the piece of lace I’ve added from my stash.  The layers were all attached over an A2 sized top folding card base.  Lastly, I added some white hearts that were actually from a different card kit.  LOL!

Vicki-SSSBeMyValentine-Anniversary-close

I wanted to share a closer look at the flower.  The stamp set in that card kit is so stunning!  I’ve white heat embossed the flower and leaves over some watercolor paper and then used my Clean Color Real Brush markers to color it with.  I’ve used some foam tape to pop up the flower over the stenciled heat embossed piece that was cut out with a circle die and attached to the card front.

You can see the shimmer over the butterfly wings that I’ve covered with a glitter brush pen.  I only glued the center of the butterfly so that I could pop out the wings a bit.

Vicki-SSSBeMyValentine-Anniversary-flat

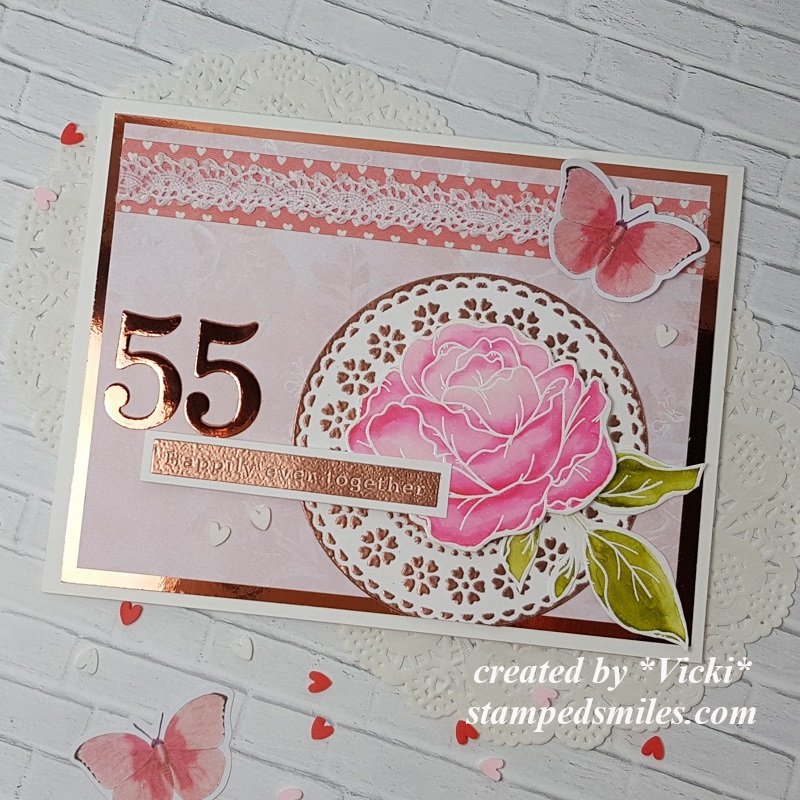
Although this card looks a bit simple, there were a few steps to the stenciling and heat embossing some of the elements.

I hope you like it!  Thanks so much for stopping in and I’ll see you soon!

Challenges:

  1.  Simon Says Stamp Wednsday – Anything Goes
  2. QKR Stampede – #382 Anything Goes
  3. Allsorts – Take Flight
  4. Creative Fingers – #178 Anything Goes
  5. Watercooler Wednesday – WWC256 All About Occasions
  6. Lil Patch of Crafty Friends Anything Goes

It’s New Release Time at Whimsy Stamps!

Hello friends!  Can you believe that October has gotten here so fast?!  I thank you SO MUCH to everyone that has shared about my give away and I really have been enjoying your comments about the way you share smiles through your creations.  It is such an inspiration and joy to hear about this.

For my card today, I am sharing a sweet and fun festive image from the new release:

Vicki-PenguinElvesWorkshop-Oct2

Yes, I cannot get enough of the penguins that Crissy Armstrong makes up for Whimsy Stamps!  This image is called Penguin Elves at the Workshop and I think they’re having lots of fun for Christmas!  They’re colored up with Copic markers and then I’ve taken a white gel pen for highlights as well as a silver and gold gel pen for detailing.  I took some fine loose glitter and attached with liquid glue on parts of the penguins’ hats and then a glitter brush pen on the bow the penguin is holding.  I have used the Pierced Border Trio dies to cut the panel on the top and bottom of the image.  I then took an ink blending tool to add some distress ink around the panel.

For the sentiment banner, I printed out the new released Penguin Christmas Sentiments 1 and cut out a banner and then went over it with a Copic marker so that it matched up with my design.  For the front panel of my card, I also took the newly released digital papers called Christmas Red, Gold and Green and printed them out and trimmed it to size my A2 white card base.  I also took my ink blending tool to distress more coloring on the edges to match my image panel.  I then took that and mounted it over the papers and then glued some gold thin ribbon on the top and bottom of the image panel and added a bow along with some festive sequins filled with Stickles tinsel glitter glue.

I hope you’ve enjoyed my card today using the new digital release from Whimsy Stamps this month.  Be sure to check back for other creations I make from the new release this month too!!  Thanks so much for stopping by!

challenges:

  1.  The Holly and Ivy Christmas Challenge – Anything Goes with Christmas
  2. Christmas Card Throwdown – Technique:  Coloring
  3. Crafting By Designs – Get Ready for Christmas
  4. Aud Sentiments – Use a 2 word sentiment
  5. Winter Wonderland – Anything Goes + Christmas
  6. Crafting From the Heart – Anything Goes
  7. Make My Monday – Animals