Hello friends! 🙂
It’s been SO gorgeous outside with this wonderfully warm weather we’re having right now, so I find it hard to stay indoors right now! We have rain coming, so I will be able to get some crafting done then!
Swinging by to share this really sweet digital image by Sylvia Zet for Whimsy Stamps called Cuddly Ride! They have sold the rubber stamp version, but now they’re releasing these older images as digital files now! So weather you like the rubber stamp or the digital images, it’s great to know that you can choose either!
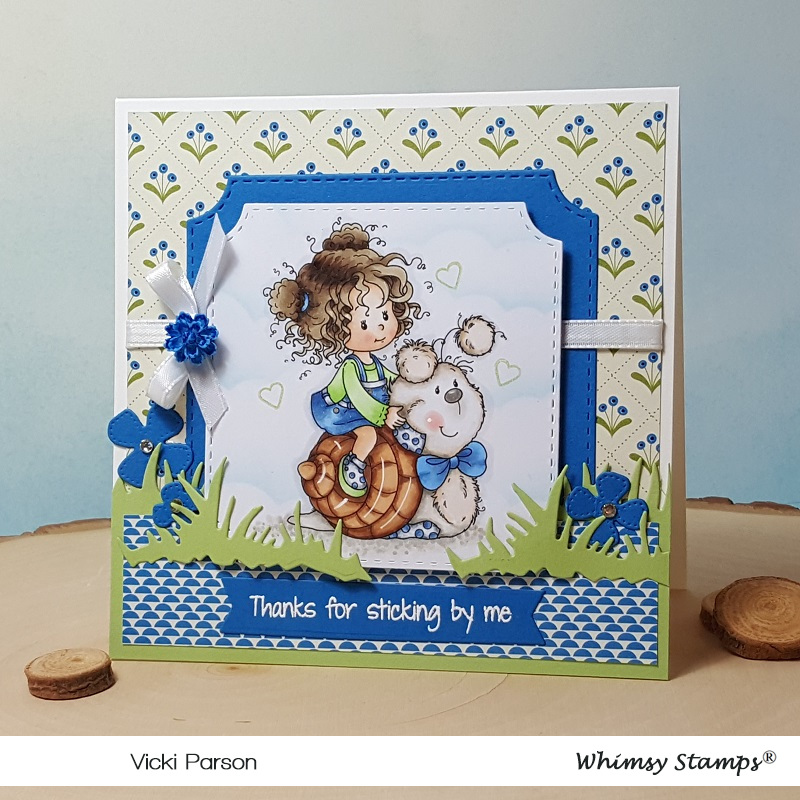
I got her colored up in the following Copics:
- Snail shell – E29, E27, E25, E23, E21
- Snail body – W5, W3, W1, E21, E000, R20
- Snail bow/patches, girl outfit – B37, B34, B32, YG13, YG11, C5, C3, C1
- Girl’s Hair/Skin – E49, E47, E44, E43, E40, R20, R00, E21, E11, E00, E000
- Pointillism under snail – W3, W1, W0
- Used a white gel pen for highlights on snail and covered the ground with a Wink of Stella glitter brush pen
After coloring her up, I also sponged some clouds behind her with a stencil and then cut it out with the Whimsy Stamps Notched Square Dies. I’ve also cut an additional larger blue layer for behind the image. For the blue flowers scattered around as well as for the pieces for grass accents on my card, I’ve used the Whimsy Stamps No-See All Seasons Tree Dies.
I’ve taken a sentiment from my stash (retired Whimsy Stamps) and white heat embossed it over a piece of the blue cardstock and then I’ve used the Whimsy Stamps Quick Strips Die Set to cut it out. Lastly, I’ve added some ribbon, a bow with a resin flower glued over the center of it and then I’ve added some rhinestones to the centers of the blue flowers.
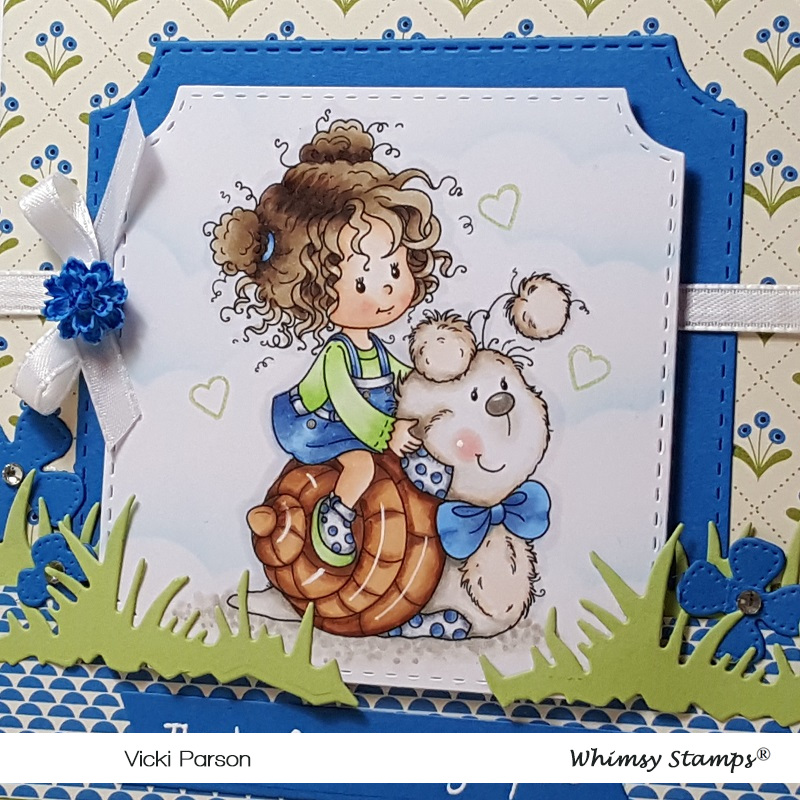
From the same sentiment stamp set that I’ve used, I took a tiny heart image and stamped it with green ink around the colored image. Of course, I tried to capture the wonderful shimmer underneath the snail where I’ve colored the Pointillism technique, but it just won’t show up in photos very well, but I just love the shimmer under him! I also used a silver metallic gel pen to color the “buttons” on the girl’s jumper.

I thought she turned out really cute and I think this would make a wonderful card for that special friend who is always by your side!
That’s all for me now. I think I may need to go back outside and enjoy some fresh air and sunshine before it’s gone! Have a lovely day!
Challenges:
- Simon Says Stamp Wednesday – Animal Antics
- Crafting With an Attitude – Anything Goes
- Creative Knockouts – Anything Goes
- Crafty Catz – Anything Goes + optional: Use Your Dies
- Creative Fingers – Anything Goes
- Simply Create Too – Anything Goes