N is for Night

Hello friends!  Once again, it’s another Friday in October!  Two weeks from today will be Halloween!  I may have a few “goblins” showing up for some candy! 👻  This reminds me that I will be needing to make up a few treat bags!

Today is a new challenge over at the Alphabet Challenge Blog!  Our next letter is “N”, and our hostess, Pamela, has chosen “N is for NIGHT (clouds, moon, sky, sleeping image, stars, etc.)   I think this will be a fun one for Halloween!  *Please remember that this is a bi-weekly challenge, so you have two weeks to enter.*  I hope you’ll join in the fun with us.  Here’s the project I’ve made for this challenge:

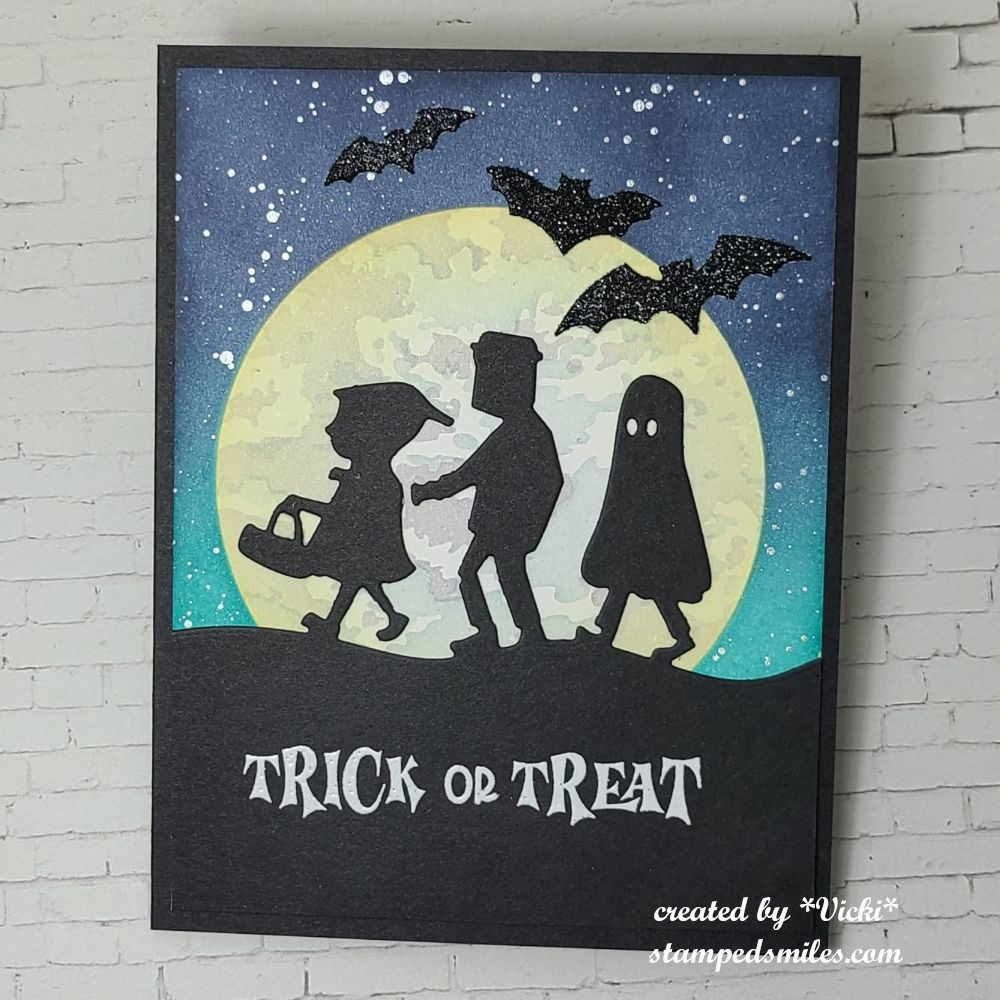
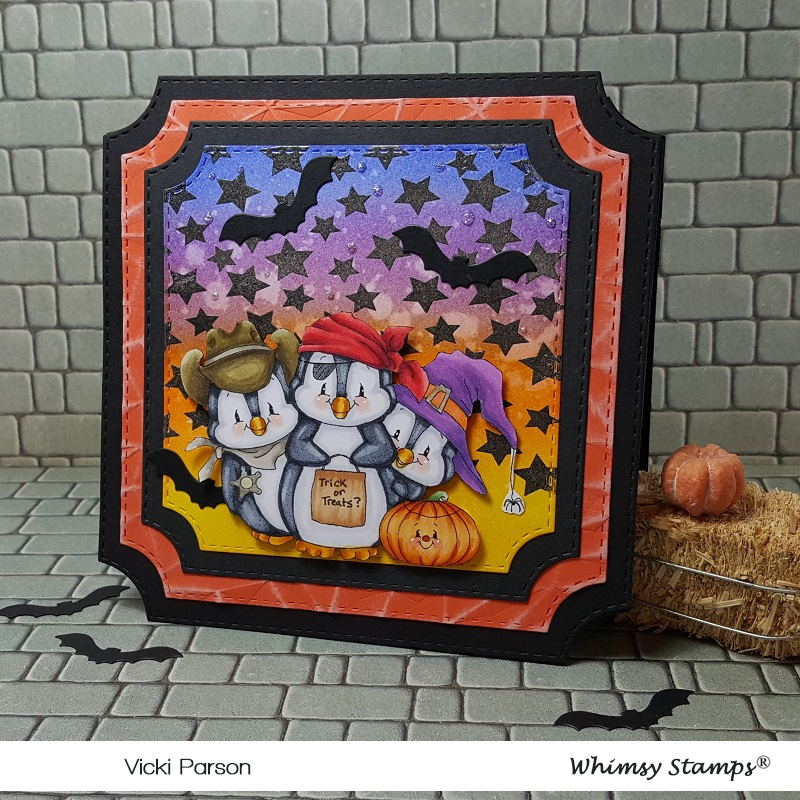
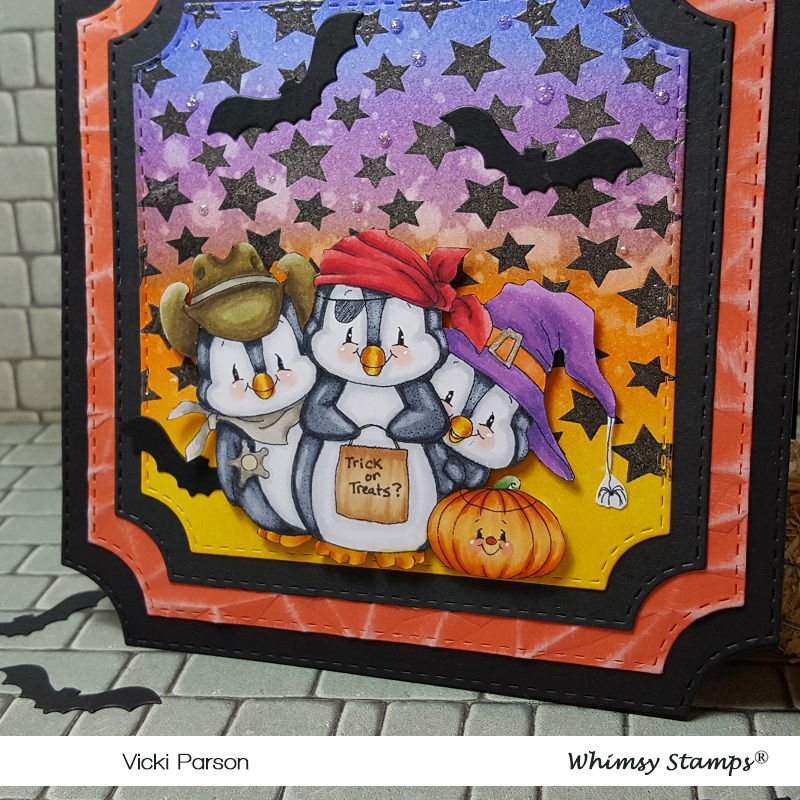
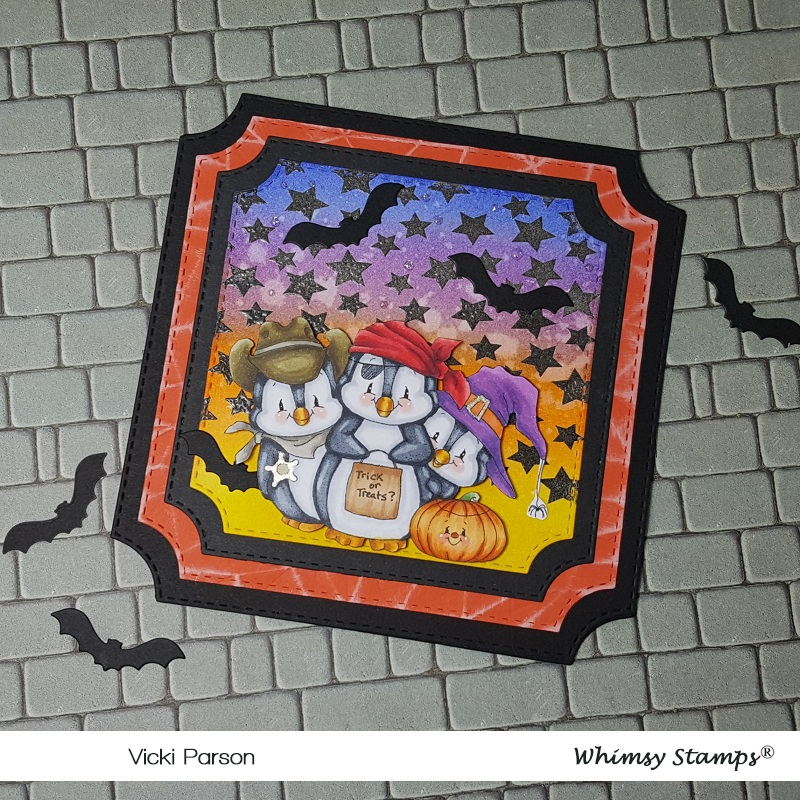
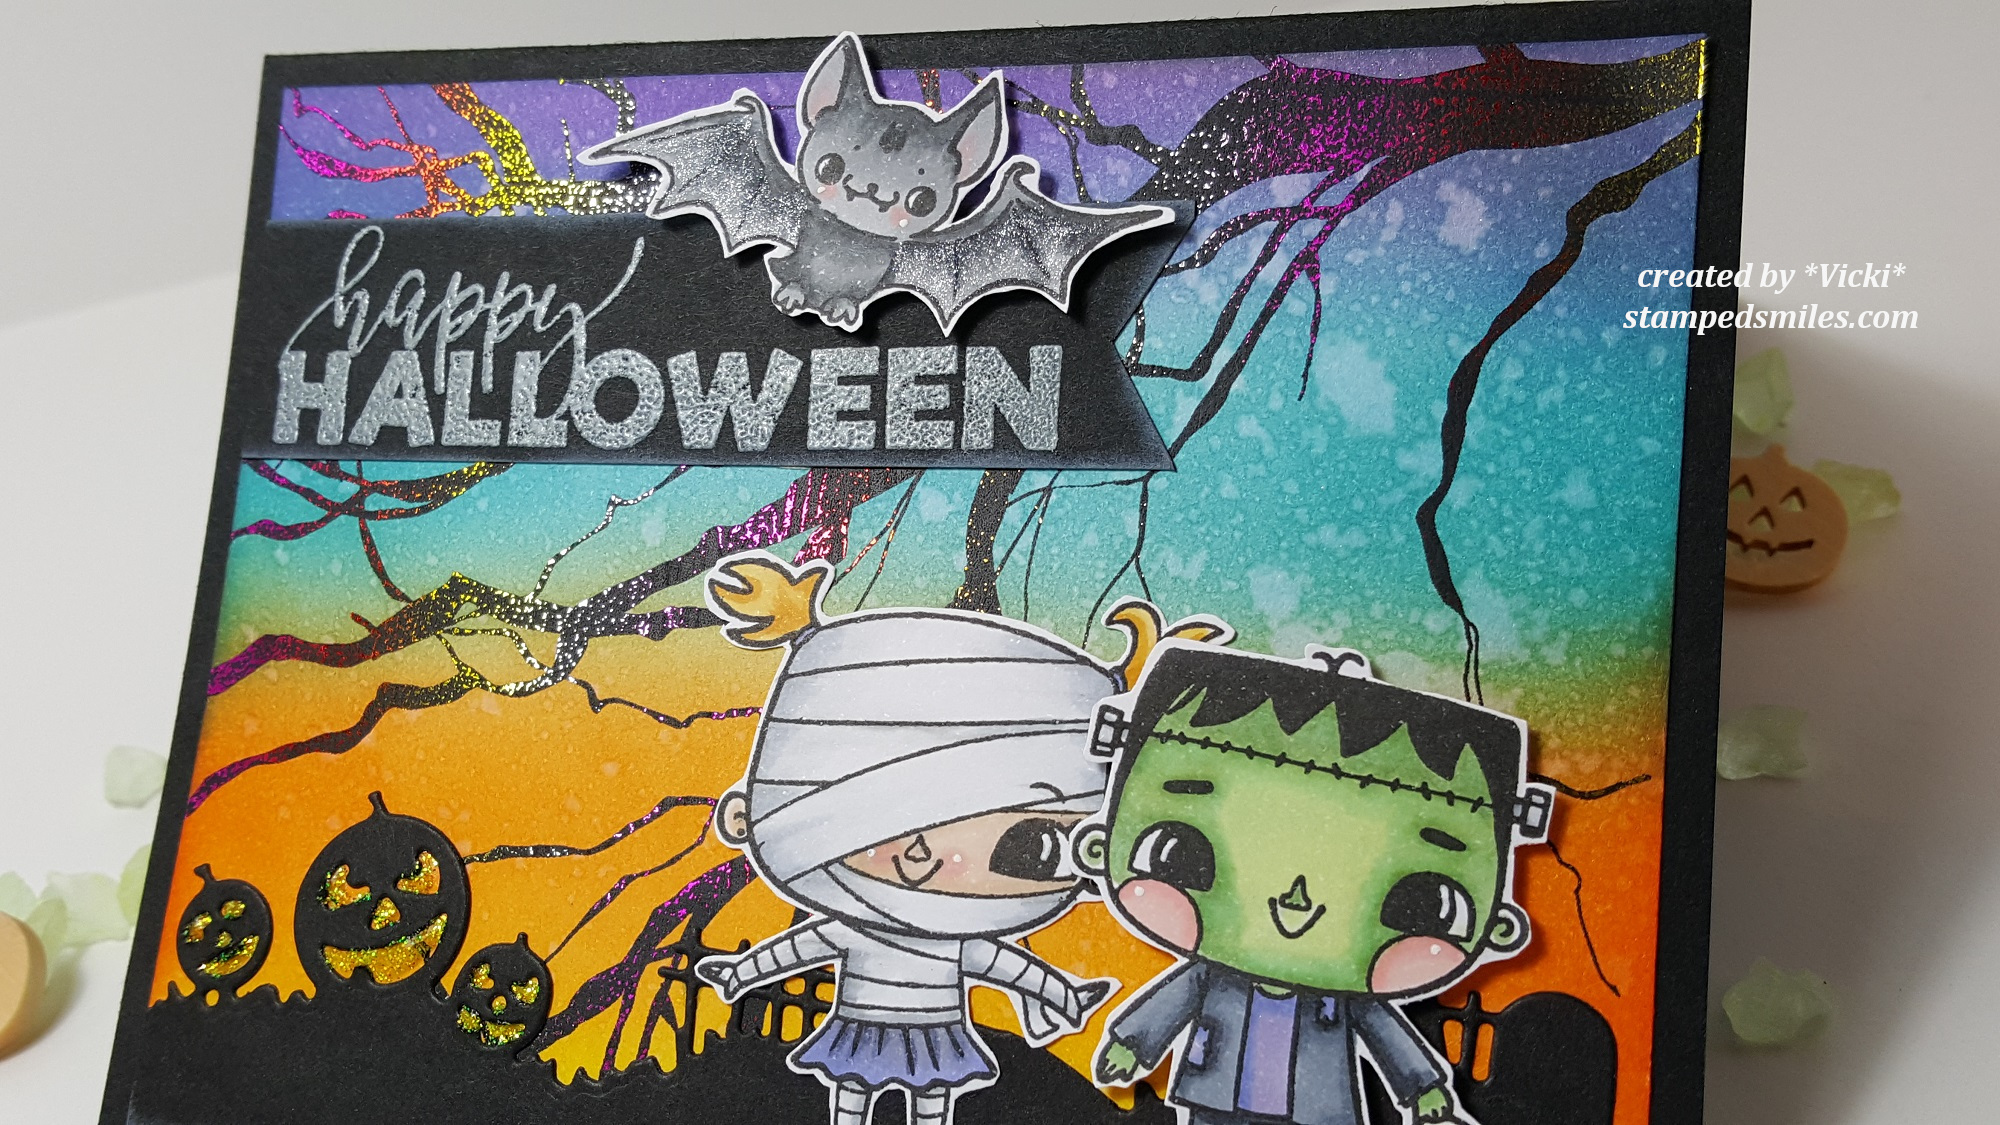
Well, you know I had to do this challenge in the Halloween theme, right?!  I absolutely loved making this card!  I pulled out all of my Taylored Expressions Halloween items to play with!

I started with the background and created the moon with the Moonlight Layering Stencil.  I made sure to center it where I wanted the moon to be in placement on my background before I ink blended everything in.  I also used a very light hand when making the moon in greys and yellow tones.  This stencil also comes with a mask to cover the entire moon shape, so I used some Pixie Spray to tack it down to stay in place over my card before I began ink blending the blues in the background for the sky.  While leaving the moon mask in place, I also used some Copic opaque white watered down and splattered over the blue ink blended sky for “stars”.

I was then able to remove the moon mask to finish my card.  I layered this panel over an A2 side folding black card base.  I used the Taylored Expressions Trick or Treat Border die to cut out another black piece to fit over the moon.  I left some space at the bottom of the border to white heat emboss the sentiment from the TE Spooktacular Sentiments set.  I just attached this to the bottom of the moon sky panel and then I die cut some bats from the TE Little Bits-Bats die with the TE Black Glitter Cardstock and attached them to the sky.

  • I’m loving how the moon seems to be glowing over the trick or treaters!  I hope you like it too and will join in the fun with us!  Be sure to check out the challenge blog to see more inspiration!

THANKS SO MUCH FOR DROPPING IN TODAY!!  HAVE A GREAT WEEKEND AHEAD!

Challenges:

  1. Creative Inspirations – Autumn/Something Spooky
  2. Craft Rocket Autumn/Halloween
  3. Crafty Calendar – Halloween
  4. Let’s Craft & Create Anything Goes with optional: Things with Wings (bats)
  5. Crazy is our Fame-Stencils are our Game! – Stencil(s) with optional: Halloween
  6. Two Old Bats – Anything Goes Halloween
  7. Unicorn Autumn and/or Halloween
  8. Crafty Gals Corner Fill in the Blank: “Spooky________”  – NIGHT!

Embossing for Cute Card Thursday

Hello friends!  I hope you’re having a great week so far!  Many thanks for the kind thoughts about my post yesterday and the video tutorial.  I think I get a bit nervous thinking I’m going to mess up instructions, but perhaps I’ll get the hang of it! 🙂

Today starts a new challenge over at Cute Card Thursday!  This week it’s all about “embossing“!  Now there are a few different ways to emboss and I happen to love them all!  So you could do heat embossing, “dry” embossing with an embossing folder or even maybe do some embossing paste!  However you emboss it, we look forward to seeing what you come up with!  Here’s the card I made for the challenge:

Vicki-WSPenguinTOT-CCT596

TRICK OR TREATS?!!  Oh my word now how stinkin’ cute are these penguins?!  Don’t they look like they just rang your door bell for Halloween?! LOL!  That penguin image that I’ve used here is from Whimsy Stamps called Penguin Trick or Treaters and oh were they fun to color!

I was inspired to create with them for this embossing challenge, so I took a piece of Bristol Smooth Watercolor Paper and stamped the stars from the Whimsy Stamps Basic Christmas Backgrounds clear stamp set with a pigment black ink.  I covered it with clear embossing powder and heat set them.  Then I went over the stars with some distress inks (Mustard Seed, Carved Pumpkin, Wilted Violet & Blueprint Sketch)  and ink foam blending tool.  I also spritzed some water over it for the water droplet look.

All of the panels including the card base were cut from the Whimsy Stamps Notched Squares die set.  So I took the finished colored panel and attached it over a black die cut panel and then I took a piece of orange cardstock that was die cut and ran an embossing folder over it. I rubbed a white ink pad over it to pop out the details in the embossing and then I mounted it over the die cut black card base.

After coloring the penguins, they were fussy cut out and popped up with foam tape over the colored panel.  I had an older Halloween set of dies that I couldn’t part with from Whimsy Stamps and I cut out some bats from black cardstock and attached those to the starry background.  I also added some drops with some Tonic Studios Silver Glitter Accents for a bit of sparkle.

Vicki-WSPenguinTOT-CCT596-close

Here’s a closer look at these cute little trick-or-treaters and how I’ve colored them up.  I have used the following Copic markers to color them with:

  • Penguin bodies – C8, C3, C1, 0blender, R00, YR27, YR24, Y35, White gel pen
  • Pumpkin – YR27, YR18, YR14, YR21, R20, YG67, YG63, YG61
  • Candy Bag – E33, E31, E30, wrote letters with Copic liner
  • Sheriff Costume – E89, E87, E84, E81, W5, W3, W1, Silver gel pen
  • Pirate Costume – R39, R37, R35, R32
  • Witch Costume – V17, V15, V12, YR07, YR04, Silver gel pen

Vicki-WSPenguinTOT-CCT596-flat

I think these look like a fun group to go trick-or-treating with, don’t you?! 🙂

I hope  you’ve enjoyed my fun Halloween card today and were inspired in some way!

Happy Halloween – All Treats & No Tricks! :)

Hello friends!  I want to thank you thank you thank you from the bottom of my heart for everyone of you that has left such sweet comments full of birthday wishes and lots of kindness that you’ve shared through something we have in common which is creating and sharing smiles!  I so enjoyed the stories that you’ve left about how you share your handmade creations with others.  PLEASE continue to create doing what you love and share those smiles with as many people as you can!  It really makes the world a much better place when we can serve one another in kindness.

I have always loved Halloween as a child and have so many fond memories dressing up each year and thinking about what I would be.  I tried to pass that tradition onto my children, and I dressed up right along with them!  For me, Halloween is full of lots of fun things besides just treats!  I wanted to celebrate those memories with a card today:

Vicki-BM-HalloweenBox

I’ve stamped the trick-or-treaters and bat and then colored them up with my Copic markers and fussy cut them all out and put them aside while I worked on the rest of the card.

For the background of the card, that “tree branch” panel came in the kit, so I ran it through my laminator to foil it…it turned out awesome!  (See photo below!)  I then took my distress inks and blended in a night sky over it.  I spritzed it with water and dried it off with a towel to get the water drop look.

I took this awesome border silhouette die from Impression Obsession and attached to the bottom of the scene for the trick-or-treaters to stand on.  I sponged the bottom edge with white ink.  Speaking of white ink, this is what I used to stamp the sentiment on a piece of black cardstock as well as sponge around the edges with it.  I used the glow-in-the-dark embossing powder over top of it.  (Unfortunately, I couldn’t get a good photo of it glowing in the dark…. but it does, and it looks cool!)  I made a banner with that strip and attached it to the left side of the card and then popped the bat up over it with foam tape.

Vicki-BM-HalloweenBox-foiled

Here you can capture a better look at the foiled tree branch in the background as well as the heat embossed sentiment.  I glued down the mummy girl and then I took foam tape to pop up the Frankenstein for dimension and depth.  I also added some yellow Stickles to the eyes and mouths on the pumpkins.

This card was so fun to do!  Hope you’ve enjoyed it as well!

Wishing you all a very fun Halloween however you choose to spend it!  I think I will be watching some scary movies and eating some popcorn which is something I enjoy doing with hubby!

Challenges I’d like to enter:

  1.  Creative Moments – Anything Goes with optional twist: Spooktacular
  2. Crafty Gals Corner – Halloween Colors
  3. Simon Says Stamp Wednesday – Halloween/Spooky
  4. The House That Stamps Built (O2418) – Anything Goes
  5. Moving Along With the Times – Halloween
  6. Crafty Catz – Anything Goes with an Optional Twist:  Halloween
  7. Always Fun – Halloween