Turtley Adorable!🐢

Hello friends!  I hope you’re having a great week so far!  Really hate it when technology doesn’t cooporate and I have to figure it out, but hopefully I can soon!  Sometimes it just needs to be done!🤔

Anyway, I was wanting to post some masculine cards I made for Father’s Day earlier this week, but I’ll have to post another time as this card was already done and is needed to enter a challenge that is ending soon:

Vicki-BRMturtle

I love that wee little baby turtle riding on the back with his tongue out!  The stamp was colored up with Copic markers, cut out with a circle die, along with another circle layer of Cabbage cardstock that I’ve also used for the A2 top folding card base, and another circle layer of vellum.

I was super excited to try out the brand new Ranger Distress line color “Speckled Egg”  products!  I’ve used the Distress Oxide ink to sponge over the image onto a piece of Sidewalk cardstock that was cut out with a stitched rectangle die.  I also took the Circle Tone stencil and added some Opal Chroma Glaze over it.  You can see how pretty the shimmer is on those dots!

For the banner along the side, I took another piece of sidewalk cardstock and cut my own banner with scissors.  I took my embossing ink pad and covered the banner piece with it and then heat embossed the Speckled Egg Distress Glaze EP over it…turned out so pretty!  I heat embossed the sentiment from the same turtle stamp set over a piece of vellum and wrapped it around the banner before attaching it to the card.

Lastly, I’ve added some metallic shimmer ribbon from my stash and some pretty sparkling sequins that remind me of bubbles.  The card was designed based upon a sketch, see details below post.

Vicki-BRMturtle-close

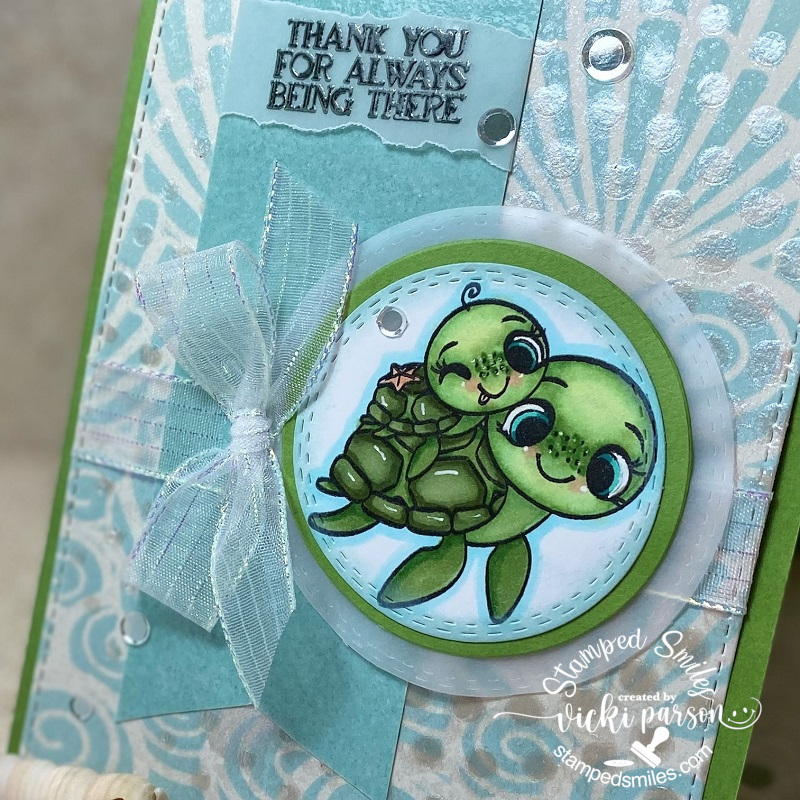
Here’s a better view of the cute image and coloring I’ve done.  I’ve added some dots with a white gel pen for their cheeks as well as their eyes and noses.  I’ve also used it for highlights on their shell.

You can also see a better view of that pretty shimmer from the Metallic Chroma Glaze that I used over a stencil.  Thought it was great for the circle theme going on.

Vicki-BRMturtle-flat

I hope you’ve enjoyed my card today and have been inspired in some way or has brought you a smile!  Thanks so much for dropping in and I’ll be seeing you again soon!

Challenges I’d like to enter this card for:

  1. Colour Crazy Craft – Anything Goes + coloring
  2. The Divas That Cut…Paper! – Summer Fun + dies
  3. Crafting Happiness – #154 Anything Goes optional: Under the Sea
  4. Lil Patch of Crafty Friends – Anything Goes
  5. Make My Monday – #125 Use Stencils
  6. The Sisterhood of Crafters – Stenciling

Oceans of Love for Digi Doodle Studios

Hello again my friends!  I’m back to share this card I made using this adorable image from Digi Doodle Studios:

Vicki-DDSNixie-Aug20

Isn’t she adorable with her little underwater crab friend?!  This is the Nixie Mermaid digital stamp from the Digi Doodles Studios “Under the Sea” collection.  I thought she was so cute and I actually had her colored up before I ended up hurting myself and had to leave.  I finished out the card when I got better.

I have also used some fun digital papers and a sentiment that work well with this particular image.  The pretty pink patterned papers you see in the background come from the Digi Doodle Studios Summer Breeze Card Making Paper collection.  The sentiment came from the Digi Doodle Studios Mermaid Sentiments set.  I printed out the sentiment and cut it out with a ticket die, sponged around the edges with the turquoise ink color and layered it over the same turquoise colored cardstock I’ve used throughout my layout.

The layout idea came from a sketch challenge that I’m entering for below this post.  I have several layer panels including the fun turquoise sparkly paper that I’ve used that was cut with a wave border die and then sponged with some white ink.  I added some pearls to each corner of the image panel, wrapped some white organdy ribbon around the card front base, tied a bow and added a silver bow where I have attached some silver string and a starfish charm to it.  The entire card measures 5.5″ square.

Vicki-DDSNixie-Aug20-close

Here’s a closer view of the coloring that I’ve done on this mermaid image.  Mainly colored with Copic markers, but I’ve used a gel pen to color the sprigs next to the flower in her hair and the bracelets around her wrists.  I took a glitter brush pen and covered her entire fish body and the bubbles in the water with.  (Of course it looks so shimmery in person!)  I then took some glossy accents and covered the little crabs eyeballs with and then some liquid pearls to dab a dot over the pearl inside the oyster.  This mermaid image panel was popped up with foam tape over the card front.

Vicki-DDSNixie-Aug20-flat

I hope you’ve enjoyed my underwater mermaid card today!

Thanks so much for stopping in today!  I’ll be back tomorrow with something fun!

Challenges I’d like to enter this card for:

  1.  Cheerful Sketches – August Challenge
  2. The House That Stamps Built – A1419 Tic-Tac-Toe (I used first row down)
  3. Pammie’s Inky Pinkies – PIP1933 Anything Goes

Paper Nest Dolls Guest Design Spot with Fishy Kisses!

Hello friends!  Happy Memorial Day and I hope you’ve been having a great weekend!  I would like to take a moment on this day to stop and give thank you and remembrance to all of the U.S.  service men and women who’ve served our country.  Your service will never be forgotten.

I am very excited to share a card I made with an image that Christine sent me to play with from the Paper Nest Dolls!  I’m sharing my card as a Guest Designer for her and I’m thrilled to be apart of it with her adorable images!

Vicki-PDMermaid Ellie Seahorse

I am using this CUTE image called Mermaid Ellie with Seahorse for my card. Isn’t that little seahorse she has her arm around adorable?!  She was so much fun to color too!

There is just so much shimmer/shine and sparkle on this…so I hope I can capture it all for you!  For the card, I’ve used the Tonic Basic Oval dies to cut her out with, but I’ve used the “Out of the Box” technique and cut out her tail before cutting the rest of the oval.  You can see in the photo below how I’ve slightly curled her tail upwards.

The background of the card was done with a stencil and ink blending.  I thought it was so fun as it reminded me of the scales!  I cut this piece out with a square stitched rectangle die and then layered a piece of aqua colored mirrored cardstock that I’ve also used as an oval layer behind the mermaid image as well as a strip at the bottom.

For the strip at the bottom, I’ve wrapped around some linen thread and tied a bow with it.  I’ve also wrapped around some ribbon to the layered stencil and mirror cardstock panels and then attached them to a 5″ square top folding card base.

I’ve taken a sentiment and heat embossed it with some “Mermaid Tail” EP and cut it out with a word banner die and sponged around the edges of it which I slipped under the first layer of the oval cut mermaid.  I’ve added some burlap and a few of the sea shell sequins behind the oval image panel and popped her up along with the sentiment banner with some foam tape.  Lastly, I added some half-back pearls randomly over the design.

Vicki-PDMermaid Ellie Seahorse-close

Here’s a closer view of the image and all of the shimmer and sparkle details.  I’ve colored her up in the following Copic markers:

  • hair – 100, W9, W7, W5, W3, W1
  • Mermaid shells – BG13, BG10 (covered with glitter brush pen)
  • Mermaid Tail – YG25, YG13, YG11, BG000 (pointillism with darkest and blender 0 and also green and white gel pens.  The fin at the end was also covered with a glitter brush pen.)
  • Mermaid Skin – E21, E11, E02, E00, E000, R20
  • Seahorse – V17, V15, V12, R11, R00, R000 (pointillism with V colors and blender 0)
  • Shading – BG000

Vicki-PDMermaid Ellie Seahorse-flat

It’s hard to see it from the other angles of the card, but it looks like the sentiment heat embossed with “Mermaid Tail” shows more of the shimmer in it as well as the ribbon.

Challenges:

  1.  Cheerful Sketches – using sketch
  2. Tuesday Throwdown – Stenciling
  3. CCEE Stampers – CCEE1921 – Use a die
  4. QKR Stampede – #349 Anything Goes
  5. Cupcake Inspirations – CIC471 – mermaids