For Someone You Love at Sparkles Monthly

Hello friends!  I hope that you had a great Valentine’s Day yesterday however you chose to celebrate it!  We chose to stay indoors where it’s warm and watch a movie!  

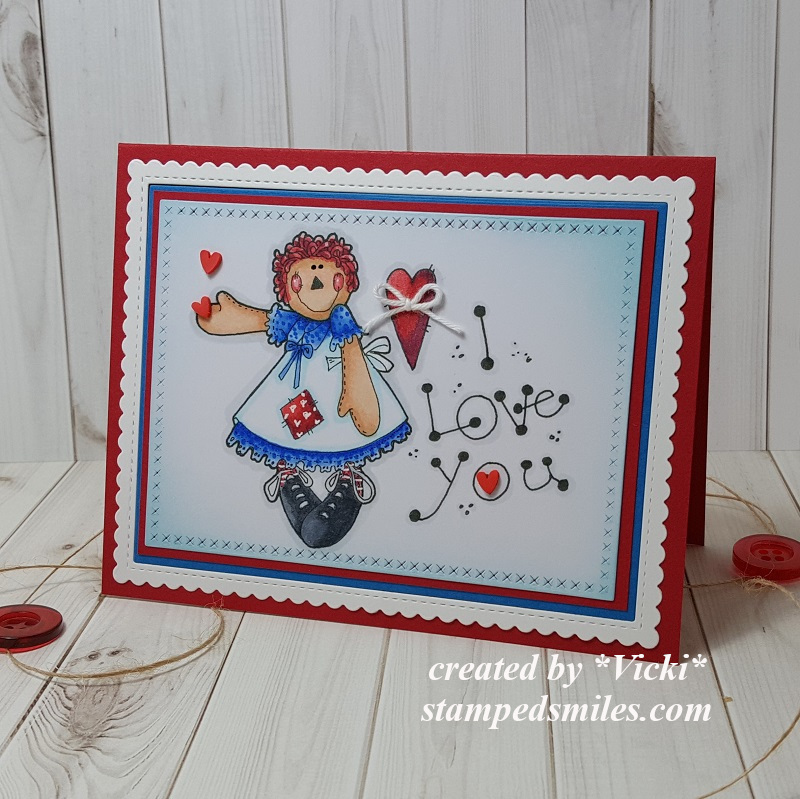
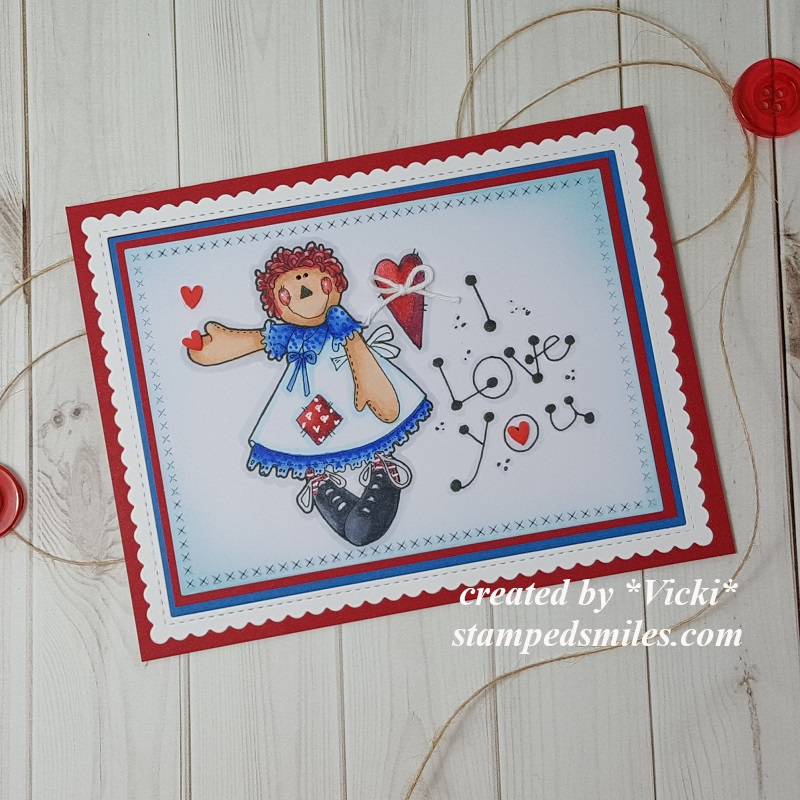
And speaking of love, this brings us to the February challenge over at Sparkles Monthly and for this month, our hostess is asking for a “Love Card (for anyone you love)” .  Be sure to stop by the blog to see what the rest of the design team has created for you.  Here’s my project for this challenge:

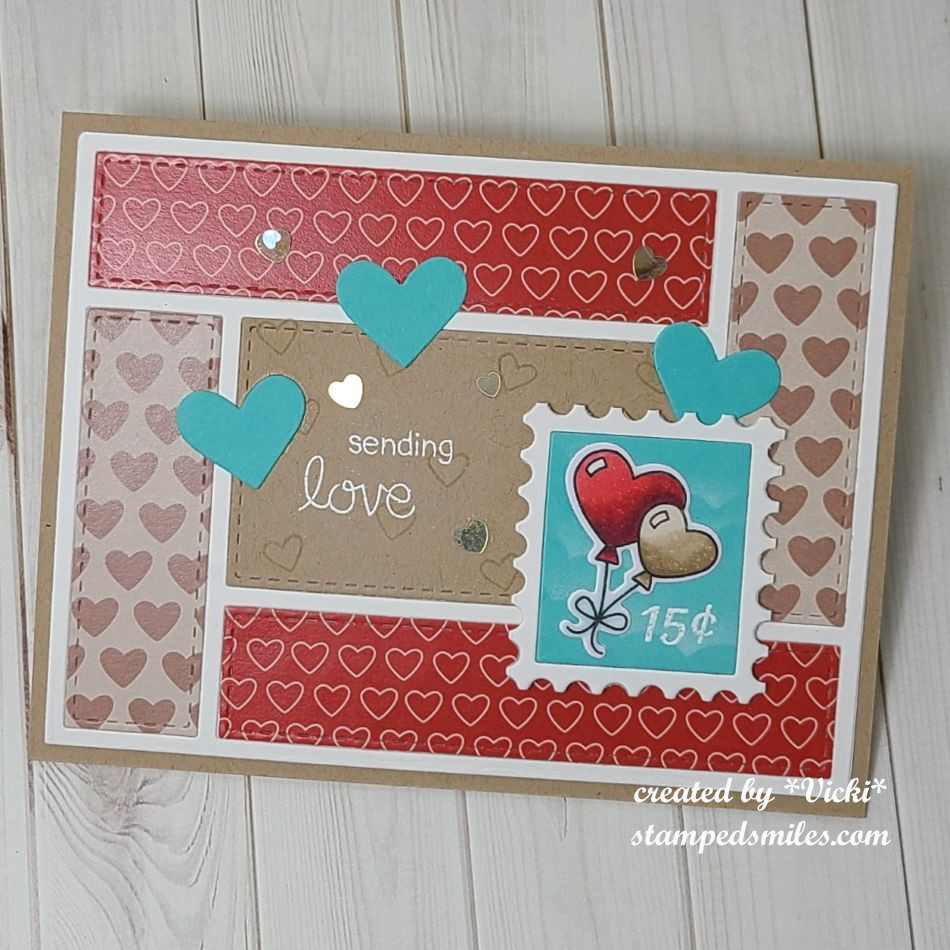
Aren’t these heart sweaters adorable?!  I had fun making a couple of cards to send to my kids (whom I love) for Valentine’s Day.  I was actually able to create two similar cards using a stencil set that allows you to make 4 sweaters at one time.

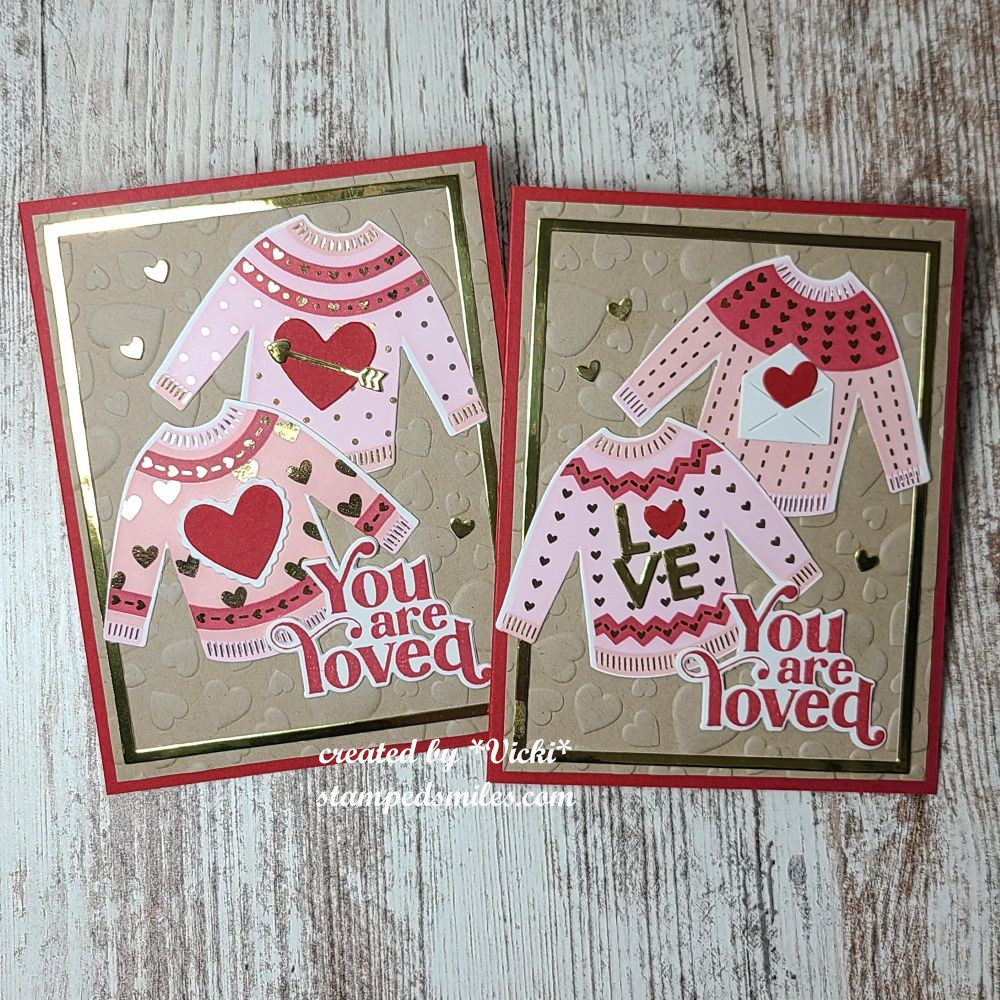
I love the Taylored Expressions Sweater Weather Stencil Set that you can ink blend up to four different sweaters at once.  This had previous come out for Christmas, but in December, they came out with a cute Valentine line to go with this stencil.  So I gold foiled a panel from the TE Foil It-Valentine Sweater Weather pack and then to decorate the sweaters, I used the TE Dinky Decorations Valentine die set.   I wanted more hearts, so I die cut a few extra to place around the background.

Speaking of the background, I used the TE Lots of Love 3D embossing folder and then sponged a bit of white over the hearts so they stood out a bit more.  I also die cut the A2 Thin Frame die for a gold mirror frame.  The sentiment came from the TE Love & Hugs stamp set

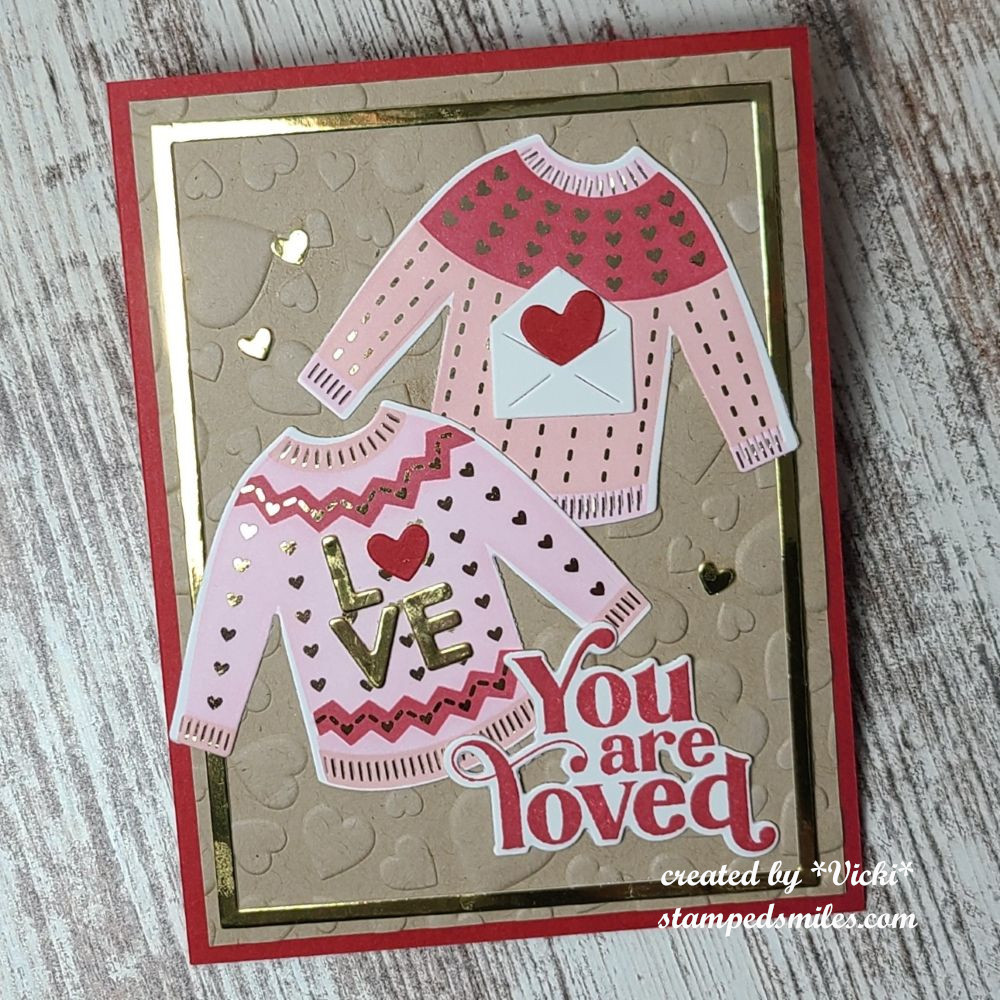
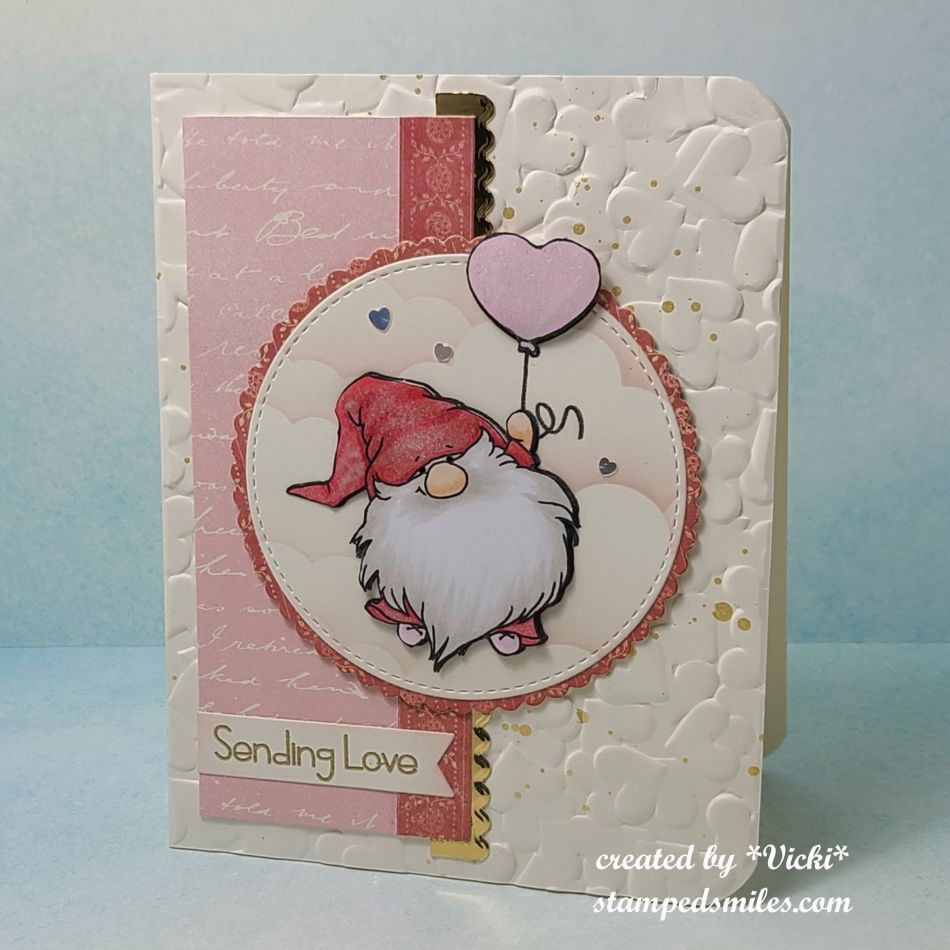
And here’s a closer look at the other card I made.  I know I could’ve used just one sweater for each card, but I thought these sweaters were too cute, so I decided to use all of them!  I’m thinking one of my sons would probably wear a sweater like one of these and the other would think it’s ridiculous! LOL  Regardless, at least they each know that they are loved by me!

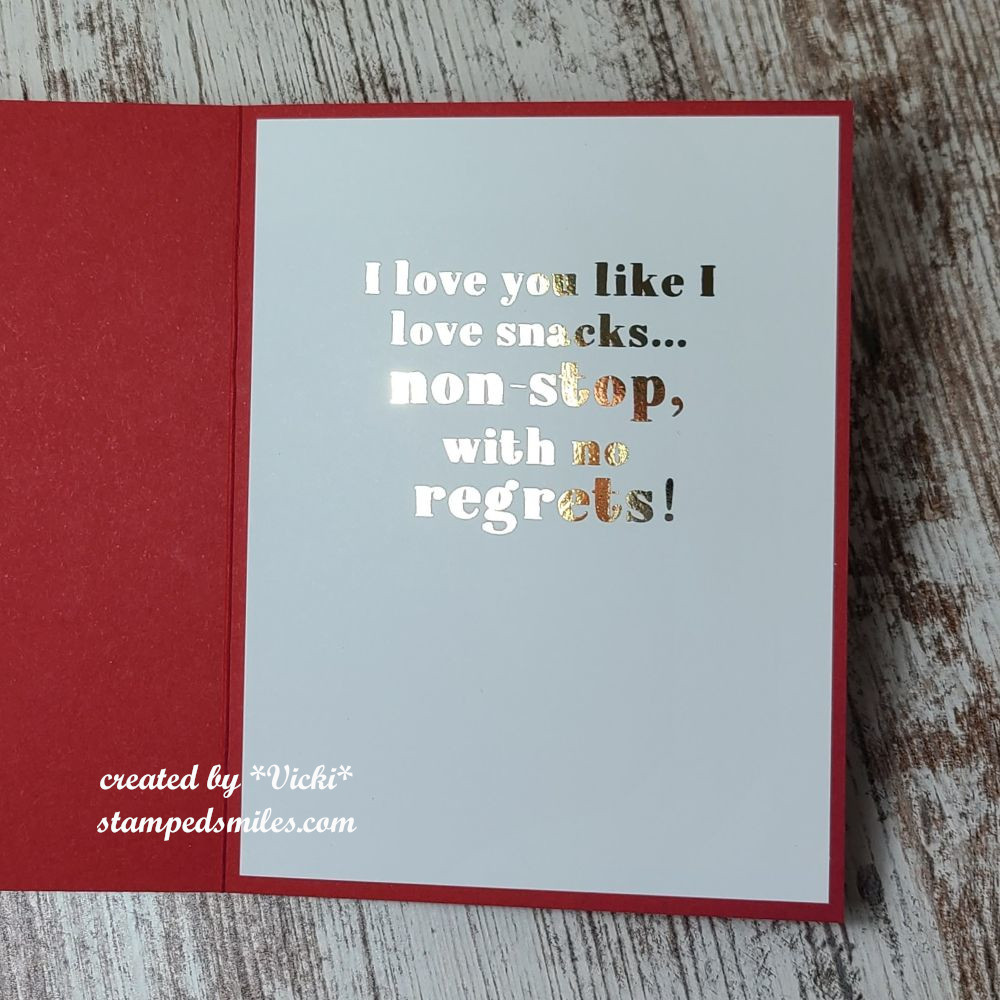
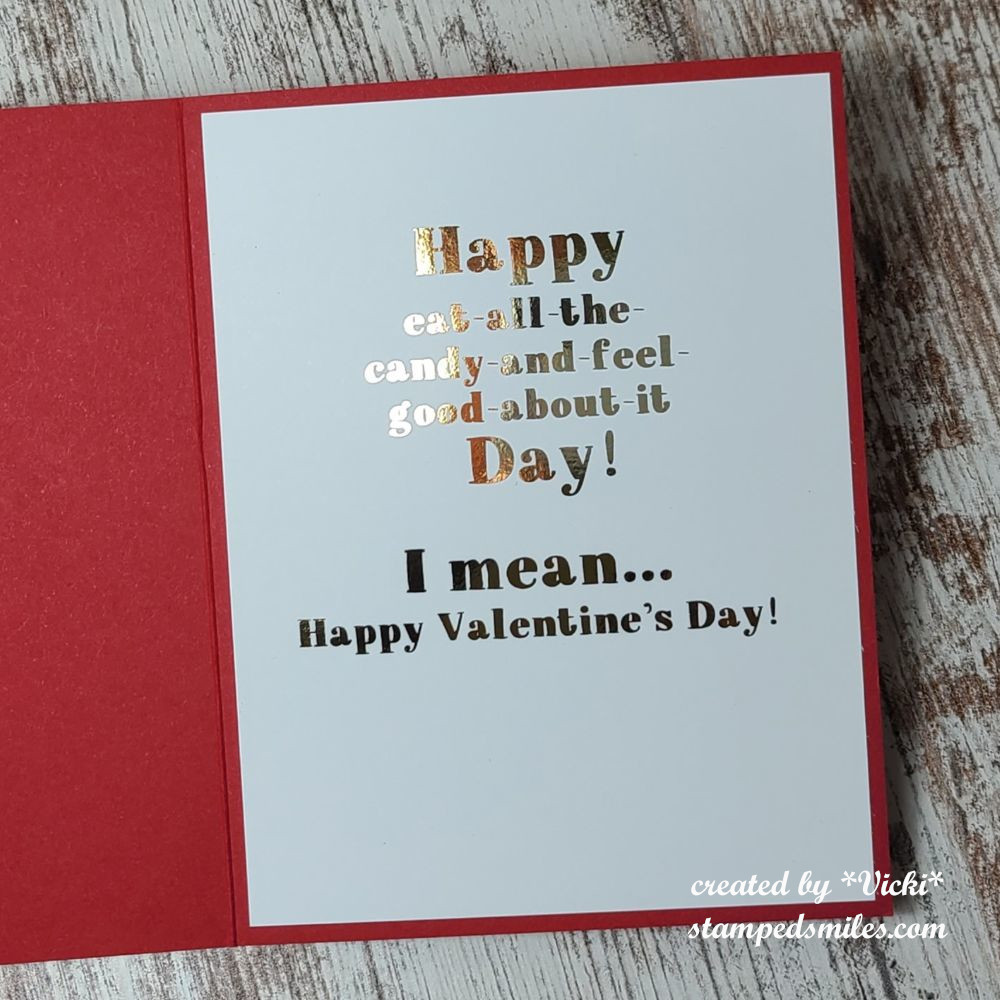
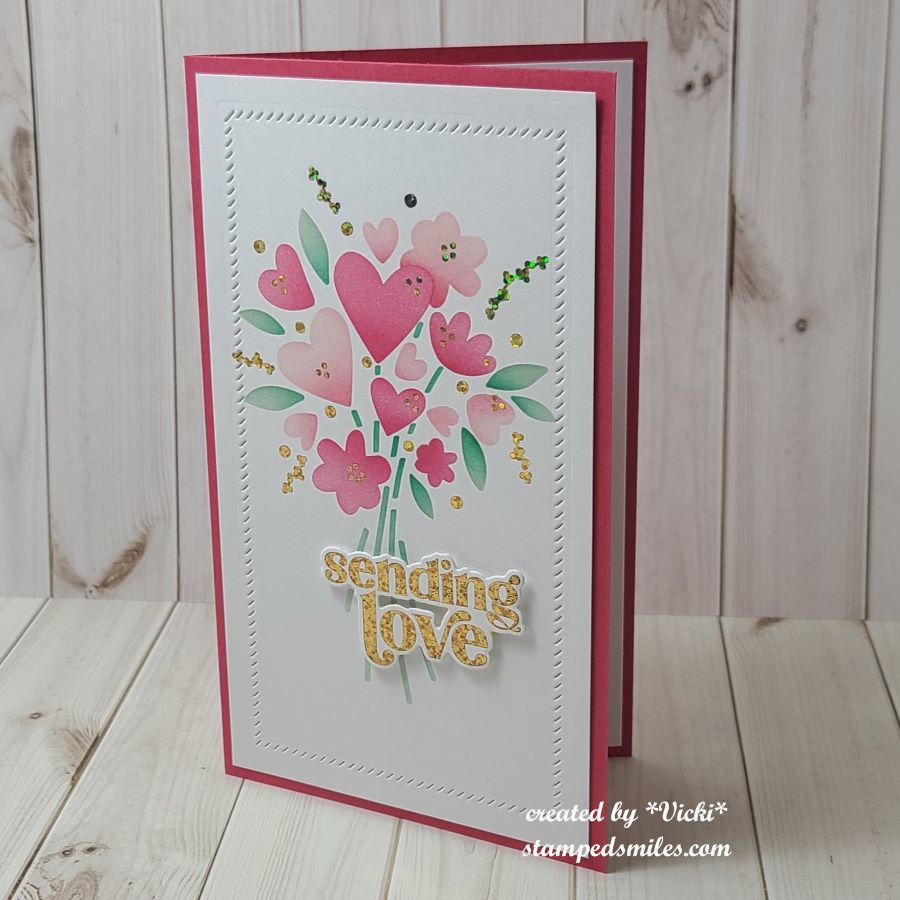
I also had these fun TE Snarky Valentine Insiders panels that I gold foiled.  I have to share some snark with those I love too! LOL  (Click on the photos above to enlarge them if you’re on my website.)


I thought I’d share another card I had made for someone I love that was given to my husband for Valentine’s Day yesterday.  (Sometimes, I have to wait until he gets it before I share!):

This pup and his boing heart hat cracks me up!  Look at that face!  I actually made this last month during a Craft Roulette challenge.  I decided that I liked it so much that I put a Valentine greeting on it for my husband to give him on Valentine’s Day.

I used the Taylored Expressions Puppy Love (retired) stamp set and colored in this cute pup with Copic markers and die cut him out.  I stamped the TE Gingham Check BG Stamp in black ink over red cardstock.  I splattered some white Copic Opaque over top.

For the lace, I white heat embossed the border stamp from the TE Flip the Lace stamp/die (retired) over the Toffee cardstock and placed beneath the check background piece.  I added a black strip between the two and then popped the dog on it.  I stamped the “Seriously” from the pup stamp set and the Valentine greeting from the lace stamp set together and fussy cut them out to pop up with foam tape on the card.  I added a few white hearts around the pup.  The entire card is a mini slim from a pre-cut and scored Toffee card base.

  • Thanks so much for stopping by today and I hope that you enjoyed these “love” cards or have been inspired to make and send a card to someone you love too!  I look forward to seeing what you share in the gallery this month!  

HAVE A GREAT WEEKEND!

Challenges:

  1. Critter Crazy Anything Goes With a Featured Creature (Bottom card only)
  2. Crafty Animals Anything Goes + Animal (Bottom card only)
  3. Pearly Sparkles Love is in the Air
  4. Crafts Galore Encore – #132 Anything Goes
  5. Crafty Calendar – Hearts
  6. 613 Avenue Create – Anything Goes with optional: Lots of Love
  7. Crazy is Our Fame-Stencils Are Our Game – Pinks &/or Reds + stencil (sweater cards)
  8. Make My Monday – #245 Love (bottom pup card)
  9. Crafty Gals Corner – #264 Fill in the Blank:  “Pink________” (sweaters)

Time to Send Love

Hello friends!  It’s getting closer to Valentine’s Day and Sending out love to others is a good reason to make cards!  I’ve joined a couple of challenges to play along with:

I have fallen in love with these card layout dies from Newton’s Nook called A2 Card Layout Die and was also able to use as part of a sketch for a challenge that worked with it.  The die made it very easy for the layout.  I’ve also used some Newton’s Nook papers as well as a new Valentine themed stamp set that came out in December.  

For the postage stamp on the card, I’ve taken the NN Postage Stamp Layout die and cut one in turquoise and then another in white.  One for the inside and one for the frame.  I cut it apart so that I had several postage stamps.  I stenciled clouds on the turquoise insert and added the heart balloons from the NN Valentine Postage Sampler set over it.  I stamped, colored and cut it out with the coordinating die.  I also white heat embossed the number at the bottom.

I took the same stamp set and stamped some random hearts on the center kraft cardstock panel.  The sentiment came from the NN Sending Hugs stamp set (retired) and was white heat embossed over the hearts.

For the die cut turquoise hearts, I’ve used the NN Charming Hearts Frame die.  It cut out three hearts that I could use for accents on this card.  I’ve attached the entire design over an A2 top folding kraft card base and finished it with some heart shaped sequins.

Thanks so much for joining me today!  I hope you’ve enjoyed my card or found some inspiration!

Challenges:

  1. Newton’s Nook Inky Paws Challenge – Cherry Red, Turquoise, Buttery Brown & White + Newton’s Nook products
  2. Sketch Saturday – #768 sketch with twist:  include a heart
  3. The Divas That Cut…Paper – Something New + die (new Newton’s Nook products!)
  4. Creative Fingers – #293 Anything Goes
  5. Pammie’s Inky Pinkies – #2504 Anything Goes

Sending Love Using My Stash

Hello friends!  Just popping in with a quick post to share a card I’ve made for a few challenges.

This year, I’m going to try and “shop my stash” instead of buying and buying and buying all the things.  YES…I know it’s easier said than done, but I’ve joined a fellow crafter that I’ve known for a long time to join in her monthly challenge prompts in her group on FB  (This & That With Danni’s Dreams) to help keep me motivated in spending less.  I’m sure she’d love you to join her, so check it out.  Her monthly prompts are from her “Use Your Stash” challenges that she just started this year.

Her themes/prompts for January 2025:  gnome(s), embossing folder, border die/punch, heart(s) and 12×12 paper.  (You can choose one, several or all.)  Here’s the card that I’ve made “Using My Stash” with ALL of the prompts:

I think gnomes are cute and I happen to have several stamps, so it was no problem finding one of those!  I’ve used an older gnome set from Whimsy Stamps Gnome One Like You.  I colored him up with Copics, but I fussy cut out the gnome and the heart balloon to pop up over the image on the circle that I’ve stenciled some pink clouds on.

The background has an older Sizzix embossing folder not sure of the name, but it’s a 3D embossing folder with hearts piled up.  The embossing folder and hearts was another two of her prompts.  I splattered some gold watercolor over the background before placing it over an A2 sized top folding cream card base.  I also used a corner chomper to round the edges of the right two corners.

I’ve used some very old 12×12 papers from Stampin’ Up! called “Fan Fare”.  I hoarded it for a long time and even wrote the coordinating colors on the back of the package!  It’s high time to use some of it up…even if it’s a small strip!  I’ve also taken the Whimsy Stamps Basic Border dies (not available any more) to cut a mirror gold strip along the edge of the papers. (The remaining of her other prompts used.)

I gold heat embossed the sentiment from the stamp set over a piece of the cream cardstock.  I cut it out with a banner die and sponged some light pink ink around the edges.  Lastly, I covered the heart balloon with a glitter pen and added a couple of tiny sequin hearts around the gnome.

I had a great time pulling out items from my stash and it felt good to be using them!  I certainly plan on doing more of these every month!  So stay tuned for more posts to help “Use Your Stash”!  Thanks so much for dropping in!  See you again soon!

Challenges:

  1. Freshly Made Sketches – #FMS668
  2. Creative Friday – #376 altrosa (Old pink)
  3. Crafty Calendar – Add a Die Cut
  4. Stamping Sensations – Anything Goes optional:  hand colored image

Hearts and Flowers for Sparkles Monthly Challenge

Hello friends!  I hope you’re having a great week so far and enjoyed a nice Valentine’s Day yesterday with some yummy sweets!  We enjoyed some treats of our own! 😉

Today I have a new challenge to share with you for the Sparkles Monthly Challenge blog and this month the lovely Dawn would like to see some “Hearts & Flowers” on your creations!  Although Valentine’s Day is over, I think hearts are great for adding any time of the year, so check out the inspiration from the design team and here’s what I’ve made:

I’ve made a mini slim card using the Taylored Expressions Hearts in Bloom Layering Stencils which are so great for mass producing several cards at once.  For this card and the other cards below, I decided I wanted to use the TE Hearts in Bloom Foil Panels which works with these stencils. I foiled them with gold foil.  I think the foiling adds such a pretty shine and glitter.  I also used the TE Love & Hugs Foil Panels for the sentiment and die cut it out with the coordinating die set.

So after foiling everything, I used the stencils to create the pretty bouquet of flowers with the hearts in it and then added a frame around the edge with a TE Diagonal Stitch Mini Slim die that doesn’t cut anything, but adds those slash marks.  I used some foam tape to pop up the foiled sentiment and just attached everything to a coordinating mini slim card base.

I couldn’t just make this one to show you, so here is the whole set of cards I’ve made together:

Those stencils create all of these patterns at one time.  I just lined the foil panels up at one time and then used each stencil for the colors.  If you didn’t want to use the foil panels, you could also just use the stencils on one sheet of cardstock and then cut them apart to make the card fronts.

I found these sets to become very addicting!  And just like that, two of them have been sent out!  

I’ve been really busy with creating behind the scenes and I will be sharing more soon!  I will be around to see what’s been going on with you all shortly!  I really appreciate your kindness and support…it really means so much!❤️  Thanks for stopping in!

Challenges:

  1. Try it On Tuesday – Hearts &/or Flowers
  2. Make My Monday – Love
  3. Allsorts – Anything Goes/Hearts
  4. Ally’s Angels – Anything Goes
  5. Little Red Wagon – Show Us Some Love/Valentine
  6. Crafty Gals Corner – Add a Heart
  7. Simon Says Stamp Wednesday– Fun with Foil

Art Journal Inspiration and Valentine’s Day Cards!

Good evening friends!  Tomorrow is about “LOVE” for Valentine’s Day!  I hope that whatever you’re doing that you spend it with those that you love or at least tell someone how much they mean to you!  I have a special post this evening that is dedicated or inspired by love. ❤️

First up is my art journal page with the prompt/theme of “LIGHT/KEEPING IT LIGHT” that I’m guest hosting this month for the Art Journal Journey Challenge.   It’s been so fun to see all of the wonderful art created so far!

This page was inspired by not just the “light” prompt for the challenge, but it was also inspired by the love of my life.  We have spent many moons together and have enjoyed our time in the moonlight as we both love nature and have spent some time traveling and seeing some beautiful things.  I’m so thankful to have had these special memories with him.

For the background:  I started with a 5.5″x8.5″ watercolor with pre-punched holes at the top with my Zutter machine.  I used my watercolor to create the blue sky background with an idea of where I was going to place the moon.  I left that area to watercolor in the yellow rather than the blue.  I then used some white opaque copic watered down and splattered over top for stars.  The “moon” was die cut in white with a heart shaped die and I added a moon stencil over top to make it look like a heart shaped moon and glued it in the center of the watercolor background.

The bottom portion was made with just ripping some cardstock and ink blending one with the greens and one with greys and black.  I die cut the trees in black and glued them in place and then added the ripped layers over top.

I stamped the Lavinia Stamps “Star Gazers” stamp in black in and fussy cut it out.  I colored the rocks they were sitting on as well as their wings and popped them up on the grey ripped border.  I also hand drew more rocks around them and used a white gel pen to highlight.  I added some glitter to the wings.  Lastly, I wrote over black cardstock with a white gel pen, cut them out and attached to the ripped green border.  I then used a black pen to doodle around the words.


Next up are a few Valentine cards that I’ve made.  I’m actually really bummed because I would’ve shared another two cards that I made, but I forgot to take photos of them before I sent them out!  I used a pizza theme and they were so fun! 

This first one is for my husband and I’ve used the Craft Roulette #201 parameters to create it:

We had to make an easel card, so I decided to make a heart shaped one.  I’ve used the cute skunk from Lawn Fawn with all of the “sweets”. (which was also one of the parameters)  My husband loves his sweets!  I also had to use “quiet” colors and some sort of bokeh, so I’ve made a bokeh background and used a solid heart stamp in white over the blended colors.  It reminds me of those conversation hearts.  This skunk makes me smile!

This is another fun card that I’ve made for a friend!  I couldn’t wait to use this fun mosaic heart from Taylored Expressions.  It came as a freebie for a limited time with a Valentine release.  I like that it comes with the solid heart backer which makes putting it together easier.   I ink blended a panel in two shades of pink and then die cut the heart with the pieces.  I used the frame cut in white and then popped in the ink blended pieces inside the frame.  

The embossed heart background was made after cutting out a piece of Bubblegum cardstock with the postage rectangle die.  I stamped and die cut the sentiment over top of the heart and added some gold rhinestones. 

And this card was done for the Inky Stamper FB challenge which was to create a square card.  I have made this one 4.25″ square and used the cute Snail stamp set along with some Doodlebug papers which you can also find in their store.

I just stamped, colored and cut out the images, added a border at the bottom and cut out a scallop square in white and stenciled some clouds at the top.  More pink papers onto a white square card base and called it done!  There’s nothing better than getting snail mail!

  • I hope you’ve enjoyed my heart-filled post today and you’ve been inspired in some way!  Thanks so much for stopping in and I’ll see you again on Thursday for a new challenge to try!  Happy Valentine’s Day!

Challenges:

  1.  Art Journal Journey – LIGHT/KEEPING IT LIGHT (art journal page only)
  2. Crafty Animals – #80 Anything Goes + animal (skunk card)
  3. Critter Crazy – #83 Anything Goes + critter (snail card)
  4. Pearly Sparkles Love/Have a Heart (skunk card)
  5. Creative Knockouts – #514 Love/Valentine’s Day (skunk card)
  6. A Place to Start – Monochrome (mosaic heart card – pink)
  7. Aud Sentiments – #310 Dies/Love/Wed/Anniversary + sentiment (skunk card)
  8. Creative Inspirations – For Someone You Love/Special Friend (mosaic heart card)
  9. The Male Room – Valentine/Use a Heart (skunk card)
  10. Crafty Catz – Anything Goes optional: Valentine/Love (snail card)

Lots of Love and Commissioned Wolves

Happy weekend friends!  It’s almost time for Valentine’s Day which means we share our appreciation to those that we love!  I like to make cards that are great for any time of year and hearts are versatile enough to do this without being specifically Valentines.  Here are a few cards that I’ve made with this in mind:

I actually participated in last week’s Craft Roulette #149 and the perimeters were: 1. tissue/vellum 2. collage 3. far away 4. three pops of red.  So…while watching, I had decided that I was going for the Tim Holtz Postale Tissue Wrap that was already collaged with images.  I decided because of the collage images, that I was going to find an airplane image to use with it and my thoughts turned to an older Simon Says Stamp card kit I had with the “Home Sweet Home” stamp set.  I white heat embossed the airplane, the long building strip and the sentiment over black cardstock. It seemed to lend itself to a slimline card design, so that’s what I went with and used collage medium to attach the tissue to the background.  Once it dried, I glued the die cut buildings strip and went around it with a Big Brush marker that I smudged to create the shadow effect.

I made a banner with the sentiment and attached a white string to the back and tied a bow with it to the airplane and popped up the plane with foam tape.  The collage background panel was layered over a black piece that was attached to a standard slimline top folding card base.

Here’s a closer view of the details so that you can see them a bit better.  My “three pops of red” came from 3 hearts that I cut out with red cardstock.  The die was from the coordinating set with the stamps.  I attached them around the airplane and covered them with a glitter brush pen.

If you’re interested in seeing what the Craft Roulette is all about, you can check them out live every Friday night around 6:00 pm CST.  I will be doing this tonight as well!  It’s just something fun to get your crafting thinking and I love that I can pull out my stash and use it up!


And of course I couldn’t help but follow along with the Lawn Fawn Create With Us “Wood You Be Mine?” class!  There’s a little inside joke about Woodchucks chuckin’ wood with my son and I couldn’t resist sending him one of these cards. (CLICK ON THE PHOTOS ABOVE TO SEE THEM LARGER IF YOU’RE ON MY WEBSITE)

I just pretty much followed along with the same design as they shared in class with the exception of the background stencil.  I didn’t have the same one they used, so I pulled out one from Taylored Expressions that is no longer available.  but if you’d like to follow along with the class, you can check it out here.


And lastly, I wanted to share a commissioned card that I made for someone that requested a card to give to their partner.  Not really too specific other than they liked wolves and the “What a Wonderful World” by Louis Armstrong lyrics somewhere displayed on the design.  So here’s what I came up with:

I did not own any stamps with wolves on them, so I turned to my Cricut machine to cut out a silhouette wolf and then I flipped it to cut another one so that they faced each other.  I wanted to give the appearance of the wolf couple howling together. LOL  I also had some digital map paper that I could print out to use for the hearts as well as making an envelope with it too.

The background was ink blended with the center being lighter toned in blue and then I splattered some white over top for a night sky or an “outer space” looking sky…however you’d like to interpret it, I suppose.  I cut a large heart with the map paper and arranged the two wolves over it so that, although it’s the same image flipped, I can make them look like different wolves and then cut off the bottom portions. I popped up the large heart with foam.  I also used the same papers to cut smaller hearts above them and added some glitter and covered them with crystal effects to make them shinny.  I printed out the lyrics on my computer and cut it out in a banner shape to attach below the wolves.

  • Hope you’ve enjoyed my “love” creations today and have been inspired in some way!  Thanks for stopping by!

Challenges:

  1. Sweet Stampin’– LOVE (Beavers)
  2. Simon Says Stamp Monday – Love is in the Air (slimline)
  3. Everybody Art – #529 Heart/Love
  4. Cardz 4 Guyz – Valentine for a Guy (wolves)
  5. Try it On Tuesday – All You Need is Love
  6. Fab ‘N’ Funky – Valentines or Hearts
  7. Little Red Wagon – Somebody to Love
  8. The Sisterhood of Crafters – Hearts
  9. Crafty Gals Corner – Add a Heart

An Electric Connection and Happy Mail Love For Valentine’s Day!

Happy Valentine’s Day friends!  Today is the day all about hearts and love!  Although I’ve already sent out my Valentine cards, I have a couple of lovely individuals who take a peek at my blog from time to time…so I have to wait until they’ve received their cards before I share them here!😉  It’s somewhat hard to “hide” my crafting since hubby’s now retired! LOL  So here’s the cards I made:

I just KNEW the minute I saw this Taylored Expressions Love Lights Stamps & Stencil Combo set that it was something perfect for making cards for my retired electrician hubby!  This set also coordinates with other products and so I started by foiling the TE Foil It-Love Lights panel and then ink blending with the stencil set.  I had to use blue as this is hubby’s favorite color.  So, I’ve used the TE Sprinkles and Potato Chip inks.  The cardstock is TE Sprinkles. (I used softer tones for the Valentine feel.)  I also used the coordinating TE Mini Strips-Watt’s Up sentiment set that was silver heat embossed over the TE Sprinkles cardstock and cut out with the TE Mini Strips-Asymmetrical Die.  I just love the punny sentiments that go with this set!

The tiny light bulb for the accent I used actually came from a TE ‘freebie’ with one of my orders, so I die cut the light bulb with white glitter cardstock and lightly sponged some yellow ink in the center.  I die cut the center and bottom of the bulb with silver brushed cardstock and glued it onto the light bulb.  I die cut a circle from some vellum and also sponged this with yellow ink and glued the light bulb on top of it and attached it to the side of the card nestled with the sentiment strips that were popped up with foam tape.  He will have gotten this one this morning.

And here’s another card that I sent to someone very special!  It’s a simple card, but wow it was so much fun to create with using the Simon Says Stamp Limited Edition Happy Mail Love card kit! (Looks like it’s still available at the time I’m writing up this post, but not sure how long it will stay available.)  I so love those CUTE Doodlebug products and there are so many of them including the stamp set that goes together in this kit!  I wanted to play some more with it, but I have so many other things to focus on, so I’ll have to come back to it later! LOL

I’ve used the Doodlebug background papers from the kit and cut it out with a Lawn Fawn Cross-Stitch die and also cut a strip of ‘grass’ with green cardstock at the bottom using the Lawn Fawn Grassy Border die.  The heart papers were attached over a red piece of cardstock from the kit and layered onto a top folding A2 white card base.  The grass border was attached over the red cardstock and heart background papers.  This gave me the room to take the CUTE Doodlebug LOTS OF LOVE Odds and Ends Ephemera die cut shapes to create my scene with!  This pack came in the kit and there are SO many pieces!  I’m sure you could go on and on making cards!  The bird and bunny die cuts were popped up with foam tape.  It’s hard to see in the photo, but I’ve taken my glitter brush pen to all of the hearts on the images and the cheeks on the cloud.

I think these cards did what was intended which was to create smiles during this cold winter season!  I sure hope that it has done the same for you as well! 😉 Wishing you a happy Valentine’s Day with all of my heart! ❤ Thanks for stopping in and I’ll be seeing you soon!

Challenges:

  1. Moving Along With the Times – Love/Anniversary/Wedding
  2. Creative Inspirations – With Love
  3. The Paper Funday – Anything Goes optional ‘Hugs & Kisses’
  4. 613 Avenue Create – Anything Goes optional ‘Whimsical Valentine’
  5. Everybody Art – Love and/or Heart
  6. Try It On Tuesday – ‘All Loved Up’
  7. Cardz 4 Guys – ‘Love’ cards
  8. Little Red Wagon – Be My Love/Valentines

Huge thank you to those that keep the challenge blogs going!

Stinky Love

Hello friends!  Happy Friday and I hope that you’re having a great week so far!  I’ve been having some fun creating a couple of Valentine’s Day cards with a fun/snarky inside greeting.

So, I absolutely fell in love with these STINKIN’ CUTE skunks from Lawn Fawn!  A few weeks ago, I caught a live on FB and enjoyed the crafty products shown with these Lawn Fawn Scent with Love stamps!  I wanted to play with them and decided to order it!  I didn’t have them on hand during the video, but I decided to do my own spin from their cards once mine showed up in the mail.

I didn’t use the heart stencil they had as I decided to use my TE Heart of Hearts Layering Stencil on both of these cards.  I’ve used some clear glitter paste over the first layer without using the largest heart, let it dry and then used some red ink for the second layer.  The red strip was embossed with a 3D heart folder.  I’ve used the Lawn Fawn Scripty Love die that was ink blended faded with the red ink and layered over another die cut sentiment with glitter cardstock.  All of the images were colored with Copic markers and die cut with coordinating dies. I’ve used some black glaze and white gel pens for accents.  I just glued all of the pieces down with the exception of the skunk that was popped up with foam tape.

OK, I had shared the inside of the card that the recipient will be receiving as I thought they would get a kick out it. 😆 I’ve used the SSS Sassy Insides stamp set for the inside of both of these cards.  I finished with the Valentine sentiment and the tiny hearts from the Lawn Fawn set.

And so this is also a “spin off” from the second card they did on the live, but I decided not to add another layer to it; instead, I used the large heart within my stencil to center these darling hugging skunks.  I did about the same thing that I did on the card above with different colored inks.  The only thing popped up is the skunks over the sentiment banner that I cut out using the MFT Stamps banner dies.  I think this turned out so cute for a one layer simple card.

And then here’s what the inside of the card looks like with another sentiment from the same SSS stamp set that I’ve used on the above card! 😆  I think this one was so appropriate for using with the skunks!

So I’m thinking that these cards would be something fun for the recipients to receive in the mail.  It’s a great time of year to get something to chuckle about especially if it’s unexpected!  I hope you’ve enjoyed seeing them too!


Thank you so much for stopping in today!  I wish you a happy and wonderful weekend ahead!!  See you soon!

Challenges:

  1. Lawn Fawnatics – Lots of Heart
  2. Make the Cards – Valentine card
  3. Unicorn – Red (top card only)
  4. Crafty Animals – Anything Goes with animal
  5. Pearly Sparkles – Anything Goes
  6. NBUS – #35 NEW SKUNK STAMPS! YAY!
  7. Critter Crazy – Anything Goes with animal
  8. Double D – Hearts
  9. Aud Sentiments – Love Sentiment

Raggedy Love

Happy Valentine’s Day my friends!!  Hope that you’re “feeling the love” and have a wonderful day today!

I wanted to share a card I made for Valentine’s Day.

Vicki-RaggedyLove

This really cute images is from Stamp On It called “Love You” digital stamp by QKR Stampede.  I wanted to try and keep to the “original” Raggedy Ann style of colors as I could, so I ended up Google searching for photos so that I could use that as a basis for my coloring.  I also thought that the rectangle die cut panels would go great for cutting her out with.

I sponged around the edges of the image panel with some blue distress ink, added some heart confetti pieces along with a white twine bow to the center of the heart.

Vicki-RaggedyLove-close

Taking a closer look at the image, you can see how dimensional those confetti hearts are.  There is actually a heart that prints out in the center of the “o” in the sentiment, but I decided to place one of those confetti hearts over it.

There is also some shimmer you can see in the heart with the bow that I’ve covered with a glitter brush pen.  And in coloring her in, I’ve added some extra “dots” on her blue dress and then I took a white gel pen to add a pattern on her red patch on the apron and then also to add some “stripes” to her socks and “dots” to her cheeks.

If you look at her eyes, I’ve taken a black gel pen which gives them a slight dimension and makes them stand out a bit more.

Vicki-RaggedyLove-flat

I really hope you’ve enjoyed my “Raggedy Love” card today and that you have a wonderful Valentine’s Day today!

Thanks so much for stopping in and I’ll see you again very soon!

Challenges to enter this card for:

  1.  QKR Stampede Anything Goes
  2. Pearly Sparkles – Include some red
  3. Lil Patch of Crafty Friends Anything Goes
  4. Make My Monday I Heart You
  5. Try It On Tuesday – Share the Love
  6. Double D – Hearts
  7. The House That Stamps Built – DCC F520 Hearts
  8. Aud Sentiments – Love/Valentine Sentiment

Seally For You

Hello there friends!

There’s something brand new in the Digi Doodle Studios store this month and it’s just perfect for making an adorable Valentine’s Day or love themed card!  Check out this sweet card I’ve made for you today:

Vicki-DDSSeallyForYou

Aren’t these snow seals just the sweetest?!  I’ve used the brand new Pairables digital set called Seally for You from Digi Doodle Studios for my card here.

It’s really easy to create a scene on your computer with the images and then just print them out to color!  I have this cute couple arranged in a “Titanic” situation (If you’ve seen the movie, then you know what I’m referring to! LOL!)  on my scene here, but also have printed out a couple of extra hearts along with the fish and floating ice cube to fussy cut out and add to my scene later after assembling it.  The “water waves” that I’ve added to my scene is actually from the DDS Otterly Loves Pairables.  That is what is so cool about these Pairables sets, is that you can use the different elements together with another set to create some fun & unique scenes!

I used cut out vellum for the water and added another strip that I actually clear heat embossed the sentiment as it came out of the printer.  You can heat emboss over vellum as the ink stays wet a little longer after printing it out.  (Not for too long though!)

I added the colored up fish, hearts and ice cube to the design as well as sponged some soft pastel clouds with a stencil.  I was also trying to be different by tilting the image layer over the card.  The card front panel was embossed with a falling snow embossing folder, I wrapped some ribbon around the corner and attached this piece to an A2 sized top folding white card base.

Vicki-DDSSeallyForYou-close

I’ve colored the images with Copic markers.  You can see that I’ve fussy cut out the smaller heart and then popped up the top heart with foam tape.  I tucked the ice cube and one of the fish behind the vellum and then popped up the fish over the ice cube with foam tape.  I took one fish and attached next to the heat embossed sentiment.

You can also see the hearts long with the ice cube and ice platform that I’ve taken a glitter brush pen to add some shimmer to them.

Vicki-DDSSeallyForYou-flat

I hope you’ve enjoyed my card today or have been inspired to create your own fun digital scene to play with too!  Thanks so much for dropping by today and I’ll see you soon!

Challenges I’d like to enter my card for:

  1.  Challenge Up Your Life – Winter Landscape/Scene (6 total challenges)
  2. Crafty Friends – Love/Romance
  3. Get Creative – Use Hearts
  4. Creative Inspirations – Anything Goes
  5. C.R.A.F.T. – Love/Valentine’s
  6. Creative Moments – #184 Anything Goes with twist:  love