Hello friends! I’m really excited to be sharing some more inspiration today as a guest designer this month using some brand-new Inky Stamper stamp sets that were just released! Stop by the store and check them out…they’re so cute!
First, I have a couple of shaped interactive cards for those warm drinks as the temperatures start to cool down. I made one for Autumn and shared it in the Inky Stamper FB Group and was asked how it I made it, so I thought I’d share that one along with another Christmas style version that I made too:
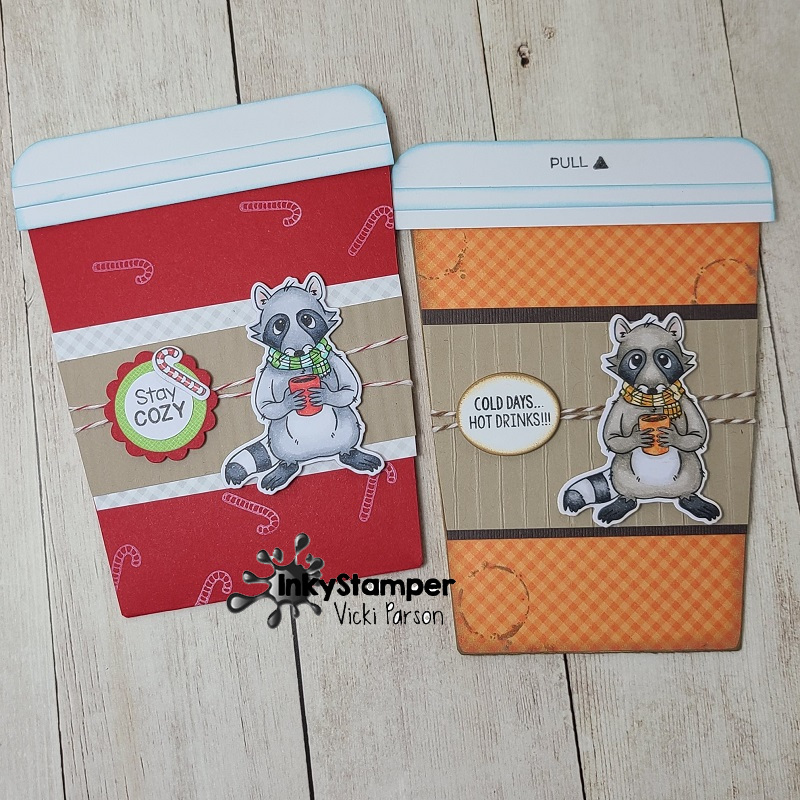
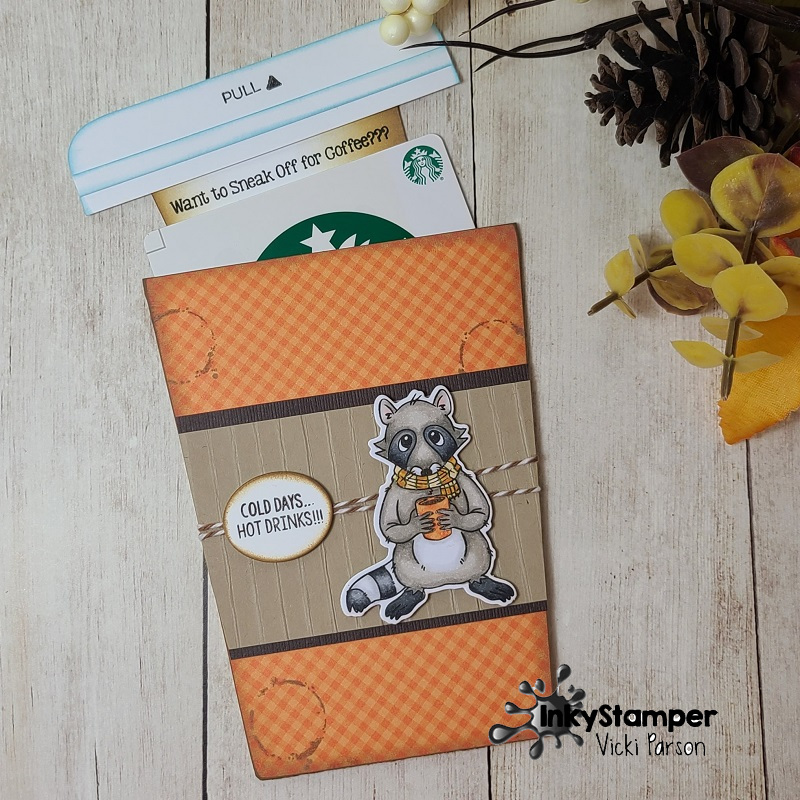
Aren’t these so cute with that little raccoon from the Inky Stamper Warm Beverages stamp set?! The one on the right is the one I made with Fall colors covering the front of the cup with the Doodlebug Gingham/Linen paper pad. I also used the Doodlebug Bon Bon Twine around the cup sleeve.
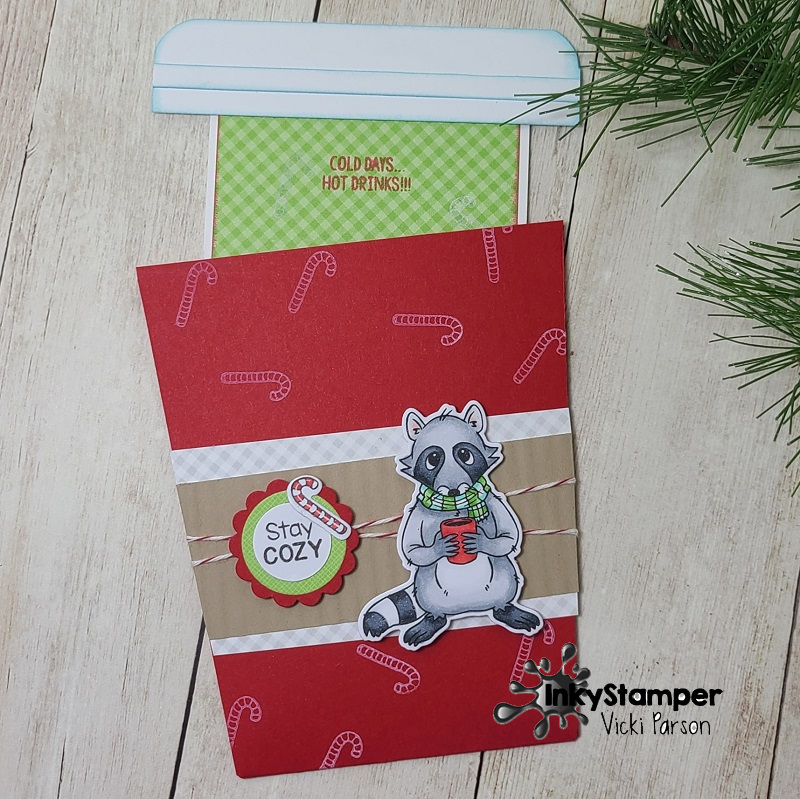
The cup on the left is more Christmas themed and I’ve used pretty much the same products, but just changed up the colors a little bit. This cup is slightly different because it’s about 1/4″ shorter so that it would properly fit inside an A2 envelope. The Autumn card was a bit snug, so I tweaked the size a bit more on the Christmas to make it fit nicely.
When you pull the lid off the top of the coffee cup, there is an insert with a greeting and/or a place where you can add a gift certificate. These were so fun to create and easy to do! Mass production could be possible for sure!
All that is needed are some measurements and a few tips along the way to get you started. I thought it would be easier to understand with a video, so check that out below or watch on You Tube HERE.
I also had a birthday card that I needed to make for someone, so I thought I’d pull out the new Inky Stamper Hippo stamp set and have some fun with it!
Aren’t these party animals so cute?! I thought this one would be fun to turn into a polaroid style, so I pulled out a square die to create my own polaroid frame with it! I also cut another one in black cardstock so that I had a bit of dimension with it. I stamped the sentiment from the set at the bottom of the frame.
The background behind the Hippo was created by white heat embossing the music note image from the stamp set over some Inky Stamper Watercolor Panelsand then using some watercolors for an emboss resist background. I colored up the Hippo, bird and party hat and cut them out to arrange over the background. I added a couple of pieces of the Doodlebug Grey Swiss Dot Washi Tape over top of the Doodlebug Gingham/Linen Paper that was cut out with a wonky stitched die and attached to a white top folding A2 card base. I found a couple of sequins from the Picket Fence Rubber Duckies mix and then filling the centers of them with yellow Stickles.
So many different things going on in this post, but I hope that you’ve enjoyed it and have been inspired to create something too! Thank you so much for stopping in today!
Hello friends! I hope you’ve had a fantastic week! It seems like this month is flying by!
I’m excited to share with you a fun video hop collaboration with Pink and Main on my You Tube Channel today! (Be sure to check it out on MY VIDEO because there is a giveaway and you’ll need to leave comments on the videos to be entered to win!) So head on over to see the wonderful inspiration with the Pink and Main products going on!
Here’s the fun Autumn themed slimline card I’ve made for the video hop today:
So Pink and Main has come out with some fabulous new products which I’ve used for my card here and I’ve added some fun techniques to use with some of those products as well!
The background was really fun to create using the Pink & Main Blending Brushes along with the new Crackling Campfire Distress Oxide Ink color that just came out! I’ve also used the wonderful Leafy Stencil from Pink & Main over the background too. The cups and leaves were also colored using the oxide inks and a waterbrush which you can see in my video as well as how I’ve inked and cut out the one image backwards so I have two cups with the handles in opposite directions on my design here.
You can check out how I’ve put this design together and the techniques I’ve used in this video below, or to leave a comment and see the link to the next person in the video hop, CLICK HERE to go to the video on You Tube.
I absolutely fell in love with that Need to Venti stamp set and coordinating dies! I loved that older Christmas Mugs stamps they had previously came out, but Autumn is awesome to add to my collection because it’s my favorite time of the year! So be sure to check out how to stretch out the use of this set in video above!
The Blessings slimline die was so fun to use on my card too and I love that the frame cuts out separately from the center and there was room to layer behind it before attaching to your slimline card base. The Brutus Monroe Copper Glitterstock was the perfect accent behind the scallop frame. That frame was cut out with several layers of cardstock and stacked together for thickness.
The same Copper Glitterstock was used to cut out the sentiment dies as well. I’ve used some vellum to layer behind the Autumn sentiment, which the backing diecut was also included in this same slimeline die set! The final measurement of my slimline card was a piece of brown cardstock measuring 8.5″ x 7″ and scored at 3.5″ in the center. The finished card will fit inside a #10 envelope when closed.
Here’s a closer view of the details with my colored cups using the distress oxide inks and waterbrush. I’ve also used the same Need to Venti stamp set and oxide ink colors to stamp the leaves and die cut them out to arrange over my scene as well.
I popped up the cups with foam squares and added some drops over the whip topping in the cups with some Nuvo Honey Gold Crystal Drops.
Hopefully you can see the pretty Autumn colors and dimension in the card. I sure had lots of fun putting all of this together!
Thanks so much for dropping in today and I’ll be seeing you soon!
Hello friends! I’m so excited to be sharing a special collaboration blog hop with my fellow crafty friends collab FB group as we share our own personal progression on how practice over time can help to increase your confidence and skills within your crafting journey.
So please grab your favorite beverage and join us in this fun and informative blog hop that shows how “the power of practice” can be utilized in your own crafting! (highlights are done in red.)
I would like to start off by stating each person’s experience is their own journey and will run on it’s own pace which is something that we all need to be aware of and patient with. Some particular skills will take much longer to grasp than others and you need to take it easy on yourself without harsh judgement. Just enjoy the process and have fun with it! (That was and still is the hardest thing for me to learn.)
Although I’ve been paper crafting for the last 20 years or so, I’ve been involved in several different crafts throughout my entire childhood or since I could hold a crayon in my hand! My grandmother as well as my mother has passed down their experience with crafts which I learned from and picked up many others along the way including what I love today. So some things I do may already come naturally for me without recognizing where it came from because it was taught to me long ago. There are some things, however, that I’ve had to spend the time learning.
Now taking classes aren’t the ONLY way to learn something for sure! Good ole “Trial and Error” are great for learning and gaining personal experience from…which I tend to learn the most from actually!😁 Another thing that helps is new tools/products to help make the process easier or look more “finished” or “professional” in nature. When I first started with my stamps, there was not a common heat tool for instance. I had to heat emboss over a stove! So times have changed as well as techniques and inspiration. Inspiration is EVERYWHERE over the Internet too! Many people have so many clever ideas…I wish I could keep up with them all! Some things may not be of interest to you and others may intrigue or intimidate you. Find what interests you the MOST..at the time…and work on it because you will love learning about it which means you will gain more knowledge from it. You don’t have to share with others what you do as long as YOU enjoy what you’re doing. Do what feels right to you and your journey. It’s never about others, it’s about YOU!
I feel like I could write an entire book on just this matter, but since this is a visual craft, it’s better to “see” with your eyes sometimes or show how things can come together…or not!🤨
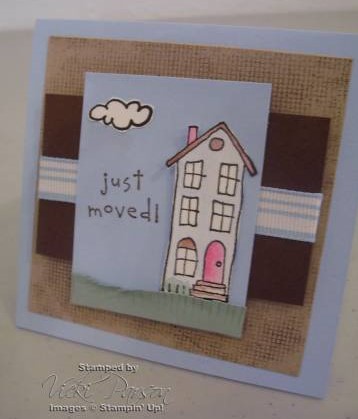
I’m starting with a photo of a card I had made back in 2007 when I had already been a year into having a blog and was still a Stampin’ Up! demonstrator at the time. Even the technology of simply taking a photograph has improved tremendously over the years…
I no longer have most of the products used here and I had to lift the photo from my Splitcoaststampers gallery as they have stored my oldest photos I have anywhere. This was the first place that I shared anything I made online. (There are 124 pages of my gallery and if you look through, you will see the progression over time.)
Now I could really criticize myself and pick this all apart, but it was part of my process at the time. And at that time, I was happy with it. It looks like I’ve colored with ink pads and a blender pen, cut out the images with scissors as well as cut fringes of the grass border. (tools have improved since and many purchases have been made as well!😊) As we move forward, I can share how I updated that design today:
What I have decided to do was to take the photo of the older card above and make an updated version of the same design, but with the mindset and techniques that I’ve learned since. You can see that my coloring has improved as well as the different tools and items that have been updated to help with my design execution. I still used similar colors, similar layout design as well as coloring an image, but just maybe updated the look from the practicing of not just the coloring over time, but the practice of just cutting the layers and putting things together as compared to years past. Just meerily putting together card after card has helped me with the practice and made me better aware. So you can see how just putting together a card in general, with practice, can help improve skills!
Another tip I find helpful is to join your fellow crafty friends in groups and collaborations like this blog hop as well as other groups which is what I’ve also made this card for, called “The Crafty Chefs“, where we take turns coming up with a new “recipe” to follow each month. There’s no pressure, just a group of friends coming together, learning from each other through challenges, and inspiring one another as we enjoy our love of crafting! For me, this is a huge deal. Check out the link above if you’re interested in joining with us! It’s still fun to craft, but it’s even better when it’s shared with someone. So here’s the September Crafty Chef’s recipe that our head chef Linda has come up with for us to use.
(I have used ALL of the “must do” items and then added a couple of pearls from the “can do” items.)
I have found that within the last several years, many people enjoy watching video tutorials on You Tube..which makes sense because seeing someone actually doing something or putting something together is a better way to learn rather than just seeing a finished photo of a project. So to see how I’ve made my latest card for my son’s birthday, check it out below or CLICK HERE to view on my You Tube channel:
Hopefully through the video you were able to learn a few things that you can incorporate into your own card making. Sometimes we can improve upon ourselves by even trying to recreate something we’ve done in the past and add some new things you’ve learned along the way. It’s a great way to see how far you’ve come along and not be so critical of yourself to remind you that you are always learning, as I still am right now as well.
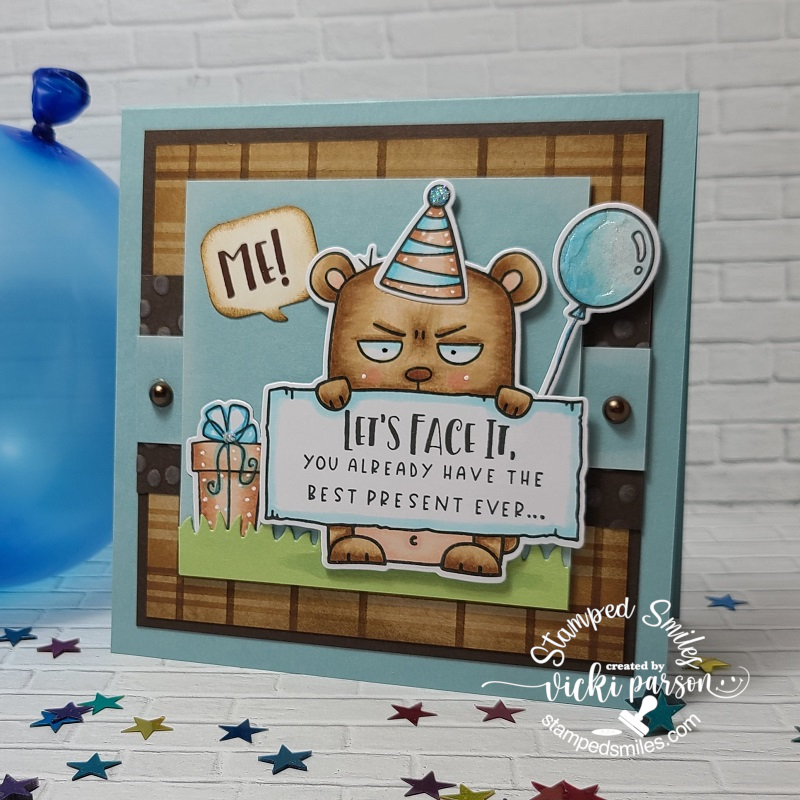
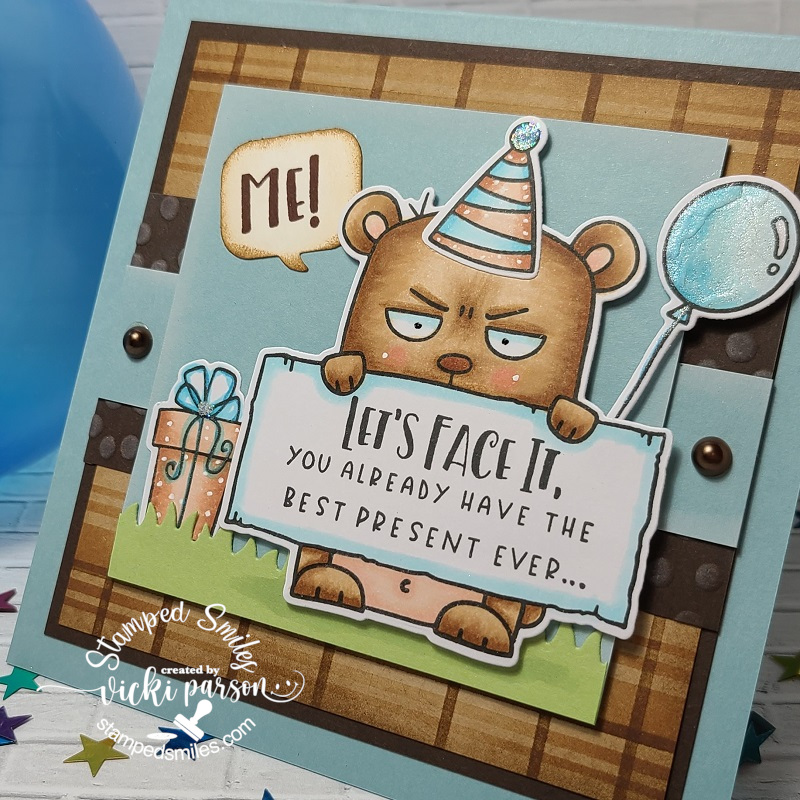
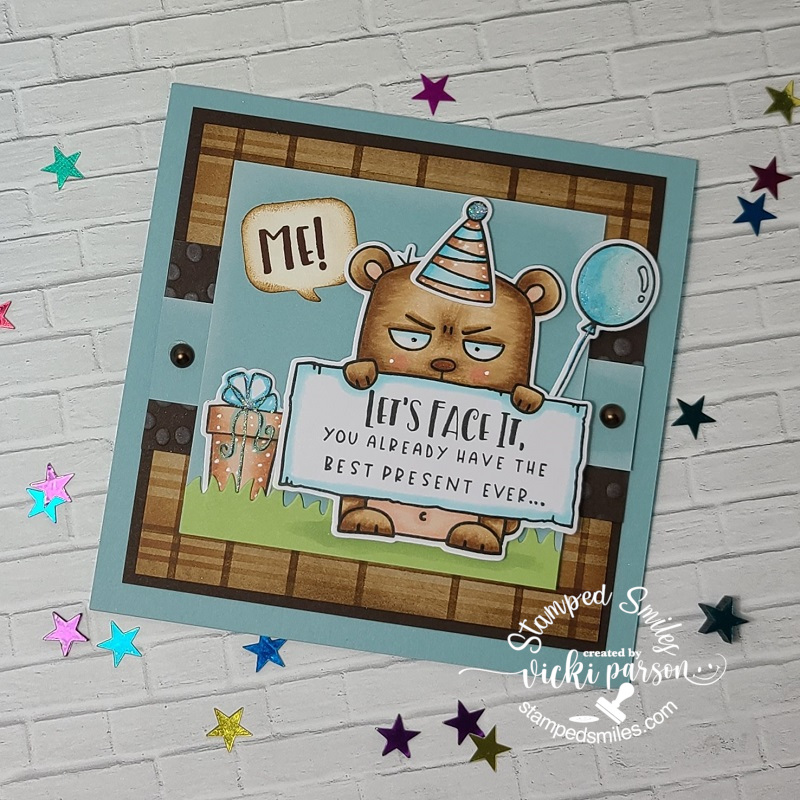
I have to chuckle at this card for my son’s birthday as he is a fun-loving jokester that will appreciate this along with the fact that it’s a bear image. He was nicknamed “Bear” in his school years, so I thought these Big Grumpy products from Taylored Expressions would work perfectly for this! I’ve also used the Big Grumpy Birthday stamps to go with him along with the other products used in my video above.
For the sparkle, I’ve taken some Stickles Star Dust glitter and added to the birthday hat as well as the center of the bow in the present. I used a glitter brush pen over the balloon and bow. I added dots to his cheeks, hat and the present with a white gel pen. I forgot to mention in the video that I’ve added a couple of brown pearls to the blue strip so that I added something from the “can do” list for the Crafty Chefs recipe!😉
I really hope that this post was helpful as well as enjoyable for you and that you received some benefit for taking the time to read over it. I know that I will be looking forward to seeing what my other crafty friends have to share and inspire me with! I think there is something to learn from everyone no matter how long you’ve been doing it.
The power of practice simply means, to me, being able to refine your skills into something that you want to be better at, take in more information or take it to the limits of your ability. This is done by repeating often and over time to increase or add to your knowledge of what you’re trying to improve upon. If we are not trying new things, then we are not learning or growing as individuals.
Thanks so much for stopping by my friends and I’ll be seeing you again soon!
Hello friends! We are nearing the end of July and I wanted to be sure to try and get at least ONE “Christmas in July” project in before the month is gone, so I thought I’d keep things fun and simple as well as “kill 2 birds with one stone” so-to-speak!
Now we’re given one “must do” item from the previous chef to use on our recipe. My item from Nana Connie was *”die cut” and so here is the project that I’ve made for this month’s “Crafty Chefs” group:
I have used a scallop square (cut from gold metallic mirror cardstock) and stitched square die cuts for layers on my project here. I’ve taken this really cute elf image from the Christmas Elves Pairables digital set from Digi Doodle Studios on the front of my design.
I’ve printed out and colored the present from the same digital set along with another elf image (for his arm only) so that I could cut them out to make it look like he’s holding the gift. His cut out arm was popped up with foam tape. I’ve colored with Copic markers, added details with gel pens, liquid applique and Stickles glitter under his feet for snow affects. I also stamped extra snowflakes for the background as well as add three snowflake rhinestones for accents.
Here’s the Crafty Chef’s August Recipe:
MUST DO:
*Die Cut (can also use electronic machine like Cricut, etc)
Interactive (More than 1 fold eg: easel card, gatefold, etc.)
Specialty Paper (foil, vellum, glitter, etc.)
ribbon/twine/raffia
CAN DO:
Color an image
Add THREE of something
**add glitter/sparkle – (this one I’m passing along to the next chef)
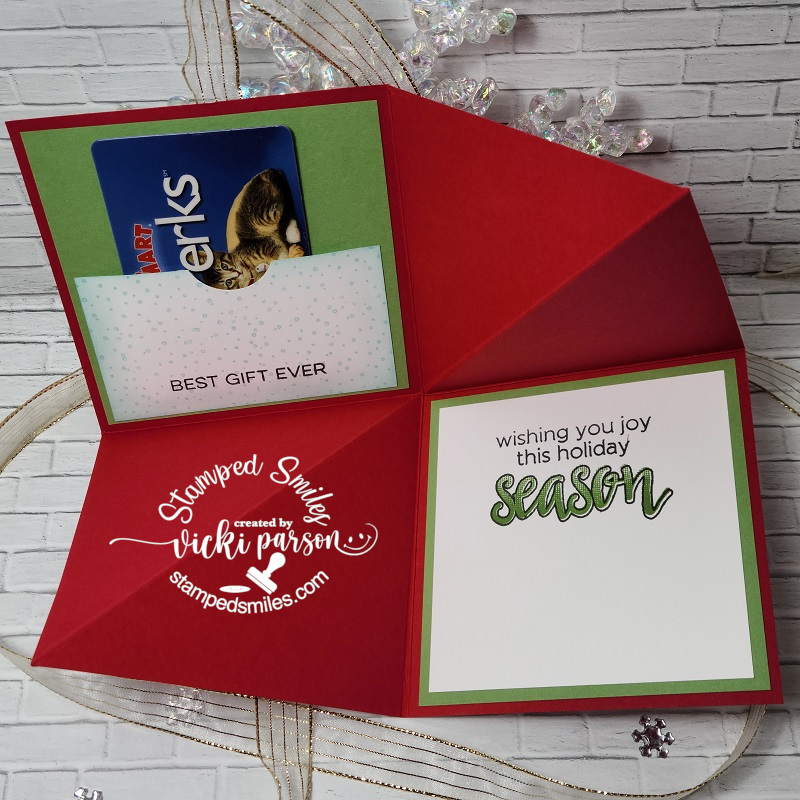
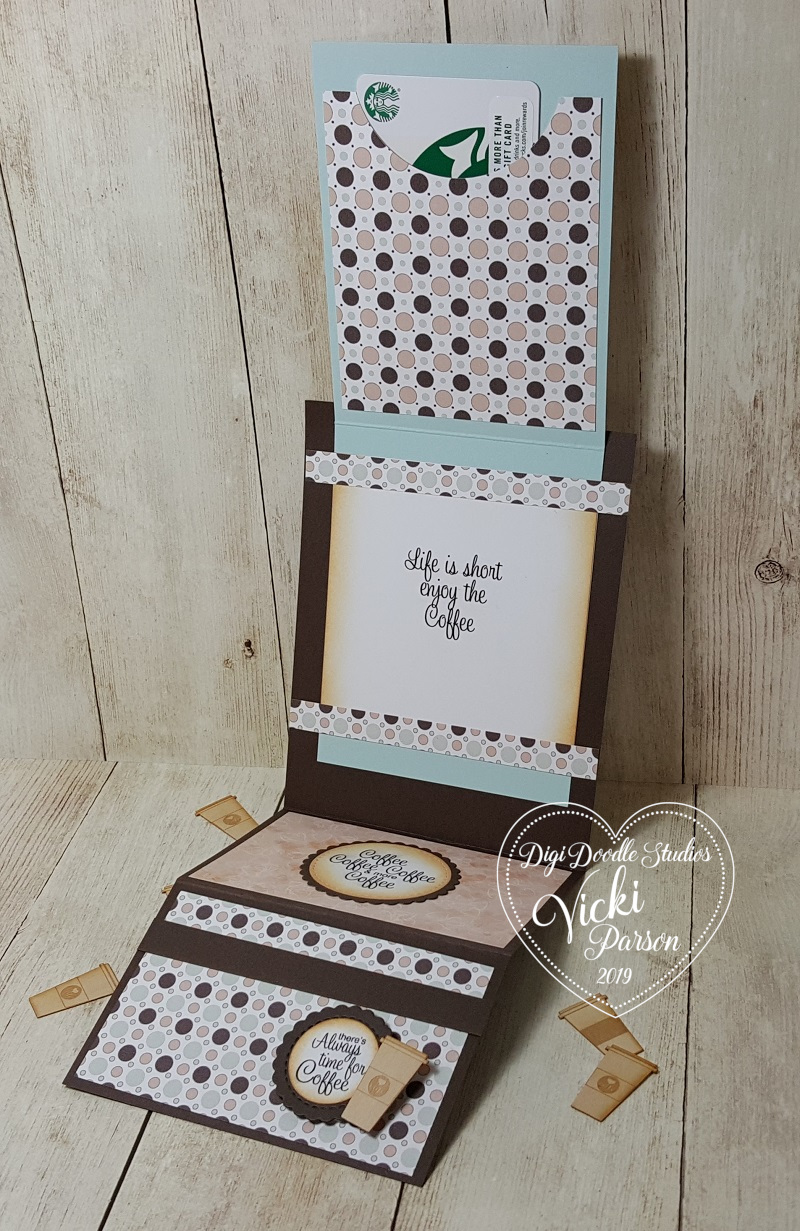
It doesn’t appear to be very interactive by looking at it, but when you untie the ribbon along the side, this is what it looks like when you open it up:
I have decorated two of the opposite panels with a greeting and then I’ve added a pocket to the top left panel so that I could include a gift card or cash to the recipient for Christmas! I thought it was a super quick and fun interactive design to do!
If you are interested in learning how this project comes together, I’ve made a video sharing the measurements on how it’s done: (CLICK HERE to see the video on You Tube.)
During this time of the year when it’s pretty warm over my way, it’s sort of a nice thought to think about some snow! Plus, it always nice to get a start on some Christmas too! (It’s not necessary for the “Crafty Chefs” to use a Christmas theme…it can be anything.)
I hope you’ve been inspired by my project today and have learned something fun in my video with it too! (I have even more interactive tutorials on my You Tube video channel if you’d like to see other ideas!)
Thanks so much for stopping in today friends and I’ll be seeing you again soon!
Hello friends! Really feeling the cold air around here, so I’m still thinking in winter mode and have another interactive winter card to share with you again today! (Please be sure to check out THIS POST to see another interactive winter card and video tutorial if you’ve missed my last posting!)
What’s a better way to embrace the cold than to create interactive cards in your nice warm crafty space, right?! So sit back, have a warm sip and get creative with me today!
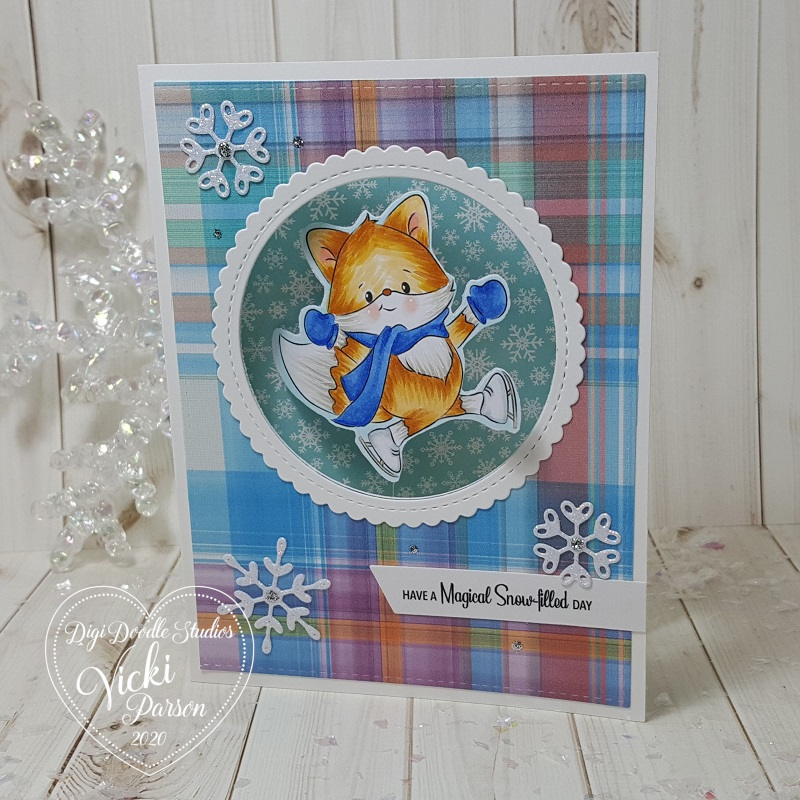
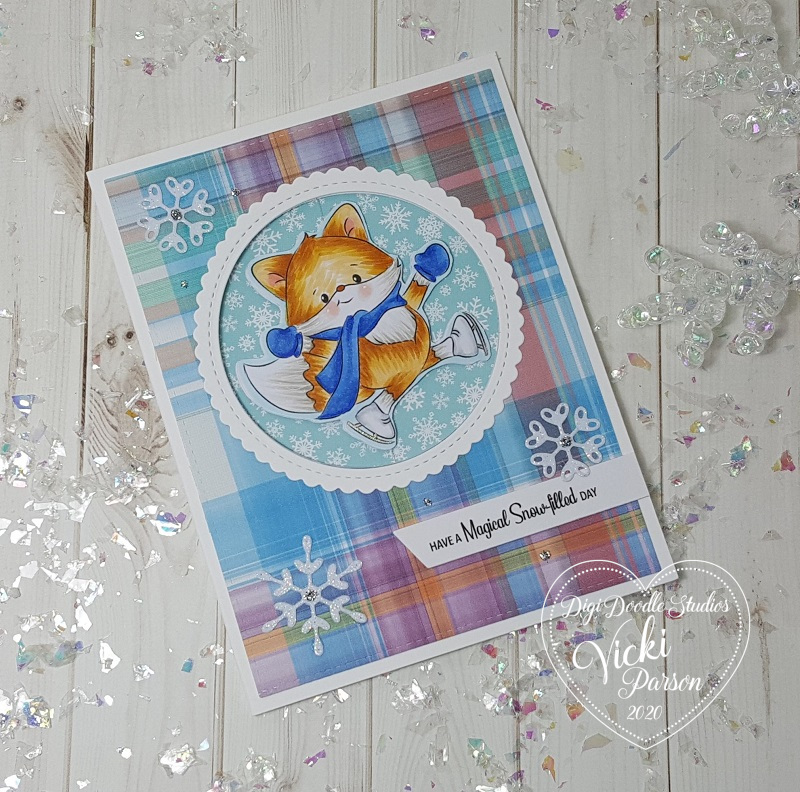
This cute little guy is so fun to watch him spin around doing his cool ice skating trick! I’ve used the Foxy Skater image from Digi Doodle Studios for my card here along with the Winter Plaids N’ Patterns Digi Paper Pack and Snow Days Sentiments set as well!
I’ve used several dies from My Favorite Things for the front of the card! I’ve cut out the plaid papers with the A2 Stiched Rectangle die and mounted it over an A2 sized side folding white card base. The spinner “window” was cut out with a Circle die that was also used to cut the center for the Scallop Stitched Circle frame around the opening. The sentiment was printed out and cut with the MFT Slanted Banners die (not finding link in store). I’ve also used MFT dies for the snowflakes (also not shown in store), that was cut from some Brutus Monroe Fallen Snow Glitterstock. I’ve added some silver Stickles to the centers of the snowflakes and dotted around the front of the card.
I’ve also used some snowflake papers for the inside area of the card from the Candy Land Paper Pack from MFT as well!
Check him out below as he spins around:
What’s different about this particular spinner card is how I’ve used a single digital image to create the front AND back of this Foxy Skater guy!
To see how I’ve put together this card for the spinner action, check it out in my video below or you can watch it on You Tube HERE:
I still have this card along with the other interactive card from my last post sitting here on my desk playing around with them! Not sure I can give them up quite yet as I’m having fun!! LOL!
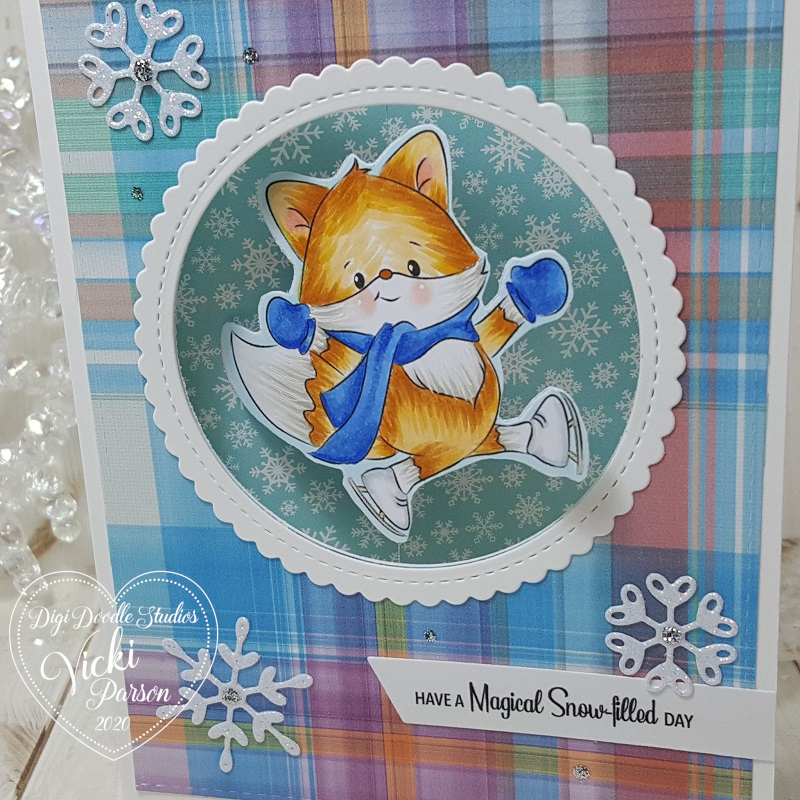
Here’s a closer look at the cute “Foxy Skater” guy that twirls around on the card. I was going for a bit of a textured look on his fur, so I also used a white gel pen to mix in some white fur on his cheeks, chest and tail areas. I’ve also used a gel pen for the cheeks and a metallic gel pen for his skate blades. It was a little more time consuming to color in two fox images, but as you can see, it’s totally worth having both sides for this spinner action design! 🙂
To flip the image in the opposite direction, I used Word doc. on my computer, copied the original image so that it was the exact size, pasted him again and then used the “rotate” setting to flip him in the opposite direction.
Check out the video to see how I was able to fussy cut him down for my card design.
I hope you’ve enjoyed my spinner card today and that the video is helpful for you to create your own fun version during the wintry cold months ahead of us!
Thanks so much for stopping in today my friend and I’ll be seeing you soon!
As I mentioned in my last post, it’s really cold and snowy over my way so I thought I’d join in with the winter season and have a little interactive fun in my craft room! (Where it’s much warmer inside! LOL!)
I have used some Digi Doodle Studios products to create this really fun interactive card design:
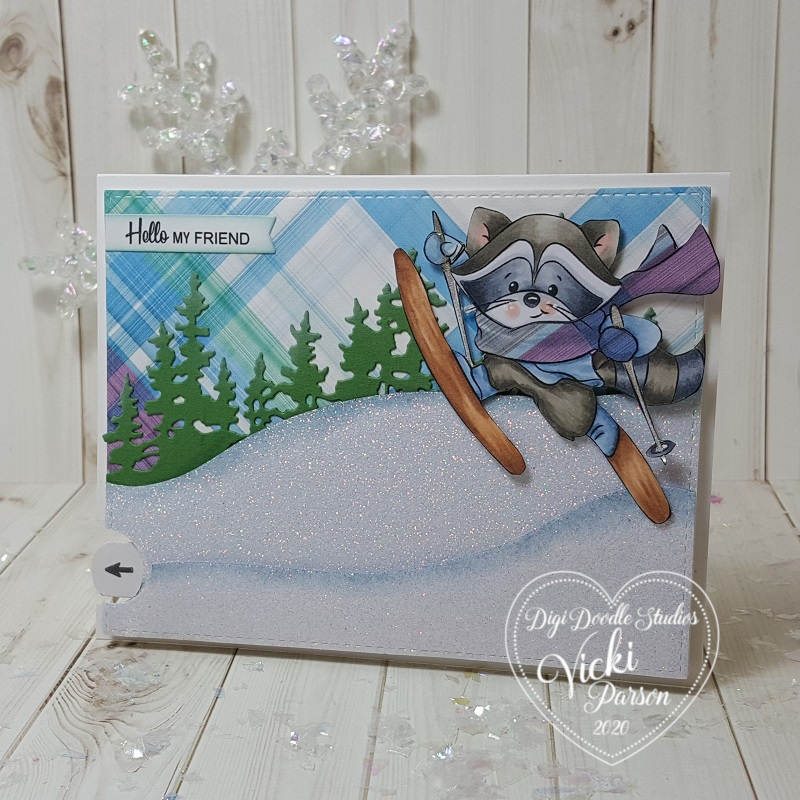
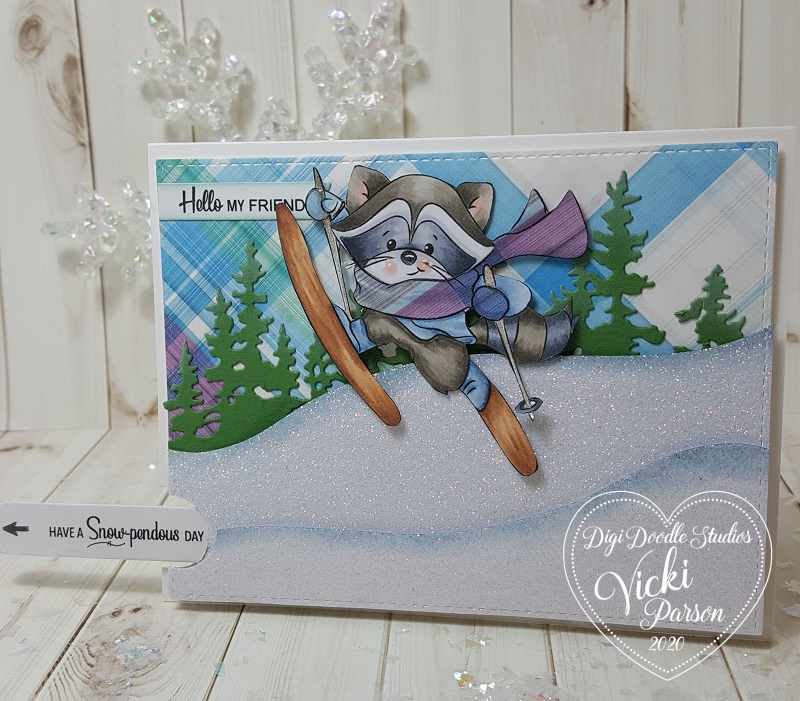
This cute little critter is just having a blast! 🙂 This card was so fun to play with and I couldn’t put it down! This cute critter is the Skiing Bandit Raccoon digital stamp from Digi Doodle Studios.
I’ve colored him up with my Copic markers and used a glitter silver gel pen to color up his skiing poles. He was fussy cut out with scissors. You will notice that his scarf and mittens resemble the background papers too, which were paper pieced from the Digi Doodle Studios Winter Plaids N’ Patterns Digi Paper Pack.
To create the scene, I’ve die cut some ‘hill slopes’ with a die cut, but you could use just scissors to cut one yourself. I die cut a set of trees for the background and ended up inking up the edges of the snow hills along with the banner sentiment at the top.
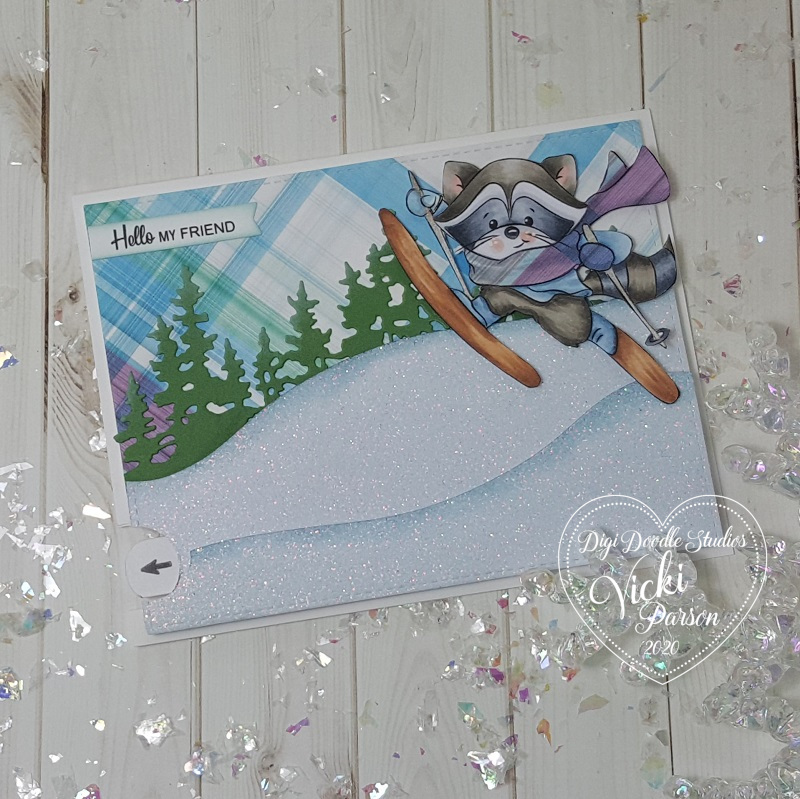
What’s fun about this card is that when you grab that little arrow at the bottom left of the card, this little skiing bandit starts flying down the glittery snow hills!
If you’d like to see how this card moves along and how to create one for yourself, be sure to check out the video below or watch on You Tube HERE!
I thought that the invisible way he flies over the hills along with the idea of how to create your own slider mechanics with scraps is something fun that anyone can put together with items they have on hand!
And of course here’s the view of him flying down the hill as the arrow slider tab gets pulled from the card! The pull tab slider sentiment comes from the Digi Doodle Studios Snow Days Sentiments set, which is what I’ve also used at the top front of the card.
For the sentiment on the pull-tab slider, I’ve taken a marker and underlined part of the sentiment and added an explanation mark on the end.
I also decided to stamp a black arrow at the end of this slider so that when it’s tucked inside, you can see that arrow so the recipient knows what to do! You could of course just use a pen to draw your own arrow as well.
I hope you’ve enjoyed my interactive slider card today! I’m still having fun pulling that skiing raccoon over the snowy hills! LOL! I think this would be a really fun card to send along to a friend for a smile during these cold months, don’t you?
Thanks so much for stopping in! I’ll be seeing you again very soon!
Good morning friends! Aaah! It sounds like a great morning for coffee, doesn’t it?! Well it sure does to me anyway! Today, my post is all about coffee…so grab yourself a cup, sit back and enjoy!
I’m so excited today to share my post with you because Digi Doodle Studios is a first-time sponsor for the Coffee Lovers Blog Hop! There are lots of fun coffee themed products in the store and I’m thrilled to be sharing some with you today:
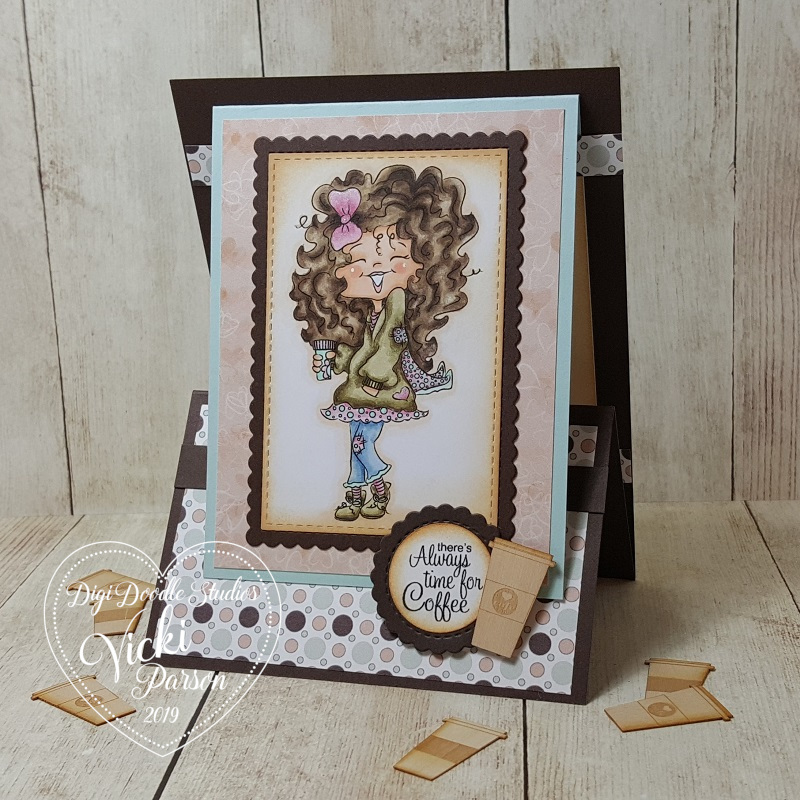
Isn’t she just adorable with coffee in hand?! This image is called “Ginger” from Digi Doodle Studios and I’ve got her all-colored up front and center of my Z-Fold Gift Card Holder.
If you have ever made a Z-Fold card, then this is something with a little bit of extra added fun with a gift card holder pocket on the inside, plus you can see how the card nicely displays on the front which is perfect for popping into an envelope to mail out to your coffee loving friend!
The papers that I’ve used for this work perfectly with the theme today which are also from Digi Doodle Studios called Coffee Break Digi Papers. (I love that I never have to worry about running out of my favorite pattern!!) There are also several sentiments from Digi Doodle Studios used on my project called Coffee Anyone Sentiments.
*If you want to see a video with detailed instructions on how to make one of these Z-Fold Gift Card Holders along with a sharing of the full collection of the digital papers that I’ve used on my project, check out the video below or CLICK HERE to view it on You Tube:
This is such an easy and fun project to put together especially for the up-coming Holidays, but as you can see this is very neutral so that I could easily use it for most any time of the year.
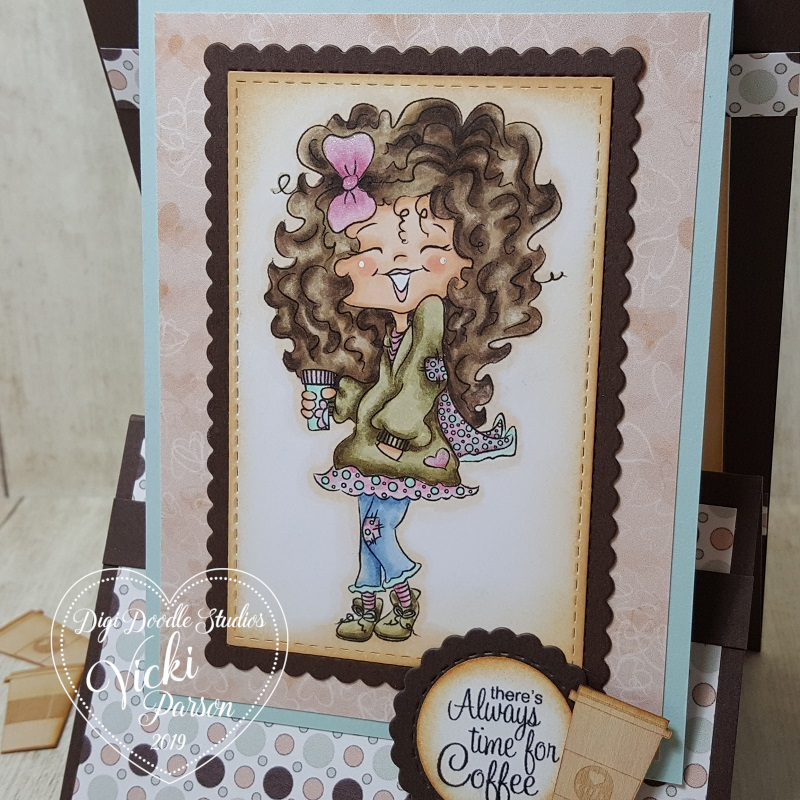
Here’s a closer view of “Ginger” and how I’ve colored her up with Copic markers. Of course, if you know me, I had to add a bit of sparkle somewhere. I took a glitter brush pen and added some sparkle to her pink bow, the heart on her coat and the lid and flower on her coffee cup.
I die cut her out with a stitched rectangle die and then layered a piece of brown cardstock die cut with a scallop rectangle die. For the around the edges of the image panel as well as the other sentiments I printed out, I sponged some Tea Stain Distress Ink around the edges. The sentiment were cut out with a stitched circle die and then layered with a piece of brown cardstock cut with a scallop circle die.
To keep the image panel in place, a foam dot was used at the bottom panel so that when you pull up on the flap it opens up:
And this is what is so fun, is that when you flip up the front panel, you see how it opens up with the fun coffee sentiments inside and the surprise gift card holder at the top!
I have an urge to go to Starbucks now! LOL!
I hope you’ve enjoyed my fun Coffee themed project today as well as the video tutorial on how to make one yourself! I’d love to see yours if you make one! If you have any questions about anything, please let me know!
Now to sip on some more coffee and join in on all of the coffee inspiration today! Thanks so much for stopping in and I’ll see you again soon!
As You Like It – Favorite Papers and Why? – Digital papers because I never have to worry about running out of my favorite pattern and I don’t have to worry about storage!
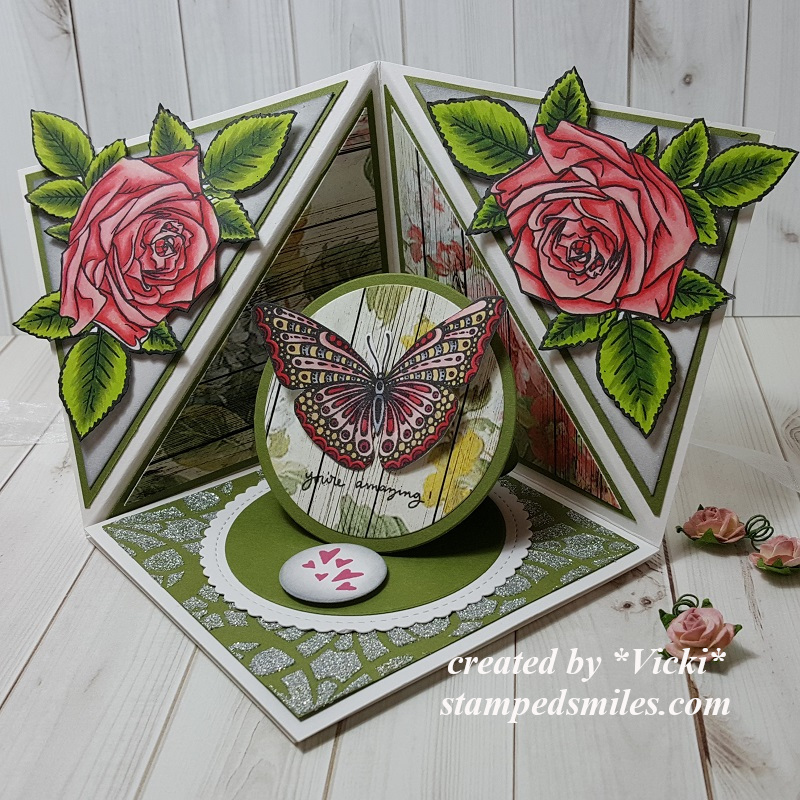
Today I’m sharing the Triangle Corner Pop Up Card. I have actually received several messages and comments that people wanted to see a video tutorial on how to make one. So I thought I would come up with a version that I could share to show the many different variations that you can come up with and the fun you can have with it!
This style is a much more elegant approach which is much different than a past creation I put together. I love that you can change the look and have fun playing with different stamps and elements to fit inside the design!
For this one, I have taken the Rose and Butterfly stamp sets to stamp and Copic color. I fussy cut out the images on my design. I’ve used Jurassic 100# and White 100# cardstock. The decorative paper is from the Rustic Florals paper pad. I stenciled the bottom of the Jurassic panel with a stencil using some Unicorn Horn Glitter Glaze. Both of the rose images along with the small heart circle on the easel card were popped up with some foam tape.
For the circle easel design, I’ve cut out a scallop circle with the white cardstock in the size that I thought would fit within the design. Then cut the body of the card with other circle dies in the Jurassic cardstock and then the front with some more of that Rustic Florals paper that I’ve used in the background. The sentiment below the butterfly and the hearts on the small circle were stamped from same stamp set. All of the white panels (with the exception of the scallop circle) was ink foam blending with some grey distress ink. To keep the card “locked” in this position, I’ve used the Mini Disc Magnets.
If you are interested in learning how to create one of these cards for yourself, then please be sure to check out my video below. CLICK HERE to view on You Tube.
These cards can look really intimidating, but once you see the measurements of how to put one together, they’re really easy and fun to make!
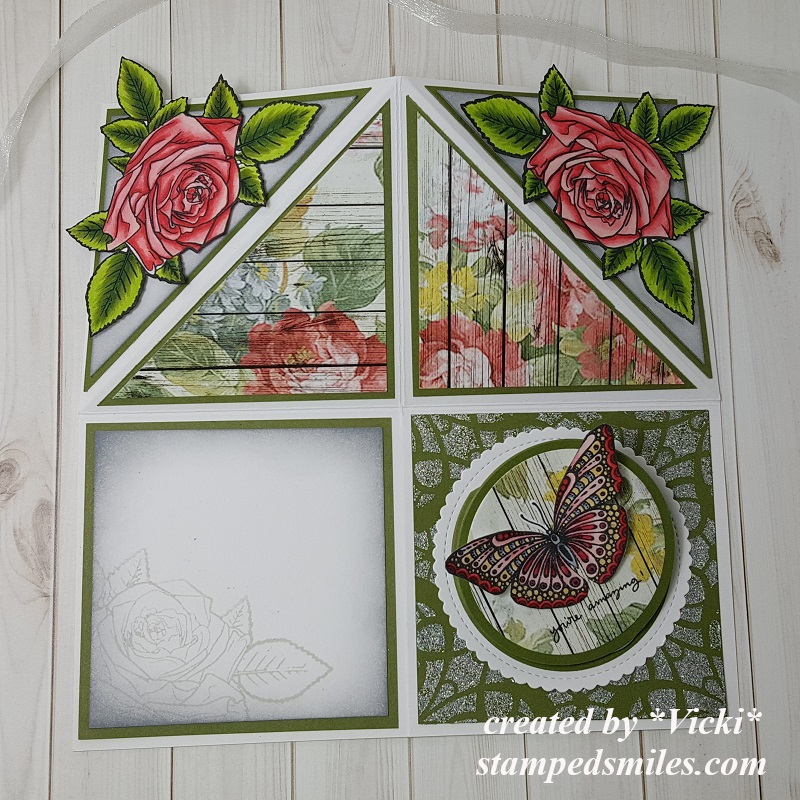
Here’s what the card looks like completely opened up. You can see on the left bottom panel that I’ve taken that rose from the stamp set again and stamped it in the corner with some grey ink after ink foam blending around the edges of it. This will be the area that I’m leaving for a personal message.
To fold it down to a 4″ square card that’s close you will start by folding down on the top and then fold it over from the right side to the left. This will completely close it up.
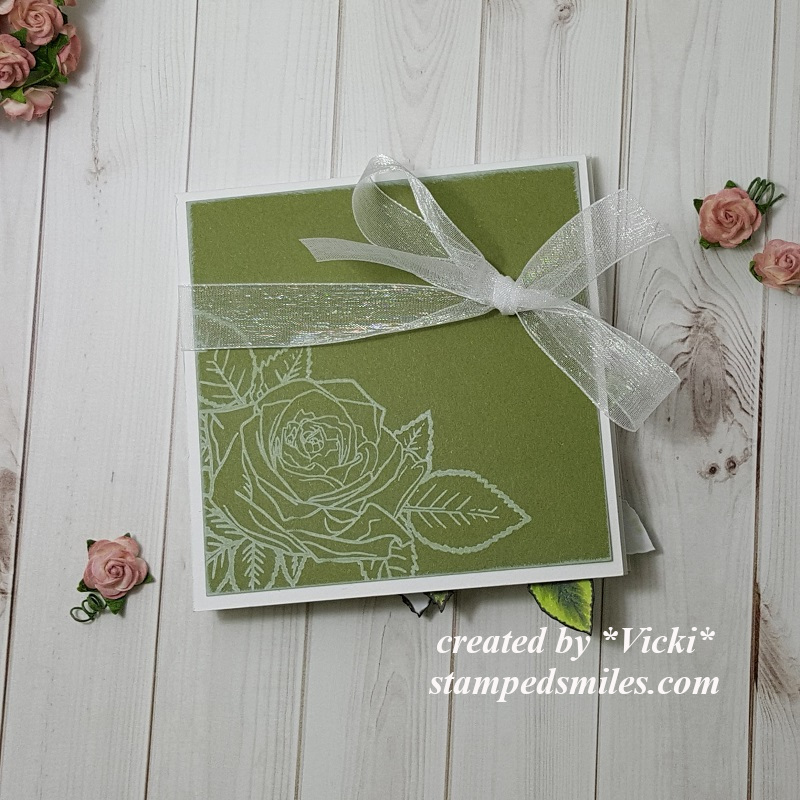
Here you can see that the card is completely closed to a 4″ square size minus the rose leaves sticking out which I don’t mind.
I took another panel of the Jurassic cardstock for the front of the card and sponged around the edges of it with the white Ink and then also stamped the rose again in the corner of it. Because I had several dimensional and extra layers on this card, I had to use a ribbon to tie it together to help it stay closed up. You might need an envelope that is slightly larger than an A2 envelope, but if you use less layers and dimension, it should fit in an A2 size envelope.
Hope you’ve enjoyed my interactive card and tutorial today! Thanks so much for dropping in with me!