Hello friends! Really hope your week is going well. My thoughts go out to all of those that are experiencing difficulties in their life and hope things turn better for you very soon. I hope to bring a smile for you today.
I’ve really had such a fun time playing around as a guest designer this month for Inky Stamper and this will be my final project for them this month. Chelsea has some really cute stamps and I hope you’ll check them out! (I have the badge on the sidebar of this blog if you need to come back later to find it. Just click on the badge to get to the store.)
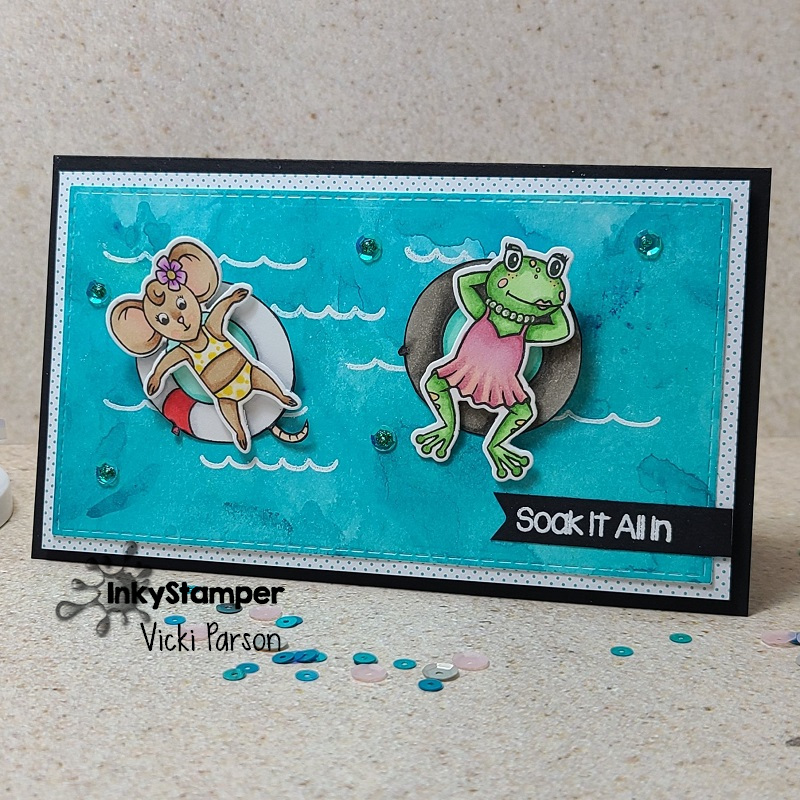
For my final project, I’ve decided to create a mini slimline card with an interactive component! If you’re not familiar with a “mini slimline” size, you take a piece of cardstock measuring 6″ x 7″ and then fold it in half on the 7″ side so that your card base is 6″ x 3.5″. I really don’t mind any size of card really as I have been known to make my own envelopes too. But I first learned about this “mini slimline” size from Taylored Expressions as she has many products in this size including the envelopes. (I have used one of the “slimline stitched dies” from TE to cut one of my panels on this card.)
I’ve used BOTH of the Chaise Lounge stamp set with “Freida the Frog” (as she is named) as well as the Splash stamp set with “Rosie” (as she is named) from Inky Stamper on my card here today! I think they’re so CUTE! Ever have those moments with a friend floating around in the swimming pool and just soaking in the sun and some secrets?!! LOL! That sounds like a fantastic summer event to me!
For the “water” background, I took some Bristol Smooth cardstock and white heat embossed the “water wave” image (both stamp sets have one of these images in it). I took out some of the Nuvo Shimmer powders from my stash and made a fun watercolor panel with them. I haven’t used these in quite some time, so it was fun to play with and I forgot how shimmery they are! Obviously, the white embossed waves resisted the watercolor.
I cut out the panel with the TE slimline stitched die and mounted it over a piece of dotted paper from the Doodlebug Swiss Dot Paper Pad. I stamped and colored the images, die cut them out and popped them up over the floaty tubes. (Remember the tip about using a white gel pen to go around the edges to get rid of those lines you see when you cut them out.) I then punched a hole on this watercolor panel where I wanted the images to be, so they weren’t too close to each other to freely spin around! Inky Stamper has these awesome interactive elements called “Clear Move-Its” and I LOVE them! They snap together and voila!
I popped up this panel with foam tape and then layered it over my black mini slimline card base so the spinners could move freely. I’ve also added a black sentiment banner that was white heat embossed with the Chaise Lounge stamp set.
I couldn’t resist adding a bit more “bling” so I also pulled out the Picket Fence Mermaid Water sequins being careful not to interfere with the spinners and then filled the centers with some Stickles from my stash. I could just keep spinning these all day long! LOL!
Really hope that you’ve enjoyed my projects this month as a guest designer for Inky Stamper and you’ll pop by to check them out! Super fun stuff! (Be sure to join the InkyStamper Inkspiration FB Group for more fun!) I’m sure I’ll play with their stuff again in the future!
Thanks for popping in today and finding my posts! Glad you’re here!
Challenges to play in for fun:
- Dragonfly Dreams – Summer Fun
- Penny’s Paper-Crafty – Anything Goes using Paper