Hello friends! Happy Saturday!
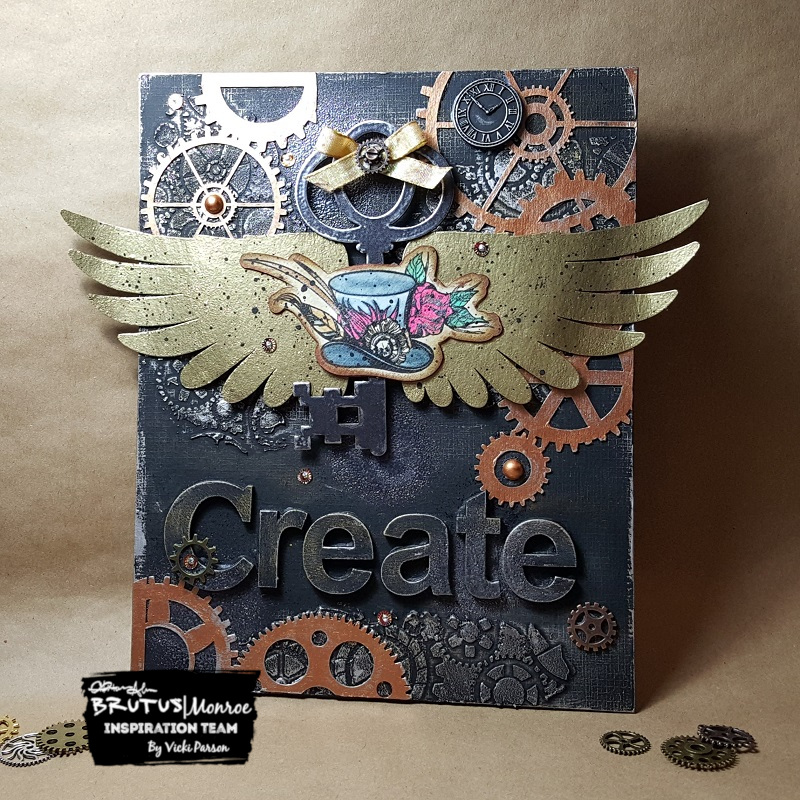
Oh I had so much FUN playing around with all of the really cool “Steampunk” products! Today, I’m sharing this mixed media canvas project that I made:
This was so much fun to just get “messy” and enjoy a different creative process other than making a card! If you’ve been around my blog for a while, then you’ve probably seen me share a different project from time to time. Sometimes I just like to ‘change gears’! Hahaha!
So I had this old 8″ x 10″ canvas laying around and thought it would be cool to take several chipboard pieces I had and make something. I started off by taking some wooden letters from my stash and gluing those on. I then took a stencil (gears) and randomly added embossing paste through it over the canvas. Once dried, I then painted over everything with some black gesso.
I’ve used several metallic paints from my stash and using my “finger tool” I went over all of the textured areas of the canvas and along the edges. I also used the paints to paint over the Chipboard Gear Background which was randomly cut out with my scissors and glued randomly over the canvas. At first I was thinking it was weird to mix the different color metallic together, but then thought that steampunk can sort of be like that anyway.
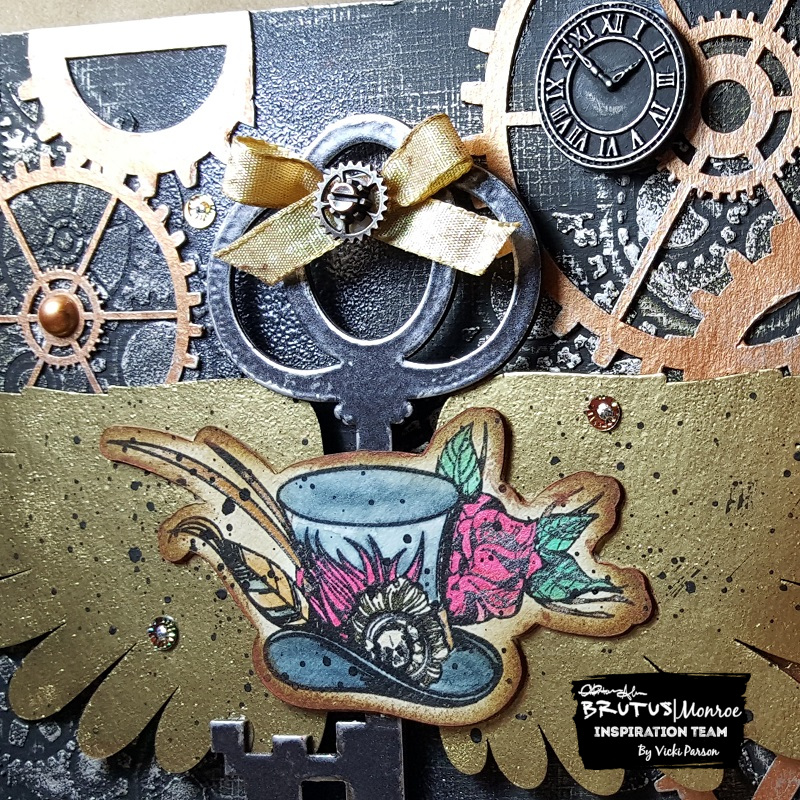
What’s hard to capture in a photo is that Gilded Sparkle embossing powder over the wings! It’s stunning IRL! I’ve heat embossed the Chipboard Wings with it and then I heat embossed the Chipboard Key with the EP. I went around the edges of it with some silver metallic paint so that it showed up better against the black background.
For the image, I stamped the hat with black Ink onto an already cut out white Cardstock from the Steampunk Cut file. I colored it up with several different Aqua Pigments and sponged around the edges of it with some brown ink. I also took some Copper metallic paint and went around the edges too. I took the heat embossed wings along with that hat image and splattered them with some black paint as well.
The wings were attached onto the canvas with some black foam tape and then I curled the ends of them that are hanging off the edges. I attached the heat embossed key in the center of the wings and then added the colored image over top.
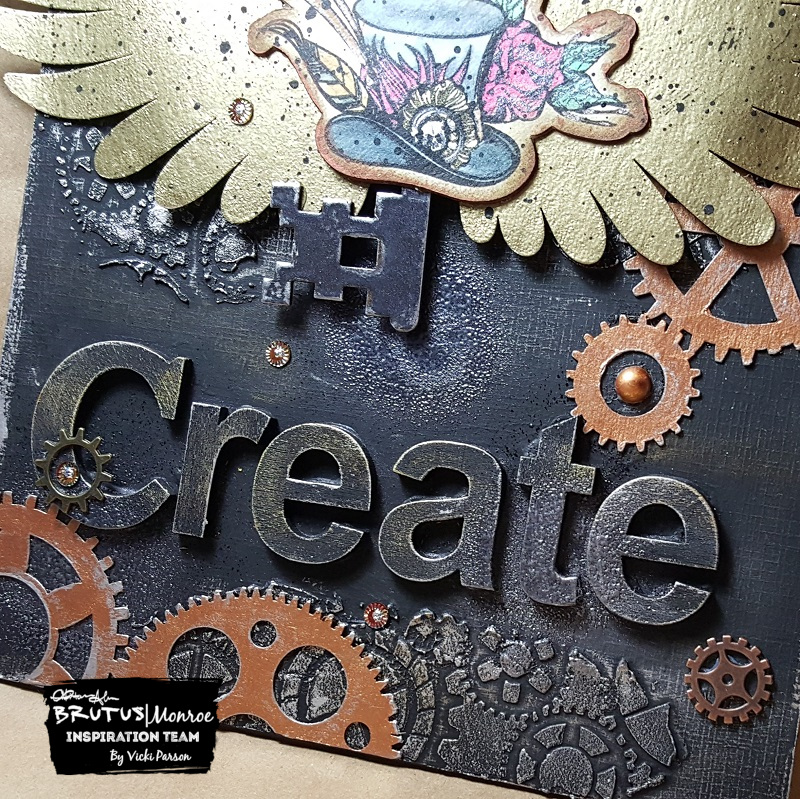
For a little bit more texture on the canvas, I decided to take the EP to randomly heat emboss areas that were sprayed with water. The water was just so that the powder had something to stick to and then once heat set, I added more until I was happy with it. I like the look of the embossing where the spray marks are.
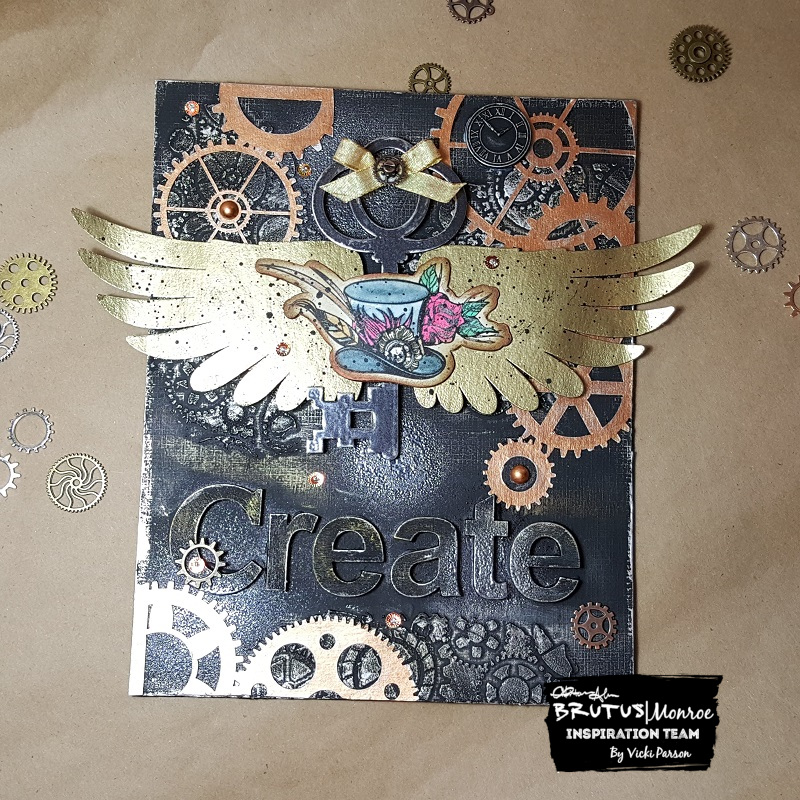
Lastly, to finish it off, I’ve used the metal gears, ribbon (tied in bow over top of the key), gold pearls (painted in copper metallic paint), and sequins – as well as another gear (attached in the center of the ribbon bow) and a clock button (painted with black and metallic paints) from my stash that was all glued on. I also added some silver glitter to the center of each sequins.
Hope you’ve enjoyed my “Steampunk Mixed Media Canvas” today and were inspired in some way.
Thanks for dropping by! I’ll see you soon!
Challenges:
- Crafty Gals Corner – Emboss It
- Creative Moments – Anything Goes
- A Inky Mess – Anything Goes Mixed Media
- More Mixed Media – Anything Goes (optional bright colors)
- A Bit More Time to Craft – Anything Goes