Hello friends! Hope you’ve had a great Fourth of July weekend and staying cool through this really hot week too! I had planned on scheduling a post or two while I was gone last month, but time just didn’t let me get there and I’m a bit behind, but I wanted to share a couple of masculine cards I made for some men in my life for Father’s Day:
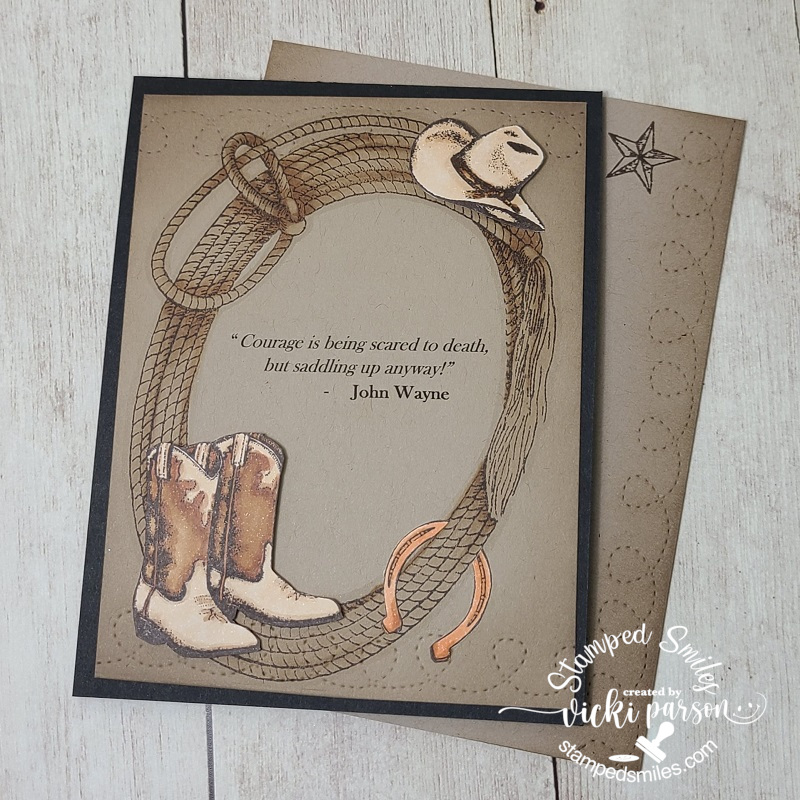
Up first is this card I made for my dad. He’s a huge John Wayne fan and so I thought it would be fun to print out one of his famous quotes for a card. After printing it out, I stamped the large rope lasso image around it from the Whimsy Stamps Cowpoke clear stamp set. I printed the quote over a piece of kraft cardstock and stamped with chocolate colored ink with the rope frame and colored it with Copics. I also cut the other images from the same stamp set over White Copic Blending Card and colored it with Copics. I just fussy cut them out with scissors and placed them over my card front with some foam squares. I cut a section of the horseshoe out so that it “appears” as if it’s hanging around the lasso and glued it over each side of the lasso.
I thought it would be fun to add some more details to mimic the boots by die cutting the loopy stitched borders from the Whimsy Stamps Straight Edger Die Set and then I ink blended around the edges with chocolate ink. I also did this with the envelope you see behind the card too.
He really liked this one! I remember as a child sitting with him sometimes and watching those really old “cowboy movies”. LOL
The next card I made was for my husband…

This card was PERFECT for him! Most of the time, the kids would always tell him that his jokes were NOT funny, but the fact that HE thought they were so funny is what made them laugh! 😂 And then he would claim that they were laughing or smiling, so he knew they liked them!😄
So, when I saw this Dad Jokes stamp set from Lawn Fawn, I knew it would be a good one to have on hand for cards with him. I kept this card a simple one with a grassy stitched border and then I used one of those woodgrain papers from Lawn Fawn and also die cut the LF Father’s Day Border using the same woodgrain paper for it.
I positioned the little chicks to the side with the *crickets* sentiment above them and then the other one laughing while the little chick with the tie is telling the “dad joke”. I popped up the speech bubbles with foam squares. You will also see that I’ve stamped another “dad joke” on the envelope with some ha ha ha next to it as well.
**Side note: My husband’s favorite “dad joke” from the stamp set was…”What’s brown and sticky?…A stick!“** He had to tell that one to the (adult)kids of course! 🙄
Hope you’ve enjoyed my masculine cards today or had a smile! Thanks for dropping in and I’ll see you soon!
Challenges:
 The Male Room – Monochrome (Top card only with brown tones)
- Alphabet – ‘G’ is for Giggle/humorous card (Second card only)
- Lil’ Patch of Crafty Friends – Anything Goes
- Corrosive – Anything Goes
- Pammie’s Inky Pinkies – Anything Goes
- Penny’s Paper-Crafty – Anything Goes using Paper