Hello friends! I hope that you all had a great Christmas! I’m still celebrating with my family over the weekend and happy to be with all of my loved ones for sure!
I have this really sweet image along with some news to share with you today.
For the news: This will be my final post as a design team member for Whimsy Stamps. I STILL adore Whimsy Stamps and of course will continue to use the products and promote the products and still use my affiliate link with them when I can, but my term has ended and it was time for me to move on is all…I will truely miss being apart of this wonderful team and working with my friends over there for sure, but will always remain friends of course!
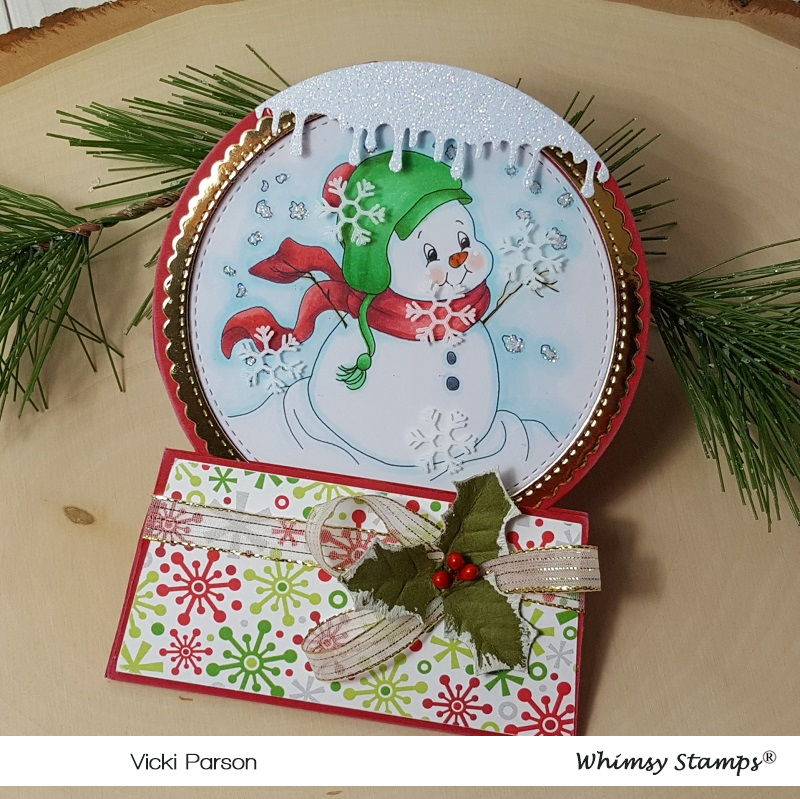
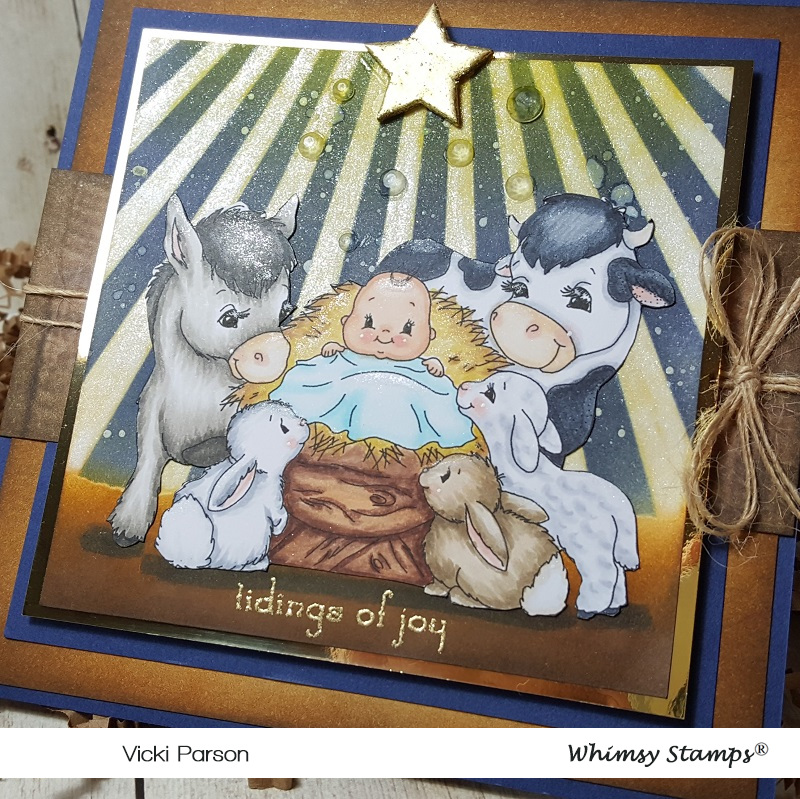
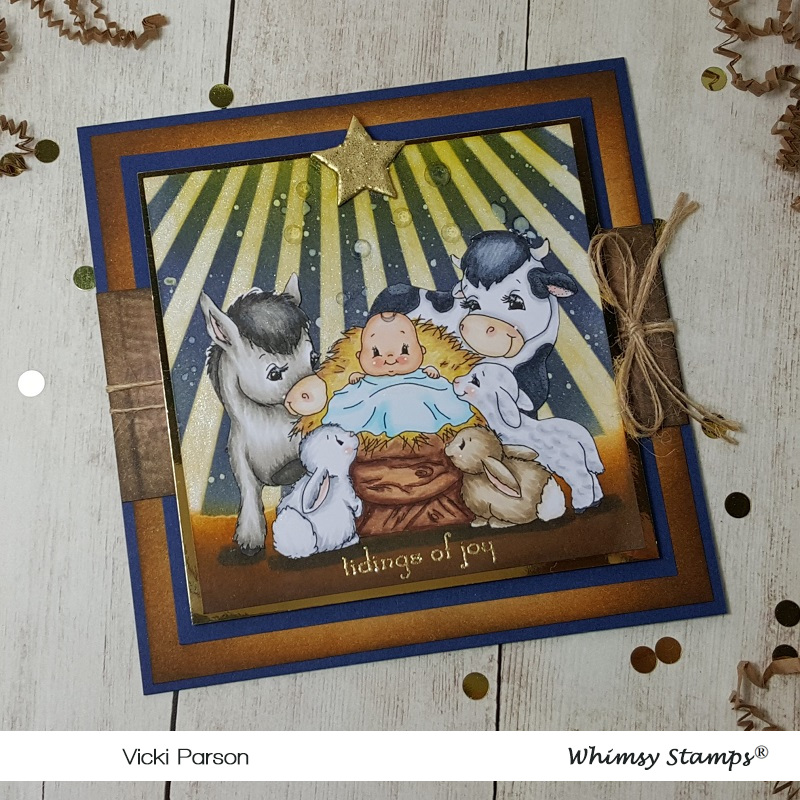
And, perfectly, this brings me to my card for today with this darling image. This card was made and sent to a lovely teamie for our Christmas card swap and I thought it was perfect to send along to her….

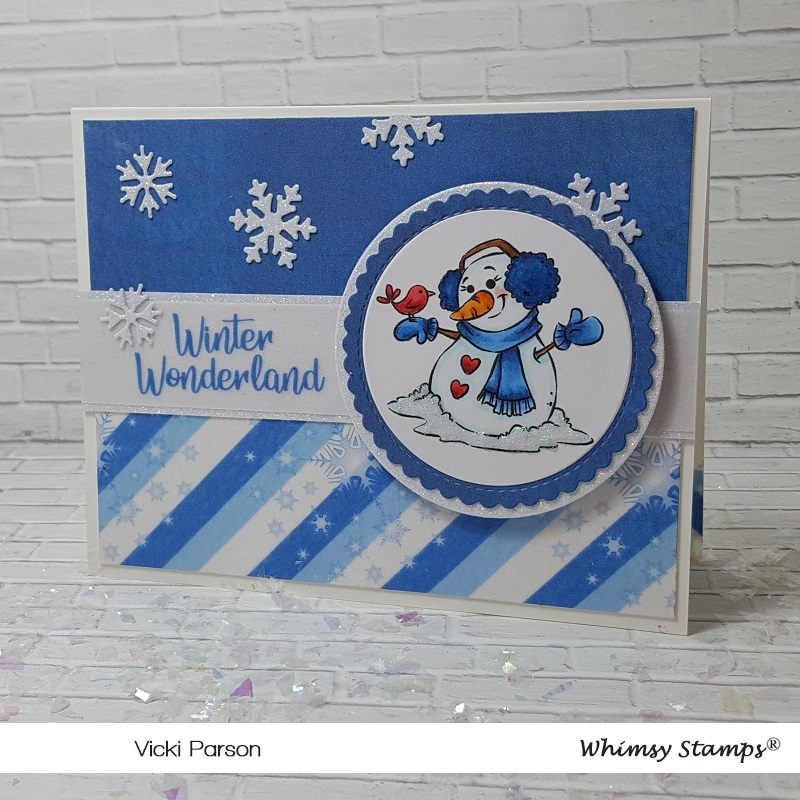
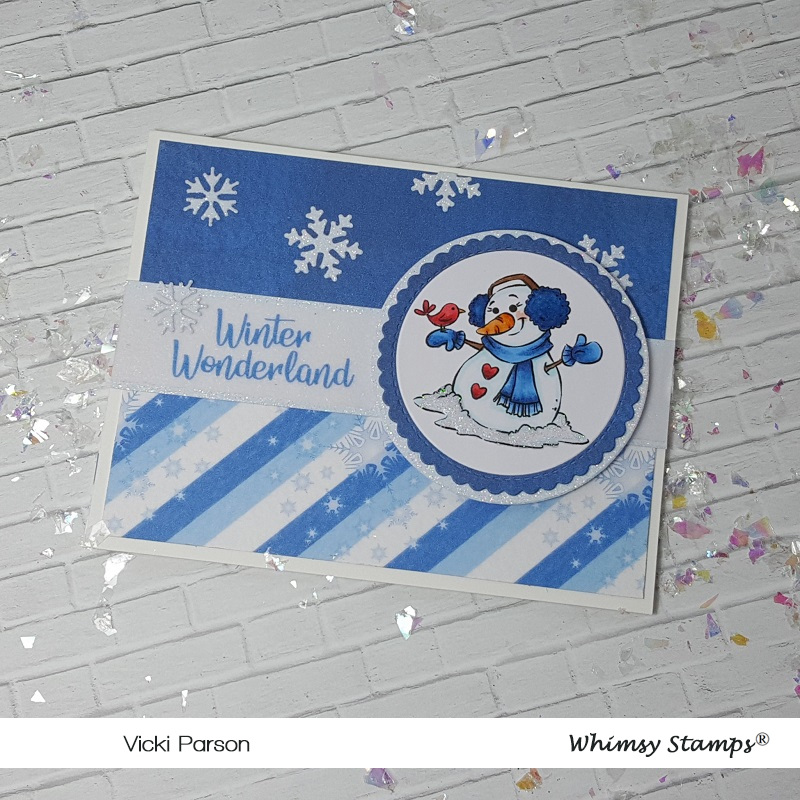
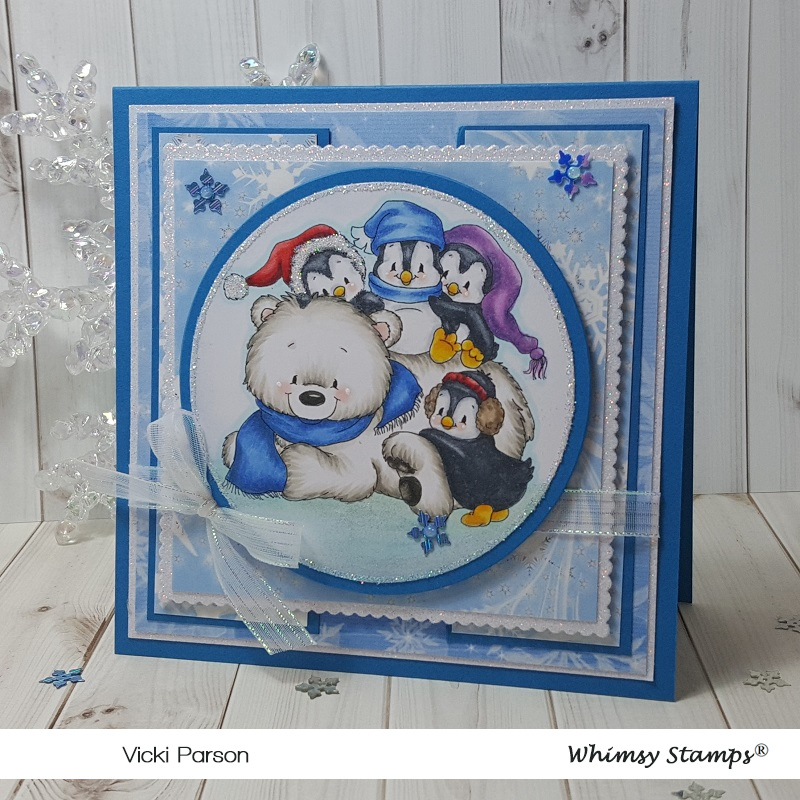
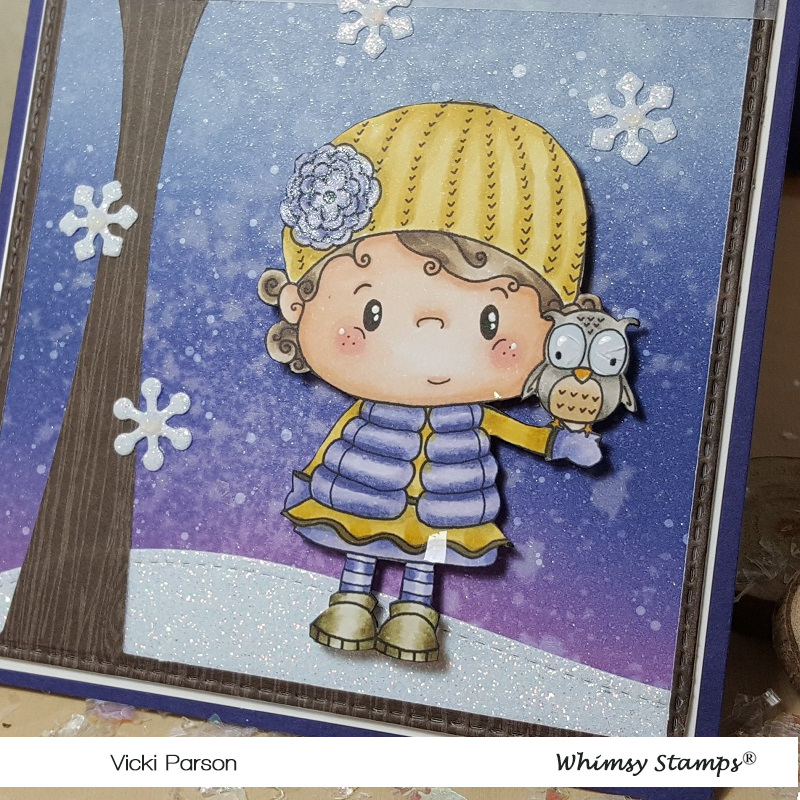
I have used this adorable Wee Stamps image from Whimsy Stamps called “Winter Friends“. I just fell in love with the sweetness of it all for sure!
After coloring up the image, I die cut it out with a stitched circle die and layered it over another blue die cut circle. I then took some “Fallen Snow Glitterstock” from Brutus Monroe and cut out a piece with the MFT Linked Chain Circle Frames die and attached that piece around the die cut circle image.
I wanted to pair this image to match up with the colors from the Whimsy Stamps “Christmas So Soft” Digital Papers Collection. I used one panel for the entire background base that was mounted over a blue 5″ square top folding card base. And then I used the pink strip from the same collection mounted over another strip of blue cardstock across the middle of the card wrapped with some silver metallic ribbon.
In the bottom corner of the card is where I stamped the greeting in black ink from the Whimsy Stamps Holiday Mini Sentiments clear stamp set. The circle image was mounted over top of the card with some craft foam and then I die cut some snowflakes from the Whimsy Stamps No-See All Seasons Tree die set with more of that Glitterstock that was randomly added to the card along with placing one in the center of the ribbon bow. I’ve also added a gem to the center of that snowflake as well.

Here’s a closer view of the coloring that I’ve done on this sweet image. I’ve used my usual Copic markers and also used a white gel pen for highlights in certain places. I covered the “holly berries” in her hair with a glitter brush pen and for the snow ground, I used a glue pen and then added some glitter over top of that for sparkling snow.

A perfect image to send to one of my special DT Whimsy friends! I hope you’ve enjoyed it as I really enjoyed creating it and sending it off to my friend too. 🙂
It’s NEVER a “good-bye”, but I’ll see you again soon my friends! HUGS
Challenges I’d like to enter this card for:
- As You Like It – Favorite Die and Why? (I am constantly using the circle, square and rectangle stitched dies because they’re nice basic shapes but also add that stitched detail along the edges to add more interest if needed.)
- Daring Cardmakers – Pretty Pastels Christmas
- Allsorts – Anything Goes
- Stamps & Fun = Creativity – Anything Goes
- Papercraft – Anything Goes
- Cute Card Thursday – Anything Goes