Hello friends! Last month was a very busy month for me and I know that I had mentioned a couple of times that I had some things that I was working on “behind the scenes”, so I thought I’d share what I’ve been doing.
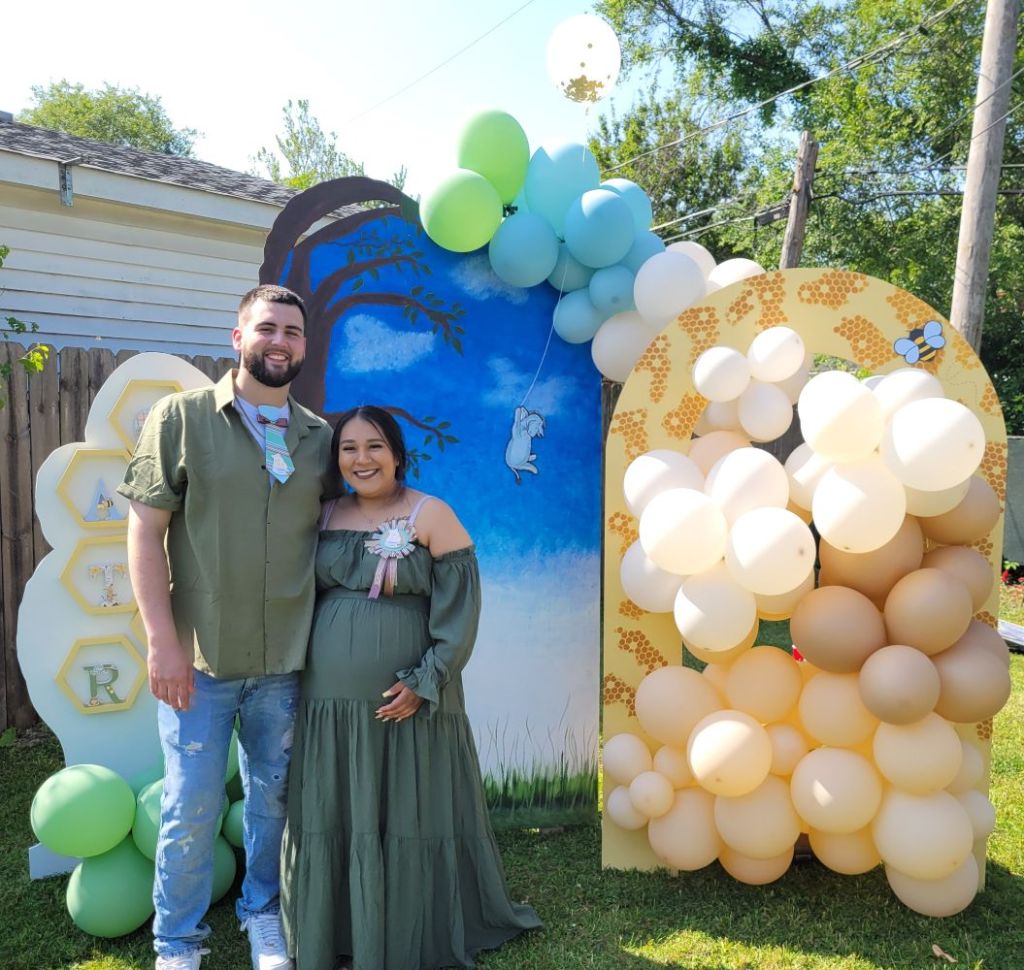
At the end of last year, my son surprised us with the news of a new grandchild coming! A few months ago, I was asked to help with some decorations for their baby shower and of course I wanted to help! Here’s a photo of the soon-to-be parents in front of a back drop that my husband cut out and I hand painted. My husband and I also put together the balloons around it:
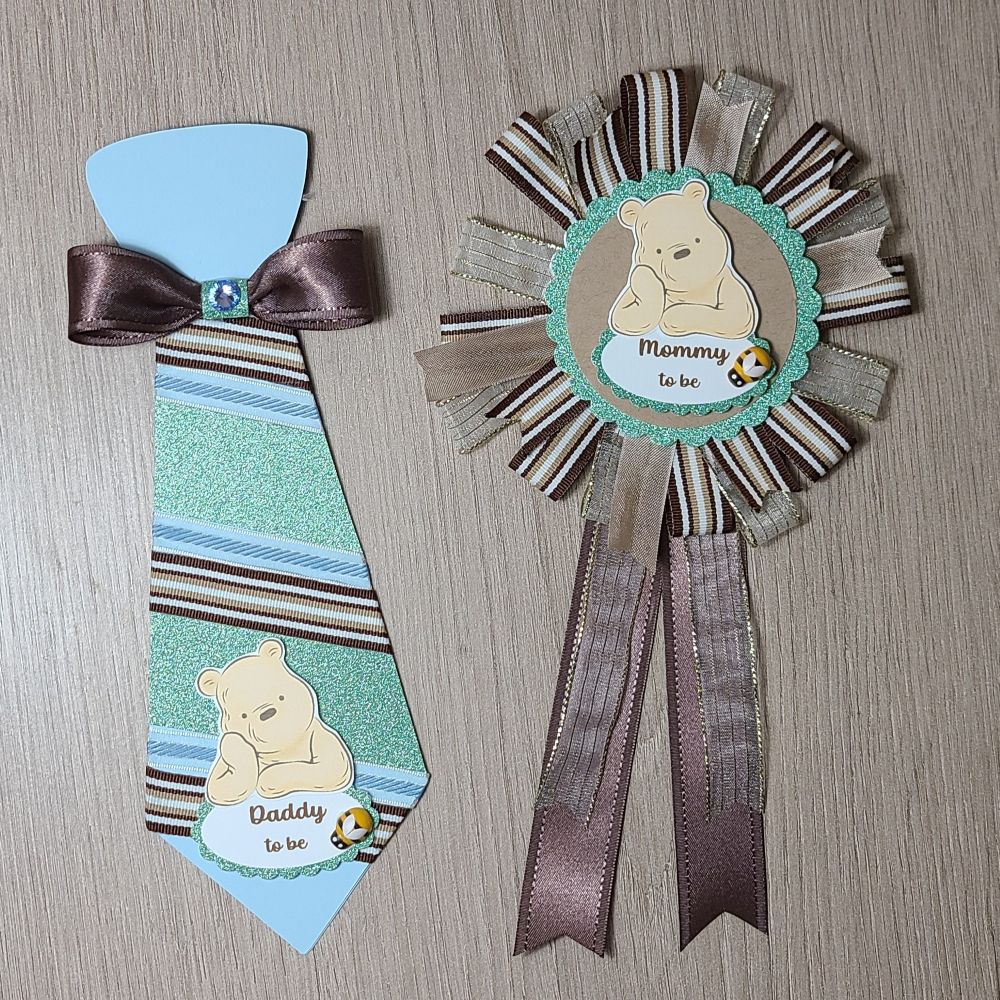
You may also notice, on the couple, they’re wearing a corsage that I made for each of them to wear. My son wasn’t too thrilled about wearing it, but he humored his mom. LOL
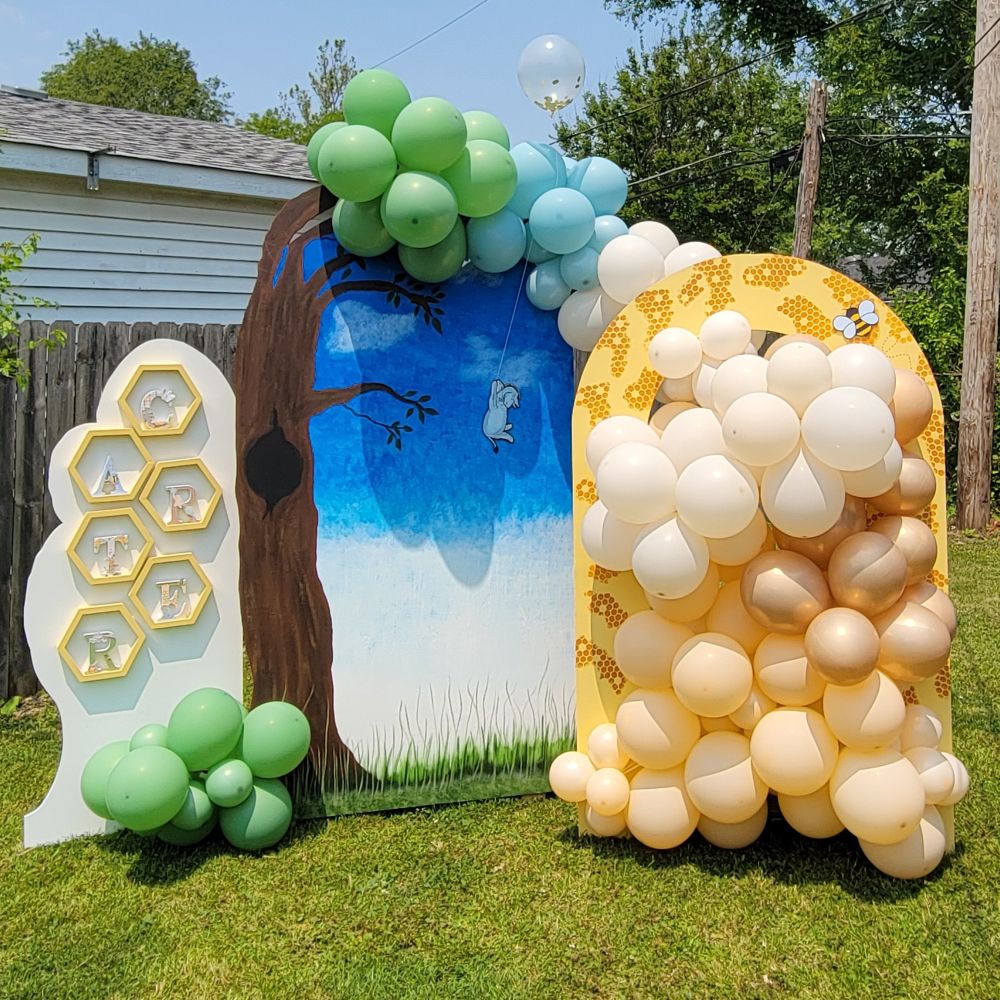
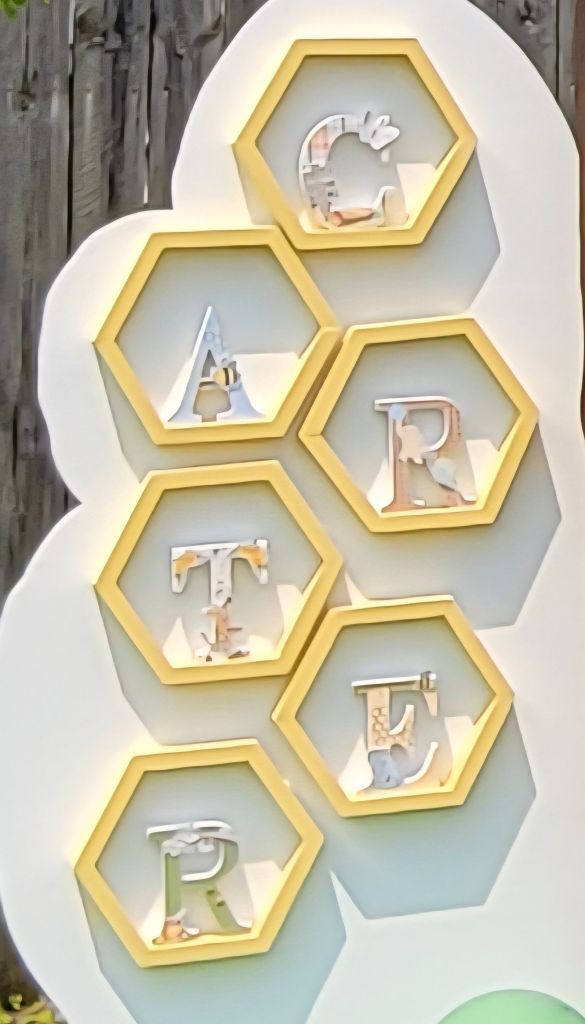
On the left white panel, There are hexagon shelves that my husband put together and there are wooden letters of the baby’s name. I decorated each of the letters with Winnie the Pooh papers and characters. I wish I had taken a better photo of them, but I tried to zoom in a photo with the gallery below.
You can see how tall each of the panels are. My son is over 6 foot tall. I don’t paint much, so painting something this large was a big undertaking, but I enjoyed the labor of love doing all of these things for them.
Below you can see all of things that I’ve made for the baby shower and there is a brief description with each photo explaining what it is. If you are on my website, please click on each photo to enlarge it and scroll just beneath it to read the description:
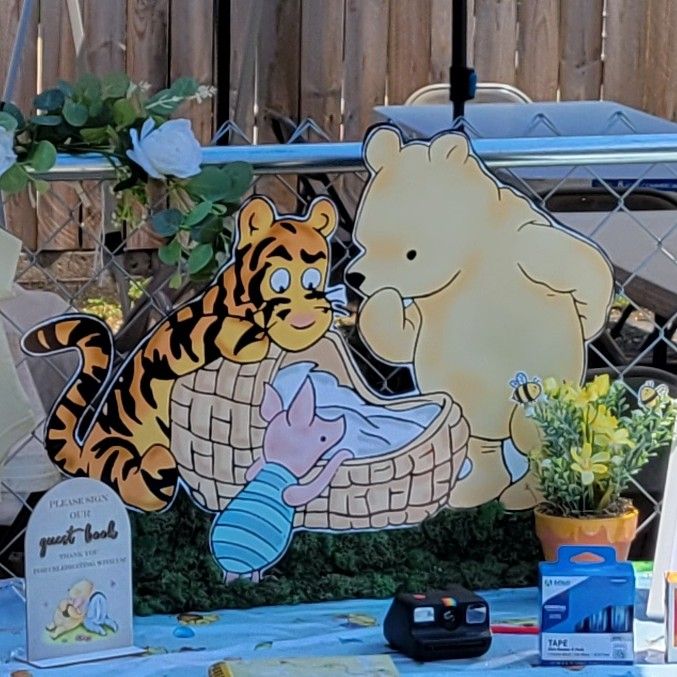
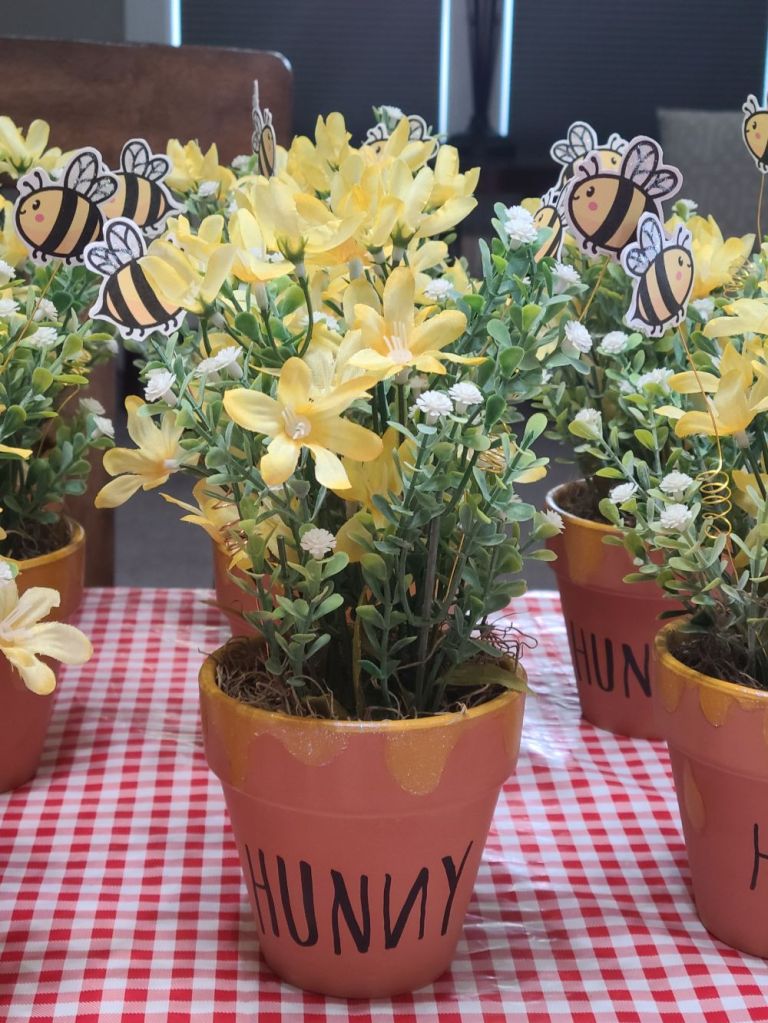
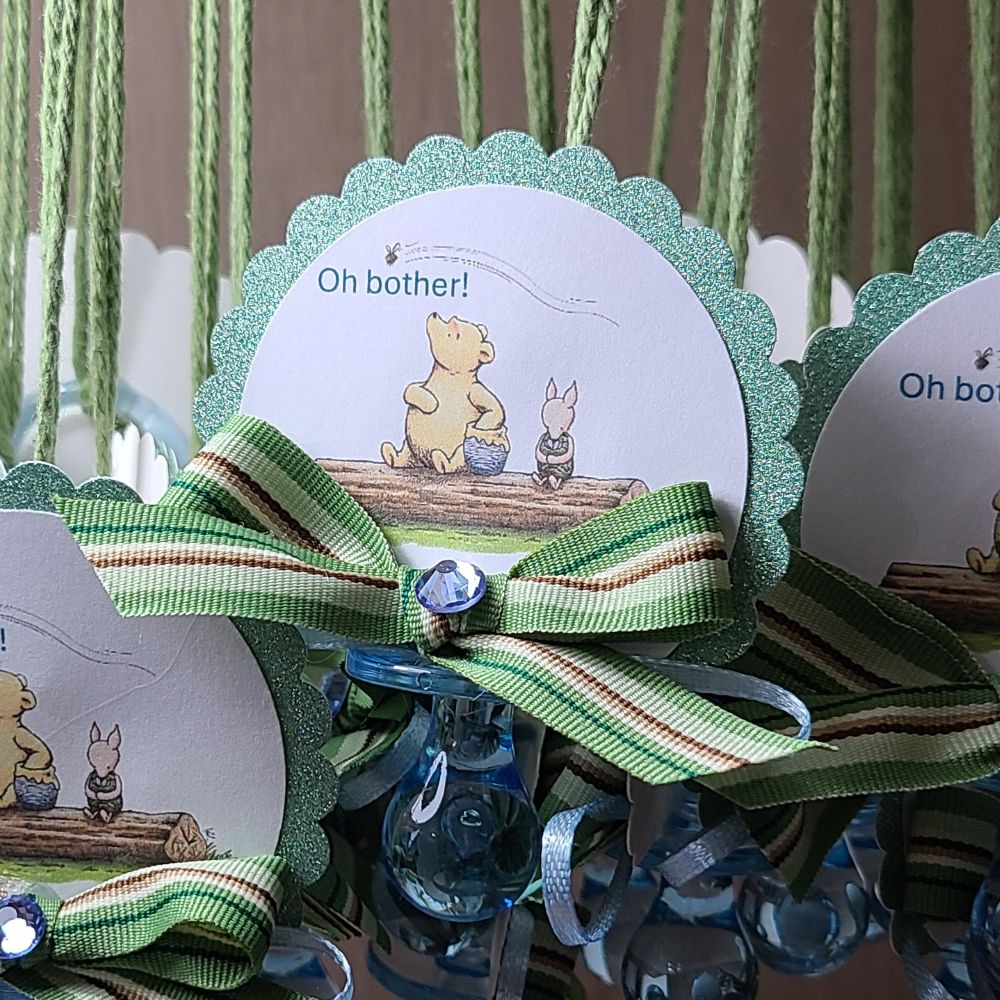
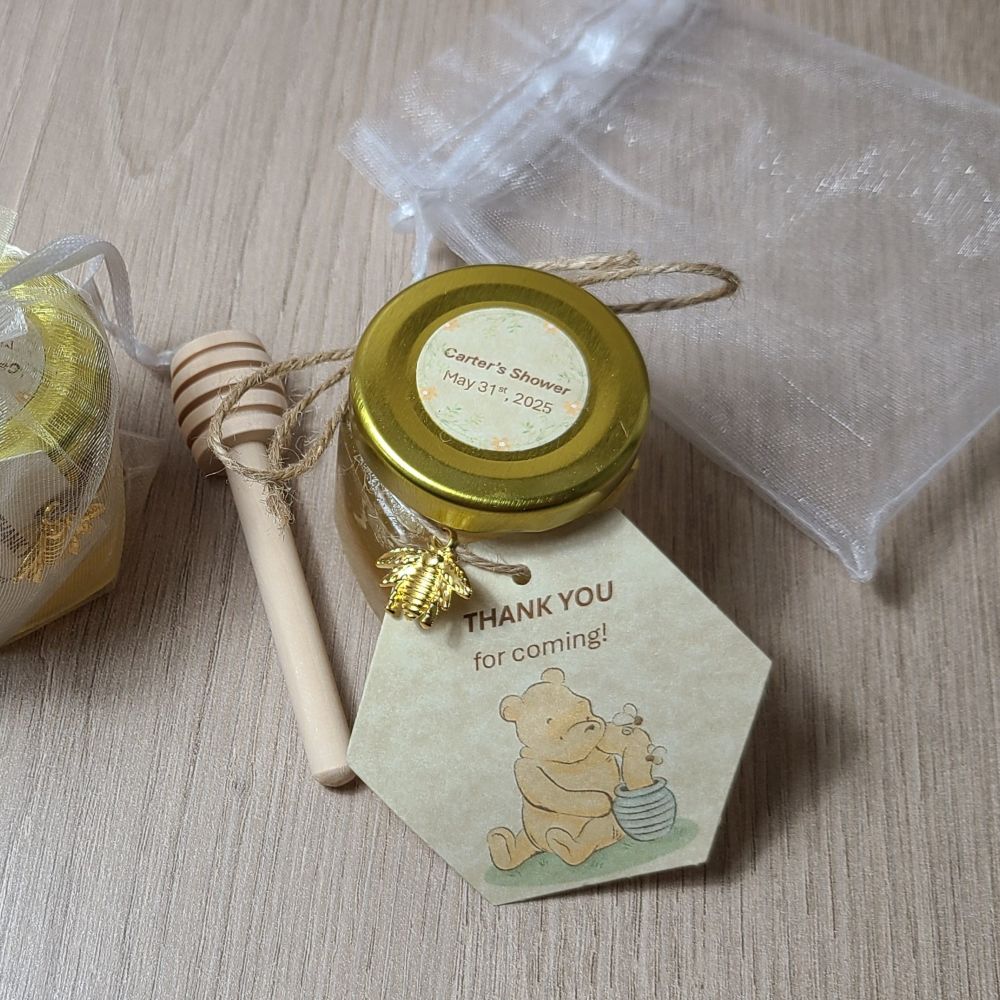
The full backdrop when finished with 3 large wooden panels cut out by my husband and hand painted by me. I added a hexagon stencil pattern with paint on the yellow arch panel. Eeyore and the bee were cut out from computer print and attached to a foam cut out by hand.Left back drop panel with hexagon shelves. Each hexagon has the wooden letters of baby’s name that I decorated with Winnie the Pooh characters and papers. This photo is really blown up because I didn’t capture a good photo of the letters.We made a large “hundred acre wood” sign that my husband cut out and placed in a clay pot. I used paper covered chipboard for the “welcome” and stenciled with black paint on the rest. The Winnie the Pooh character with all of the balloons was cut out from a computer print and flipped with each side on a cut out black foam piece. We staked it in the ground and attached the balloons around it. We made 5 different characters to line the drive.This is one of three different prints that we had done on poster size that was hand cut out and placed on a foam board. To make the characters stand up, my husband made a wooden stand with slots wide enough to fit the cut outs with the foam board. Since the front of the wood showed when the characters were upright, I covered the wood with moss by gluing it to the wood that showed. This character is on a table about 16″ x 20″ large. (I didn’t get good photos of these either!)I made 15 center pieces by painting the yellow honey drip over a clay pot. I also added some glitter paint over it and added the “hunny” letters. I printed and cut out the bees and attached them with wire to stick inside the pots with the fake flowers. I added some moss at the bottom to cover up the foam used inside to stick the flowers in. I covered the bee’s wings with glitter too.For each of the center pieces, we added a charger plate underneath each one so the couple could add candies for each of the tables.These are the corsages that I made for the mommy and daddy to be. I used the Cricut to cut the tie pattern from cardstock and then added some glitter papers, ribbon and cut out a cute Winnie the Pooh to go above the lettering. I had some wooden bee embellishments and added a pin on the back to attach the clothing with.I made 50 of these pacifier necklaces for the party. I cut out the image with a circle punch, added the glitter scallop punch layer behind it. I used some green yarn to tie around the blue acrylic pacifier decoration and attached the image over it with hot glue. I also attached a ribbon bow as well as a blue gem in the center. The rule of the game was if anyone was crossing their legs, arms, hands, etc. they collected a necklace from someone else. Whoever collected the most necklaces won the game. (It was funny to watch everyone playing the game! I lost mine really fast!)I made 50 of these hexagon tags and personalized sticker on top with the name and date for a party gift. Inside the jar was real honey combs from a local area.
They put in so much work having this baby shower with lots of food, yummy desserts and drinks. I know with all of the set up and cleaning up they were wore out! We were also wore out when it was finished up. LOL Now it’s just the waiting to meet the newest member of the family by the end of this month. We are certainly looking forward to it!
Hope you’ve enjoyed my post today…and now you can see why I’ve had “BEEs” on my mind lately! LOL Thanks so much for stopping by!