Essential Worker Chef

Hello friends! I hope that your week is finding you in a good place right now. Sometimes I feel a bit overwhelmed with things that are going on in the world, but I am so thankful that I have the crafty time to keep my mind creative and music to help alongside to keep on keeping on. This is one way that I know I can express myself in a postitive way and hopefully inspire someone too.

In my previous post, I had made several healthcare worker cards and I had made one for my son who is a mail carrier, but I was having a hard time finding an image for a food service worker. (check out that post HERE.) I asked if anyone knew of any images. Someone had reached out to me and shared a few images that were just too adorable and I couldn’t pass up on nabbing one for my other essential worker son:

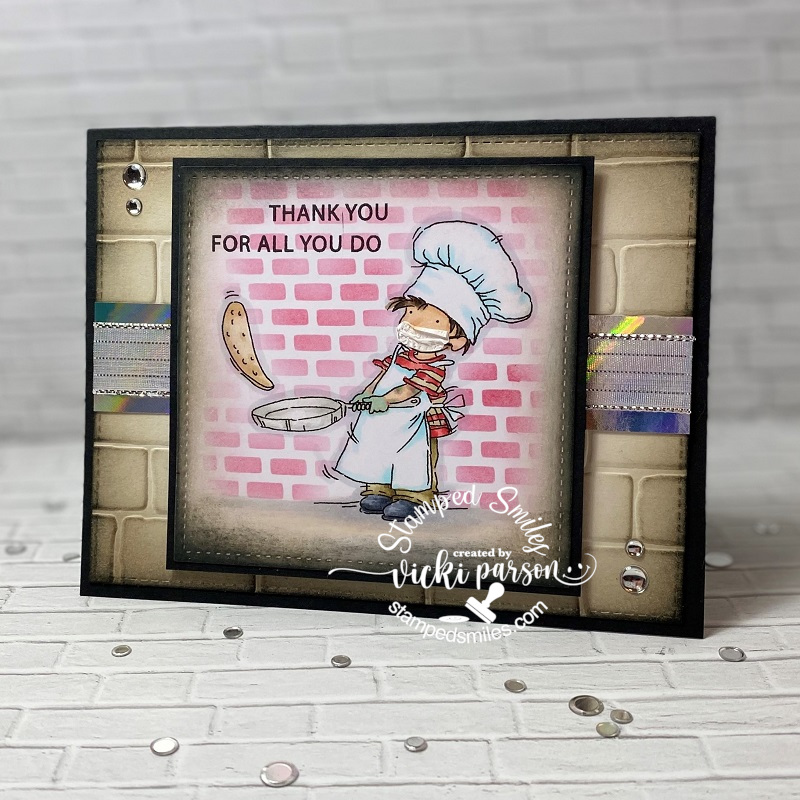
Isn’t he just as cute as can be?! I’ve used the LOTV Pancake Day digi stamp for my card. It actually reminds me of my son making crepes for a restaurant that he used to work for. I was treated with a delicious pumpkin pecan cream crepe by him a few years back on my birthday! It was yummy!

As you can see, I’ve altered the image a bit to fit with the current covid-19 restrictions by giving him a make-shift face mask as well as coloring some plastic-style gloves on his hands. To make it even more personal, I decided to give him a couple of colored tattoos on his arms as my son has tattoos on his arms and dark brown hair.😁

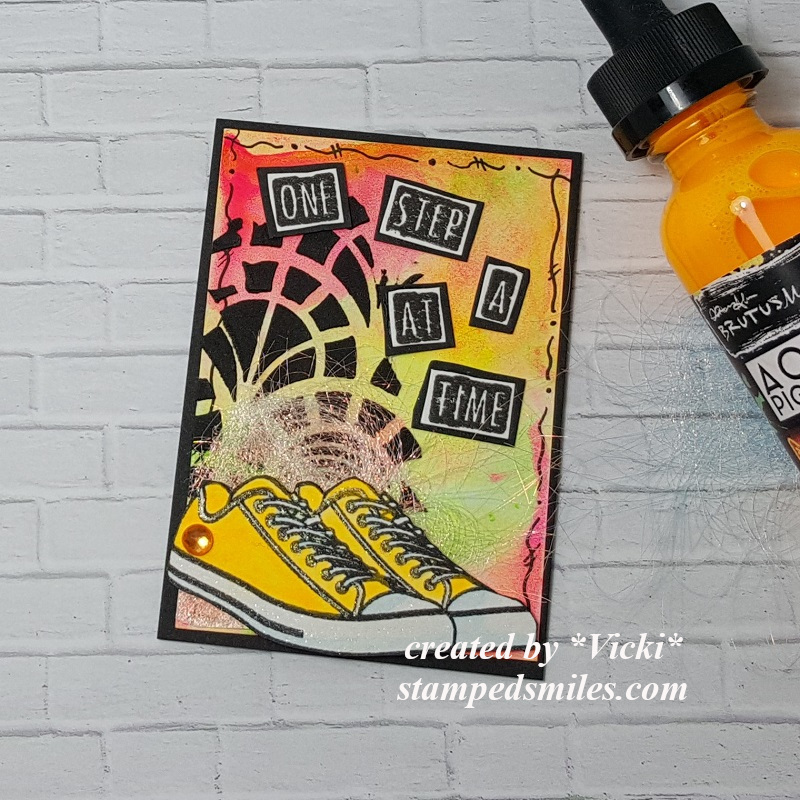
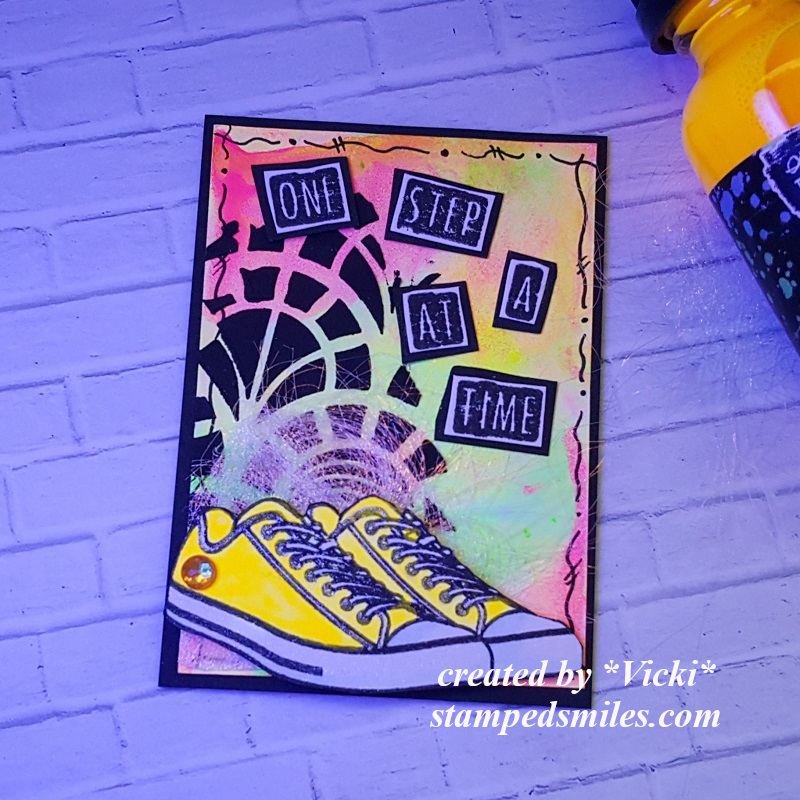
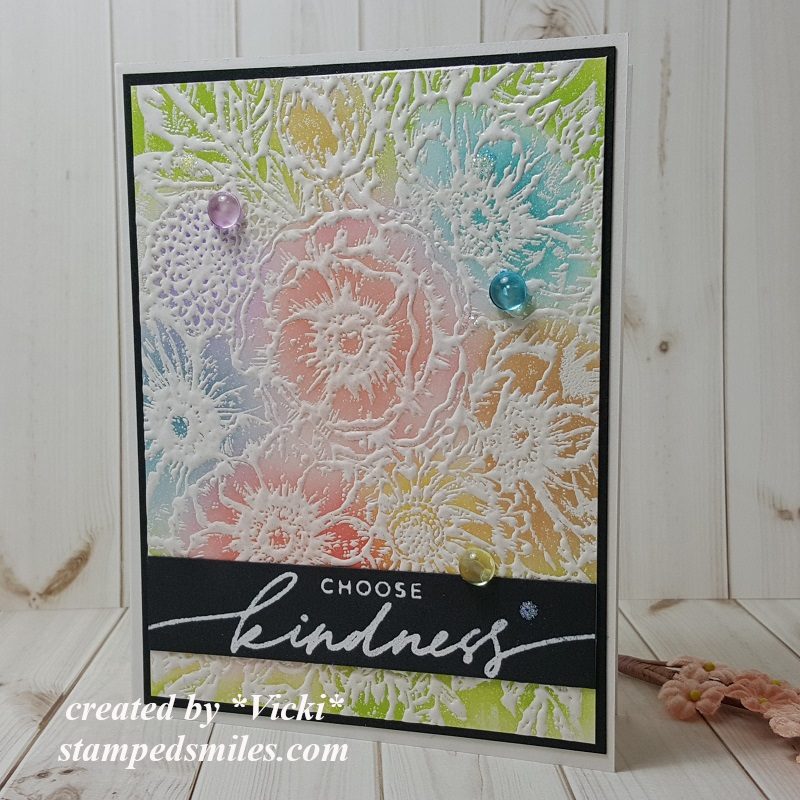
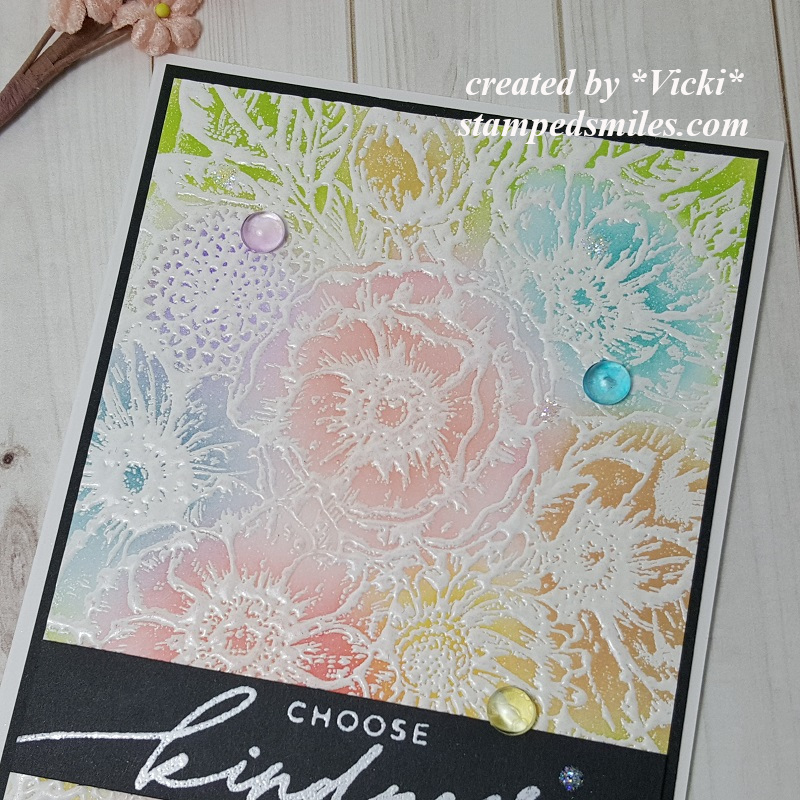
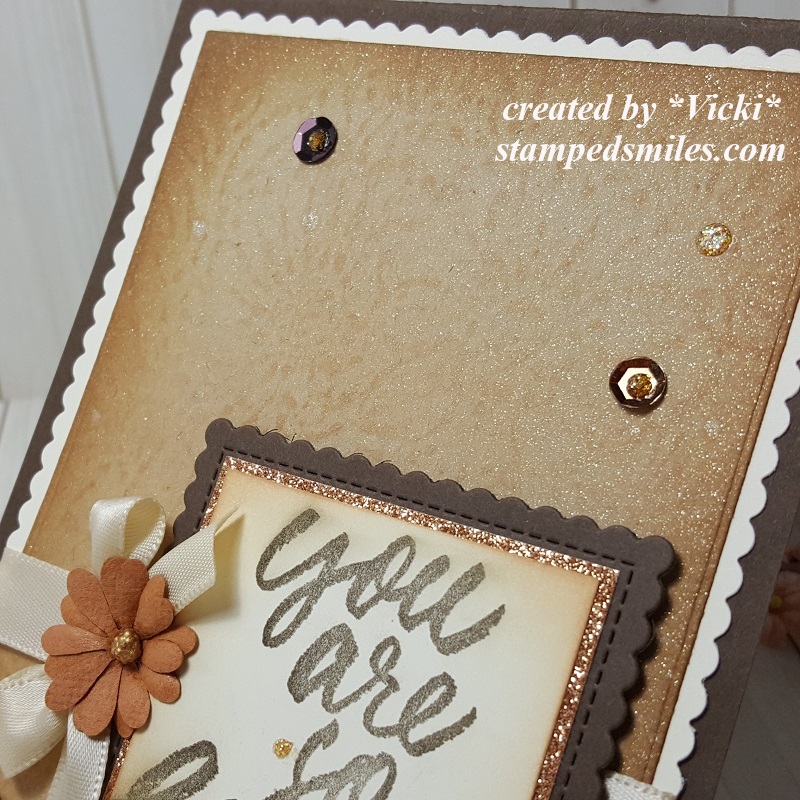
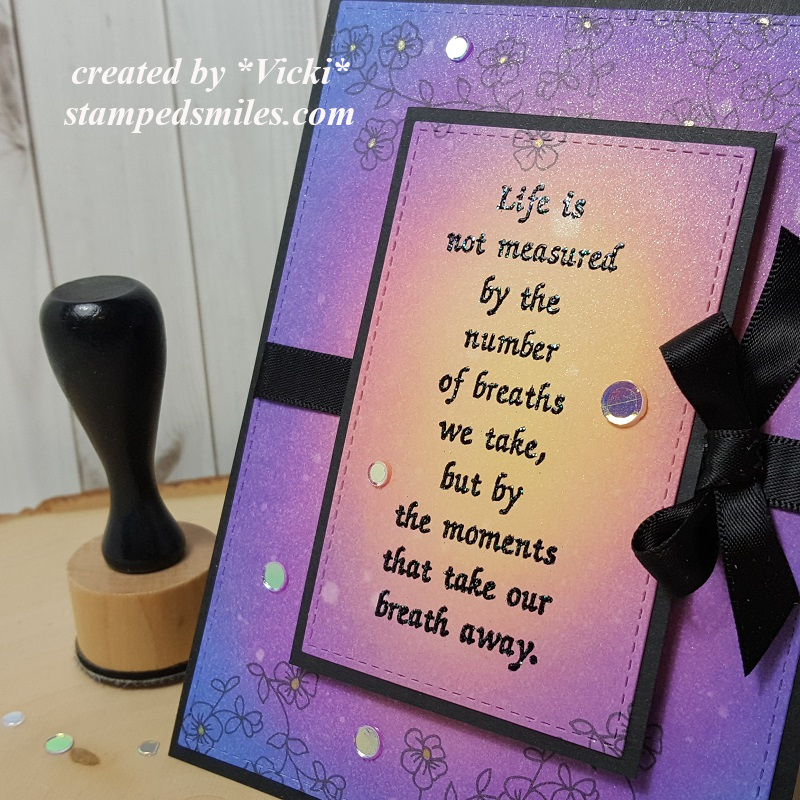
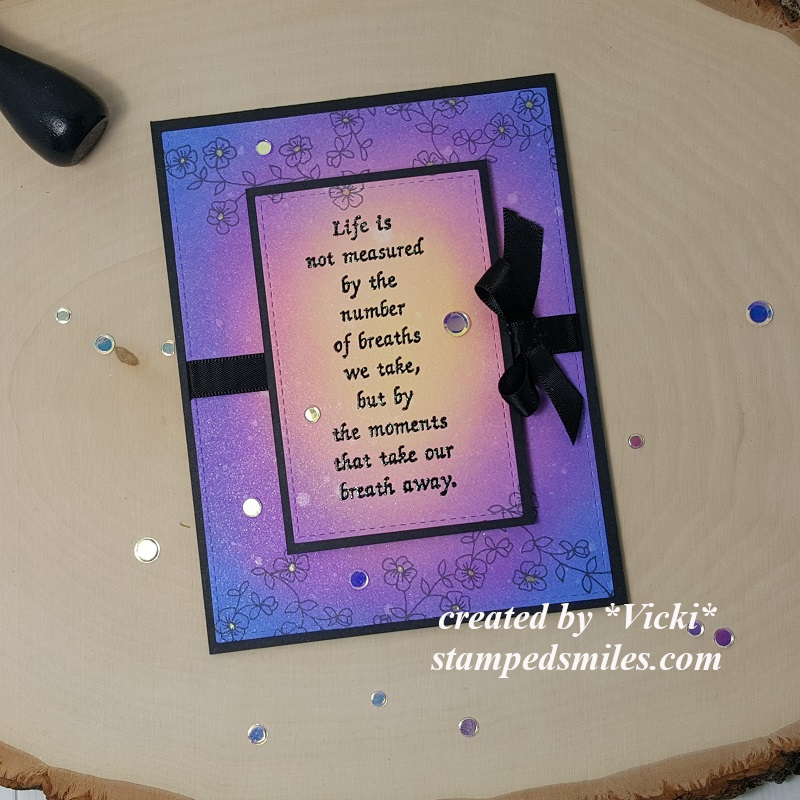
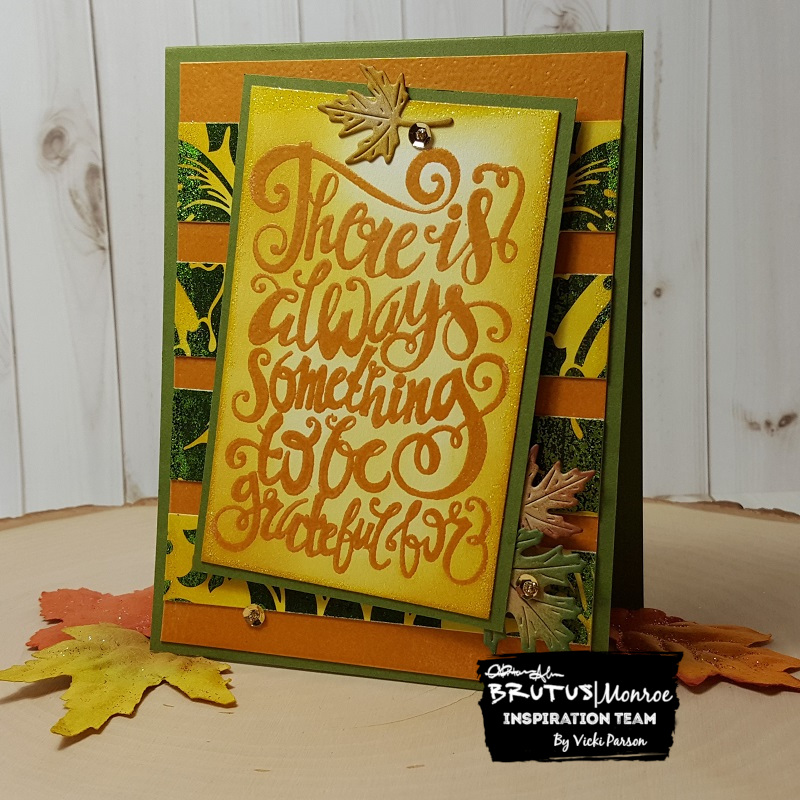
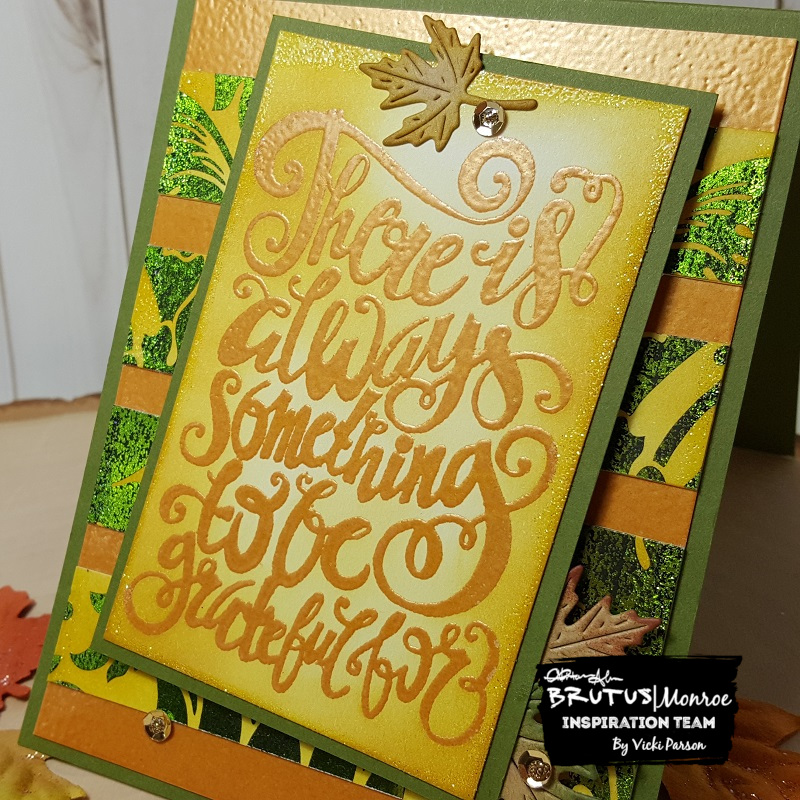
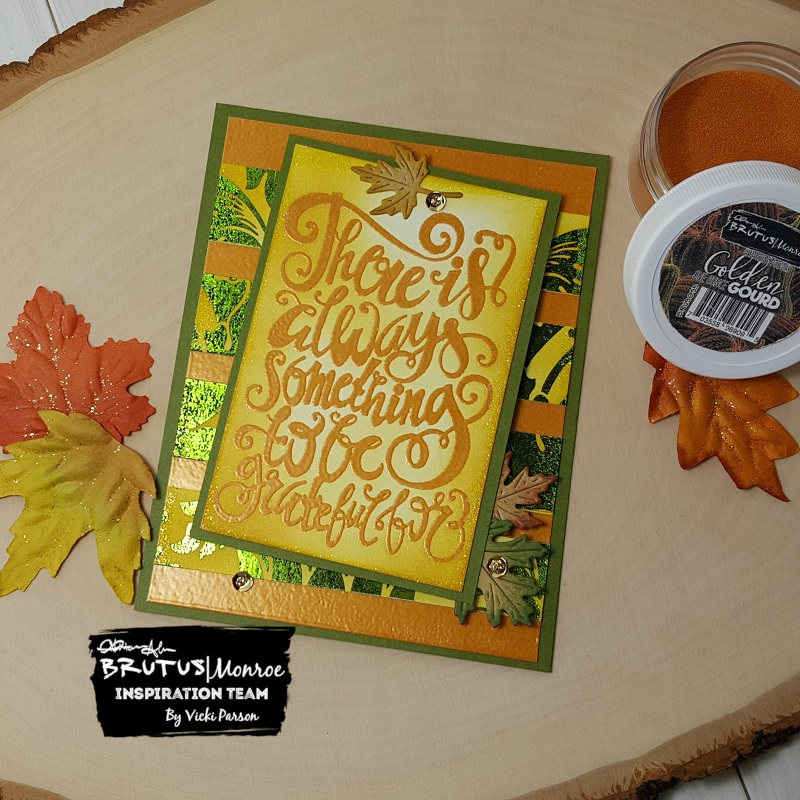
For the card, I’ve used some Sidewalk cardstock from Brutus Monroe and used a Stampin’ Up! brick embossing folder over it and then sponged some distress ink around the edges. It was cut out with a stitched rectangle die. I added a strip of Prism paper and some silver metallic ribbon over it before attaching it to a top folding A2 sized black card base. I finished it off with some silver Glossy Dots from Pink and Main.

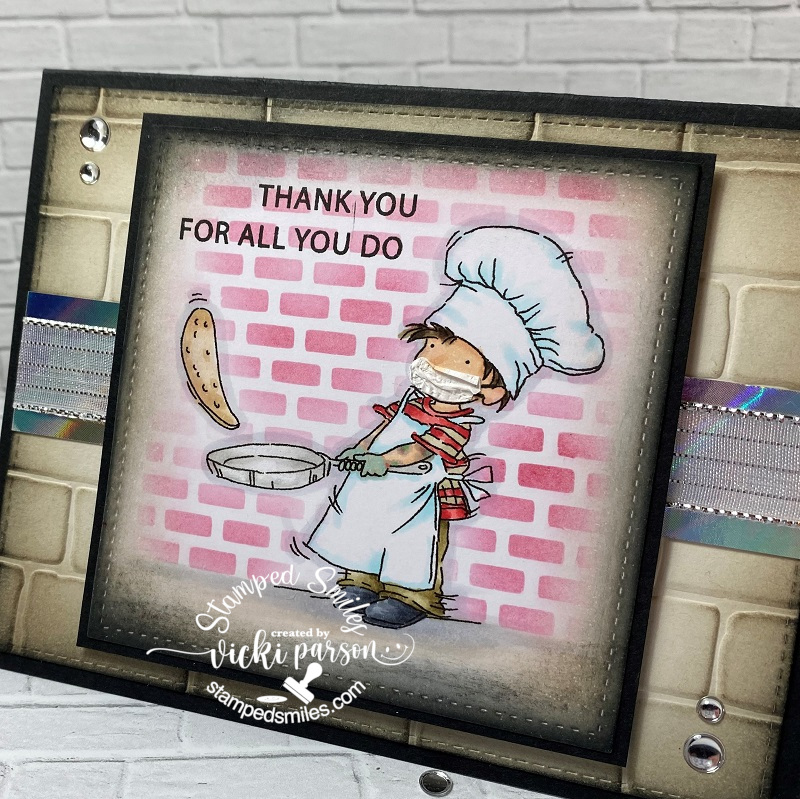
I colored the image with Copic markers and as mentioned above added the special coloring for the tattos and gloves for his hands. I’ve also covered the pan with a glitter brush pen.

To make the face mask, I took a Copic liner to draw in the lines for the cord around his ear and then I took a tiny piece of thin tissue style paper that was used between the packages of acetate sheets you buy. I wanted it because it was thin and I was able to create tiny folds and wrinkles in it…I just glued it over the area on his face and manipulated it before it completely dried.

I stamped the sentiment from a Lawn Fawn stamp set with black ink next to the image and then I used a stencil that was cut out by my mom, thanks mom, on her Cricut machine and inked it up with some red ink using a foam brush tool. I wasn’t very accurate with not covering the image, but thankfully the sand eraser helped out! I finished coloring up the “ground” area and sponged around the stitched square cut out of the image. I layered it onto another piece of black cardstock and popped it up over the card with craft foam.

I think this card turned out so cute and it’s on the way to him now! I think he’ll get a kick out of it and he’ll probably notice the extra personalized details I’ve added to it too!😂

I hope you have enjoyed my special essential worker card today and brought you a smile! Thank you so kindly for stopping in and I’ll see you again soon!✌

Challenges:

  1. Pearly Sparkles – #52 For the Boys/Men
  2. Love to Scrap – LTSCB134 For the Boys
  3. QKR Stampede – #400 Anything Goes
  4. Digi Choosday – Anything Goes + colored image
  5. Arty Divas – #23 Anything Goes
  6. The Paper Funday – #18 Anything Goes with twist: make it masculine
  7. Simon Say Stamp Wednesday – Masculine
  8. Unicorn – Masculine

ATCs With Flowers, Rainbows and Stencils…Oh My!

Hey there friends!  Hoping you had a wonderful weekend and ready to start a fun week ahead!  Although we’ve been having some cool and rainy days this week, I know that some nice warm weather is on it’s way and I’m really looking forward to it and getting outdoors to my flowers!

For today, I have something a bit different that is not a card, but I think a really cool and fun way to experiment with different media and ideas…especially on a smaller “non-intimidatingly” way.  I’m talking about those ATCs (Artist Trading Cards for the newbies)!  It’s like a “fun size” candy bar in small bite form…these are like the “fun size” of the traditional A2 sized cards!  LOL!  They’re normally 3 1/2″ x 2 1/2″ which is similar to the size of a business card.  They’ve been around for years since I started stamping and newer to me are the round coin ones.  (I will attempt those at another time, I’m sure!)

I had a few challenges in mind and found some time yesterday to have a play:

Vicki-BRM-StenciledRainbowATCs-close

Rainbows seem to be a huge deal right now and I think there is even a special day dedicated to them!  I also was wanting to play with my crafty stash.

For the ATC on the left, I used the stencil and some embossing paste over a piece of watercolor paper and set aside to dry.  While that was dry, I cleaned off the stencil and used it on another piece of white cardstock and used my distress inks and ink blending tool to create a rainbow background for another ATC (right).  I ended up stamping the bicycle over it with black ink and then sprayed the panel with some shimmer spray.

Going back to the dry embossed paste panel, I took some Creamy Aqua Pigments and added rainbow colors at the top and then sprayed them with water and let it drip down.  I let the colors run and even left some white on there as you can see above.  I let it dry and then splattered some black watered down paint to splatter over it with a paint brush.  I then stamped the clouds from the same stamp set, fussy cut them out and popped them over the background.

On both ATCs, I white heat embossed the sentiments over black cardstock and cut them out with my scissors to place over top.  For the bicycle ATC, I added some metallic Fibers along with some flowers.  Part of the sentiment was popped up on foam tape for both of them.  One of the clouds was popped up with foam tape on the left one.

Super fun to play and create with!


I had made one early last month too, but never posted it, so I thought this would help fit it in for today:

Vicki-NeonshoesATC

Not really a “rainbow” theme, but this was sure fun to create and doodle around with!

For this one, I finally got a chance to play with my Neon Aqua Pigments! I used the “smoosh technique” with them for this background and let it dry.  Then I used some black embossing paste over the Wallpaper stencil.

I also stamped the shoes and colored those in with the Neon AP and popped it up with foam tape over a another piece of the metallic Fibers like I used on the “bicycle ATC” above.  I also took  glitter pen to go over the shoes and added a yellow rhinestone to it.  From the stamp stamp set, I took the sentiment and stamped it in black ink, fussy cut it out and layered it over some black CS and fussy cut it out leaving a border.  Each one glued over the background.  I took a black pen and doodled along the edges.

Vicki-NeonshoesATC-neonglow

And of course, when you shut the lights off and turn on your black light, you can REALLY see the fun and funky neon colors glow on it!!  Even this photo doesn’t do it justice because it looks so fun in person!

For my ATCs, I’ve been attaching them to Chipboard for sturdiness.  I also added the Artist Trading Card Labels for the backs of them.

Hope you’ve enjoyed my ATCs today and gave you a little inspiration to try one out for yourself!  But I have to warn you….just like those “fun-sized” candy bars, you can just have one!!  LOL!

Thanks for dropping in today friends!!  Enjoy your week!

Challenges: (For top ATCs only)

  1.  ATC Around the World – Flowers (Bicycle ATC only)
  2. Creative Crafting Uncles – Anything BUT a Card
  3. Creativ Fusion Arts & Crafts – Anything Goes
  4. Happy Little Stampers ATC – Rainbow
  5. Crafty Friends – Flowers (Bicycle ATC only)
  6. {Cupcake Inspirations} – CIC493 “Let’s Roll!” (Bicycle ATC only)
  7. A Bit More Time to Craft – #116 Anything Goes

Faux Emboss With a Stamp!

Hello there friends!  Hoping you had a wonderful weekend and a fabulous Mother’s Day as well!  I had a wonderful day with flowers delivered to me and wonderful phone messages.

Today I wanted to share a couple of cards that I had made participating in the “Spring Card Camp” classes from Online Card Classes. (It started April 11 and ran through the end of April.)  Although we are now on a separate Part 2 Spring Card Camp, I have enjoyed the classes each day and I thought I’d just take my time and enjoy everything.  So there may be posts spread across time as I go.  I just like to take my time and actually enjoy the process rather than hurry up and run right through it.  I feel this helps me to fully understand what I’m doing and what products I’ve used, take notes, etc.

The first class was taught from Jennifer McGuire as she showed us how to use a stamp and create our own embossing folder to make an impression with it!!  Something that I had not heard of before, so this was fun to try out:

Vicki-BMKindFloral-fauxemboss

So the idea of each class is to pretty much get a “two for one” type of design and stretch your supplies and design concept so that it makes it easier to create multiple cards at a time, which is really great right now as I seem to be making more cards and donating extra cards that I normally wouldn’t be doing at this time of the year.  (I also actually thought this could be applied towards Christmas making time as well…which I will be keeping in mind!)

I started with this panel first as this was my piece that created the faux embossng folder:

Vicki-BMKindFloral-FE

I decided to use this gorgeous large image from the Kind Floral stamp set to create my “faux embossing” piece with.  This image was heat set several times with white EP.   All of the cards I made including the sentiments were used with this same stamp set.

After using it for my “faux embossing” on my other cards shown below, I went back to it and finished it on a card by using some blending brushes and ink to color in the panel.  I took a strip of black cardstock and white heat embossed the sentiment over it and then layered it onto a white A2 side folding card base.  I finished it off with some colored bubble drops and Stickles glitter drops.

Vicki-BMKindFloral-FE1

Here’s a closer view of the white heat embossing I did on this panel with the image.  It’s very thick as I had to build up layers to create a faux embossing folder to get a good impression with it.  (See below)

Vicki-BMKindFloral-FE2

For my first card using the “Faux Embossing” piece, I took a sheet of pink cardstock and made the impression into it.  You can see it in the background.  For this panel I used the negative side of it and then sponged some darker pink ink over top of it so that you can really see the impression from the image.  I used a Wonky Stitched Rectangle die to cut it out with and layered it over a piece of kraft Cardstock.  This was attached to a top folded A2 sized white card base.

I took another sentiment from the same stamp set as above and heat embossed it with Gilded EP.  I sponged some more pink ink around the edges of this panel and layered it over another piece of kraft CS.  I popped it up with foam tape over some die cut flowers from vellum along with a strip of gold mirror cardstock and finished it off with some gold sequins.

Vicki-BMKindFloral-FE2a

Here’s a closer view at the texture in the background from the faux embossed piece.

I thought this gave a subtle but soft and pretty look to the design.  Also, that sentiment could not be at a more perfect time right now, don’t you think?

Vicki-BMKindFloral-FE3

And for my last card, I made the faux embossed background using some more kraft CS.  This image I used the positive side and ran some distress ink over the raised areas to bring it out more.  I took a darker brown ink to go around the edges.

I stamped a sentiment from the same stamp set with brown ink, layered with some Copper Glitter paper and then cut a piece of Macchiato CS from a scalloped stitched square die that was also used for the A2 Sized top folding card base, and popped up the sentiment panel with foam tape.

I layered the embossed background piece over a vanilla cardstock layer that was cut with a scalloped stitched rectangle die and then I wrapped some silk ribbon with a bow around it before placing the sentiment panel over it.  I attached the flower and the sequins to the design and finished it off with some Nuvo Honey Gold Glitter Drops.

Vicki-BMKindFloral-FE3a

Here’s a closer look at not only the texture from the embossed background piece, but I also took some Shimmer Spray and covered the background with it.  You can sort of see the beautiful shimmer over it…and it really looks incredible in person.

Hope you’ve enjoyed what I’ve learned and created for class!  Thanks for dropping in with me today!  There will be more things I have to share with you coming up, so I’ll see you soon!!

Challenges:

  1.  Pearly Sparkles – Add a Ribbon or Bow (last card only)
  2. Moving Along With the Times – #118 Flowers
  3. Crafts Galore Encore – #75 Anything Goes
  4. Simply Create Too – #160 Use Flowers
  5. The Corrosive – #15 Anything Goes
  6. Use Your Stuff– #397 Flowers and/or Butterflies
  7. Arty Divas – #21 Anything Goes
  8. Cute Card Thursday – #633 Anything Goes

Full Bloom Rainbow

Hello friends!  I hope you’re having a great week so far!  I’m wondering if this cold weather has me feeling this way lately, but I’m seriously lacking in creativity and just have misplaced my MOJO lately!  If you’ve found it, please let me know! LOL!

In the meantime, I seriously needed to create a rainbow in my life and found that a young lady certainly was in need of a smile sent her way as well so I thought I would do just that:

Vicki-PinkMainCK-MMTPT604

I had received my Pink and Main Crafty Courtyard Card Kit and really loved the happy colors and pretty blooms in the stamp set and so I started out using the stencil with rainbow order inks for the background!

I’ve also used the same color of Distress Oxide inks to do the stamping on the tag and envelope as well.  I absolutely love the tag die set was included with the kit which I’ve used for the main focus of my card.  I always want to add just a bit of black to my rainbow colors, so I decided to white heat emboss the sentiment from the stamp set and then used one of the tag die elements to cut it out with and pop up over the bottom of the tag.

I’ve also used the ribbon and enamel dots included in the kit to finish it off.  (The floral sequins used for the photo prop were also included in the kit.  LOL!)

Vicki-PinkMainCK-MMTPT604-close

Here’s a closer look at the details in the tag.  For the black border around the tag, I just cut a piece down to size and then cut off the edges with my scissors to match up with the tag.  The scallop tag behind it was cut with the paper and die from the kit.  I used some circle punches to create the black re-enforcer and then I tied the ribbon together with some black twine from my own stash and topped the center with an enamel dot from the kit.

Vicki-PinkMainCK-MMTPT604-flat

This card has now been sent along to a young lady that is currently in the hospital dealing with cancer treatments and really needs some cheerful happy colors, so I hope that this will help fill her day with some cheer.

Hoping that this card has also sent some feelings of cheer today your way as well!  Thanks so much for stopping in today friends and I’ll see you soon! 🙂

Challenges:

  1.  Allsorts – Dies and/or Punches
  2. A Bit More Time to Craft – Anything Goes #110
  3. Pammie’s Inky Pinkies – PIP2007 Anything Goes
  4. Through the Craft Room Door– Anything Goes
  5. Fab ‘N’ Funky – For a Child (sent to a 15 yr. old in hospital)
  6. Simon Says Stamp Wednesday – Add a Sentiment
  7. Creative Knockouts – Flower Power

Guest Rock Star for Repeat Impressions POTW!

Hello friends!  I’m hoping that you’ve had a wonderful weekend!

I’m very excited to be sharing my projects today as a guest “Rock Star” for Repeat Impressions!  I’ve been asked to share a special post for their “Project of the Week” segment on their blog today!  Yay!

If you’ve been following me for a while, then you know how much I love to ink blend!  It’s something that is fun to do, and I’m always amazed at the finished colors!  I want you to get the same satisfaction when you do it too, so I thought that would take a fun photo tutorial for my guest POTW post!

Vicki-RIGDT-inkblendedscene

There is just something about this scene that makes me feel happy and relaxed!  So of course, that sentiment goes just perfectly with it!  This sentiment/saying is one of my all-time favorites and I was thrilled to use it for this design!

I’ve used the “Canoeing” (2905-G) along with the “Mountain Vista” (629-I) From Repeat Impressions for the image stamping over the ink blended scene.

Vicki-RIGDT-inkblendedscene-close

Here’s a closer look at the details in this card with how I went about creating it.  You can see the different blended colors in both the water and sky.  The setting sun was colored in with a glitter gel pen which created some shimmer to it.  The white gel pen highlighted details in the water.

Vicki-RIGDT-inkblendedscene-flat

Really had fun creating this scene with these stamps which were just perfect for an ink blended background!  I thought this would make for a wonderful retirement card!   If you want to create one of these types of cards yourself, please be sure to check out the step-by-step tutorial over at the Repeat Impressions Blog to see how I went about doing this!

I loved that sentiment stamp so much, that I just couldn’t help but create one more card using it again with another ink blended design:

Vicki-RIGDT-inkblendedlife

Really LOVE how this one turned out!

What’s fun about ink blending is all of the different color combinations you can play with and blend together for different looks!  This time, I’ve used different colors and started my ink blending in the center.  I’ve also used a die to cut out the center of the ink blended panel, heat emboss the sentiment over it, layer with a piece of black cardstock behind it, and pop it up over the rest of the ink blended background.  So even though it was cut out in the center, it’s a continuous ink blended design!

Vicki-RIGDT-inkblendedlife-close

On this ink blended panel, I’ve used some Shimmer Spray over it which gives it a really pretty shimmer with a bit of a “water droplet” effect as the Distress Oxide Inks react to water/liquids.  I think this turned out really cool as it gives it sort of a “Bokeh Effect”.

Before I cut out the center of the ink blended panel, I’ve used the “Flower Power Frame” (10202-Q) to stamp in black ink at the top and bottom of the panel. You can see that part of the stamped image was die cut on the sentiment panel.  I colored the centers of the flowers with a yellow glitter gel pen for added detail.

Vicki-RIGDT-inkblendedlife-flat

To add to the look, I thought it needed some sparkling clear sequins to finish it off!

I hope you’ve enjoyed my creations today and please be sure to stop on over at the Repeat Impressions Blog to check out the full tutorial on ink blending!

Thank you so much to Wendy and the fellow Rock Star friends for having me along as a guest!  Really enjoyed creating these projects with these fabulous stamps!!

Also thank YOU for stopping in today!  I appreciate your support so much!  I’ll be seeing you again soon my friends!

Challenges I’d like to enter:

  1.  Addicted to Stamps &More – Anything Goes
  2. Cute Card Thursday – CAS
  3. Cardz 4 Galz– Black and Bling (second card only)
  4. Daring Cardmakers – Someone or Something You Love (ink blending, words/verse)
  5. Creatalicious – #181 Anything Goes with optional embossing
  6. The Creative Crafters – #25 Anything Goes

It’s Going to be “Owl-right!”

Hello friends and welcome to the weekend!  I hope you have some great plans ahead of you and have some fun!

Today I’d like to share this card I’ve made with a darling feathered cutie and the punnyness that goes along with him….

Vicki-DDSOwlright

Isn’t this little guy the cutest owl you’ve seen?  This image was actually created on my computer with the “Owl-rageous” Pairables digital stamp set from Digi Doodle Studios.  The owl, the branch and the sentiment are all separate images, but I’ve pieced them together on my computer and printed it out to create this scene!

I’ve actually printed out an “extra” owl and flower to color in and pop up over the image for added dimension.  I used the “out-of-the-box” technique to circle die cut out the image.  The branch is sticking outside the circle.

I’ve used a woodgrain embossing folder and rubbed some white ink over it and also added a strip of yellow paper from my stash wrapped in twine along the edge.

I die cut a flower and rubbed some pink ink over it, attached a button and twine bow over it to pop up over the owl panel.  Then added some sequins filled with glitter glue in the centers.

Vicki-DDSOwlright-close

Here’s a closer look at the coloring I’ve done on the images.  I’ve used a purple glitter gel pen for the tiny hearts on the branch and then a yellow glitter gel pen for the centers of the flowers.  I’ve used some yellow ink to sponge around the circle panel.

Vicki-DDSOwlright-flat

This card actually has me longing for Spring to come with those flowers!  He’s letting us know that everything is OWLright!! ha ha ha!!  Hope you’ve enjoyed my creation today and I really appreciate you stopping in!  See you soon!

ETA:  Hubby said I should include the song….

Challenges to enter:

  1. Cheerful Sketches – Feb sketch
  2. Love to Craft – LTCCB43 Anything Goes
  3. Crafts Galore Encore – #72 Anything Goes
  4. Pammie’s Inky Pinkies – PIP2006 Anything Goes
  5. Not Just Cards – Feb Anything Goes
  6. Arty Divas – #115 Anything Goes
  7. Through the Craft Room Door – Anything Goes
  8. Alphabet Challenge – ‘W’ is for “Anything You Wish”

Turner Syndrome Awareness Blog Hop

Hello friends!

February is TSA month and If you’re not familiar with this, please read about it below:

Turner Syndrome is a genetic disorder where a female is born with only one X chromosome, instead of two, leaving her with life-long medical issues and learning disabilities. This condition occurs one in 2,500 female births worldwide, but is more common among pregnancies that do not survive to full term. That is why Turner Syndrome Females are considered MIRACLES!

My TS related project is inspired by the TSA official color board:

For my project, I have combined two different digital sets that were kindly made especially for this blog hop and the TSA cause:

Vicki-JansDigi-TSAbloghop

I was really inspired by the wonderful colors along with the images from the inspirational board above, but it was fairly easy since the images were already pre-colored in the set to create with!

I’ve used the TSF Key digital set from Jan’s Digi Stamps for the images on my card.  Also what’s cool about this set is that all of the proceeds from this set go directly to the Turner Syndrome Foundation!  It’s a stunning set to have plus a great way to help with a terrific cause too!

I have printed out the images over a piece of white cardstock and cut them out.  I also added one of the images in a repeat pattern to print out over a piece of green cardstock for a decorative strip on the background of my card design.

I took an embossing folder and embossed only the top portion of my card base, added the green printed strip with ribbon wrapped around it and sponged the edges.  I layered some pink cardstock and cut a scallop square piece of lavender colored cardstock for behind my vanilla panel and popped it up over the card base with foam tape.

Lastly, I’ve attached the bow, button and twine to the side of the image panel and attached the cut-out butterfly to the top corner of the image panel.  I glued only the center portion of the butterfly so that I could pop out the wings.

Vicki-JansDigi-TSAbloghop-close

Here’s a closer view of the images.  I’ve used a Copic marker on the vanilla-colored panel to create a “shadow” around the key image and then I attached the cut-out key over top of that.  I’ve used the same Copic marker for a few more shadows around the key.  For that butterfly, I’ve used a glitter gel pen to color portions of the butterfly and then a clear glitter brush pen to go over the wings.

You can see that TSA symbol on the key which is the same image used for the green background panel I created on the computer.

Vicki-JansDigi-TSAbloghop-flat

I hope you’ve enjoyed my card today!

Thank you so much for stopping by!

Challenges I’d like to enter my card for:

  1.  Jan’s Digi Stamps Challenge – #6 Anything Goes
  2. Pammie’s Inky Pinkies – PIP2004 Anything Goes
  3. Arty Divas – #14 Anything Goes
  4. Through the Craft Room Door – Anything Goes
  5. Allsorts – A Touch Vintage

Super Girl Starla Flying By!

Hello friends!  Happy Tuesday and I hope you’re having a wonderful week so far!  I actually can’t believe that September is already flying through this quickly!

Speaking of “flying”, I have this really cute card to share with you using another Whimsy Stamps image:

Vicki-WSStarla-Sept17

This little digital cutie is called Starla from Whimsy Stamps.  She has her arms out and so I thought it would be cute to have her appear as if she’s smiling while flying up through the clouds at us!  I also thought this would be a really nice encouragement card for a child and I’ll be sending it out to hopefully share some smiles.

I stenciled some clouds in behind her, cut the image out with a stitched square die and layered a piece of purple cardstock behind her.  I ran a piece of green colored cardstock through a star embossing folder, wrapped a silver ribbon around it and then attached it to a purple 5″ square top folding card base.

I die cut some stitched cloud borders for the bottom of the card design but sponged them with some Broken China Distress Ink before attaching them with foam tape.  I also die cut some stars to add for accents on the design with both silver glitter stock and a piece of purple to paper piece in the center of one of the silver outline stars.  I also added a rhinestone star to the center of the bow.

Vicki-WSStarla-Sept17-close

Here’s a closer look at Starla with the coloring I’ve done on her.  I’ve colored her up with Copic markers and added some details with gel pens.  I’ve also covered her headband with a glitter brush pen and also added some extra glitter over the stars at the top of her head band.  You can also see where I’ve added some “strokes” to show that she’s zooming through the clouds.  I also covered that area with a bit of shimmer with the glitter brush pen as well.    The “little girl” in me had to color some purple!

Vicki-WSStarla-Sept17-flat

The sentiment at the bottom was stamped with a sentiment from my stash with some black ink.

I hope you’ve enjoyed my card today and it’s brought you a smile or inspired you in some way!  Thanks so much for stopping in!  See you soon!

Challenges:

  1.  The House That Stamps Built – S1119 TicTacToe
  2. Daring Cardmakers – Special Thoughts
  3. QKR Stampede – #363 Anything Goes
  4. Sweet Stampin’ – Cards for Kids
  5. Addicted to Stamps – For a Lady/Girl
  6. Splitcoast Stampers Teapot challenge – Put a Smile on their face

Always Be Grateful

Hello friends!  Happy Saturday!  Yay!  The weekend is finally here! 🙂

I really love all things Fall including the beautiful colors you start seeing from the leaves on the trees.  Nothing better than a nice walk in the brisk cool air!  This is what has inspired my card today too!

Vicki-BMGrateful-Sept7

I knew I wanted to used this sentiment for a Fall theme.  I think it’s awesome just to have a sentiment be the focal of your card sometimes.  It was heat set over a piece of white cardstock and then sponged around the edges with the yellow Ink.  I wanted a bit more sparkle, so I took my Embossing Ink pad and rubbed it along the edges of the panel and heat embossed some of the Vintage Sparkle EP over it.

And of course I wanted to do some foiling too because it’s just fun especially when you have these cool Vintage Wallpaper-Foilable Washi Sheets to do it on!  I used the Deco Foil Spring Grass transfer sheets over it and then used more of that ink to sponge around the edges and also heat set some more of that Vintage Sparkle over the edges too.

For the background, I took a piece of white cardstock measuring 4″ x5.25″ and covered it with the Embossing Ink pad.  I used some more of that Golden Gourd EP and heat set this entire piece.  Then I took the foiled strips and attached them over top of this panel and layered onto a top folding A2 sized Jurassic card base.  I also layered the embossed sentiment panel over a piece of this same cardstock.

I then added the sentiment panel over the card front with some foam tape and then added some die cut leaves that I sponged with ink and then a couple of gold sequins with some gold glitter in the centers for more sparkle.

Vicki-BMGrateful-Sept7-close

Here’s a closer look at the heat embossed sentiment, background, and the sparkle around the edges where I heat embossed.

Vicki-BMGrateful-Sept7-flat

And here’s another look at the foiled washi strips too with the card laying flat.

I hope that you’ve enjoyed my Fall creation today and were inspired in some way!  Thank you for joining me today as well as the entire week!  See you soon!!

Challenges I’d like to enter this card for:

  1.  Creative with Stamps – Autumn
  2. Unicorn – #47 Autumn
  3. The Male Room – Autumn
  4. Simon Says Stamp Wednesday – Stamp It
  5. Aud Sentiments – Fall/Autumn + Sentiment
  6. Daisy Chain – Autumn is Coming

Brand New Images from Digi Doodle Studios + Video!

Hello friends!  Happy Friday!  I’m happy for the weekend to get here, how about you?!  The weather has started to cool down slightly and it’s so nice to have that air conditioning turned off for a change!

Today I’m super excited to share with you some really fun and adorable new image set that Digi Doodle Studios has come out with from the brand new “Pairables” Collection!  The set that I’m sharing today is adorable and so fun to mix and match images with!  Check out the two cards I made with it:

Vicki-DDSWizardPairables-video

I absolutely had so much fun creating a little scene with the images and then printing them out for coloring and making cards with!    All of the images that I’ve used here come from the new Digi Doodle Studios Charming Enchanters Wizard Pairables Digital Stamp Set and I believe that I’ve probably used most of the images from the set on these two cards.

Vicki-DDSWizardPairables-boy

For this particular card, I’ve used my computer to arrange the stars from the wizard’s wand and the sentiment how I want them placed and then printed it out twice.  One I printed on Copic blending card and another image printed out on Neenah Solar White cardstock so that I can do the ink blended background on it.

Vicki-DDSWizardPairables-boy-close

Here’s a closer view of the coloring details on the wizard.  You can see that he has a bit of a “glow” about him.  So after I colored him in with my Copic markers, I decided that I could use a yellow color pencil to add just a bit of glow to certain parts of the image.  I’ve then used gel pens to color in other detailed portions of the image and a white gel pen for the stars in the background as well.  I’ve tried to capture a little bit of that stunning shimmer for the background, but of course it doesn’t show up as great as it is in real life!

He was fussy cut out and placed over the ink blended background that I’ve made.

Since my last video on the ink blending, I’ve had a few more questions about it, so I thought I’d share a more in-depth look into it.  To see a video of how I’ve created the background on this “wizard” card, I’ve made a video to show in detail how I’ve done it with a few tips and tricks along the way.   So check it out below or watch it on You Tube by CLICKING HERE.

I hope that this helps a little more on explaining how I achieved the look for ink blending backgrounds.  I know that I’ve had people ask me to do a video on another background I’ve made on another card, so perhaps I will share another video on that later.

If you do have any questions, please feel free to leave a comment here or on You Tube or contact me and let me know!  If you have other suggestions, I’d always love to hear that too!

Vicki-DDSWizardPairables-girl

Here’s the other card that I’ve made using the same Charming Enchanters Wizard Pairables Digital Stamp Set.  Again, I’ve arranged and sized the images how I wanted them on my computer, printed it out just the same as above and fussy cut out all of the colored images to place over my background.

I’ve mounted the image panel over a piece of purple cardstock and then placed it over a top folding 5″ square black card base.  I’ve used a piece of ribbon to run behind the layered image panel and then added some fun decorative metal corners on it.

For this card on the background, I didn’t distress it with water, I just left it ink blended.

Vicki-DDSWizardPairables-girl-close

Here’s an up-close look at the coloring I’ve done on the image.  You can see again that I’ve used my gel pens to color in the tiny details like the stars on her hat, the bubbles from her cauldron, the bookmarker and the tiny nail on the wall.

To get the glow on the images, I’ve taken a green colored pencil and added it in the places that I thought her green magic potion would glow from.

Thanks so much for stopping in and hanging out with me today!  See you soon!

Challenges I’d like to enter:

  1. Get Creative – Anything Goes
  2. Through the Craft Room Door – Anything Goes
  3. Try it On Tuesday – Boys/Girls/Children
  4. Addicted to Stamps and More – Make Your Mark
  5. Crafting By Designs – September Anything Goes