Cute Card Thursday is Feminine

First, I just want to say THANK YOU so much to everyone that has joined along with the “Purple Day” blog hop!  I’m really thrilled that you have taken an interest in it and I can see from your comments that it’s working and bringing new awareness to some…really love that and appreciate your kind thoughts as well!


So today brings us to Thursday and that means it’s time for a new Cute Card Thursday challenge!!  Yay!  The theme for this week is “feminine”!  This is a great opportunity to make a card for that special gal in your life, so I hope you will join along with us!

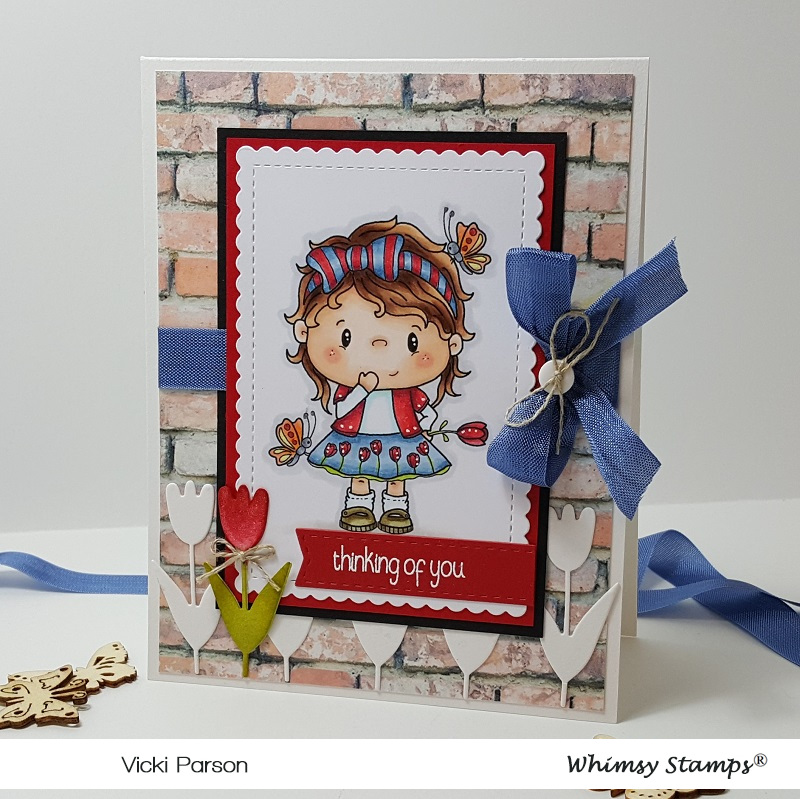
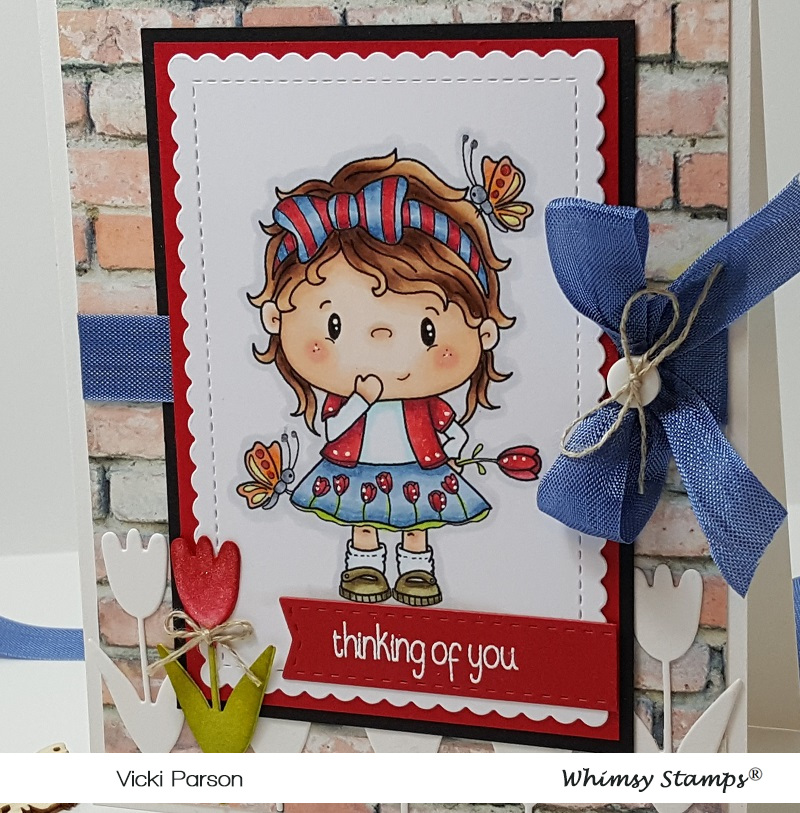
Here’s the card I made for the challenge:

Vicki-CCT575-Feminine-SSS

Well, I don’t know about you, but I have “collected” several card kits because…well…they ALL look amazing when they show them off!!  ha!  I have grown a wee little tired of all of the boxes/envelopes full of card kit product that I’m not doing anything with, and I tend to leave EVERYTHING in the box together and then forget about some of the products that are in there!  {sigh} So I was thrilled to pull this one out to make a card!

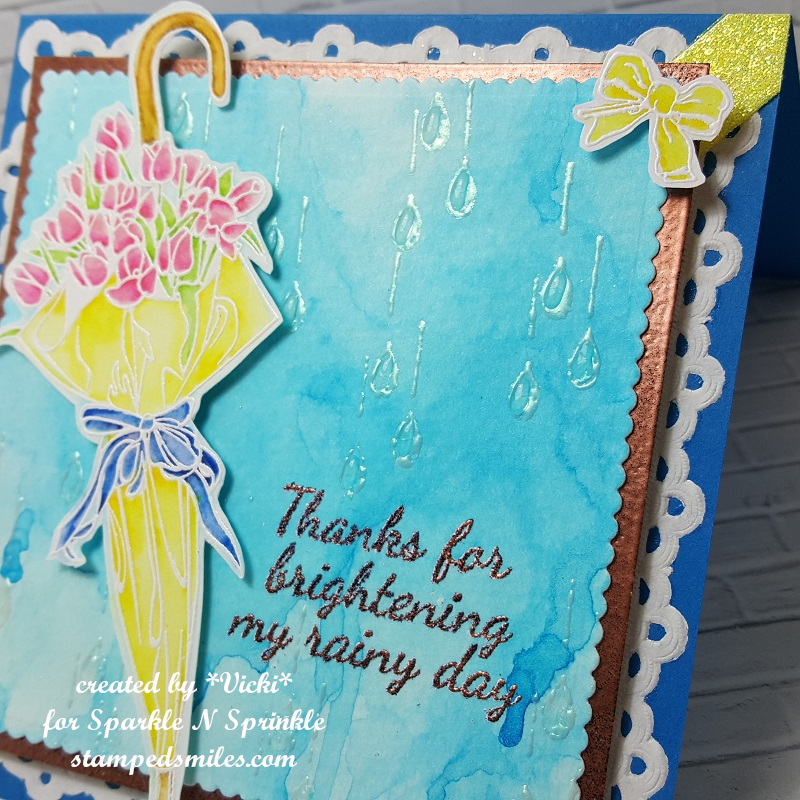
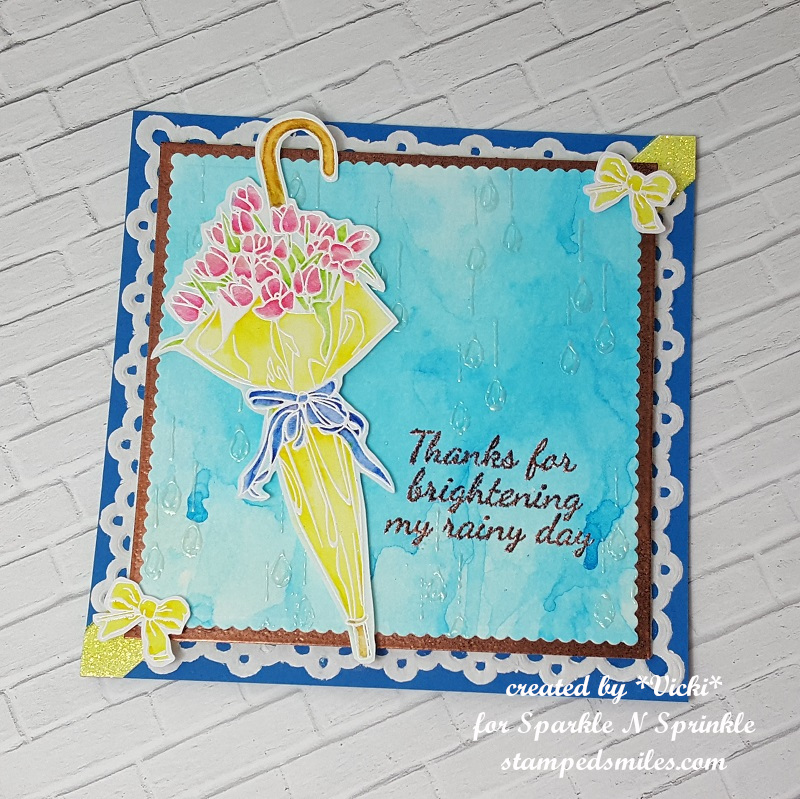
Anyway, I have used the Simon Says Stamp April 2018 “Mother’s Day special edition” card kit for this.  It came with a pretty floral background stamp called “Flower Explosion” that I’ve stamped with the same ink as cardstock in the background and then sponged around the edges.  I stamped the “mom” from the stamp set in black and then made a banner by white heat embossing the other sentiment underneath.

Vicki-CCT575-Feminine-SSS-close

A close up of the flowers here that I’ve stamped out from the SSS “Mom’s Clematis” stamp set over some Bristol watercolor paper.  I’ve used the Zig Clean Color Brush markers and a water brush to color them in with and then fussy cut them out to arrange over the stamped card panel.  As you can see in the photo, I have covered the flowers with a Spectrum Noir Glitter Brush Pen.  (You have to get that just right in photo to show up!)  I used some foam dots to pop up the bud and largest flower.

Vicki-CCT575-Feminine-SSS-flat

And then to embellish it up a bit, there were some pretty gold puffy stickers in that kit, so I took a heart and placed it next to the sentiment and then added some sequins from the kit and filled them with some gold Stickles.  Everything was mounted over a piece of black cardstock which was then mounted over a top folding A2 sized card base the same color as the image panel.

Please do hop on over to the Cute Card Thursday Blog and check out the rest of the inspiration from the design team and play along with us!

Thanks so much for dropping by and I’ll see you soon!

challenges:

  1.  Simon Says Stamp Wednesday – Anything goes
  2. Simon Says Stamp Work It Wednesday – Spring flowers + use SSS product
  3. Try it On Tuesdays – Say it With Flowers
  4. My Time to Craft – Mother’s Day or For a Female
  5. Crafty Cardmakers – “That Special Someone” (Mother’s Day)

Cute Card Thursday Has Spring Fever!

Hello friends!  Hope you are having a great week so far!  It is Thursday already and we are getting closer to the weekend and even closer to the end of March already! WOW!

Since it’s Thursday, it’s time for a new challenge over at Cute Card Thursday!  The theme of the challenge this week is “Spring Fever“!  I can feel it for sure!  Hope you can join us this week with your Spring creations!  Here’s what I’ve made for the challenge:

Vicki-CCT574-SpringFever-BM

For this card, I did the “smooshing” technique with a couple of distress inks and the little Aqua Pigment bottle from the kit (see photo) for an added color and shimmer.  I set that aside and worked on the images.

Taking a couple of the scene images from the stamp set, I put them together to create this scene over some X-Press It Card and colored everything in with Copics.  I then cut it out and sponged along the edge where the grass is and attached it over the smooshed watercolor panel.  I took both the bunnies from the set, colored them as well and fussy cut them out and popped up the one in the front with foam tape and glued the one in the back.  I cut both of these panels with the MFT Wonky Stitched rectangle die.

I stamped the clouds in the upper portion and colored them with a white gel pen.  I then took a sentiment from the same stamp set and heat embossed it with EP and die cut a banner strip.  I layered this piece over a piece of black cardstock and then took some of the paper from the kit and layered it behind the black.  This is where I took the ribbon and wrapped around the layers and added the bow too.  This was all attached to a white A2 top folding card base.

Vicki-CCT574-SpringFever-BM-close

Here’s a closer look at the image panel.  You can see the pretty shimmer in the background.  I also took some liquid applique and put it on the bunny tails so that when I heat set them, they puffed up.  Always hard to photograph, but I’ve added some shimmer to the carrots with a clear glitter brush pen and colored the shovel parts with a silver gel pen.  Lastly, I’ve attached some sequins from the kit and filled the centers with some Nuvo White Blizzard Crystal Drops.

Vicki-CCT574-SpringFever-BM-flat

From a different angle you may be able to see more of the shimmer on the card.  I love how it turned out and it certainly has me getting that “Spring Fever” where I can’t wait to go outside!!  How about you?  What do you look forward to in the Spring?

Thanks so much for dropping in today my friends!!  Have a wonderful day and I’ll see you soon!

Challenges I’d like to enter my card for:

  1.  Alphabet Challenge – ‘Z’ is for Zesty Colors (I’ve used Squeezed Lemonade and Spiced Marmalade distress inks for background)
  2. Pammie’s Inky Pinkies (PIP1911) – Anything Goes
  3. Allsorts – Favorite image, stamp or die (I love using stamps and coloring them!)

Eggs in One Basket

Hello friends!  Back today to share a fun Easter card with you!

Before I get to my card, I wanted to let everyone know that this will be my last post as a design team member.  I have enjoyed creating with the products and I’m sure I’ll be pulling them out to play with on my blog from time to time!  Sometimes we just have to lighten up our “baskets” to make things a little easier to carry.

Vicki-SNSEasterChick

This little chick dressed in bunny ears just makes me giggle!!  I had so much fun with this cute stamp set called Easter Parade by Jan Mahew.  The other chick has this fancy hat on and is adorable too! 🙂

To start out with, I thought it would be fun to take this basket weave embossing folder to create the background of the card (resembling a basket of course!) and I rounded the top corners of it along with taking some of the new colors of Super Thick embossing powders in the Spring Lilac and Pink Cheeks and sprinkling some over top of this background.  I heat embossed it from underneath so it wouldn’t fly all over.  (Remember that you don’t need anything to attach it with, just heat set it from underneath!)

I’ve also used these embossing powders to create the look over the eggs as well!  I stamped out the open image egg from the stamp set and then layered the Spring Lilac, Pink Cheeks and Neon Super Thick Embossing Powders in strips and very carefully heat set it from underneath.  (I did this BEFORE they were fussy cut out.)

I thought that my images needed grounding, so I took a grass border die and cut a strip to place at the bottom of the card front.  I wrapped some yellow ribbon around the basket background and also stamped out the CUTE sentiment from the stamp set and made a banner with it that I’ve also added a bow, button and twine in the center of.  I’ve attached all of this to an A2 sized top folding card base.  I flipped up the edges of the banner to give it a bit of dimension.

Vicki-SNSEasterChick1

Here I wanted to point out to you this adorable little chick!  If you look at his belly area, you will see that he looks quite fuzzy!  After I colored him in with my Copics and fussy cut him out with scissors, I took the Nuvo Medium Tip Glue Pen to go over his belly area with and then sprinkled over it with the Canary Flocking.  I always press it into the area for good adhesion and let it dry.  Now you have a fuzzy feeling peep!  I added him to the background and nestled him in the grass border.  I used the Dimensional Glue to adhere the flat images down.

Vicki-SNSEasterChick2

For the eggs, as mentioned above, I melted the powders (carefully trying to keep it contained within the lined stamped egg image) and then fussy cut them out with scissors.  Then I took some foam tape and nestled them among the grass too.  As you can see, I have cracked eggs which accidentally happened when I pushed down on the eggs to stick them.  I actually thought it was sort of cute with the basket theme and funny chick dressed like a bunny, so I cracked them even more and kept it that way!  (It was hard to capture in the photo, but the eggs with the embossing have a pretty shinny sheen over them.  It was sure fun to play with those embossing powders!

Vicki-SNSEasterChick-flat

I hope you’ve enjoyed my card today and that you hop on over to check out this fun stamp set along with those super thick EPs!!

Thanks so much for dropping in today!  I enjoy reading each comment and what you have to say!

Challenges I’d like to enter this card for:

  1.  Crafty Catz – Anything Goes with optional twist:  Spring
  2. The Creative Crafters – Anything Goes
  3. QKR Stampede – #339 Anything Goes
  4. Crafting From the Heart – Just for Fun (Anything Goes)

Thinking of Tulips With Whimsy Stamps

Hello friends!  I’m here!  In case you were seeing nothing on my blog or something weird going on within the last day, I appologize!  I was messing with something and pretty much should have left things alone!  I think we are all back now and everything is good!  Whew!  (Don’t worry, I won’t be doing that again!)  I guess I thought I was savvy with tech things, but it turns out, I’m not!  Ha!

So now that I’ve got things back to normal, I can share my card with you this evening!

Vicki-WSTulip-March19

This is one of the adorable March digital releases from Whimsy Stamps called Tulip by CC Designs.  She was so fun to color, and I was thinking about tulips the entire time I was coloring her up!  Tulips are my favorite flower and I have a brick foundation with little buds of daffodils and tulips coming up!  Of course, this makes me excited about Spring and the warm weather we are starting to get!!  (Hopefully I will be able to share photos of how they come up soon!)

Whimsy Stamps has also released some really cool digital papers that I’ve used for the background of my card here called Rustic Wood and Brick Collection.  (Reminds me of my brick foundation where the flowers are coming up!)  I have also used a retired Whimsy Stamps die set called “Garden Flowers” that happened to have a tulip in it, so I cut several in white cardstock to go along the bottom of the card.  I also took one and inked it up in the colored I’ve used on my image and tied an additional thread bow at the top of it.

The sentiment on the bottom of the image panel comes from the Whimsy Stamps Everyday Mini Sentiments clear stamp set.  I white heat embossed it and then cut out with the Whimsy Stamps Quick Strips die set.  I used a MFT stitched scallop die to cut out the image from and layered her with some red cardstock.  Before I added the blue ribbon, I attached the piece of black cardstock where my layered image panel would go and wrapped it around the brick background.  I then added a white button with a linen thread bow in the center of that.  (This is what I used on the colored tulip.)  All of these layers were then mounted onto an A2 sized top folding white card base.

Vicki-WSTulip-March19-close

Here’s a closer look at her all colored up with Copic markers!  You can purchase them at Whimsy Stamps. These are the colors I’ve used on my image today:

  • bow, jacket, skirt, tulips – B97, B95, B93, R39, R37, R35, YG25
  • shirt, socks, shoes – BG000, E87, E84, E81
  • hair, skin – E27, E25, E23, E21, E11, E00, E000, R20
  • butterflies – C5, C3, YR04, YR02, Y13
  • C1 around image and white gel pen for flowers and jacket along with red and black gel pens for dots on butterflies
  • covered the red portion of die cut tulip with Wink of Stella clear glitter brush pen.

Vicki-WSTulip-March19-flat

I hope you’ve enjoyed my card this evening!  Are you as ready for those Spring flowers as much as I am?  What are your favorite flowers?

Thanks so much for stopping in today!!  See you again soon!

Challenges I’d like to enter my card for:

  1.   Words 2 Craft By (W2CB63) – “Happiness held is the seed, Happiness shared is the flower.”
  2. As You Like It – Dies or Stencils & why? (I love using dies because I feel there are so many fun things you can do with them/versatile, even it you don’t stamp!)
  3. A Bit More Time to Craft – #88 Anything Goes
  4. Challenge Up Your Life – Bye-Bye Winter

Another Pot O’ Gold!

Hi there friends!  I guess I am really feeling the luck of the Irish this week!  I have another fun St. Patrick’s Day themed card to share today:

Vicki-SNSPotOGold

My card here may seem a bit simple, but it has a few really fun added extras to really make it shinny and glittery!  I have used Lil Leprechaun (Digital only stamp set).   I took the pre-colored versions of the set and arranged them in a blank Word.doc for how I wanted it to appear on my card front.  I used the clover images and resized them to fit around the bottom of the pot of gold area and then placed the sentiment where I wanted it off to the side.

I then printed it out and then cut it out with the Nuvo Basics Rectangle dies.

I used a couple of Copic green markers to make the “blades of grass” next to the pot of gold and clovers.  I also used some colored chalk to sponge in some colors for the rainbow behind the pot of gold.

Vicki-SNSPotOGold2

Here you can also see on the panel where I’ve taken some Super Thick Gold EP and sprinkled some in the corners of my image panel and then heat set it from underneath.

I also took a Nuvo Precision Glue Pen to add some “dots” in the center of the clovers and then of course used the Shamrock Glitter to go over them!  I also covered the coins in the pot with the glue and sprinkled some Champagne Glitter over them for some sparkle!

With the same Champagne Glitter that I used on the coins in the pot, I also took some Sticker Paper and covered an entire panel with it and burnished it in!  The shimmer and glitz on this are stunning in person and really sets off the card!  I’ve also used the Glitter Brush to take away the excess glitter particles and it’s a must have for clean up too!  (Instead of clinging to the brush, it repels it away!)  These sheets are somewhat thin, so I made sure that I’ve added some layers of cardstock in between this glitter panel for stability to the card.  (Keep this in mind if you are using the sticker paper for this idea.)

Vicki-SNSPotOGold-flat

I tried to capture some of the sparkle in the photo, but it really looks brilliant when you are holding it in person! 🙂

I hope you’ve enjoyed my card today and I really appreciate you stopping in!

Challenges I’d like to enter this card for:

  1.  Crafting With an Attitude – Anything Goes
  2. Creative Moments – Anything Goes
  3. QKR Stampede – Anything Goes #338
  4. Creative Fingers – Anything Goes
  5. Pammies Inky Pinkes – Anything Goes PIP1910
  6. Not Just Cards – Anything Goes

Whimsy Stamps St. Patrick’s Day Celebrations Week!

Hello friends!!  I’m so happy that we are into March as I hope to be feeling warmer temps and “seeing the green” very shortly over my way!  I’m more than ready for that!

In the meantime, how about we celebrate with some inspiration!

Vicki-WSPatricks Day Celebrations

I have made this super fun (mostly green) card especially for this fun event with the really adorable Little Leprechaun digital stamp by Crissy Armstrong.  I thought he was so cute sitting atop his pot of gold with his new winged friend there!  He was so fun to color up for this card! (See the Copic list below!)

For the card, I started out with some watercolor paper, and I’ve used some Aqua pigments (liquid watercolor from Brutus Monroe) and some extra water for the background of my card, then I cut it out with the Whimsy Stamps Hand Stitched Nested Rectangle Dies.  I also used this to cut out the leprechaun image too.  I’ve used some gold mirror cardstock to mat a layer of it behind the image panel.

I thought it would be fun to add a rainbow behind the image panel, so I took the WS Kinetic Curved Hills die set and cut strips with the straight curve die in the colors of the rainbow and added the strips over the background.  Then I attached the layered image panel and took the WS No-See All Seasons Tree die set to cut some grass and mushrooms to attach at the bottom of the card.  I used a white gel pen to color the spots on the tops of the mushrooms.  I also sponged some ink over all the pieces.  One of the sections of grass was popped up with foam tape.  Lastly, I took an older sentiment from Whimsy Stamps and made a banner that was popped up with foam tape over the design.  I then mounted the entire card panel over an A2 top folding white card base.

Vicki-WSPatricks Day Celebrations-close

Here you can see a close-up view of the coloring.  I have used the following Copics to color in the image with:

  •  pot, hat band, stockings, coat trims & dragonfly body:  C8, C5, C3
  • Leprechaun outfit:  C09, C07, G05, G03, Y11, Y13
  • Leprechaun gold trim and coins:  Y17, Y15 (layered over with gold gel pen)
  • hair, skin, dragonfly wings:  E09, E23, E21, E00, E000, Y11, R20, R00
  • clover on hat:  YG97, YG95
  • outline of image and “dots”:  C3, C1, C0, Y11, gold gel pen

You can also see the rainbow has some shimmer on it.  This is where I took a Spectrum Noir clear glitter brush pen to go over it.  You can also see a bit of shimmer from the Aqua pigments in the background…they’re really stunning, and I’ll be using them again in the future, so be sure to check back!! 🙂

Vicki-WSPatricks Day Celebrations-flat

I wanted to bring out some more of that gold with the mirror layer behind the leprechaun, so I brought some gold sequins into the layout and filled them with some gold Stickles.  When you hold this card up to the light, the whole thing really shimmers and sparkles!!  I loved how it turned out!  I hope you’ve enjoyed it too!

Thanks so much for dropping in today!

Challenges I’d like to enter this card for:

  1.  Double Trouble – challenge #23 – “Thing 1“:  The Wearin’ O’ the Green “Thing 2“:  Collaboration with Heart 2 Heart Challenge (entered below!)  “Thing 3“:  Include a golden touch (used gold mirror cardstock and sequins filled with gold Stickles!)
  2. Heart 2 Heart Challenge – Greens, Rainbows & Pots of Gold (3 part challenge)
  3. Daisy Chain – Spring is in the Air!
  4. Creative Inspirations – Spring Greens
  5. Mod Squad – Green, Green Everywhere
  6. Crafting By Designs – Anything Goes
  7. Three Amigos Blog Hop Challenges – Rainbow

Imagine…You’re Home!

Hello friends!  I have to say that I’m very happy that we’ve started the month of March and I really look forward to seeing the bit of green and growth soon to come!

Today, I have a card using this new stamp set:

Vicki-SNSCottage

Today, my card features this really fun Lil Garden Cottage rubber stamp set.  I have colored it up with my Copic markers and I’ve used the packaging from the stamp set to help with color suggestions.  (I really like that when stamp sets have a colored version on their product labels!)

Since last year I’ve been noticing lots of “fairy garden” projects, and I am amazed at how many “tiny” items that are available to purchase so that you can create your own little garden!  This image sort of reminds me of that!  I think I like creating my own little “fairy garden” on paper! 🙂  Do any of you like to make Fairy Gardens?

For the base of my card, I’ve used an A2 sized top folding kraft card base.  I took my VersaMark ink to stamp the tiny mushroom images from the set along the bottom edge of the base.  I also took another piece of kraft cardstock and heat embossed part of the sentiment with the White EP and then cut it out from a circle die.  I set these pieces aside while working on the rest of my card.

Vicki-SNSCottage3

After coloring in the image, I also took the other portion of the sentiment “Imagine…” and stamped it next to the cottage image, but then heat set that one with the Coffee EP.  I also took an additional piece of white cardstock to layer behind the image panel.  For that piece, I took my VersaMark ink pad and sponged along the edges of it and also heat set that with the same Coffee EP as well.  You can also see at the top of the image panel that I’ve lightly blended in some distress ink to soften up the white a bit.

For the sparkly twine at the top, I created it by taking the 1/4″ Tear Tape and twisting it on itself and then I ran it through some Shamrock Glitter.  I took a piece of it to make a bow and then glued it over my design.

I took some craft foam to pop up this image panel a bit before attaching it to the kraft card base.  I also took some more craft foam to pop up the side of the circle sentiment panel as well.

Vicki-SNSCottage2

To add a bit of detail to my image and make it my own, I stamped, colored and fussy cut out each of the mushrooms as well as the snail and then attached them where I wanted them to show up on my image panel.

I used the Nuvo Precision Glue Pen to “color in” the areas where I wanted it to be green and then sprinkled some of that Shamrock Glitter over those areas.  I took the Nuvo White Crystal Drops to add a few “dots” over the red mushroom.  I then took the Nuvo Morning Dew Crystal Drops (dries clear) and filled in the “window” on the cottage as well as the “snail shell” to add some shine to it.

Vicki-SNSCottage4

I hope you’ve enjoyed my card today and that you’ve been inspired!

Thanks so much for dropping in today!!  I’m so hoping that I can get back into catching up with you and getting caught up on entering challenges!  I do miss all of this!

Wishing you a happy day!

Whimsy Stamps March New Release!

Hello friends!  I don’t think I ever remember being so sick before! WOW!  I was literally stuck in the bed for a couple of days there!  I’ve been taking some meds from doctor and starting to feel a bit better now, just regular cold and not so much the fever and chills any more.  Thank you SO MUCH for the very kind get well thoughts as I truly appreciate that!  So glad that’s over with now!

Have you checked out the new release over at Whimsy Stamps yet?  There are lots of really adorable digital stamps this month and I’m excited to be sharing one of those with you today:

Vicki-WSBunny-NewRelease

I have used this sweet little image by C.C. Designs for Whimsy Stamps called Bunny.  (And that little bunny is too cute wrapped up in the garden hose!!)

I have also used some fun new digital papers for the background on my card here too!  I’ve printed out a piece from the Whimsy Stamps Rustic Wood and Brick Papers digital collection and used it on the background of my green card panel.

I also used some die cuts to add some fun elements to my design as well as wrap some ribbon at the top and add a white flower with a rhinestone in the center of it.  I heat embossed a sentiment in white EP over a piece of the green cardstock and cut it out with a stitched die cut banner.

Vicki-WSBunny-NewR2

I have it all colored up with my Copic markers and then I’ve used some metallic gel pens for the dots and for the water sprinkling from the hose.

Here you can better see how I’ve colored in the image and the details of sparkle with the gel pens.  I’ve used some craft foam behind the image panel for a bit of dimension too.

Vicki-WSBunny-NewRflat

I hope you’ve enjoyed my card for today and have been inspired to go check out the rest of the new release at Whimsy Stamps!

I’ll be back again tomorrow for some more inspiration!  Thanks so much for dropping in!!  Have a great day!

Brightening A Rainy Day

Hello friends!  Are you longing for that rainy Springtime showers with lots of flowers because you’re tired of snow?  I know that I’ve been wanting Spring to get here very soon!  I thought I’d bring some of that feeling into my blog post this morning:

Vicki-SNSMayShowersBundle-Feb20-card3

I started out with my images from these stamp sets that were released as a bundle set called May Showers Spring Bundle.

I wanted to incorporate both of these rubber stamp sets into my design, so I heat embossed the parasol image from the Showers of Tulips set and the bows from the May Showers set with White EP over some Bristol Smooth Watercolor paper.  I colored them in with my Zig Clean Color Real Brush markers and fussy cut them out with my scissors and set them aside.

Vicki-SNSMayShowersBundle-Feb20-card3-close

For the background panel, I took another piece of watercolor paper and spritzed it with water to get it good and wet before sprinkling on some Nuvo Blue Blitz Shimmer Powder.  I spritzed it again to really get the water moving around and manipulated the panel so that I could get the water drips going down the panel.  Once this dried, I cut it out with the Tonic Basics Scalloped Square Dies.

Using my cut-out parasol image for placement, I heat embossed the sentiment from the May Showers stamp set with the Coffee EP where I wanted it over the watercolor panel.  I then took the raindrops image from the same stamp set and stamped it with VersaMark ink repeatedly over the background and heat embossed it with that Magic Speckle EP.  I’ve also added some Nuvo Morning Dew Crystal Drops to the center of each drop for more dimension and shine to get a nice wet water look to it!  This was set aside to dry for a bit.

I took another piece of cardstock (slightly larger than the watercolor panel) and rubbed my VersaMark Ink pad along the edges to heat emboss it with the Coffee EP.  I attached these layers together and then glued some craft foam behind it for dimension.

Vicki-SNSMayShowersBundle-Feb20-card3-flat

I’ve used a blue 5″ square top folding card base for my design and took a piece of white doily I had from my stash and glued it on with some Dimensional Glue.  I then added a strip of white cardstock covered with a piece of 1/2″ Tear Tape going diagonally across the card base and burnished some Sunny Daze glitter over it.

Finally, I added the watercolor and embossed layers over top of the card base and then took my fussy cut images and added them to the design with some foam dots.

I hope you’ve enjoyed my Spring Showers card today and it’s inspired you in some way!  I thank you SO MUCH for dropping in!  I appreciate all of the kind comments and a big welcome to my new followers…love meeting fellow crafty friends!!

Challenges I’d like to enter this card for:

  1.  Cardz 4 Galz – Weather (any condition)
  2. Moving Along With the Times – Little Bit ‘Shabby Chic’
  3. The Flower Challenge – Use Latest Stamp/Dies + flowers (SNS stamps)
  4. Pammie’s Inky Pinkies – (PIP1907) – Anything Goes
  5. Try it On Tuesday – “Powder Your……..” (Shimmer powder, Embossing powder)

Late Valentine Share and Looking Into Future With More Calendar Months!

Hello friends!   (Long post with lots of photos!!)

I wanted to share the Valentine card I made for my hubby on Valentine’s Day yesterday, but I couldn’t share it on my blog until after he got it because he can be known to be a “stalker” on my blog to see what I’m up to!!  LOL!

Vicki-BMLoveBug-Valentine

Vicki-BMLoveBug-Valentine-close

I’ve colored up these “wasps” with Copics and for the wings and hearts there is a bit of shimmer on them as you can see in the photo.  For that I have used the Aqua Pigments Valentine Collection plus the Aqua Pigment Pearl for the wings.   I heat embossed the sentiment from the stamp set with EP and I cut the banner myself with scissors and mounted it over the card with the Foam Tape. The little wooden Convo heart accent was added too.  Lastly, I took some Nuvo White Crystal Drops and added a few dots here and there around the hearts.

I’ve cut the “wasps” out with a stitched circle die and mounted it over some cardstock from the kit that was cut with a scallop circle die.

Vicki-BMLoveBug-Valentine-flat

So, for the background of my card, as I had mentioned above, I used the stencil in the background which is a huge heart with several hearts inside of it.  I took some Ink and sponged it over my white card front background.  I was able to take some Nuvo Moonstone Glitter Paste and go over it to add sparkly dimension to it!  LOVE how it turned out!  I stamped a couple more hearts in the bottom corner and colored them the same as the hearts with the “wasps” using the same Aqua Pigments collection.  I also added more dots with the Nuvo White Crystal Drops.  I layered this onto a piece of red cardstock and cut it out with a scallop rectangle die and then mounted this entire design onto an A2 sized top folding white card base.  The envelope underneath was used to house the card in and I embellished it with some heart glitter stickers that was included in the box as well.

Challenges I’d like to enter this above card for:

  1.  Crazy 4 Challenges (C4C470) – Valentine’s Day Card
  2. Crafty Cardmakers – Love, Love, Love
  3. Always Fun – Love/Valentines
  4. Tuesday Throwdown – Falling Hearts
  5. Try it On Tuesday – Romance
  6. Crafting By Designs – Love is in the Air
  7. Crafty Gals Corner – Love is in the Air (Add a Heart)
  8. Creative Knockouts – Love is in the Air

Now if you remember this post I had a few weeks ago where I had started (late of course) making up my calendar pages for 2019 to put in my stamp room, I needed to make up a couple more of them as the time keeps on ticking….

Vicki-TE-March and April Grumplings Calendar

LOL!  These cute Calendar Grumplings from Taylored Expressions so crack me up! 🙂

Oh, I can’t believe we are getting ready to look into the month of March soon!  I think after having so much cold, ice and snow, I’m about ready to see some pretty flowers in my back yard! Yay!

Vicki-TE-March Grumplings Calendar

So, here’s my March calendar and like the entire calendar card set, I’ve used the Taylor Expressions pre-made 3×4 Calendar set for 2019.  I’ve cut down this panel very slightly so that I could mat a black piece of cardstock behind it.

For the image area, I’ve used a rainbow die from Lawn Fawn and cut it out in several different colors to create rainbow strips which I’ve added to the backside of the black scallop frame from the TE Build A Scene – Calendar 2 die set.  I’ve also cut out a strip of grass from the Build A Scene – Calendar die set.  The sentiment (from the same stamp set) was stamped with black pigment ink and clear heat embossed over a strip of vellum which I cut into a banner with scissors and then attached it to the corner of the black frame.

Vicki-TE-March-Grumplings Calendar-close

Here’s a closer view of the image panel.  I colored the image with Copic markers and then cut it out with the coordinating TE Calendar Grumplings die set.   I’ve also added some Nuvo White Blizzard Glitter Drops over the clover.

Vicki-TE-April Grumplings Calendar

And here’s my April Calendar card using the same stamp set, coordinating dies and 2019 pre-printed calendar cards.  I slightly cut the edges to mat the blue cardstock behind it as well.  I’ve used this same color of cardstock to cut the frame from the TE Build A Scene – Calendar Dies.  I stamped the sentiment onto a strip of white cardstock and made a banner with my scissors and attached it behind the frame on the top left side.  (I’ve also used this same die set to cut a couple of clouds and sponged some gray ink at the bottom of each one.

For the bottom of the frame, I took a piece of vellum and cut out that piece from the Build A Scene – Calendar 2 dies.  I took a glitter brush pen to add some sparkle to this piece of vellum, so it makes it look like a “rain puddle” he’s standing in.

Vicki-TE-April Grumplings Calendar-close

For this elephant image, I also colored him up with Copic markers and cut him out with the coordinating dies.  I attached him along with the clouds over the panel where I wanted them to be.  I cut out some “rain drops” with vellum but ended up not being able to see them very well, so I took the Nuvo White Blizzard Glitter Drops and went over them and then created more “rain drops” with it….I ended up liking that effect better, but I had already attached the vellum and just decided to leave it and go over them.  LOL!

There you go, that just tells you that I’m either getting old and my sight is failing me or I just have been continuously crafting until I’m blinding myself!!  ha!

I hope you’ve enjoyed my crafty makes today and I will be back again tomorrow to share a special post with you for a VERY special cause and I hope you can join me to share in this event!!  So please be sure to come back tomorrow!

Have a great Friday evening and thanks for dropping by!