Purple Day Epilepsy Awareness Blog Hop

Hello friends!  I am very honored to be joining my friend Fikreta Posavec to support her efforts in “Purple Day” for Epilepsy Awareness.

 Please take a moment to read:

Purple Day is a global grassroots event formed with the intention to increase worldwide awareness of epilepsy, and to dispel common myths and fears of this neurological disorder. Further intentions of this movement are to reduce the social stigmas commonly endured by many individuals afflicted with the condition; to provide assurance and advocacy to those living with epilepsy that they are not alone in their ongoing endurance; and to initiate individuals living with the condition to take action in their communities to achieve these aims.

The day occurs annually on March 26.

 Formation and history

The concept of Purple Day was initiated by a 9-year-old named Cassidy Megan and was motivated by her own struggle with epilepsy.

The Epilepsy Association of Nova Scotia helped to develop Cassidy’s idea, and the first Purple Day event was held on March 26, 2008, and is now known as the Purple Day for Epilepsy campaign.

In 2009, the New York-based Anita Kaufmann Foundation and Epilepsy Association of Nova Scotia joined to launch Purple Day internationally and increase the involvement of numerous organizations, schools, businesses, politicians and celebrities around the world. On March 26, 2009, over 100,000 students, 95 workplaces and 116 politicians participated in Purple Day. In March 2009, the official USA Purple Day Party launch was organized by the Anita Kaufmann Foundation. Canadian Paul Shaffer of the Late Show with David Letterman attended the official launch at Dylan’s Candy Bar in New York City.

In March 2012, Purple Day received the Royal Assent and became a legal day for epilepsy awareness in Canada.

In December 2015, Electronics retailer Dick Smith had arranged a major corporate partnership with Epilepsy Action Australia to support Purple Day in Australia with a $50,000 cash sponsorship, prizes and exclusive distribution of Purple Day merchandise. A week prior to Purple Day celebrations in 2016, Dick Smith was placed in receivership. Later, the Retail Food Group provided a $50,000 donation to match Dick Smith’s previously promised sponsorship.


My own experience with epilepsy revolved around someone in my childhood school.  She was constantly made fun of because of certain behaviors she had due to epilepsy and I wasn’t aware of her condition, but naturally felt sorry for her.  Due to me trying to be nice to this person, I quickly became someone who was also made fun of for it.  Children can be cruel, but I’m sure that the long term affects of what this person went through were very traumatic and long lasting.  I watched her collapse in her yard with a seizure and was so scared. (This is how I learned about what she had.) She was embarrassed about it and didn’t want to talk with anyone about it.  I have since lost contact with that person from school years, but think of this time with my heart still going out to that person and wishing her a happy life.

My hope is that there is more education about this in the school system and especially since it can be very dangerous and children need to be aware of it along with what to watch for and/or to tell a teacher what is going on or how to help.  If other children are more aware, then maybe stigma can be less severe for children with epilepsy.  It would be so hard for a child to speak out about something they are being made “ashamed’ for.


Fikreta has brought us together for a fun blog hop to bring awareness to PURPLE DAY and educate people about this condition that her husband has.

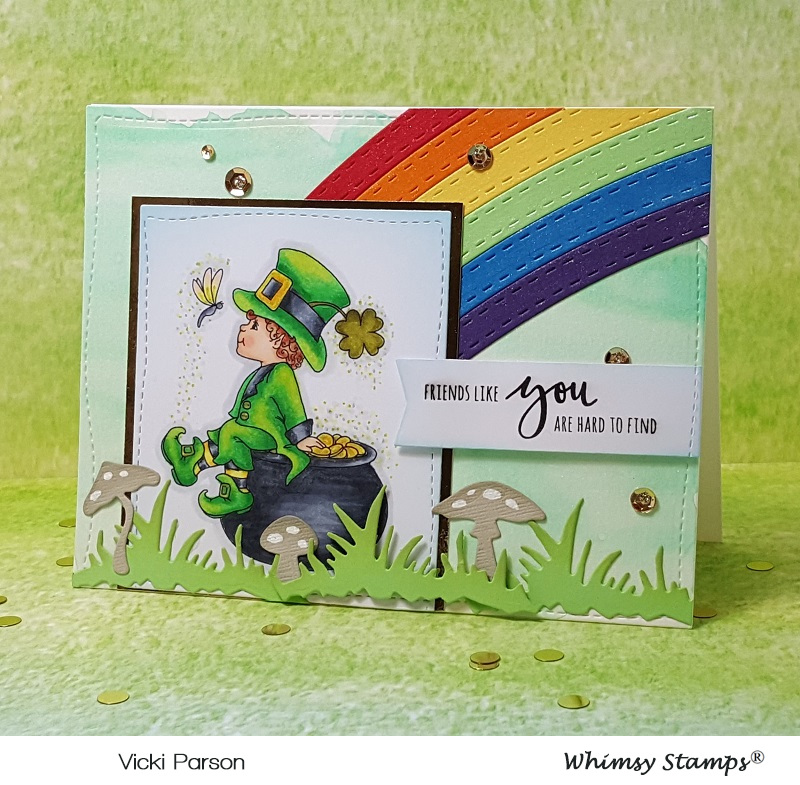
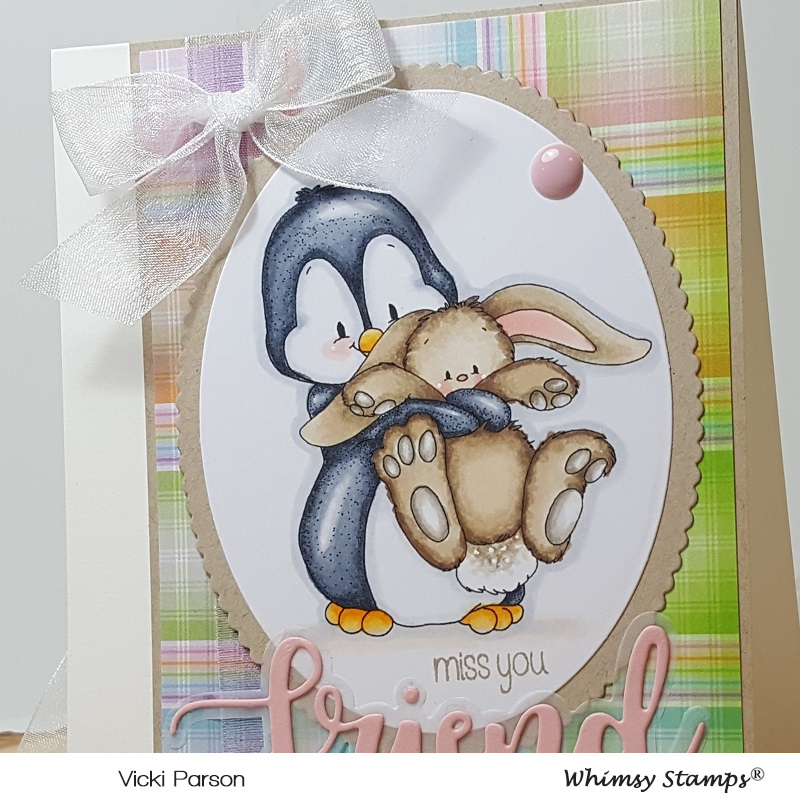
Here is the special card that I’ve made for this blog hop:

Vicki-PurpleDayBlogHop-MFTWSC429

I had so much fun with this card!  I first started out by making a panel with alcohol inks over some Yupo paper.  I didn’t have the MFT Triangle dies, so I made myself a stencil and cut out my own from the alcohol background I made.  I then white heat embossed the sentiment from the MFT All About You stamp set and cut out the black strip and attached in the center between the triangle layout.  I then cut out this panel with the MFT Wonky Stitched Rectangle die and added some splatters with some Brutus Monroe purple “basket grass” Aqua pigment and water.  (Love the shimmer it created too!  See the photo below.)

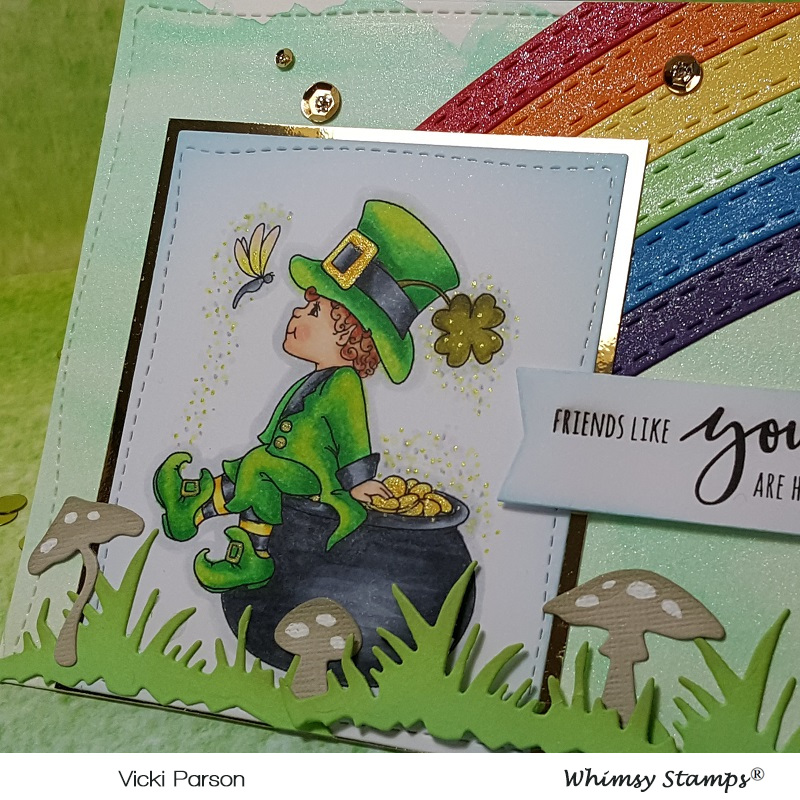
Next, I cut out the “you” die from some Brutus Monroe Spring collection glitter stock and placed it underneath the black strip sentiment.  Lastly, I stamped one of the cute little Yetis from the MFT Beast Friends stamp set and colored him with my Copics.  I popped him up over the bottom portion of the design with some foam dots.  Lastly, I’ve added some Brutus Monroe Unicorn Bottlecap Sequins and filled the centers with Nuvo White Blizzard Glitter Drops.

Vicki-PurpleDayBlogHop-MFTWSC429-close

Here’s a closer look at this cute little guy and how I’ve colored him up.  I’ve used a light purple tone marker to color the outer “fur” portion of his body.

Vicki-PurpleDayBlogHop-MFTWSC429-flat

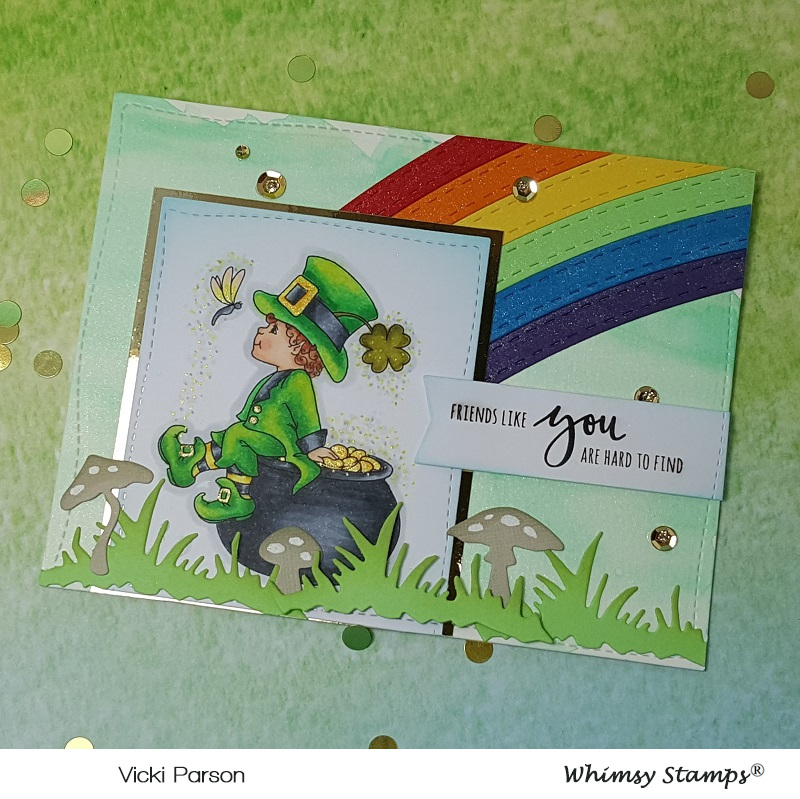
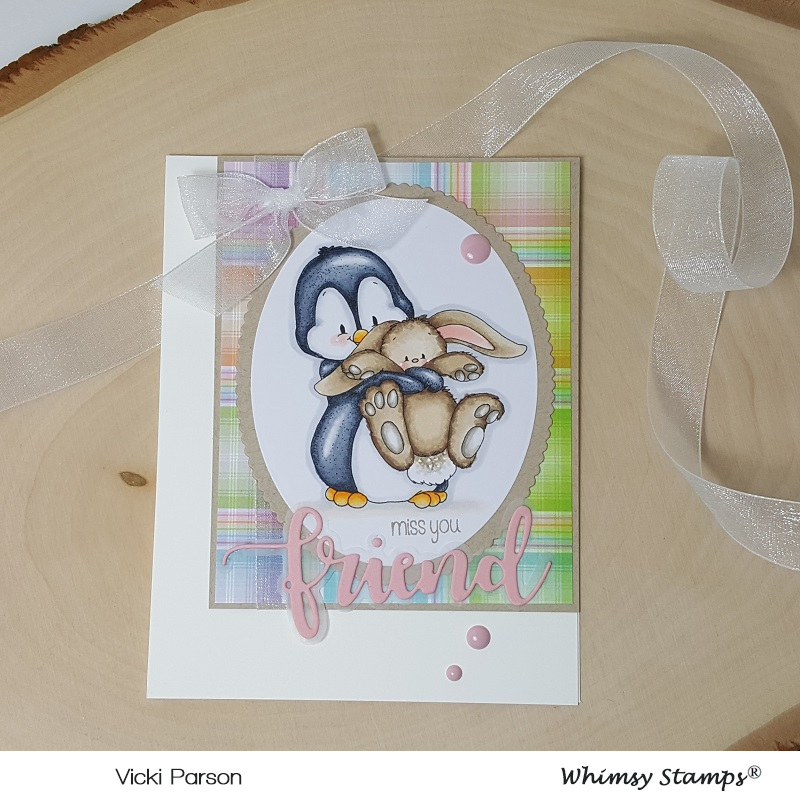
Here’s the card lying flat, and you can see in the light how those splatters shimmer!  Those aqua pigments are very awesome to play with!!

challenges I’d like to enter:

  1.  My Favorite Things Wednesday Sketch Challenge – MFTWSC429
  2. Creative Moments – Anything Goes
  3. Pammies Inky Pinkies – PIP1912 Anything Goes

Whimsy Stamps Partner’s with Make a Wish Canada

Hello friends!  It’s my pleasure today to post information about this special image that Whimsy Stamps has just released today in honor of our beloved illustrator Crissy Armstrong’s brother, Ray Gauvreau, who is currently battling cancer.

I have made a special card just for him that is being sent out his way:

Vicki-WS-Penguin Ray

I started out by coloring up this image with my Copic markers in the following:

  • Penguin body, IV wheels/post – C8, C5, C3, C1
  • penguin feet/beak, tongue, cheeks – YR24, YR21, Y23, R20, R11, R00, R000
  • Bandage, IV bag – E33, E31, Y11, R00
  • ground/shadow – C1, E0000

For the background of my card, I took some xyron printed paper and foiled the background which I think looks great for a masculine theme design and that is what I was trying to go for with this card.  After foiling it, I took and sponged some yellow distress ink to blend around the edges of it for a bit of color, along with the image panel.

I had an old stamp set from my stash and thought it would be a great fit for this card, so I stamped the vertical “fight” sentiment next to the IV bag and then I took the other sentiment and heat embossed it with white EP and cut it in a strip to attach over the image.  Lastly, I’ve added some white enamel dots to each corner of the design.

Vicki-WS-Penguin Ray-close

Here’s a close look at the image and how I’ve colored it in.  It’s hard to tell in the photo of course, but I’ve also covered the IV bag with a clear glitter brush pen.  I think this image is a really great one to add to a crafter’s collection for “get well” cards and encouragement too like this one.  After cutting out the colored image panel and sponging the color around the edges, I’ve also layered this along with the foil panel with some black cardstock before attaching it onto a white top folding A2 sized card base.

Vicki-WS-Penguin Ray-flat

In this photo that I’ve laid flat, you can better see the shine from the foiled background that I’ve done.

Thank you so much for stopping in today and for your kind support too!

I will see you tomorrow for a special blog hop, so I hope you can join me!

Challenges:

  1.  Watercooler Wednesday – WWC213 – Anything Masculine Goes
  2. Aud Sentiments – Any sentiment EXCEPT “Happy birthday”
  3. QKR Stampede – #340 Anything Goes

Cute Card Thursday Has Spring Fever!

Hello friends!  Hope you are having a great week so far!  It is Thursday already and we are getting closer to the weekend and even closer to the end of March already! WOW!

Since it’s Thursday, it’s time for a new challenge over at Cute Card Thursday!  The theme of the challenge this week is “Spring Fever“!  I can feel it for sure!  Hope you can join us this week with your Spring creations!  Here’s what I’ve made for the challenge:

Vicki-CCT574-SpringFever-BM

For this card, I did the “smooshing” technique with a couple of distress inks and the little Aqua Pigment bottle from the kit (see photo) for an added color and shimmer.  I set that aside and worked on the images.

Taking a couple of the scene images from the stamp set, I put them together to create this scene over some X-Press It Card and colored everything in with Copics.  I then cut it out and sponged along the edge where the grass is and attached it over the smooshed watercolor panel.  I took both the bunnies from the set, colored them as well and fussy cut them out and popped up the one in the front with foam tape and glued the one in the back.  I cut both of these panels with the MFT Wonky Stitched rectangle die.

I stamped the clouds in the upper portion and colored them with a white gel pen.  I then took a sentiment from the same stamp set and heat embossed it with EP and die cut a banner strip.  I layered this piece over a piece of black cardstock and then took some of the paper from the kit and layered it behind the black.  This is where I took the ribbon and wrapped around the layers and added the bow too.  This was all attached to a white A2 top folding card base.

Vicki-CCT574-SpringFever-BM-close

Here’s a closer look at the image panel.  You can see the pretty shimmer in the background.  I also took some liquid applique and put it on the bunny tails so that when I heat set them, they puffed up.  Always hard to photograph, but I’ve added some shimmer to the carrots with a clear glitter brush pen and colored the shovel parts with a silver gel pen.  Lastly, I’ve attached some sequins from the kit and filled the centers with some Nuvo White Blizzard Crystal Drops.

Vicki-CCT574-SpringFever-BM-flat

From a different angle you may be able to see more of the shimmer on the card.  I love how it turned out and it certainly has me getting that “Spring Fever” where I can’t wait to go outside!!  How about you?  What do you look forward to in the Spring?

Thanks so much for dropping in today my friends!!  Have a wonderful day and I’ll see you soon!

Challenges I’d like to enter my card for:

  1.  Alphabet Challenge – ‘Z’ is for Zesty Colors (I’ve used Squeezed Lemonade and Spiced Marmalade distress inks for background)
  2. Pammie’s Inky Pinkies (PIP1911) – Anything Goes
  3. Allsorts – Favorite image, stamp or die (I love using stamps and coloring them!)

Eggs in One Basket

Hello friends!  Back today to share a fun Easter card with you!

Before I get to my card, I wanted to let everyone know that this will be my last post as a design team member.  I have enjoyed creating with the products and I’m sure I’ll be pulling them out to play with on my blog from time to time!  Sometimes we just have to lighten up our “baskets” to make things a little easier to carry.

Vicki-SNSEasterChick

This little chick dressed in bunny ears just makes me giggle!!  I had so much fun with this cute stamp set called Easter Parade by Jan Mahew.  The other chick has this fancy hat on and is adorable too! 🙂

To start out with, I thought it would be fun to take this basket weave embossing folder to create the background of the card (resembling a basket of course!) and I rounded the top corners of it along with taking some of the new colors of Super Thick embossing powders in the Spring Lilac and Pink Cheeks and sprinkling some over top of this background.  I heat embossed it from underneath so it wouldn’t fly all over.  (Remember that you don’t need anything to attach it with, just heat set it from underneath!)

I’ve also used these embossing powders to create the look over the eggs as well!  I stamped out the open image egg from the stamp set and then layered the Spring Lilac, Pink Cheeks and Neon Super Thick Embossing Powders in strips and very carefully heat set it from underneath.  (I did this BEFORE they were fussy cut out.)

I thought that my images needed grounding, so I took a grass border die and cut a strip to place at the bottom of the card front.  I wrapped some yellow ribbon around the basket background and also stamped out the CUTE sentiment from the stamp set and made a banner with it that I’ve also added a bow, button and twine in the center of.  I’ve attached all of this to an A2 sized top folding card base.  I flipped up the edges of the banner to give it a bit of dimension.

Vicki-SNSEasterChick1

Here I wanted to point out to you this adorable little chick!  If you look at his belly area, you will see that he looks quite fuzzy!  After I colored him in with my Copics and fussy cut him out with scissors, I took the Nuvo Medium Tip Glue Pen to go over his belly area with and then sprinkled over it with the Canary Flocking.  I always press it into the area for good adhesion and let it dry.  Now you have a fuzzy feeling peep!  I added him to the background and nestled him in the grass border.  I used the Dimensional Glue to adhere the flat images down.

Vicki-SNSEasterChick2

For the eggs, as mentioned above, I melted the powders (carefully trying to keep it contained within the lined stamped egg image) and then fussy cut them out with scissors.  Then I took some foam tape and nestled them among the grass too.  As you can see, I have cracked eggs which accidentally happened when I pushed down on the eggs to stick them.  I actually thought it was sort of cute with the basket theme and funny chick dressed like a bunny, so I cracked them even more and kept it that way!  (It was hard to capture in the photo, but the eggs with the embossing have a pretty shinny sheen over them.  It was sure fun to play with those embossing powders!

Vicki-SNSEasterChick-flat

I hope you’ve enjoyed my card today and that you hop on over to check out this fun stamp set along with those super thick EPs!!

Thanks so much for dropping in today!  I enjoy reading each comment and what you have to say!

Challenges I’d like to enter this card for:

  1.  Crafty Catz – Anything Goes with optional twist:  Spring
  2. The Creative Crafters – Anything Goes
  3. QKR Stampede – #339 Anything Goes
  4. Crafting From the Heart – Just for Fun (Anything Goes)

Thinking of Tulips With Whimsy Stamps

Hello friends!  I’m here!  In case you were seeing nothing on my blog or something weird going on within the last day, I appologize!  I was messing with something and pretty much should have left things alone!  I think we are all back now and everything is good!  Whew!  (Don’t worry, I won’t be doing that again!)  I guess I thought I was savvy with tech things, but it turns out, I’m not!  Ha!

So now that I’ve got things back to normal, I can share my card with you this evening!

Vicki-WSTulip-March19

This is one of the adorable March digital releases from Whimsy Stamps called Tulip by CC Designs.  She was so fun to color, and I was thinking about tulips the entire time I was coloring her up!  Tulips are my favorite flower and I have a brick foundation with little buds of daffodils and tulips coming up!  Of course, this makes me excited about Spring and the warm weather we are starting to get!!  (Hopefully I will be able to share photos of how they come up soon!)

Whimsy Stamps has also released some really cool digital papers that I’ve used for the background of my card here called Rustic Wood and Brick Collection.  (Reminds me of my brick foundation where the flowers are coming up!)  I have also used a retired Whimsy Stamps die set called “Garden Flowers” that happened to have a tulip in it, so I cut several in white cardstock to go along the bottom of the card.  I also took one and inked it up in the colored I’ve used on my image and tied an additional thread bow at the top of it.

The sentiment on the bottom of the image panel comes from the Whimsy Stamps Everyday Mini Sentiments clear stamp set.  I white heat embossed it and then cut out with the Whimsy Stamps Quick Strips die set.  I used a MFT stitched scallop die to cut out the image from and layered her with some red cardstock.  Before I added the blue ribbon, I attached the piece of black cardstock where my layered image panel would go and wrapped it around the brick background.  I then added a white button with a linen thread bow in the center of that.  (This is what I used on the colored tulip.)  All of these layers were then mounted onto an A2 sized top folding white card base.

Vicki-WSTulip-March19-close

Here’s a closer look at her all colored up with Copic markers!  You can purchase them at Whimsy Stamps. These are the colors I’ve used on my image today:

  • bow, jacket, skirt, tulips – B97, B95, B93, R39, R37, R35, YG25
  • shirt, socks, shoes – BG000, E87, E84, E81
  • hair, skin – E27, E25, E23, E21, E11, E00, E000, R20
  • butterflies – C5, C3, YR04, YR02, Y13
  • C1 around image and white gel pen for flowers and jacket along with red and black gel pens for dots on butterflies
  • covered the red portion of die cut tulip with Wink of Stella clear glitter brush pen.

Vicki-WSTulip-March19-flat

I hope you’ve enjoyed my card this evening!  Are you as ready for those Spring flowers as much as I am?  What are your favorite flowers?

Thanks so much for stopping in today!!  See you again soon!

Challenges I’d like to enter my card for:

  1.   Words 2 Craft By (W2CB63) – “Happiness held is the seed, Happiness shared is the flower.”
  2. As You Like It – Dies or Stencils & why? (I love using dies because I feel there are so many fun things you can do with them/versatile, even it you don’t stamp!)
  3. A Bit More Time to Craft Anything Goes
  4. Challenge Up Your Life – Bye-Bye Winter

Time to Celebrate at Cute Card Thursday!

Hello friends!!  I’m very excited to share my card with you today for Cute Card Thursday!  We are celebrating our 11th birthday this week!!  WOO HOO!!  So of course, the theme for this week is “CELEBRATE“!!  Hope you can pop on over and celebrate with us by sharing your creation!!

This week we are sponsored by All Dressed Up Stamps and I have used one of their adorable images for my card today:

Vicki-CCT573-ADU-Celebrate

I have used this very sweet image called Time to Shine and she is having so much fun dancing around with all of the stars floating about her!

For the card, I have taken some silver sparkle cardstock and cut the stitched scallop frame and then placed some pretty papers behind it.  I mounted these pieces onto a piece of black cardstock as well as the image that was cut out with another stitched scallop rectangle die, also mounted with a piece of black cardstock and then added to the center of the sparkle framed panel.

I also took some pretty, pink, silky ribbon and wrapped it around the corners of these layers and also tied a bow with it that I’ve attached to the upper right corner of the wrapped around ribbon.  These layers were then mounted onto a white, top folding A2 sized card base.  Lastly, I’ve added some stars that were die cut from the same sparkly cardstock and I’ve also added one to the center of the wooden star veneer that was glued in the center of the pink bow.

Vicki-CCT573-ADU-Celebrate-close

Here’s a closer look at the Copic coloring I’ve done on this image.  I have added some extra sparkly details to the image by taking a Spectrum Noir Glitter Brush Pen and went over just the bottom portion of her dress.  I then took a silver gel pen and colored in the stars around her and added some dots to her dress and hair with it as well.  I wanted to create lots of sparkle and shine to this one! 🙂

Vicki-CCT573-ADU-Celebrate-flat

Thanks so much for dropping by!  I really appreciate your kind comments and I enjoy reading them so much!  Hope you have a fabulous day!

Challenges I’d like to enter this card in:

  1. All Dressed Up Challenge – Anything goes + ADU image
  2. All Dressed Up Facebook Challenge – Girly Girls
  3.  Crafty Friends – Ladies/Girls
  4. Simon Says Stamp Monday – Feminine/Girly
  5. Crafty Creations – Anything Goes

Another Pot O’ Gold!

Hi there friends!  I guess I am really feeling the luck of the Irish this week!  I have another fun St. Patrick’s Day themed card to share today:

Vicki-SNSPotOGold

My card here may seem a bit simple, but it has a few really fun added extras to really make it shinny and glittery!  I have used Lil Leprechaun (Digital only stamp set).   I took the pre-colored versions of the set and arranged them in a blank Word.doc for how I wanted it to appear on my card front.  I used the clover images and resized them to fit around the bottom of the pot of gold area and then placed the sentiment where I wanted it off to the side.

I then printed it out and then cut it out with the Nuvo Basics Rectangle dies.

I used a couple of Copic green markers to make the “blades of grass” next to the pot of gold and clovers.  I also used some colored chalk to sponge in some colors for the rainbow behind the pot of gold.

Vicki-SNSPotOGold2

Here you can also see on the panel where I’ve taken some Super Thick Gold EP and sprinkled some in the corners of my image panel and then heat set it from underneath.

I also took a Nuvo Precision Glue Pen to add some “dots” in the center of the clovers and then of course used the Shamrock Glitter to go over them!  I also covered the coins in the pot with the glue and sprinkled some Champagne Glitter over them for some sparkle!

With the same Champagne Glitter that I used on the coins in the pot, I also took some Sticker Paper and covered an entire panel with it and burnished it in!  The shimmer and glitz on this are stunning in person and really sets off the card!  I’ve also used the Glitter Brush to take away the excess glitter particles and it’s a must have for clean up too!  (Instead of clinging to the brush, it repels it away!)  These sheets are somewhat thin, so I made sure that I’ve added some layers of cardstock in between this glitter panel for stability to the card.  (Keep this in mind if you are using the sticker paper for this idea.)

Vicki-SNSPotOGold-flat

I tried to capture some of the sparkle in the photo, but it really looks brilliant when you are holding it in person! 🙂

I hope you’ve enjoyed my card today and I really appreciate you stopping in!

Challenges I’d like to enter this card for:

  1.  Crafting With an Attitude – Anything Goes
  2. Creative Moments – Anything Goes
  3. QKR Stampede – Anything Goes #338
  4. Creative Fingers – Anything Goes
  5. Pammies Inky Pinkes – Anything Goes PIP1910
  6. Not Just Cards – Anything Goes

Whimsy Stamps St. Patrick’s Day Celebrations Week!

Hello friends!!  I’m so happy that we are into March as I hope to be feeling warmer temps and “seeing the green” very shortly over my way!  I’m more than ready for that!

In the meantime, how about we celebrate with some inspiration!

Vicki-WSPatricks Day Celebrations

I have made this super fun (mostly green) card especially for this fun event with the really adorable Little Leprechaun digital stamp by Crissy Armstrong.  I thought he was so cute sitting atop his pot of gold with his new winged friend there!  He was so fun to color up for this card! (See the Copic list below!)

For the card, I started out with some watercolor paper, and I’ve used some Aqua pigments (liquid watercolor from Brutus Monroe) and some extra water for the background of my card, then I cut it out with the Whimsy Stamps Hand Stitched Nested Rectangle Dies.  I also used this to cut out the leprechaun image too.  I’ve used some gold mirror cardstock to mat a layer of it behind the image panel.

I thought it would be fun to add a rainbow behind the image panel, so I took the WS Kinetic Curved Hills die set and cut strips with the straight curve die in the colors of the rainbow and added the strips over the background.  Then I attached the layered image panel and took the WS No-See All Seasons Tree die set to cut some grass and mushrooms to attach at the bottom of the card.  I used a white gel pen to color the spots on the tops of the mushrooms.  I also sponged some ink over all the pieces.  One of the sections of grass was popped up with foam tape.  Lastly, I took an older sentiment from Whimsy Stamps and made a banner that was popped up with foam tape over the design.  I then mounted the entire card panel over an A2 top folding white card base.

Vicki-WSPatricks Day Celebrations-close

Here you can see a close-up view of the coloring.  I have used the following Copics to color in the image with:

  •  pot, hat band, stockings, coat trims & dragonfly body:  C8, C5, C3
  • Leprechaun outfit:  C09, C07, G05, G03, Y11, Y13
  • Leprechaun gold trim and coins:  Y17, Y15 (layered over with gold gel pen)
  • hair, skin, dragonfly wings:  E09, E23, E21, E00, E000, Y11, R20, R00
  • clover on hat:  YG97, YG95
  • outline of image and “dots”:  C3, C1, C0, Y11, gold gel pen

You can also see the rainbow has some shimmer on it.  This is where I took a Spectrum Noir clear glitter brush pen to go over it.  You can also see a bit of shimmer from the Aqua pigments in the background…they’re really stunning, and I’ll be using them again in the future, so be sure to check back!! 🙂

Vicki-WSPatricks Day Celebrations-flat

I wanted to bring out some more of that gold with the mirror layer behind the leprechaun, so I brought some gold sequins into the layout and filled them with some gold Stickles.  When you hold this card up to the light, the whole thing really shimmers and sparkles!!  I loved how it turned out!  I hope you’ve enjoyed it too!

Thanks so much for dropping in today!

Challenges I’d like to enter this card for:

  1.  Double Trouble – challenge #23 – “Thing 1“:  The Wearin’ O’ the Green “Thing 2“:  Collaboration with Heart 2 Heart Challenge (entered below!)  “Thing 3“:  Include a golden touch (used gold mirror cardstock and sequins filled with gold Stickles!)
  2. Heart 2 Heart Challenge – Greens, Rainbows & Pots of Gold (3 part challenge)
  3. Daisy Chain – Spring is in the Air!
  4. Creative Inspirations – Spring Greens
  5. Mod Squad – Green, Green Everywhere
  6. Crafting By Designs – Anything Goes
  7. Three Amigos Blog Hop Challenges – Rainbow

Anything Goes for Cute Card Thursday!

Hello friends!  It’s time for an easy peasy “ANYTHING GOES” challenge over at Cute Card Thursday this week!!  Our monthly sponsor Whimsy Stamps will be joining us this week and I’m thrilled to share some of those products on my card today:

Vicki-WS-PenguinLovesBunny-March7

I have used this really sweet digital stamp on my card called “Penguin Loves Bunny“!  He is holding him ever so tightly and not wanting to let go!! 🙂

As I’m trying to get back into the swing of things here, I wanted to be sure to join some challenges and so I’ve picked out a nice sketch to start my card with here.  (See the details below the post for all challenges.)  I’ve been wanting to get out these yummy plaid papers that I’ve had for a couple of years.  This seemed like the perfect image for that too!

So I took the panel of plaid papers and layered it with some kraft cardstock.  I took some white organdy ribbon and wrapped a piece around the left side of it and tied on a bow at the top before attaching it to the upper right of my A2 sized top folding white card base.  I’ve cut out the image with an oval die and then layered another oval piece that was cut out with the kraft cardstock.  This oval panel was layered over the plaid.

I took a sentiment from the Whimsy Stamps Everyday Mini Sentiment clear stamp set and stamped the “miss you” underneath the image.  I also used the Whimsy Stamps Friend Word & Shadow die set to cut a piece of vellum with the shadow and then cut the word out with some pink cardstock and then attached them right underneath the stamped “miss you” sentiment.  Lastly, I’ve added some of the pink enamel dots from the Whimsy Stamps It’s a Party enamel dots set.

Vicki-WS-PenguinLovesBunny-March7-close

Here’s a closer look at the coloring of this image.  I’ve colored it in with Copic markers in the following colors:

  • Penguin:  C8, C5, C3, C1, Y38, Y35, Y32, R00
  • Bunny:  E47, E44, E42, E41, W5, W3, W1, R20, R11, R00

I also used a blender 0 and a white gel pen for cheeks and bunny tail.

Vicki-WS-PenguinLovesBunny-March7-flat

I thought this image would be so fun for Easter too!!  I can see it used in so many different ways!

Hope you’ve enjoyed my card today!!  Thanks so much for dropping in!!  See you soon!

Challenges I’d like to enter my card for:

  1.  Tuesday Morning Sketches – #493
  2. Crafty Animals – Anything Goes + related to animals
  3. Creative with Stamps – Friends
  4. {Cupcake Inspirations} – Plaid CIC465
  5. QKR Stampede – Anything Goes #337

Imagine…You’re Home!

Hello friends!  I have to say that I’m very happy that we’ve started the month of March and I really look forward to seeing the bit of green and growth soon to come!

Today, I have a card using this new stamp set:

Vicki-SNSCottage

Today, my card features this really fun Lil Garden Cottage rubber stamp set.  I have colored it up with my Copic markers and I’ve used the packaging from the stamp set to help with color suggestions.  (I really like that when stamp sets have a colored version on their product labels!)

Since last year I’ve been noticing lots of “fairy garden” projects, and I am amazed at how many “tiny” items that are available to purchase so that you can create your own little garden!  This image sort of reminds me of that!  I think I like creating my own little “fairy garden” on paper! 🙂  Do any of you like to make Fairy Gardens?

For the base of my card, I’ve used an A2 sized top folding kraft card base.  I took my VersaMark ink to stamp the tiny mushroom images from the set along the bottom edge of the base.  I also took another piece of kraft cardstock and heat embossed part of the sentiment with the White EP and then cut it out from a circle die.  I set these pieces aside while working on the rest of my card.

Vicki-SNSCottage3

After coloring in the image, I also took the other portion of the sentiment “Imagine…” and stamped it next to the cottage image, but then heat set that one with the Coffee EP.  I also took an additional piece of white cardstock to layer behind the image panel.  For that piece, I took my VersaMark ink pad and sponged along the edges of it and also heat set that with the same Coffee EP as well.  You can also see at the top of the image panel that I’ve lightly blended in some distress ink to soften up the white a bit.

For the sparkly twine at the top, I created it by taking the 1/4″ Tear Tape and twisting it on itself and then I ran it through some Shamrock Glitter.  I took a piece of it to make a bow and then glued it over my design.

I took some craft foam to pop up this image panel a bit before attaching it to the kraft card base.  I also took some more craft foam to pop up the side of the circle sentiment panel as well.

Vicki-SNSCottage2

To add a bit of detail to my image and make it my own, I stamped, colored and fussy cut out each of the mushrooms as well as the snail and then attached them where I wanted them to show up on my image panel.

I used the Nuvo Precision Glue Pen to “color in” the areas where I wanted it to be green and then sprinkled some of that Shamrock Glitter over those areas.  I took the Nuvo White Crystal Drops to add a few “dots” over the red mushroom.  I then took the Nuvo Morning Dew Crystal Drops (dries clear) and filled in the “window” on the cottage as well as the “snail shell” to add some shine to it.

Vicki-SNSCottage4

I hope you’ve enjoyed my card today and that you’ve been inspired!

Thanks so much for dropping in today!!  I’m so hoping that I can get back into catching up with you and getting caught up on entering challenges!  I do miss all of this!

Wishing you a happy day!