Kitty Celebrates Up in the Air!

Hello friends! I’m excited to start with this cute one for today:

Vicki-SnS-Kitty clouds

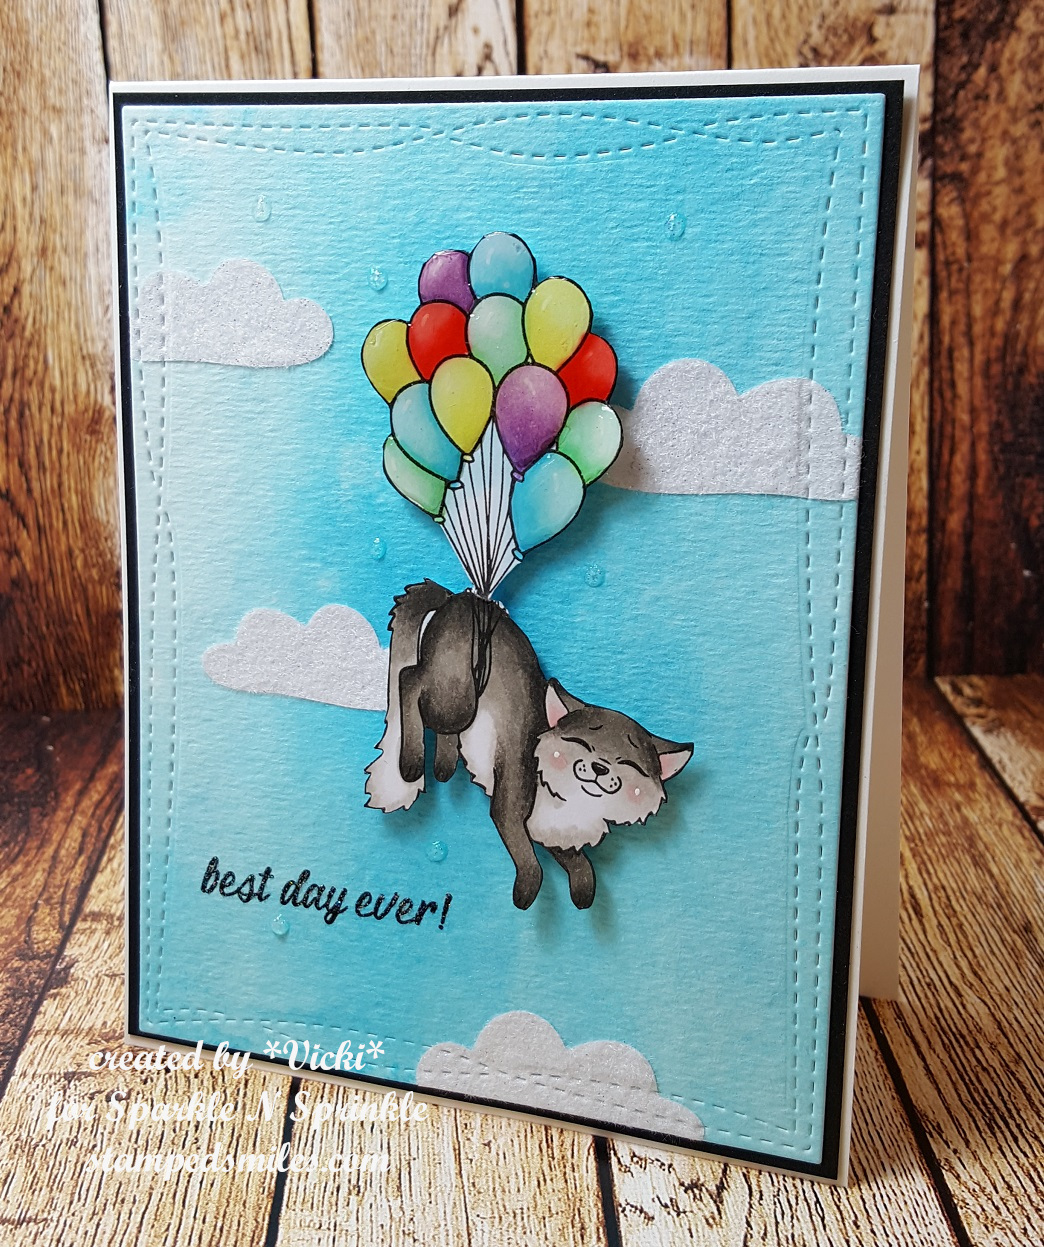
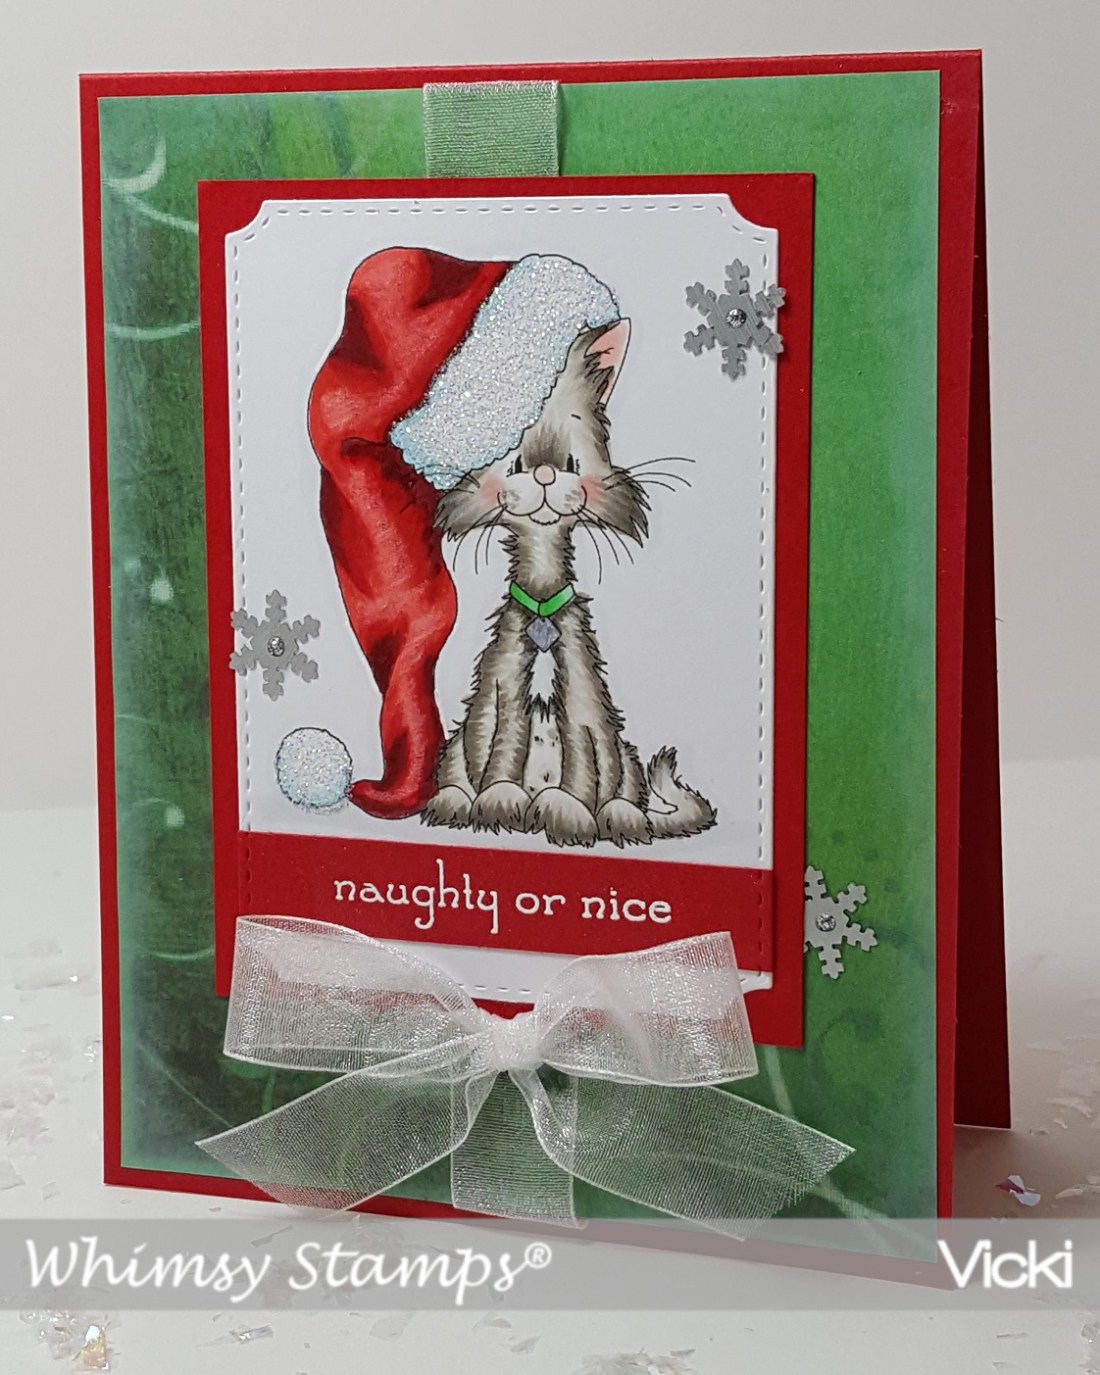
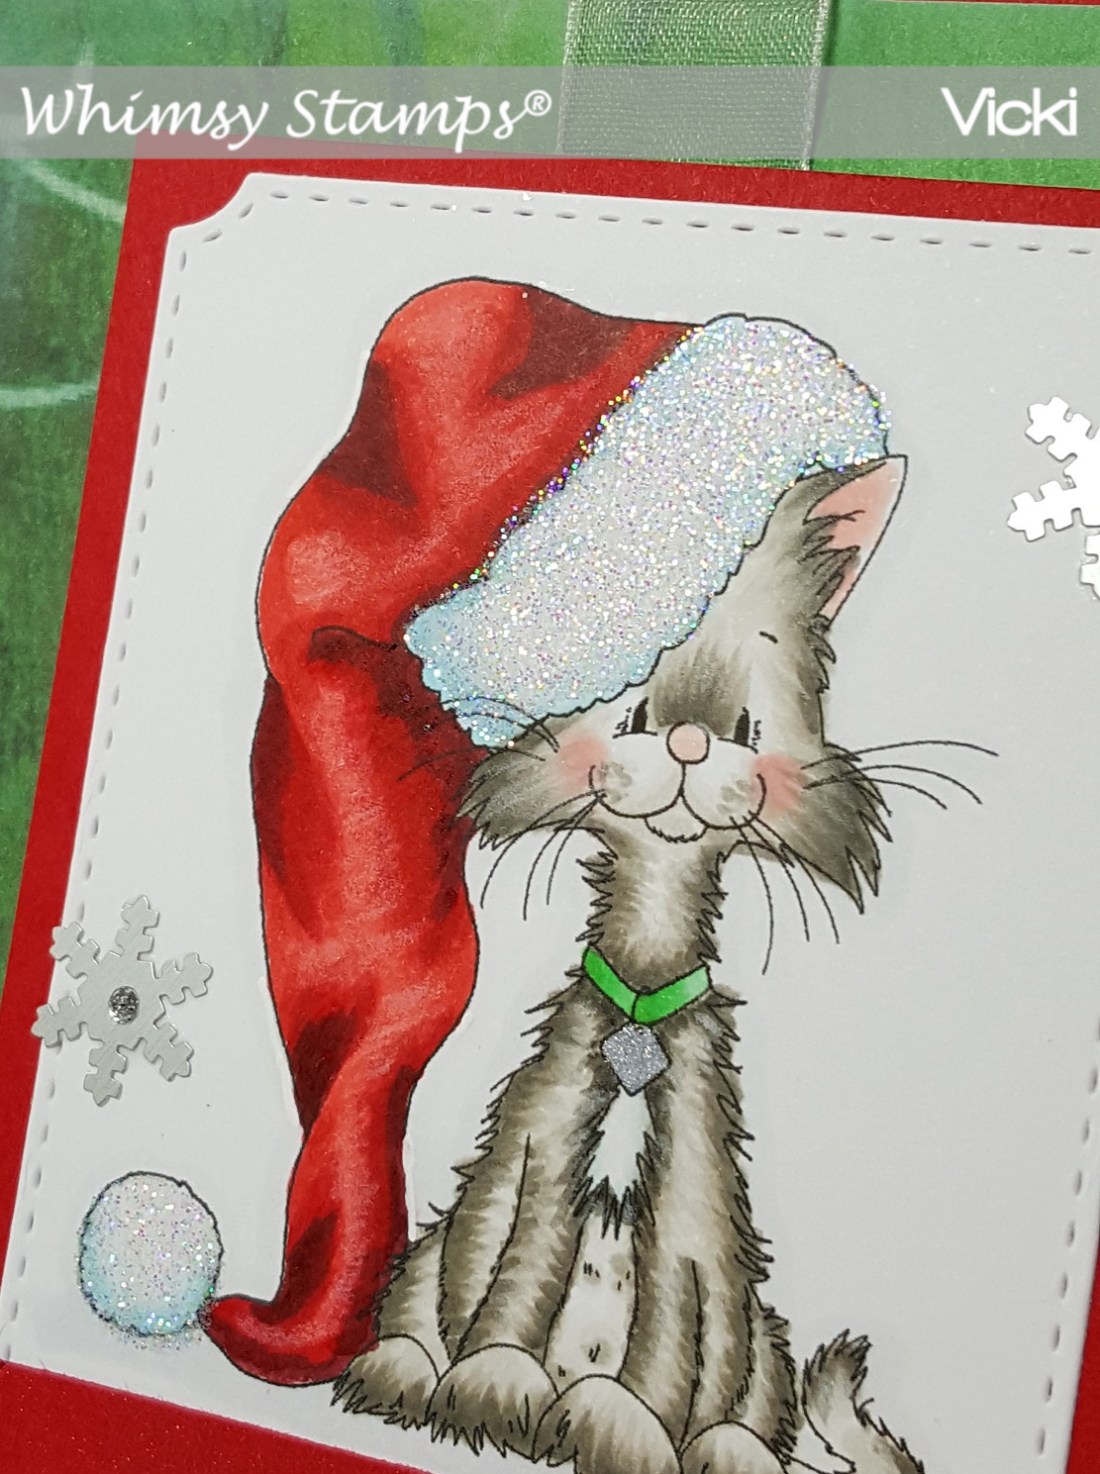
Tee hee!  Kitty got a little “carried away” with celebrating, I think!  I have used the NEW Kitty Celebrates rubber stamp set for my card.  I’ve stamped him over Copic Blending Card paper and colored him in with Copic markers and then fussy cut him out.

So before attaching him to my card, I thought it would be fun to add some Nuvo Crystal Drops in Morning Dew (Gloss-dries clear) and apply a layer over my balloons to give them a shiny balloon look!  I then set kitty aside while I worked on the rest of the card.

For the background of my card, I made a nice “blue sky” by taking some Watercolor Paper and sprinkling some Nuvo Blue Blitz Shimmer Powder over it and then spritzing some water over it and letting it run all over the panel until I achieved the look I was going for.  (LOVE the subtle shimmer over it too!) and then set it aside to let it dry.

The next thing for me to do was to create some “fluffy clouds” for the kitty to be among:

So, I took some cloud dies from my stash and cut them out with some Sticker Paper.

These sheets are sticky on one side, so I carefully peeled the release paper and handled them with some tweezers and applied some of the Twinkling Clouds Flocking over top of the sticky side, rubbed them with my finger to secure and tapped off the excess.  I now have some really cool soft and fuzzy clouds to attach to my blue sky!

So now all I have left to do is assemble everything for my card!  I started by taking the clouds and adhering them to my background with some dimensional Glue.   I then cut down the watercolor blue-sky panel with a rectangle stitched die that fit the size of my card.   Then I needed to add my sentiment, so I took the sentiment from the same stamp set and stamped it with a black pigment ink and added some Sparkle EP and heat embossed it.  I layered this die cut sky panel over a piece of black cardstock which was then layered over an A2 sized top folding white card base.  Lastly, I’ve added the fussy cut kitty over top of the sky background panel with some foam dots and then randomly added some drops with the Nuvo White Blizzard Glitter Drops over the sky panel.

Vicki-SnS-Kitty Clouds5

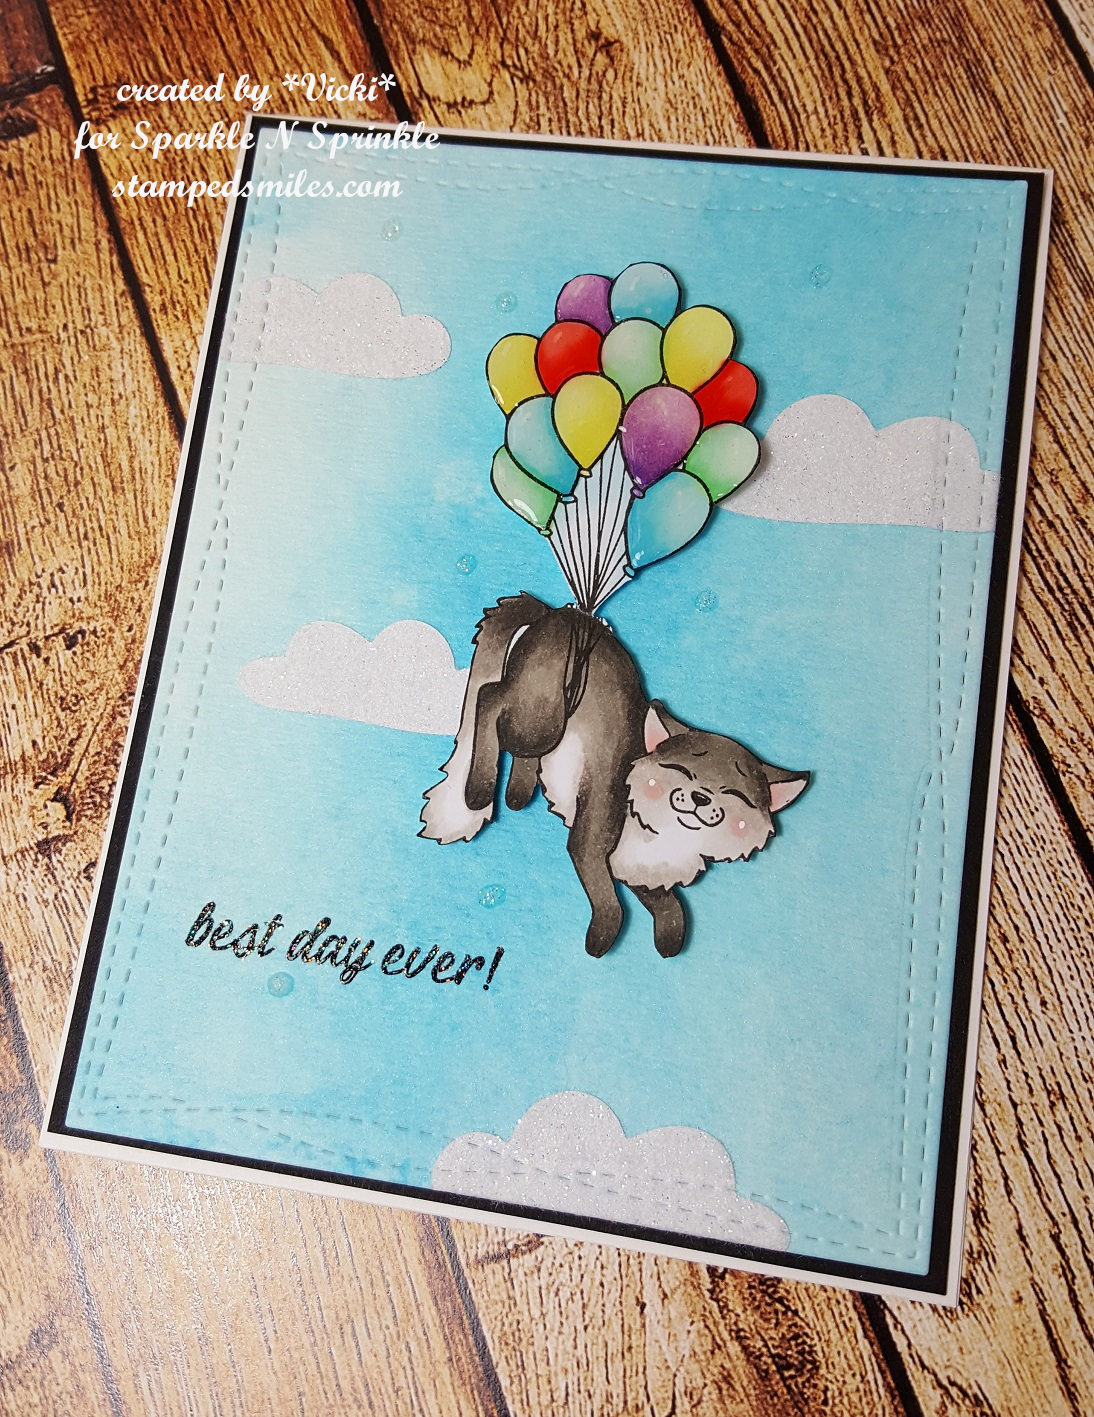
I think this turned out really cute and I sure had fun making it!  Here I’ve laid it down so the light catches the details of the sparkle in the clouds, the sentiment and the glitter drops in the background as well as the shine over the balloons too!

Hope you’ve enjoyed my card for you today!  Thanks for dropping in!

Here’s some challenges I’d like to enter this card for:

  1. Simon Says Stamp Monday – ‘B’ is for:  Balloons, Blue Sky, “Best Day ever”
  2. Tuesday Throwdown – Anything Goes
  3. Addicted to Stamps & More – Anything Goes
  4. The Male Room – Celebrate
  5. Little Red Wagon – House Pets

Whimsy Stamps Christmas Mouse!

Hello friends!  I’m back to share with you a very special treat from Whimsy Stamps!

I have used this special image to share some inspiration with you as I am a Whimsy Stamps fan myself! 🙂

Vicki-WS-MouseFreebie-Dec1

Isn’t this darling?!  Crissy Armstrong has created this adorable “Christmas Mouse” digital stamp as a special treat in appreciation for loyal fans of Whimsy Stamps!  How cool is that?!

I have colored up this cutie with Copic markers in the following colors:

  1.  mouse body:  W9, W7, W5, W3 Ear/tummy/cheeks:  R20, R00, W3, W1, W0
  2. hat:  R59, R29, R27, R24 (same as ornament), YG67, YG63, YG61
  3. Shading/Ground:  C3, C1, E0000

I have also printed out this image an additional time to color up the ornament, fussy cut it out and then covered it with some Diamond Dust Glitter using the Nuvo Medium Glue Pen to adhere it.  I then popped it up over the original image with some foam tape for dimension.

I cut the image out with a stitched circle die and added a gold cardstock circle layer behind it.  I found some cool papers to represent the “night sky” that I was looking for.  (I think these are Stampin’ Up! papers.)  I’ve cut a piece out using the Whimsy Stamps Hand Stitched Nested Rectangles die and then I attached this piece to a white A2 sized top folding card base and off set it along the right side of my card.  I then cut a thin strip of that gold cardstock to place alongside of the papers.

The circle was attached to the card with part of it sticking off the right which I cut off to align with the card.  I thought this sentiment from the Whimsy Stamps Penguin Christmas Sentiments 1 digital set fit perfectly with this image.  I cut it out to form the banner, sponged some light grey ink over the edges and attached it to the top of the card.  Lastly, I’ve added some sequins with some Nuvo White Blizzard Glitter Drops in the center of each one.

Here’s a closer look at the design:

Vicki-WS-MouseFreebie-Dec1-close

Here you can see the glittery details of the ornament…. love these types of ornaments on my Christmas tree!!  I’ve also colored the ornament cap with a gold gel pen and added some ‘dots’ with a white gel pen for his cheeks.  Looking at this, I’m thinking some glossy accents for his nose would be cute too but didn’t do that for this one!

Thanks for dropping in!  I’ll see you soon!

Challenges I’d like to enter this card for:

  1.  Watercooler Wednesday -“All About Holidays” WWC198
  2. Simon Says Stamp Wednesday – Anything Goes
  3. 4 Crafty Chicks – “Crazy Egg” Anything Goes
  4. Jingle Belles – Christmas Cards

A Christmas Pig for 2 Crafty Critter Crazies Challenge

Hello friends!  Here we are in December already!  Christmas will be here before you know it!  I think this is a great time to remember to pull out your critter supplies and have some fun with them while you make up your Christmas projects too!  The first of the month brings us a new challenge over at the 2 Crafty Critter Crazies blog!  So come play along with us this month!  It’s ALWAYS anything goes as long as you use a critter(s) somewhere on your project!  We look forward to seeing what you come up with!

Here’s what I’ve made for the challenge this month:

Vicki-2CCC-QKR

This month our lovely sponsor is QKR Stampede, and they were kind enough to allow our design team to choose an image to play with!  I have to tell you that this image made me literally *snort* when I saw it!!  LOL!  I have used the Christmas Pig image for my card.  I think this piggy is too cute with his present all neatly wrapped next to the decorated tree while he gets sleepy waiting for Santa to come! 🙂  I do recall growing up in the country and having a couple of pigs.  I always wondered about them in the cold, but we had a place they could come inside the barn to stay warm.  They were funny to listen to, but I always thought they were too stinky to get too close! LOL

I decided to color the image with my Copics and then I fussy cut it out and layered it over a piece of red cardstock.  For the base of my card, I took an A2 top folding red cardstock and then layered a piece of decorative paper from DCWV and then also attached a strip of white glitter paper on each side of it.  I then took some woodgrain cardstock that I’ve previously made and die cut a fence border out with it and placed it across my design.

I then took the layered image panel and attached it over the card with craft foam and then added the ribbon with some red jingle bells attached to the bow and attached the die cut greeting below that with red cardstock.

Vicki-2CCC-QKR-close

Upon a closer look at the image panel, you can see that I’ve added some Nuvo Crystal Drops Morning Dew to each red ornament on the tree and then I’ve taken a gold gel pen to color the star on top of the tree along with a clear gel pen to color the star outside the window.  For the snow-covered ground in the window, I’ve used some glitter attached with a Nuvo Smooth Precision glue pen.  I’ve also used this pen to attach some Twinkling Clouds Flocking to the piggy’s hat trimmings!  It makes the area so soft and fuzzy plus it has a bit of sparkle added to it too!

Thanks for stopping by!  Please come back a bit later as I have something very special for you!

Challenges I’d like to enter:

  1.  QKR Stampede – Anything Goes
  2. {Cupcake Inspirations} CIC459 – The Holidays (theme challenge)
  3. Crafty Creations – Anything Goes
  4. The House That Stamps Built (N2818) – Anything Goes
  5. Mod Squad – Use a Critter on your Holiday card

Whimsy Stamps Seal On Ice

Hello friends!  Back with you today to share another image from the November brand new digital release from Whimsy Stamps!  Check it out:

Vicki-WSSealonIce-Nov2

These seals by Crissy Armstrong have stolen my heart!  I had to create with this Seal on Ice digital image too and share it with you today!

I started with my image by coloring it up with the following Copic marker colors:

seal:  C5, C3, C1, C0 W1, W0, R00 – Hat/scarf:  BG49, BG45, E53, E51, E50

I fussy cut him/her out and went along the edges with a black Copic friendly marker.

For the card design, I found some matching cardstock to go with the seal’s outfit and used it as the 5×5 Top folding card base as well as a mat layer behind the image panel.  I took the Whimsy Stamps Pierced Border Trio Dies to cut some pieces for the snow with some glitter paper.  I put one strip at the bottom of the card base and another on the bottom of the woodgrain paper I’ve used to place the seal on.

Before adding the seal to the snow border with foam tape, I took the Whimsy Stamps Snow Flurry clear stamp set and stamped some of the snowflakes with pink ink over the woodgrain paper.  I added this layered panel onto a piece of the new digital papers this month called Christmas Roses & Snowflakes which I’ve cut out with a square stitched die along with the woodgrain paper.  I took a sentiment from the Whimsy Stamps Holiday Mini Sentiments clear set and white heat embossed it and cut it out with a portion of the square stitched die as well and attached it to the design.

I’ve finished it off by adding a bow to the corner of the woodgrain paper panel with some clear sparkly ribbon and added another one of those snowflake gems to the center of it!

Vicki-WSSealonIce-Nov2-close

Here’s closer look at the coloring details.  Isn’t this a cutie?!  I love the feminine look to it by adding in the pink snowflake digital papers and sparkly ribbon.

Thanks so much for stopping by today!!  See you soon!

challenges:

  1.  Cardz 4 Galz – Let’s Go Digital
  2. Addicted to Stamps and More! – Anything Goes
  3. Watercooler Wednesday (WWC194) – Anything Goes
  4. Crafty Animals – Anything Goes + animal/teddy bear
  5. CRAFT – Winter

Anything Goes at Cute Card Thursday + Whimsy Stamps November Release

Hello friends and welcome to November!!  It’s hard to believe that we are closing in on the end of another year!  Time has went by so fast especially since I’ve started back up on my new blog here! 🙂  So glad you are here with me!  Thank you for that!

Today starts a brand new challenge over at Cute Card Thursday!  For this week, it’s an easy “Anything Goes” challenge!  And since our sponsor this week is Whimsy Stamps, I thought this would also be a great time to introduce to you an image from the brand new Digital Release that has just came out TODAY!!  Check it out:

Vicki-WSSealinWater-Nov1

This cute seal critter is presenting his underwater gift for the Holidays!  This new digital image from Whimsy Stamps is called Seal in Water by Crissy Armstrong.  I had fun coloring him up with my Copic markers.  I decided to use the markers in a “pointilism” fashion to give him a spotted seal look. (I’ve also added some light dots with a white gel pen.) Copics used:  for seal – Blender 0, W7, W5, W3, W1, R00 for hat/bow – R39, R37, R35, R32 for package – BG99, BG96, BG93 for trimming/bubbles – C3, C1, C0, BG000

For the background I used a stencil to blend some blue colors to make them appear as if he’s underwater as he has bubbles around him.  I cut him out with a stitched oval die and cut out a piece of gold foil cardstock with a larger stitched oval for matting behind the image.

If you take a look at those fun festive papers on my card, this is also part of the new Whimsy Stamps November Digital release as well!  The papers are from the Christmas Traditions Collection.  I’m sure I’ll be using more from this collection on an upcoming card soon!  I have took the corner chomper and rounded the two bottom corners and then took a gold ink pad to rub along the edges with it.  You can also see that I’ve used one of the Whimsy Stamps Penguin Christmas Sentiments 1 digital set and cut a banner with it to place on the bottom of my card.  I’ve die cut a border in red cardstock going across the middle and added some white silk ribbon with a bow.  I mounted the oval image panel on the card front with foam tape and then cut off the edge.  I mounted everything over an A2 sized red top folding card base.

I’ve finished off my card with some Christmas sequins filled with Tinsel Stickles and I’ve also covered the bubbles with some Nuvo White Blizzard Crystal Drops.

Vicki-WSSealinWater-Nov1-close

Here’s a closer look at the coloring details of my spotted Holiday seal along with the sequins, glitter and bubbles!  Gotta love that popped out belly!! 🙂

Be sure to check out not only the new Whimsy Stamps release on the Inspirations Blog, but please be sure to check out the Cute Card Thursday challenge to see the inspiration from the rest of the design team and play along this week!  We love to see what you’ve created!

Thanks for stopping in!  Please stay tuned in for more posts today!

Challenges:

  1. Winter Wonderland – Color It!
  2. Crafting From the Heart (226) – Anything Goes
  3. Make My Monday – Stencil Stories (Used a wave stencil for behind the seal)

Anything Goes For Cute Card Thursday!

Hello friends!  It’s Thursday and time for a new challenge over at Cute Card Thursday!

This week is an easy “Anything Goes” challenge!  So please share with us what you are working on this week weather it be a card, a scrapbook page, journal page or altered item, etc.  We look forward to seeing what you’re doing!

I’ve decided to use another newly released image from Whimsy Stamps (our sponsor this week) on my design today:

Vicki-CCT550-WS-Oct 4

Isn’t this cat just too stinkin’ CUTE?!   I’ve used the newly released October digital stamp Scruffy Cat by Crissy Armstrong for Whimsy Stamps on my card today.

*Edited to Add Copic marker colors I’ve used! *

For hat:  R59 for darkest shadows blended out with R29, R27 and R24.  I’ve used a white Prismacolor pencil for some highlighting.  I did use some B000 for shadows on the hat trimmings, but the loose glitter I glued on covers it up in the photo.

For cat:  I used W5, W3, W1 and W0 and started with the darkest color along edges and flicked in with the other colors.  R20 blended out with R00 for his ears and cheeks.

Collar:  G07 and G05.  I used a glitter gel pen for the tag.

I have used the Whimsy Stamps Notched Rectangles die set to cut him out with and mount him over a piece of red card stock.  I’ve also used a strip of red card stock cut with the same die and white heat embossed the sentiment from the Whimsy Stamps Holiday Mini Sentiments clear stamp set and attached under the kitty.

Before attaching the kitty panel, I’ve used some of the Whimsy Stamps Christmas Cool Mix digital papers and added a white organza ribbon around it.  I also sponged around the edges with some white ink using a sponge dauber and then I attached that to the front of a red top folding card base.  Lastly, I’ve attached the kitty panel along with the ribbon bow underneath and finished the card with snowflake sequins and silver glitter in the centers.

Vicki-CCT550-WS-Oct 4-close

Here’s a closer look at my coloring as well as the glittery details on the kitty collar tag and the loose fine glitter on the hat trimmings.

Please be sure to check out the challenge blog to see the details of the challenge and catch the inspiration from the rest of the design team!

Hope you’ve enjoyed my card today and look forward to seeing what you come up with!  Thanks so much for stopping in!

Challenges:

  1.  QKR Stampede – Anything Goes #315
  2. The Paper Players (PP412) – Tic-Tac-Toe:  Green, any embossing, sequins/glitter
  3. Crafty Animals – Anything Goes
  4. Crafty Cardmakers – Lace or Ribbon

Fun in the Fall

Hello friends!  I can almost feel it in the air!  Fall is coming near and I’m looking forward to joining in the crisp cool air and pretty colors with the changing leaves.  These are just a couple of things that I love about this season!  How about you?

Well this sweet little penguin certainly knows how to have fun in the Fall for sure:

Vicki-PenguinFuninFall-Sept 11

Here’s another September release from Whimsy Stamps called Penguin Fun in Fall image by Crissy Armstrong.  Of course, I grabbed my purple color markers to color his hat and scarf!  LOL!  I decided to create a purple and turquoise plaid pattern.  I also gave the leaves in the air a bit of movement with my coloring as if he’s throwing them up in the air.  Trying to be a bit different with my layout, so I tilted the image panel and cut it off on the right side of my card base.

I’ve also used the September release digital papers from Whimsy Stamps called Autumn Beauty.  These are fabulous papers and I know I’m going to be using some more of these on an up-coming card!  I’ve used two different patterns on the background and the banner strip.  Lastly, I added some fun Autumn Leaves sequins from Little Things from Lucy’s Cards.  I’ve actually had it for a while and hoarded the package and not used it until now!  I filled the centers of the round ones with some gold Stickles.  I also added a twine bow at the bottom of the banner strip.

Vicki-PenguinFuninFall-Sept11-close

Here’s a closer view of the image.  Here you can see where I’ve used some foam dots to pop up the fussy cut penguin for a bit of dimension. (I’ve also colored the one underneath as you can see it peeking out a bit on the side.)   I cut the image panel out with a stitched square die, sponged around the edges with some Spiced Marmalade distress ink and then went over the edges with some clear glitter Stickles as well as put some on the penguin’s hat tassel.

I hope you’ve enjoyed my colorful Fall card today! Thanks for stopping by as I really appreciate seeing your encouraging words or knowing you’ve stopped by! 🙂

Challenges:

  1.  Creative Inspirations – Anything Goes
  2. Crafting By Designs – Anything Goes
  3. That’s Crafty – Autumnal theme.
  4. Brown Sugar – All Creatures Great & Small
  5. Use Your Stuff – Animals

It’s a Mouth-Full!

Hello friends!  I’m back with you again to share another fun image from the Whimsy Stamps September Digital Release!

Vicki-NutsAboutYou-Sept4

This guy is so stinkin’ CUTE and I really had fun coloring this one! 🙂  I thought this was a great image to use any time of the year really and a cute idea for also a “new home” themed card.  I have used the So Nuts About Home Digital Stamp.

After coloring the image, I went around the edges with some distress ink using my ink foam blending tool.  Mounted that onto a black layer and popped it up over the card design with some craft foam.  I die cut a leaf from kraft cardstock and used some more distress inks with the ink foam blending tool to give it a bit of color.  I then added some sparkle with some Ranger Vintage Platinum glitter and a clear shimmer brush pen.  I curled the edges a bit and attached it over the image panel in the corner.

For the background of my card, I have used the new Autumn Beauty digital papers released this month.  You can see a bit peeking out, but it really doesn’t do justice to the papers…they’re really gorgeous!  I’ve layered them onto a piece of glitter cardstock that was cut along the edge with a scallop border die and then I lined it all up along the right side of my card base.  I’ve added a piece of burlap ribbon and a button with a twine bow on the lower portion of the card before adding my image panel to it.

Vicki-NutsAboutYou-Sept4-close

Here’s a closer look at this cutie and my coloring details.  He really makes me smile! 🙂

Hope you’ve enjoyed my creation today!  Thanks for sharing part of your day with me!

Challenges:

  1.  4 Crafty Chicks – Crazy Egg Anything Goes
  2. Moving Along With the Times – Gingham and/or Buttons
  3. Alphabet Challenge – ‘L’ for leaves

Lawn Fawn Friday

Hello friends!  Yay, it’s Friday!  I have lots of fun Lawn Fawn “goodies” to share with you today and although it’s still a bit warm over my way, I am in the mood for Fall, how about you?  There’s nothing better in the Fall, for me, than a warm apple cider donut that we get every year from an apple orchid we like to visit each Fall!  It had me thinking of the current challenge going on…

Vicki-LF-FallTreats

It may be a bit of an oldie, but a goodie to me and I really enjoy using it!  I have pulled out my LF Love You a Latte stamp set to base my card for today.

I started with a white A2 sized top folding card base and added a piece of (now retired) “Perfectly Plaid Fall” mini paper stack that I’ve cut with the LF Stitched Rectangle die along with the pieces used on my image panel also cut with the same die set.  I layered that onto a white piece of cardstock that was cut from the LF “Scalloped Rectangle die” (Looks to be retired too!)  I have taken a strip of the plaid papers and used the LF Valentine Borders die to cut the edging on it.  I then wrapped some twine around it and added the LF Stitched Leaves that were cut from kraft cardstock and colored on the edges with distress ink and a foam blending tool.  I then tied a bow with the twine and placed it over the leaves.

I colored my images, fussy cut them out and placed them over my layered paper panels and then popped it up over the plaid card base with some craft foam.

Vicki-LF-FallTreats1

Upon a closer view of the image, you can see that I white heat embossed the sentiment from the stamp set.  I also added some glitter to the marshmallows in the cup and covered the donut with some glossy accents.  I added a LF Small Stitched Leaves that I made similar to the others to tuck inside with my treats! 🙂  All the leaves were covered with a glitter brush pen.

*Be sure to scroll down below for more Lawn Fawn goodies!!*

Here are the challenges I’d like to enter this card for:

  1.  Lawn Fawnatics – Coffee, Tea and Treats
  2. Retro Rubber (RRCB94) – Anything Goes + Older Stamp(s) Mine is circa 2015
  3. Watercooler Wednesday (WWC185) – Anything Goes
  4. Simon Says Stamp Wednesday – Anything Goes

I thought this was a good place to stick in this project I made and had entered into my local county fair last month.  This particular item did not place, but the category was “Hand Stamped Item Other Than a Card”…so I created this using a Lawn Fawn stamp:

Vicki-LFSkunk-Wood Slice

I found a bag of these really cute wood slices when I was out shopping with my mom earlier this Summer at Hobby Lobby.  They seemed like a perfect size to do this with!

I stamped this adorable skunk from the Lawn Fawn Stinkin’ Cute stamp set and then colored him in with my Prismacolor pencils.  Of course, the woodgrain gives it some slight imperfections, but I didn’t mind and thought it gave it more character!  (See the wood knot under his chin!)  I’ve added some green “Flower Soft” for the grass portion to give him something to stand on.  I also added some glitter to the hearts above his head.  Hubby drilled a hole in it for me so that I could add some twine for it to hang.

Vicki-LFSkunk-WoodSlice1

Here I’ve turned it at a bit of an angle so that you can see the thickness of the slice and the fun texture of the bark on it.  I thought this would be so cute on a gift bag or something.  I have it hanging in my room because he’s just too stinkin’ cute anyway! 🙂

Thanks for stopping in today and I wish you all a fabulous weekend!

P.S.  Sunday I will be sharing a post with a brand-new release…so be sure to check that out too!  Bye!

It’s Magical at Cute Card Thursday

Hello friends and happy Thursday to you!  Tomorrow is Friday and we are about to get started on the weekend!  I am ready for it too!

We have another brand new challenge up for you this week at Cute Card Thursday and the theme is “Magical“.  This will be fun to see how you interpret this one! 🙂  Here’s the card that I made for the challenge:

Vicki-CCT545-oddball-magical

I have used one of the sponsor’s images this week from Oddball Stamps which is Kawaii Big Eye Unicorn (with and without ornaments) Twinkles.  I have used the image without the ornaments on him, but it comes with both!  I think it’s adorable!

I printed out the image and used a wonky stitch rectangle die to cut out the panel with the image in the bottom right corner.  I printed it out a second time so that I can cut it out with some masking paper.  I placed the cut out masked paper unicorn over my card panel unicorn and stenciled the colorful cloudy background.  I colored the unicorn and the grass he’s sitting on with Copic markers.  Lastly, I stamped a sentiment from a My Favorite Things stamp set at the top with black ink.

Vicki-CCT545-oddball-magical-close

So looking at the unicorn from a different angle, you can see that I’ve added tons of shimmer and glitter to it.  I used a glitter brush pen for the muzzle, the hooves, the inside ears and around the eyes.  I’ve also went around the unicorn on the grass for a bit more shimmer too.  I took some clear dazzling diamonds glitter to add to the rainbow horn and tail using liquid glue.   Of course, there’s even more sparkle with the sequins.  I had a couple of heart sequins to add around the unicorn as well.

Thanks for stopping in today!

Challenges:

  1.  Papercraft Challenges – animals
  2. Addicted to Stamps & More! – Make Your Mark (stencil and Copics)
  3. Crafty Gals Corner – Anything Goes