Caring Thoughts Wreath

Hello friends! Sorry to be throwing so many posts out to you at once, but as you can see there are so many exciting things going on the first of the month and I’m happy to be sharing it with you!

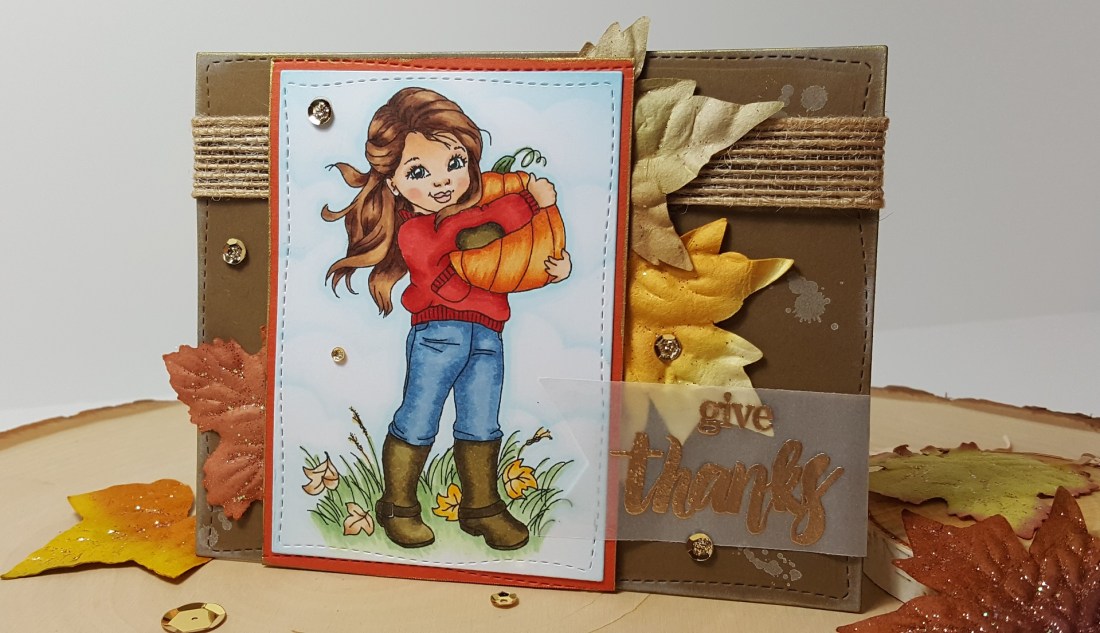
I have come up with an easel card design that I’ve created using the digital set called Memory in Our Hearts:

Vicki-SnS-MemoryinOurHearts-OctGDT

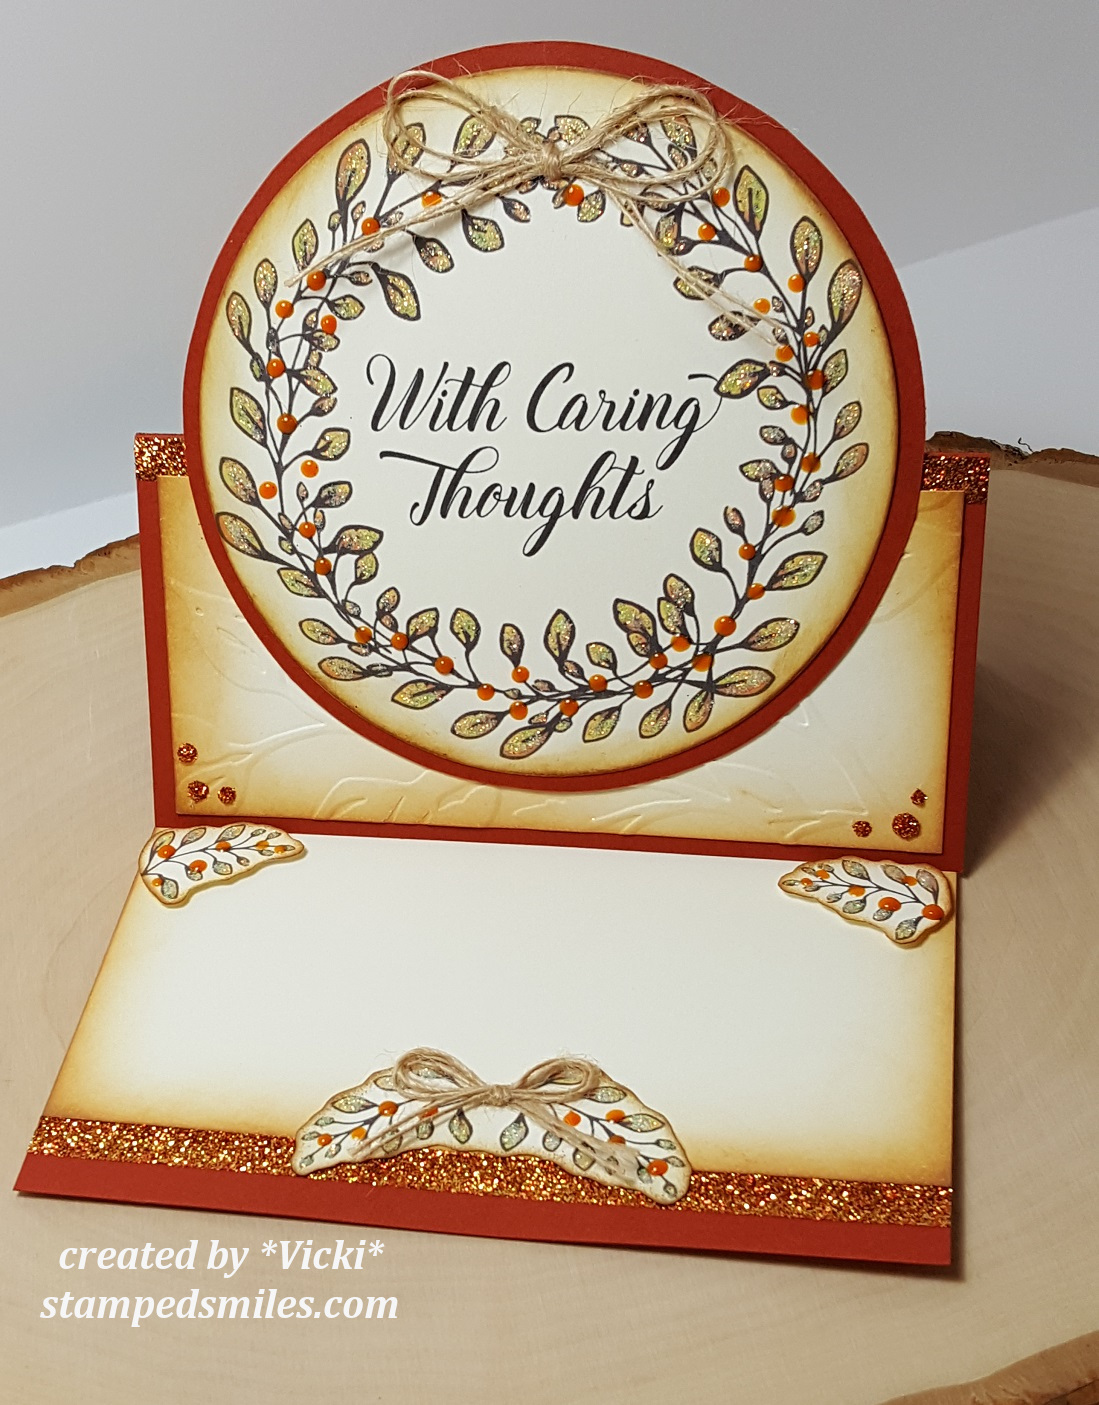
The great advantage to using a digital set is that they come with pre-colored images as well as outlined images to create many different looks you’re wanting.  In addition to that, you can also manipulate the size and structure of your image as I have done with my card here.  (This is a great way to come up with a unique design too!)

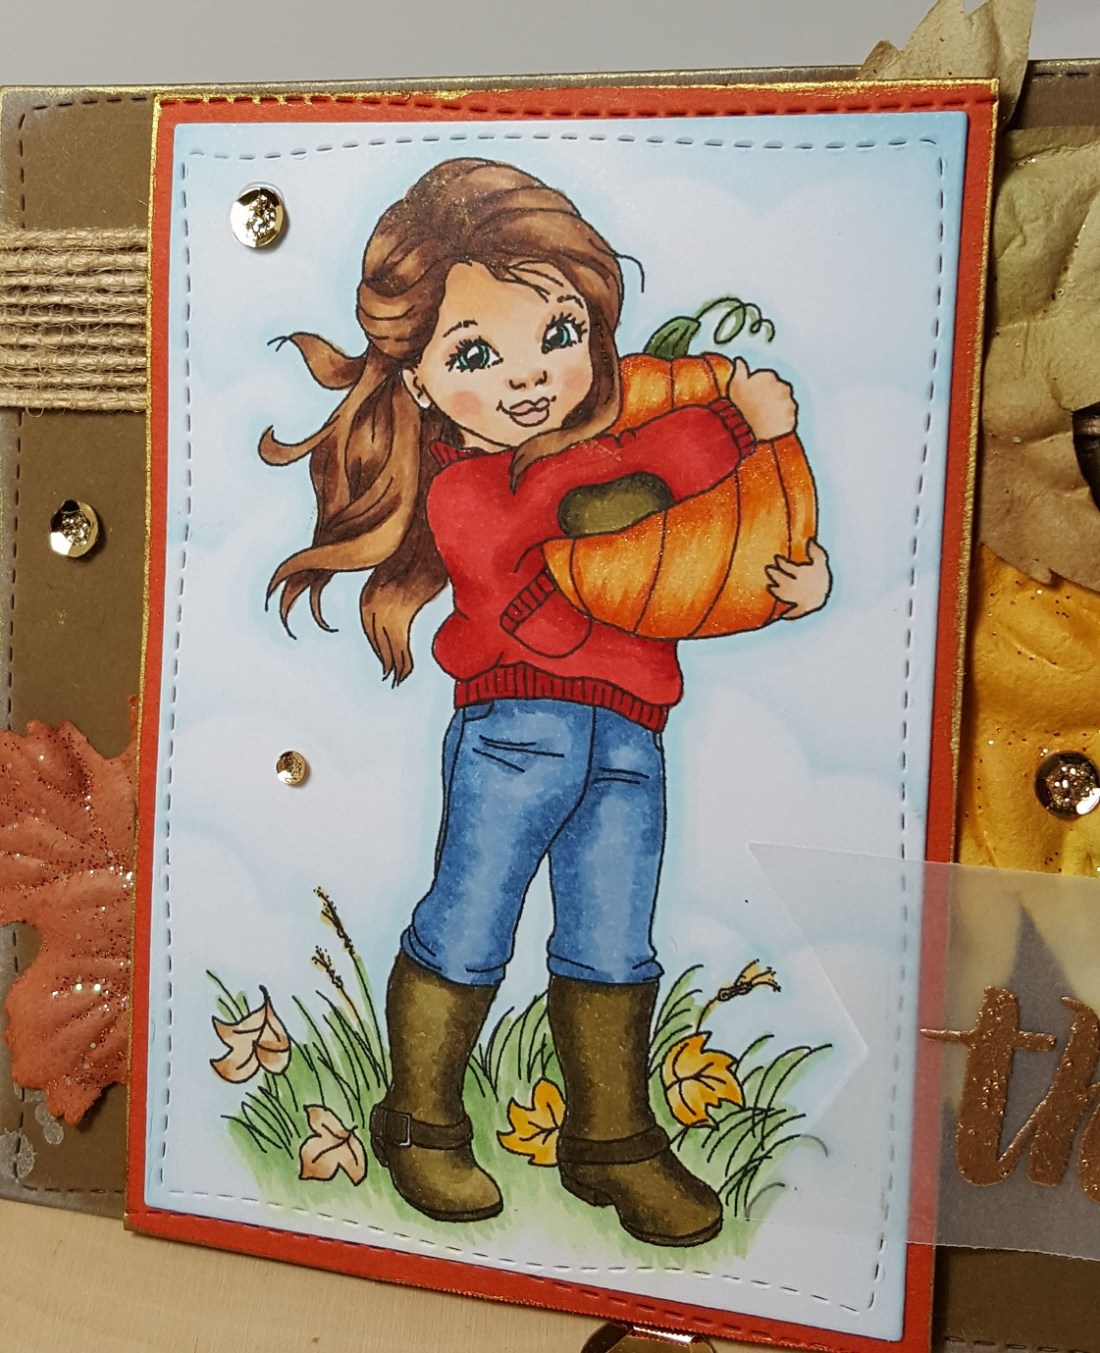
I have taken some of the pre-colored “sprigs” in the fall theme color and sized and moved them around in a Word doc. to create my own Fall wreath with it!  I then added the beautiful sentiment to the center and placed where I wanted it and then printed it out along with a couple more sprigs that you see on the inside of this design.

Vicki-SnS-MemoryinOurHearts-OctGDT1

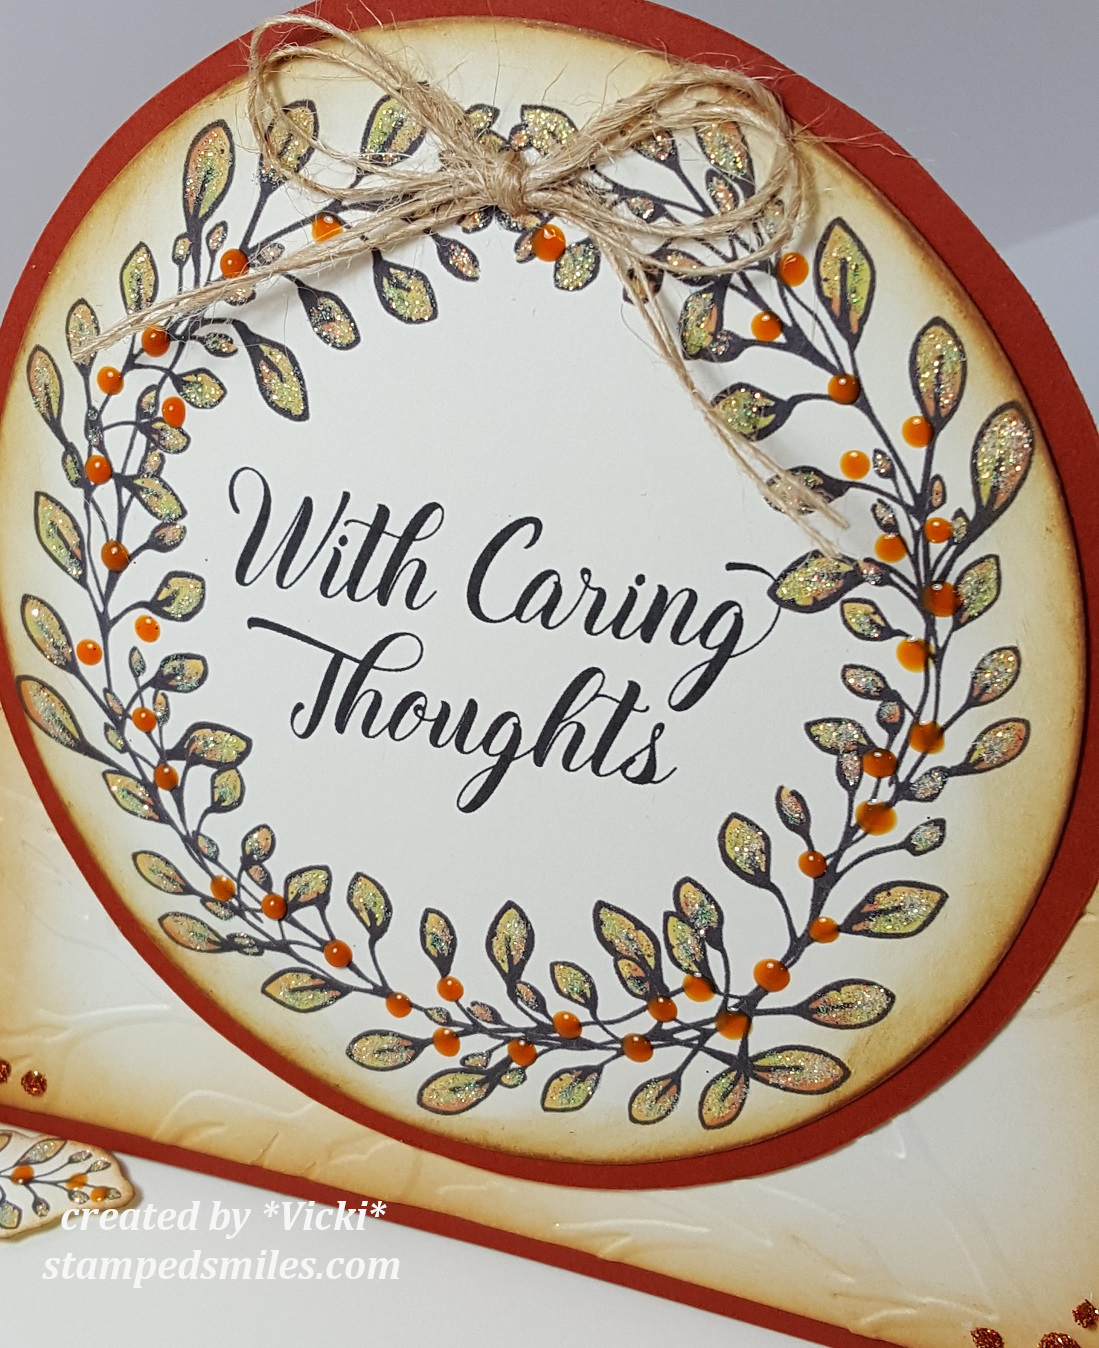
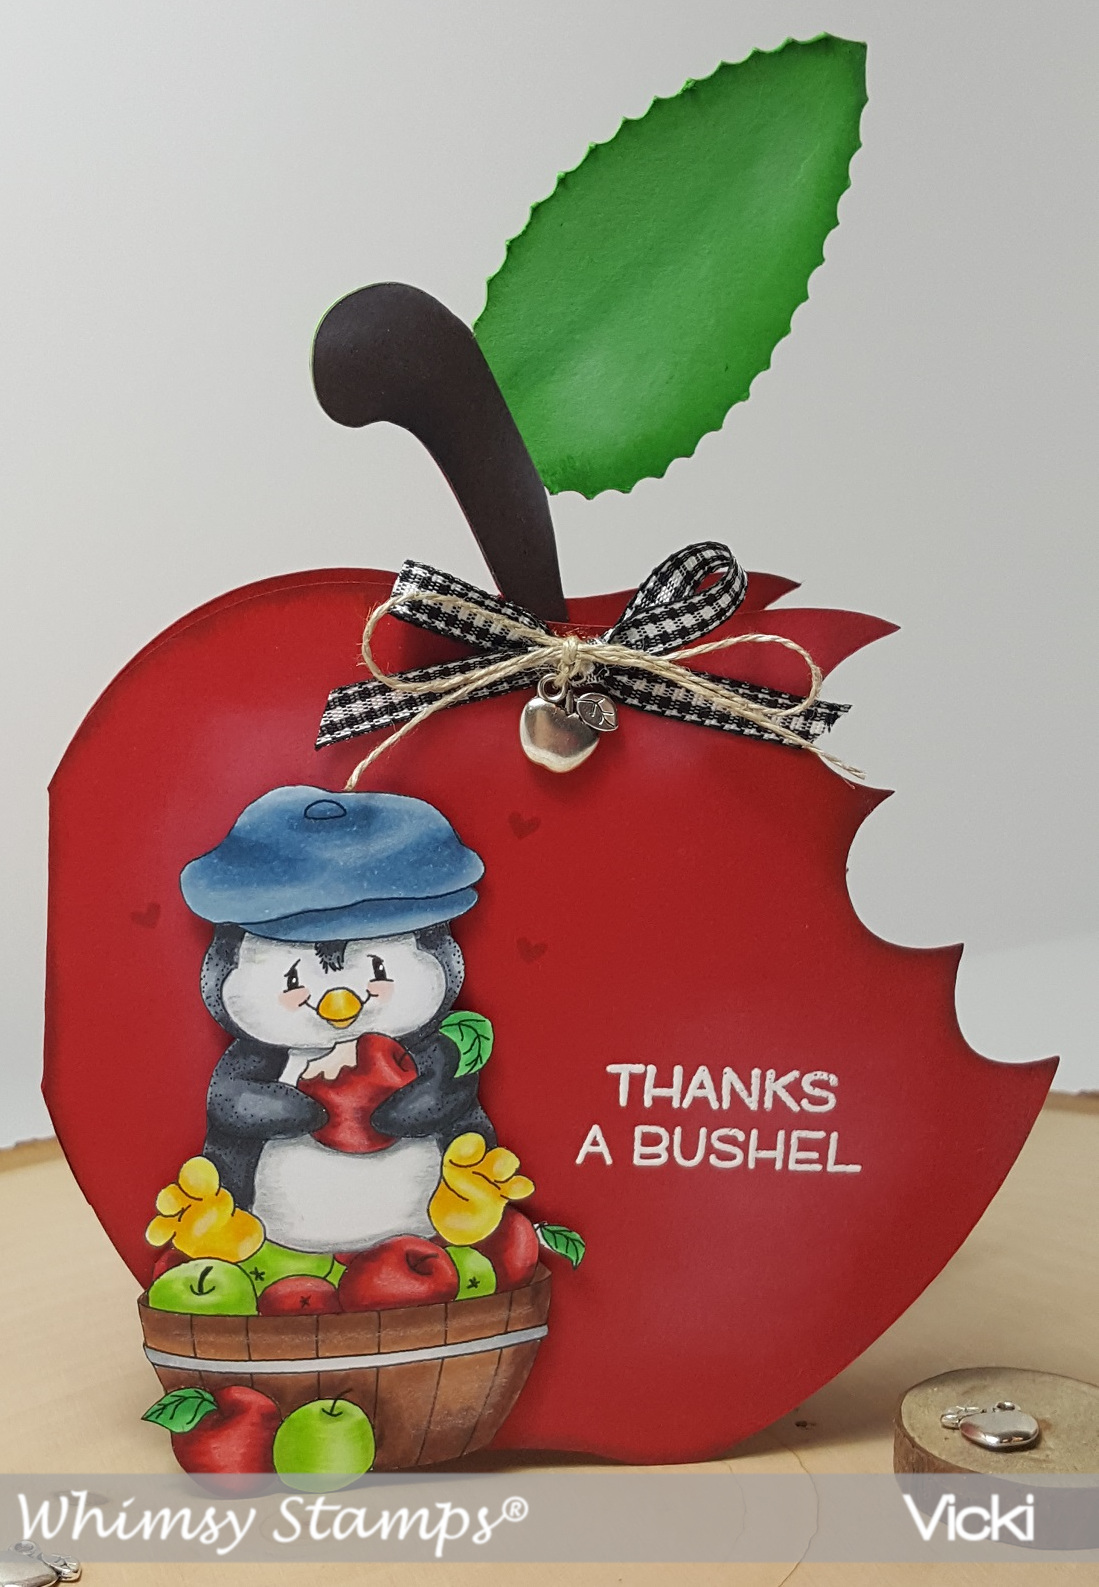
To step things up a notch, I’ve used a protractor to draw a circle around my wreath image as well as a larger circle for a mat behind it and fussy cut them out. (I didn’t have a circle die large enough to accommodate my wreath image.)  I took my ink blending tool and some Tea Dye and Vintage Photo distress inks to add some color around the edges.  Since I made a Fall wreath design, I wanted to add some glitter to the leaves.  So, I took the Nuvo Precision glue pen and added some glitter over them.  For the “berries”, I took some Ripened Pumpkin Nuvo Crystal Drops in random areas around the leaves.  I made a bow with some natural twine and added it to the top of the wreath.  (I did this same process for the smaller “sprigs” on the inside of the card as well.)

Vicki-SnS-MemoryinOurHearts-OctGDT2

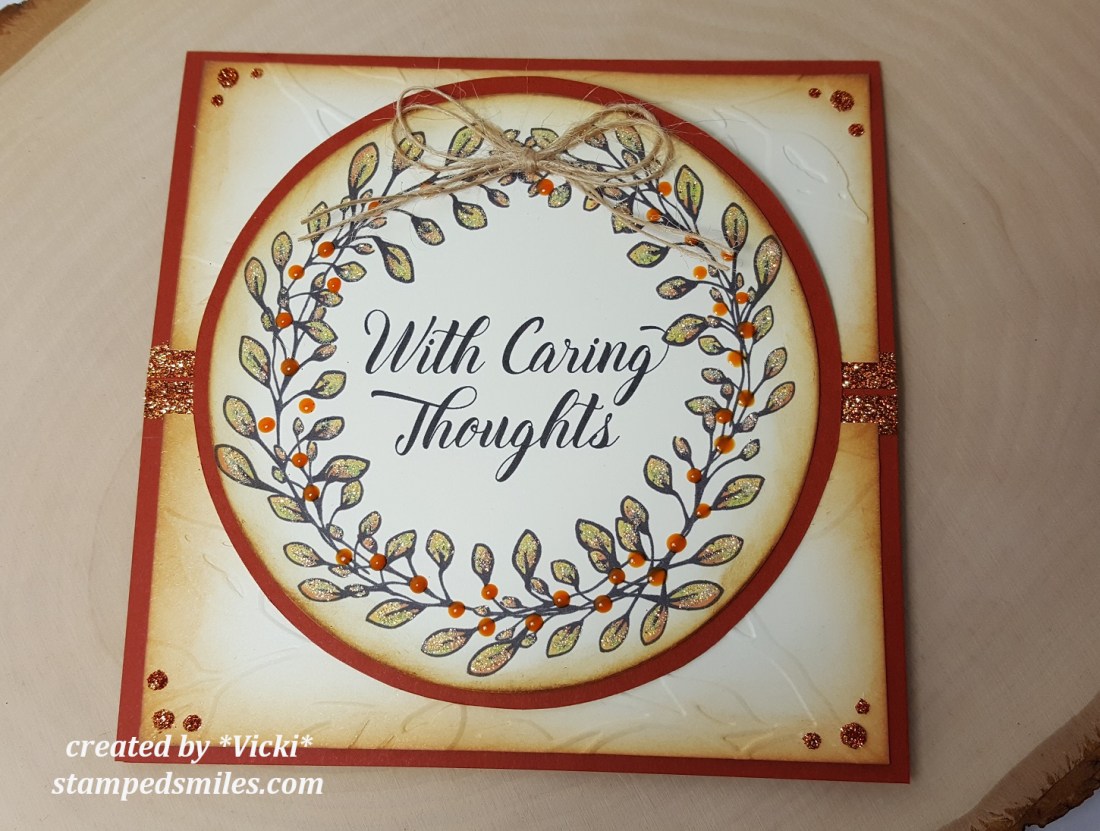
For my card design, I have made an “easel style” card (more on that below).  My card size is a 5 1/2″ square.  I have used the same cardstock color that I’ve used to print out my wreath image and separated it in two panels to fit on the front of my card base.  I took an embossing folder from my stash to add some texture to my design and also used the distress inks again to add some color around the edges.  I used glue to add some “dots” in the corners and then sprinkled some “Autumn Medley” glitter over them and let it dry.  I have also taken some 1/4″ Tear Tape to the middle edges of the card base and burnished some of this same “Autumn Medley” glitter to that.  I think it really brings in that pretty Fall color theme with some added sparkle!

Vicki-SnS-MemoryinOurHearts-OctGDT3

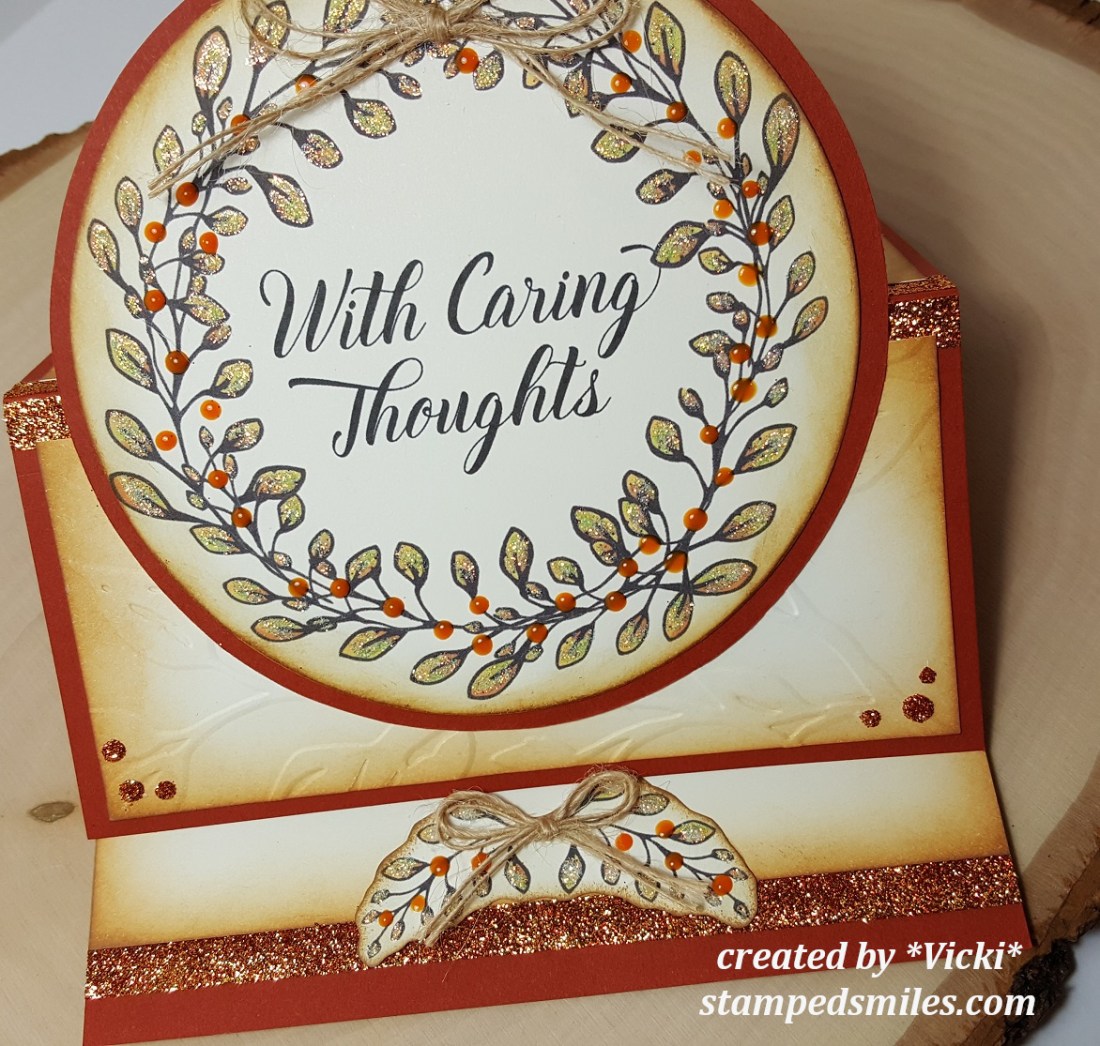
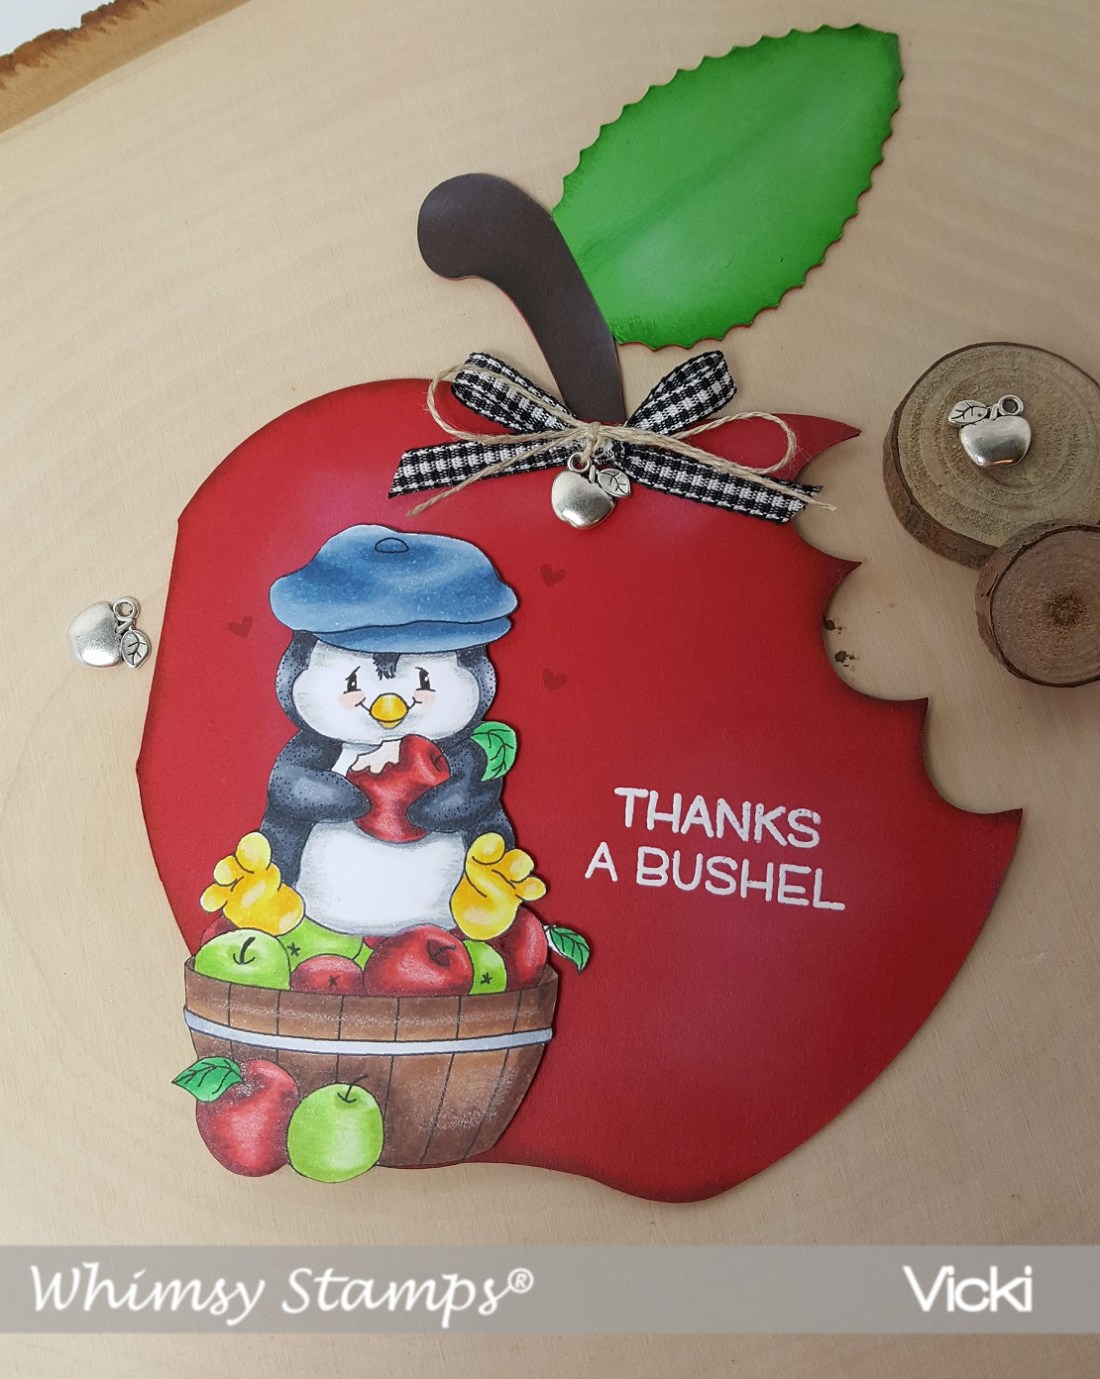
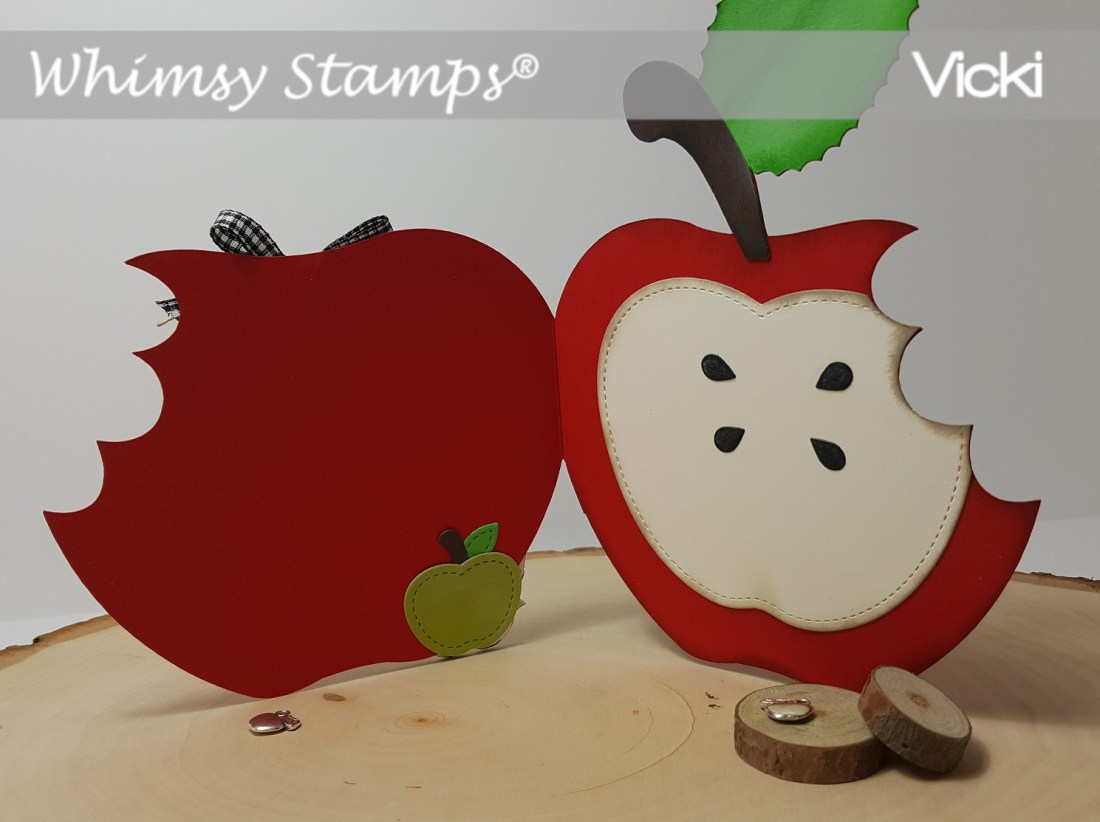
And for the inside of my card, you can see that those extra “sprigs” that I’ve printed and cut out create an easel style “stopper/display” function for my card design.  It’s easy to create this look with a score mark made in the center of the card front base as you can see with the circle wreath shown fully.

I have used some of the same-colored cardstock as the printed-out wreath for the inside of my card with some more distress inks along the edges as well as another strip of 1/4″ Tear Tape along the bottom edge burnished with some more of that “Autumn Medley” glitter.  I’ve used some foam tape to pop up the “sprig” cut out images so that they create the “stopper” for the front card base to rest while being displayed.

I hope that you’ve enjoyed my interactive card today and I look forward to sharing many more projects with you during my guest design spot!

Thanks so much for stopping in today my friends!  Please be sure to check out my earlier posts from today!  See you soon!

challenges:

  1.  {Cupcake Inspirations} CIC457 – Fall
  2. Try It On Tuesday – Thankful

It’s Autumn at Cute Card Thursday

Hello friends!  It’s Cute Card Thursday again and we are going all Autumn over there this week!  Sounds like a great challenge to me…hope you will stop over and check out the inspiration and add your creation in the gallery too!  Looking forward to seeing your makes!

Here’s my card:

Vicki-CCT549-KindaCute

I thought this image was so darn cute!  I’ve used an image from our sponsor this week called Girl with Wheelbarrow from Kinda Cute Stamps.  She is busy gathering pumpkins in that wheelbarrow and looks to be on a mission with it too!  I adore that sweet little bunny along for the ride!

I’ve colored the image with Copic markers including for the ground.  I’ve taken a tiny sponge with some blue ink and very lightly sponged in a sky.  The sentiment was stamped with brown ink from an older Lawn Fawn set.  I’ve also used the Stitched Leaves die from Lawn Fawn to cut out some leaves with kraft cardstock and then sponged some color over the edges to attach to the design.

I cut out both the image panel and the orange design paper with a Stitched Scallop rectangle die set from My Favorite Things.  I’ve also cut out a tiny brown banner at the top left corner from a die set from MFT as well.  Lastly, I’ve added some gold sparkling enamel dots around the leaves.

Hope you are out and about enjoying the Autumn season!  Thanks so much for stopping by my blog today, I’m so happy to have you here!  See you very soon!

Challenges:

  1.  Sweet Stampin’ – Dies/Punches (I stamped the sentiment-hopefully this qualifies)
  2. Always Fun – Anything Goes
  3. Addicted to Stamps & More – Anything Goes #311
  4. Crafty Gals Corner – Anything Goes + Fall
  5. Mod Squad – Autumn Colors (Orange, red, purple, yellow, brown) I used all EXCEPT purple! – must use at least 3

Just A Girl and Her Pumpkin

Hello friends!  Wow, I think Fall has begun over my way as the air has changed with cooler temperatures and I absolutely LOVE it! 🙂  Although I’ve been busy crafting away in my room, I like to get outdoors for a few breaks to walk around and see signs of the leave starting to change over.

Today, I am over at the Whimsy Stamps Inspiration blog to share my card with you using one of the really adorable images from this month’s release called “A Girl and Her Pumpkin” digital stamp by Crissy Armstrong:

Vicki-WSGirlPumpkin-Sept25-blogpost

Isn’t she adorable?!  I really enjoyed coloring her up with my Copic markers.  As I was coloring, it actually reminded me of going to a near-by apple orchid with my children as they were growing up.  I would take photos of them with all of the pumpkins surrounding them as they would pick out which one they wanted to carve for Halloween.  (My oldest was not a fan of “pumpkin guts” and so we always ended up doing that part for him! LOL!)  But it must have made an impression with them because they still enjoy going as adults now!   Besides, what’s better than apple cider donuts and freshly picked apples?!  YUM!

So, after the reminiscing of memories, I cut her out with the WS Hand Stitched Nested Rectangles along with the card front base and attached to a white A2 sized top folding card base.  For the sentiment, I took a piece of vellum and heat embossed a greeting from the WS Painted Sayings stamp set and I also took some of the splatter images from the same set and stamped them randomly in the background with white ink.

Before attaching the image panels onto the card, I’ve added some gold ink around the edges, attached some leaves behind it and popped it up with foam tape.  The piece of vellum was hand cut into a banner and folded around card base and attached with glue behind the letters to hide it.  I then put some burlap ribbon around the card front base as well as the image panel, vellum banner and gold sequins filled with gold Stickles.

Vicki-WSGirlPumpkin-Sept25-close

Here’s a closer view of the image and how she’s colored.  You can also better see the gold inked edges.  And of course, the photo didn’t pick it up, but I took some Wink of Stella clear glitter brush pen to go over the pumpkin with.

I’ve also used a cloud stencil to lightly sponge in a nice Fall sky behind her.

I think she would look so cute surrounded by a field of pumpkins…so there’s an idea!  Maybe I’ll work on that for next time!

Thanks so much for stopping in today!  I appreciate you taking the time!  See you soon!

challenges:

  1.  QKR Stampeded – Anything Goes #314
  2. Just Us Girls – JUGS459 photo week
  3. Crafty Friends – Autumn Colors
  4. Stamps & Fun = Creativity – Fall
  5. Crafting From the Heart – Anything Goes

Fall is Here with Craft Show Projects

Hello friends!  I was really hoping to post this yesterday, but hubby was around and I was trying to get many different things done at once.  As you might guess, I am frantically running around trying to get a good start and handle on getting items made up for my up-coming craft table!  I will have more on that below, but first, I’d like to share a card I made for the Lawn Fawnatics challenge before it expires too! LOL

Vicki-LawnFawn-FallisHere

As you may have seen in my past posting, I had gotten MANY Lawn Fawn items recently as I just adore Fall/Halloween and of course Christmas soon to follow!  It’s hard resist so many cool things that come out each year!  (If I worked myself ahead of time, then I would be less frantic and be able to actually slowly enjoy my new items!  LOL)

So for this card, I have used the fun Thanks a Latte stamp set as well as the Forest Feast stamp set for accents and sentiment.  I’ve stamped the tree stump in brown ink at the bottom of a vanilla panel that I’ve cut out using the LF Cross-Stitched rectangle die.  I also used a cloud stencil to sponge in some clouds in the background behind the stump.  I’ve stamped and colored with my Copic markers the other elements of the design and cut them out with the coordinating dies and arranged them on the stump panel.  I stamped the sentiment under the cup on a strip of vellum with chocolate ink and then heat embossed it with clear glitter EP and wrapped it around the card base with the plaid paper as well as the twine with the white heat embossed sentiment that was cut from brown cardstock with a banner die strip.  Lastly, I’ve added some shimmer over the liquid contents in cup as well as the leaves.

challenges:

  1.  Lawn Fawnatics – Mood Board

2.  City Crafter – Fall Colors

3.  Sketch Saturday – sketch 531

4.  Words 2 Craft By (W2CB57) – “Life starts all over again when it gets crisp in the Fall” – F. Scott Fitzgerald

5.  Simon Says Stamp Wednesday – “Pop It Up” (Popped up cup, leaves and whipped topping)

6.  Aud Sentiments – Fall + a sentiment


Now I’d like to share something that I’ve been working on for my up-coming craft show next month.  It’s coming quickly and I have many things to get ready for it.  I’ve not made these before for purchase, but I find that I am always in need of them and use them every year, so I thought these would be a fun way for someone to present a gift:

Vicki-ShakerGiftCardHolders-CraftShow

These are my “Shaker Gift Card Holders”.   I had made one in a previous post that I did earlier this year, but you may already be familiar with my “Shaker Money Holders” which I did a tutorial for on Splitcoaststampers.com a couple of years back.  CLICK HERE if you’d like to see that tutorial with a video I did.

As you can see, I’ve used the same Lawn Fawn stamp set that I’ve used on my card above as well as pulled in some other of those cute little images from other sets too!

I am going to be burning the midnight oil for a while, so I will probably have to wait to share more photos after my craft show finishes up, but I will take photos as I create so that I can also keep track of what I’ve made and how it all went over.

Hope you’ve enjoyed my post this evening and I’ll see you again soon!

Fun in the Fall

Hello friends!  I can almost feel it in the air!  Fall is coming near and I’m looking forward to joining in the crisp cool air and pretty colors with the changing leaves.  These are just a couple of things that I love about this season!  How about you?

Well this sweet little penguin certainly knows how to have fun in the Fall for sure:

Vicki-PenguinFuninFall-Sept 11

Here’s another September release from Whimsy Stamps called Penguin Fun in Fall image by Crissy Armstrong.  Of course, I grabbed my purple color markers to color his hat and scarf!  LOL!  I decided to create a purple and turquoise plaid pattern.  I also gave the leaves in the air a bit of movement with my coloring as if he’s throwing them up in the air.  Trying to be a bit different with my layout, so I tilted the image panel and cut it off on the right side of my card base.

I’ve also used the September release digital papers from Whimsy Stamps called Autumn Beauty.  These are fabulous papers and I know I’m going to be using some more of these on an up-coming card!  I’ve used two different patterns on the background and the banner strip.  Lastly, I added some fun Autumn Leaves sequins from Little Things from Lucy’s Cards.  I’ve actually had it for a while and hoarded the package and not used it until now!  I filled the centers of the round ones with some gold Stickles.  I also added a twine bow at the bottom of the banner strip.

Vicki-PenguinFuninFall-Sept11-close

Here’s a closer view of the image.  Here you can see where I’ve used some foam dots to pop up the fussy cut penguin for a bit of dimension. (I’ve also colored the one underneath as you can see it peeking out a bit on the side.)   I cut the image panel out with a stitched square die, sponged around the edges with some Spiced Marmalade distress ink and then went over the edges with some clear glitter Stickles as well as put some on the penguin’s hat tassel.

I hope you’ve enjoyed my colorful Fall card today! Thanks for stopping by as I really appreciate seeing your encouraging words or knowing you’ve stopped by! 🙂

Challenges:

  1.  Creative Inspirations – Anything Goes
  2. Crafting By Designs – Anything Goes
  3. That’s Crafty – Autumnal theme.
  4. Brown Sugar – All Creatures Great & Small
  5. Use Your Stuff – Animals

Anything Goes at Cute Card Thursday with a Shaped Apple Card

Hello friends!  It’s time for another weekly Cute Card Thursday Challenge!   For this week, since it’s the beginning of the month, we will have our easy peasy “Anything Goes” challenge for you this week!  We are sponsored by Whimsy Stamps!

Vicki-PenguinAppleBushel-Sept6-CCT546-ATG

I couldn’t resist using this cute little fellow on my card for today!  This is the Penguin Apple Bushel digital stamp from Whimsy Stamps.  I’ve colored him with Copics and pencils and then fussy cut him out and attached him on the front of my apple shaped card with foam tape.  Hard to see in the photo, but I’ve added just a wee bit of shimmer with my glitter brush pen on the bitten inside apple he’s holding.  I’ve also added some white dots for his eyes with a gel pen.

Vicki-CCT546-ATG1

For the shape of my apple card, I found a fun apple card pattern and cut it out with my Cricut Explore machine and enlarged it the size that I wanted it to be.  I’ve taken some sponges and ink to add some shading and highlighting details to the apple.  I’ve taken that CUTE stamp set from Lawn Fawn called Thanks a Bushel to stamp a couple of hearts around the penguin as well as white heat emboss the sentiment on the front.

I’ve also added a black gingham ribbon along with some twine that I’ve attached an apple charm to before attaching it to the top of the apple.

Vicki-CCT546-ATG

So of course, I wanted to show you what the inside of the shaped card looked like too!  I thought that the inside needed to “look like” the inside of an apple, so I took the Lawn Fawn Outside In Stitched Apple die and cut a piece to fit the inside of the apple and then followed the “bite marks” to cut off the end and then I took a sponge to sponge around the areas of it with brown colored ink for shadows.  I’ve also taken the same die set to add a tiny green apple on the opposite side of the inside of the card.  The purpose for that was not just to add an extra decorative element, but I also wanted to cover up the back side of the penguin sticking out from the front of the card.  I then needed to add the “apple seeds” to the inside of the apple, so I took the Lawn Fawn Stitched Apple Frames to cut out the seeds die in black cardstock and glued them to the vanilla die cut apple panel. I’ve also added some shimmer to the seeds with my glitter brush pen.

I thought that there was still plenty of room for a message below the seeds or you could also write on the opposite side as well.  It’s just a fun and unique card design to go with that darling penguin!  I will need to make a special envelope to fit the card inside for giving.

Thanks so much for joining me on my blog today!

Have a fantastic day!

Challenges:

  1.  Stamping Sensations – “I Spy with My Little Eye, Something Beginning with ‘B’!” (Bushel, bows, blue cap, bite, barrel)
  2. Crafting From the Heart – Anything Goes
  3. Artistic Inspirations – Anything Goes
  4. Crafty Cardmakers – All Creatures Great & Small
  5. Fab ‘N’ Funky – Bingo! (I’ve used the third column:  die-cuts, ribbons, red)
  6. The Crafty Addicts – Anything Goes with optional Back to School

It’s a Mouth-Full!

Hello friends!  I’m back with you again to share another fun image from the Whimsy Stamps September Digital Release!

Vicki-NutsAboutYou-Sept4

This guy is so stinkin’ CUTE and I really had fun coloring this one! 🙂  I thought this was a great image to use any time of the year really and a cute idea for also a “new home” themed card.  I have used the So Nuts About Home Digital Stamp.

After coloring the image, I went around the edges with some distress ink using my ink foam blending tool.  Mounted that onto a black layer and popped it up over the card design with some craft foam.  I die cut a leaf from kraft cardstock and used some more distress inks with the ink foam blending tool to give it a bit of color.  I then added some sparkle with some Ranger Vintage Platinum glitter and a clear shimmer brush pen.  I curled the edges a bit and attached it over the image panel in the corner.

For the background of my card, I have used the new Autumn Beauty digital papers released this month.  You can see a bit peeking out, but it really doesn’t do justice to the papers…they’re really gorgeous!  I’ve layered them onto a piece of glitter cardstock that was cut along the edge with a scallop border die and then I lined it all up along the right side of my card base.  I’ve added a piece of burlap ribbon and a button with a twine bow on the lower portion of the card before adding my image panel to it.

Vicki-NutsAboutYou-Sept4-close

Here’s a closer look at this cutie and my coloring details.  He really makes me smile! 🙂

Hope you’ve enjoyed my creation today!  Thanks for sharing part of your day with me!

Challenges:

  1.  4 Crafty Chicks – Crazy Egg Anything Goes
  2. Moving Along With the Times – Gingham and/or Buttons
  3. Alphabet Challenge – ‘L’ for leaves

Lawn Fawn Friday

Hello friends!  Yay, it’s Friday!  I have lots of fun Lawn Fawn “goodies” to share with you today and although it’s still a bit warm over my way, I am in the mood for Fall, how about you?  There’s nothing better in the Fall, for me, than a warm apple cider donut that we get every year from an apple orchid we like to visit each Fall!  It had me thinking of the current challenge going on…

Vicki-LF-FallTreats

It may be a bit of an oldie, but a goodie to me and I really enjoy using it!  I have pulled out my LF Love You a Latte stamp set to base my card for today.

I started with a white A2 sized top folding card base and added a piece of (now retired) “Perfectly Plaid Fall” mini paper stack that I’ve cut with the LF Stitched Rectangle die along with the pieces used on my image panel also cut with the same die set.  I layered that onto a white piece of cardstock that was cut from the LF “Scalloped Rectangle die” (Looks to be retired too!)  I have taken a strip of the plaid papers and used the LF Valentine Borders die to cut the edging on it.  I then wrapped some twine around it and added the LF Stitched Leaves that were cut from kraft cardstock and colored on the edges with distress ink and a foam blending tool.  I then tied a bow with the twine and placed it over the leaves.

I colored my images, fussy cut them out and placed them over my layered paper panels and then popped it up over the plaid card base with some craft foam.

Vicki-LF-FallTreats1

Upon a closer view of the image, you can see that I white heat embossed the sentiment from the stamp set.  I also added some glitter to the marshmallows in the cup and covered the donut with some glossy accents.  I added a LF Small Stitched Leaves that I made similar to the others to tuck inside with my treats! 🙂  All the leaves were covered with a glitter brush pen.

*Be sure to scroll down below for more Lawn Fawn goodies!!*

Here are the challenges I’d like to enter this card for:

  1.  Lawn Fawnatics – Coffee, Tea and Treats
  2. Retro Rubber (RRCB94) – Anything Goes + Older Stamp(s) Mine is circa 2015
  3. Watercooler Wednesday (WWC185) – Anything Goes
  4. Simon Says Stamp Wednesday – Anything Goes

I thought this was a good place to stick in this project I made and had entered into my local county fair last month.  This particular item did not place, but the category was “Hand Stamped Item Other Than a Card”…so I created this using a Lawn Fawn stamp:

Vicki-LFSkunk-Wood Slice

I found a bag of these really cute wood slices when I was out shopping with my mom earlier this Summer at Hobby Lobby.  They seemed like a perfect size to do this with!

I stamped this adorable skunk from the Lawn Fawn Stinkin’ Cute stamp set and then colored him in with my Prismacolor pencils.  Of course, the woodgrain gives it some slight imperfections, but I didn’t mind and thought it gave it more character!  (See the wood knot under his chin!)  I’ve added some green “Flower Soft” for the grass portion to give him something to stand on.  I also added some glitter to the hearts above his head.  Hubby drilled a hole in it for me so that I could add some twine for it to hang.

Vicki-LFSkunk-WoodSlice1

Here I’ve turned it at a bit of an angle so that you can see the thickness of the slice and the fun texture of the bark on it.  I thought this would be so cute on a gift bag or something.  I have it hanging in my room because he’s just too stinkin’ cute anyway! 🙂

Thanks for stopping in today and I wish you all a fabulous weekend!

P.S.  Sunday I will be sharing a post with a brand-new release…so be sure to check that out too!  Bye!

Spots and Dots for Cute Card Thursday

Hello friends!  It’s Thursday once again and time for another new challenge over at the Cute Card Thursday blog!  I really enjoy creating with challenges as it gives me inspiration and a push to finish a design in a way I might not have thought about doing otherwise.  If you haven’t done this yet with your card making, I encourage you to give it a try…you never know what you might come up with!

I know we are in the heat of August, but I think this month is going by fairly quickly and the Autumn Season will be here before you know it!  I was inspired by this along with another GORGEOUS image released this month from Whimsy Stamps, so check out my card for this week’s Cute Card Thursday challenge:

Vicki-CCT543spotanddots-WSAutumnHarvestRide

I have used this stunning Fall image From Whimsy Stamps called Autumn Harvest Ride by Crissy Armstrong.  I had some older Fall papers from my stash that had this fun dotted print on them and used these for the theme of the challenge to combine it with this wonderful Fall image as well.

The special card design I’ve used is called a Center Step Card.  (Click on the link to see the tutorial on how to make one for yourself on Splitcoaststampers.)

Vicki-CCT543spotsdots-WSAutumnHarvestRide

Upon a closer look at the design, I have also used a brand new (to me) elegant die cut by Spellbinders that I received as a prize winning from a fellow blog friend.  I’ve cut that with some garden green color and used that as a “back-drop” for my main image panel.  I’ve taken the Whimsy Stamps Pierced Border Trio Dies and cut another garden green piece for the image to sit.  I’ve also stamped out the sentiment with the Whimsy Stamps Everyday Mini Sentiments set and cut it out with an older Whimsy Stamps tag die to attach on the image panel with some twine.  I popped up the image panel with craft foam and layered this on the center panel of my card design.  I’ve also added a couple of Prima leaves between that.  I’ve attached some other dotted papers to the other panels including the bottom long panel and wrapped some gold ribbon around the bottom one before attaching it.  Lastly the gold ribbon and twine bows were added along with the button in the center gold bow and then I’ve added gold enamel dots on the side panels.

Vicki-CCT543spotsdots-WSAutumnHarvestRide-close

Here’s a closer look at the image and the coloring I’ve done with it.  I’ve mainly used my Copic markers to color it in and then added some gold gel pen coloring to the carousel pole, the saddle and bridle with the gold parts on them.  I took some Tinsel Stickles glitter to add to the “dots” on the saddle and bridle.  I then fussy cut it and attached it over the white dotted background and garden green border panel at the bottom.

Hope you’ve enjoyed my creation today and inspired you in some way to play.

I’ll be back again soon to share more creations!  Have a great day!

Here are the challenges I’d like to enter:

  1.  Creative Fingers – Anything Goes
  2. Crafty Friends – Anything Goes
  3. My Time to Craft – More Than One-Fold
  4. Shopping Our Stash – Leaves
  5. Crafty Gals Corner – Add Ribbon and/or Bow.