Eggs in One Basket

Hello friends!  Back today to share a fun Easter card with you!

Before I get to my card, I wanted to let everyone know that this will be my last post as a design team member.  I have enjoyed creating with the products and I’m sure I’ll be pulling them out to play with on my blog from time to time!  Sometimes we just have to lighten up our “baskets” to make things a little easier to carry.

Vicki-SNSEasterChick

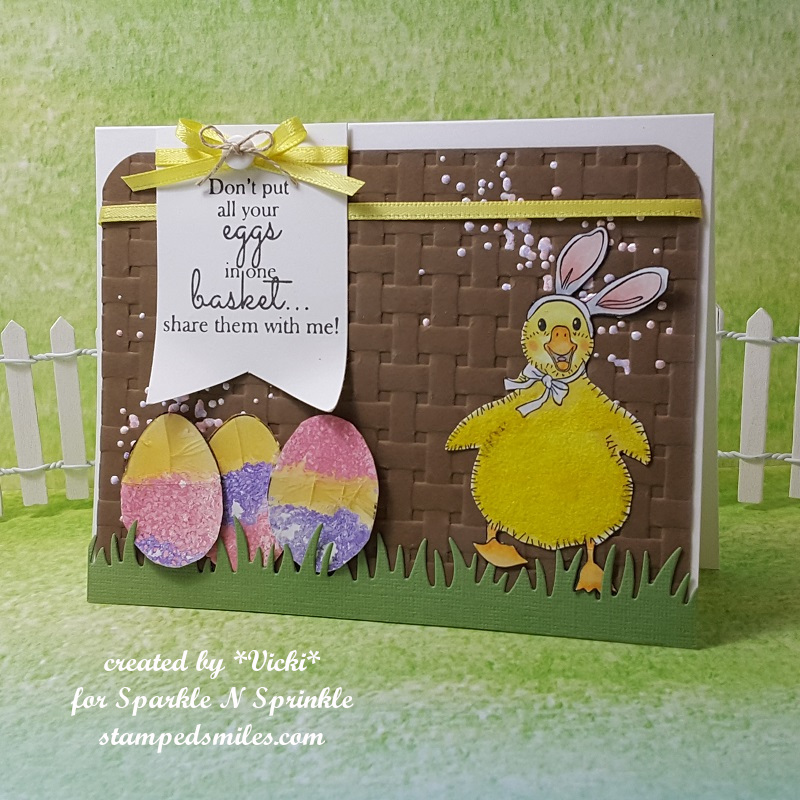
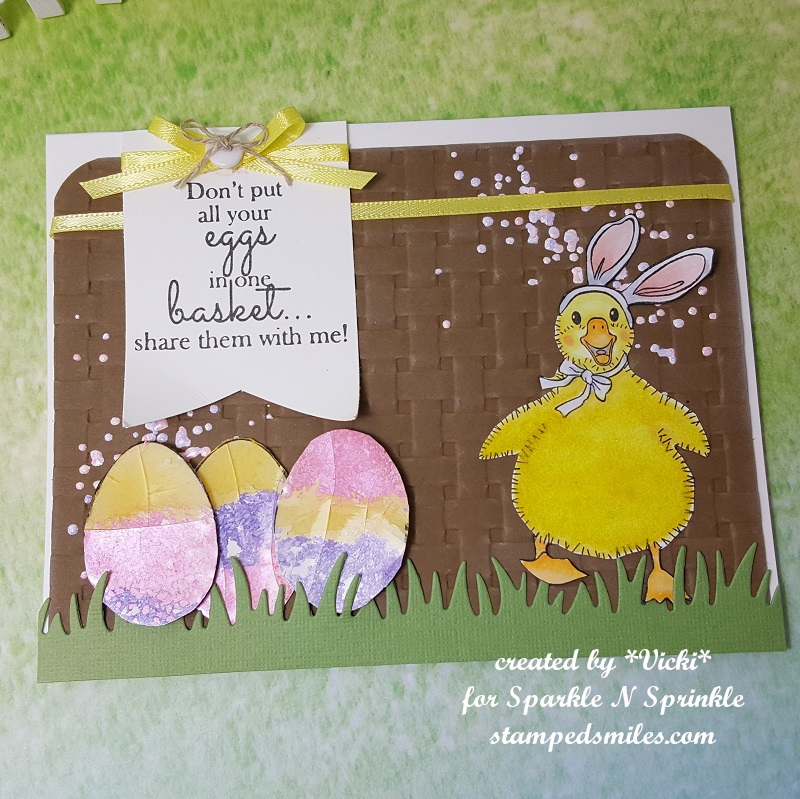
This little chick dressed in bunny ears just makes me giggle!!  I had so much fun with this cute stamp set called Easter Parade by Jan Mahew.  The other chick has this fancy hat on and is adorable too! 🙂

To start out with, I thought it would be fun to take this basket weave embossing folder to create the background of the card (resembling a basket of course!) and I rounded the top corners of it along with taking some of the new colors of Super Thick embossing powders in the Spring Lilac and Pink Cheeks and sprinkling some over top of this background.  I heat embossed it from underneath so it wouldn’t fly all over.  (Remember that you don’t need anything to attach it with, just heat set it from underneath!)

I’ve also used these embossing powders to create the look over the eggs as well!  I stamped out the open image egg from the stamp set and then layered the Spring Lilac, Pink Cheeks and Neon Super Thick Embossing Powders in strips and very carefully heat set it from underneath.  (I did this BEFORE they were fussy cut out.)

I thought that my images needed grounding, so I took a grass border die and cut a strip to place at the bottom of the card front.  I wrapped some yellow ribbon around the basket background and also stamped out the CUTE sentiment from the stamp set and made a banner with it that I’ve also added a bow, button and twine in the center of.  I’ve attached all of this to an A2 sized top folding card base.  I flipped up the edges of the banner to give it a bit of dimension.

Vicki-SNSEasterChick1

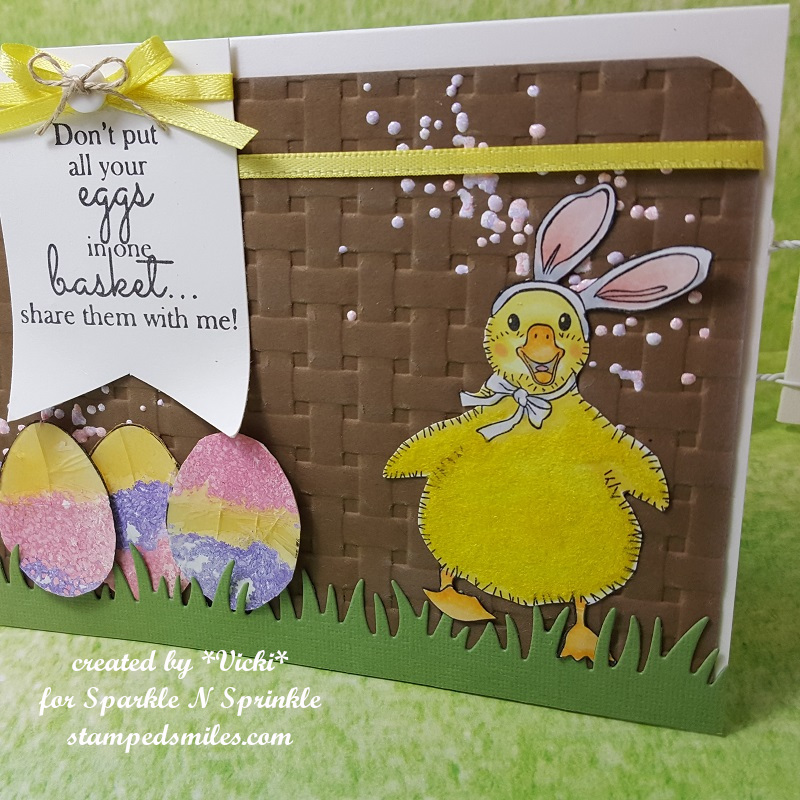
Here I wanted to point out to you this adorable little chick!  If you look at his belly area, you will see that he looks quite fuzzy!  After I colored him in with my Copics and fussy cut him out with scissors, I took the Nuvo Medium Tip Glue Pen to go over his belly area with and then sprinkled over it with the Canary Flocking.  I always press it into the area for good adhesion and let it dry.  Now you have a fuzzy feeling peep!  I added him to the background and nestled him in the grass border.  I used the Dimensional Glue to adhere the flat images down.

Vicki-SNSEasterChick2

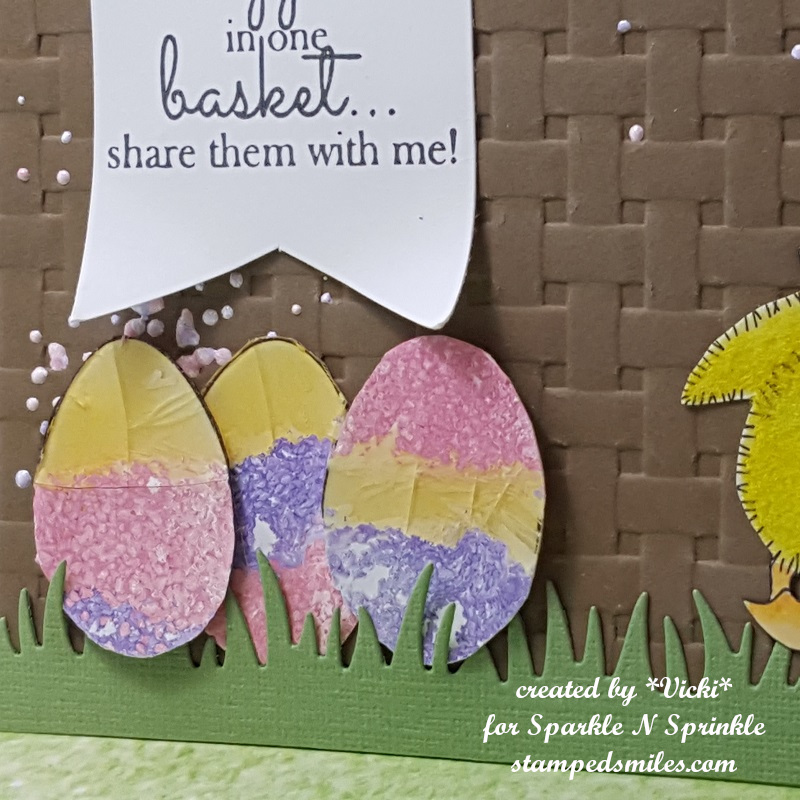
For the eggs, as mentioned above, I melted the powders (carefully trying to keep it contained within the lined stamped egg image) and then fussy cut them out with scissors.  Then I took some foam tape and nestled them among the grass too.  As you can see, I have cracked eggs which accidentally happened when I pushed down on the eggs to stick them.  I actually thought it was sort of cute with the basket theme and funny chick dressed like a bunny, so I cracked them even more and kept it that way!  (It was hard to capture in the photo, but the eggs with the embossing have a pretty shinny sheen over them.  It was sure fun to play with those embossing powders!

Vicki-SNSEasterChick-flat

I hope you’ve enjoyed my card today and that you hop on over to check out this fun stamp set along with those super thick EPs!!

Thanks so much for dropping in today!  I enjoy reading each comment and what you have to say!

Challenges I’d like to enter this card for:

  1.  Crafty Catz – Anything Goes with optional twist:  Spring
  2. The Creative Crafters – Anything Goes
  3. QKR Stampede – #339 Anything Goes
  4. Crafting From the Heart – Just for Fun (Anything Goes)

Christmas Non-Card Creations and Final ICAD Week 9 Results!

Hello friends and TGIF!!  Hope you have some happy plans laid out for the weekend!  I will be doing various things including helping my son move!

If you remember my post from last Friday, I shared some hand-made cards that I had entered into my local County Fair.  There are a few other items that I’ve entered besides cards for certain categories and I thought you’d enjoy seeing a few other things that I’ve created just for the fair:

Vicki-Christmas Center Piece-Snowman Hat

My first project was entered into the “Christmas Centerpiece” category, and I was excited to see that I had won first place with this!  Can you tell what I’ve used to create the “snowman hat” design?

Let’s take a closer look…

Vicki-Christmas Centerpiece-Snowman hat1

I asked hubby to save me one of his empty coffee cans and I’ve spray painted it in black.  I’ve also bought a $1.00 charger plate from Hobby Lobby in black and then attached them together to form the snowman hat.  Then I took some white paint and splattered the entire thing for a fun “snow fall effect”.  I then began to decorate it by attaching some ribbon, pine tree sprigs and pinecones.

Vicki-Christmas centerpiece-snowman hat2

I bought a really pretty snowflake ornament with lots of sparkle to use as a center piece for the front of the snowman hat.  The ribbon bow was attached below that and then the pinecone and sprigs were placed and attached in the center of the bow.  (Even the plaid ribbon has some pretty sparkle in it!)

Vicki-Christmas centerpiece-snowman hat-3

For the pinecones and the “snow” over the top of the hat, I have used some embossing paste mixed with some texture stones to give it a thick snow appearance.  While it was still wet, I’ve added some glitter to all of it.  Love the way this turned out!  It will be a great center piece at Christmas time! 🙂

And since I was in a Christmas mood, I also made another item for the Fair:

Vicki-Christmasbasket

This poinsettia basket was entered into the “handmade basket” category, and I was happy to see that I had won first place for this entry as well!  For the fair entry, you can have a basket made of anything as long as it was handmade…so of course I made a paper one! 🙂

Vicki-Christmasbasket3

I remember a while back this awesome basket with a tutorial that someone had made from Heartfelt Creations, and I knew I wanted to give it a try.  It is such a sturdy basket too as I’ve used some pretty heavy-duty paper to compile it together.

Vicki-Christmasbasket1

The papers that I’ve used are actually some pretty old ones from a past Stampin’ Up! collection.  They’re double-sided and you can see the pretty poinsettia pattern on the other side from inside the basket walls.  The poinsettia die was a purchase I had made from a sale item in a booth at that Stamp Convention I went to earlier this Summer.  I love the embossing details it made with the poinsettia flower.  I also took some white ink to pop them out a bit so they’re more noticeable.  There is one on each side of the basket and a smaller one at the top of the handle.

Vicki-Christmasbasket4

I’ve used some gold foil paper for the center of the flowers and then added some gold enamel dots on random spots for the centers.  I took some thin and narrow gold ribbon to the edges of the handle and then tied a triple bow with it and placed the poinsettia in the center.  I just filled the basket with pinecones that I had on hand, but I could see so many things that this basket would work for!  Maybe I need to make one for another Holiday too?!

Well although I made these for the fair, they will be nice to use for my own home and of course the photos do not do justice to what they look like in person!  I had so much fun with these projects too!  (I may still have another project or two to share with you from the fair entries…so keep watching!)

Lastly, I’m also very excited that I have fully completed my ICAD challenge for 2018!!  Yay!!  I cannot believe that I kept up with it the entire time and did a card for every single day the last 61 days in June and July!!  I know that I’ve posted every week what I’ve done, and this is my final set for week 9:

Vicki-ICAD2018-week9

These were so much fun!  Some days were really hard and others I zoomed right through it!  I learned many things not only from other ICADians, but also about myself with art and how it affects me physically, mentally and emotionally.  I am very surprised in more ways than one.  Just when you think you don’t have it in you…you can surprise your own self! Have you ever done something like this?  I urge you to try as it is such a learning experience.

Vicki-ICAD2018-completed

There is just NO WAY I would have enough room to get every single one of these cards in a photo shot!  I had a huge ring binder that I kept them all on and they actually just barely fit on it!  LOL!  Such a fun thing to see all of these together at once and it will be great to go back and look at later too!  Glad I wrote on the back of what each one was.

I hope you’ve enjoyed my post today and have been inspired in some way!  There are SO many crafty things I enjoy doing…. there are just never enough hours in the day sometimes! LOL!!  We crafters can understand that! 🙂

Thanks so much for dropping in, I really appreciate your kind thoughts and read each and every one!  See you soon!