This is my second post for today, please scroll down to see the Pearly Sparkles Guest Challenge details or click HERE.
Hello again my friends and Happy May Day to you! I think I’m so ready for May so that I can start being outside with hopefully better weather than what April gave us!
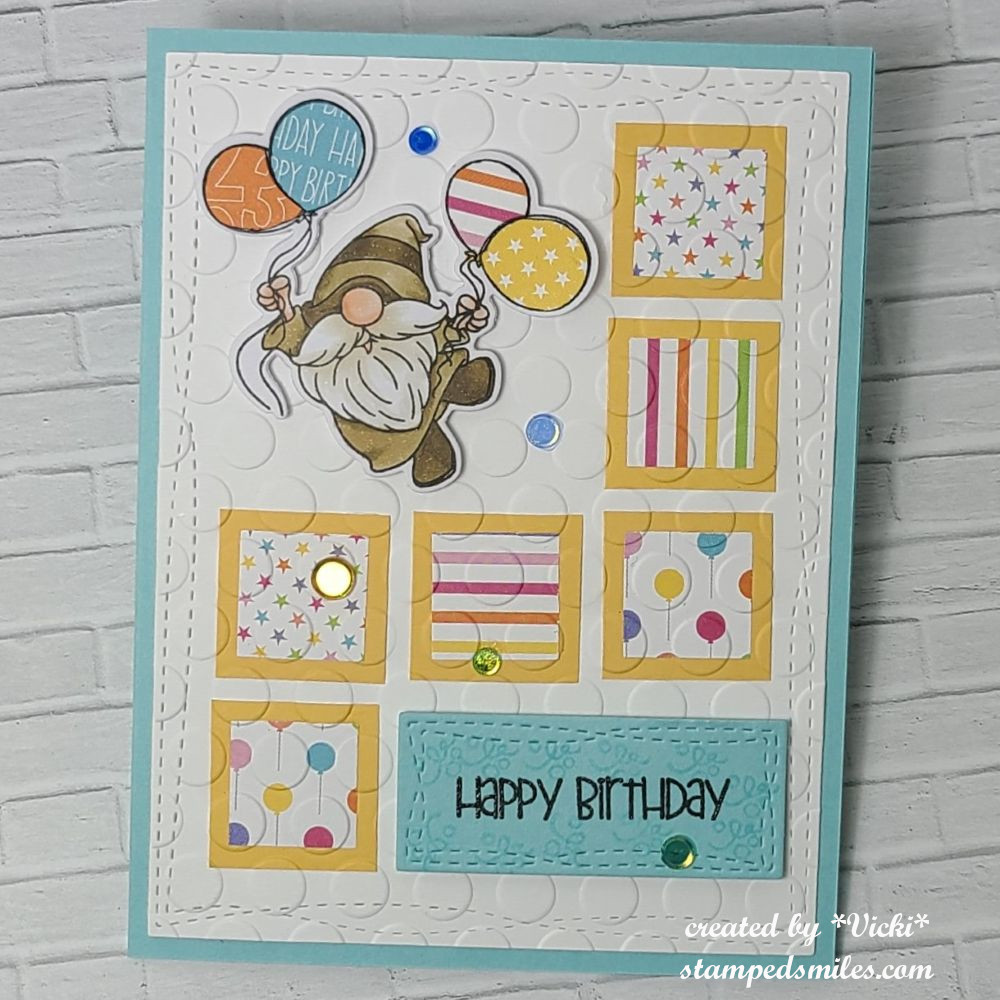
Today also brings us to a new challenge over at the Mix It Up Challenge Blog. The challenges always run for 6 weeks so there is plenty of time to enter. The theme given for us this time is: Paper Piecing or you can always do the ‘Anything Goes” too. Here’s the card that I came up with for the challenge using the theme:
Look at this darling little gnome holding on tight to his balloons! I got this adorable stamp from Ink ‘n’ Splatter a while back, but this is the first time I’m using it. He’s called Party Gnome Celebration. *Today is also the start of this company merging back up again with Digi Doodle Studios! Dina has some cute artwork with her digital and clear stamps both! You can see some past creations I made on my blog here under the category: Digi Doodle Studios.*
I’ve stamped the party gnome, colored him and then used some pattern paper from my stash to paper piece onto the balloons. I just stamped the same image over different pattern papers, fussy cut each balloon out and glued each balloon in place.
For the background, I thought it would be fun to use some more of the pattern papers to create inchie squares and make a layout with them. I attached the squares to the card front and then I embossed over top of it with a very old “Dotted Cuttlebug” embossing folder. (If you’ve been a crafter for a while, then you know it’s old! LOL) I black heat embossed the sentiment from the Party Gnome stamp set and cut it out with the same wonky stitched rectangle die set I’ve used for the front panel and popped that and the gnome up with foam tape. I also stamped a few of the confetti image around the sentiment and then topped the card off with sequins.
I hope you’ve enjoyed my card today and I hope you find some time to create for our Mix It Up Challenge as well! Hop on over to the see the inspiration! Thanks for dropping in!
Challenges:
Tic Tac Toe – #269 ( I used straight across middle row)
Hello friends! Just popping in with a quick post to share a card I’ve made for a few challenges.
This year, I’m going to try and “shop my stash” instead of buying and buying and buying all the things. YES…I know it’s easier said than done, but I’ve joined a fellow crafter that I’ve known for a long time to join in her monthly challenge prompts in her group on FB (This & That With Danni’s Dreams) to help keep me motivated in spending less. I’m sure she’d love you to join her, so check it out. Her monthly prompts are from her “Use Your Stash” challenges that she just started this year.
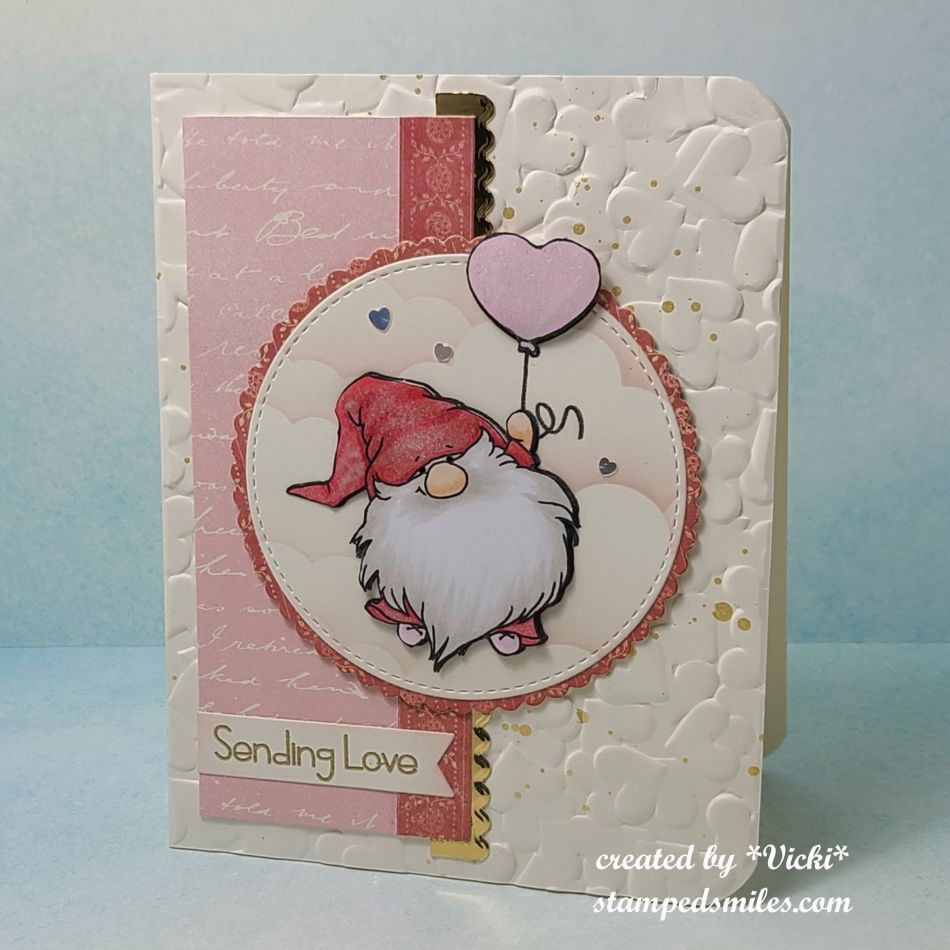
Her themes/prompts for January 2025: gnome(s), embossing folder, border die/punch, heart(s) and 12×12 paper. (You can choose one, several or all.) Here’s the card that I’ve made “Using My Stash” with ALL of the prompts:
I think gnomes are cute and I happen to have several stamps, so it was no problem finding one of those! I’ve used an older gnome set from Whimsy Stamps Gnome One Like You. I colored him up with Copics, but I fussy cut out the gnome and the heart balloon to pop up over the image on the circle that I’ve stenciled some pink clouds on.
The background has an older Sizzix embossing folder not sure of the name, but it’s a 3D embossing folder with hearts piled up. The embossing folder and hearts was another two of her prompts. I splattered some gold watercolor over the background before placing it over an A2 sized top folding cream card base. I also used a corner chomper to round the edges of the right two corners.
I’ve used some very old 12×12 papers from Stampin’ Up! called “Fan Fare”. I hoarded it for a long time and even wrote the coordinating colors on the back of the package! It’s high time to use some of it up…even if it’s a small strip! I’ve also taken the Whimsy Stamps Basic Border dies (not available any more) to cut a mirror gold strip along the edge of the papers. (The remaining of her other prompts used.)
I gold heat embossed the sentiment from the stamp set over a piece of the cream cardstock. I cut it out with a banner die and sponged some light pink ink around the edges. Lastly, I covered the heart balloon with a glitter pen and added a couple of tiny sequin hearts around the gnome.
I had a great time pulling out items from my stash and it felt good to be using them! I certainly plan on doing more of these every month! So stay tuned for more posts to help “Use Your Stash”! Thanks so much for dropping in! See you again soon!
Hello friends! November has come with the pretty leaves on the trees and the coolness in the winds. I always turn to comforting “things” this time of the year and it always gives me a sense of peace before the year comes to an end. A warm fuzzy blanket, socks/slippers, sweaters, etc. is what I usually turn to. What is your comfort “thing”?
I promised to share with you the fun things we did over at the “Inky Escape” event that I recently attended and it was wonderful to see all of my crafty friends again for laughs and fun together. I think I miss them already!
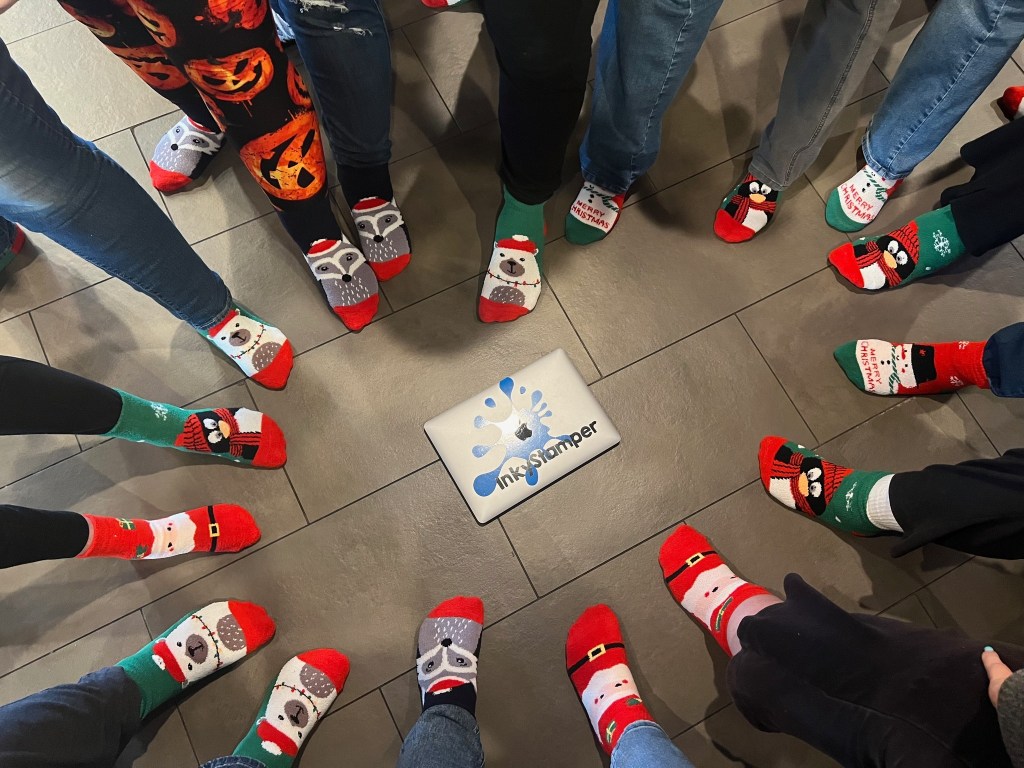
I lifted this fun photo from the Inky Stamper FB page as I don’t have any photos other than seeing what others took. There were a total of 18 of us this time:
Everyone received a “swag bag”…but the case this time was a Christmas stocking full of fun goodies and one of them was that everyone received cute fluffy socks. I’m not exactly sure which one is me in that photo, but I did have a polar bear sock! LOL We each placed one foot in the circle and Chelsea took the photo.
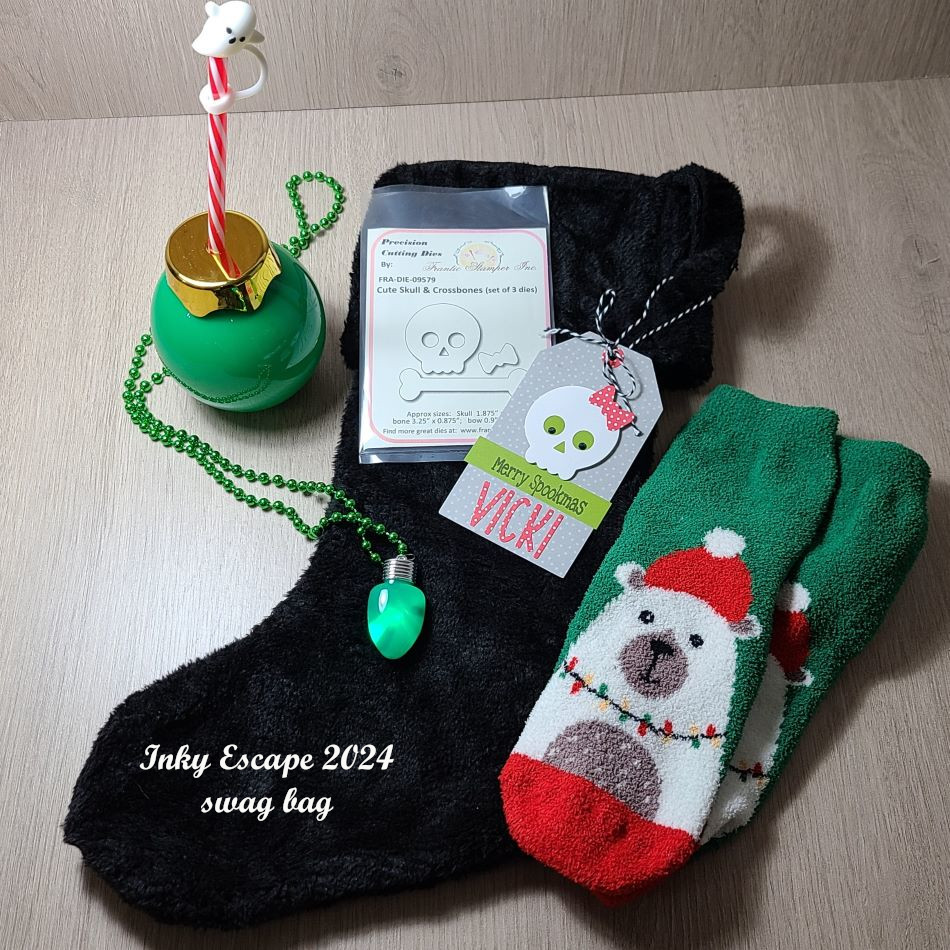
And speaking of the “swag bag”/Christmas stocking…here’s what we each received:
When I got to the event, there was this black stocking on my table with the cute tag attached to it with my name. Each person received a personalized tag on the swag bag, plus the “skull” dies that were used to create the tag which was inside the stocking! There are my polar bear fuzzy socks (I’ve already washed them up by hand so the colors wouldn’t bleed in the wash…and they’re so warm and fuzzy!) I also received the cute “Christmas bulb” drink holder with a candy cane straw and a little ghost stopper for the top! We used these containers to hold the “Jingle Juice” that we drank at some point! And then I received a light up Christmas bulb necklace that has different settings when you push the button the back. The theme for this event was called “Merry Spookmas” which you can see the greeting for that on my personalized tag. So fun!
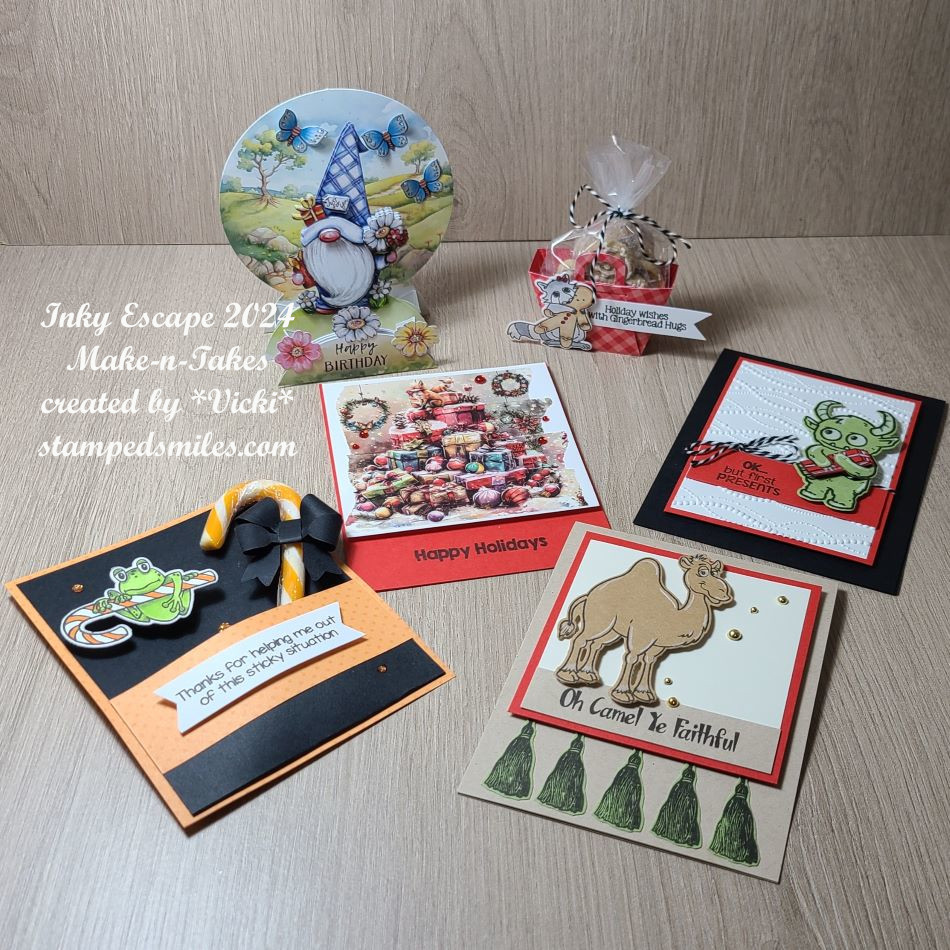
And speaking of fun…here are all of the Make-n-Takes that we created during the event. We sat and made 4 projects and then two of those projects were “bonus” makes using some other special items. (There is a “story” about one of them, but you can check out each project up close in the gallery below.)
*If you are on my website, just click on each photo to enlarge and scroll downward to see more information about each photo while it’s enlarged.*
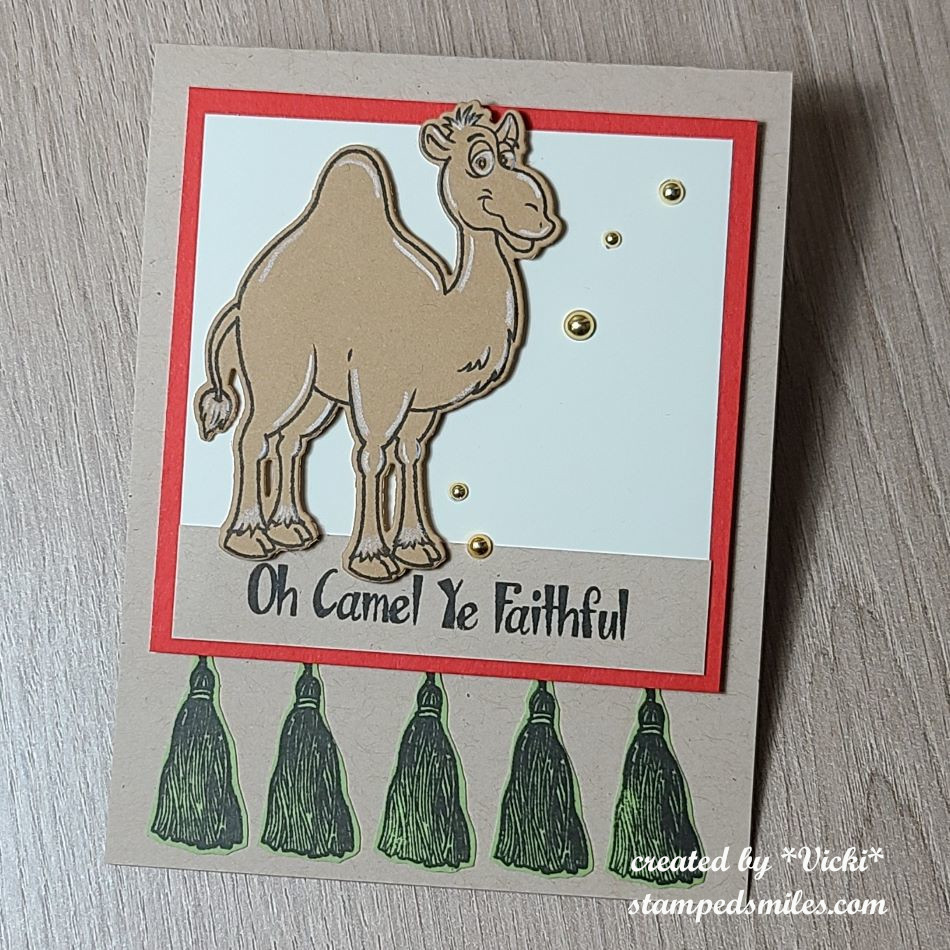
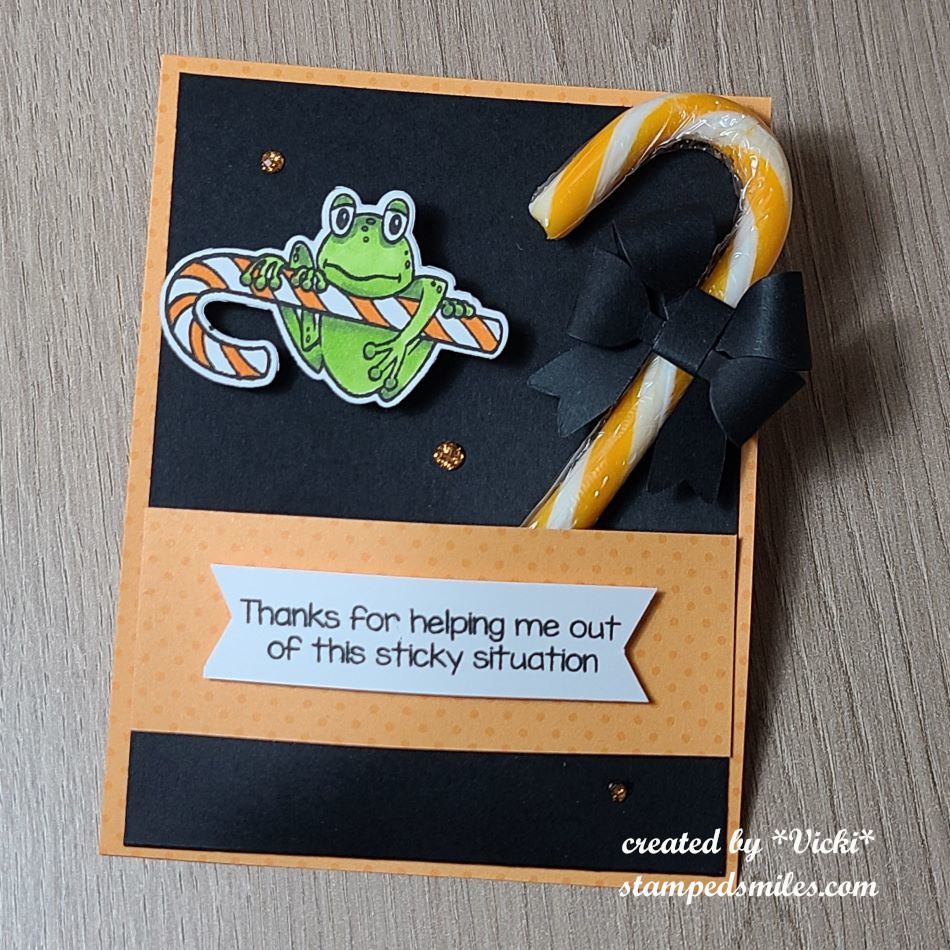
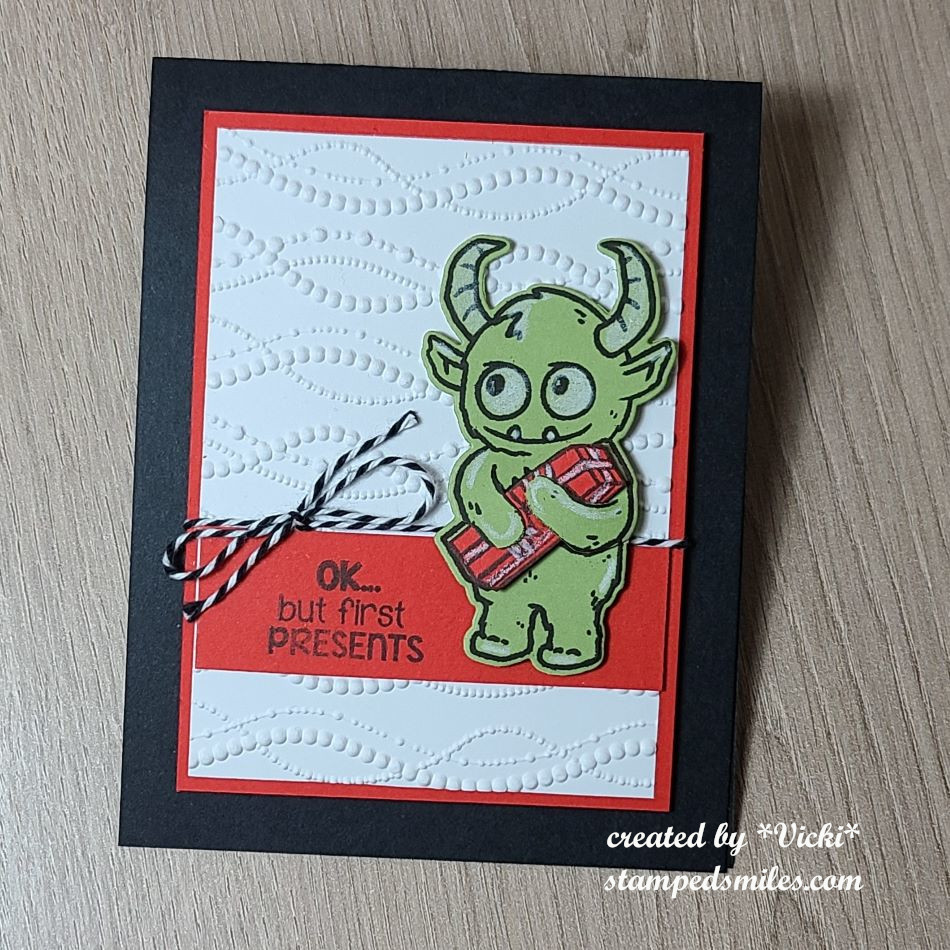
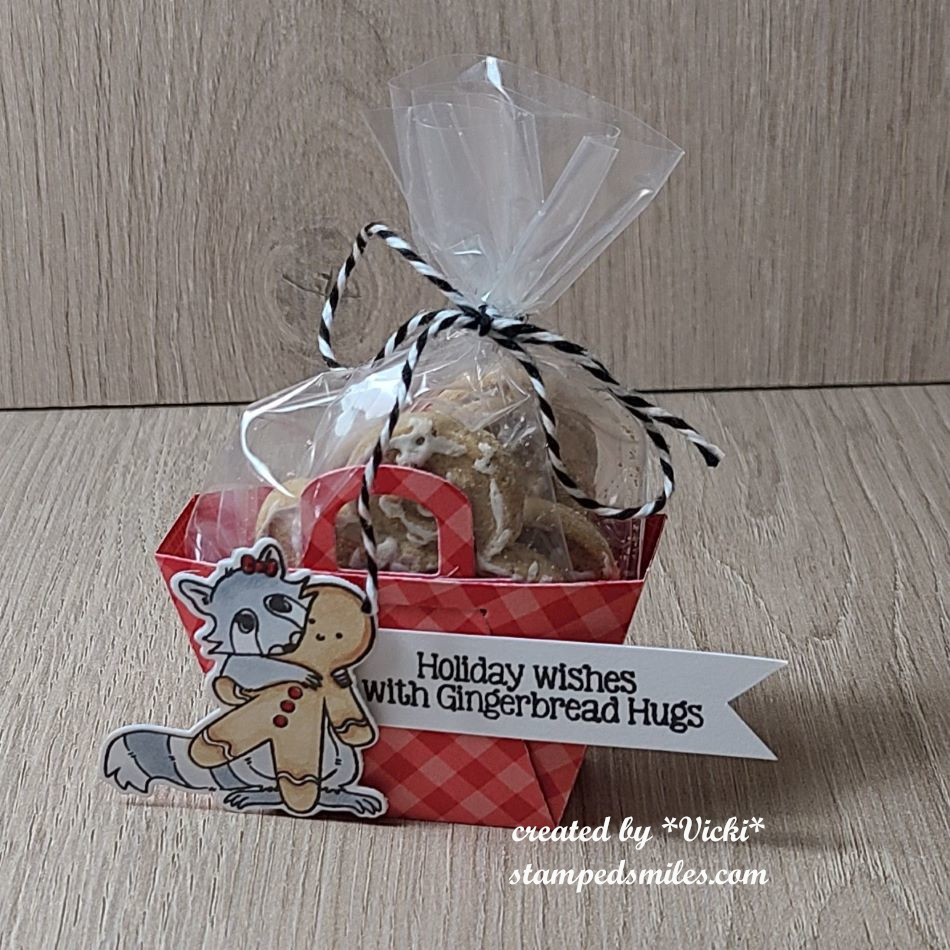
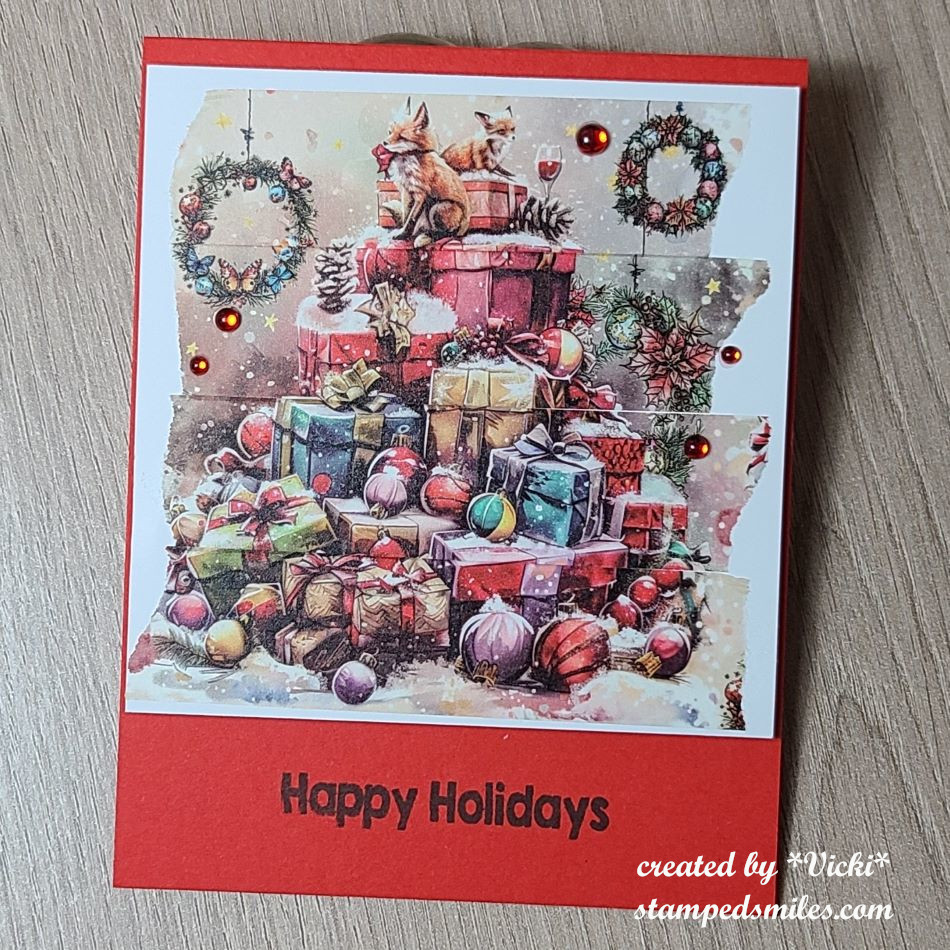
Camel stamp set used. Images were stamped on colored cardstock and cut out.I TOADally FROGgot to run the black cardstock through an embossing folder! Doh! Orange Cream candy cane inside pocket with paper bow and frog on wobbler.My favorite stamp set of this release is the Gifter set. He was stamped on cardstock and cut out. Present was paper pieced inside his arms.Cute gingerbread treat container came complete with gingerbread cookies wrapped with twine!Bonus make-n-take was easy peasy with some very cool Aall & Create washi tape that made this image!We chose the “winter” gnome that we wanted, but mine was so messed up I had to ditch it! I came home and made a birthday one that similar from my own card kit stash! LOL
The first four make-n-takes were made using the brand new Inky Stamper release that came out during this event! You should go check them out now on the website! (They’re all shown on the home page under “Featured Products”.) My favorite is that darling “Gifter” stamp set! I’m sure you’ll be seeing something from that set soon from me! *wink*
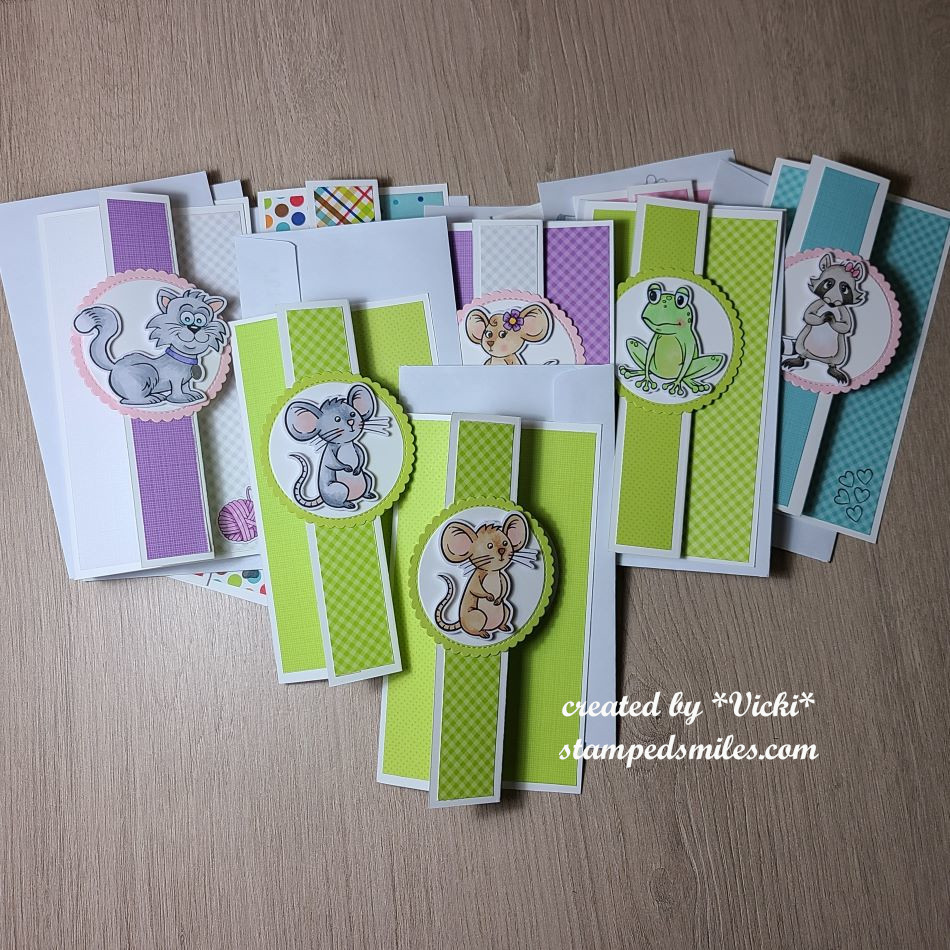
And since I was there to “crop” (as they say), I brought some things to work on that I really wanted to get done. So I decided to pull out some more Inky Stamper images to color and make a “Sheetload of Cards” using the September Sheetload of Cards Template by Crafty Al. If you’re not familiar with her, check out her You Tube Channel and look for all of her “Sheetload of Cards” videos to see how you can find instructions for each month. #SUYSSep2024 #ShowUsYourSheetLoad
I utilized her template to create the full 12 cards as demonstrated. The dimensions of the finished card design is 3.5″ x 6.25″ which I really liked as it helped to use up the full 6″x6″ size of those paper pads! Also, you don’t have to create envelopes for these as they fit perfectly inside those #6 envelopes (3-5/8″ x 6.5″) that you can find at any office supply area of a store.
As you can see, I used a variety of images that I stamped, colored and cut out for each design. I matched up my design papers to coordinate with the images. All of the images I used are from Inky Stamper. All papers come from a variety of Doodlebug Design papers.
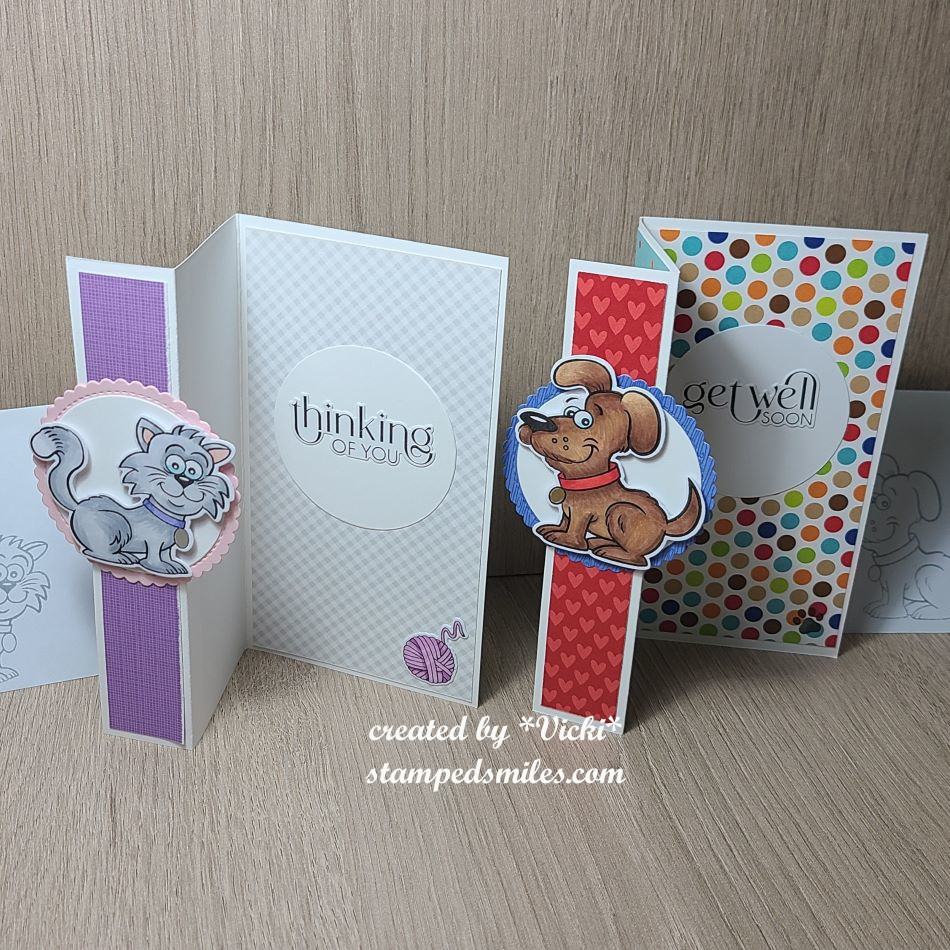
Here’s a closer look at two of the cards I made from the set so that you can see how the card opens up and the greetings on the inside of each card. (Sentiments come from Taylored Expressions.) You can also see the coordinating envelopes next to them with the matching critter stamped in grey ink.
These cards are on the way for a special charity for ill children patients to help lift spirts and I hope each one will!
I know there were so many things going on during the event that I was even surprised that I got all of these finished. They were mostly finished with the exception of the greeting which I added when I got home. I had plenty to do while I was there and also enjoyed all the activities too!
I hope you’ve enjoyed my post today as well! I thank you so much for stopping in!
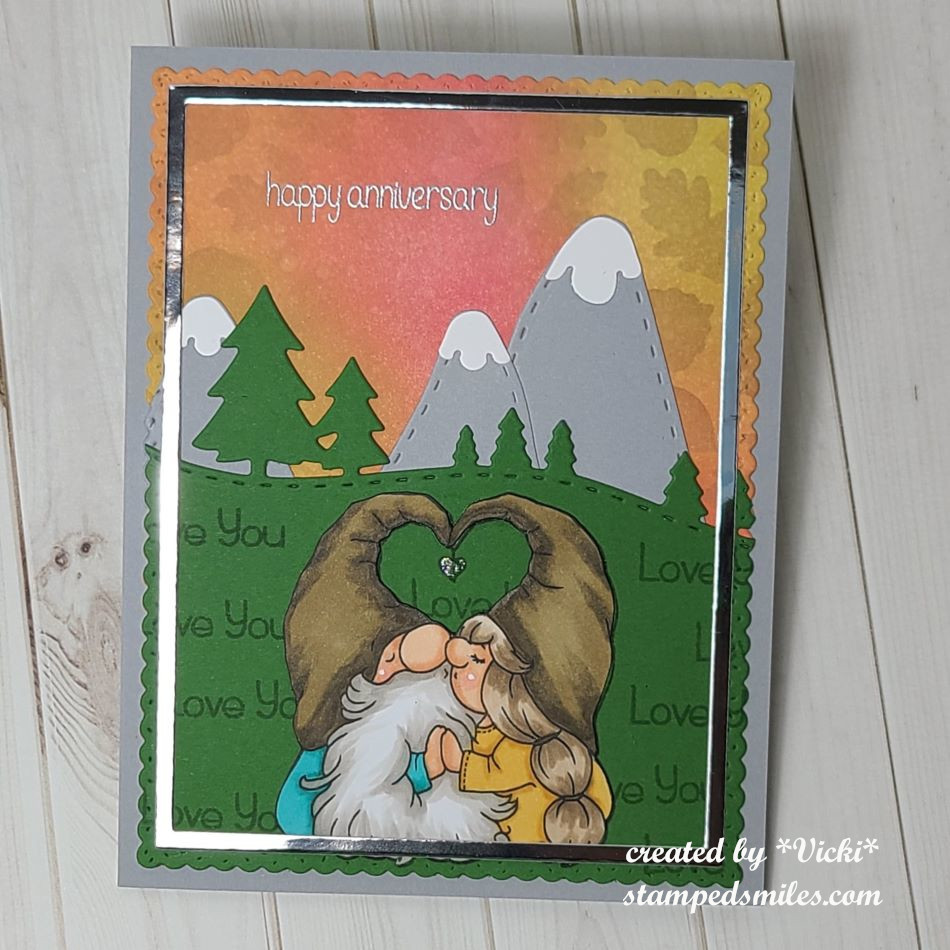
Hello friends! I hope you’re having a great start to your week! I’m just popping in to share the card I made my husband for our 25th wedding anniversary…he’ll be getting it this morning and then we’re off to a date night (afternoon as we’ve gotten older)!😆
I think this turned out pretty cute! I dug into my Whimsy Stamps stash and colored up these cute gnomes and fussy cut them by hand to add to the scene. I cut off the string and heart in the center of their hats and stamped the image over the green cardstock with the cut out image layered over top of it.
For the background: I blended some Autumn colored inks in various places and then stenciled in the leaves with a light brown ink. I die cut the mountains and attached them to the background by sizing it up with the green die cut tree border for placement. I stamped the “love you” sentiment all over the green background and then layered the colored image over top of the other. I added some silver sparkle on the heart in the center of the hats.
I also took a die cut silver cardstock frame to go around it and then I silver heat embossed the “happy anniversary” sentiment at the top of the scene.
All the layers were cut with a scallop rectangle die and placed over a side folding A2 grey card base.
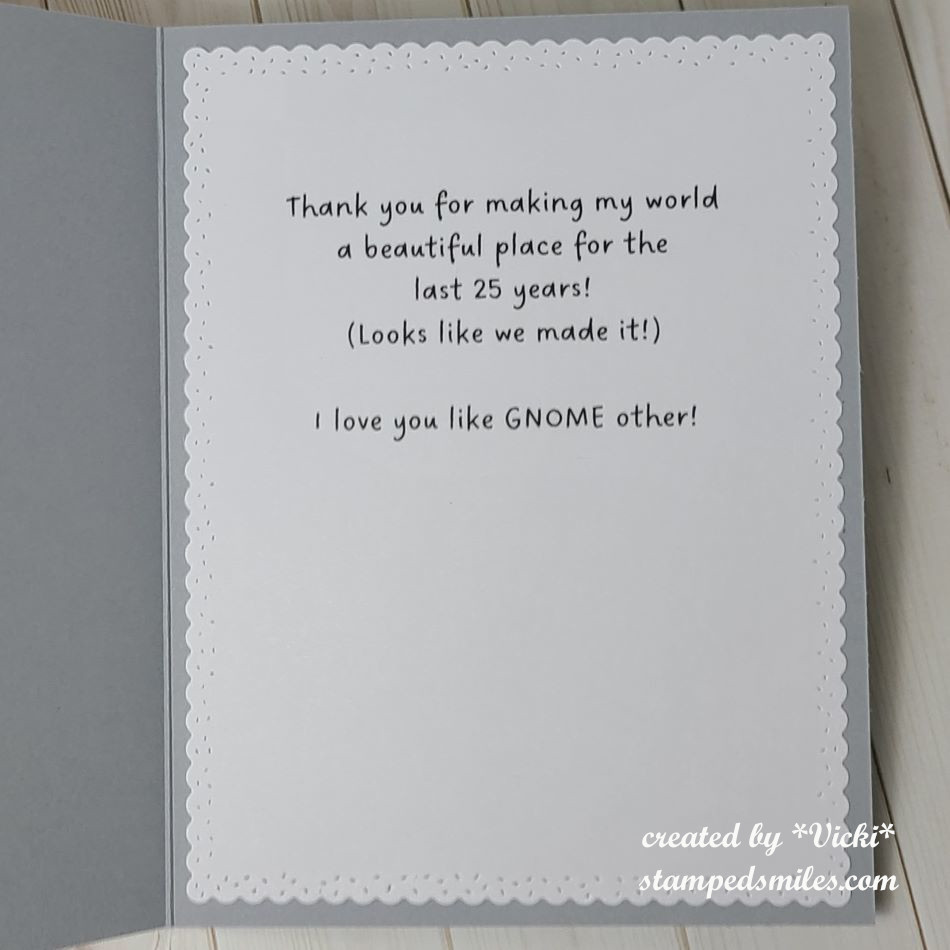
And here’s what I put on the inside of the card. I thought it up myself and printed it out on the computer. It was cut out with the same scalloped rectangle die and attached. I still need to sign it as I’m typing this up!
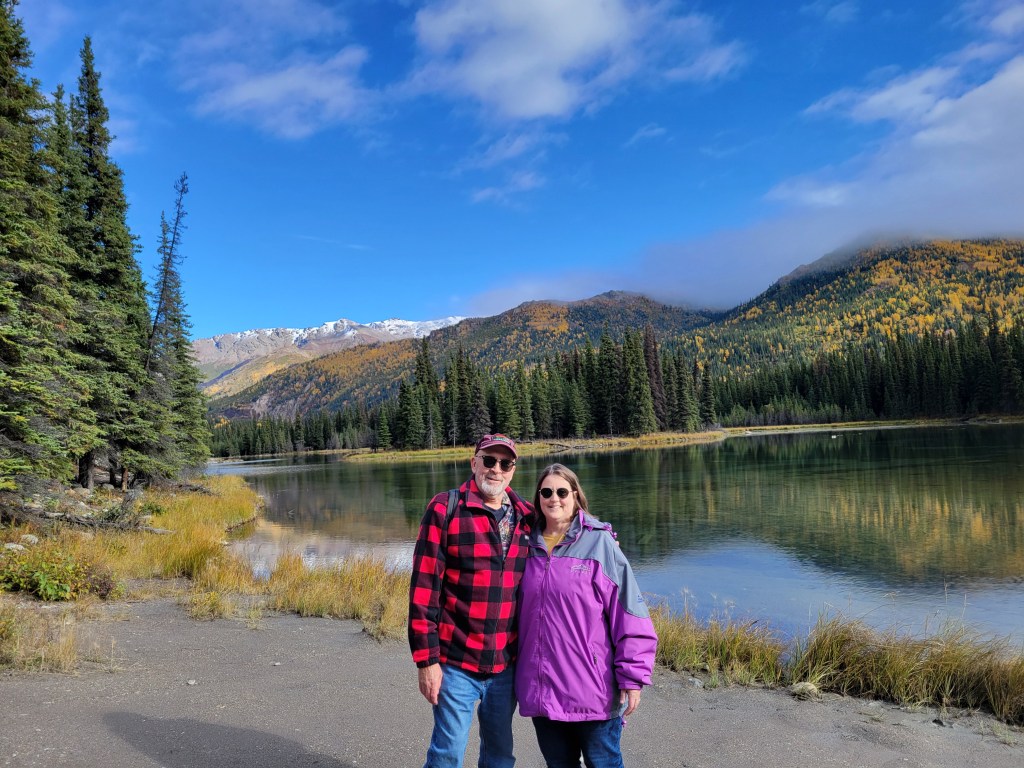
Here’s the inspiration that I used to help me create this card:
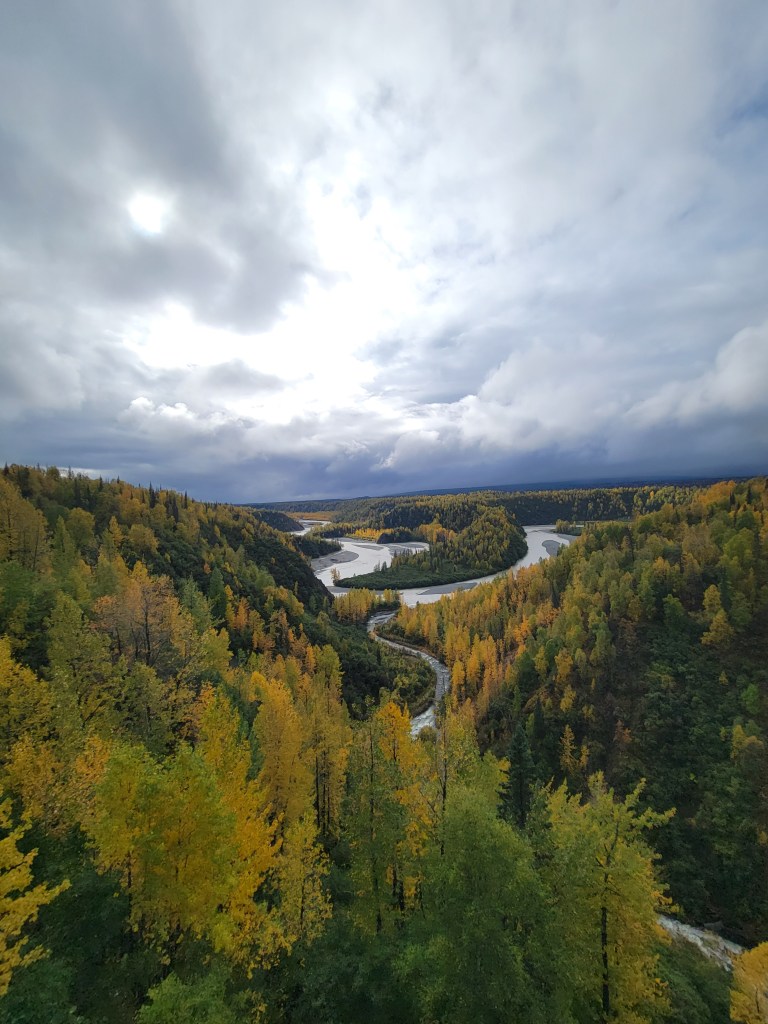
These are some more photos that we took while we were in Alaska last month. After our cruise, we took a land tour and went on a train ride that took us up to Denali Park. We had a good day to take a 3 mile hike one day and ran into someone that took our photo and we took their photo too!
I will be back later to share some photos of the stamp retreat I just came back from! Always lots of fun and great to see my crafty friends! Thanks for stopping by today!
Challenges:
Retro Rubber – #rrcb242 Fall by the Lake (all products are at least 3 yrs old)
Hello friends! I hope that you’re having a wonderful week so far! We have experienced our very first snow accumulation this year and it was very pretty on the inside where it’s warm! LOL It wasn’t necessary to shovel as it melted when it hit the pavement/streets, which makes it nice too! I’m excited to be sharing some more Inky Stamper products with you today as I continue on with my Guest DT for this month. This time it’s all about stretching out those products you purchase to get even more out of them which I’m sure we all need during this time of the year!
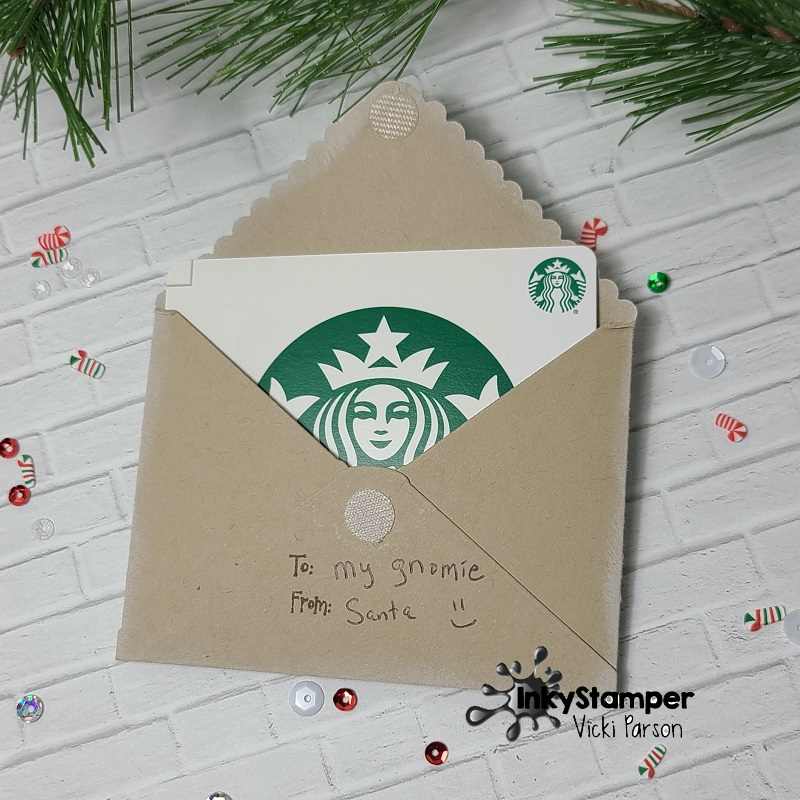
Isn’t this little mouse gnome the cutest?! I don’t think I’ve seen a mouse gnome before, but this is another brand-new stamp set from Inky Stamper called Gnome, of course!
I’m not only using this same stamp set for both of my projects today, but I wanted to point out that this one above is not a card, but it’s a gift card envelope that I’ve created using the Inky Stamper Mini Envie Die. I love this die for quickly creating the perfect sized envelope to fit your gift card inside, but Chelsea also comes up with fun mini cards in a lot of her kits that work great for tucking inside this envelope too! (There’s a brand-new kit in the store that has just came out using one of the brand-new stamp sets making a mini card in her class.) I also wanted to point out that this die can be cut from one of the 6×6 Doodlebug paper packs sold in the store too!
For the front of my envelope here:I thought it would be fun to create a little scene for my mouse gnome to hang up his stockings! I took a strip from the Doodlebug Buffalo Check/Wood Grain paper pack to place along the bottom and stenciled some bricks for the background. I stamped, colored and cut out the gnome with the coordinating die and I punched a small hole on each side of him where his hands are for the string. I then took some of the “stockings” from the Picket Fence Fireplace Stockings sequins and attached them to the string that wraps around the back of the scene panel. I added a sentiment from the same stamp set, popped up the gnome and attached to a piece of green glitter cardstock and then attached it to the envelope front.
Here you can see the other side of the envelope that I’ve white heat embossed the deer from this gnome stamp set and sponged some white ink around the edges. Now to keep the envelope flap closed, you could wrap some twine or ribbon around it, but I love using the Inky Stamper Papercrafting Velcro because it’s the perfect size for this closure and it’s such a great price! You can see how easily a gift card can fit right inside too!
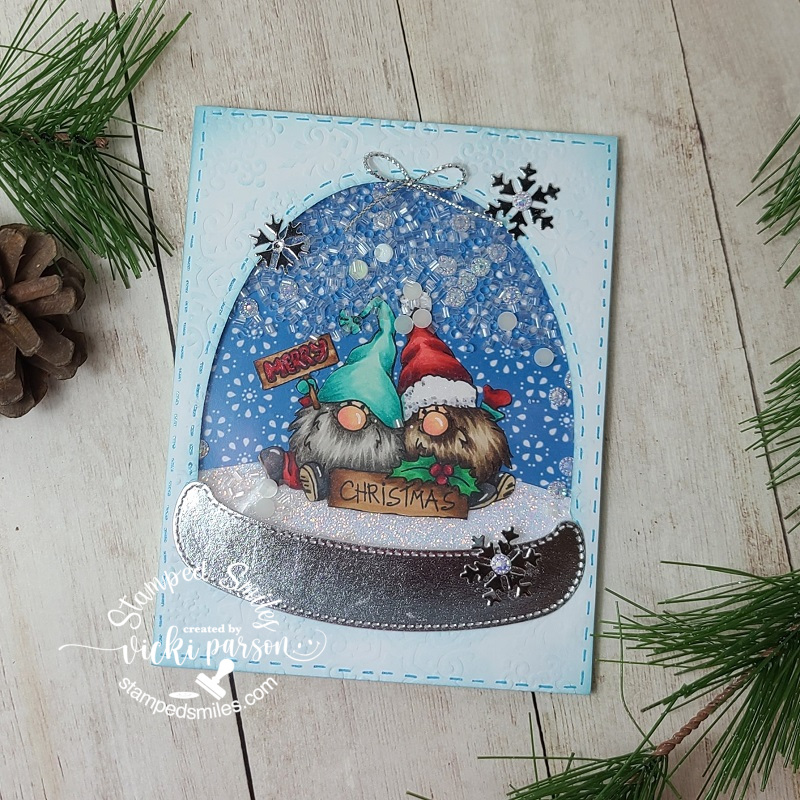
And here’s another scene I’ve created using this adorable Gnome stamp set, but on a regular A2 sized card this time.
So, as I was using the Inky Stamper Mini Envie Die for my gift card envelope above, I was looking at the other die pieces that come with this set and thought that the stitched triangle die would make for some great pine trees for my little mouse gnome scene. I pulled out some Doodlebug Gingham/Linen as well as the Doodlebug Swiss Dot paper packs to cut out the triangles and design my scene with the “ground” and “snowy sky” too. I placed the “sky” paper down first, added a curved “ground” and tucked in my formed triangle pines. I also tucked in the wooden sign from the stamp set and stamped the greeting over it. This gnome stamp set also has a tiny pipe that you can die cut out which is just the right size for the gnome. You can see that I’ve tucked that in behind the gnome’s hand on the right and I added some “smoke” with a marker on the background too.
I thought that the Picket Fence Woodlands sequins would be perfect with our gnome, so I’ve attached a few over the “ground” area. I also added some Picket Fence Icicles sequins to the “sky” area for the appearance of snowfall in the background. I also added another white “snowflake” to the center of my gold cord bow at the top. This is a great way to stretch your sequins by making it apart of your main scene.
For the glittery “snow”, I’ve covered the pines, sign, the gnome, the mushrooms and “ground” with some white Nuvo Crystal Drops and then covered those areas with some loose glitter while it was still wet. The reason for that is because if you just use glitter, it will dry clear, and I wanted some white to show.
I hope you’ve enjoyed my mouse gnome projects today and have been inspired to see something different with the products that you have in your stash too! Thanks so much for dropping in! Be sure to check out the Inky Stamper Store as well as LIKE the Facebook page to see a live video on Tuesday nights. There is also a fun InkyStamper Inkspiration Facebook Group to join for more inspiration and fun challenges each month too!
Happy weekend! It’s very hot here today as we are under a heat advisory! So thought it was best to stay indoors and keep working on my “catch-up” posts! This one is a bit different than my usual papercrafting posts, but it’s my finished projects from the crafting retreat I had with friends right before the wedding and why I was so busy! But first, I’d like to share a fun “thank you” card I made for my friend that hosted it all:
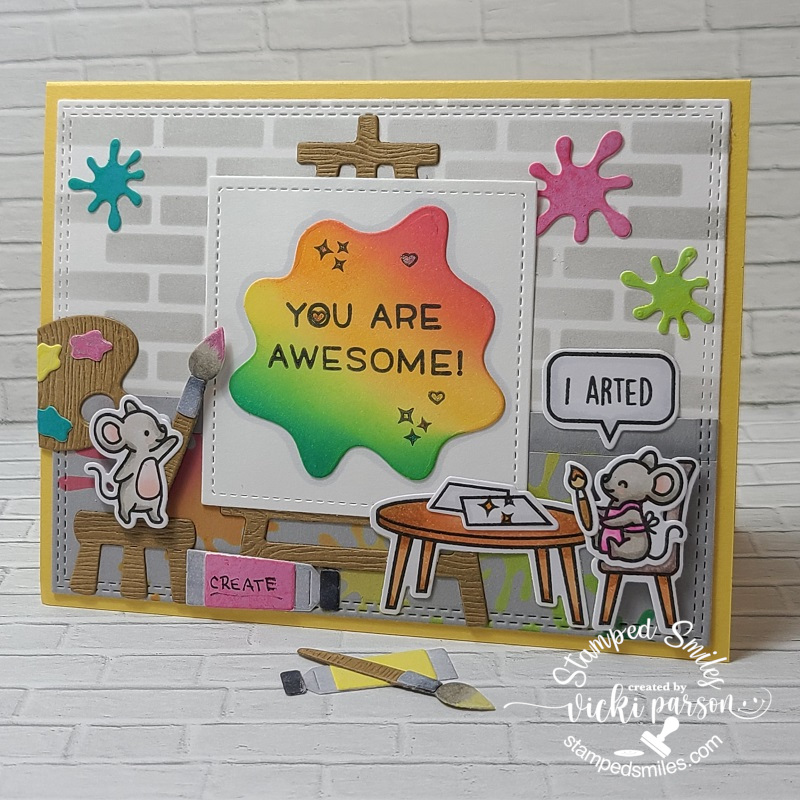
And as you know from my last post, I was on a Lawn Fawn fever mode, so this was also made for my friend that hosted the fun “Painting Divas” retreat for us! This ADORABLE set called Just Add Glitter was a perfect set to use to create a card for the theme as well as those products to accompany it with the Art Supplies dies, Canvas and Easel as well as the Paint Splatter Background Stencil too!
For the background, I created a scene with a brick stencil from my stash that I’ve had for years which was blended on with some grey ink. The bottom solid grey portion of the scene I used that paint splatter stencil and some Distress Oxide colors and blended in over it. By using the oxide inks, the colors showed up better over the grey.
I used these same colors of Oxide inks to sponge over the die cut pieces from the Art Supplies dies as well as the “masterpiece” splatter on the “canvas” and the brick wall splatters. I’ve used some LF Woodgrain paper to cut out portions of the “wooden” pieces and the rest of the pieces were cut from white cardstock and then just colored with Copic markers. I arranged the scene to make it fit the way I wanted and then attached it down with some of the pieces being popped up with foam tape. (The sentiment on the rainbow canvas blob was from a freebie stamp the company is famous for adding to your order.) I had fun making this one and I chuckle at the “I arted” sentiment! 😅
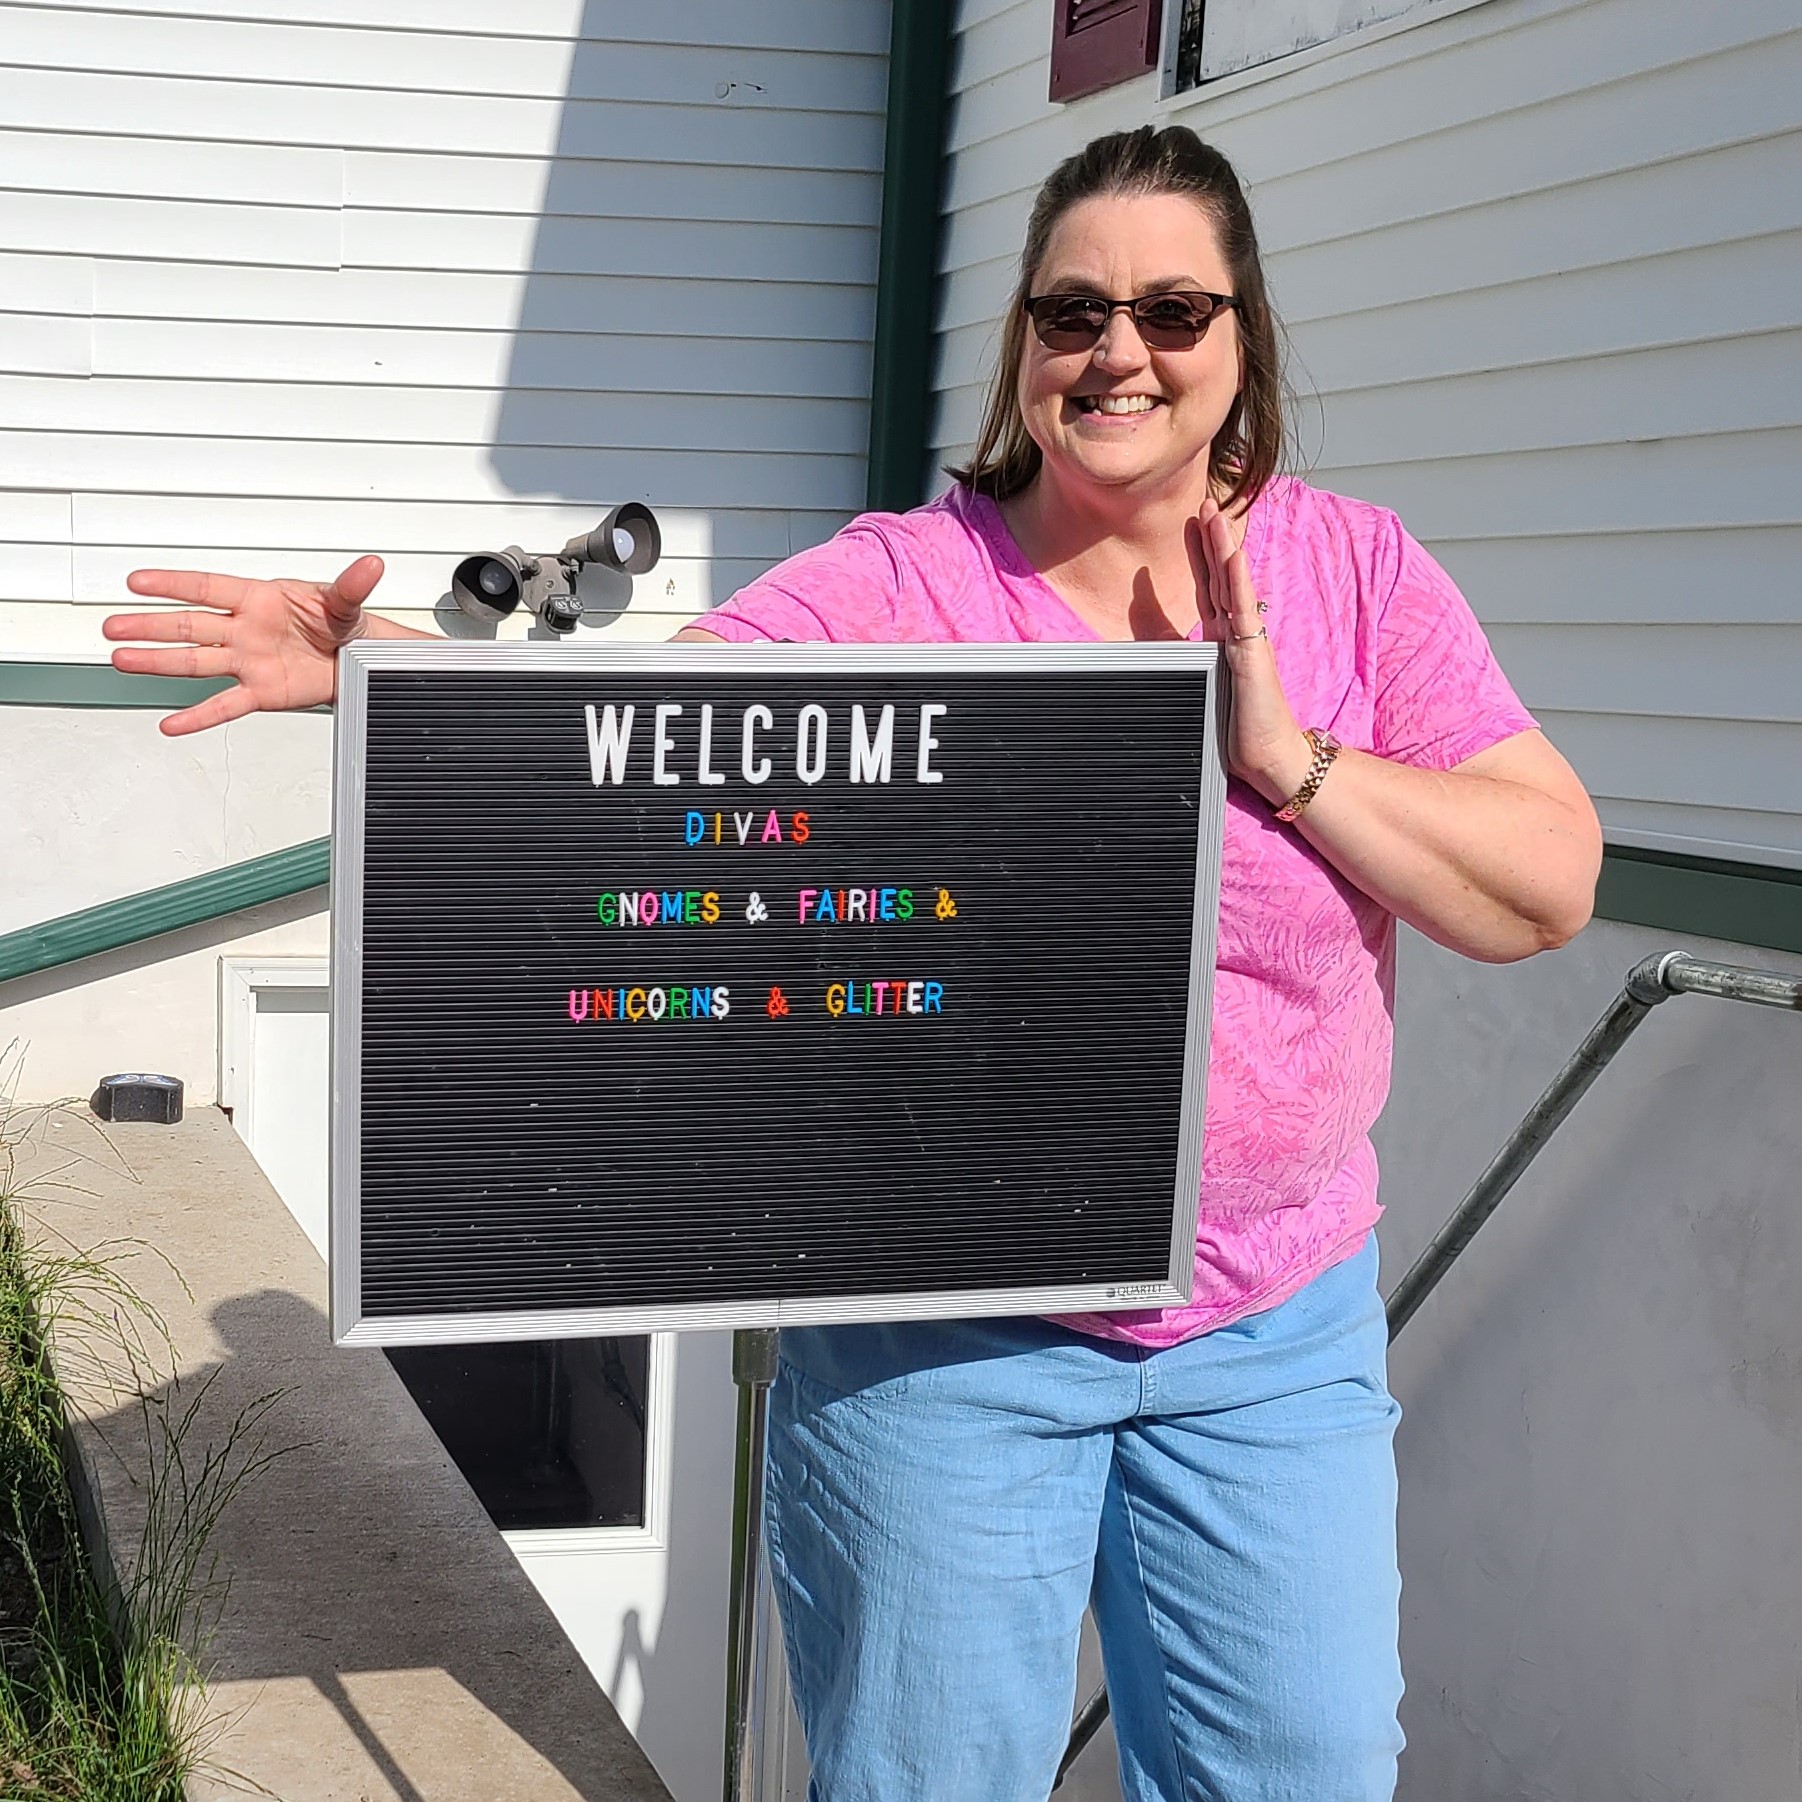
For the “Painting Divas” Retreat, we had projects with different teachers and of course you probably recall the Mixed Media birdhouse I did from my past blog post. CLICK HERE TO VIEW POST The theme was on that cute little sign as we arrived…”Gnomes & Fairies & Unicorns & Glitter”…how fun is that?!! We were to create a decorated gift bag to bring with us using the theme and enter for a contest…but totally forgot to bring mine back home for a photo to show! LOL (I am hoping that we get together to share some photos as I wish I had taken more than what I did!)
I took a quick photo with birdhouses everyone finished for my class, and it was so fun to see everyone’s interpretation of how they made their own. I enjoyed seeing what everyone did! (I think two of these are missing in this photo.)
Now, I am not an avid decorative painter and don’t spend a whole lot of time doing it, but a couple of girls at this retreat are, and have been doing it for many years! (even longer than I have been a paper crafter…which is a LONG time! LOL) So I have had the privilege of learning a bit about it. I’m glad to have this time to share something together and doing when we can. I appreciate it and the memories that are made. 🥰
Below is my gallery of projects that I did for each class. I did this in order of when each class was taught. If you’re directly on my website, just click on each photo to enlarge it and also see the description of what the dimensions and types of surfaces that were used. All were hand painted by me using acrylic paints.
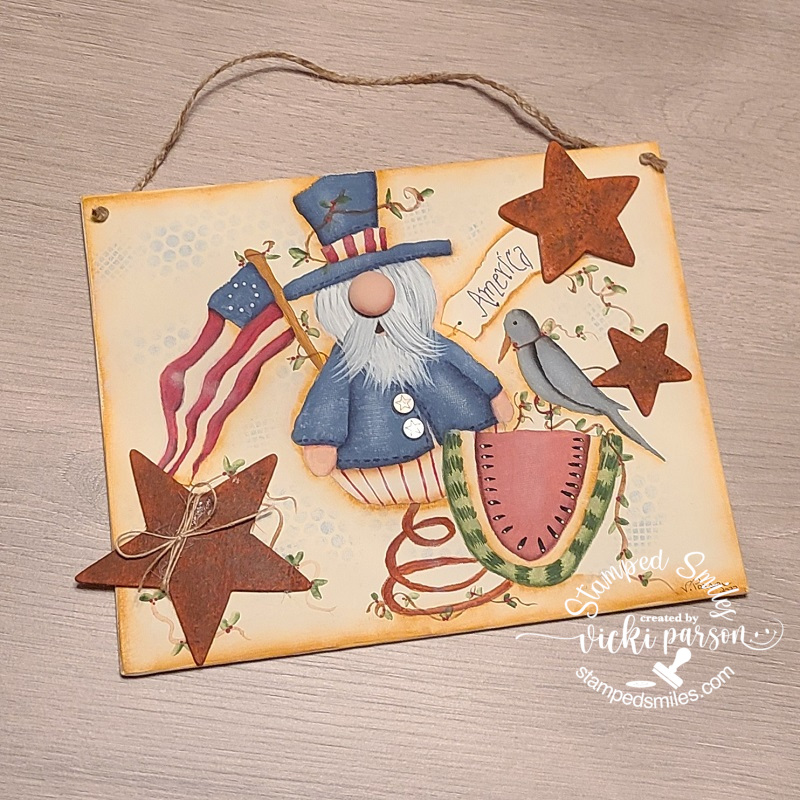
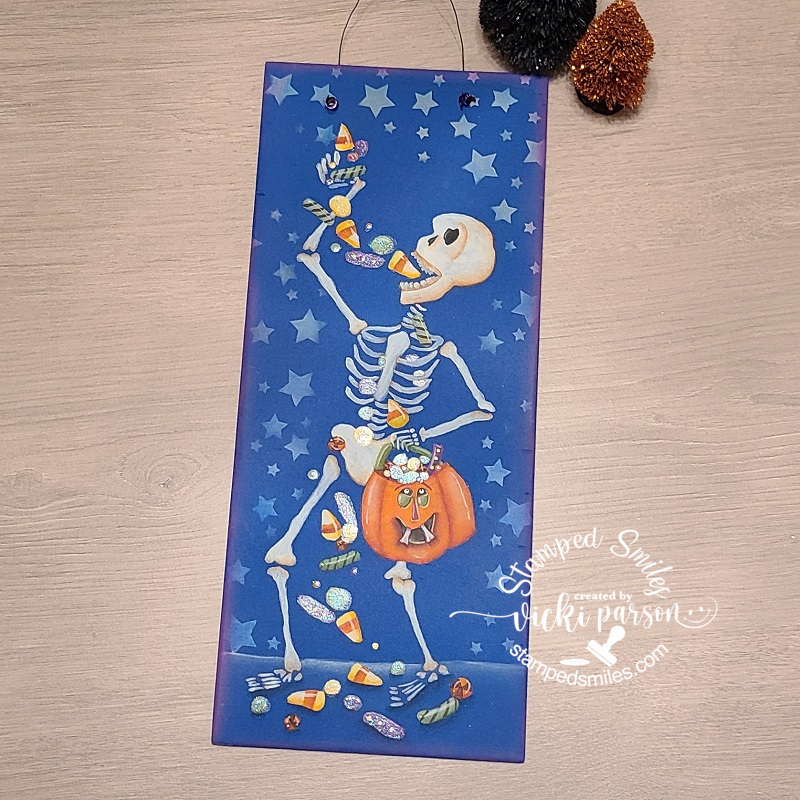
Painted over a canvas board measuring 8″ x 10″ with addition of 3 stars, buttons and knob for nose. You could make a face or paint a gnome, so of course I painted a gnome for mine. I went on my own and added twine to the star…not sure I like it.Painted over a 6″ x 14″ thin wood board. I love Halloween so this was a fun one. It came prepped base coated with the blue background. Stars were stenciled with dry brushing. I added some glitter paint on some of the candies after I sealed it.I zoomed in for a closer look at the pumpkin and some of the candy as it’s hard to see from a distance.Painted over a stretch canvas in 10″ x10″ size pre base coated with black paint. The snowflakes were stenciled with dry brushing and glitter paint was added over the green and red areas. Gold Drip Drops were added to elf and Rhinestones to a few of the larger snowflakes. There was also some splattering done over entire piece.This is a cute “photo holder tag” from an 8″ x 5″ thin wood board. I painted over white and then washed with some black for a shiplap look. Wrapped around burlap ribbon plus other ribbons/twine. I added my own decoration at the bottom and popped in a photo.
I have one last project to share which is something I recently finished up before this painting retreat, but it had been sitting around the last few years as an un-finished box not being used.
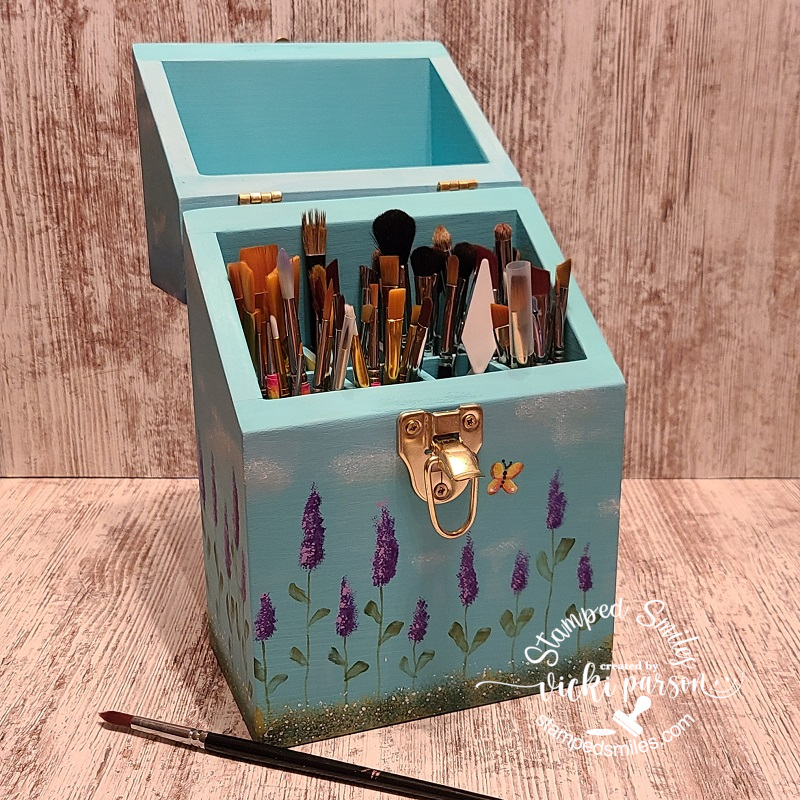
A few years back, I had gone to a paint convention and purchased this brush box that was hand-made by an older gentleman and vendor at this place. I started it quite a while back and finished up the top portion of the box doing some ombre painting. I added the wooden lettering on the front and some glitter paint to the lettering after it was sealed.
And here’s what the inside of the box looks like with all of my brushes stored in it. (Well most of them anyway! LOL) What I like is that there are separate compartments so that I can organize the different types/styles of brushes in each. The brushes are protected and dust-free. The dimensions of this brush box are 11″ x 7″ x 4″ deep all made with wood. The hardware was removed and then replaced after painting and sealing.
Like I mentioned, I don’t always do decorative painting like this, but since it’s already part of my life and I have accumulated things related to it, I will probably do some things here and there. It’s like a mixed media thing for me as I don’t always do that, but sometimes I enjoy getting things out for something different. I like many different crafts which makes this all so fun for me. It’s nice to have a variety of interests to keep enthusiasm going!
How about you? Do you have interests in other things besides paper crafts?
Stay COOL and safe out there today friends…how do you like to keep cool?
Thanks so much for joining me today and I hope you were inspired in some way on your visit!
Hello friends! I think we’re getting closer and closer to Spring! I sure am ready for it, how about you? Let’s welcome the warmer weather and pretty flowers to come!
I had previously made a winner/top 3 for a challenge I had entered which was exciting to have also won a place to be a future guest designer for one of the challenges too.
So this month, I’m very excited to be joining my friends over at the Cheerful Sketches challenge blog as a guest and they always have a beautiful sketch along with lots of inspiration for it each month! So please be sure to check them out and play along if you can! Here’s the lovely sketch they’ve provided for me to work with this month:
This is a very nice sketch and open to lots of different interpretations as well, so I had fun playing with it along with an image that was provided to me from a current sponsor for the challenge and here’s what I came up with:
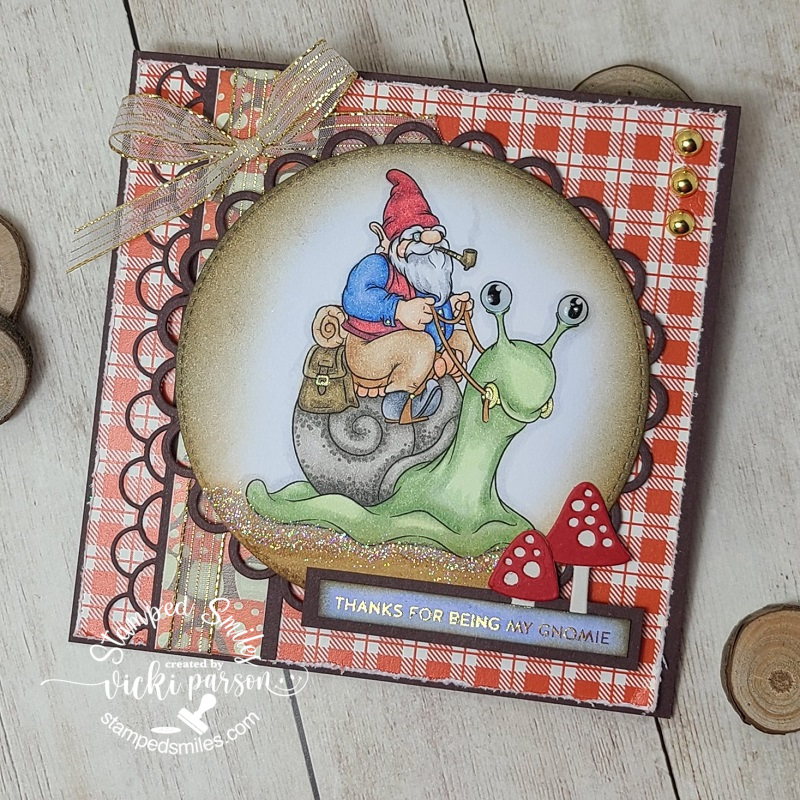
Everyone loves the gnomes and this one is too cute riding his snail friend! I’m using the “Grumblebonce Rides Again” from Dr. Digi’s House of Stamps for my card today. I’ve colored him up with Copic markers, added details with gel pens, glitter under the snail and glossy accents on the snail’s eyeballs. I die cut the image with a stitched circle die and ink blended around the edges before attached to another loopy circle die cut from brown cardstock.
I found some fun papers fitting for the image with red plaids and a strip of mushrooms that I’ve attached over another loopy die cut strip I’ve had in my stash forever. I wrapped some gold ribbon around it and attached to the red plaid papers that are attached to a 5″ square top folding brown card base. Before attaching the red plaid papers, I used a distress tool to rough up the edges. I’ve popped up the image with foam tape and added 3 gold enamel dots in the upper right corner.
With the card now laying flat, you can better see some of the shine from the sentiment at the bottom. I found these fun gnome style sentiments that can be foiled. So I used some gold foil and ran the strip through my Minc Machine. I sponged some blue and brown inks over it and then added some die cut mushrooms behind it and layered a piece of brown cardstock to layer behind it.
I placed the mushroom sentiment at the bottom with a portion of it with foam tape and the other parts just glued to the circle sentiment panel. I think it turned out pretty cute and I had fun coloring it up!
So please be sure to check out the challenge and come play along!
Thanks so much for dropping in and I’ll see you soon!
Hello friends! We’re here! We made it to Christmas Eve!😀 My cards have been sent out, my cookies are done and delivered as well as my other little gifts. This is quite a long post, so grab your hot cocoa or whatever your favorite beverage is and a Christmas cookie or treat and let’s see what I’ve been doing this past week:
So, starting with my Christmas cards, I usually make around 40ish cards each year give-or-take and I only like to make a handful of them at a time for not only boredom of the same design, but for product depletion as well.
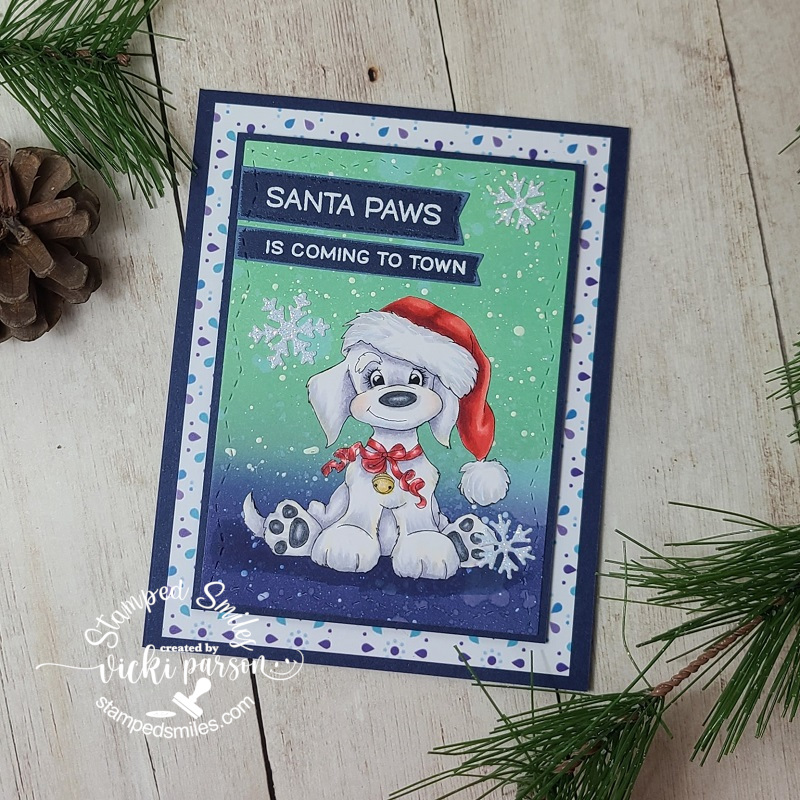
So back in July, I purchased this really adorable card kit from Taylored Expressions (included was the Frosty Background Cling and Clear Combo set + more.) that came with coordinated colored envelopes as well as the seals. So, I made a set of four different colored designs in two of each one. The snowmen were popped up with foam squares over the backgrounds and I added some fun Snowflake bits that were included with the kit as well.
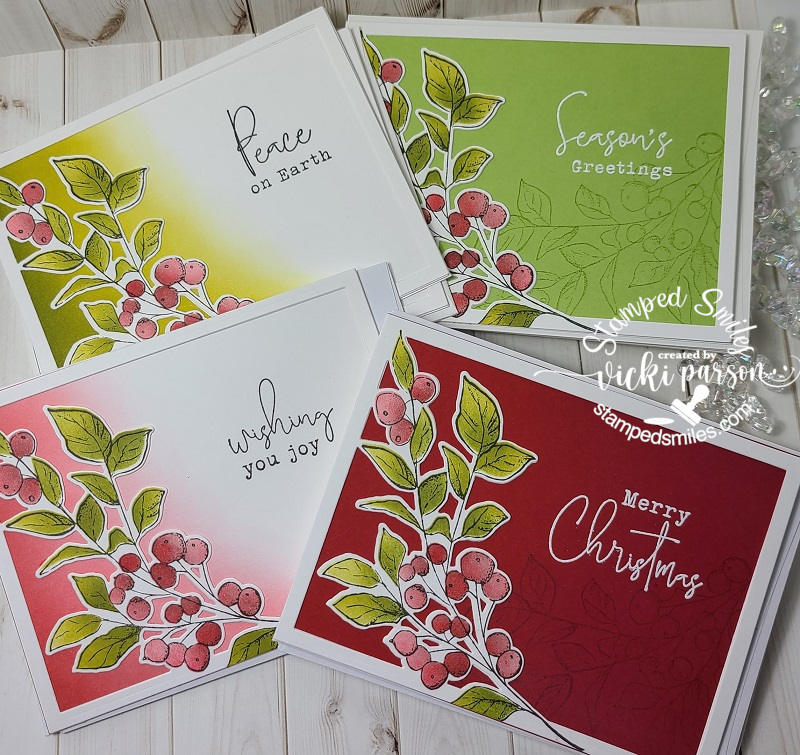
Next up is another set of cards I made using some more gorgeous products from Taylored Expressions. I’ve used the Seasonal Sprig stamp and die combo along with the stencil to color them in with. Some of these I ink blended the backgrounds, so I just used cardstock with a watermark effect and a white heat embossed sentiment. I used the die to cut an extra frame behind the stamped one for added stability. I made 4 of each design shown here for a total of 16.
I then made another set of four using the same products, but for these I gold heat embossed the image and sentiment and then used some watercolor for coloring it in with. I also got some of these coordinating envelope seals to use on about 10 of the 16 cards. (No longer available in store.) I’ve also partially ink blended the background behind the frame on these as well.
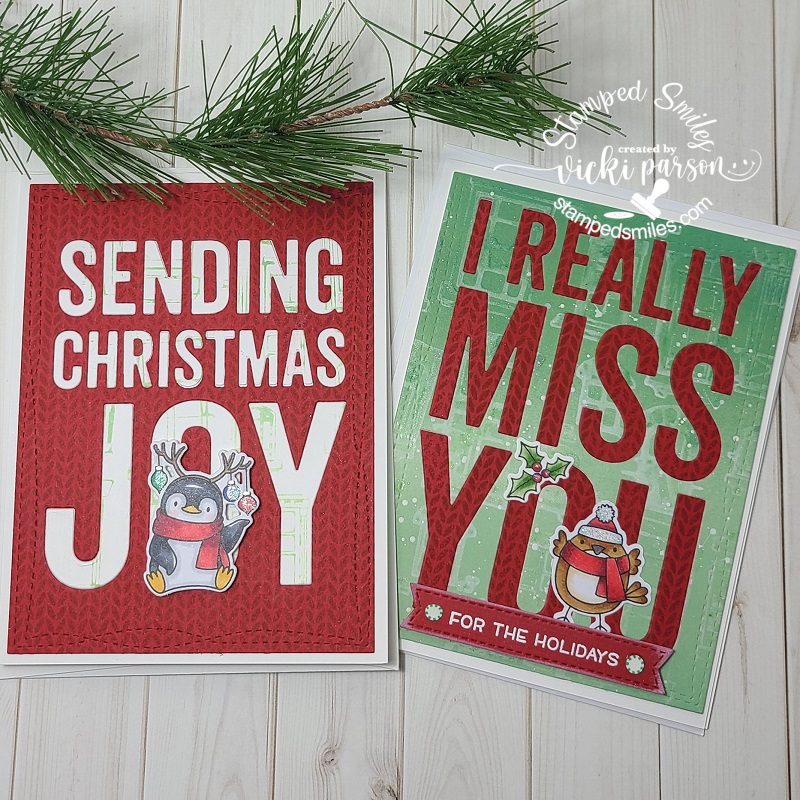
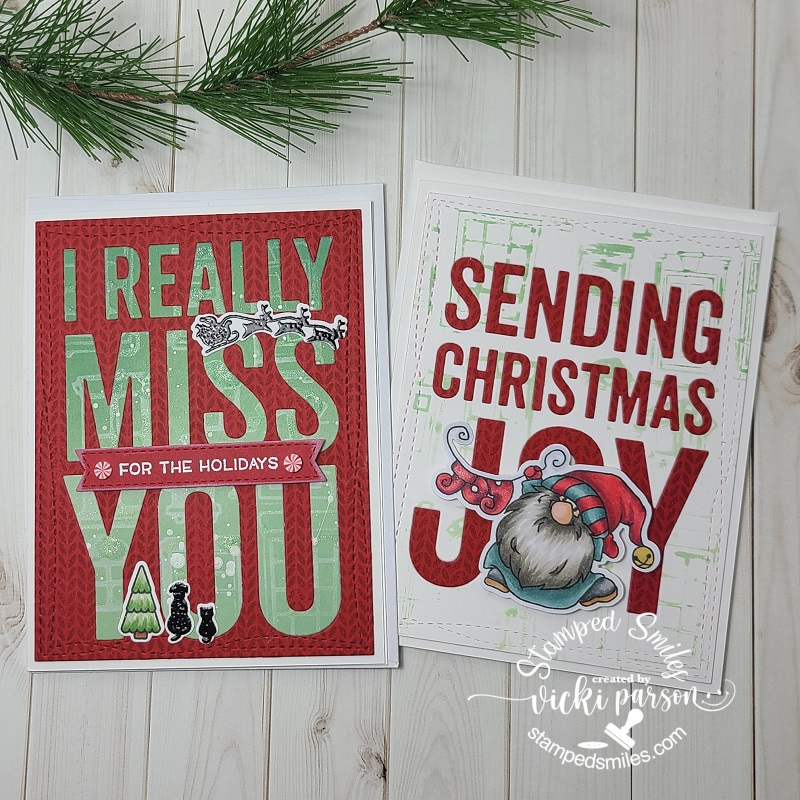
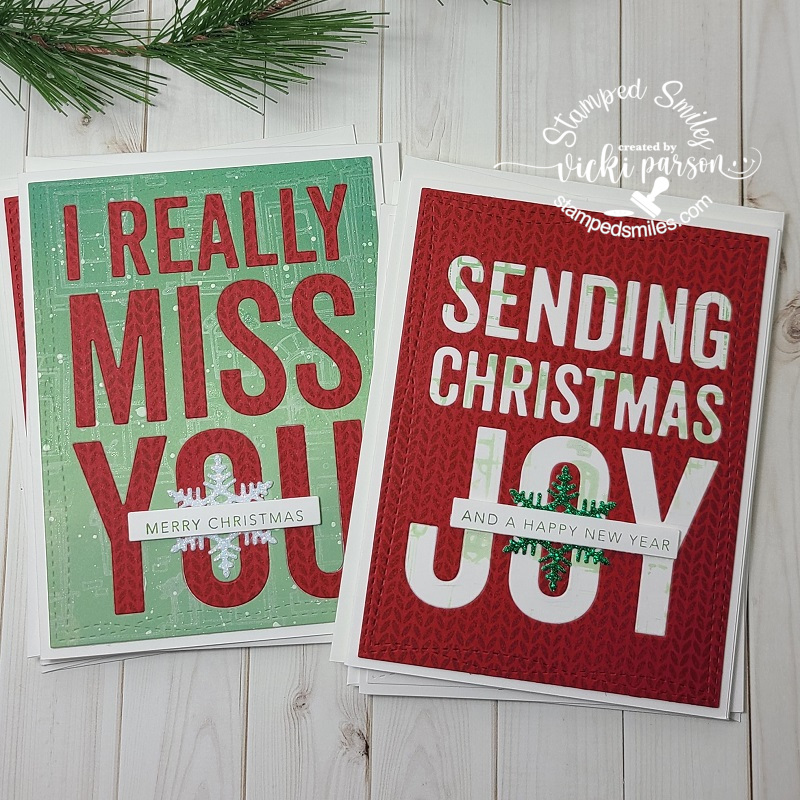
Here are some cards that I’ve actually made a total of 8 similar designs using the large wording background dies from My Favorite Things. I’ve used the “Sending Christmas Joy” and “I Really Miss You” dies for all eight of these, but only after I stamped the backgrounds. I used the MFT Knitted Sweater BG stamp and the Alley Cat BG stamp for a couple of backgrounds before I die cut them. Then I used the die cut letters to place into the other backgrounds on the cards to get that look. So it was like creating 2 cards with one cut and filling it all in. (For the Alley Cat background stamp, I ink blended the background and stamped it as a watermark effect over it and then took the “left over” ink from that to stamp it again to create an additional BG.) I then cut out each of the panels with the MFT Wonky Stitched Rectangle die and placed over a white A2 sized side folding card base. The penguin image is from the MFT Holiday Penguins set and the bird on the other one is from the MFT “Tweet Holidays” (Not found in store.)
And then of course you don’t want to waste any backgrounds you’ve made, so you make more cards! I’ve used a couple more images to personalize the design for people too. I combined the sets Newton’s Nook Whispering Pines and the Lawn Fawn Winter Skies. I think I took a set from them to create a sentiment to fit my cards as well. (not sure from which set.)
For the other card, I took this cute image from the Whimsy Stamps Gnome for Christmas stamp set, colored him up with my copics and cut him out with the coordinating die to pop him up over my card.
And then for these set of 4 cards, I’ve just die cut a snowflake from some glitter paper and glued in the center of the “O” on each design and popped up a sentiment over that with foam tape stamped and die cut from the Taylored Expressions Mini Strips – Holiday and Mini Strips die.
And as you remember in a previous post those “recycled Crystal Light containers” that I make, I made another set of three of them here. This time, I’ve used this snowman stamp. I just used my scissors to fussy cut those cute snowmen out as they were pretty simple to do and then I popped them up over an ink blended tag using the stencil over them. I used coordinating cardstock and silver heat embossed the sentiment strip at the bottom and of course added my “snowman soup” poem on the back of the containers. I’ve also added a layer of silver mirror cardstock behind the tags.
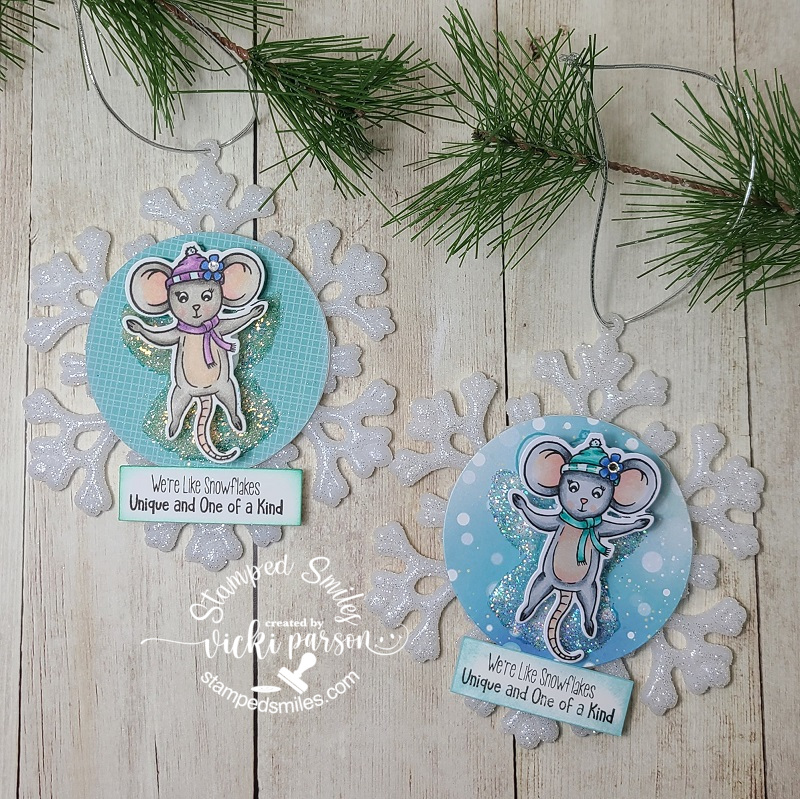
And I made a couple of these darling ornaments from a fairly “new to me” company that I was actually introduced to with product during my time as a {Cupcake Inspirations} sweetie DT when they sponsored a challenge a while back. P.S. There are a few more days left to enter their current challenge of “SNOWFLAKES” if you want to pop on over to join us too!!
But I was so taken with this darling image and kit from Inky Stampers from this Snow Much Fun Kit. You get the snowflake ornament (with string), the stamp set and die, papers, wobbler, along with glitter to complete it too! Well, I wanted to make more than one, so I grabbed another set of Snowflake Ornaments from the store and just added my own papers and glitter from my stash to make it.
Whew! I’m ready for that “Looong winter’s nap” now!!🥱 I hope you’ve enjoyed my post today and it has brought you some inspiration and/or a smile somehow! I have received some beautiful Christmas cards and I so appreciate them and have them all displayed by being pinned around my garland in our pass-through in the living room/dining area. I think after a bit of rest, I need to finish up my projects for the “Bugaboo Christmas Chaos” that I halted in the middle for to finish up Christmas projects….so I’ll be back soon with that.
In the meantime, I wish a MERRY CHRISTMAS TO ALL AND TO ALL A GOOD NIGHT!!🎅
Hello my friends! Are you getting all of your Holiday errands finished up? I’ve still got some cards to send out and get going on my cookies! I always feel behind every year…are you this way too?
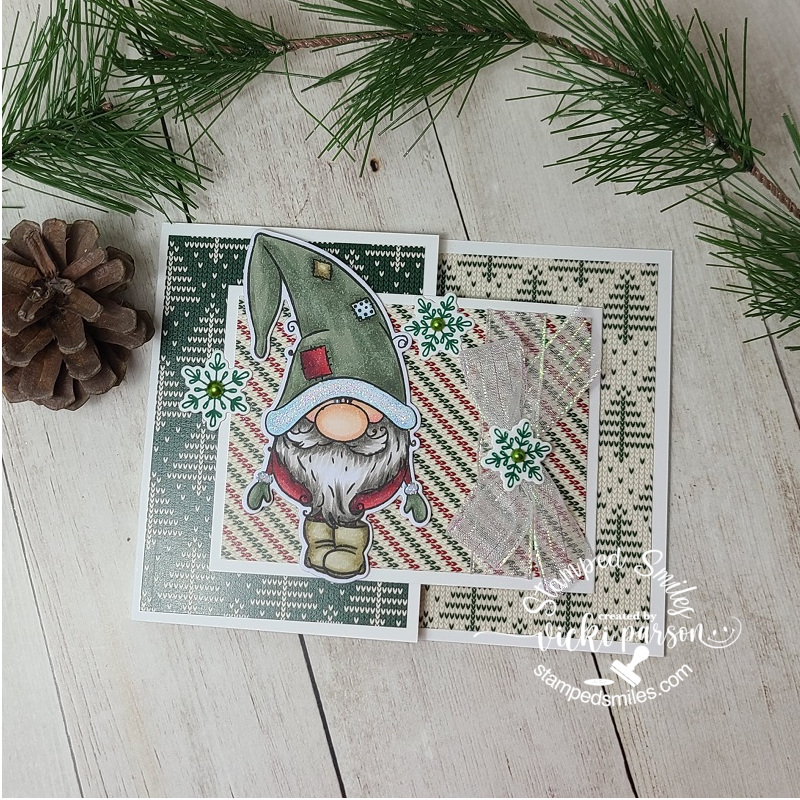
So, while I was “making merry” literally, I thought I’d join in the December Crafty Chefs Group Challenge and see what I could come up with for it. This cute little gnome has been wanting to jump on my craft table for a while…
Isn’t he adorable?! He came from a stamp set that I had actually got last year around this time and just never had the time to pull it to play with before Christmas rush finished up. Note to self…I have TONS of those items this year, so plan EARLIER! LOL! It seems I always get closer to a deadline and then want to come up with all kinds of things I want to try…is it the pressure or what?!
Anyway, I’ve got him all colored up with Copics and then I used the coordinating dies to cut him out with that I’ve attached with foam tape over my “Joy Fold Card“. (This was part of the challenge for the Crafty Chefs this month and I followed along with a tutorial to a link *see link above* that was given, but I changed it up slightly by making it an A2 size.) For the card design, I’ve used these Sweater Weather Papers. I’ve added some shimmer metallic ribbon and also stamped some green snowflakes from the gnome stamp set and cut them out with the coordinating dies as well. I also found some green colored pearls to add to the centers of each one too! The ribbon, pearls/gems and color green were a requirement for the Crafty Chefs challenge.
The snowflake on the left side of the gnome is popped up and actually helping to hold the top flap down, so you have to pull it out to open the card.
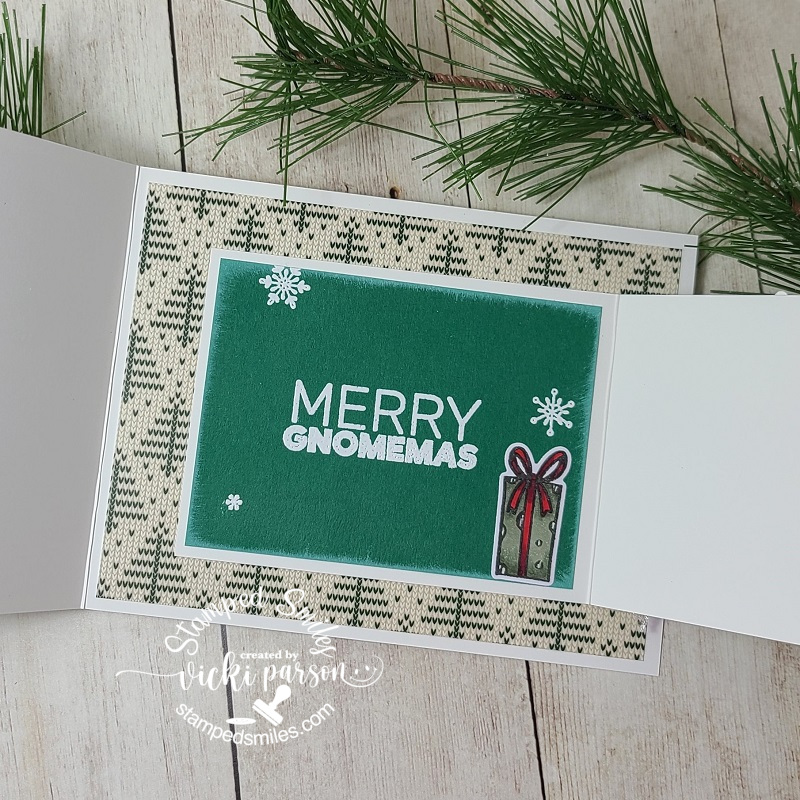
So when you pull open the flap, open the inside flap, this is what you’ll see inside. I heat embossed the sentiment along with a couple of snowflakes from the gnome stamp set with white EP and colored up a gift package, cut it out with the coordinating dies and attached it to the green panel. I also took the white Ink Pad and rubbed it along the edges of the green panel before attaching.
Here’s this month’s requirements for the December Crafty Chef Challenge. I used them all except for the very last one. It’s been a long time since I’ve made a Joy Fold card, so this was really fun!
I’m also VERY excited to announce that I have FINALLY finished all of those projects from the Whimsy Stamps Virtual Retreat that I took over a weekend back in October! Yep, I guess I’m pretty slow! In my defense, I took extra time so that I could enjoy each minute of it all and go back to revisit posts and tutorials! There were 23 projects total, and I made a few extras along the way. Here are my last ones:
This was for kit 19 and a wonderful coloring tutorial from the one and only Crissy who also illustrated the image of course! The sentiment I added myself is from Lawn Fawn.
This was for kit 20 and I was so thrilled to finally be able to get to these adorable gnomes! Love this fun shaker design! I put my own spin on it with the embossing folder background, stitches, twine and snowflakes.
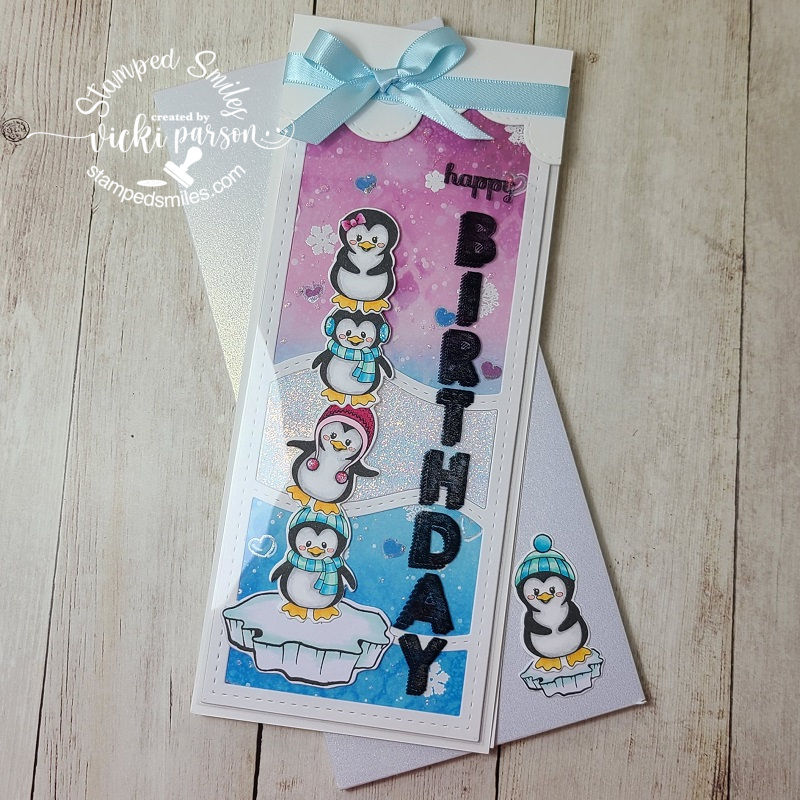
Last, but certainly not least is this fun mixed media project by Iris for the final project. We even got to make a customized envelope to house the slimline card. She had Christmas greeting on her design, but I wanted to make it a winter birthday card. Love how it turned out!
So that’s all I have to share for now, but I know I’ll be back again on Monday to share a reminder challenge post for you! I appreciate you taking the time to stop by to see what I’m doing friends! Hope you are staying healthy and happy! Enjoy your weekend!
Hello friends! I hope that you’ve had a very pleasant weekend! I enjoyed spending some time visiting with my son for his birthday as I haven’t seen him for a while, so it was nice to laugh with him. If you haven’t checked out the card I made for his birthday, check out my last post for the blog hop along with a video I shared!
Today starts a brand new challenge over at the {Cupcake Inspirations} challenge blog! We are Playing with a fun color combination this time using the colors: Lime, Pink and Green It’s not only a yummy cupcake, but yummy colors too! Looking forward to seeing what everyone comes up with!
Here’s my take with the colors for my first card for the challenge:
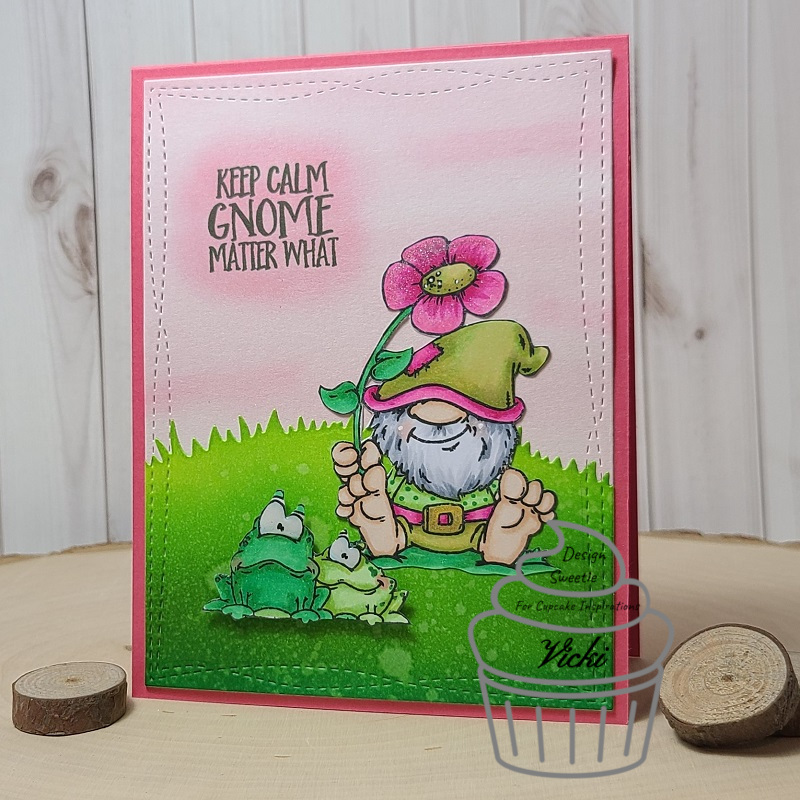
For some reason, the first thing I thought of was gnomes! So I grabbed this really adorable Gnome Matter What clear stamp set from Whimsy Stamps and colored up that gnome and frog pair! I fussy cut them out and made a grassy hill for them to sit on by ink blending a panel that was spritzed with water and then cutting it out with a mushroom border die from Lawn Fawn.
I also used the Lawn Fawn Watercolor Wishes paper pack in the pink shade for the background behind the grassy hill which I stamped the sentiment over and gently rubbed some more pink pastel over it.
The entire panel was cut out with my fave Wonky Stitched Rectangle die from MFT and layered over a bright pink A2 sized top folding card base.
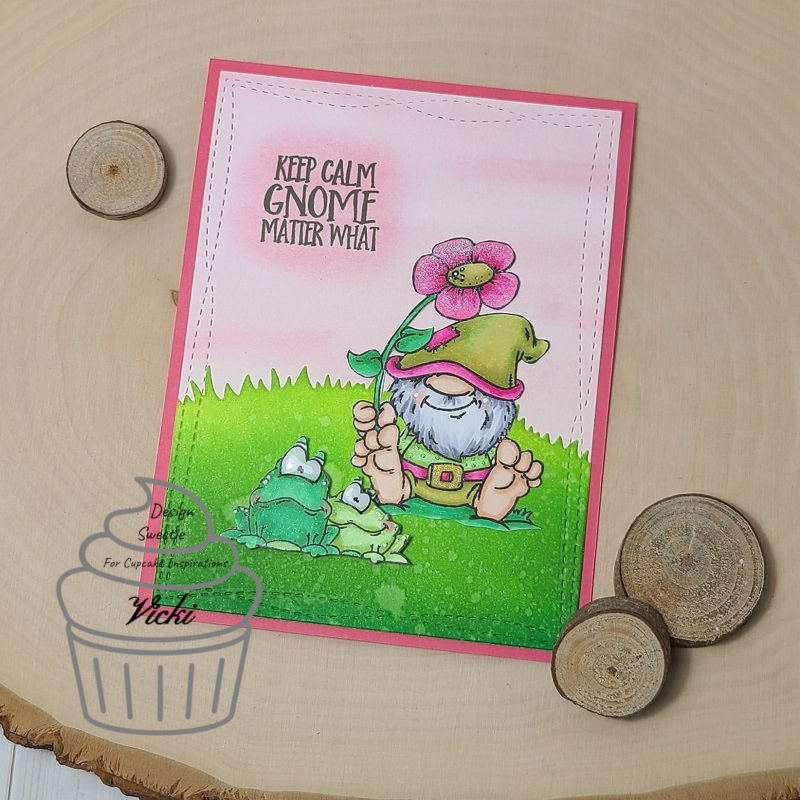
A closer look at the images, you can see how I’ve got them colored up with Copics, but I’ve also added the usual details to the images with a white gel pen for the gnome’s cheeks and flower center. I went over the flower with a glitter brush pen. I’ve also added some dots to his shirt with a metallic green gel pen and then went over his buckle with a gold gel pen.
I’ve just attached the gnome with liquid glue, but I’ve used foam tape to pop up the frog pair and then I’ve added some more dots with the white and green metallic gel pens and then went over their eyes with glossy accents for shine.
I think maybe this is a fantastic message for all of us right now. That gnome looks pretty chill!😉
Thanks for joining me today friends and I’ll be seeing you soon!