Hello friends! I hope that you’re having a wonderful week so far! We have experienced our very first snow accumulation this year and it was very pretty on the inside where it’s warm! LOL It wasn’t necessary to shovel as it melted when it hit the pavement/streets, which makes it nice too! I’m excited to be sharing some more Inky Stamper products with you today as I continue on with my Guest DT for this month. This time it’s all about stretching out those products you purchase to get even more out of them which I’m sure we all need during this time of the year!

Isn’t this little mouse gnome the cutest?! I don’t think I’ve seen a mouse gnome before, but this is another brand-new stamp set from Inky Stamper called Gnome, of course!
I’m not only using this same stamp set for both of my projects today, but I wanted to point out that this one above is not a card, but it’s a gift card envelope that I’ve created using the Inky Stamper Mini Envie Die. I love this die for quickly creating the perfect sized envelope to fit your gift card inside, but Chelsea also comes up with fun mini cards in a lot of her kits that work great for tucking inside this envelope too! (There’s a brand-new kit in the store that has just came out using one of the brand-new stamp sets making a mini card in her class.) I also wanted to point out that this die can be cut from one of the 6×6 Doodlebug paper packs sold in the store too!
For the front of my envelope here: I thought it would be fun to create a little scene for my mouse gnome to hang up his stockings! I took a strip from the Doodlebug Buffalo Check/Wood Grain paper pack to place along the bottom and stenciled some bricks for the background. I stamped, colored and cut out the gnome with the coordinating die and I punched a small hole on each side of him where his hands are for the string. I then took some of the “stockings” from the Picket Fence Fireplace Stockings sequins and attached them to the string that wraps around the back of the scene panel. I added a sentiment from the same stamp set, popped up the gnome and attached to a piece of green glitter cardstock and then attached it to the envelope front.

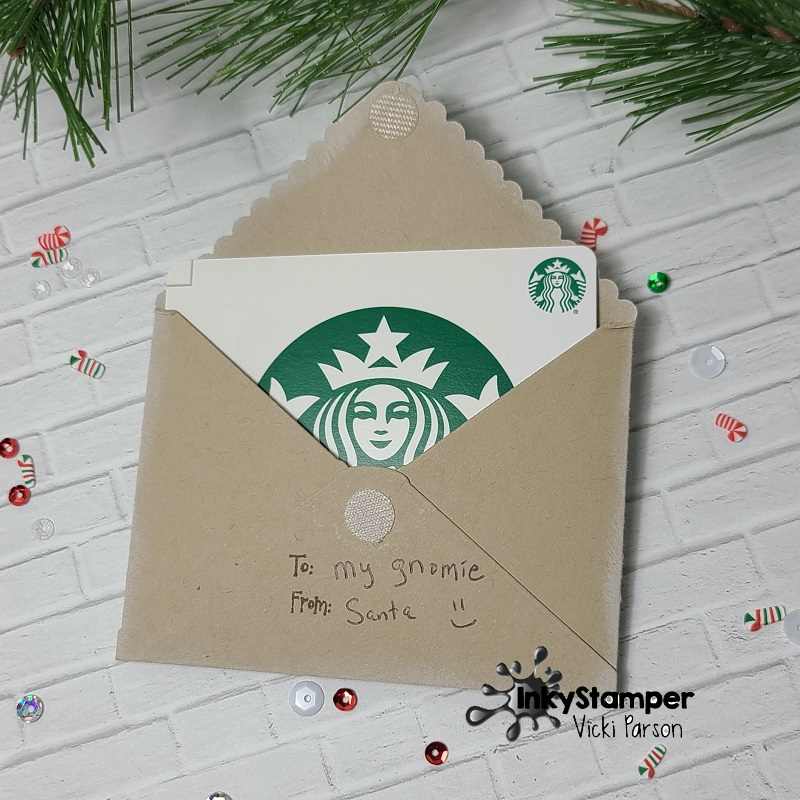
Here you can see the other side of the envelope that I’ve white heat embossed the deer from this gnome stamp set and sponged some white ink around the edges. Now to keep the envelope flap closed, you could wrap some twine or ribbon around it, but I love using the Inky Stamper Papercrafting Velcro because it’s the perfect size for this closure and it’s such a great price! You can see how easily a gift card can fit right inside too!

And here’s another scene I’ve created using this adorable Gnome stamp set, but on a regular A2 sized card this time.
So, as I was using the Inky Stamper Mini Envie Die for my gift card envelope above, I was looking at the other die pieces that come with this set and thought that the stitched triangle die would make for some great pine trees for my little mouse gnome scene. I pulled out some Doodlebug Gingham/Linen as well as the Doodlebug Swiss Dot paper packs to cut out the triangles and design my scene with the “ground” and “snowy sky” too. I placed the “sky” paper down first, added a curved “ground” and tucked in my formed triangle pines. I also tucked in the wooden sign from the stamp set and stamped the greeting over it. This gnome stamp set also has a tiny pipe that you can die cut out which is just the right size for the gnome. You can see that I’ve tucked that in behind the gnome’s hand on the right and I added some “smoke” with a marker on the background too.
I thought that the Picket Fence Woodlands sequins would be perfect with our gnome, so I’ve attached a few over the “ground” area. I also added some Picket Fence Icicles sequins to the “sky” area for the appearance of snowfall in the background. I also added another white “snowflake” to the center of my gold cord bow at the top. This is a great way to stretch your sequins by making it apart of your main scene.
For the glittery “snow”, I’ve covered the pines, sign, the gnome, the mushrooms and “ground” with some white Nuvo Crystal Drops and then covered those areas with some loose glitter while it was still wet. The reason for that is because if you just use glitter, it will dry clear, and I wanted some white to show.
- I hope you’ve enjoyed my mouse gnome projects today and have been inspired to see something different with the products that you have in your stash too! Thanks so much for dropping in! Be sure to check out the Inky Stamper Store as well as LIKE the Facebook page to see a live video on Tuesday nights. There is also a fun InkyStamper Inkspiration Facebook Group to join for more inspiration and fun challenges each month too!
Challenges:
- Merry Little Christmas – Anything Goes
- Jingle Belles – Funny Ho, Ho (punny gnome sentiments)
- Crafty Friends – Christmas
- Creative Inspirations – Sparkle, Sparkle, Sparkle
- Craft Rocket – Christmas/Winter
- Crafty Calendar – Anything Goes
- Stamping Sensations – Christmas Celebrations
- We Love Stamping – Christmas
- Pammie’s Inky Pinkies – Anything Goes

Cute little set with that fun mouse Santa!
LikeLike
Great gift card envelope and card! Love them both! So happy to see your Inky Stamper GD creations this month – they have so many fun products!
LikeLike
Cute gift card envelope AND card! I’ve never seen a gnome mouse before either but this is really a cutie. Precious card Vicki!
Lynn
LikeLike
Gorgeous cards with the gnome mouse. They look so lovely. Your gift card envelope looks so precious!
You have already had snow???? Here, it still looks like summer.
xxx Margreet
LikeLike
The first card is a great size – I never would have guessed. Both scenes are lovely and I really like the clothes line and how you managed to make it appear like your mouse is holding it.
LikeLike
Such cute cards and gift card/envelope. This is a unique and cute image.
LikeLike
Love your little mouse gnome he’s a cutie,both festive projects are fabulous with lots of colour and embellishments
LikeLike
Oh my gosh both of these are super cute and totally charming! So pleased you could join our Jingle Belles fun this fortnight!
LikeLike
That sentiment is priceless … so very glad you had some laughs with us at Jingle Belles.
LikeLike
Awww this mouse gnome is too cute! Love both of your creations so fun and festive!
LikeLike
Such a fun Winter card and lots of details, many thanks for sharing with us at Stamping Sensations and We Love Stamping November challenges.
B x
LikeLike
Hi Vicki this is one super cute festive creation love that image and colours also that lovely sparkle a super make
hugs
lorraine x
LikeLike
What gorgeous creations, love the cute mouse and your wonderful designs.xxx
LikeLike
Such a cute Christmas card! Love the little mouse and fabulous sentiment. Thank you for sharing with us at Creative Inspirations, good luck.
Hugs
Gina xx
LikeLike
Wow! What a fun creation – the envie is adorable! Whoever gets this fun little Nutcracker and that Starbucks card will be happy dancin’!!! Thanks for sharing – can’t wait to see what you do next!
LikeLike
Hello… thanks for entering your lovely little gnome card into the ‘Christmas’ challenge at Crafty Friends. Good luck and hope you will join us again. Diane Louise (Team Leader) x
LikeLike
Love this guy, so cute and I love the “Scenes” you’ve made…the papers are just perfect! And thanks for the nuvo-glitter tip…I’ve been wondering how to create a snowy look…As usual a trip to your blog puts a smile on my face! Thanks my friend!
LikeLike
What cute Christmas gnome cards. And who doesn’t love gnomes!!! Thank you for sharing with us over here at Merry Little Christmas Challenge Blog and best of luck with your entry.
Barbara DT Member for https://merrylittlechristmaschallenge.blogspot.com/
LikeLike
Love to see the snow as long as its on cards or in another country lol.Love the die-cut scene and cute Mouse Gnome
Carol x
LikeLike
Wonderful cards with the mounse gnome – certainly an original image and so beautifully coloured and mounted on these fun cards
Thank you for joining us at We Love Stamping
Blessings
Maxine
LikeLike
What a great way to decorate the front of an envelope. Super adorable image too. It helps to bring the card to the envelope to tie them together. I love the cute secen you created on the card too.
LikeLike
Two really fun cards. I love how to arrange both scenes. This mouse is great at pretending to be a gnome 🙂
LikeLike
Oh my, I’m having cuteness overload. Wonderful coloring and delightful creations! Thanks for playing along with us at PIP Challenges.
Hugs
LikeLike
Creative and adorable card and envelope, and amazing colours, The end result is magnificent x
LikeLike
How cute is that gnome mouse! Loving your designs, such fun 😊. Happy and creative wishes! Hugs Jo x
LikeLike
Not just one but two adorable bearded mice. I have never seen a mouse gnome before either but these sure are cute! We are glad to see you enjoying the challenge at Stamping Sensations this month. Hugs, Lesley
LikeLike
Adorable cards! Love them both! Thank you so much for playing along with us over at the Merry Little Christmas Challenge blog!
LikeLike