It’s a HAPPY Birthday!

Hello friends!  I hope you’ve had a lovely weekend!

After starting this year, I tend to “look back” on my stash items and take a good “inventory” of what I have and the things that hardly EVER get used, if have gotten used at all!  And of course I try to tell myself…”no more!”  LOL!  I honestly just let all of my card kits just sit and don’t dive into them and use them!  I get so excited about them when they come out, oooh and aaahhh over every single item in the kit and then it just sits…then before you know it, another kit comes out!  It’s an endless cycle that I’d like to stop!  Does anybody else have this problem?!

**This year, I hope to not only just open the boxes with content, but also make some creations with them!  If I’m already suscribed and getting boxes, then why am I not using them?!  You saw in a previous post the Snowflake set of creations, so I plan on doing more of that this year…so stay tuned! 🙂

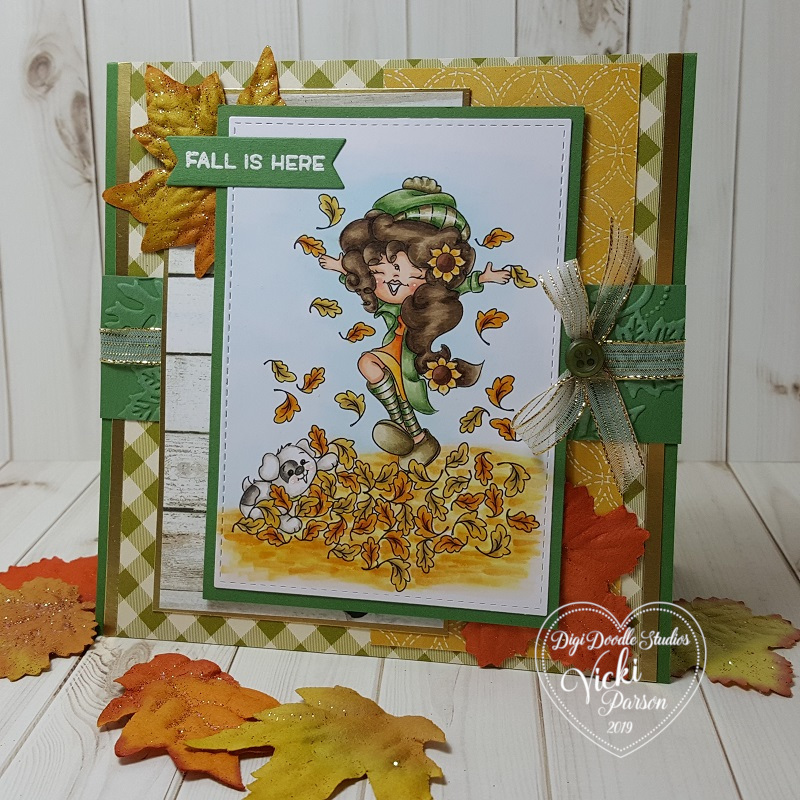
I actually have made a card from a fun special edition “Sweet Birthday” card kit from Simon Says Stamp last year that I was super excited about, but only dug in enough of it to make this one card:  (Hanging head…..)

Vicki-SSSSweetbirthday

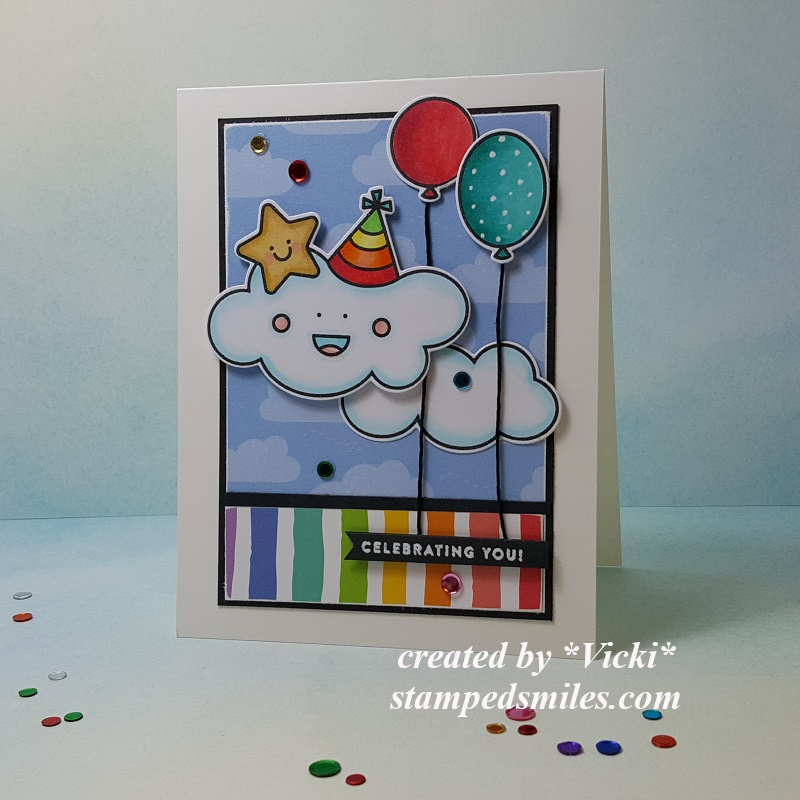
At least I made ONE with it, right?! LOL!  I just thought this was such a happy, colorful and fun card kit that it was just perfect to send a birthday smile for someone that really needed some “happy” sent their way.  My schedule was crazy and then I forgot to get it posted!  LOL!

The stamp set used in creating this one from the SSS card kit was called Sweet Birthday and I was excited to be able to get the coordinating dies to go with it too.  It’s very simple with the cardstock and pattern papers from the kit for the layout design.  I used an additional piece of black cardstock to white heat emboss the sentiment from the stamp set, cut it out with my scissors and pop it up along with the party hat cloud and balloons with the black “strings” underneath them.

I used a white gel pen to add “dots” to the blue balloon and then added some sequins from the card kit over the design.

Vicki-SSSSweetbirthday-close

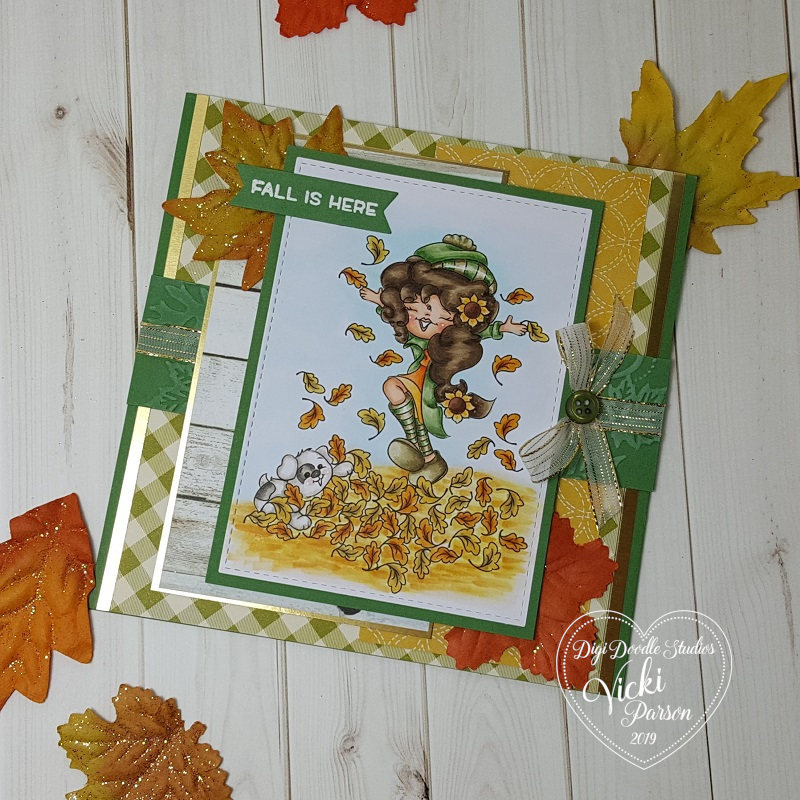
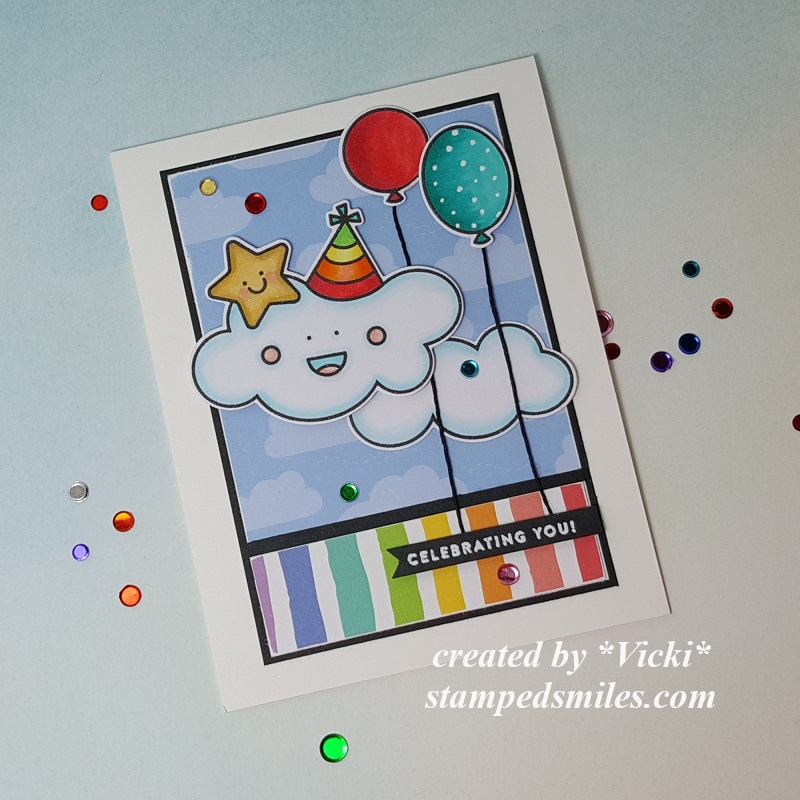
Here’s a closer look at the images and how I’ve colored them up with my Copic markers.

At this point I don’t remember if I’ve added a glitter brush pen over anything, but more than likely I probably did because I like using it! LOL!

I’ve also used a sanding block around the edges of the pattern paper as I like to distress my papers sometimes too.

Vicki-SSSSweetbirthday-flat

I didn’t know who this person was that received this card, but a request came from a crafty friend who asked to send smiles to someone for a loved one’s birthday and of course I was happy to get creating and hope that this helped in some way to lift spirits.

And I hope that this has helped put a smile on your face too!

Thanks so much for popping over here today and I truly enjoy seeing your comments!  Please let me know what you think of YOUR stash?  Is it “out of control” like mine?  LOL!  Would you like to see me making posts using more of my card kits?  Share your thoughts below! 🙂

I’ll see you again soon my friends!

Challenges:

  1.  Love to Craft – LTCCB42 Jan. Anything Goes
  2. Love to Scrap – LTSCB129 Jan. Anything Goes
  3. Seize the Birthday – Anything Goes + Toppings:  Layer It!
  4. Use Your Stuff– Anything Goes
  5. Try it On Tuesday – What a Cutie/Make Someone Smile

Fall is Here with Digi Doodle Studios!

Hello friends!  Now that we have started October, the temperatures will start to drop and the leaves will begin to change color and drop from the trees.  That’s when we know that Fall is truly here and I look forward to being out in it! 🙂

I wanted to capture that feeling on my card for you today using an image from Digi Doodle Studios:

Vicki-DDSJoieAutumn-Oct2

This cutie is called Joie Autumn and I just love her sweet little pup companion there playing around in the fall leaves with her!  She looks so happy and this is probably something I would do instead of actually raking them up!! LOL!!

Have you ever “googled” a card sketch?  I never really thought to do this, but I have some really cool Autumn type papers and I wanted to create some layers with them on my card, but I didn’t want it to look like a hot mess, so I picked out a card sketch and used that to create this card using some more papers from my stash!  I also got to use my Autumn embossing folder for the strip in the center along with my favorite glitter ribbon across it.

I’ve layered some gold foil cardstock with a few of the layers in there and added some Prima leaves and a button over the gold ribbon bow to finish it off.  I white heat embossed the sentiment from Lawn Fawn and cut it out with a My Favorite Things banner die.

Vicki-DDSJoieAutumn-Oct2-close

Here’s this sweet image upon a closer look at the coloring I’ve done!  I’ve also added a highlight with a white gel pen to her cheeks, the pup’s cheeks and the rim on her hat.  I took a gold gel pen and colored the pup’s collar with it as well as using it for additional “dots” around the sunflowers in her hair.

The light blue shading around her was used with Copic markers as well as the blending of the colorful pile of leaves on the ground.  I took colors from the leaves as well as other colors to blend and mute them together to make it appear like a leafy colored ground.

I cut this image out with a stitched rectangle die and layered it onto some green cardstock which is the same I’ve used for the 5.5″ square card base and the embossed strip in the middle.

Vicki-DDSJoieAuumn-Oct2-flat

I hope you’ve enjoyed my Fall creation today and you’ve been inspired in some way!  I appreciate each and every one of your kind thoughts more that you’ll ever know!

Thanks for dropping by and I’ll see you soon!

Challenges I’d like to enter this card for:

  1.  As You Like It – CAS or FAF Why? – I actually like both and I think my style runs a bit into both sometimes.  I feel like I have SO much crafty stash that I just want to keep adding more onto my cards…so lately it’s been this way! 🙂
  2. Cardz 4 Galz – Pretty Bows (not really sure if it’s pretty, but it’s glittery!)
  3. Stamps & Fun = Creativity – The Magic of Fall
  4. Make My Monday – Autumn
  5. Through the Craft Room Door – Anything Goes
  6. Sheepski Designs – Autumn

Guest Designing for Digi Doodle!

Hello friends!  I’m back today to share some fun news with you!!!!

I’m very excited to finally be able to share with you that I’m guest designing for

Digi Doodle Stamps!

Today, I’m sharing my first card for them with this really adorable image:

Vicki-DDLovesMeNot-June7

I have used the Loves Me Loves Me Not digital stamp to create my card.

What I had in mind when making this card was all of that crazy rain we were having this past month and how it seemed to never end.  I also loved the flowers she was holding because my daisies came up in my back yard and they really make me happy seeing them bloom.  So I combined this image with some rainfall in the background and took away the petals from the image to make it appear as if she’s holding out her hand in the rain!  🙂  Hubby has been taking extra great care of me while all of this rain was happening around us and I think this would be a special card for someone who always seems to bring out that happy sunshine no matter the weather!  (His favorite color is blue!)  Wink wink

Vicki-DDLovesMeNot-June7-close

Here’s a closer view of the coloring I’ve done on her with Copics.  For the background, I’ve taken a white panel and stamped some rain drops from another stamp set in my stash.  I fussy cut out my colored image and attached her over top of that rain panel.  I took some Nuvo Glitter Drops and added them over the rain drops in the background behind her.  I also white heat embossed the sentiment (From MFT) and cut it out with a banner die and slipped that under her foot when placing it on my card.

It’s hard to tell in the photo, but I’ve covered her bow and top of her hair with a glitter pen to make it look like she’s been wet in the rain.

Vicki-DDLovesMeNot-June7-flat

For the rest of my card, I’ve added the raindrop background light blue stitched scallop card panel over a dark blue layer and attached some pink ribbon around them.  I’ve added the bow to the side and then attached a yellow enamel heart over that.  These panels were mounted over an A2 sized white top folding card base.

Lastly, I’ve added the image panel and mounted it over the yellow scalloped panel and another piece of dark blue cardstock that was attached with foam tape.

I hope that you’ve enjoyed my card today and it brought you a smile!  Thank you so much for stopping by with me today!  I will be having another really super fun post to share with you tomorrow, be sure to stop by!

Challenges:

  1.  Love to Scrap – Anything Goes
  2. Creative Craft Cottage – Eileen’s Anything Goes (Digi Doodle is sponsoring!)
  3. Pammie’s Inky Pinkies – PIP1922 Anything Goes
  4. The Paper Girls – Top 5 Faves (Coloring, sparkle, hearts, ribbon, flowers)
  5. Watercooler Wednesday – WWC224Anything Goes Feminine
  6. Crafting with an Attitude – Anything Goes

2 Crafty Critter Crazies – You are my Happy

Hello friends!!  Happy April Fool’s Day! 🙂

Well, there’s “no fooling” here today as I bring you a post to share the creation, I’ve made for a new challenge over at the 2 Crafty Critter Crazies Challenge Blog!  Since it’s the first of April, we have a new challenge starting with the “Anything Goes + critter” theme in mind!  Hope you will join us with your critter creations!

We are being sponsored by Digi Doodle Studios and this is the card I made for the challenge this month:

Vicki-2CCC-DigiDoodle-Mia

Our sponsor was kind enough to share this very sweet image called Mia which I’ve used for my card today.  This is my first experience with these images, and I must say they have some really cute ones in their store, so hop on over and check them out!

I’ve colored her up with Copic markers including drawing extended lines for the grass and coloring it up all the way across and down.  I cut it out with a cross stitched rectangle die and then used a sun ray stencil to ink some yellow behind her by taping off the grass edge, so I didn’t get any on that part.  I then stamped the sentiment in black ink over top of that.

To continue on with the yellow color theme I’ve got going on, I cut out a piece of yellow glitter cardstock that was cut out with a scallop rectangle die (retired from Lawn Fawn) and attached it to the back of the image panel.  I took some plaid papers for the bottom portion of the A2 white top folding card base and then attached some yellow grosgrain ribbon across the top and then attached the image panel and then added a yellow ribbon bow along the edge.  Lastly, I finished it out with some yellow rhinestone crystals.

Vicki-2CCC-DigiDoodle-Mia-close

Here’s a closer look at the coloring I’ve done on the image.  I took a black gel pen to color in the eyeball’s circles.  I wasn’t sure how to go about coloring the eyes, but this is the way that made the most sense to me.  I also went around the edges of the butterfly with the black gel pen.  I took a glitter brush pen and went over the liquid in her cup.

Vicki-2CCC-DigiDoodle-Mia-flat

I have to add that this image really got me thinking about past memories with my sweet little Mocca and how we would go out on nice Spring days like this.  She certainly was always “my happy” for sure and I still miss her like crazy.  I’m sure any of you that have lost pets understand what I’m saying.   It’s great to have the memories we’ve shared after all this time!

Thanks so much for stopping by!  I appreciate it so much!

challenges:

  1.  Crafty Friends – Spring
  2. Crafty Gals Corner – Spring is Here!
  3. Krafty Chicks – Coffee, tea or hot cocoa
  4. As You Like It – Favorite Coloring medium – Copic Why?  It’s my favorite “go to” coloring method and I love the way the markers blend together for shading and highlight effects.
  5. Creative Knockouts – Outside Fun
  6. Allsorts – Use Yellow
  7. Digi Doodle Studios Challenge – #15 Anything Goes