Mixing It Up With Layers!

Hello friends!  WOW!  That last month went by really fast!  I think it’s because I was busier than usual on my blog, but that’s great that all of the crafting got me through the cold month quickly!  I know it will still feel cold in March, but hopefully it will start warming up little by little!  Until then, I still need to wear some layers!

Speaking of LAYERS… That brings us to a new challenge over at the Mix It Up Challenge Blog.    The challenges always run for 6 weeks so there is plenty of time to enter.  The theme given this time around is: LAYERS or you can do the ‘Anything Goes” too.  Here’s the card that I came up with for the challenge using the theme:

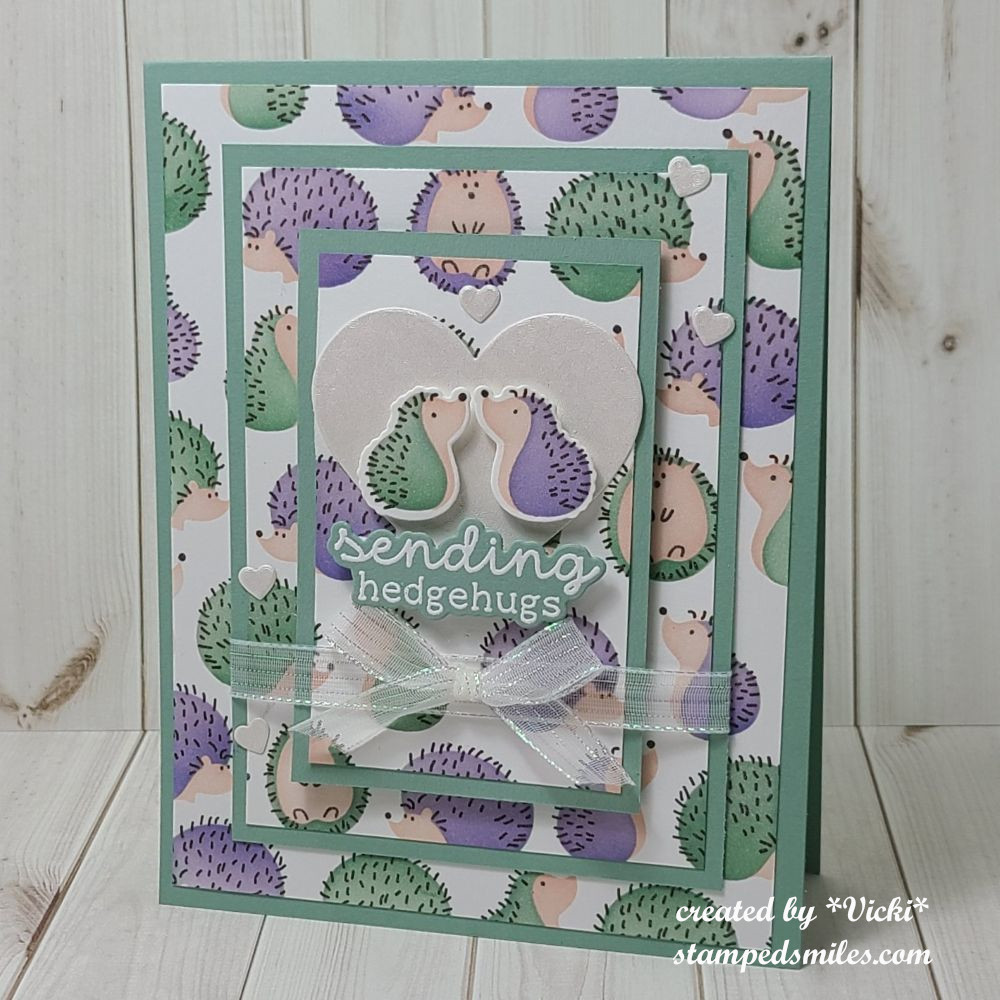
Aren’t these hedgies cute!  I’ve had this stencil set for a while and haven’t had a chance to use it until now and I thought it would be fun to try out the Triple Time Stamping technique.  (If you don’t know what I’m referring to, check out this video on You Tube HERE.)  I thought this would be a great way to insure several layers on my card.

The cute hedgehogs come from the Taylored Expressions Hedgehugs Stamp & Stencil Combo.  I used the technique to layer the panels together and then stamped and stenciled the hedgehogs and then layered each panel with the Spearmint cardstock.  The smallest layer on top was popped up with foam tape.  (I added the white shimmer ribbon around the middle and front panels before attaching to the card.)

I used the coordinating die to cut out some extra hedgehogs and I popped them up with foam tape over a white metallic heart.  I also white heat embossed the sentiment from the TE To the Point stamp set and cut it out to pop up under the “kissing hedgehogs”.  I’ve also added a few more tiny die cut hearts from the white metallic paper.

I THINK I’ve got about 7 layers all together not including the card base.

  • I hope you’ve enjoyed my card today and will stop by the challenge blog to see all of the inspiration from the team over there!  I would love to see your creation in the gallery too!

Thanks for dropping in and I’ll see you soon!

Challenges:

  1. Gem of a challenge – Anything Goes
  2. Pammie’s Inky Pinkies – PIP2508 Anything Goes
  3. Little Red Wagon “Tiny Dancer” (tiny things)  I used tiny white hearts
  4. Penny’s Anything Goes Using Paper
  5. Simon Wednesday – Anything Goes
  6. Just Us Girls Stencil Week

Sending Snail Mail Hugs

Hello friends!  Yippee!  It’s finally “officially” Fall now! (According to the calendar anyway.) We are very slowly starting to get lower temps at least in the evening time anyway.  I’ve gotten out my Fall decorations and I’m ready!  How about you?

Today I have a very sweet image from Whimsy Stamps to share with you:

Vicki-WSLoveSlowMuch-Sept24

Awe!  I wouldn’t normally hug a snail, but I must say, this one is SUCH a cutie don’t you think?  This digital image is called “Love You Slow Much” from Whimsy Stamps-Sylvia Zet’s Wee Stamps Collection which was previously released as a rubber cling stamp.  So now you can have the option of choosing the digital or the rubber versions!

Of course, with Fall having started, I was really inspired to create with this cutie in some orange, yellow and tan toned colors!  With the exception of that blue bow tie on the snail, I’ve colored it differently as I think that makes him really stand out especially for dispensing hugs…or perhaps receiving them! 🙂

I’ve cut out the image with a stitched circle die and then die cut another larger circle in the orange color to mat behind that.  I’ve taken a piece of decorative paper from my stash with the wording and added some stitch marks along the edge of it with a black marker and then mounted it to a piece of white cardstock.  I wrapped some white organdy ribbon around these two pieces and mounted it onto an orange 5″ square top folding card base.

I took another piece of orange cardstock and die cut a tag out from an older Whimsy Stamps die that I have and then I stamped the “hugs” sentiment from the Whimsy Stamps Everyday Mini Sentiments clear stamp set towards the bottom of the tag and added it to the bow on the ribbon.  Lastly, I took some flowers and attached them around the card design.

Vicki-WSLoveSlowMuch-Sept24-close

Here’s a closer look at the coloring I’ve done on this image and used the following Copic markers:

  • Snail Body:  W7, W5, W3, W1, R00
  • Snail Shell:  E35, E33, E31, E30
  • Snail Bow Tie:  B26, B24, B21
  • Fairy’s Dress, Hair Flowers, Shoes, Wings:  YR07, YR04, YR02, BG000, C7, C5, C3
  • Fairy’s Hair & Skin:  E47, E44, E42, E41, E21, E11, E02, E00, E000, R20
  • I used BG000 and E0000 for around image and shadows
  • I’ve also used a gold gel pen for the center of the flowers in her hair and over the tiny marks behind her wings.  I’ve used a white gel pen for highlights in the Fairy’s cheeks as well as highlights on the snail’s shell.  I took a glue pen over her wings and added some clear glitter over them.
  • I’ve also used a Copic marker (unsure of color) to color a rhinestone for the center of the orange flowers.

Vicki-WSLoveSlowMuch-Sept24-flat

I hope you’ve enjoyed my creation today and that it has inspired you in some way!

Thanks so much for stopping in today!  I always appreciate your support!  I’ll be seeing you soon!!

Challenges I’d like to enter this card in:

  1.  Creatalicious – Anything Goes with optional circles
  2. Stamps & Fun = Creativity – Anything Goes
  3. The Paper Girls – Anything Goes
  4. The Fairy & The Unicorn – Fantasy Anything Goes
  5. Creative Knockouts – Anything Goes
  6. QKR Stampede – Anything Goes #364
  7. Creative fingers – Anything Goes
  8. Always Fun – Cute Critters