Hello friends! I’m here! In case you were seeing nothing on my blog or something weird going on within the last day, I appologize! I was messing with something and pretty much should have left things alone! I think we are all back now and everything is good! Whew! (Don’t worry, I won’t be doing that again!) I guess I thought I was savvy with tech things, but it turns out, I’m not! Ha!
So now that I’ve got things back to normal, I can share my card with you this evening!
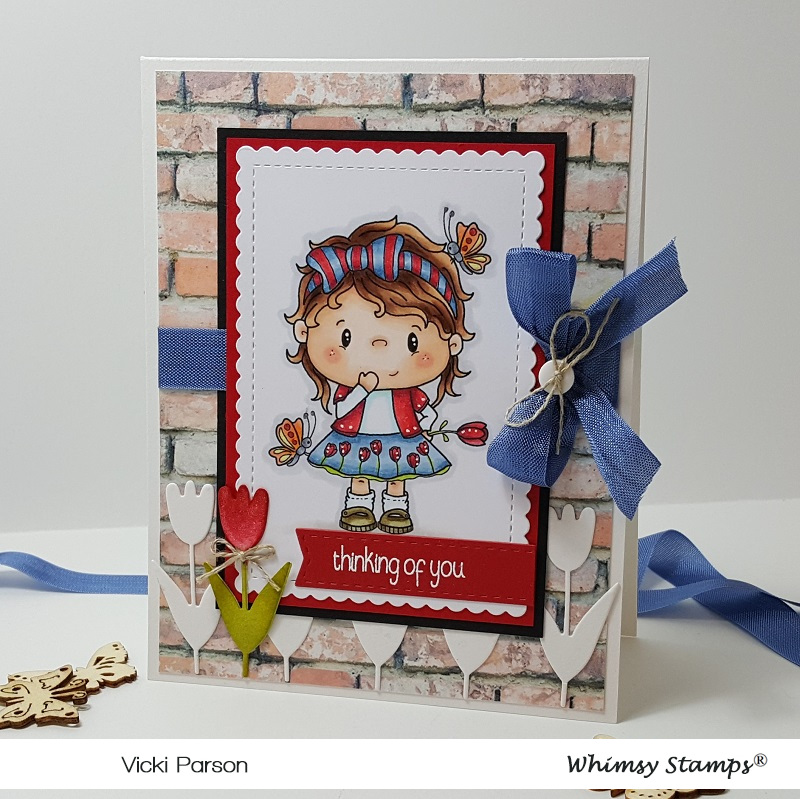
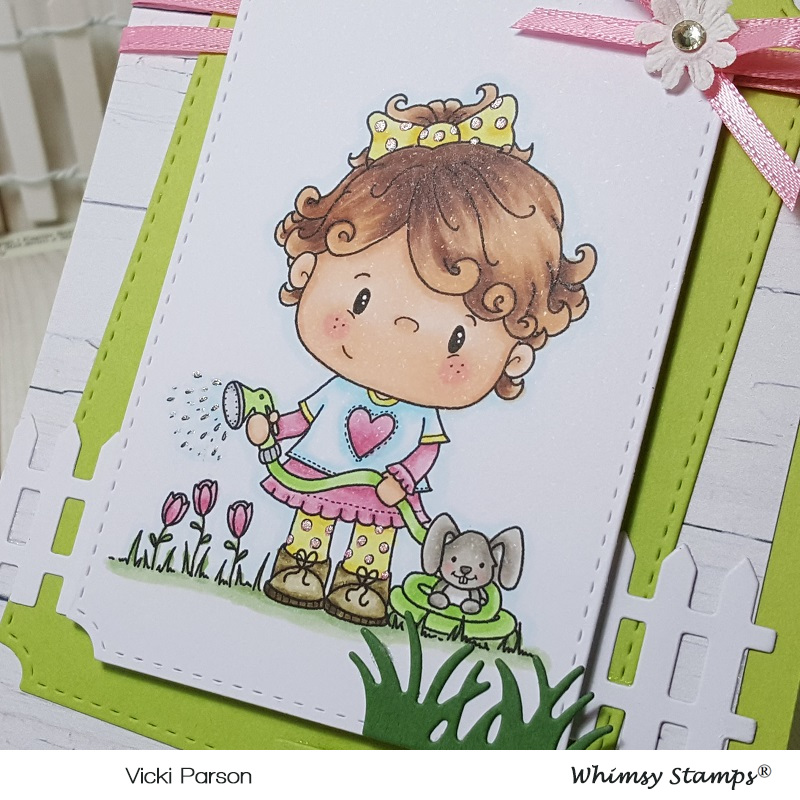
This is one of the adorable March digital releases from Whimsy Stamps called Tulip by CC Designs. She was so fun to color, and I was thinking about tulips the entire time I was coloring her up! Tulips are my favorite flower and I have a brick foundation with little buds of daffodils and tulips coming up! Of course, this makes me excited about Spring and the warm weather we are starting to get!! (Hopefully I will be able to share photos of how they come up soon!)
Whimsy Stamps has also released some really cool digital papers that I’ve used for the background of my card here called Rustic Wood and Brick Collection. (Reminds me of my brick foundation where the flowers are coming up!) I have also used a retired Whimsy Stamps die set called “Garden Flowers” that happened to have a tulip in it, so I cut several in white cardstock to go along the bottom of the card. I also took one and inked it up in the colored I’ve used on my image and tied an additional thread bow at the top of it.
The sentiment on the bottom of the image panel comes from the Whimsy Stamps Everyday Mini Sentiments clear stamp set. I white heat embossed it and then cut out with the Whimsy Stamps Quick Strips die set. I used a MFT stitched scallop die to cut out the image from and layered her with some red cardstock. Before I added the blue ribbon, I attached the piece of black cardstock where my layered image panel would go and wrapped it around the brick background. I then added a white button with a linen thread bow in the center of that. (This is what I used on the colored tulip.) All of these layers were then mounted onto an A2 sized top folding white card base.
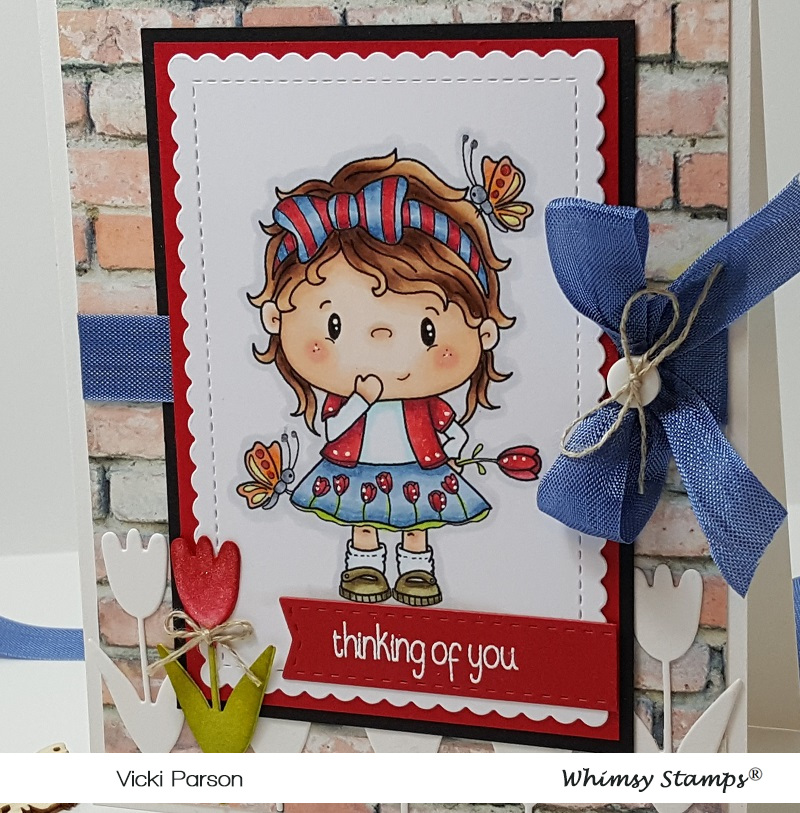
Here’s a closer look at her all colored up with Copic markers! You can purchase them at Whimsy Stamps. These are the colors I’ve used on my image today:
- bow, jacket, skirt, tulips – B97, B95, B93, R39, R37, R35, YG25
- shirt, socks, shoes – BG000, E87, E84, E81
- hair, skin – E27, E25, E23, E21, E11, E00, E000, R20
- butterflies – C5, C3, YR04, YR02, Y13
- C1 around image and white gel pen for flowers and jacket along with red and black gel pens for dots on butterflies
- covered the red portion of die cut tulip with Wink of Stella clear glitter brush pen.

I hope you’ve enjoyed my card this evening! Are you as ready for those Spring flowers as much as I am? What are your favorite flowers?
Thanks so much for stopping in today!! See you again soon!
Challenges I’d like to enter my card for:
- Words 2 Craft By (W2CB63) – “Happiness held is the seed, Happiness shared is the flower.”
- As You Like It – Dies or Stencils & why? (I love using dies because I feel there are so many fun things you can do with them/versatile, even it you don’t stamp!)
- A Bit More Time to Craft – #88 Anything Goes
- Challenge Up Your Life – Bye-Bye Winter