**DON’T FORGET TO ENTER THE GIVEAWAY I’M OFFERING IN THIS POST – THERE’S STILL A FEW DAYS LEFT TO ENTER!**
Hello friends and welcome to the New Year of 2025! Hope that you’ve had a wonderful and healthy Holiday Season and ready to start the crafty year! I look back and can’t believe that I’ve been blogging since 2006…next year will be 20 years of blogging! Holy cow! Should I have some sort of celebration?
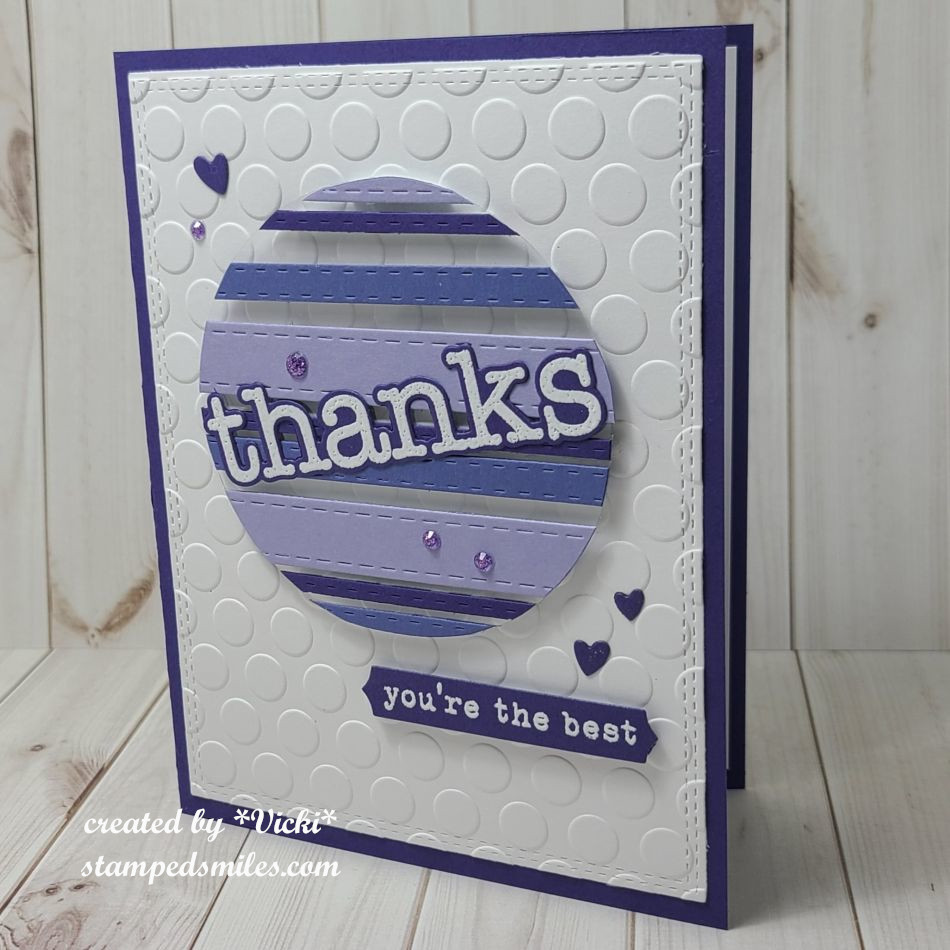
Today not only starts a brand new year, but it’s also the start of a new challenge over at the Mix It Up Challenge Blog. ( NOTE:The challenge blog has recently been taken over by Tina, but it’s running the same way that Leslie had been running it…so hope you can join along as you always have or if you haven’t yet, sure hope to see your creations over there!) The challenge will run for 6 weeks so there is plenty of time to enter. The theme given this time around is: Monochromatic (meaning shades of the same color) or you can do the ‘Anything Goes” too. Here’s the card that I came up with for the challenge using the theme:
Of course I chose shades of purple for my design in the Taylored Expressions colors: Eggplant, Dried Fig and Macaron. I also used the floating technique with the circle of acetate and the different strips attached and popped up with foam tape strips. Very easy and fun to do!
The “thanks” sentiment and strips were white heat embossed over the Eggplant color and cut out with the coordinating dies. The little hearts were also apart of the die cut. I then added some purple color rhinestones to finish it off.
I’ve used a VERY old embossing folder by Cuttlebug…do you remember that thing? I attached the embossed piece to a side folding A2 Eggplant card base and added a white panel with a sentiment on the inside.
I hope you’ve enjoyed my first card of the New Year or have been inspired to create a monochromatic card as well to enter in the challenge with us!
Thanks so much for stopping in today and I look forward to seeing all of your crafty inspiration throughout the year! See you soon!
Challenges:
Creative Inspirations – Something Old/Something New (I’ve used a VERY old embossing folder!)
Hello friends! I hope that your October has been a good for you! We have just started seeing some cooler weather and even a bit of frost coming tomorrow night! I also wanted to say thank you for your comments about my last post. After having such a break, getting my crafting back on has been touchy. I’m trying to get organized!😁
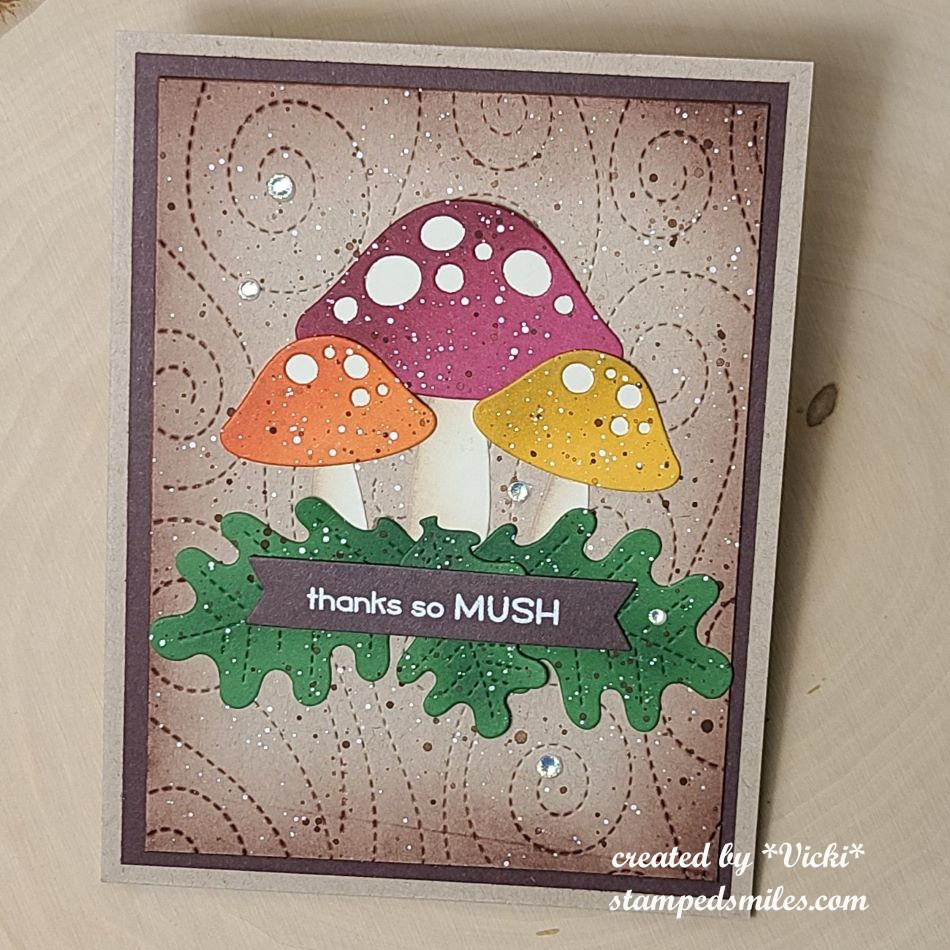
Today starts the October challenge over at Sparkles Monthlyand for this month, our hostess is asking to see a mushroom(s) on your project. Be sure to stop by the blog to see what the rest of the team has created for you. Here’s my project for this challenge:
I really like how this one turned out! I was trying to keep it in an Autumn feel with using these colors and adding leaves. Everything I’ve used came from Lawn Fawn.
I started by cutting out the background panel, the leaves and the mushrooms in different colors of cardstock. I sponged over the each of the pieces for dimension and shading and then splattered over top of them with brown and white paint.
I just attached all of the layers together that I thought was pleasing to my eye and then I white heat embossed the sentiment over the brown cardstock and cut out the banner and popped it up over the leaves with foam tape. Lastly, I just added a few white gems for sparkle.
I hope you like my card today and has inspired you in some way to play along with us for the challenge this month! I would to see your mushroom creations in the gallery! I appreciate you stopping today!
Hello friends! I hope that you’re enjoying your August so far! Recently, we’ve been experiencing much cooler temperatures than we normally have this time of year, so it’s been great to go out for a few walks.
I’m ALMOST caught up with things that I haven’t posted, with the exception of a few birthday cards that I’ll share later. For today, I’d like to share some projects that I’ve made at an event I attended back in April along with a class from Inky Stamper.
But first, here are a few projects I’ve made for their recent challenges:
This is a tag I’ve made for the Inky Stamper Inkspiration FB Group July challenge. The challenge was to make a tag and I thought I’d try out a fun idea of making a pocket for my tag that held another tag inside so that you could put a message and a gift card.
I’ve used some Limeade Dots/Stripe 12×12 Doodlebug paper to cut it out with and used a border die to help with the pocket decoration. I cut another tag to place inside the pocket for a special message and to include a gift card. At the top of the inside tag, I’ve made little “charms” with images from the Inky Stamper Margarita stamp set. I’ve also stamped the background of the inside tag. I don’t usually color with pencils, but this time I decided to pull them out.
To get the sentiment to fit around the pocket border, I had to curve the stamp a bit to make it work with the tag.
So the Inky Stamper Inkspiration FB Group challenge for August was to use a white pencil. This happens to be a favorite to use for Chelsea with her images and it does make for a nice quick highlight. So the images were just stamped on colored cardstock and I used the white pencil to highlight them with.
I decided to combine this with last week’s Craft Roulette Episode #226 with the parameters of – Project: “See-through” (I made a see-through shaker card) Colors: “Jungle” (I used greens and browns for my jungle) Element: “Teacher(s)” (The sentiment says it all!) Random: “Tangle” (There are a tangle of leaves inside shaker element.)
Back in April there was an Inky Stamper Inky Escape event that I attended and here are some projects that I made from the Make-n-Takes that were provided as well as some of the projects that I was working on using the new release that came out during the event:
(If you are on my website, click each photo to enlarge it and read the captions)
The tag was made my Chelsea that was attached to my “swag bag” and the box was a make-n-take project. There was a moon pie included with project, but when I came home, I added 4 Ghirardelli chocolate squares to show how many fit inside.This card uses the same stamp set as the tag above. The background is a scratch ‘N’ sniff made with Kool-Aid.This was a light up card using the Pear Blossom EZ Light.Cute make ‘N” take with a magnet on the back of the baby roo that fits inside the mama pouch slit!This was an extra make ‘N’ take using some ALL & Create Washi Tape! Cool!
There is actually another Inky Escape coming up in October that I’m attending and I’m sure it will be fun with Halloween and Christmas theme combined!
While I was there, I worked on some more of my own projects using some of the new sets:
I decided to take and use one 6×6 paper pack from my stash and it seemed to go really well with the outer space theme and I love the purple colors from this set. I’ve used the following Inky Stamper stamps sets: Astronaut, Big Words, & Alien.
Click on the photos below to see a close up look at each card:
Before the Inky Escape Event, there was also an on-line class from Inky Stamper that I took part in and that’s because I thought the projects were super cute! Here are the projects that were completed for this class:
These were both created with the Inky Stamper Hedgehog stamp set. The Journal Book , the Doodlebug DIY Snow globe and Doodlebug dimensional stickers/shaker balls were all provided with the class. I decided to add a few extra elements with mine. The tiny hedgehog on top of the snow globe was included in our box, but not apart of the projects…but I thought it would be fun to add it!
Speaking of Doodlebug, while I was at the Inky Escape Event, Chelsea had a few things on sale and I snagged a kit and special ordered the Doodlebug Frame with it. So when I got back home and the frame came in, I wanted to do my project right away:
I have this displayed in my stamp room and I love the rainbow of colors in it with the different crafty tools in smile faces! The size is 8in. x 8in. with a glass on the front. Although it’s not really that visible in the photo, it is actually quite dimensional.
I think it goes well with the black frame that matches my black frame with the crafty squares swap group I was in. (You can see that post here.)
Whew!😳 I’ve been really busy this year, but I don’t think you would’ve known this without my posting about it! I’m glad that I’ve gotten caught up with things that I’ve done and hopefully I won’t be doing posts like this in the future! It just seems like so much all at once!
Anyway, there we go and now I need to finish and send out a few birthday cards coming up, so I will catch up with that later as well! For now, thanks so much for stopping in and keeping tracks of my sporadic postings! I will be back to share a DT post for a challenge coming!
Hello friends and happy May! I hope you are having a wonderful week and have been enjoying your Spring season with lots of sunshine and flowers! There’s always lots of things to do when the weather turns warmer, but that’s a good thing!
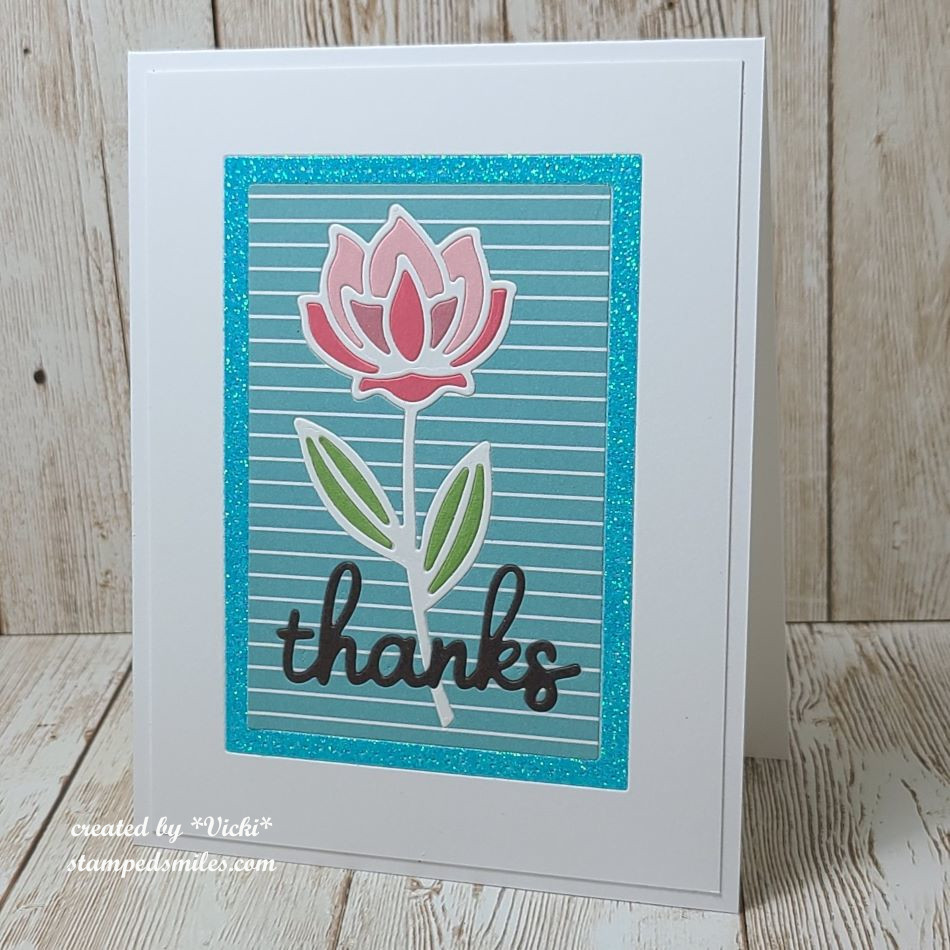
Today starts a new challenge over at the Mix It Up Challenge Blog! There is always lots of wonderful inspiration from the team, so please go check it out and play along! The challenges are always ANYTHING GOES with an optional theme. This month’s optional theme is Inlaid Die Cut (flat or raised)! For these challenges, you have plenty of time to enter as they run for 6 weeks! I look forward to seeing what you come up with! Here’s the project I made:
I think this card turned out very well using the inlay die cutting technique! I found the perfect dies, but of course you can use almost ANY dies you want to try this including your regular shaped die cuts! I always find those frame style dies to be very easy to work with for this.
I received this cool freebie die from Taylored Expressions called “Simple Stems” and thought it would be perfect for this technique. I also inlaid a sentiment die from my stash over top of the flower and inlaid that too. I used the Taylored Expressions Frame in Frame 3 die set to create the middle pattern and glitter frame around the flower. These were also inlaid into the white card front panel.
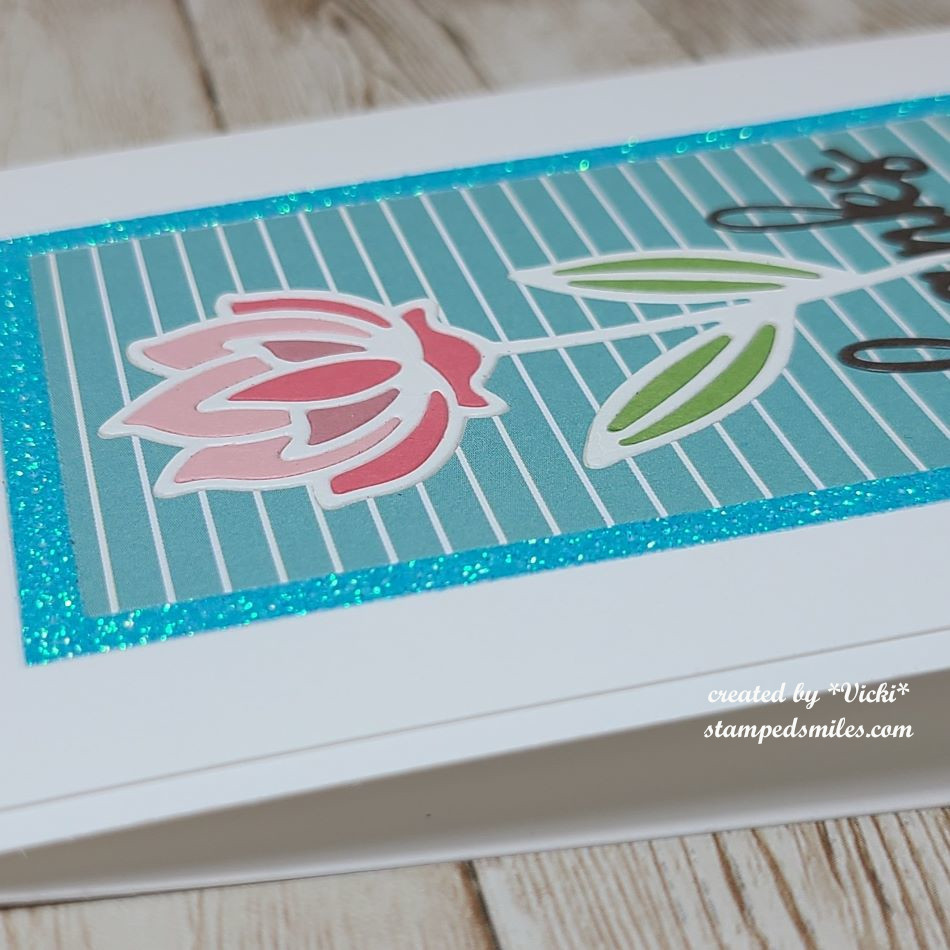
It’s a little tricky at first to figure out in what order to die cut all of your pieces so that it looks right. Mine is very flat which I find helpful for mailing out and with the cost of postage stamps going up again this Summer, I need to rethink the type of cards I make any more. Here’s a photo so you can see that everything lays flat to the card front:
For the inlaid die cutting, I also find sticky sheets very helpful. I took a piece of double-sided sticky sheet and placed it on the back of the white card front panel AFTER I had cut out the frame from it. This makes the inside of the panel sticky so that I could lay all of my pieces on top and also keep it flush with the white card front panel. Once I laid all of the die cut pieces, I took the backing off the sticky sheet and attached it the A2 top folding white card base with everything in place. You also don’t have to worry about liquid glue oozing out.
It’s a simple CAS card, but it was so fun to do! Hope you’ve enjoyed my card and take some time to check out the challenge this month! Thanks so much for dropping in! See you soon!
Challenges:
Daring Cardmakers – “Something Old, Something New” (old glitter paper and new die cut + I used blue paper)
Hello friends! I hope that you’re having a wonderful week so far! The weekend is here, but it sure has been a beautiful couple of days this week with sunny and warm days so hubby and I were able to go out to walk around a bit before the snow starts hitting us!
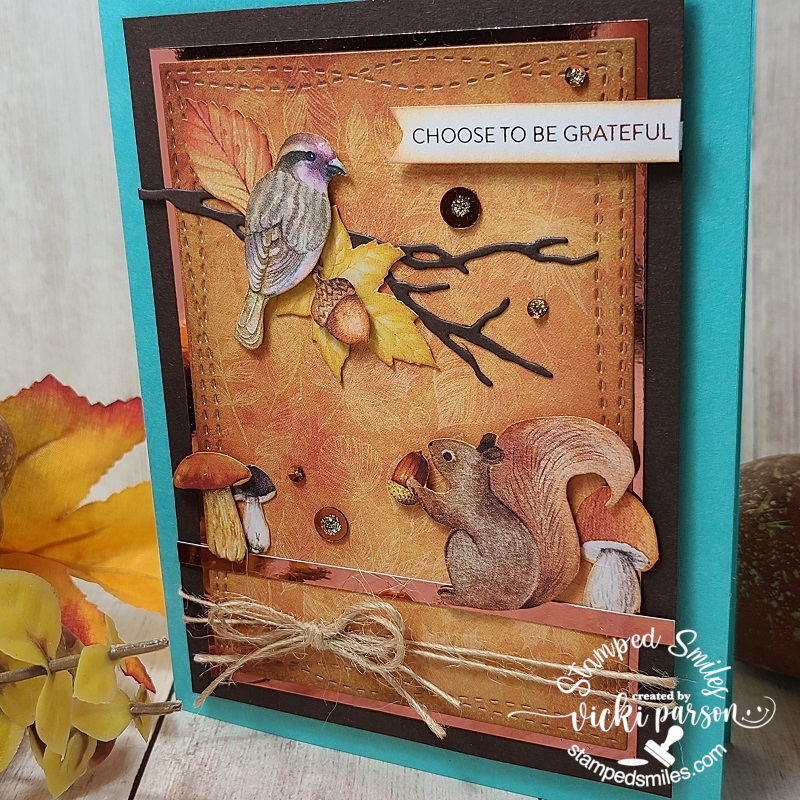
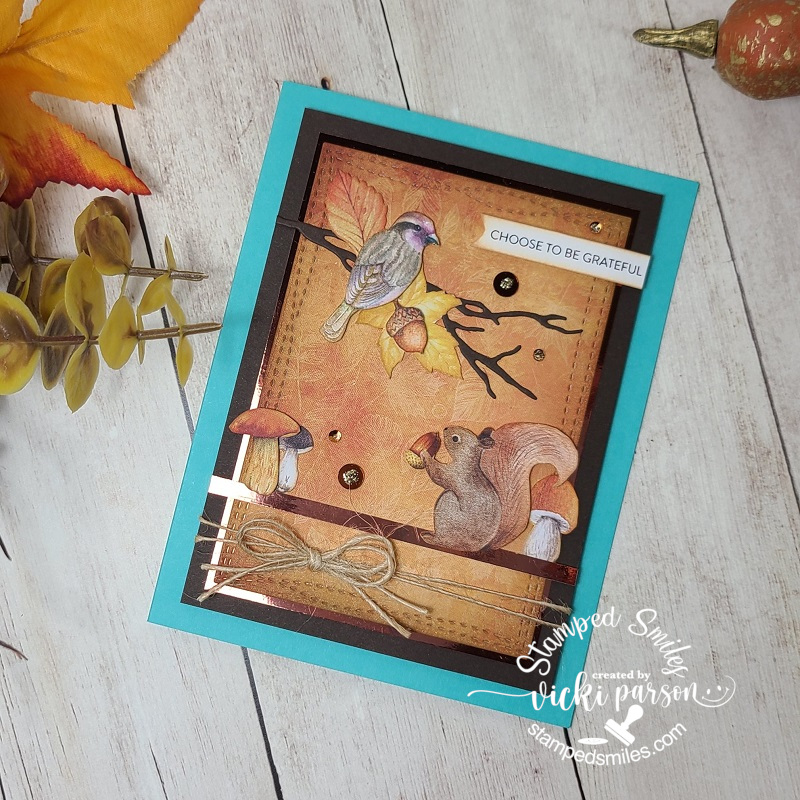
Something that is great to go out in nature to see are the critters with the birds and the silly squirrels…we have them EVERYWHERE! They’re busy gathering and burying their food for wintertime around here. My thoughts turned to the Simon Says Stamp “Big Thanks Autumn” November card kit (sold out, but not papers) as I love all things Fall/Autumn and this card kit with those beautiful papers spoke to me and I wanted to create with it to make my project for this month’s Crafty Chef’s Group recipe from our lovely friend Meg’s recipe:
There were some blue colored A2 card bases already cut and scored inside the kit, so I used one for my side folding card base here and then layered a dark brown cardstock piece from the kit as well as a piece of copper mirrored cardstock which was then layered over a piece of the decorative papers (I mentioned above) in the kit, which is also where the critter, mushrooms and leaves images came from on this card.
The leafy background paper was cut from a MFT Wonky Stitched Rectangle Die and then I took a strip of the copper mirrored cardstock across the bottom third of the layered pieces and also added some twine wrapped around the bottom of the layers before popping them up with craft foam over the card base. I die cut a branch from a die in my stash and then fussy cut the images out from the papers included in the kit which were glued or popped up with foam squares over the panel. I sponged some Tea Stain Distress Ink around the edges of these pieces before attaching.
Lastly, I’ve taken one of the sentiments from the sentiment strips sheet included in the kit and ran it through my laminator with a piece of copper Deco Foil. (I think that is a cool way to add a little extra something to those sentiments.) I made a banner out of it, sponged it with some of the ink I used for the images and popped it up over the leafy background piece with foam tape.
Here’s a closer look at the critters I’ve cut out and how I’ve arranged and popped some of them up to create my scene. There was also a very pretty SSS Autumn Sequins Mix included in the kit, and I took some of those and added it to the layout and then filled the centers with some gold Stickles glue.
For the Crafty Chef’s recipe that was given, here’s what I MUST use:
Mirror cardstock
3 layers or more
ribbon (I hope my twine counts!)
image of garden visitors (birds, hedgehogs, etc)
CAN do items:
Sparkle/Glitter (I used sequins and Stickles)
pearls/gems (I did not use) *passed onto next chef.
dry embossing (I did not use)
There is a new recipe given for each month and no pressure to follow along or even when you want to follow along and play…which is great and I’m happy to be able to use up some of the goodies from my stash (NEW AND OLD) and just have fun with it.
I hope you’ve enjoyed my creation today as well and I will be seeing you all again soon! Thanks so much for stopping in today friend, as I’m very grateful for you!
Hello friends! I haven’t really mentioned too much about what’s going on in the world right now, and I know it has tremendously affected many people around me. In the crafting community I sense changes as well in different ways. I do hope that crafting can help either take your mind off the situation or at least help with making you ‘feel’ that creating from the heart, as we stay at home, is a fantastic way to contribute and help bring about smiles in many ways.
I would like to ask you if you want to respond about it:Has crafting helped you during this time or has it made it difficult to concentrate? I have found that taking TONS of classes have actually been my savior right now especially as I was taking that break I had. (Helps me to concentrate on something like a technique.) I found MANY having classes (free or having group parties going on with crafters teaching and sharing). Due to this pandemic, I know many people/companies in the crafting community have revved up their classes and challenges as well… along with giving out free digital images!
This brings us to my post for today….
I have made several stacks of “thank you” cards geared towards our healthcare workers and it has been very rewarding for me to be able to color in all these images in my post today as a salute and honor to those that have been “on the front line” dealing day to day since the beginning of this pandemic. My heart goes out to all in this uncertain time and although there are many horrible stories related to this, there are also some good ones too. Let’s rise up.
Taylored Expressions put on a card drive to send cards to the healthcare workers and it ended today, so these cards have already been sent.
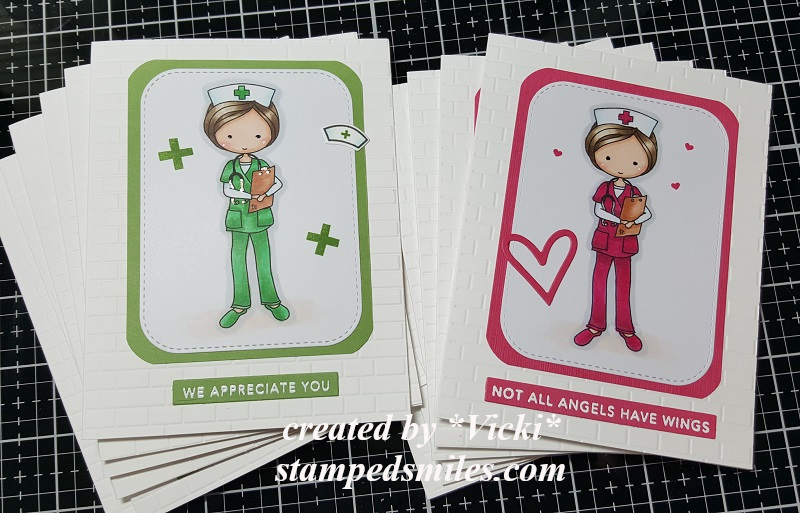
For this particular stack of cards, I’ve made 6 of the pink and 6 of the green using this adorable MOKA Melissa Nurse free download from Taylored Expressions. I’ve also used the Subway Tiles embossing folder for the background as well as white heat embossed the sentiments from the Life Saver Mini Strips stamp set and die cut them out with the clever Mini Strips Die. I’ve used a heart die that came with an order I had and then I took some tiny images from other sets for the accents.
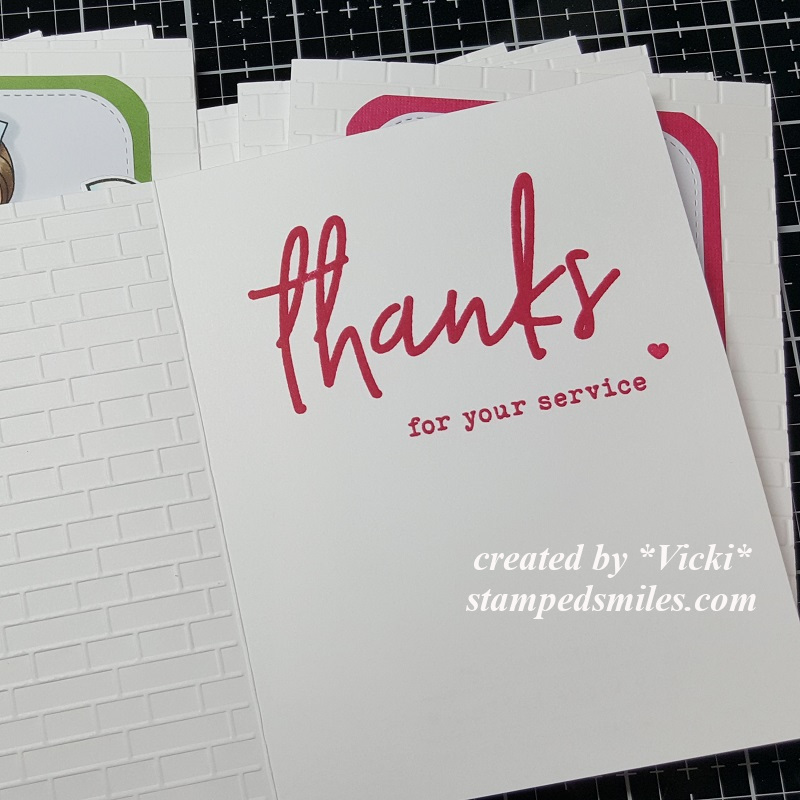
I stamped a message on the inside of all of the cards from TE Big Thanks stamp set too. (This set came for free with an order I placed.)
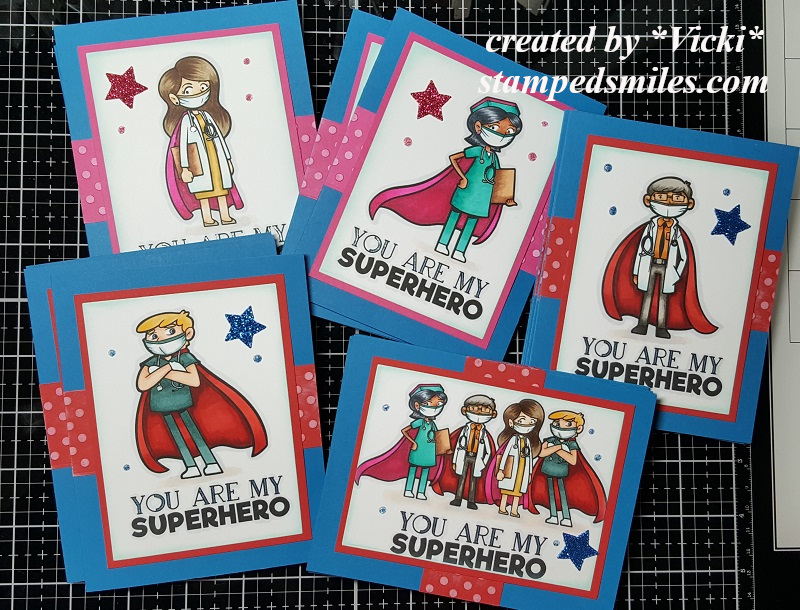
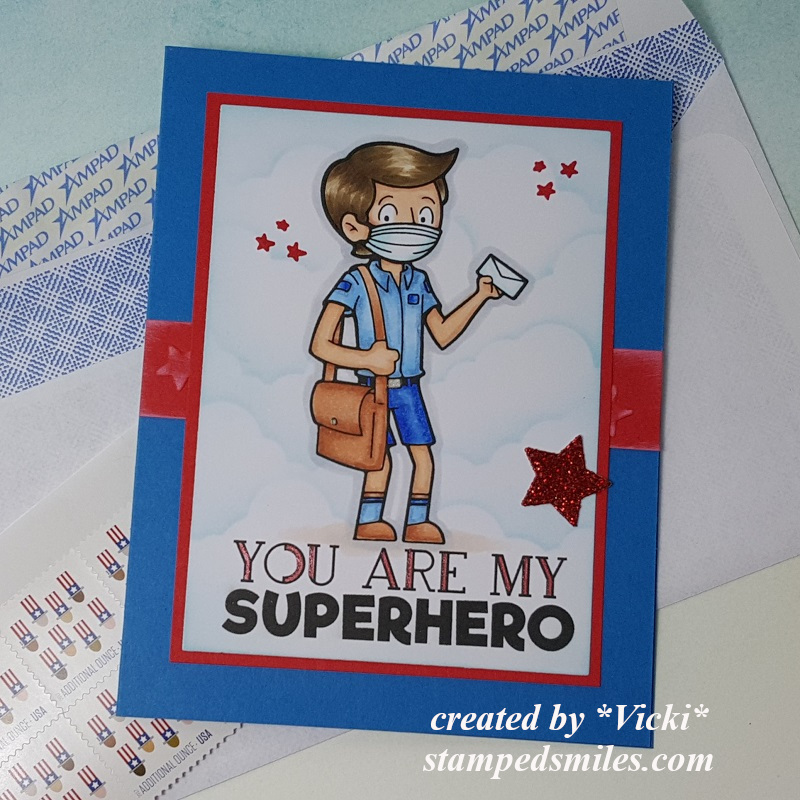
Here’s another set of 20 cards I made for healthcare workers using the Freebie Healthcare Super Hero Coloring Pages. (To print these out to fit over an A2 sized card base, I used my printer settings to print out 4 pages on one sheet.)
I layered them over some pink and red cardstock and then the base of the card is some A2 sized side folding blue cardstock. The left over pieces from the pink and red cardstock strips were ran through and embossing folder and white white Ink was ran over it.
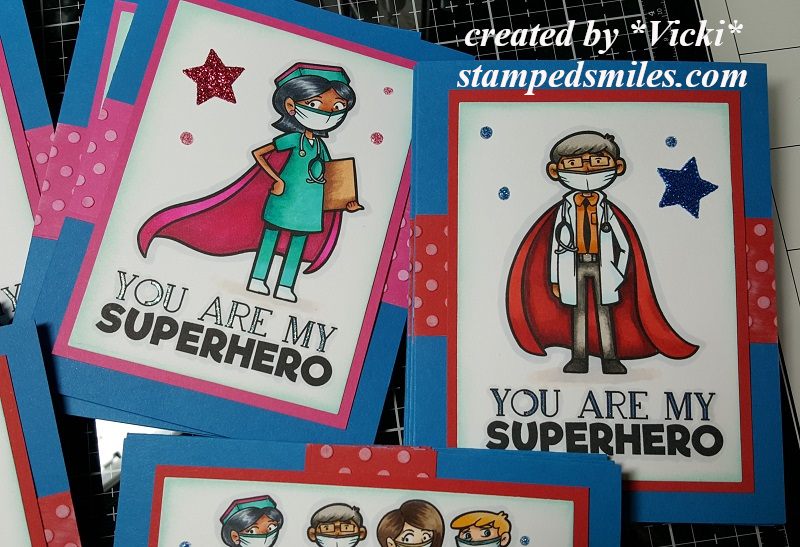
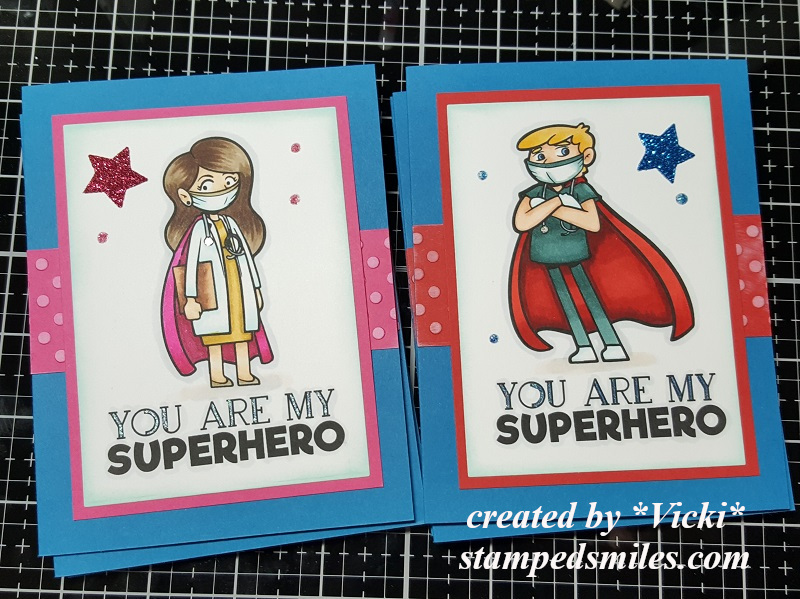
Here’s a closer look at the individual sets. I used a star die to cut out some stars with Glitter paper. I also took some blue and pink glitter glue to create extra “dots” around them. This was good practice for me to experiment with different skin tones too.
I’ve used Copic markers to color all of these in with and then I took some gel pens to color in parts of the image as well as the outline in the sentiment too.
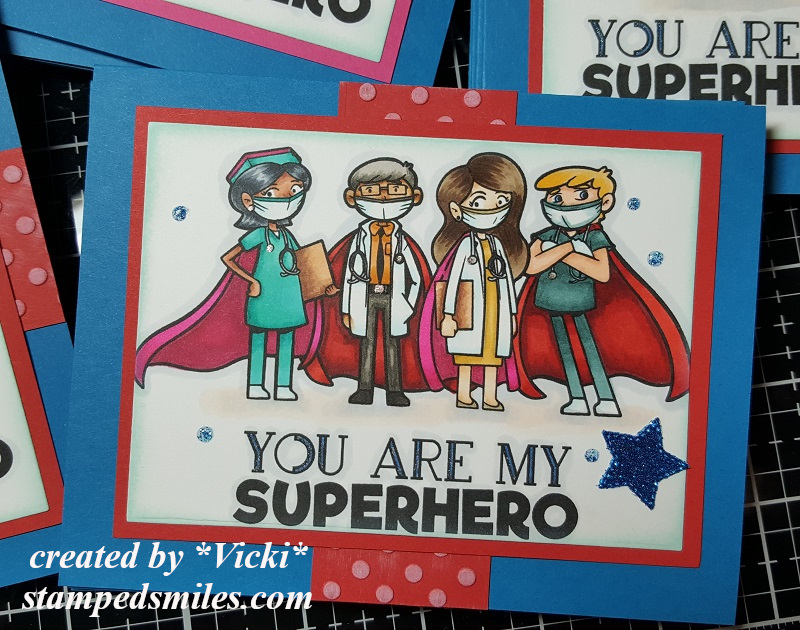
I thought this was a fun one with all of them together and I like that they’re all wearing capes and masks too. I had these finished up at the end of April, but just now getting all of these out where I wanted them to go. I’m sending some masks along with the cards to our local hospitals.
One last and important card I made was specifically for my son who’s a postal carrier. Of course I tried coloring it in with the same hair color he has too. LOL! After I made the batch of cards above, they came out with more superhero freebie downloads, so I grabbed the Mail Carrier Superhero Coloring Pages to make one for him too. And this one is already on it’s way as well. For the background, I used the Scene stencil for the clouds with blue distress ink.
I finished this one similar to the ones above.
The ONLY superhero I’m missing is one for my other son who’s a food service worker and I haven’t seen any of those images out yet. Does anyone know where to find one? I would love to make a “thank you” card for him as well. I may just come up with my own version with what I already have…but have to think about how first. LOL!
This particular song came to my mind and was something that I listened to while coloring….
It was somewhat catchy and upbeat I thought. I always like to try and think of the positive ways that cards I make give a positive impact or inspiration somehow. Could be wishful thinking, but it’s my hope anyway.
Thank you so much for taking the time to stop by today to read my post! I hope that you’ve been inspired in some way! Have a beautiful weekend my friends!
Hello friends! We’re finally on the last Friday of February! Yay!
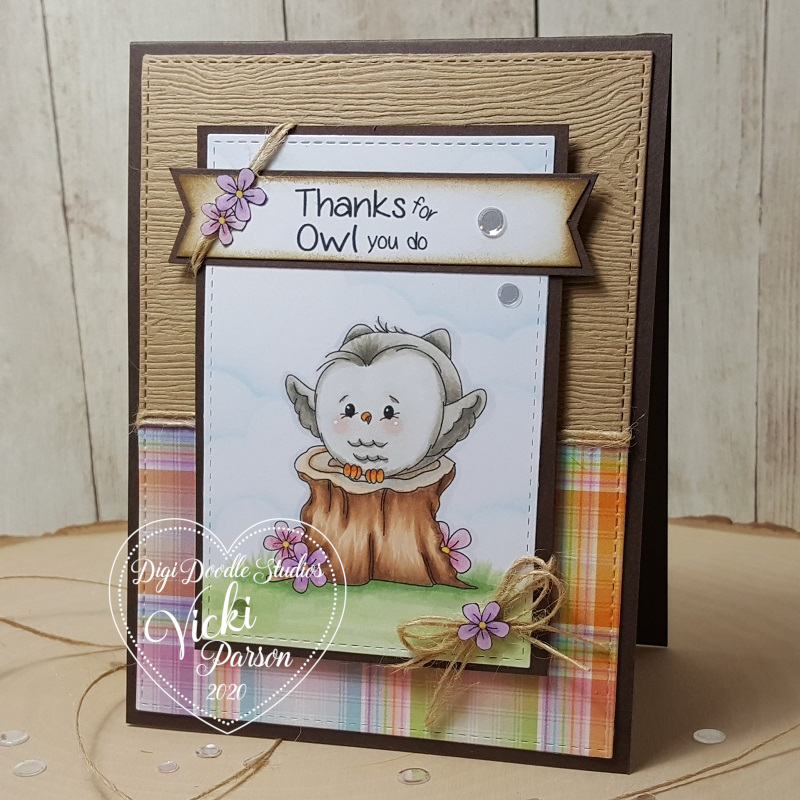
Although we’ve had snow in our forecast recently, I’m feeling Spring will be in the air soon and I really look forward to it along with all of the pretty flowers and green grass! So today, I’m sharing a card I’ve made using this adorable Pairables set from Digi Doodle Studios:
Isn’t this little owl the cutest?! I love how he has his little wings out for a hug! I’ve used several of the images from the “Owl-rageous” Pairables set to create the scene on my card. I have used Word.doc on my computer to arrange and size the different images where I wanted them for my scene and printed it out to color. I’ve also printed out the flower image from the set along with the sentiment separately to cut out for my design.
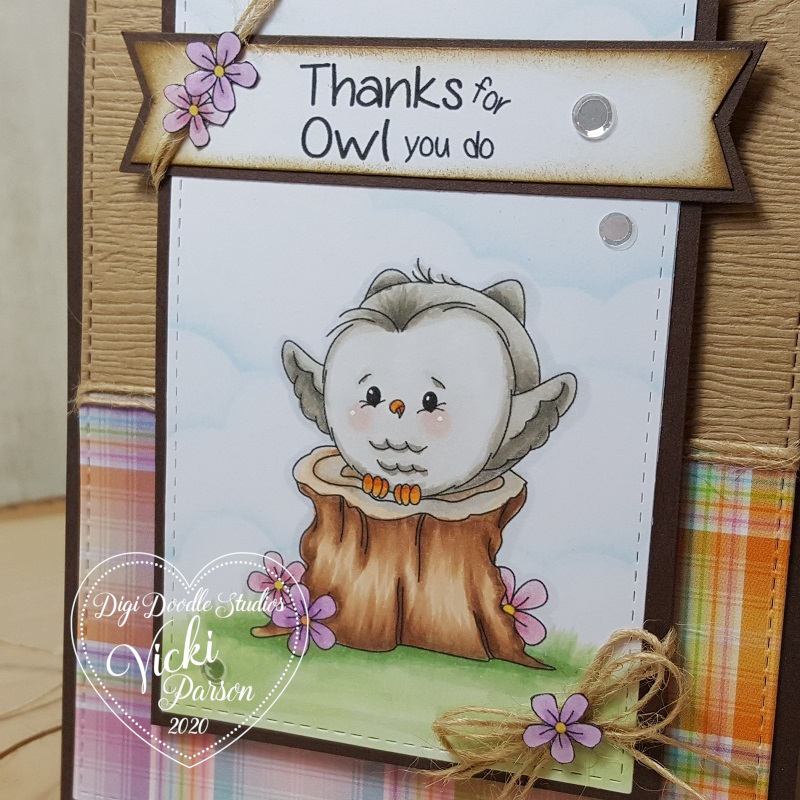
As you can see, I’ve taken the flower image and sized it differently and arranged it around the stump for the scene. I’ve also used it to cut it out separately to attach to the twine next to the sentiment as well as the twine bow at the bottom.
I’ve printed out the sentiment, cut it out and then cut the fish tails on each end and ink blended with brown ink around it. I’ve matted it with the same brown cardstock that I’ve layered the image panel on and it’s also the base of my top folding A2 sized card.
I’ve pulled out some textured woodgrain cardstock as well as the Spring Plaid papers from my Lawn Fawn stash. I thought the woodgrain and Spring-like colors worked well for this cute owl. I’ve finished it off with some clear sequins.
Here’s a closer look at the coloring I’ve done on this cutie! I’ve used the W tones to color him in and then the E20s to color the stump. I also end up going for the G24, G21 and G20 for coloring my grass. I love the bright Spring green it gives I think. I highlighted his cheeks and eyes with a white gel pen.
You can also see a subtle cloud line behind him. I’ve used the MFT Cloud Stencil with my ink blending tool and Tumbled Glass distress ink to create the background.
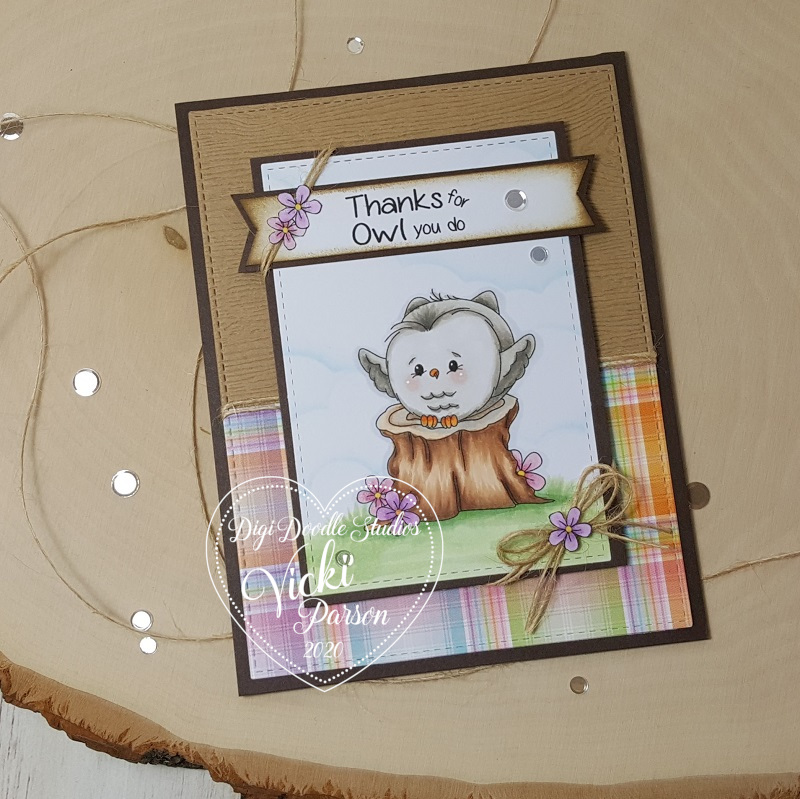
You can see that I’ve wrapped some twine around the center of the card where the two different papers meet as well as wrapped around each corner of the image panel. This is where I decided to add the cut out flowers on each end.
I feel like this owl with my arms open and ready to take in all of Spring when it comes and thank Mother Nature for bringing it around! LOL! How about you?
Thanks so much for stopping in today my friends! I’ll be seeing you soon! 🙂
Hello friends! If you live around my area, then you know that it’s in full swing Winter Weather time! We do have snowflakes in the forecast for tomorrow, but hopefully it’s not too bad!
So while we’re thinking of snow, I thought this would be a great time to share with you all of the winter style cards I’ve made using a brand new subscription card kit that I’ve got going from Pink and Main. So grab a cup of your favorite beverage and enjoy some crafty winter inspiration!
So my first card kit from Pink and Main was the December 2019 Winter Wonderland Crafty Courtyard Box which is no longer available, but they have this month’s box out which I will I get soon! Here’s what I’ve made for the December box:
Yeah, I know! That’s a lot of cards, right?! I was surprised myself how many cards I was creating from this kit and I could’ve just kept going as I still have plenty of supplies left! I needed to make a few more cards to send out after Christmas for the ones I missed and send out thank yous…so this came in handy actually!
P.S. Every single one of these cards were completed with an envelope too! (So far so good on my New Year’s Resolution! Yay!)
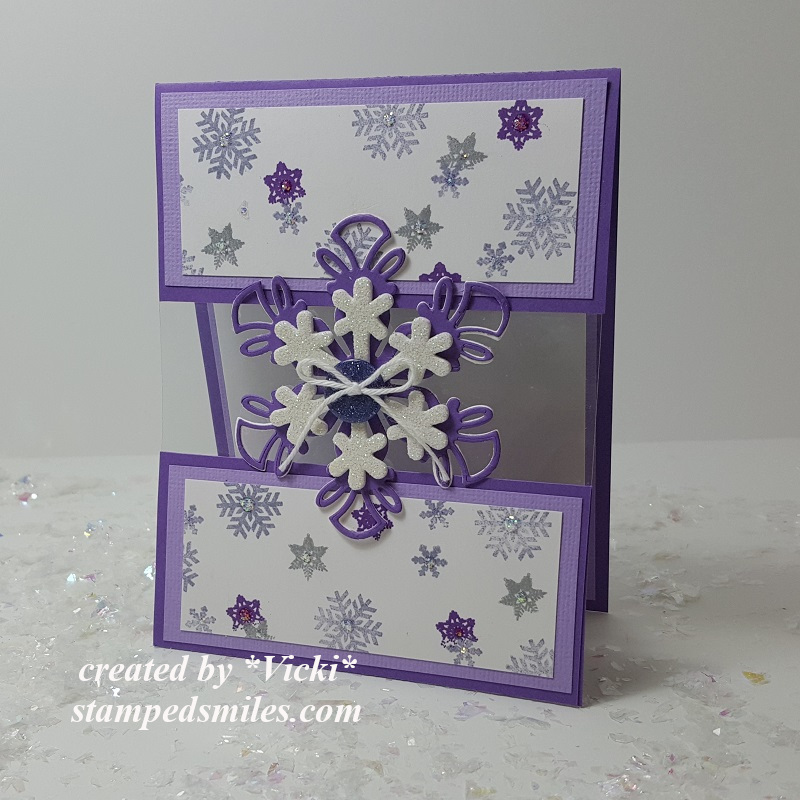
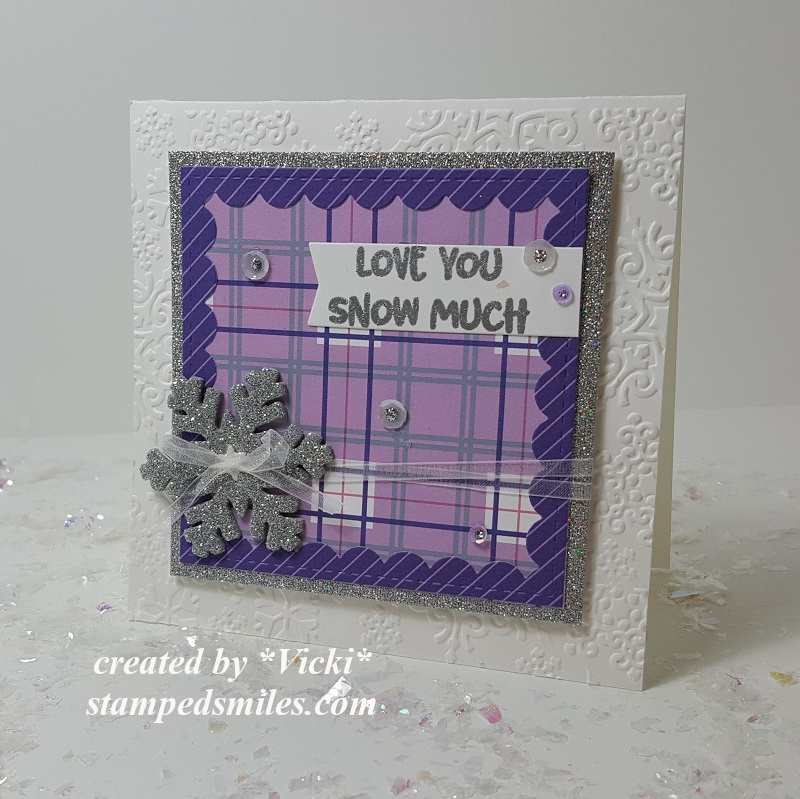
My first card here is a “see through” design using acetate for the center of the design. I have used a Bold Snowflake die from Pink and Main NOT included in the kit, but overlayed it with another foam snowflake and button that WAS included in the kit.
I stamped snowflakes from the stamp set in the kit and added some “dots” with Stickles over the design too.
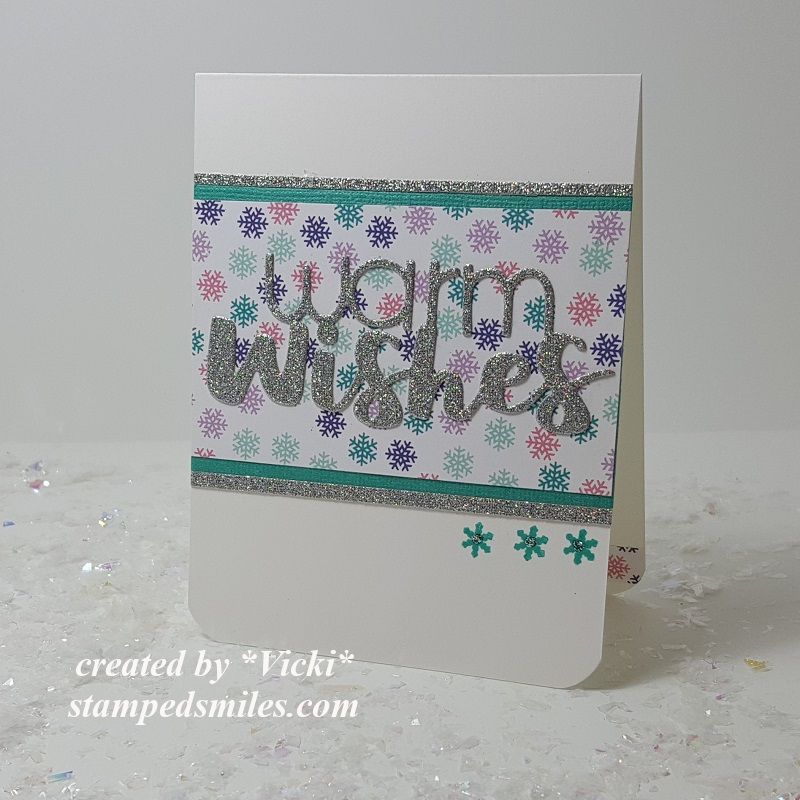
This card was pretty simple, but I love it! I’ve used the sentiment die that was included in the kit and die cut it with the sparkle cardstock from the kit as well as the pretty snowflake papers. All I did was stamp 3 snowflakes and added another dot of Stickles to the centers. I chomped the corners at the bottom and done!
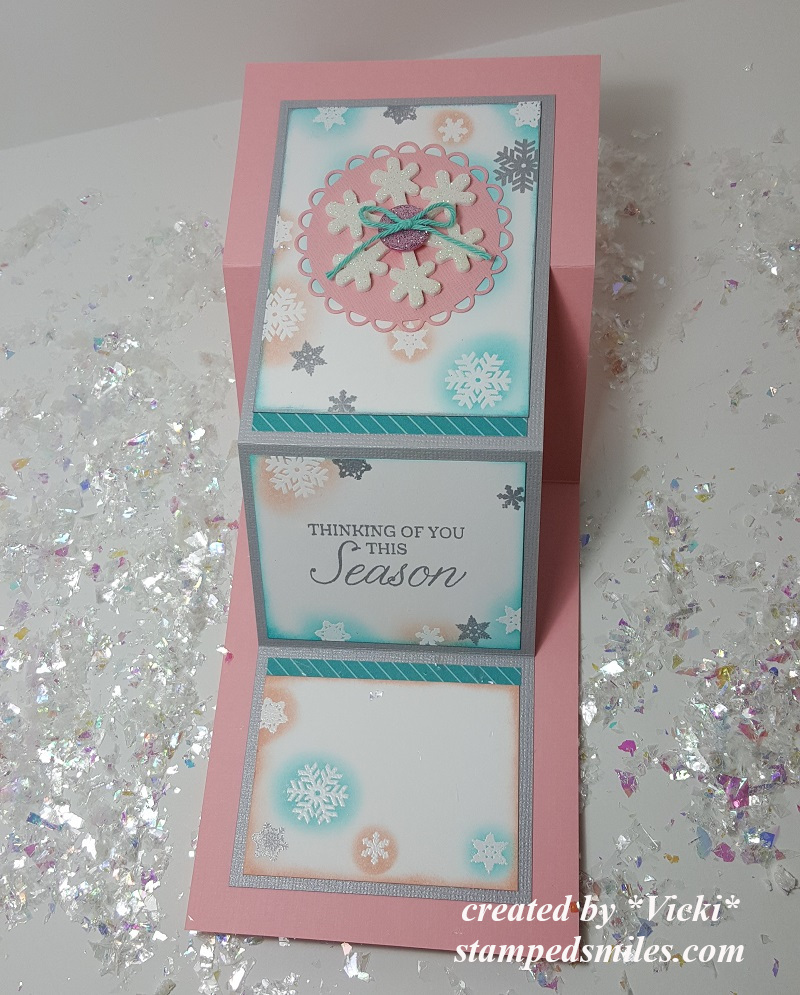
For this particular card, I’ve decided to make a ‘Z-fold’ card design and if you’d like to know the measurements and/or how to see one put together, then please check out my video tutorial on it here – “Coffee Style Z-fold Gift Card Holder“.
This is how the card folds closed. It folds down to an A2 size. I love how the colors look on this one! Everything on this card except for the greeting on the inside was from the kit.
So I wanted to use lots of those papers from the paper pad included with the kit and they were double sided so I had even more choices to deal with! LOL! I decided to make square panels for my layout and use those sparkly silver snowflakes from the kit to place over top. I heat embossed the sentiment from the stamp set at the bottom.
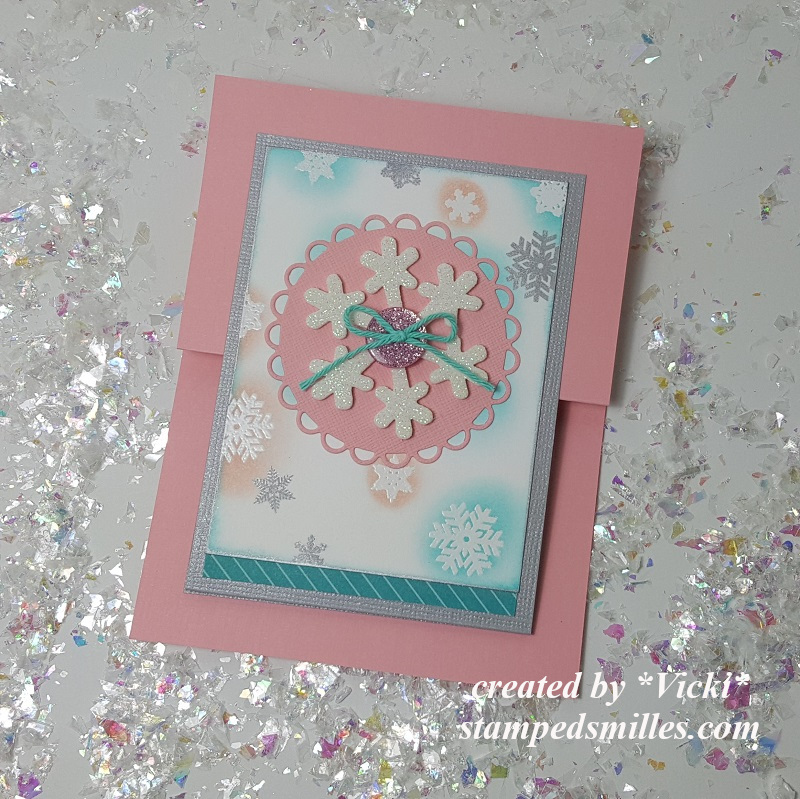
This card was just destined to be a square design. I wanted to use my Reverse Scallop Square dies from Pink and Main for this one. I’ve also used papers from the kit as well as the silver sparkle paper and snowflake. I took a snowflake embossing folder fort he background. I used sequins from the kit and filled the centers with more of that silver Stickles. (I got a bit of the prop over my sentiment there. LOL!)
I wasn’t finished using that “Reverse Scallop Square” die set, so I took it to die cut some embossed snowflakes and layer them over some of the papers from the kit. The middle of the card has a strip of the awesome translucent tape included in the kit. I covered the middle of the snowflakes with a rhinestone and pop up the embossed sentiment with foam tape over the tape.
And this last one was hubby’s favorite. I took the largest image from the stamp set in the kit and heat embossed it over a watercolor panel. Then I took some Distress Oxide ink spritzed with water over a glass mat and brushed them over it and splattered some with with a brush as well. I die cut the sentiment from the die included in the kit with the sparkle paper in the kit and finished the design with more sequins filled with Silver Stickles.
I had “SNOW” much fun with this kit and creating these cards! I hope you’ve enjoyed it as well and have been inspired in some way!!
Thanks so much for stopping in and I enjoy seeing what you have say! I loved reading all of your New Year’s resolutions and NOT resolutions too! LOL!!
Hello friends! Hope you’re having a great week so far!
Today starts a brand new challenge over at Cute Card Thursday and the theme for this week is “Sentimental“. We look forward to seeing your interpretation with your creations for this challenge!
Here’s how I’ve interpretated the challenge this week:
I really love sentiment stamps and sometimes they just seem to get used when you need to add a sentiment with your design. I actually like to use them as not only the focal point of a design, but I like to also use them for backgrounds!
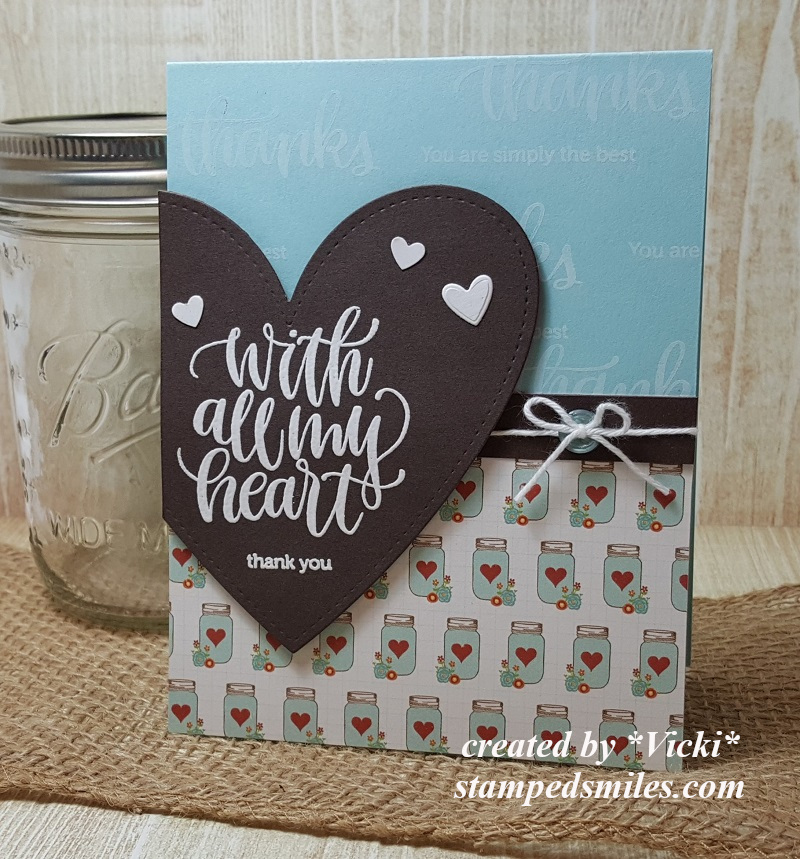
For my card today, I have used an older Simon Says Stamp card kit. (Nov 2016) I really loved the font and the wording in this set and the different sizes that you can mix together. The images are from the SSS Thankful Heart stamp set.
I started by stamping two of the images from the set with white ink over the A2 sized top folding card base and then added some papers from the card kit on the bottom portion. I took a piece of white twine around the center of the card and added a button and bow.
The heart was die cut from a piece of cardstock from the kit with a stitched heart die and then I white heat embossed the sentiment and added some craft foam behind it before attaching it to the card. I’ve also added a couple of hearts that were cut from white cardstock.
Very simple card, but a good one to have on hand for someone! I hope you’ve enjoyed it and please be sure to join along with us this week!
Thanks so much for stopping in and I’ll see you soon!
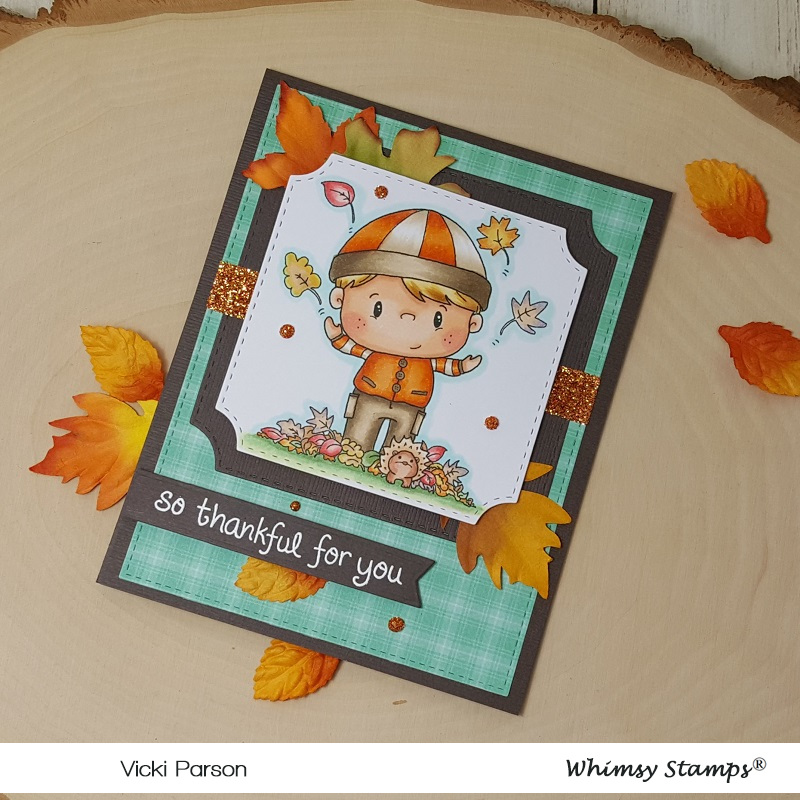
Hello friends! Can you believe that Fall is right around the corner already?! I so look forward to this every single year! What’s your favorite Season? Fall is my favorite season and I just love everything Fall related! I’m excited to share this really cute and fun Autumn style card with you today using some Whimsy Stamps products!
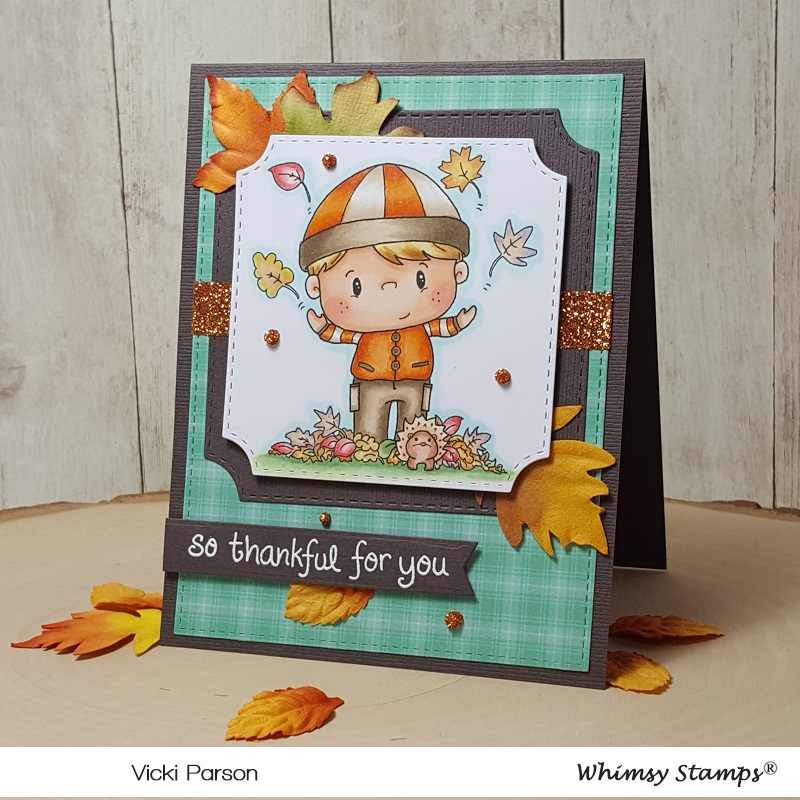
I think he’s just having too much fun in the crisp cool Autumn air, don’t you?! This is Russell from the Whimsy Stamps August digital release just in time to start your Autumn makes! I can picture him colored up in all sorts of fun Autumn colors, right?! I’ve colored him up with Copics over some X-Press It Blending Card. (See photo below for Copic list details.)
After coloring him, I’ve cut him out using the Whimsy Stamps Notched Square dies and then cut another piece of brown cardstock to layer behind him. I took some fun plaid papers for the background that was cut out with a rectangle stitched die. Then I took another piece of the brown cardstock and white heat embossed a sentiment from my stash that was cut out with the Whimsy Stamps Quick Strips die set.
I took the plaid background and the brown layer behind Russell and attached them together. Then I took a strip of score tape and wrapped it around both of these layers. I sprinkled some pretty Autumn colored glitter over the tape and burnished it in. Then I glued the leaves down and then popped up the image as well as the sentiment banner with foam tape. To finish it off, I took some dimensional glue to create small “dots” randomly on the design and then I sprinkled some more of the same glitter I used for the strip over them and let it dry. A little glitter never hurts!
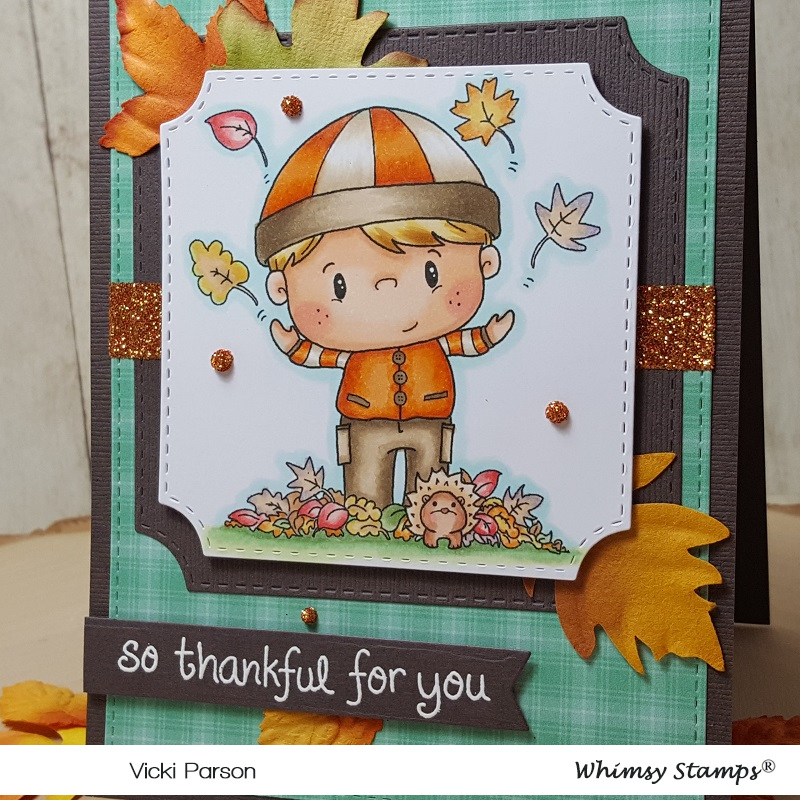
Here’s a closer look at Russell and how I’ve got him colored up. Here’s the Copic markers I’ve used to color him with below:
This was a really fun card to put together and color up! Now I’m excited for all things Fall coming soon! I hope you liked my card today and inspired you in some way!
Thanks so much for stopping in! I’ll see you soon!
I’d like to enter this card for the following challenges: