What? It’s Christmas Already?!

Hey there friends!  Wow, so my last post was Thanksgiving and I pretty much missed the entire month of December it seems like, right?!  It has been a very crazy month with lots of different things (including personal) going on so pardon me for going MIA!

I HAVE been working on some projects here and there and I would be happy to share those, but for right now, let’s focus on the Christmas projects that I’ve been working on getting ready for the up-coming Holiday next week! 
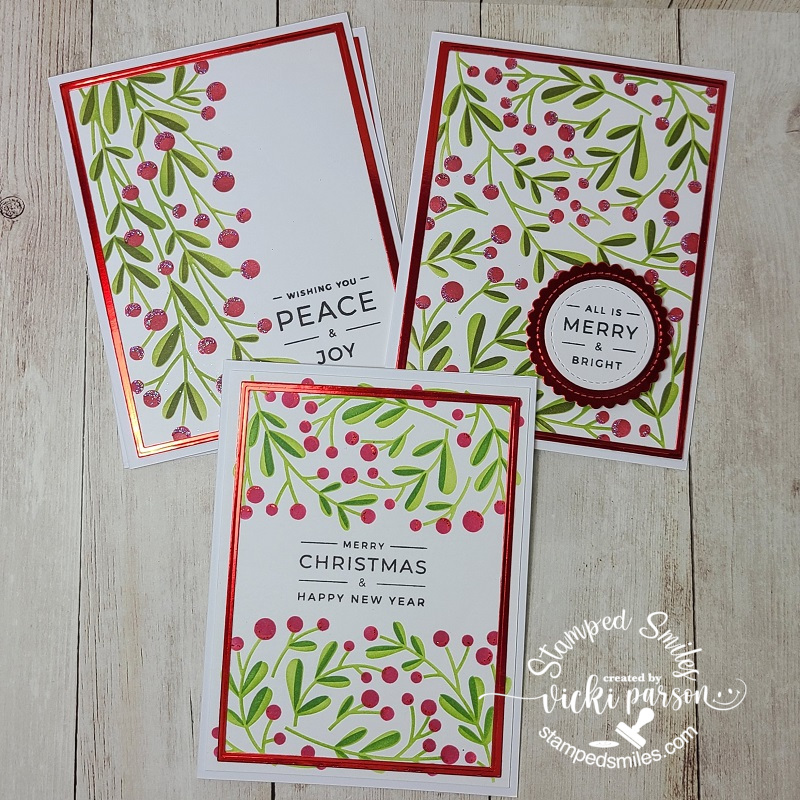
I have already sent out my Christmas cards, thank goodness, as I wasn’t even sure that was going to happen either!  I was very impressed with the new Taylored Expressions Create-in-Quads Mistletoe Layering Stencil and how quickly I was able to knock out 4 card panels at a time, which was a huge time saver to get my Christmas cards finished up!  There is actually a set of 4 designs here (like shown below), but I was in the middle of addressing the cards and forgot to photograph some before shoving into envelopes! LOL This set was using the white cardstock with the green and red colors which turned out very pretty.  I also used the red glitter paste for the highlights on the berries.
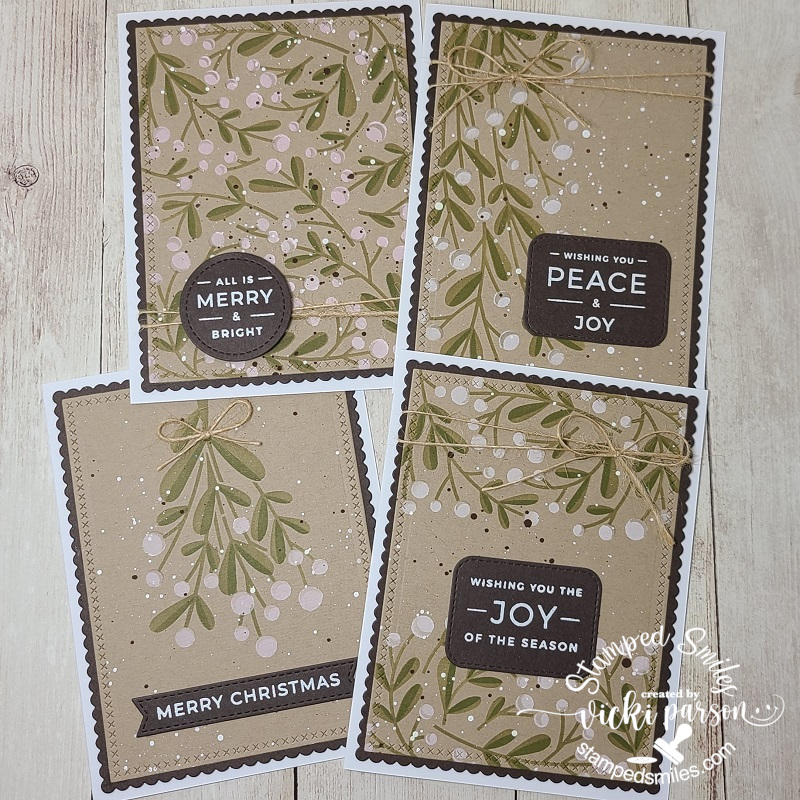
And here is the other set of four cards that I made using the Toffee colored cardstock with green and white inks for the stenciling.  I’ve also splattered these with brown and white paint.  The sentiments were white heat embossed over some TE Chocolate Truffle cardstock and cut out with some MFT dies.  Before attaching to the pre-made white A2 card bases, I also wrapped some twine around some of the panels or added a bow with it. (I love the homespun look of the white mistletoe!)

These all turned out great because they were pretty much flat and fairly easy to mail off.  I think I was short just a few which is where I’m glad that I still have a few extra cards that I had made throughout this year and I have previously given out some “extra special” Christmas cards earlier in the year as well.  I think you may have already seen them from a previous post…I will have to take a look and see under my “Christmas” section!

If you’re looking for a last-minute Christmas gift/tag, these wood slice things are so quick easy and fun to create!  I’ve had a huge box of these wood slices for a long time, so I pulled one out to make a project for the Inky Stamper December challenge on FB.  I had hubby drill out a hole for me at the top before decorating so as I knew where to put everything.

I’ve used the Inky Stamper Christmas Bauble stamp set for the stamping on the wood and colored in with pencils and gamsol.  I’ve added details with a glitter brush pen on the ornament and added some snowflakes with Nuvo White Crystal Drops.  I had to mask the frog to stamp the Santa hat on him.  I’ve used some silver twine for the hanging portion and then I glued a silver bow with some silver ribbon from my stash under the hole.
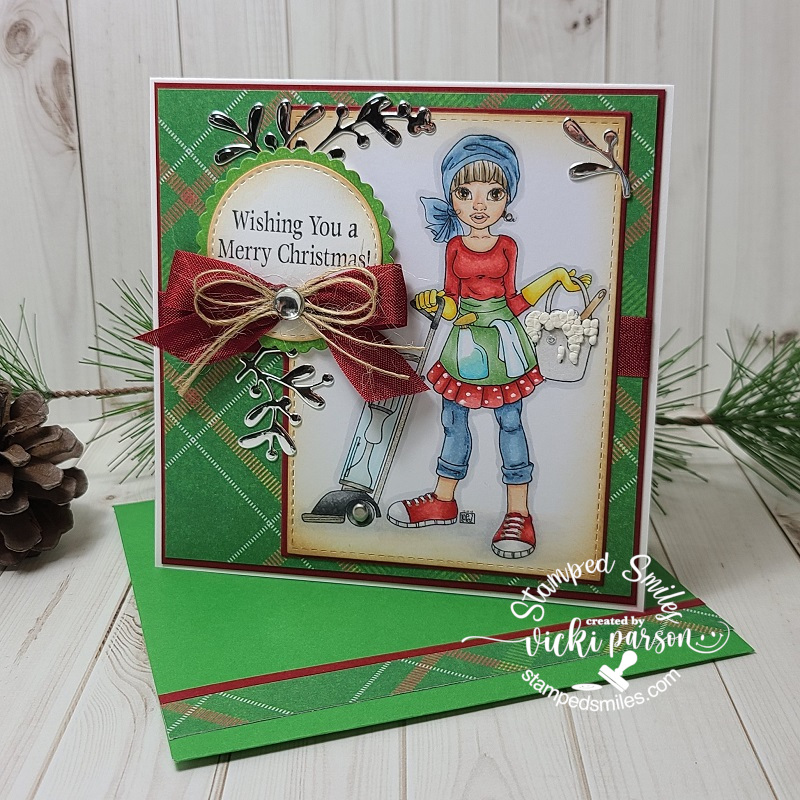
And lastly, I’ve also been working on some commissioned cards as well!  Last year, I had a request from someone to create a special Christmas card for his cleaning lady.  I had him pick out an image and asked about the colors…you may remember it as I had posted it last year.

a few months back, someone had asked me to re-create the same design for them with pretty much the exact design with the exception of the sentiment which I changed out for this person.  This one went to another country and I was concerned about the shipping costs, but it was not a problem.  The package had taken an unexpected journey because of the crazy mailing system going on at this time, but it arrived eventually and was in “perfect condition” as reported to me, so I was so thrilled with that and they seemed very pleased with it.

With the square size of the design (5″ x 5″), I’ve handmade the envelope for this one as well.  I found the exact papers used in the designs for these cards, but I don’t think I have any more left after completing this one.

Here’s how I’ve decorated the inside of the card and left blank as requested for their own personal use.

So now, I just want to take this time to say THANKS SO MUCH for hanging in there and stopping in today!  I don’t have too much time on my hands right now as I’m getting ready to make some Christmas treats and the Holidays will soon be over.  I hope you are all doing well and I wish each and every one of you a very safe, happy and healthy Holiday Season!
See you again in the New Year 2022 friends!!

What’s Up With Washi and Camping Fun!

Hello friends!  Hope you’re having a great week so far!  Today, I have some cards I made for my GDT month at Inky Stamper using washi tape!  I have loads of washi tape because I have a “squirrel moment” when I see it and think how pretty…and it’s not that expensive and easy to craft with and whatever excuse I can come up with!😁  Then it sits around unused!  

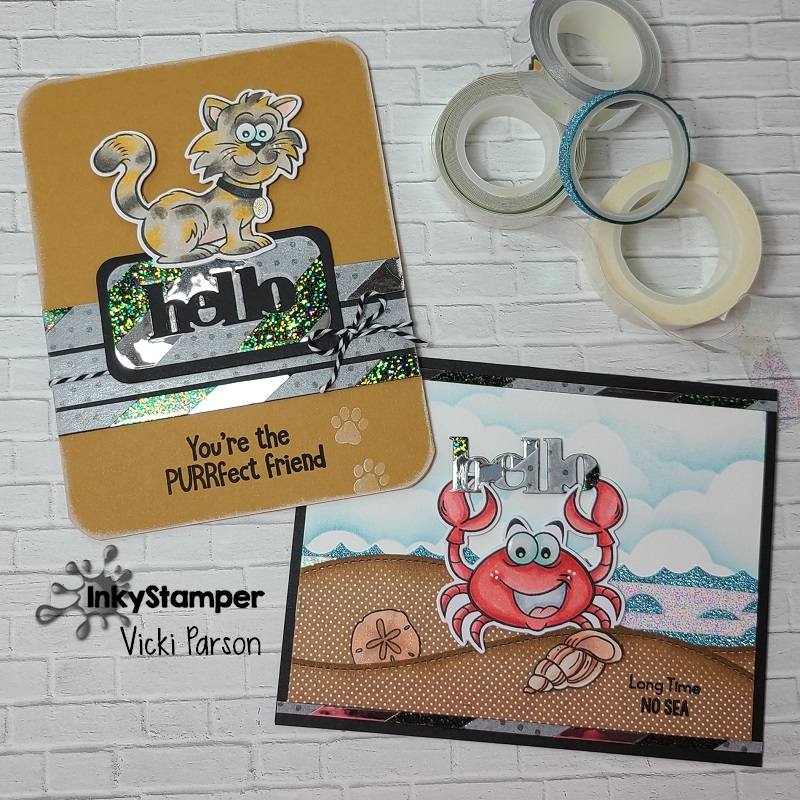
This is why I’m glad that the “Washi Tape Challenge” came up for this month in the InkyStamper Inkspiration FB Group!  You just need to use at least 1 Inky Stamper product and your washi tape…any you have!  I decided to go for 2 cards:

For both I cards, I took a scrap piece about 4.25″ x 5.5″ of black cardstock and covered it diagonally with 3 different types of washi tape.  One was from the Inky Stamper Doodlebug Lily White Swiss Dot washi tape, another from some metallic shiny silver washi tape and another from some clear sparkly washi tape in my stash.  The white turned up almost grayish over the black and the clear sparkle turned up differently as compared to it on the crab card in the background over white cardstock.  I thought it was cool the different looks I got with it.

I then decided to use some dies to cut it out with and then cut the remainder in different sized strips for my cards as well so I wouldn’t have to waste the rest of it…

Vicki-InkyStamperGDT-Washi Challenge-cat

For this card, I took a “hello” die from my stash and cut it out of the washi tape piece I created on the black cardstock piece.  I then cut out the “negative” sentiment with a rounded corners rectangle die and layered another piece of black cardstock behind it that was cut out slightly larger and popped up over an A2 card base that I’ve also layered with more of the washi tape strips I cut out from the left over.  I added this cute kitty from the Inky Stamper Cat stamp set along with the sentiment at the bottom.  I thought it would be fun to add a couple of paw prints at the bottom in white ink from the Inky Stamper Dog stamp set.  Lastly, I thought it needed some Doodlebug Twine too!

Vicki-InkyStamperGDT-WashiChallenge-crab

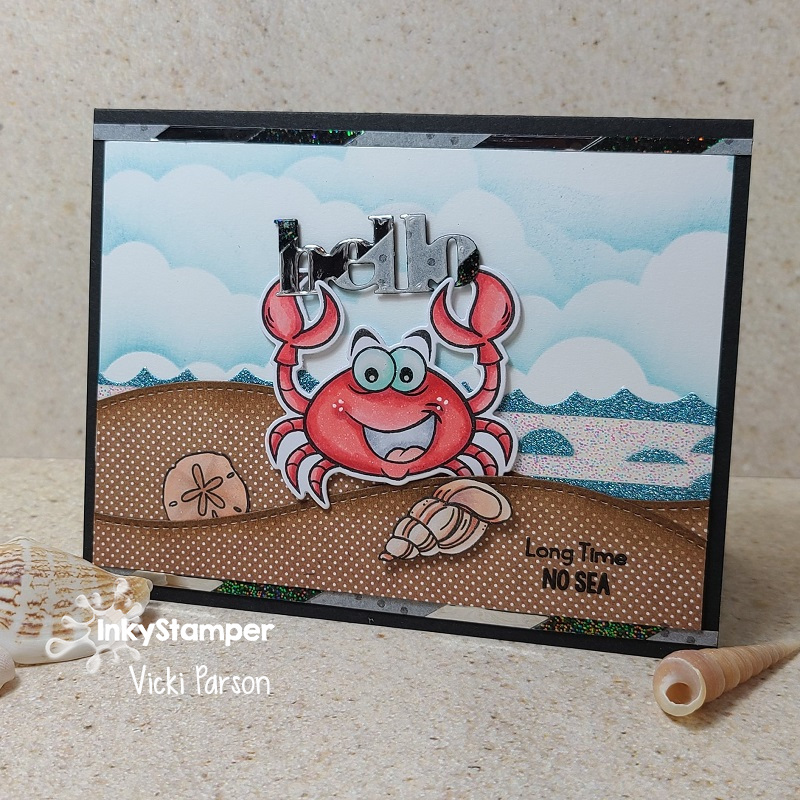
And for this card, you see that I’ve taken the die cut “hello” sentiment from above and added it to the crab’s claws to hold up in the air…so fun!  I still had a couple more left-over strips from above and added that to the top and bottom of the scene I’ve created on this card. 

So, for the scene, I’ve used the cute Inky Stamper Crab stamp set along with the sentiment at the bottom.  The sparkly looking “sea” in the background comes from a couple of different glitter washi tapes I had in my stash.  I then used a border die cut to cut it out to go across the card front.  Die cut some waves for the sand and tucked in all of the stamped and colored elements over a stenciled cloud background.  I added this card front scene to an A2 sized black card base.

How about you?!  Do you hoard your washi tapes?  I sure had fun playing around with it making these cards and I think it’ll be fun to sit and play some more with it as I have so much of it!  I think it was fun to die cut too! 


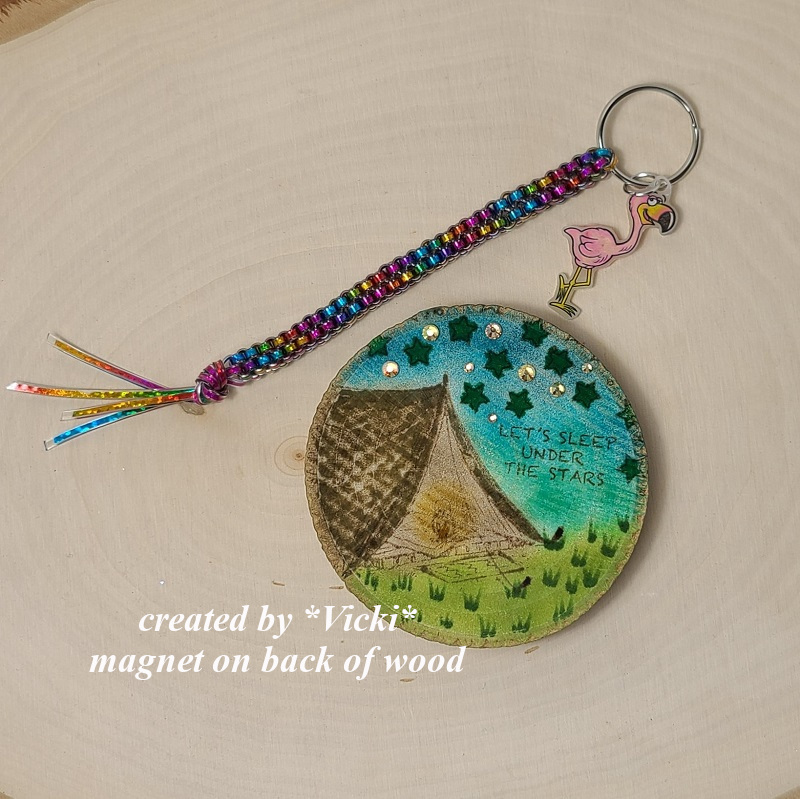
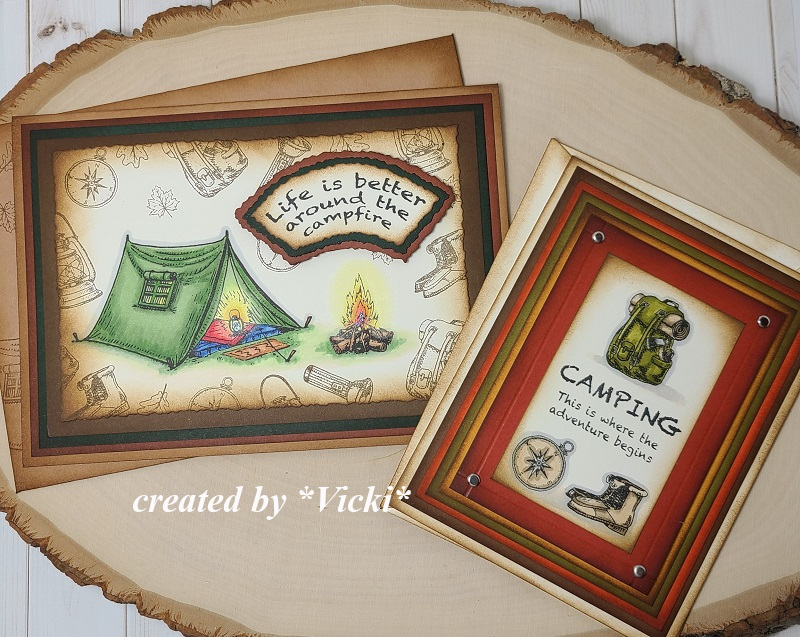
Just wanted to share some projects with you I’ve made this past weekend from a Craft Camp that I went to with Inky Stamper.  We made lots of fun projects: (click on photos to enlarge!)

Thanks so much for stopping by today!  Really hope you’ve enjoyed my washi tape cards and you can come join in the challenge with us this month!  Have an amazing crafty day!

Challenges:

  1. Aud Sentiments – Anything Goes + sentiment
  2. Allsorts – Add some sparkle 
  3. Sweet Stampin’ – Feature an animal
  4. Lil Patch of Crafty Friends – Anything Goes
  5. Crafty Sentiments – Anything goes

Lawn Fawn Friday

Hello friends!  Yay, it’s Friday!  I have lots of fun Lawn Fawn “goodies” to share with you today and although it’s still a bit warm over my way, I am in the mood for Fall, how about you?  There’s nothing better in the Fall, for me, than a warm apple cider donut that we get every year from an apple orchid we like to visit each Fall!  It had me thinking of the current challenge going on…

Vicki-LF-FallTreats

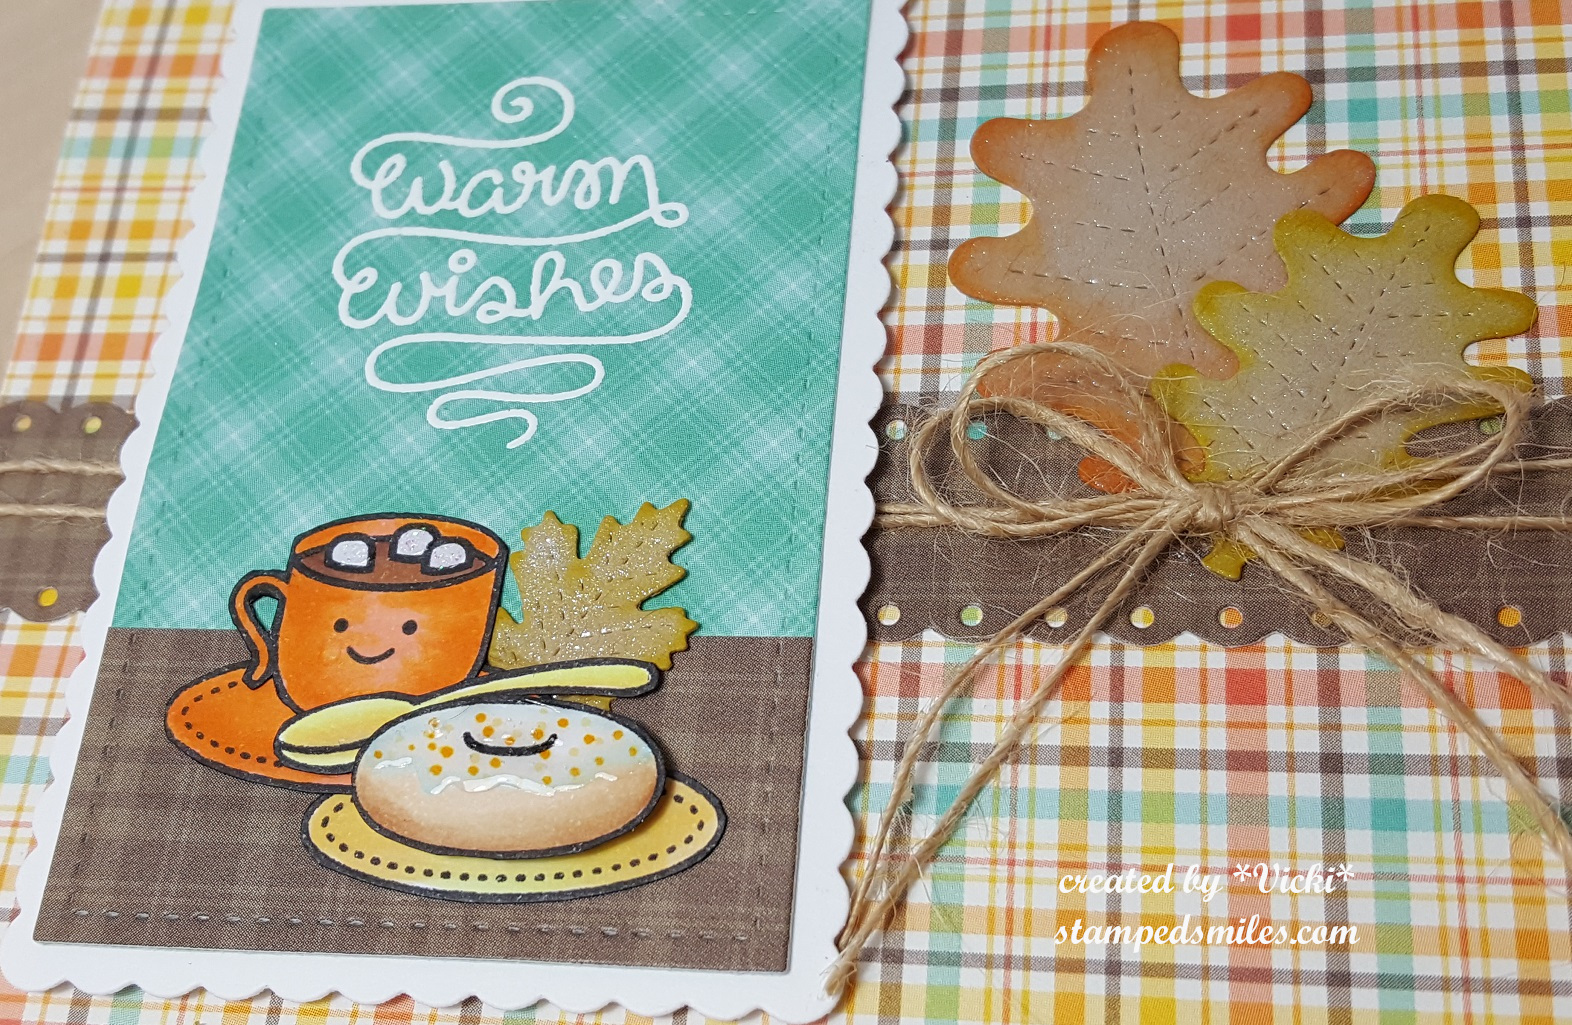
It may be a bit of an oldie, but a goodie to me and I really enjoy using it!  I have pulled out my LF Love You a Latte stamp set to base my card for today.

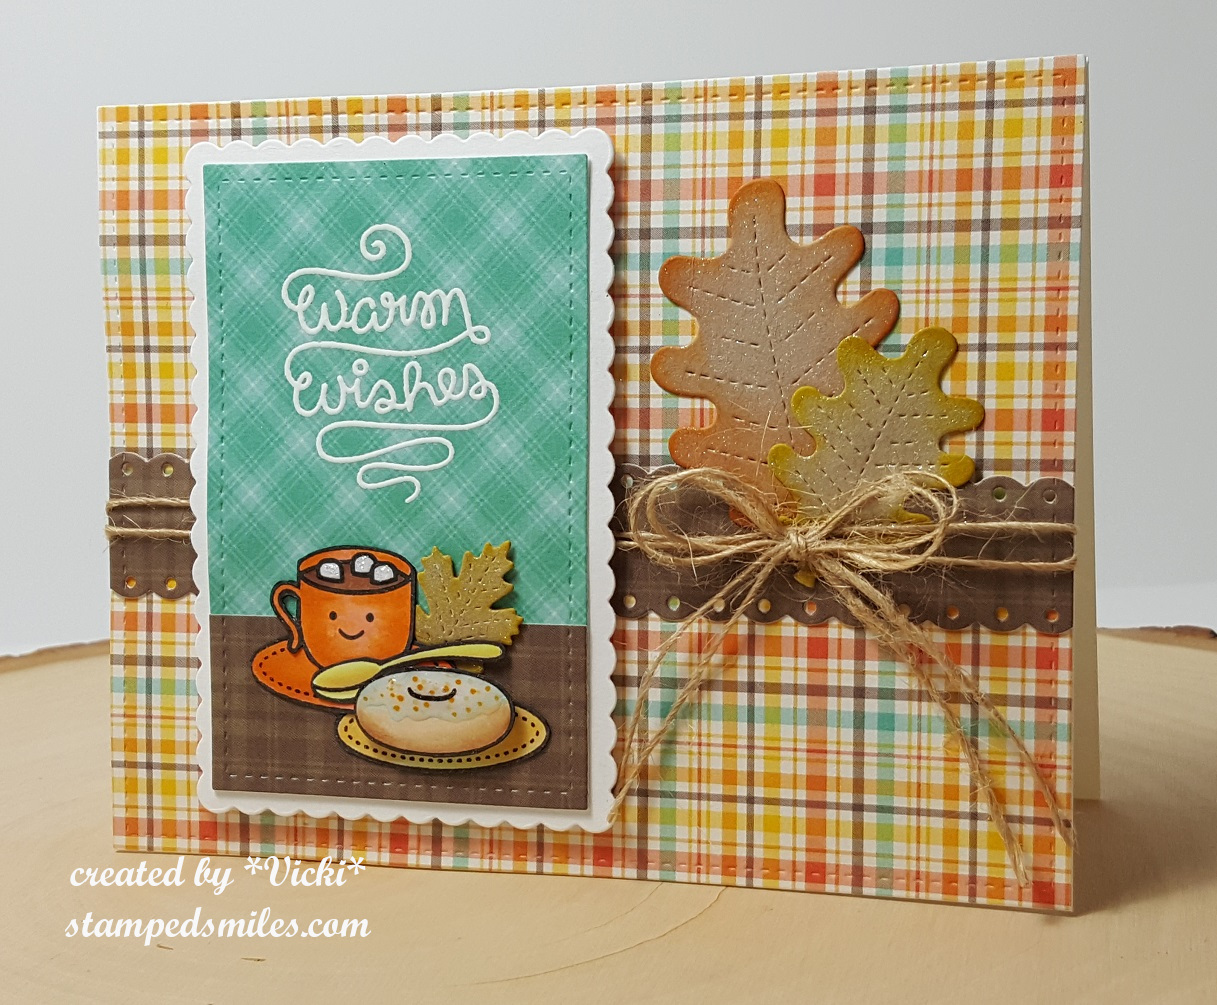
I started with a white A2 sized top folding card base and added a piece of (now retired) “Perfectly Plaid Fall” mini paper stack that I’ve cut with the LF Stitched Rectangle die along with the pieces used on my image panel also cut with the same die set.  I layered that onto a white piece of cardstock that was cut from the LF “Scalloped Rectangle die” (Looks to be retired too!)  I have taken a strip of the plaid papers and used the LF Valentine Borders die to cut the edging on it.  I then wrapped some twine around it and added the LF Stitched Leaves that were cut from kraft cardstock and colored on the edges with distress ink and a foam blending tool.  I then tied a bow with the twine and placed it over the leaves.

I colored my images, fussy cut them out and placed them over my layered paper panels and then popped it up over the plaid card base with some craft foam.

Vicki-LF-FallTreats1

Upon a closer view of the image, you can see that I white heat embossed the sentiment from the stamp set.  I also added some glitter to the marshmallows in the cup and covered the donut with some glossy accents.  I added a LF Small Stitched Leaves that I made similar to the others to tuck inside with my treats! 🙂  All the leaves were covered with a glitter brush pen.

*Be sure to scroll down below for more Lawn Fawn goodies!!*

Here are the challenges I’d like to enter this card for:

  1.  Lawn Fawnatics – Coffee, Tea and Treats
  2. Retro Rubber (RRCB94) – Anything Goes + Older Stamp(s) Mine is circa 2015
  3. Watercooler Wednesday (WWC185) – Anything Goes
  4. Simon Says Stamp Wednesday – Anything Goes

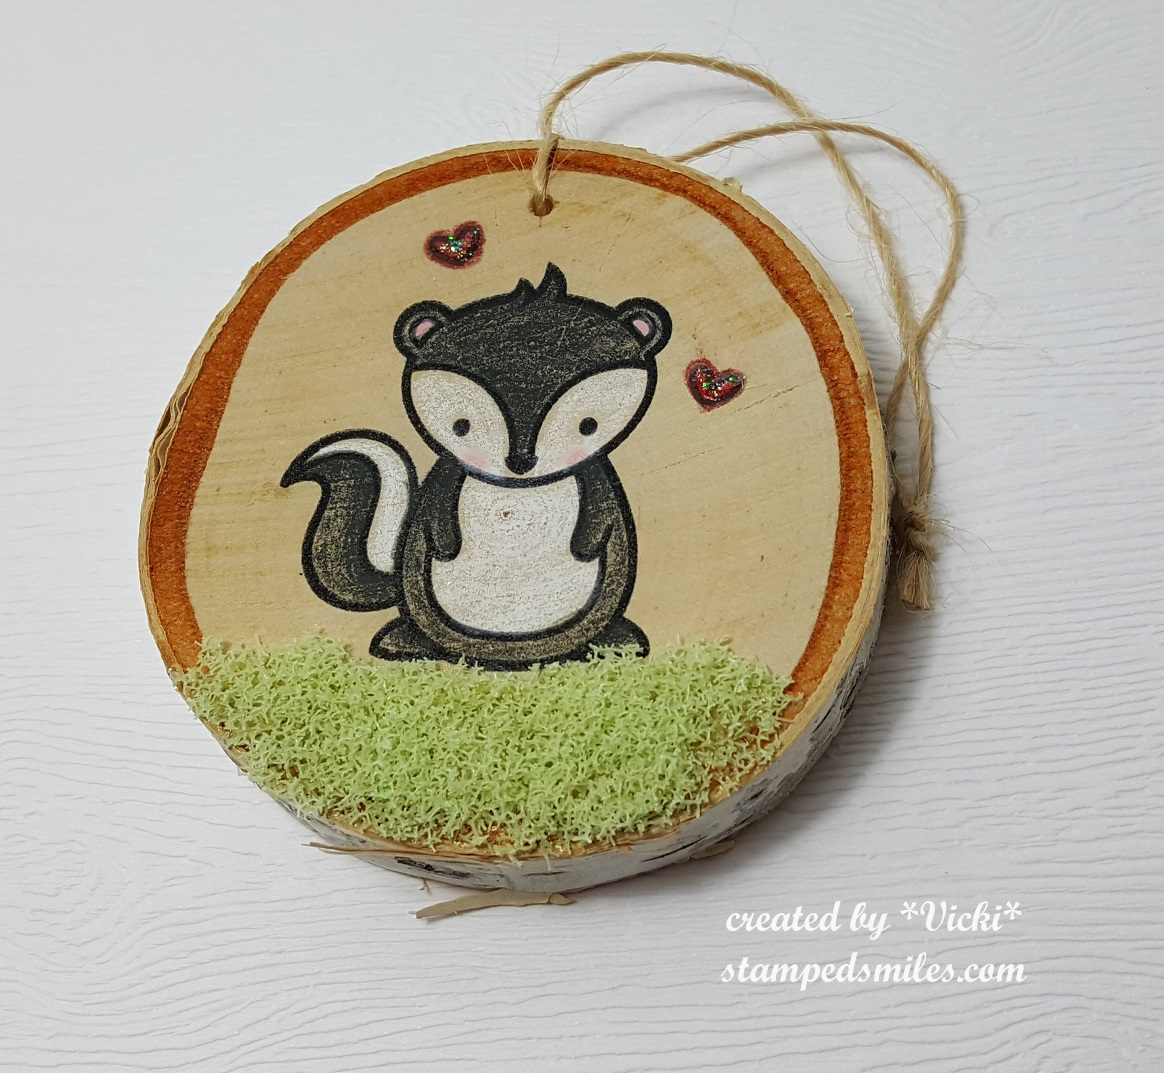
I thought this was a good place to stick in this project I made and had entered into my local county fair last month.  This particular item did not place, but the category was “Hand Stamped Item Other Than a Card”…so I created this using a Lawn Fawn stamp:

Vicki-LFSkunk-Wood Slice

I found a bag of these really cute wood slices when I was out shopping with my mom earlier this Summer at Hobby Lobby.  They seemed like a perfect size to do this with!

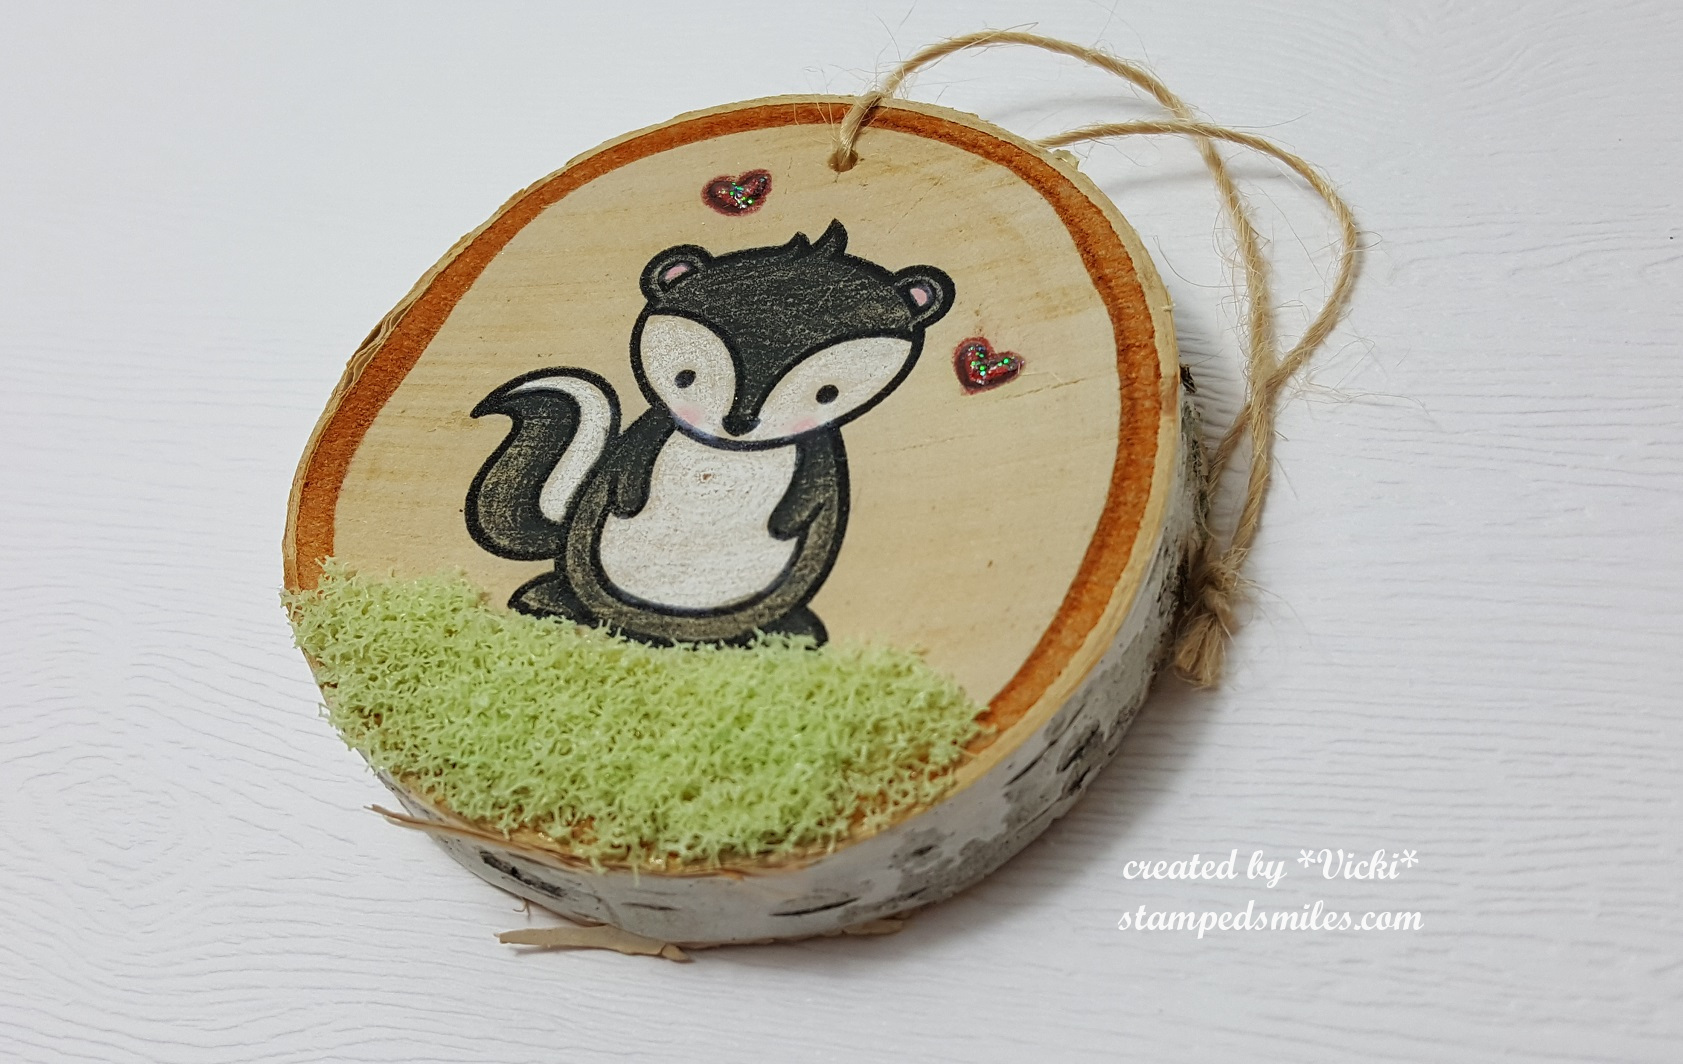
I stamped this adorable skunk from the Lawn Fawn Stinkin’ Cute stamp set and then colored him in with my Prismacolor pencils.  Of course, the woodgrain gives it some slight imperfections, but I didn’t mind and thought it gave it more character!  (See the wood knot under his chin!)  I’ve added some green “Flower Soft” for the grass portion to give him something to stand on.  I also added some glitter to the hearts above his head.  Hubby drilled a hole in it for me so that I could add some twine for it to hang.

Vicki-LFSkunk-WoodSlice1

Here I’ve turned it at a bit of an angle so that you can see the thickness of the slice and the fun texture of the bark on it.  I thought this would be so cute on a gift bag or something.  I have it hanging in my room because he’s just too stinkin’ cute anyway! 🙂

Thanks for stopping in today and I wish you all a fabulous weekend!

P.S.  Sunday I will be sharing a post with a brand-new release…so be sure to check that out too!  Bye!