Hello friends! I’m back today with one last inspiration for Art Journal Journey to remind you that there are still a few days left to enter your art journal project for this month! So please be sure to hop on over to the Art Journal Journey Challenge Blog to see the details about how to enter. I have really enjoyed all of the inspiration from the gallery! So fun to see what everyone comes up with using my “MUSIC” theme this month! I thank everyone for having me along as a host and sharing your kindness in welcoming me back this year.
I went with some animals this time:
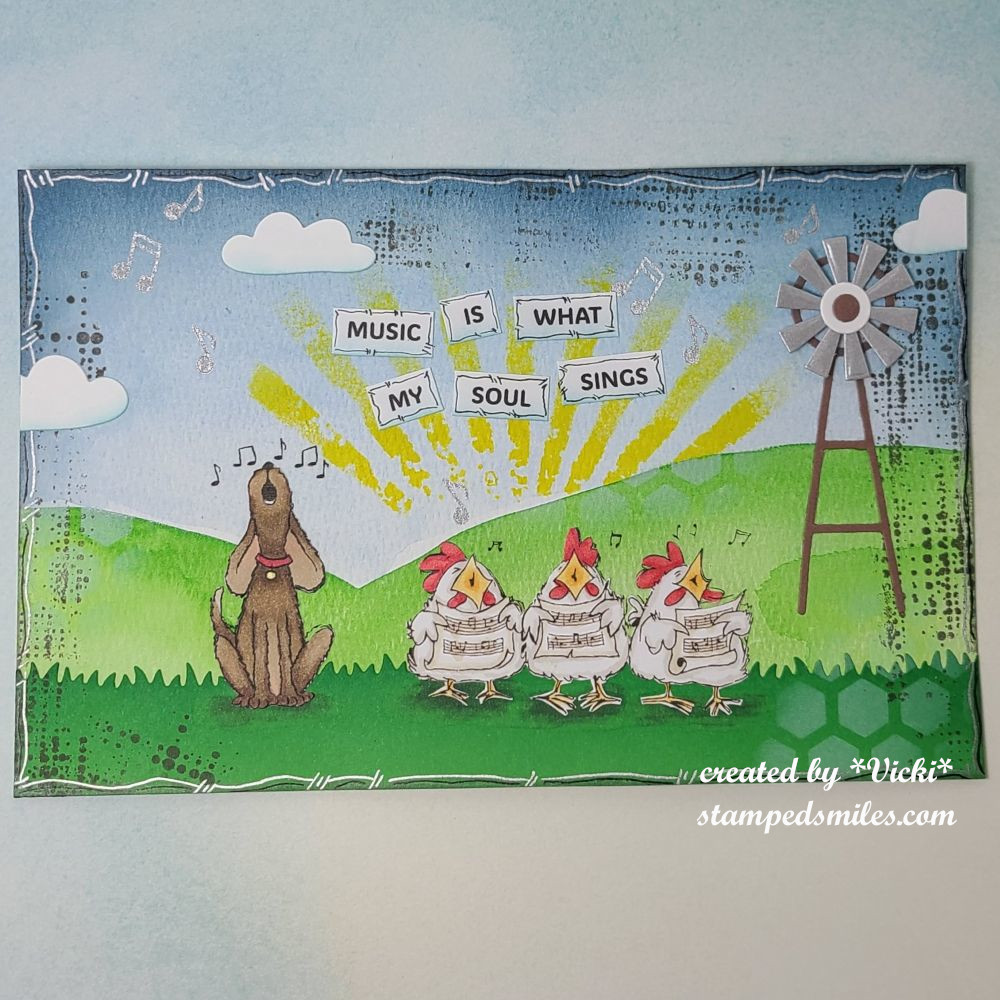
I’m pretty sure that there has to be some sort of music going on at farm too, right?! LOL I found these cute “singing” critters online and thought that a farm scene would be a perfect platform stage for them! This is also the first time that I’ve ever added an interactive element to an art journal page, so that was fun!
For the background: Starting with an 8.5″x 5.5″ watercolor paper, I printed the critters over it in the position that I wanted…this is so that the musical notes showed on the page.
I then used my Kuratake Gansi watercolors and brush to paint a scene starting with blues for the sky, letting that dry and then adding some green hills for the bottom of the scene. I went over the areas a couple of times to get the look I wanted and let it dry. I also die cut a green grassy border at the bottom of the page with green cardstock being careful to place it so that it covered the “legs/feet” of all the critters.
More layers over the background: I used older Tim Holtz stamps to add some texture by stamping brown ink, then I used an old TH stencil and some yellow paint for the “sun rays” around the hill with a sponge to apply it. I also used a sponge with white ink to stencil over another stencil in areas and lastly, I stamped some musical notes in silver ink in a few places.
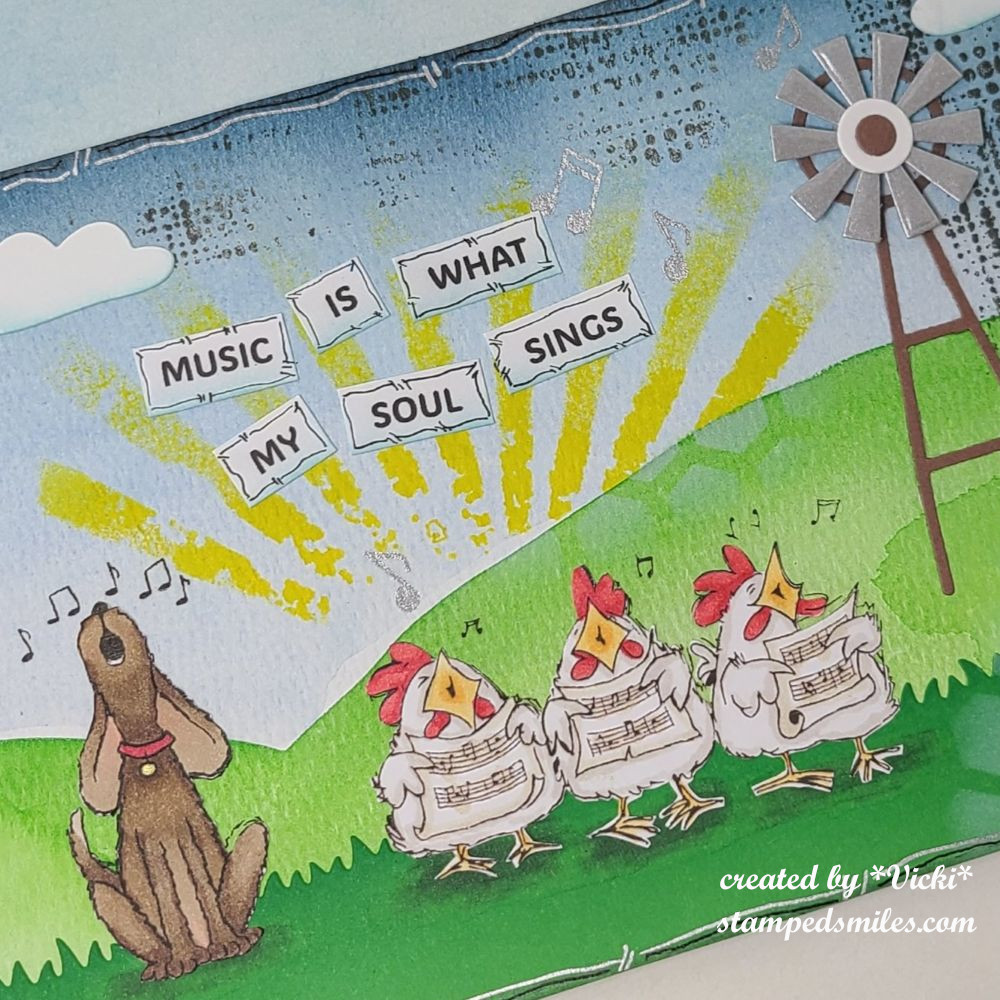
Here’s a closer look at some of the details including the critters.
Since I covered up the critters with the grassy border, I printed out the critters again on a separate piece of cardstock, colored them with Copic markers and fussy cut them out with my scissors. I attached them over top of the printed out ones on the page so that they align with the music notes above them. I used more markers to add some darker shadow grounding underneath each critter before permanently attaching to the page.
For the interactive element: I used a die cut to cut out the pieces for the windmill in the brown, white and silver cardstock pieces. I then used a circle die to cut a hole in the center of the windmill on the page and then added an element that makes the wheel portion spin in a circle when you spin it with your finger.
I went around the edges with some blue ink for the sky, attached some clouds and then printed out the quote on my computer and cut out each word attached to the page. I used some blue ink to lightly add to the bottom of each one.
Lastly, I went around the edges of the page along with the edges of each word with a black micron pen and then I used a silver paint pen to go around the edges of the page again.
It’s a pretty flat page, but it made me happy! What song do you think they’re singing?
I hope you’ve enjoyed my page today as well as my art journal inspiration throughout the month! Thank you so much for your kindness and support! See you soon!
Hello friends! It’s already closer to the end of our first month for 2025 and I hope you’re staying warm and/or cozy where you are!
Today I’m excited to share that I’ve joined the Alphabet Challenge design team! I’ve been playing along with the challenges for a few years, so this will be a fun one! Please be sure to check out the challenge blog to see how to play as we go through the alphabet letters every-other week (fortnight) for each new challenge.
For this challenge, we are at the letter “U” for Underwater and here’s what I’ve come up with:
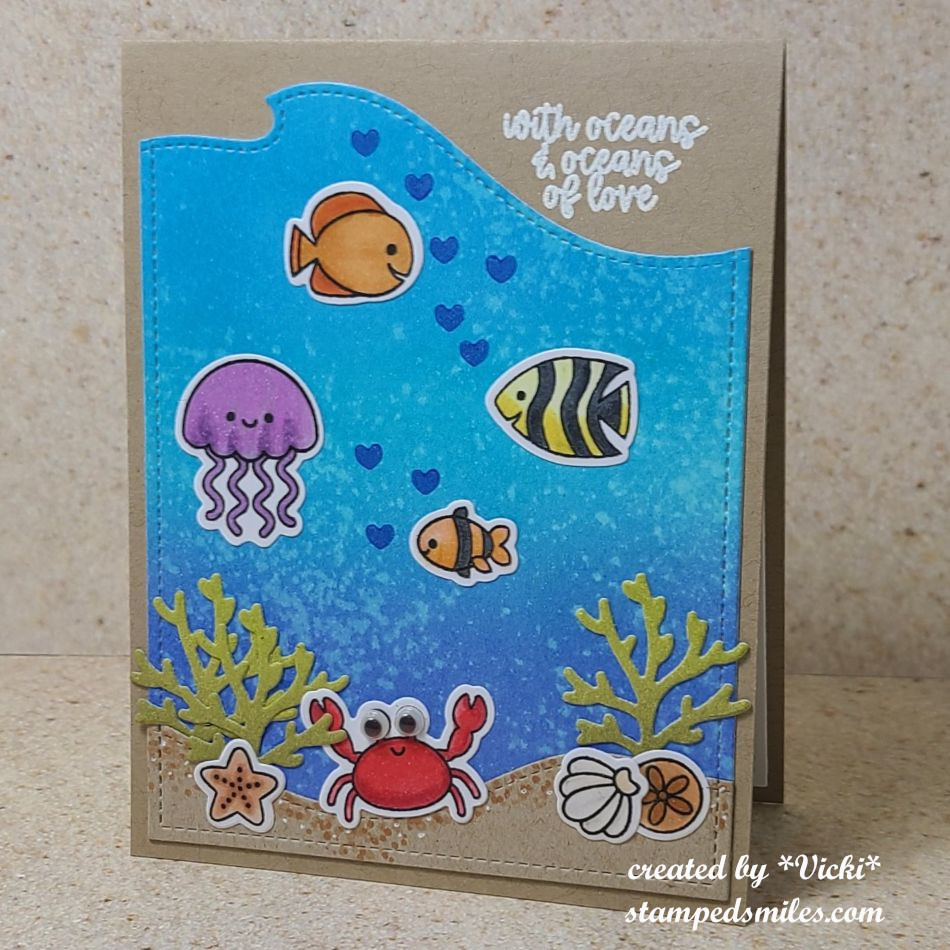
Now how cute are these smiling underwater critters?! It was hard to believe that going through my stash that I didn’t have much of any underwater critters besides mermaids, but last year I saw this adorable Doodlebug Sea Life stamp set on sale and decided to add it to my collection. This is the first time I’ve used it.
For the background: I’ve taken my Distress Oxide inks and ink blended the colors Salty Ocean, Mermaid Lagoon and Blueprint sketch over some Bristol Smooth watercolor paper. I sprayed it with water and blotted it up with a paper towel. I used a stitched wave die cut border at the top and another wavy landscape border die for the sand at the bottom with kraft cardstock. I’ve used markers and gel pens to create “dots” for the sand and then attached it to the ink blended panel. Once I had it all attached, I cut out the entire panel with a stitched rectangle die and then attached it to an A2 sized top folding kraft card base.
I stamped several of the images and colored them with Copic markers and die cut them out with each coordinating die. The “seaweed” was part of the coordinating die set that I inked over in green Oxide inks and then attached all of the images to the underwater scene.
Lastly, I white heat embossed a sentiment from the stamp set (it says: “with oceans & oceans of love”) in the top corner of the card base and stamped some blue solid hearts from the set for “bubbles”. I couldn’t resist adding some googly eyes to the crab too.
I hope you’ve enjoyed my card today and hop on over to the challenge blog to play along with us! I look forward to seeing your underwater creations in the gallery!
Thanks so much for dropping in and I’ll see you tomorrow for my monthly Art Journal Page!
Hey friends! Just poppin’ in with another card I made and wanted to get it in before the deadline ends…which I normally don’t always do!😁
I have been playing along (with the exception of the last few years) with the Coffee Loving Papercrafters “Coffee Lovers Blog Hop” which has been going on since 2014! It’s hard to believe it’s been around that long, but looking back at the posts that were shared recently for “a look back”, I had a different blog platform and there I was playing along 10 years ago! Really appreciate all of the fun that Amy has provided to us through the years as well as the many sponsors that have been apart of it.
I’ve pulled out some stamp sets from one of the sponsors (Newton’s Nook) new and older from my stash in honor of this occasion:
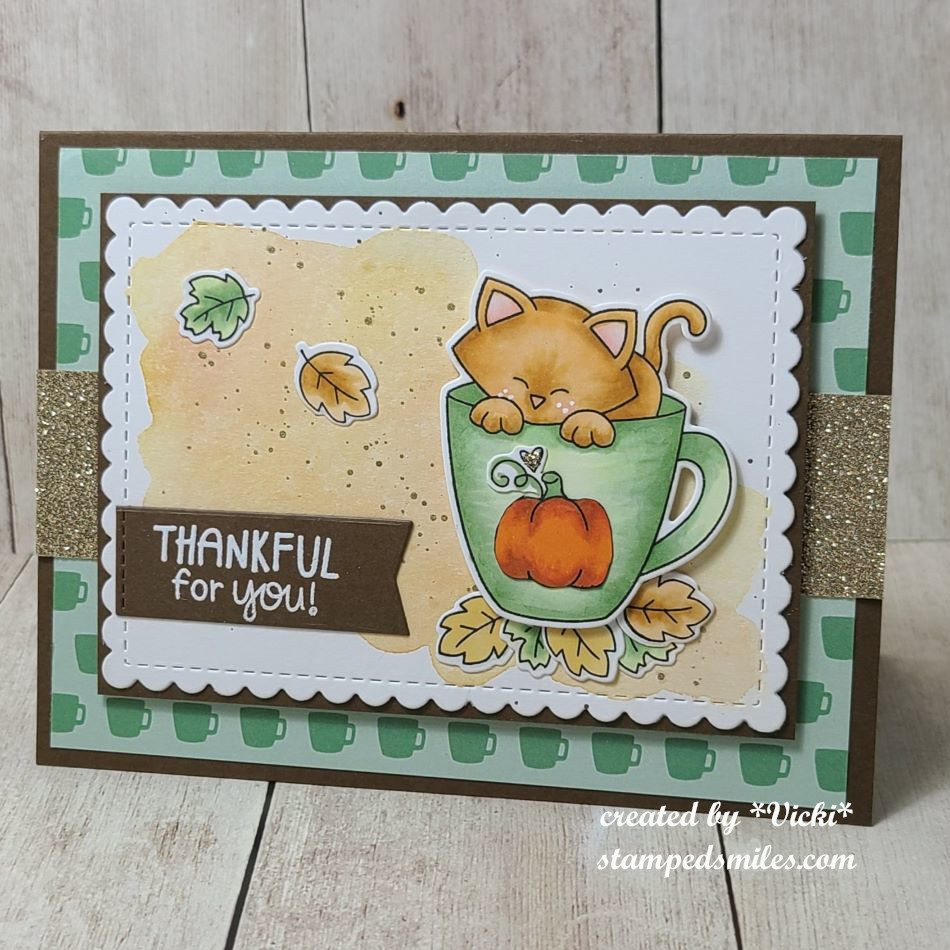
That is the cutest cup of Pumpkin Spice Latte that I’ve ever seen! I’ve used the NN Newton’s Mug stamp set with coordinating die to stamp, color and cut him out. He was popped up with foam tape over the background. For the pumpkin image on top of the mug, I’ve used an older NN stamp set called “Love a La Carte” (No longer available). I just stamped, colored and fussy cut the image to place over the mug. I also added some gold glitter on the heart above it.
For the background: I cut a piece of paper with the NN Frameworks die set and pulled out some watercolors for the background and then splattered some gold after the background was dry. I layered this over the brown cardstock. I also used a piece of that brown cardstock to white heat emboss the sentiment which came from an older STAMPtember collaboration set with NN called “Talk Turkey“. I cut it out with a banner die and attached it to the side of the scallop panel. The leaves under the mug and over the watercolor panel were from the NN Autumn Mice stamp set and coordinating dies.
I was trying to also follow along with a fun sketch from the Inky Paws Challenge (see below) and so I’ve pulled out some more papers from the NN Coffee House Stories paper pad that I thought went with the coloring on my cup and attached it to an A2 top folding brown card base. I also added a strip of gold glitter paper to bring out the touch of glitter on the tiny heart above the pumpkin.
That’s it for today! I hope you’ve enjoyed my coffee card or have been inspired to create something fun too! I’m off to check out all the other entries for more inspiration! Have a wonderful weekend ahead!
Challenges:
Coffee Loving Papercrafters – #fallwinter2024clh 2024 Fall/Winter Coffee Lovers Hop using coffee, tea, cocoa, and/or apple cider
Hello friends! November has come with the pretty leaves on the trees and the coolness in the winds. I always turn to comforting “things” this time of the year and it always gives me a sense of peace before the year comes to an end. A warm fuzzy blanket, socks/slippers, sweaters, etc. is what I usually turn to. What is your comfort “thing”?
I promised to share with you the fun things we did over at the “Inky Escape” event that I recently attended and it was wonderful to see all of my crafty friends again for laughs and fun together. I think I miss them already!
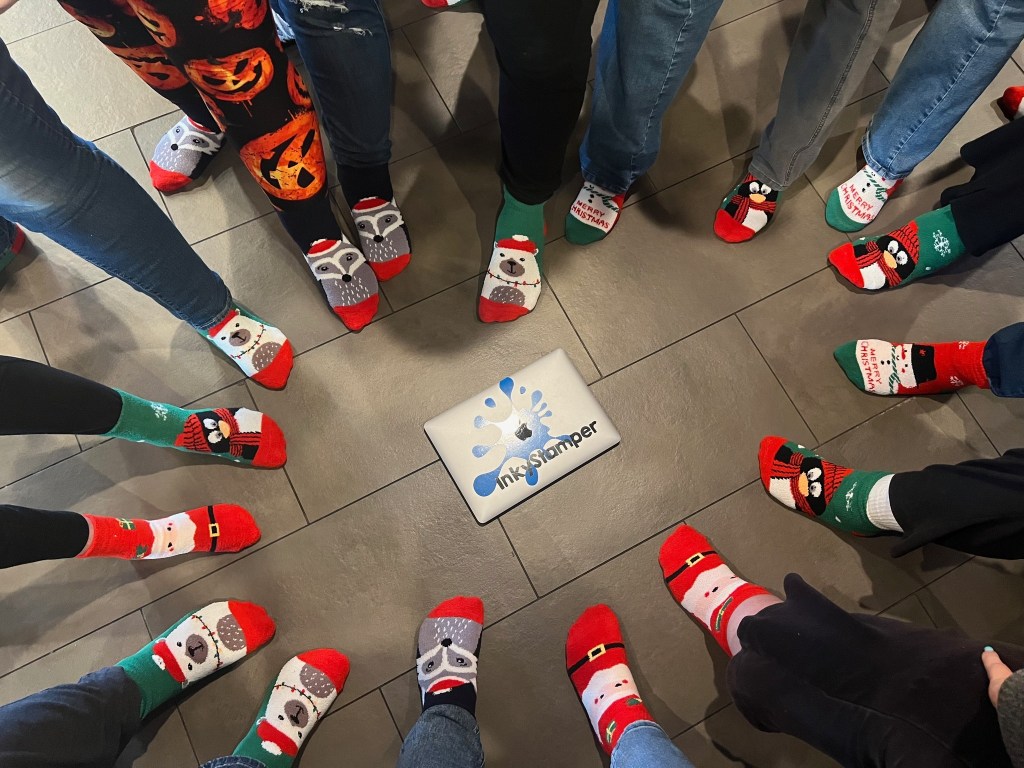
I lifted this fun photo from the Inky Stamper FB page as I don’t have any photos other than seeing what others took. There were a total of 18 of us this time:
Everyone received a “swag bag”…but the case this time was a Christmas stocking full of fun goodies and one of them was that everyone received cute fluffy socks. I’m not exactly sure which one is me in that photo, but I did have a polar bear sock! LOL We each placed one foot in the circle and Chelsea took the photo.
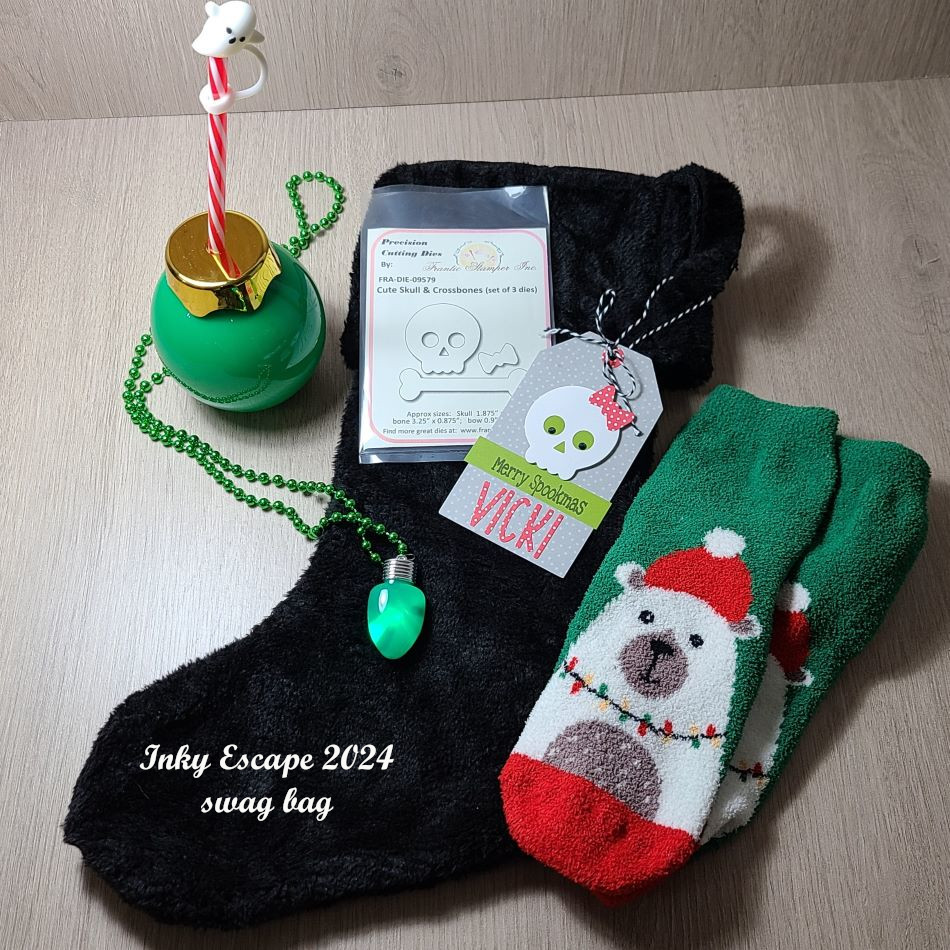
And speaking of the “swag bag”/Christmas stocking…here’s what we each received:
When I got to the event, there was this black stocking on my table with the cute tag attached to it with my name. Each person received a personalized tag on the swag bag, plus the “skull” dies that were used to create the tag which was inside the stocking! There are my polar bear fuzzy socks (I’ve already washed them up by hand so the colors wouldn’t bleed in the wash…and they’re so warm and fuzzy!) I also received the cute “Christmas bulb” drink holder with a candy cane straw and a little ghost stopper for the top! We used these containers to hold the “Jingle Juice” that we drank at some point! And then I received a light up Christmas bulb necklace that has different settings when you push the button the back. The theme for this event was called “Merry Spookmas” which you can see the greeting for that on my personalized tag. So fun!
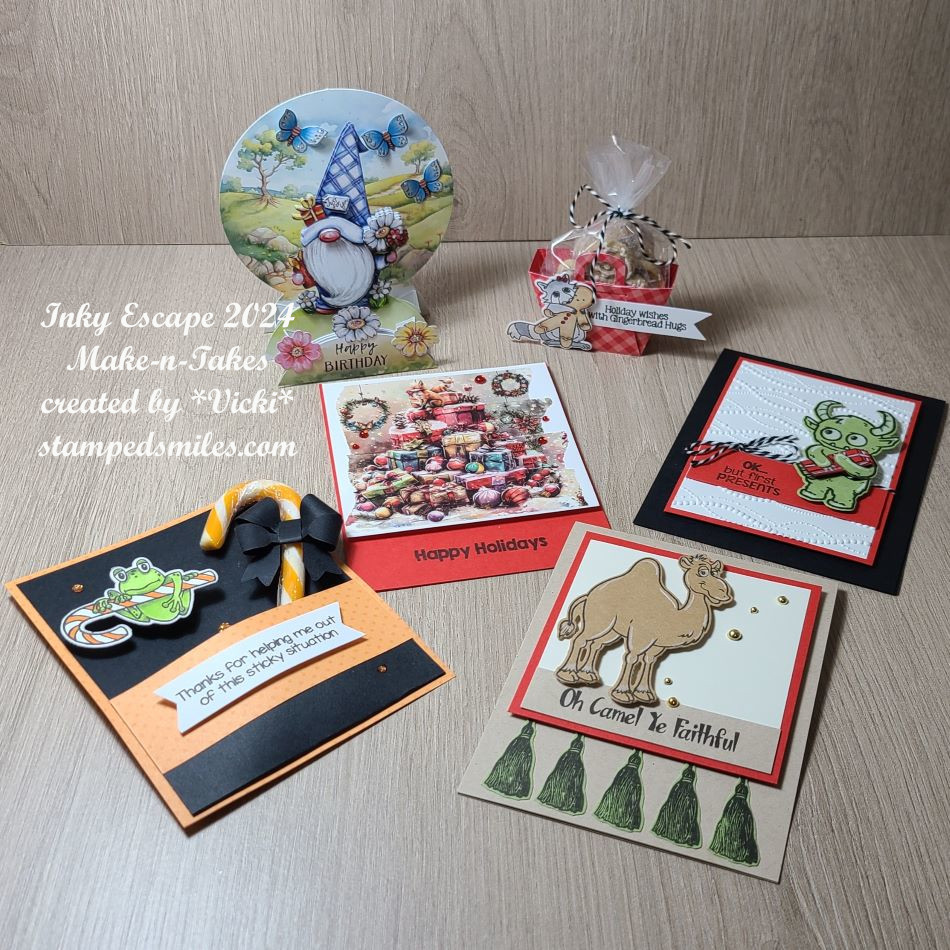
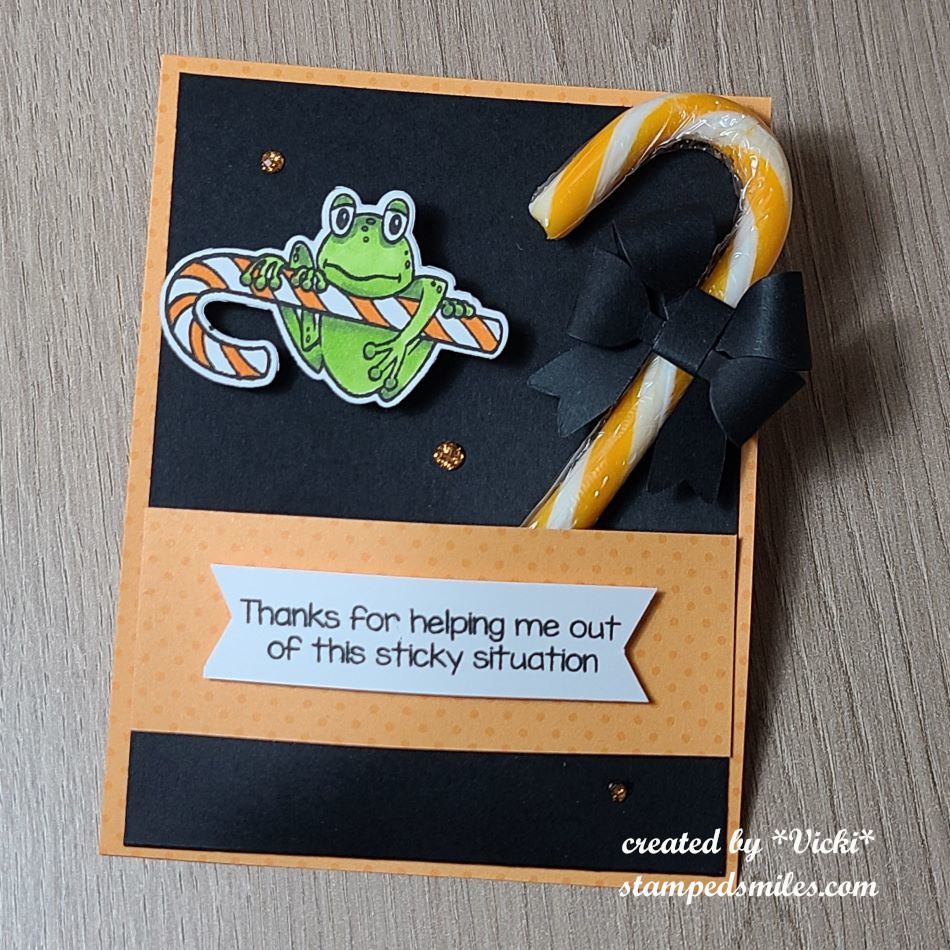
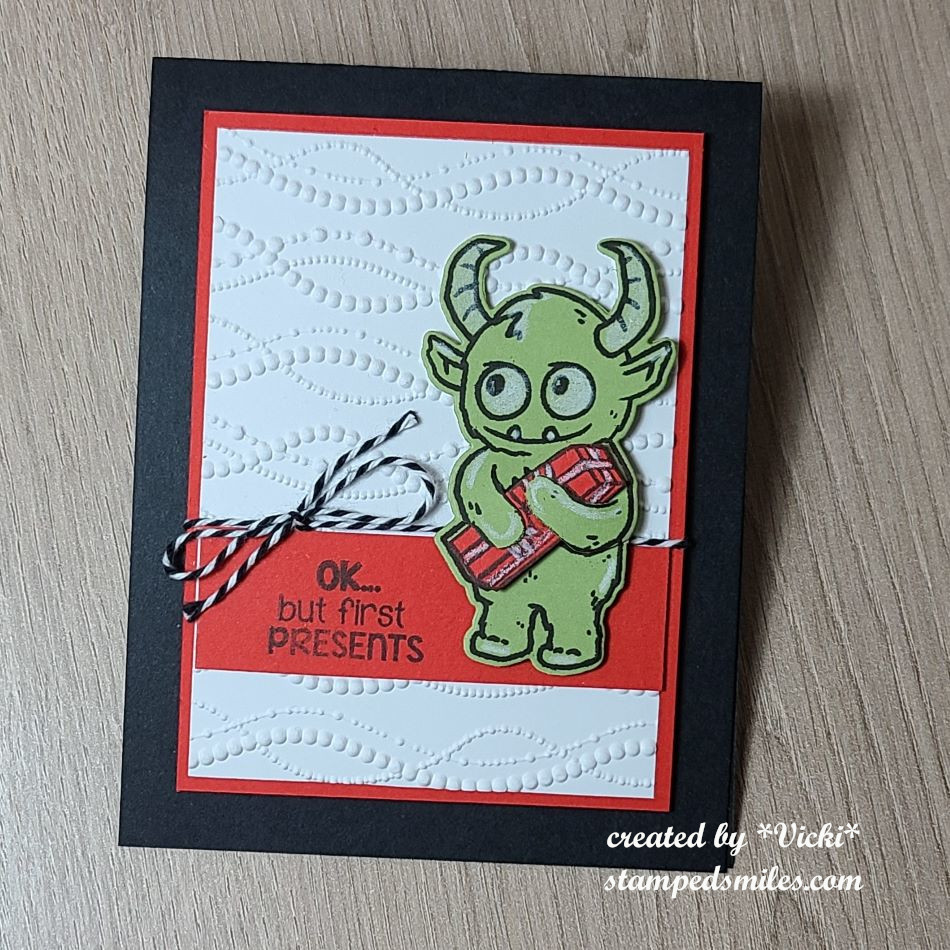
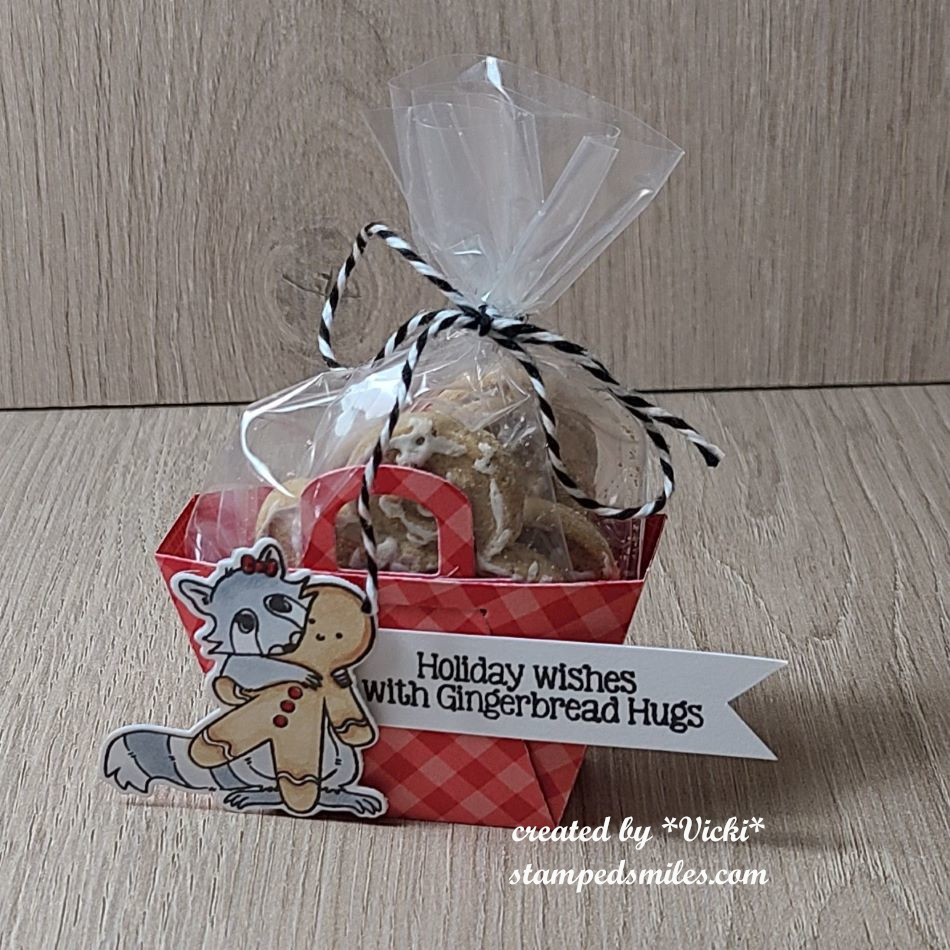
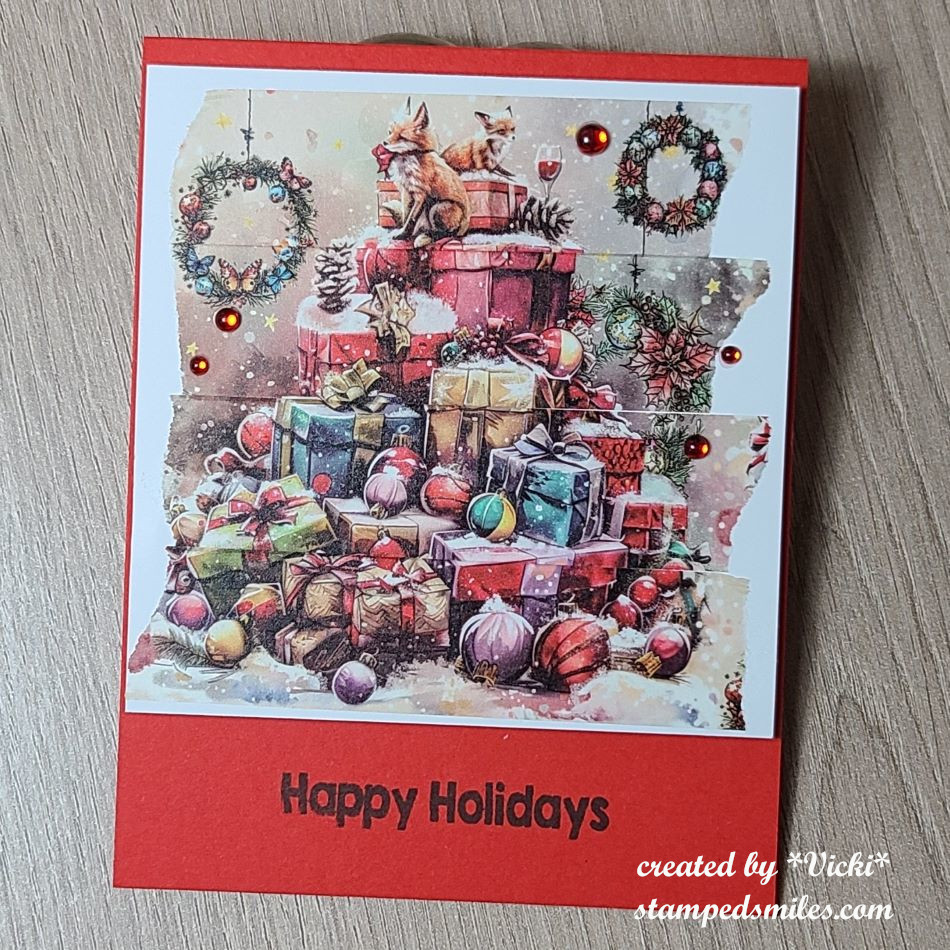
And speaking of fun…here are all of the Make-n-Takes that we created during the event. We sat and made 4 projects and then two of those projects were “bonus” makes using some other special items. (There is a “story” about one of them, but you can check out each project up close in the gallery below.)
*If you are on my website, just click on each photo to enlarge and scroll downward to see more information about each photo while it’s enlarged.*
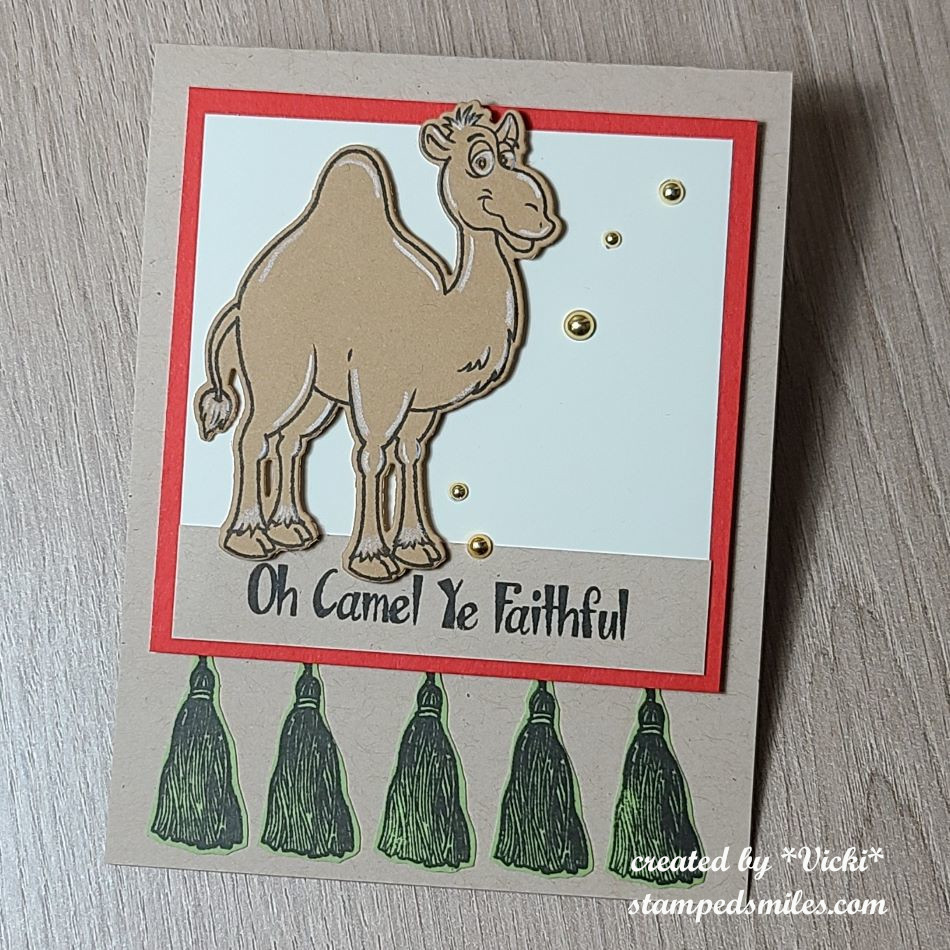
Camel stamp set used. Images were stamped on colored cardstock and cut out.I TOADally FROGgot to run the black cardstock through an embossing folder! Doh! Orange Cream candy cane inside pocket with paper bow and frog on wobbler.My favorite stamp set of this release is the Gifter set. He was stamped on cardstock and cut out. Present was paper pieced inside his arms.Cute gingerbread treat container came complete with gingerbread cookies wrapped with twine!Bonus make-n-take was easy peasy with some very cool Aall & Create washi tape that made this image!We chose the “winter” gnome that we wanted, but mine was so messed up I had to ditch it! I came home and made a birthday one that similar from my own card kit stash! LOL
The first four make-n-takes were made using the brand new Inky Stamper release that came out during this event! You should go check them out now on the website! (They’re all shown on the home page under “Featured Products”.) My favorite is that darling “Gifter” stamp set! I’m sure you’ll be seeing something from that set soon from me! *wink*
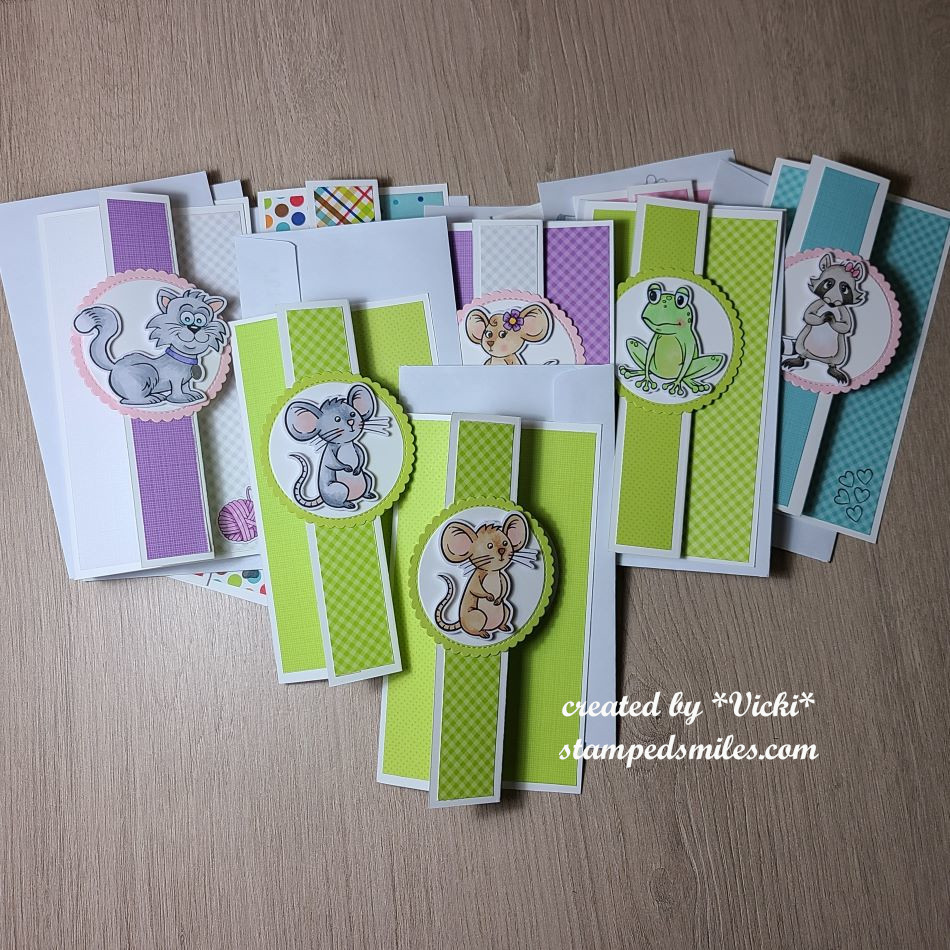
And since I was there to “crop” (as they say), I brought some things to work on that I really wanted to get done. So I decided to pull out some more Inky Stamper images to color and make a “Sheetload of Cards” using the September Sheetload of Cards Template by Crafty Al. If you’re not familiar with her, check out her You Tube Channel and look for all of her “Sheetload of Cards” videos to see how you can find instructions for each month. #SUYSSep2024 #ShowUsYourSheetLoad
I utilized her template to create the full 12 cards as demonstrated. The dimensions of the finished card design is 3.5″ x 6.25″ which I really liked as it helped to use up the full 6″x6″ size of those paper pads! Also, you don’t have to create envelopes for these as they fit perfectly inside those #6 envelopes (3-5/8″ x 6.5″) that you can find at any office supply area of a store.
As you can see, I used a variety of images that I stamped, colored and cut out for each design. I matched up my design papers to coordinate with the images. All of the images I used are from Inky Stamper. All papers come from a variety of Doodlebug Design papers.
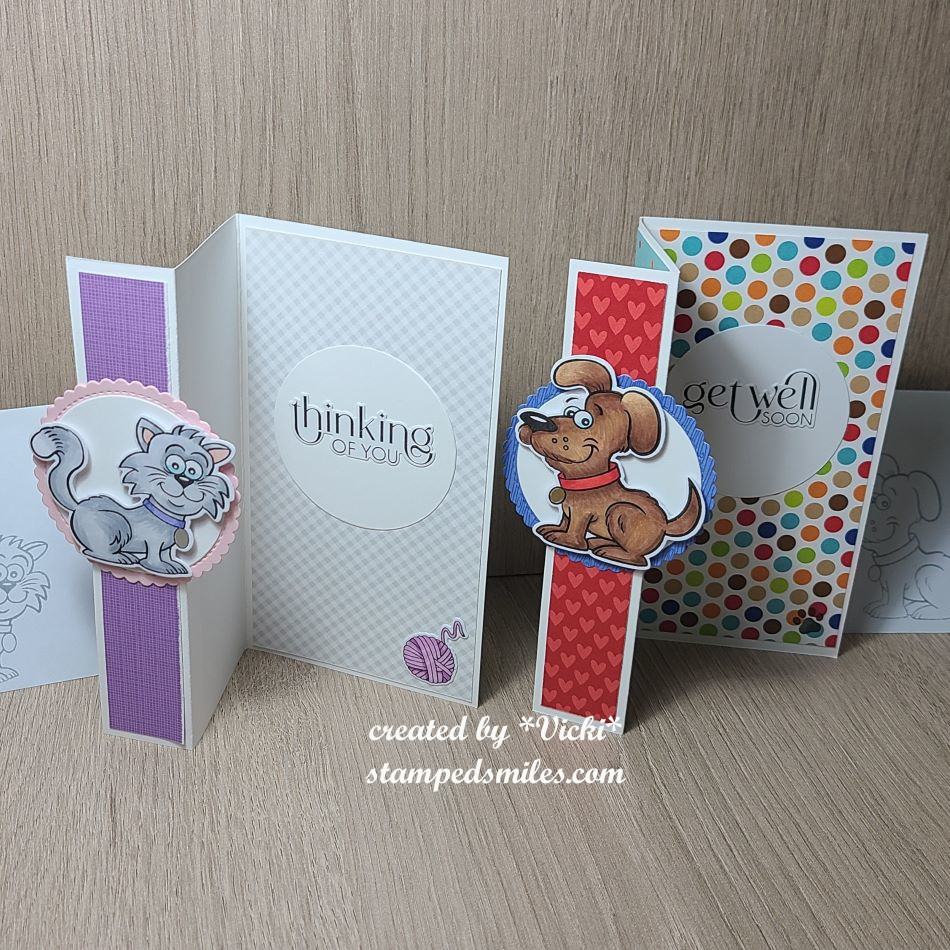
Here’s a closer look at two of the cards I made from the set so that you can see how the card opens up and the greetings on the inside of each card. (Sentiments come from Taylored Expressions.) You can also see the coordinating envelopes next to them with the matching critter stamped in grey ink.
These cards are on the way for a special charity for ill children patients to help lift spirts and I hope each one will!
I know there were so many things going on during the event that I was even surprised that I got all of these finished. They were mostly finished with the exception of the greeting which I added when I got home. I had plenty to do while I was there and also enjoyed all the activities too!
I hope you’ve enjoyed my post today as well! I thank you so much for stopping in!
Happy weekend friends! It’s almost time for Valentine’s Day which means we share our appreciation to those that we love! I like to make cards that are great for any time of year and hearts are versatile enough to do this without being specifically Valentines. Here are a few cards that I’ve made with this in mind:
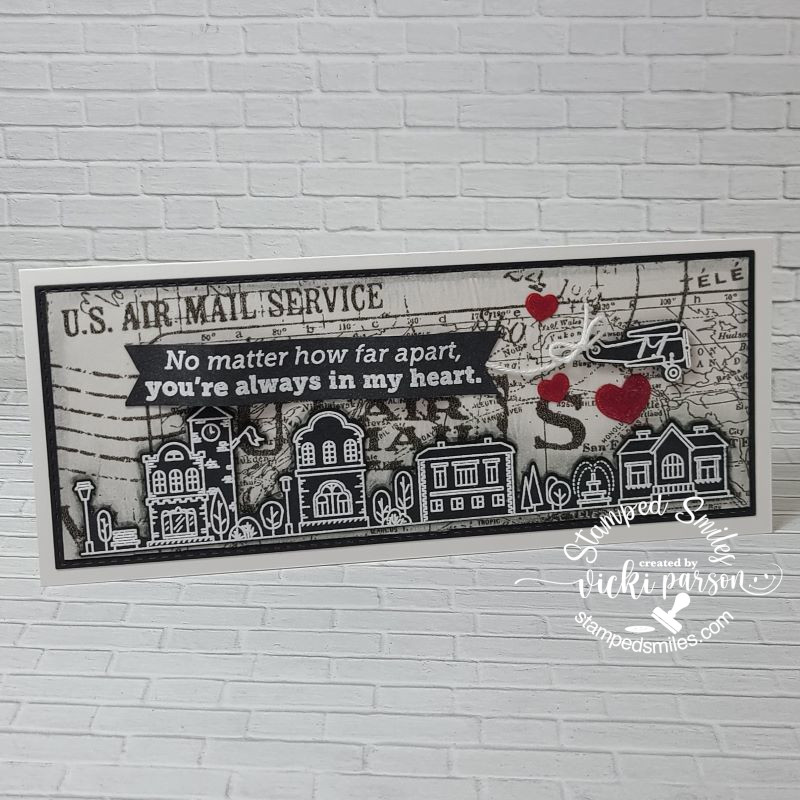
I actually participated in last week’s Craft Roulette #149 and the perimeters were: 1. tissue/vellum 2. collage 3. far away 4. three pops of red. So…while watching, I had decided that I was going for the Tim Holtz Postale Tissue Wrap that was already collaged with images. I decided because of the collage images, that I was going to find an airplane image to use with it and my thoughts turned to an older Simon Says Stamp card kit I had with the “Home Sweet Home” stamp set. I white heat embossed the airplane, the long building strip and the sentiment over black cardstock. It seemed to lend itself to a slimline card design, so that’s what I went with and used collage medium to attach the tissue to the background. Once it dried, I glued the die cut buildings strip and went around it with a Big Brush marker that I smudged to create the shadow effect.
I made a banner with the sentiment and attached a white string to the back and tied a bow with it to the airplane and popped up the plane with foam tape. The collage background panel was layered over a black piece that was attached to a standard slimline top folding card base.
Here’s a closer view of the details so that you can see them a bit better. My “three pops of red” came from 3 hearts that I cut out with red cardstock. The die was from the coordinating set with the stamps. I attached them around the airplane and covered them with a glitter brush pen.
If you’re interested in seeing what the Craft Roulette is all about, you can check them out live every Friday night around 6:00 pm CST. I will be doing this tonight as well! It’s just something fun to get your crafting thinking and I love that I can pull out my stash and use it up!
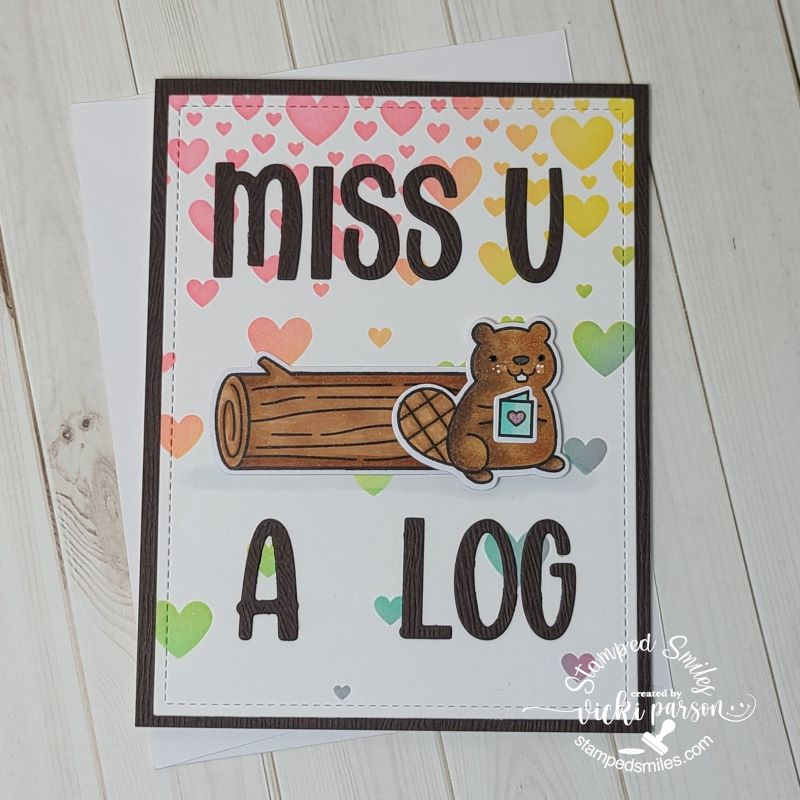
And of course I couldn’t help but follow along with the Lawn Fawn Create With Us “Wood You Be Mine?” class! There’s a little inside joke about Woodchucks chuckin’ wood with my son and I couldn’t resist sending him one of these cards. (CLICK ON THE PHOTOS ABOVE TO SEE THEM LARGER IF YOU’RE ON MY WEBSITE)
I just pretty much followed along with the same design as they shared in class with the exception of the background stencil. I didn’t have the same one they used, so I pulled out one from Taylored Expressions that is no longer available. but if you’d like to follow along with the class, you can check it out here.
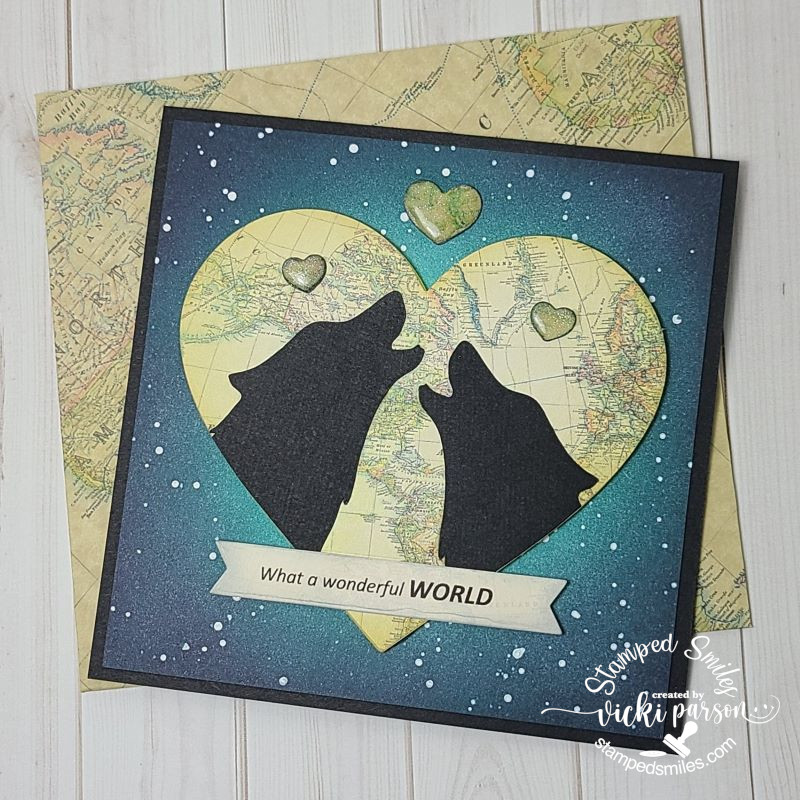
And lastly, I wanted to share a commissioned card that I made for someone that requested a card to give to their partner. Not really too specific other than they liked wolves and the “What a Wonderful World” by Louis Armstrong lyrics somewhere displayed on the design. So here’s what I came up with:
I did not own any stamps with wolves on them, so I turned to my Cricut machine to cut out a silhouette wolf and then I flipped it to cut another one so that they faced each other. I wanted to give the appearance of the wolf couple howling together. LOL I also had some digital map paper that I could print out to use for the hearts as well as making an envelope with it too.
The background was ink blended with the center being lighter toned in blue and then I splattered some white over top for a night sky or an “outer space” looking sky…however you’d like to interpret it, I suppose. I cut a large heart with the map paper and arranged the two wolves over it so that, although it’s the same image flipped, I can make them look like different wolves and then cut off the bottom portions. I popped up the large heart with foam. I also used the same papers to cut smaller hearts above them and added some glitter and covered them with crystal effects to make them shinny. I printed out the lyrics on my computer and cut it out in a banner shape to attach below the wolves.
Hope you’ve enjoyed my “love” creations today and have been inspired in some way! Thanks for stopping by!
Happy Saturday friends! I hope you’re enjoying your weekend and maybe doing something crafty too! I actually can’t believe that next weekend we’ll be into September already! Fall is coming which means hubby and I can enjoy some football game time!
Hard to believe that it’s time for a monthly Art Journal page and collaboration with my crafty friend, Carol (from Crafty-Stamper), so please check out her blog for more inspiration too! 🥰 We’re trying to get creative by using up our never-ending stash piles! So, here’s my Art Journal inspiration with the “SMASH OUR STASH” August prompt of “liquid drops/enamel dots/brads/eyelets”:
Yes, it’s the never-ending supply of those enamel things, brads and eyelets! I didn’t even use any eyelets on my page today, but at least I pulled out a few brads, enamel dots and even some liquid enamel drops too!
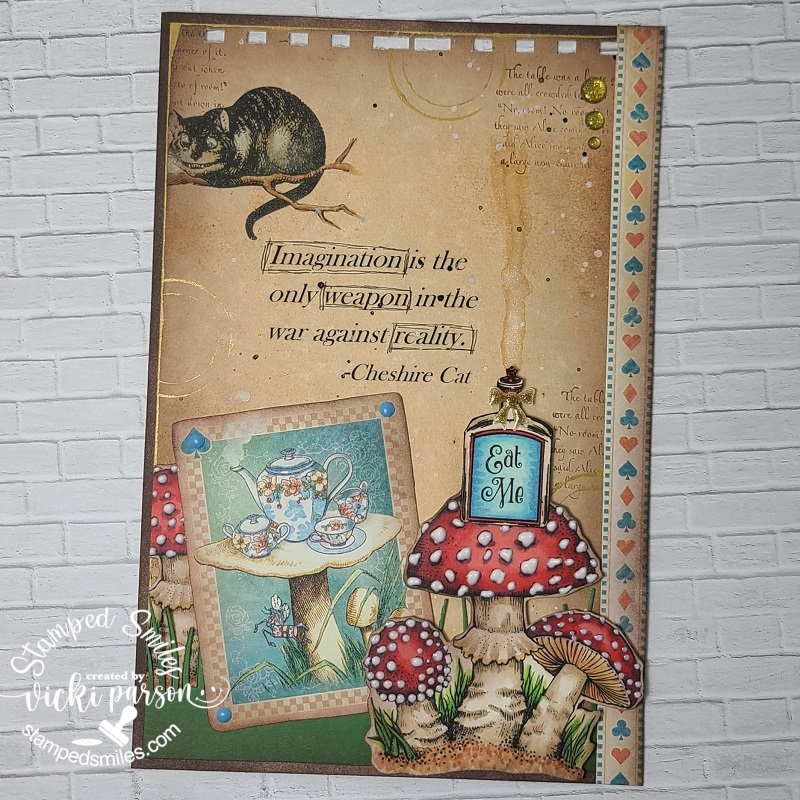
So I could take you down that “rabbit hole”😁 of how this page came about from seeing a couple of mushrooms out in our backyard that just weirdly keeps popping out randomly the last few months, but needless to say, I ended up with this page. As a child I have always loved Alice in Wonderland and imagined myself secretly finding these amazing new worlds and having conversations with odd characters. I do enjoy getting lost in a good book!
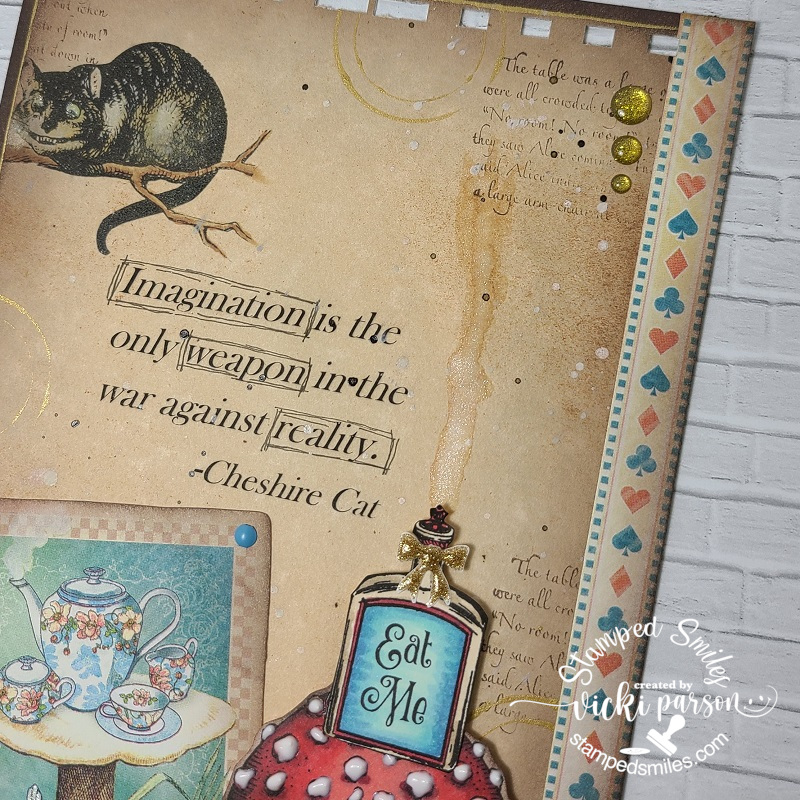
The background page was printed out with adding the Cheshire Cat image over top. (The wording was also printed out with the cat.) I stamped some other wording over the printed background, splattered some paint and took an empty plastic roll dipped in gold paint and randomly stamped that all over it too. I used my finger to also add some gold paint along the edges. The mushroom image is from Power Poppy which I’ve printed, colored with Copics and fussy cut them out with the one in the front popped up with foam tape. I die cut a grass border at the bottom and tucked one of the cut-out mushrooms behind the grass blades and then cut off all the excess. I’ve attached this entire page to a heavy weight 140# cardstock that was ink blended with chocolate ink around the edges. I took a strip of Graphics 45 Alice in Wonderland decorative paper and attached it to the right side of the page. I was then able to punch out the holes at the top for my AJ book.
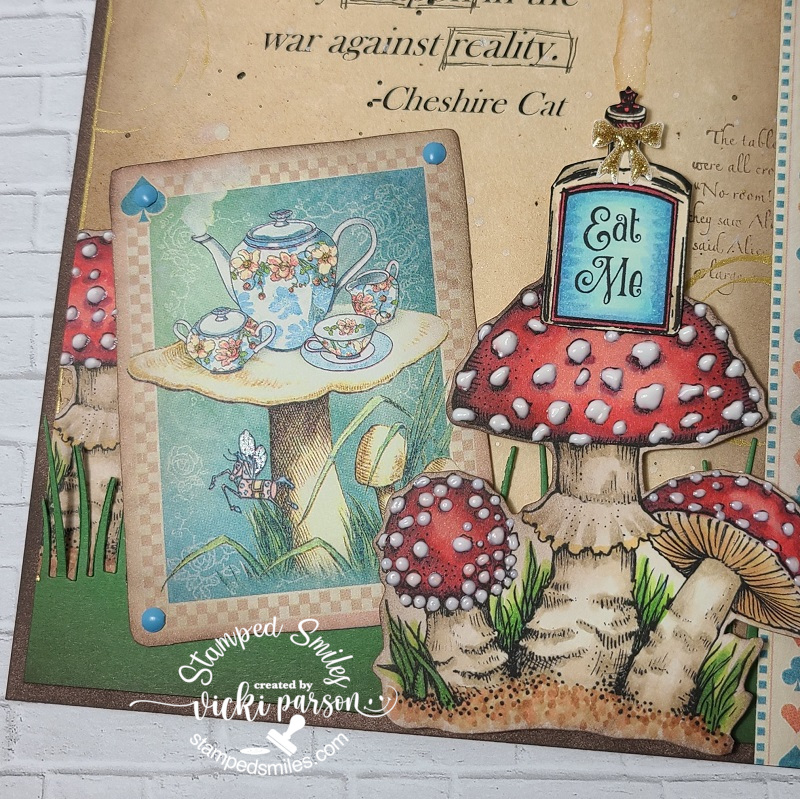
So, when you look at the bottom of the page, you can see the mushrooms and how I’ve added some white Nuvo Liquid Drops to the red tops. I think this really makes them pop and give dimension! With the same Graphic 45 decorative papers, I’ve cut out the “tea set playing card” image, blended around the edges and added a blue brad in each corner of it. I also added a bit of sparkle to the flying horse. This cut out playing card was attached below sentiment over the background mushroom and grassy border.
You will also notice the “Eat Me bottle” at the top of the mushroom, which was printed out separately from the background page, Copic colored and fussy cut out. I attached it over top of the large mushroom and added a ribbon enamel at the top of it. I also took my glitter brush pen and added something rising from the bottle…mysterious?!
Here’s a closer view of the enamel bow at the top of the bottle along with the mysterious glitter coming from it. I’ve also added some of the glitter brush pen to the Cheshire Cat’s eyes too. I thought I had room to add another three sparkly gold enamel dots to the top right and call this one done.
I hope you’ve enjoyed my AJ page today or have been inspired in some way! Thanks so much for dropping in and I’ll be seeing you soon!
Hello friends! It’s been a minute or two since my last posting as I had been sick and then totally lost my “MOJO” during that point! So I was trying to get it going again with a few Halloween projects! I have been playing with some new Taylored Expressions goodies and I thought it would be fun to give away some TE stuff as well!😀 Stay tuned to the end of this post!
click on the photos below to enlarge them if you’re on my website:
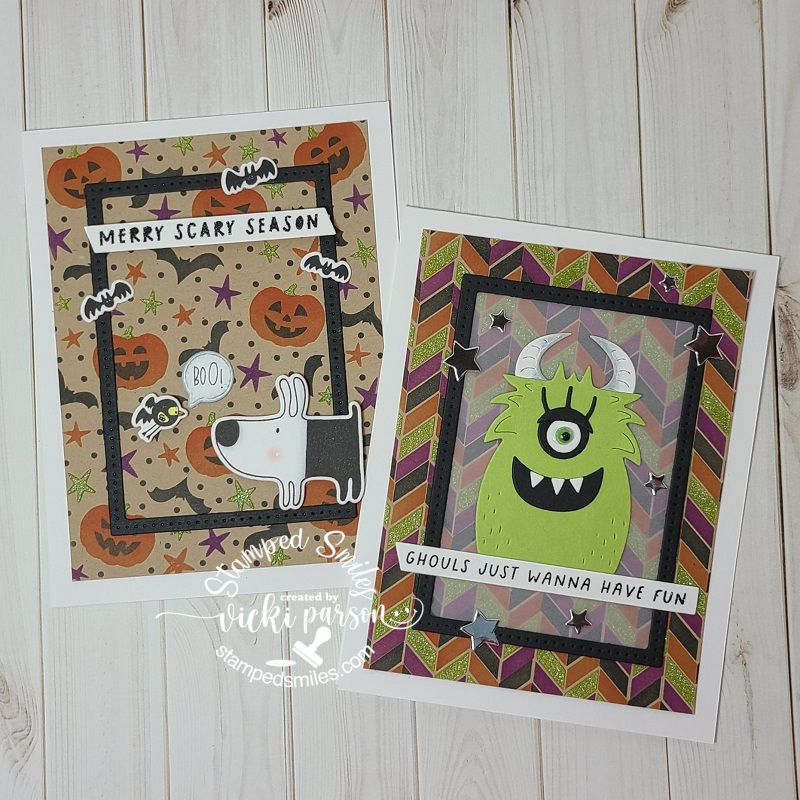
Now how cute are all of these critters, ghouls and creeps?! As you may remember from my last post, I had been having so much fun creating with the Taylored Expressions Create-in-Quads stencils, so I had my play with the Halloween Create-in-Quads with the makes above! I stenciled some black, candy corn, plum punch and lime zest colors, plus I went over the lime zest with some glow-in-the-dark glitter paste. The stencil quads make two A2 sized backgrounds as well as the cat and witch cauldron too! There is also coordinating dies to cut out the cat and witch that I used to cut out for the second set of cards. For all of the cards, I’ve used the TE Frame in Frame 3 dies (free from an order a while back) that was cut with some black cardstock. I’ve also used the TE Simple Strips-Halloween stamped and heat embossed with some black glitter EP and cut out with the TE Asymmetrical Simple Strips Die for each card.
The set of cards on the left were created with the stenciled backgrounds and then with the black frames, I’ve added a character from a “free with purchase” Gus & Gertie Halloween stamp set. The bird saying “boo” is in a bat costume. 😅 I popped up the sentiment strip, bird and dog with foam tape. I die cut the “boo” sentiment with a speech bubble die from my stash. The ghoul card was made with the awesome TE Monster Squad die set. I placed a piece of vellum behind the black frame, so the ghoul stood out a bit more, die cut my pieces as I wanted and attached it right above the sentiment strip. I added a green googly eye as well as a few die cut stars from silver metallic cardstock.
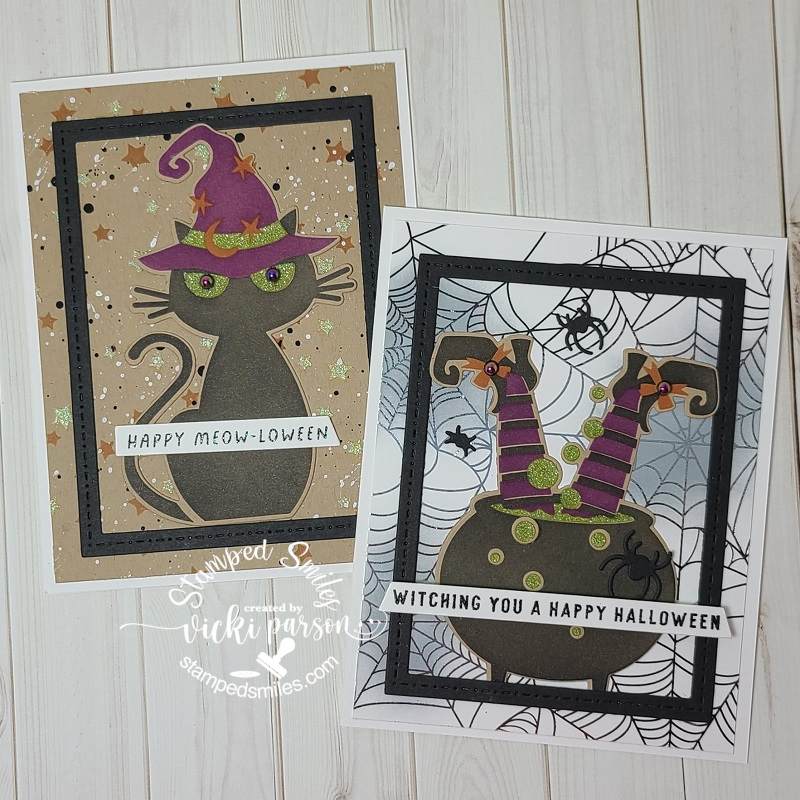
The set of cards on the right was put together with a couple of different unique backgrounds. On the black cat card, I used the TE Superstar Rotating Stencil and stenciled once with candy corn and only rotated once using the glow-in-the-dark glitter paste again. I finished it by splattering black and white paint over it. Topped it off with the black frame, the kitty and sentiment strip. I also used some Cosmic Drip Drops for kitty’s eyes. (These were also used on the bows of the witch’s shoes too!) For the witch background, I silver foiled one of the TE Foil It-Spiderweb panels and then ink blended some grey ink over a couple of the webs. I then added the black frame, the witch and the sentiment strip. Lastly, I added a couple of spiders cut out with the TE Little Bits-Spiders die set.
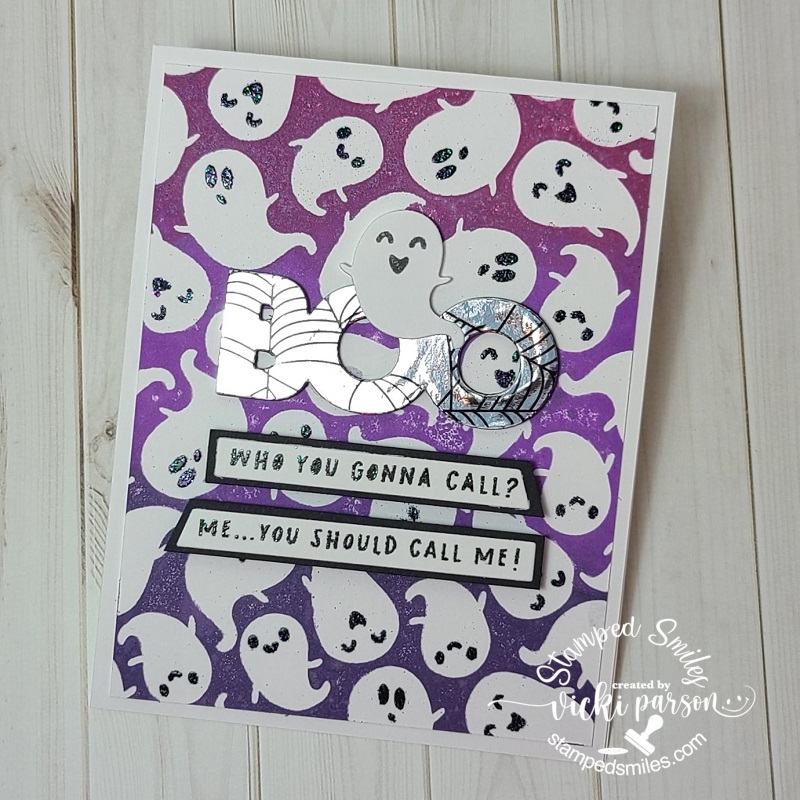
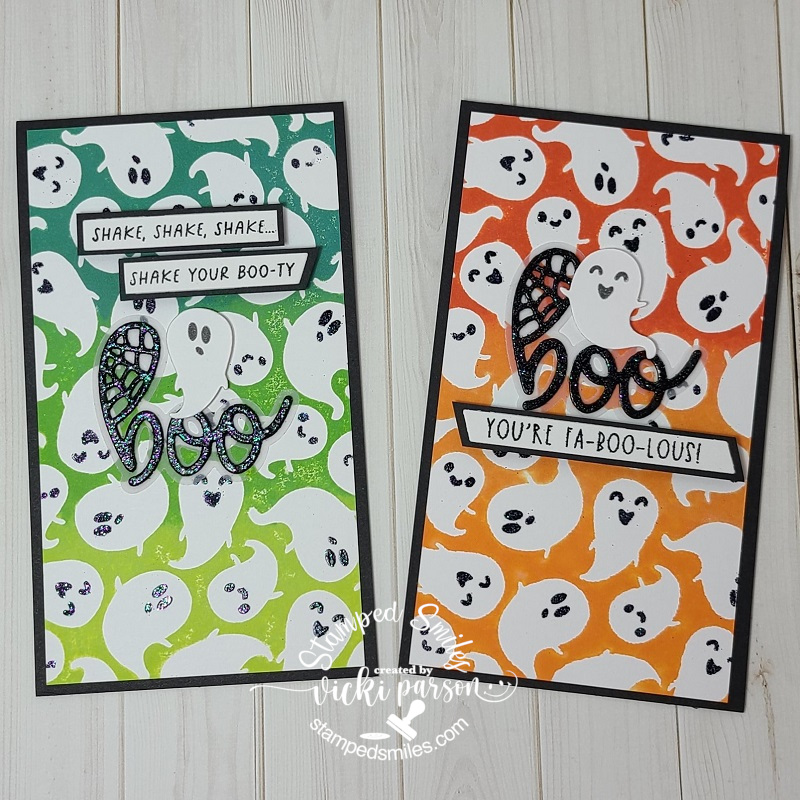
These ghosts make me smile every time I see them with those faces! 👻 For these set of cards, I pulled out the TE G-G-G-Ghost Stamp & Stencil Combo. I didn’t used any TE inks but pulled out my oxide inks for an ombre looking color to make these different backgrounds. The stencil was used for the faces by heat embossing some black glitter EP over VersaMark ink through the stencil. The purple is A2 sized and the set of cards on the right as mini slim cards. I continued using my sentiment strips that were previously used on the card sets above, but with these I’ve added a black layer that I just cut from cardstock. I’ve also used TE Ghost Gang Die & Clear Combo set to cut out the ghosts popped up around the sentiments and stamped their faces.
For the purple ghost card, I used the silver foil negative from the “witch spiderweb background” card and foiled a cut out TE On the Block-Boo Shadow die which was popped up with several layers of die cut black ones. I popped up the die cut ghost over the foiled “boo” as well as the sentiment strips.
For the set of mini slim cards, I did pretty much the same style as the purple, but for the “boo” sentiment I used the TE Boo Script + Backer and die cut 2 of the sentiments with black cardstock and then heat embossed it with the black glitter EP. I placed it over the vellum die cut backer and attached to the card front. I popped up the ghosts and the sentiment strips with foam tape.
**GIVE AWAY!!!**
(CLOSED)
So, because I’ve placed some TE orders, I have gotten multiple sets (duplicates) of goodies!! If you or someone you know would like to get one of these stamp sets, please let me know in the comments below! (Which one(s) you want!) I have FOUR large rubber stamps to give away!! Check it out….
Click on each photo below to enlarge if you’re on my website!
I have TWO of these sets to give away!!
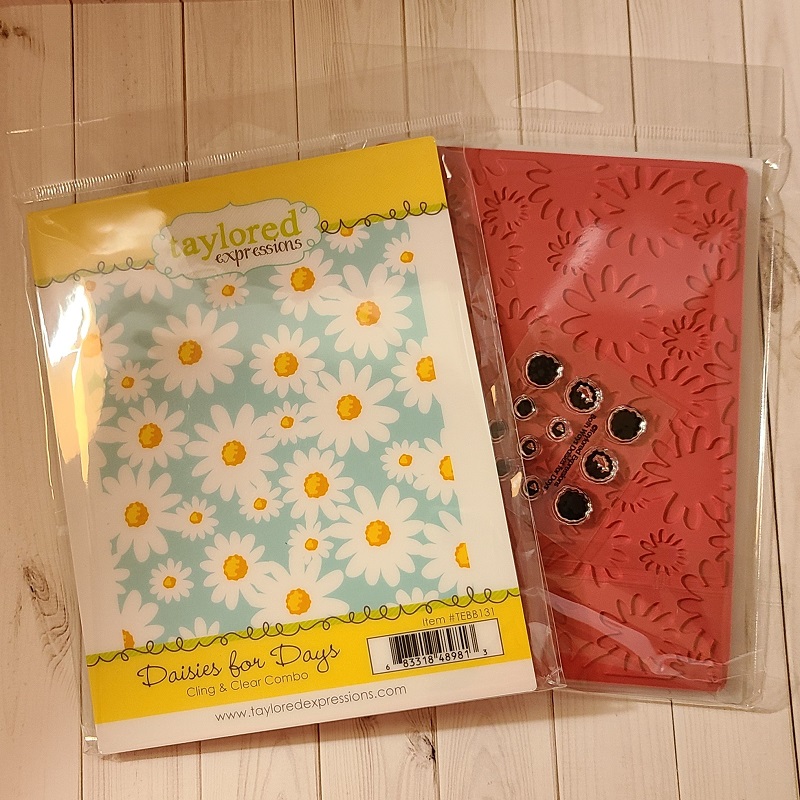
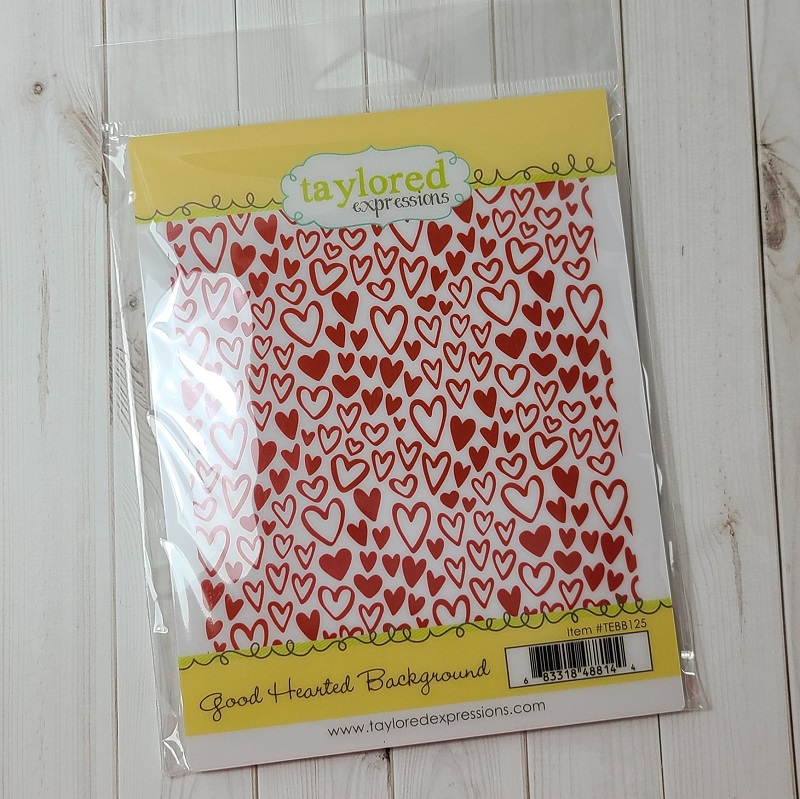
These are all background A2 sized rubber stamps. The last stamp photographed is “Winter Village Background” which measures approx. 6.25″ x 2.5″ in size. I have TWO of the “Daises for Days” to give out. (See the photo where it shows the clear stamp set included for stamping the flower centers.) The “Good Hearted Background” stamp is perfect for almost any occasion just by adding a quick sentiment with it! I also have a little “extra” to go along with each one of these to accompany the package too!
If you click on the names in orange above, you can see some examples using them on the TE website for ideas!
Just leave me a comment below if you’re interested in my give away and tell me which one(s) you’re interested in by September 22nd, 2022 which is the first day of Fall for us here in the U.S. This will give everyone time to see the post and tell a friend that might be interested too! – CLOSED!!!
Thanks so much for stopping by and sharing your support and inspiration with me as it helps keep me going! 😉
Hello friends! Hope you’re having a great week so far! I have a few cards to share with you today that I’ve made over the weekend having some fun.
I love the cute little grin this goat has! This goat along with all of the images used are from the same stamp set by Inky Stamper. This month, the Inky Stamper FB group challenged us to create a ONE-LAYER only card…not even ribbon/twine, etc. could be used! I haven’t made one of these CAS or one-layer cards for quite some time, but I enjoyed the play with it.
So I’ve used masking paper to create this by stamping the goat over masking paper, stamping the goat over the front of the card and then placing the cut out masked goat to cover him up. I then die cut a circle over another piece of masking paper and placed the left over piece on top of my card where I masked my goat image. All that was left was the circle opening and this is where I ink blended the opening with distress inks. I also stamped the small line of grass with green ink.
I took off the circle mask along with the goat mask. I colored up the goat with Copic markers and then I stamped the triangle image from the same stamp set along with the sentiment. I then added 3 black gems and colored the inside triangles with a glitter brush pen. I also used my corner chomper to round the two bottom corners.
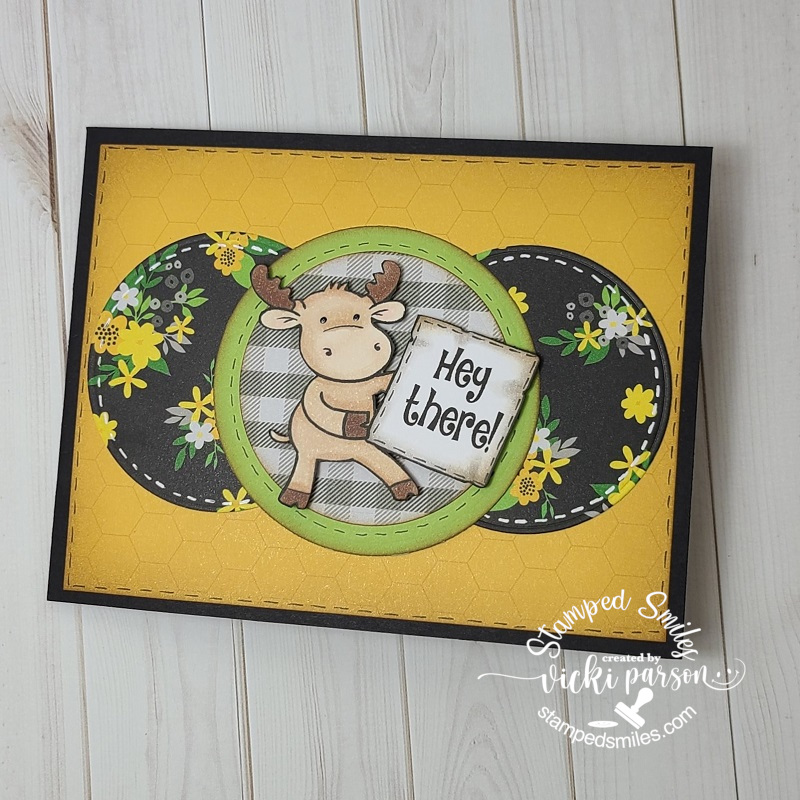
This last weekend there was another OOAK event and there was another fun card kit from Riley and Co. I didn’t attend the entire event, but joined in to see what the new release was about while I was making my cards from the kit. I’m pretty sure that there are no more of these kits left as they sold out of the first batch and had to make more.
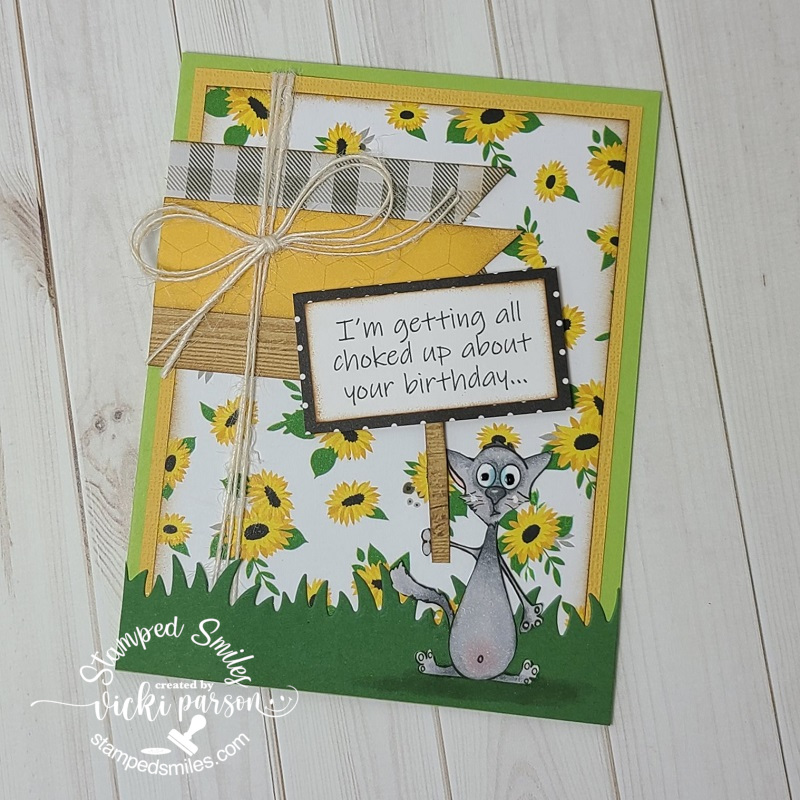
The critters are so fun to color, and I really loved these papers from the kit as they have me anxiously awaiting Spring to get here! I’m bundled up, drinking hot liquids and trying to stay warm, but nothing beats a warm Spring Day! 😁
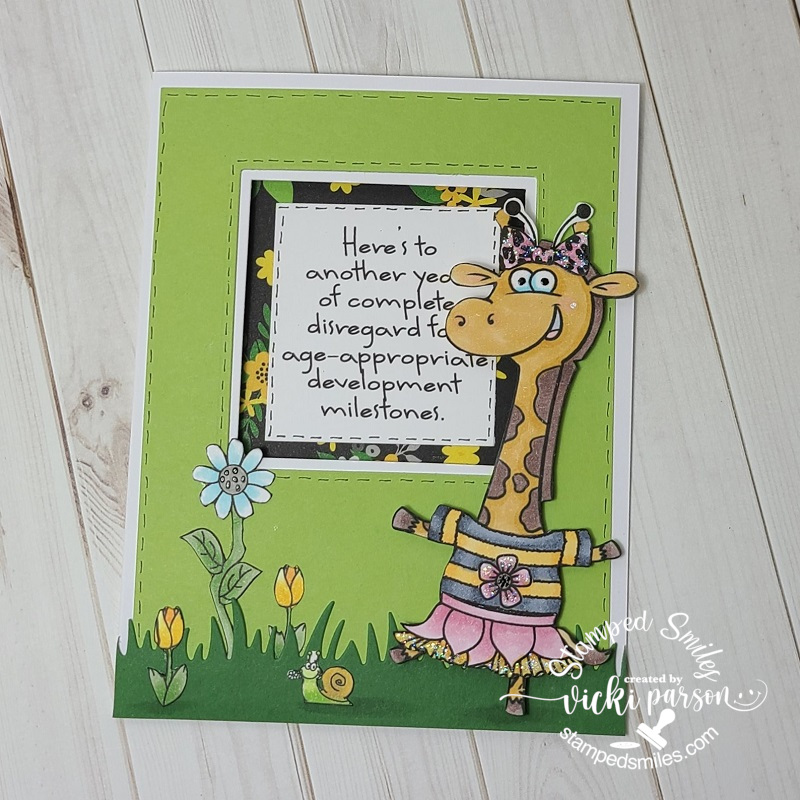
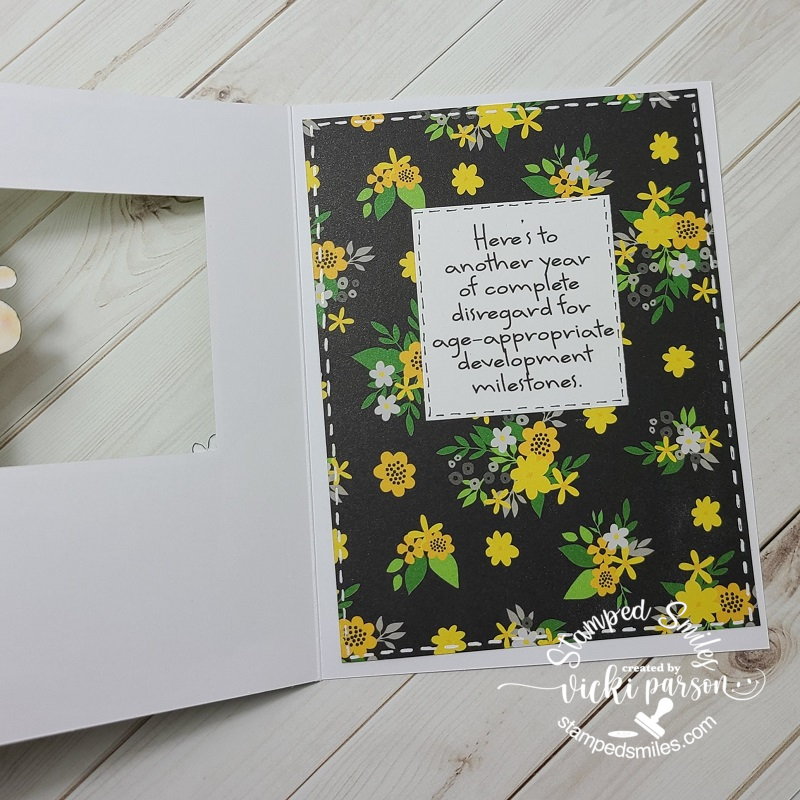
To get a better look at each one of these cards up close along with what’s going on for the insides, check out the gallery below. If you’re directly on my blog website, you can click on each photo below to enlarge it:
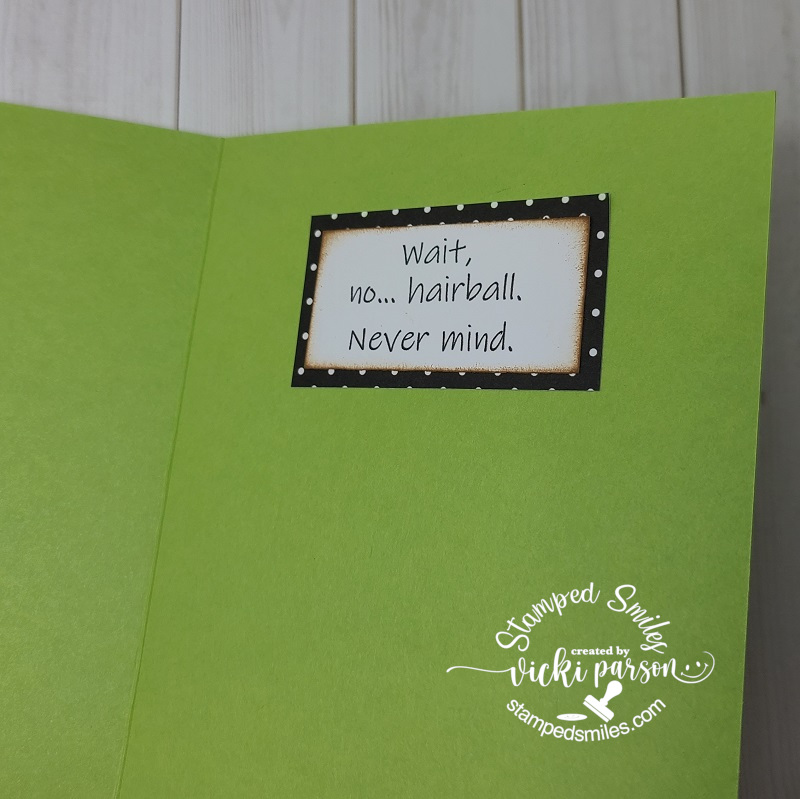
The cat’s bugged out eyeballs is too funny! I’ve used foam tape to pop up his sign.To continue with the cat sentiment on the outside, here’s what the inside part says! LOLIt may be hard to tell in the photo, but the sentiment is a window. Check out next photo to see the complete sentiment.Full sentiment for giraffe card…here you can window.This card opens along the side edge…check out next photo to see inside…I sort of messed this one up as I should’ve placed the outward fold back a little more as the card doesn’t completely open and I didn’t have room for the sentiment…so this was changed later.
Just wanted to share my recent makes as I’m still trying to work at finishing up some Valentine cards along with getting going on the wedding invites. Sure enjoy seeing the wonderful inspiration from everyone and hope that you’re all staying safe and warm friends! Thanks for stopping in and I’ll see you soon!
Hello friends! It’s getting closer towards the end of the month and so it has motivated me to get going on some challenges that are about to end soon. So I’ve grabbed my supplies and had a fun play…
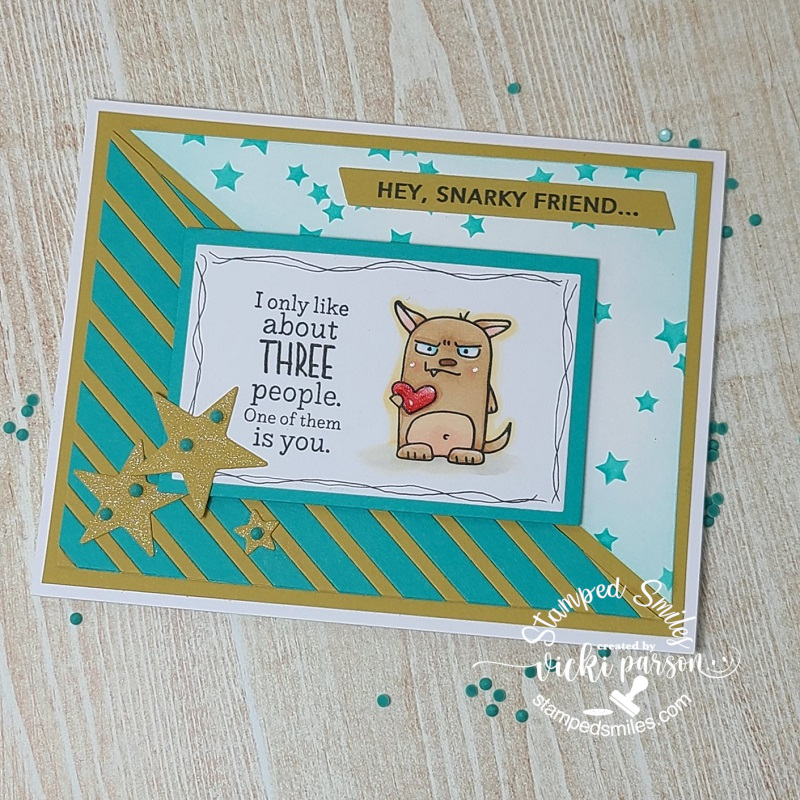
Tee hee!😁 This one makes me chuckle and I think it would be so fun to send to a special friend for Valentine’s Day or even at any time of the year! Most all of the products I’ve used for this come from Taylored Expressions. Along with many people, I do enjoy those “snarky” products they sell!
To start, I’ve based my card on a sketch for a challenge that’s about to end and worked with the Taylored Expressions Easy Strips 1/4″ and Easy Strips 1/8″ dies for the bottom right side of the card using the colors Blue Raspberry & Dijon cardstock. The colors are part of the TE Maker Challenge for January as well which is about to end too which is why this was my choice for this card. I cut the panel in half diagonal based on the sketch and used a white cardstock for the top right area and blended some TE Blue Raspberry ink with the TE Superstar Rotating Stencil. Layered these onto some Dijon cardstock which was layered onto the white top folding A2 card base.
For the image panel, I stamped the “TE Grouchy Grumplings” (Sorry, it’s been retired it looks like! LOVE that snaggle tooth! 😆) and the TE Shenanigans sentiment on the same panel layered over a piece of Blue Raspberry cardstock that was popped up with foam tape. The image was colored with Copic markers. I also stamped the TE Simple Strips-Snarky with black ink over a piece of Dijon cardstock that I cut out with the TE Simple Strips-Asymmetrical die and attached at the top right corner of the card.
To finish off the card, I die cut the stars from the TE Gathered Stars die from Dijon cardstock, glued over the card and then covered with a glitter brush pen. I also added some TE Tiny Diamonds over the stars to match the Blue Raspberry color of the cardstock. For the image panel, I used a black pen to doodle around the edges and then covered the heart with glossy accents.
Hope you’ve gotten some chuckles or inspiration from my card today! Thanks for dropping by! I’ll see you soon!
Hello friends! I’m so excited to share the “Handmade for the Holidays” release at Taylored Expressions today! You can go check out all the things right now in the store! I’m extra excited that I get to be a part of this special release with them as a guest designer too! (This was for my win during the TE 13th birthday celebration challenges I had entered from last month! 🎉 Yay!) There will also be a huge post about it on the Taylored Expressions Blog too! I really hope that you enjoy the projects I’ve made to share with you and if you stop by the store, please let Taylor know that I sent you!
For my first set of projects, I’ve made a fun Christmas décor item that you can gift for the Holidays, use as a center piece for your table setting, etc. I’ve taken the Taylored Expressions (new) Accordion Tree die and used it to make a trio of trees with the “poinsettia style” attached to the accompanying TE Tree Stumps (sold separately) to go with this die and another two trees without the stumps. For the trio of trees, I’ve used the Merry Blooms Stamps, Stencil & Clear Combo set to create a background over a Toffee cardstock base inking and blending with Sweet Basil, Cherry Pop and Mulled Wine inks. I’ve also used the same products to make the tag as well. I’ve gold heat embossed the centers for the poinsettias in the background. I’ve also taken the TE (new) Itty Bitty Sentiments Holiday stamp set and used the tiny images from the set to create backgrounds for the other two trees. I’ve splattered the tree backgrounds as well as the tag background with acrylic white and gold paints. These die cut trees were glued back-to-back with the score line in the center as a guide which makes them 3D looking. I’ll explain each item below:
This was such a fun 3D project to create! I wanted all the trees together in one piece, so I thought it would be fun to grab one of these wood slices I’ve been hoarding forever and glue the trees to this base. There is an accordion star that comes with the accordion tree die, but I thought it would be fun to take the TE Perfect Poinsettia die and cut out several of the smallest bloom to make that the “star topper” for the poinsettia tree. I’ve used the coordinating stamps to stamp the “veins” and gold heat embossed the centers for them. I folded them in half and glued it to the top of the tree. I also attached some TE Gold Drip Drops for the “ornaments” over the tree (TE Drip Drops make perfect “ornaments” for these trees!) and added some gold twine bows front and back. I’ve ink blended the edges of the poinsettia tree with Toffee ink and gold paint sponged on the poinsettia topper.
This is what the other side (back) of this piece looks like…so it’s visible from all angles. Here you can better see the other two trees and how the backgrounds were made. I’ve also added some thick white paint to the edges of them to make it look more like “snowed over” trees especially since they were splattered with white paint. For the wood slice that the trees are attached to, I’ve used some Ranger Mica Flakes for a bit of sparkle attaching it with Multi-Medium Matte glue.
For the tag, I’ve die cut the background explained above with the TE Stacklets 2 die and wrapped some gold twine around it with the TE (new) Itty Bitty Sentiments & Tags Holiday set for the little tree with the gold heat embossed sentiment over it. I’ve also gold heat embossed the large sentiment from the Joyful Season stamp set & dies that I’ve popped with my favorite product TE Sticky Strips. I’ve cut out another layering piece behind the tag with Sweet Basil cardstock, punched a hole and added more gold twine.
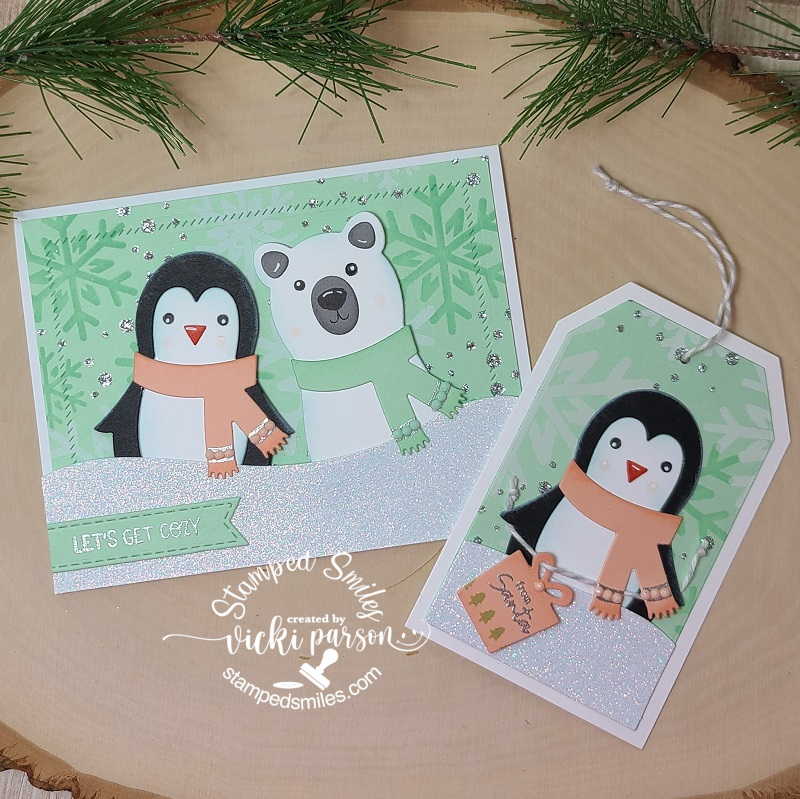
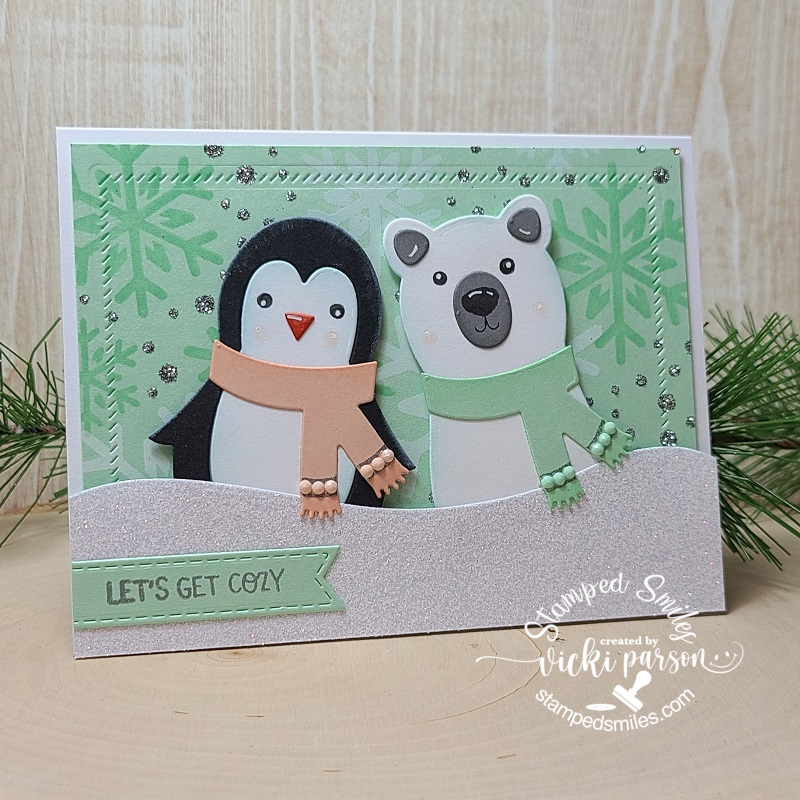
And how stinkin’ CUTE are these guys?! This is my second set of projects for this release using the NEW TE Snow Squad Dies & Clear Stamp Combo set. As you can see, the cute die cut critters are made to perfectly fit the Tag Stacklet dies! I’ve the Tag Stacklet 2 die set for my sweet penguin! The critters are so easy to cut out and decorate them as you like! I like that the clear stamp set comes with it to stamp in the eyes as those tiny dots can be so hard to deal with and loose! You get a penguin, a polar bear and a snowman with this die set!
Again, I thought it would be fun to create a background for my card and tag set, so this time, I’ve taken the TE Let It Snow Layering Stencil set for a snowy background. I’ve started with a Mint Julep cardstock base, blended the same color ink for the first layer, Sugar Cube ink for the second layer and for the third layer, I’ve used some TE Glitter Grab and immediately covered it with some TE Silver Glitter. Love how it turned out with the subtle color!
Starting with my card details, I’ve decided to give the snow squad critters soft colors with their scarves. The clear stamp set with the dies also come with a two-line image for adding details to the scarf, so I silver heat embossed those and then added some matching TE Tiny Diamonds Pastel in between those lines. They matched up perfectly! I inked around the edges of each die cut piece for the critters and stamped the face images including the cheeks which I off-stamped first to keep them light. I used a white gel pen for highlight details.
I thought it would be fun to have these Snow Squad critters pop out from a snow drift, so I took some TE Sugar Cube Glitter Cardstock and cut out a “snow drift” with a piece of the their scarves over it and popped them up over the snowy background I’ve created using a TE Diagonal Stitch Rectangle Stacklets for the stitching details behind them which was layered over an A2 sized Sugar Cube top folding card base. For the sentiment, I silver heat embossed it from the TE Winter Wishes clear stamp set over a Mint Julep cardstock that was cut out using the TE Stitched Banner Stacklets die.
And of course, I had to use the penguin again for my coordinating tag! I’ve used part of the same background I’ve made for the card and cut it out using the TE Tag Stacklets 2 die set with another Sugar Cube cut out for the layering base.
I did the same thing for this tag that I did for the card above with the snow drift, but I also added a tiny tag that he’s holding with some Doodlebug Gray Twine. The tag was created with the same TE (new) Itty Bitty Sentiments & Tag Holiday sets. I’ve stamped the row of tiny trees from the set with the Mint Julep ink and then silver heat embossed the sentiment above it. I’ve also used more of the TE Tiny Diamonds Pastel for the center of the bow on the present along with the penguin’s scarf. I’ve punched a hole at the top and added more of the same twine at the top.
So how about you?! Are you ready for the up-coming Holiday Season? I sure hope that I was able to bring you some inspiration with your handmade projects for the Holidays! Again, you can check out all of the brand new Taylored Expressions products in the store as it’s now been released! Be sure to check out all of the wonderful inspiration on her blog too!
Thanks so much for stopping in today! I appreciate all of your kind support friends! Have a great day!