More Christmas Smells

Hello friends!  Since it’s still so very warm outside, I thought it would be fun to do a bit of coloring which I haven’t really done much of lately and create another Christmas card in July!  Hope you are staying cool…or warm depending on where you live! LOL
Vicki-InkNSplatterdigi-gingerbread

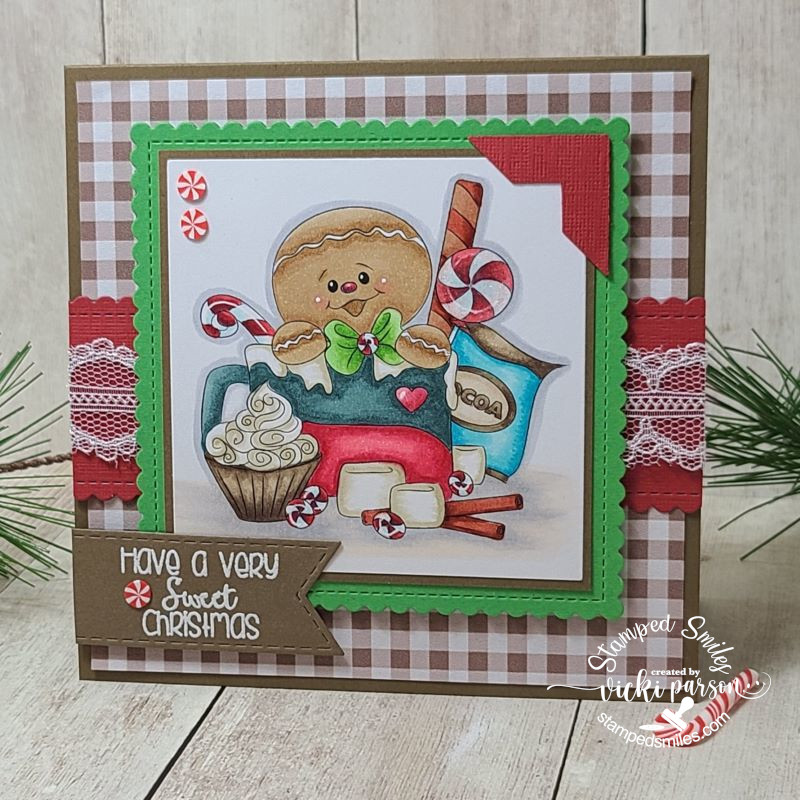
A cup of cocoa with marshmallows, a candy cane and a chocolate cupcake with a gingerbread friend to share it with sounds wonderful to me!  You may recognize the image from Digi Doodle Studios, which is where this retired image is from called “Jacks Ginger Cocoa Mug“.   It was just nice to be able to spend time coloring up a cute image and enjoy more from my long-forgotten stash!  I’ve used Copics to color the image and cut it out with my square dies to layer for my card design.

I thought the brown gingham papers went well with the cardstock that I’ve used from Stampin’ Up! called Baked Brown Sugar. I wanted to also bring in some red to the design because of the candy canes/peppermints in the image.  I layered a piece of lace ribbon over it and then popped up the layered colored image on top.  I used a photo corner punch for redder in the right top corner of the image.

The sentiment was white heat embossed over the Baked Brown Sugar cardstock and cut out with a stitched banner die.  The sentiment is also from a retired Pink & Main stamp set I had in my stash.  Lastly, I added some round peppermint clay accents to finish it off.

Hope you’ve enjoyed my Christmas card today or have been inspired for Christmas..or food!  Thanks for stopping by!

Challenges I’d like to enter:

  1. Christmas Kickstart – Gingerbread Treats
  2. Rudolph Days Challenge – Anything Goes Christmas (June)
  3. Merry Little Christmas – Anything Goes Christmas
  4. Crafter’s Cafe – Christmas in July
  5. Double D – Christmas in July
  6. Creative Knockouts – Christmas in July
  7. Crafty Catz – Anything Goes with optional Christmas in July

Delightfully Frightful Guest Designer for Digi Doodle Studios👻

Happy Friday friends!  Another weekend in October is upon us and so is Halloween!  Yay!  Well, I’m excited about it anyway! LOL If not for being a kid to trick or treat…for treats and spooky fun anyway!

Today I’m so thrilled to be guest designing for Digi Doodle Studios!  If you’ve been around my blog, then you’ve probably seen some of my past creations with the company as a design team member. 

Isn’t this such a cute and fun scene?!  I’ve used this adorable Kikimora Halloween Witch digital stamp from Digi Doodle Studios and created this fun scene with her using a past digital set called Ghostly Haunts Pairables which was discontinued.  I’ve sized and placed the images on my computer before printing them out.  I also printed out an additional one as well as another on some masking paper.

The reason for printing over masking paper was so that I could fussy cut out the image…yes even the tree, to ink blend the background.  (Any “imperfections” can be covered up with the coloring, so I ink blended FIRST.)  You could always ink blend a background and then cut out your image(s) to place over top, but I wanted this to be a one layer with the blended background to be incorporated with it for the glowing moon and night sky with a ground area.  The only thing about the image that is NOT flat are the two ghosts that I fussy cut out from an additional printing of it along with the cloud over the moon.  The ghosts were partially popped up with a foam square and I glued flat the cloud. This helped with the scene to give that dimensional look.  The scene was cut with a MFT rectangle die and was finished with ink blending around the edges ending with Black Soot at the very edges.

So, BEFORE I removed the masks from the images to color, I also decided to take some silver paint to create some splatters in the night sky.  I then took some shimmer spray to go over top of it for some sparkle. I then die cut a banner for the sentiment and ink blended some Carved Pumpkin over it to glue at the top and cut off the edge from the panel. I then layered this scene over an orange scallop edge rectangle die cut piece that was layered over an A2 top folding black card base. 

I’ve also die cut a bat from my stash in black cardstock and glued it around the sentiment banner.  I’ve covered the bat with a glitter brush pen for a bit of sparkle as well.

For the grounding of the images and some shadow effects from the moon, I took a Copic marker to color in some shadow under the witch, tombstone and tree.  You can also see on the witch that I’ve added some highlights with a white gel pen as well as silver and gold gel pens for her outfit.  I also covered the little diamond on her necklace with some Stickles Star Dust glitter.  It looks awesome in person and matches her dress.

I tried, but it’s so hard to capture all of the sparkly glitter goodness over this card.  The entire sky is covered with sparkle.  I do hope you’ve enjoyed my card.

Thanks for dropping in and have an awesome weekend!

CHALLENGES:

  1. Two Old Bats – Anything Goes Halloween
  2. Creative Friday – Pick 3 – I picked: Moon, Bat, Black
  3. Colour Crazy Craft – Anything Goes + coloring
  4. My Time to Craft – Halloween or Fall Colors
  5. {Cupcake Inspirations} – Halloween Fun
  6. Double Trouble – Halloween Cuteness
  7. Try it On Tuesday – Halloween
  8. Fab ‘n’ Funky – Halloween

Adelina Fairy from Digi Doodle Studios Celebrating Peace & Happiness for 2021🎉

Hello friends!  It’s New Year’s Eve and I’m so excited to kick this year to the curb…how about you?!  Whatever your plans are to ring in the New Year, please stay safe and enjoy sharing with those you love for hope of peace and happiness in the New Year for 2021!❤🎉

Today, I have a card that I’ve made for a challenge deadline and needed to have it in by today, so I wanted to be sure to share it with you all:

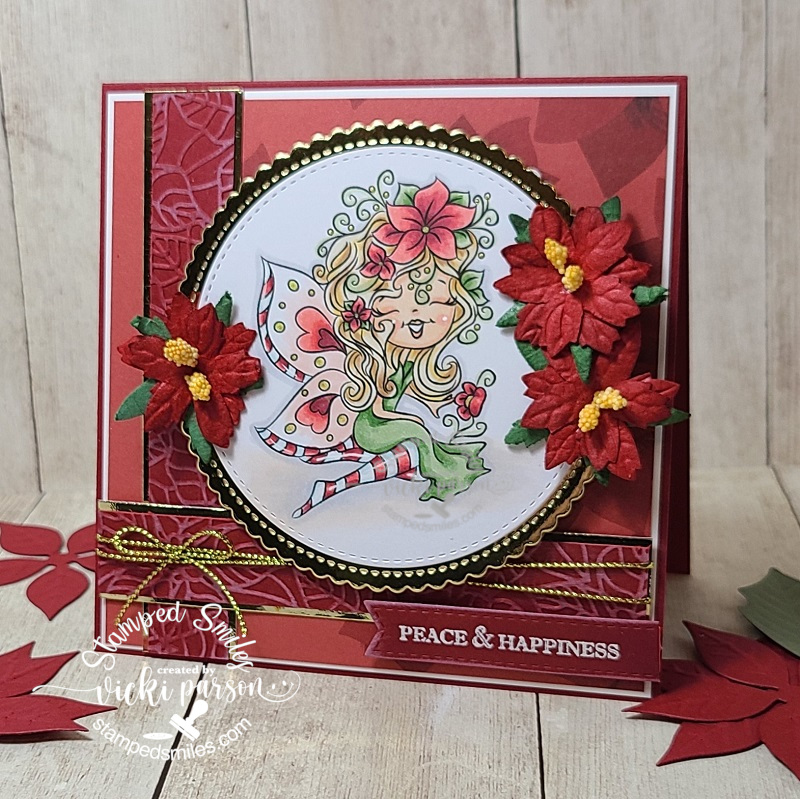
This was actually a “Digital freebie” from the Kit and Clowder Group Advent Calendar of Events they do every year.  Digi Doodle Studios gave away this darling image called Adelina-Fairy

I made this card and colored up this sweet image as the Digi Doodle Studios Facebook Group was holding a special “coloring challenge” using this specific image and I wanted to make sure that it met the deadline for getting it in and so I actually posted it in there yesterday, but I’m posting on my blog today along with more photos and details.

The image is beautiful with her poinsettia flowers and so I wanted to be sure to color it up with red and green colors in mind…although I think she would be great for ANY occasion as well as coloring the flowers differently.  I used some die cut circles for cutting her out with and then layering her over a die cut piece of gold mirror cardstock.

I’ve used some poinsettia decorative papers from my stash for the background and layered some red poinsettia embossed strips layered with gold mirror cardstock over the background before adding the layered circle image on top.  The embossed strips also had white ink rubbed over top lightly to emphasize the textures.  I white heat embossed a sentiment and cut it out with a banner die to place on the bottom corner with craft foam which is what I also added behind the image circle panel too.

Before attaching the bottom strip to the card, I also added some gold cord and a bow.  I finished off the card with three poinsettia flowers from my stash.  The entire card measures 5″ square.

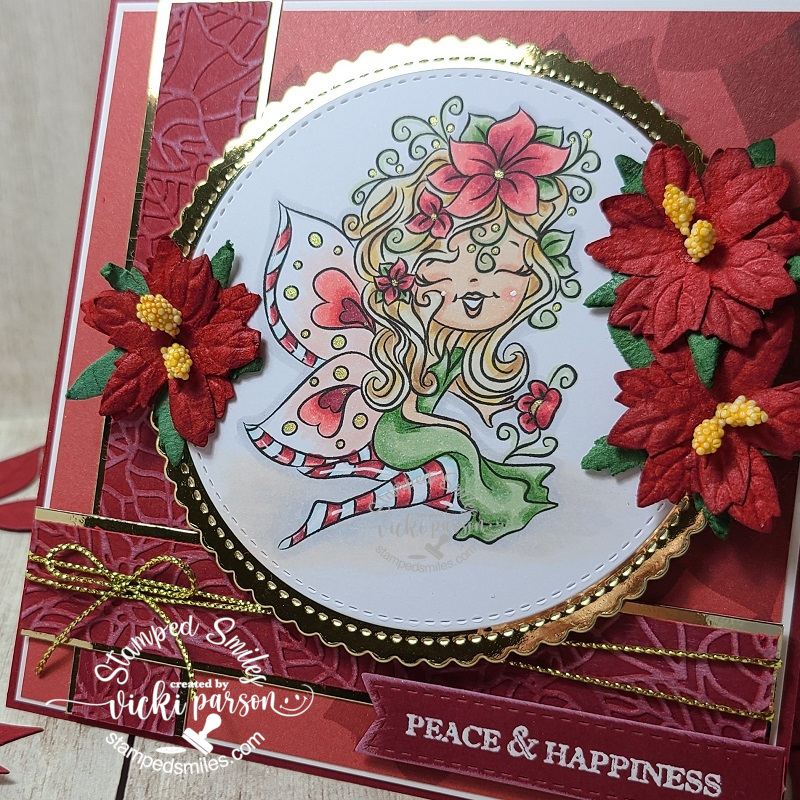
Here’s a closer view of the image and how I’ve got her colored up.  I added some really subtle shading with my Copics underneath her legs for shadows.  I did my usual white gel pen for checks and hightlights and then I used a gold gel pen for coloring in the dots on her wings and in her hair.

Really enjoyed coloring this gorgeous image and it’s awesome that I now have another Christmas card ready for next year as well!  Thanks so much for stopping in today!  Hope that you’ve enjoyed my final card and post for the year.

I want to thank each and every one of you for the wonderful support, kindness and friendship you have given to me this past year.  It really means so much to me and it’s been quite a year of creativity too!  I see that so many of my favorite companies are represented as my top photos which tickles me so much!

Here’s to wishing us ALL a happy, healthy and prosperous life in 2021!!🎉

See you in the New Year friends!

Challenges:

  1. Digi Doodle Studios Facebook Group – coloring challenge
  2. Double D – Poinsettia
  3. Colour Crazy Craft – Anything Goes + coloring
  4. Creative Moments – #205 Anything Goes
  5. Die Cut Divas – Anything Goes December

Pink Halloween for Digi Doodle Studios GDT

Hello friends!  I hope that you’re all having a wonderful week so far!  The weather has really been changing this week as we get into Fall now.  Speaking of that, it’s time for sharing some fun Halloween themed projects!

I’m VERY honored to have won a guest spot for this month over at the Digi Doodle Studios Challenge Blog!  So, for the October challenge, the theme is “Pink and/or Halloween” You can choose to use either or both…I’ve decided to use BOTH on my creation:

As a winner, I was given this darling image to play with called Gwendoline DDS Good Halloween Witch and I thought she would be so much fun to color up in the pink and black colors!  I think she turned out adorable in her pinkness!

I have also decided to print out a sentiment from the DDS Halloween Happiness Digital Sentiments Collection that I’ve used as a strip on the right side of my panel placed directly under the image panel.  Both of these panels have been sponged with some pink ink around the edges.  The witch image panel was popped up with some craft foam.

For the  papers, I have printed out the fun pink and black dotted patterns from the DDS Wonky Halloween Digi Paper Pack and then used a sander around the edges of them for a bit of distressed look.  Before attaching the black with pink dots strip in the center, I wrapped some pink metallic ribbon around it with a bow.  This strip was placed behind the image panel, but in front of the layers behind the image panel. Those layers are pink metallic mirror cardstock and a scallop die cut black cardstock which was also layered behind the sentiment strip.  All of the panels were placed over a black top folding 5″ card base.

I’ve added a couple of die cut spider webs from some white glitter paper and attached them in the corners of the design and then found some pink sequins with stars that I filled the centers with some pink glitter drops scattered around as well as placing an extra die cut star and sequins in the center of the bow.

And here’s a closer look at the coloring I’ve done over her using Copic markers.  I’ve used a white gel pen for the dots on her cheeks as well as highlights on her legs.

It’s always hard to really show all of the wonderful shimmer and sparkle, but I’ve used a glitter brush pen over the pink stars in her dress as well as the stars surrounding her. (Her pink earrings were covered with it too.)  I took a pink metallic gel pen to color in the dots on her dress and the ones surrounding her.  I then took the pink glitter drops that I’ve used in the center of the sequins and add a couple more around her trailing stars and the center of the star in her wand too.

I also very lightly sponged in some pink chalk for the stars and dots area around her after it was all dry.

I hope you’ve enjoyed my card for today and have been inspired in some way!

Thanks for dropping in today my friends and I’ll be seeing you again very soon!😉

Challenges:

  1.  Daring Cardmakers – 3 Things Starting with ‘S”:  Stars, Spider Webs, Sequins
  2.  Pammie’s Inky Pinkies – PIP 2039 Anything Goes
  3. Always Fun – Die-cutting (my fave is stitched scallop!)
  4. A Perfect Time to Craft – Anything Goes Oct
  5. Creatalicious – Anything Goes
  6. Simon Says Stamp Wednesday – Anything Goes

A Unicorn with Sprinkles & Rainbows for Dare to Get Dirty

Hello again today my friends! Yes, still posting and with another “twofer post” again today! It will calm down eventually, but for now I have lots of things to share with you!😀

As you may have read in my second post from yesterday, we kicked off the “Dare to Get Dirty” Event over at Splitcoaststampers and I shared the card I made for one of the challenges. I have another creation to share with you that I made for one of the challenges released today and this one is for the lovely Lori:

This really brought out the little girl in me when creating this card with the rainbow colors and magical scene! This sweet little unicorn image along with the rainbow in the background and the sentiment all come from the Digi Doodle Studios Unicorn Wishes Pairables set. I’ve printed them out, colored them with Copic markers and fussy cut them out with the exception of the sentiment which I left and cut out as a cloud with my Lawn Fawn Cloud Border dies. I’ve also used that die to cut some clouds from a piece of vellum and an additional piece of white cardstock.

I’ve used an older My Favorite Things Stitched Rainbow die from white cardstock that I colored with Copic markers to place behind the first set of clouds behind the unicorn. Before layering my clouds, I took some distress ink and blending tool to add a bit of blue shadow behind them. After attaching all the cloud and rainbow layers, I cut it out with the MFT Blueprints 27 die set .

Lastly, I’ve attached this layer over an A2 sized white top folding card base and popped up the fussy cut unicorn with foam tape. I took some random sequins to attach over the design.

Here’s a closer view of some of the details in the card. I added some loose glitter over the unicorn’s wings with a 2-way glue pen and some loose glitter. Hard to tell, but I’ve also added some shimmer to the rainbows and the unicorn’s mane with a glitter brush pen. I also added a bit more blue cloud shadow under the unicorn’s feet before attaching him on the card.

This was really fun to create and I know it will make a fun card to share.

Thanks so much for dropping in!

Interactive Fun for Crafty Chefs + Video

Hello friends!  We are nearing the end of July and I wanted to be sure to try and get at least ONE “Christmas in July” project in before the month is gone, so I thought I’d keep things fun and simple as well as “kill 2 birds with one stone” so-to-speak!

Now we’re given one “must do” item from the previous chef to use on our recipe.  My item from Nana Connie was *”die cut” and so here is the project that I’ve made for this month’s “Crafty Chefs” group:

Vicki-DDSElves-squarefold

I have used a scallop square (cut from gold metallic mirror cardstock) and stitched square die cuts for layers on my project here.  I’ve taken this really cute elf image from the Christmas Elves Pairables digital set from Digi Doodle Studios on the front of my design.

I’ve printed out and colored the present from the same digital set along with another elf image (for his arm only) so that I could cut them out to make it look like he’s holding the gift.  His cut out arm was popped up with foam tape.  I’ve colored with Copic markers, added details with gel pens, liquid applique and Stickles glitter under his feet for snow affects.  I also stamped extra snowflakes for the background as well as add three snowflake rhinestones for accents.

Here’s the Crafty Chef’s August Recipe:

MUST DO:

  1.  *Die Cut (can also use electronic machine like Cricut, etc)
  2. Interactive (More than 1 fold eg: easel card, gatefold, etc.)
  3. Specialty Paper (foil, vellum, glitter, etc.)
  4. ribbon/twine/raffia

CAN DO:

  1.  Color an image
  2.  Add THREE of something
  3. **add glitter/sparkle – (this one I’m passing along to the next chef)

It doesn’t appear to be very interactive by looking at it, but when you untie the ribbon along the side, this is what it looks like when you open it up:

Vicki-DDSElves-squarefold-open

I have decorated two of the opposite panels with a greeting and then I’ve added a pocket to the top left panel so that I could include a gift card or cash to the recipient for Christmas!  I thought it was a super quick and fun interactive design to do!

If you are interested in learning how this project comes together, I’ve made a video sharing the measurements on how it’s done:  (CLICK HERE to see the video on You Tube.)

During this time of the year when it’s pretty warm over my way, it’s sort of a nice thought to think about some snow!  Plus, it always nice to get a start on some Christmas too!  (It’s not necessary for the “Crafty Chefs” to use a Christmas theme…it can be anything.)

I hope you’ve been inspired by my project today and have learned something fun in my video with it too!  (I have even more interactive tutorials on my You Tube video channel if you’d like to see other ideas!)

Thanks so much for stopping in today friends and I’ll be seeing you again soon!

Challenges:

  1.  Colour Crazy Craft – Anything Goes + coloring
  2. Daring Cardmakers – Three Musketeers (3 snowflake rhinestones)
  3. Sweet Stampin’ – Chrismas in July
  4. Lil Patch of Crafty Friends – Anything Goes (Christmas in July)
  5. Crafting Happiness– #59 Anything Goes
  6. Pammie’s Inky Pinkies – PIP2030 Anything Goes
  7. Dream Valley – Christmas in July
  8. Fab ‘N’ Funky – #492 Christmas
  9. Christmas in July 2020 Hop – Anything Christmas

Celebrate For 2 Crafty Critter Crazies + Other News

Hello friends!  Happy April 1st which means it’s time for a new monthly challenge for the 2 Crafty Critter Crazies Challenge!  Remember that it’s always an “ANYTHING GOES + CRITTER” challenge to enter your creation.  We’re looking forward to seeing your projects!

This month we’re being sponsored by Digi Doodle Studios!  They were kind enough to provide images for the design team to create their projects with, so here’s what I’ve made for my challenge project:

Vicki-2CCCwithDDS

I think I could probably celebrate with these cute little hedgies, couldn’t you?!🦔🦔

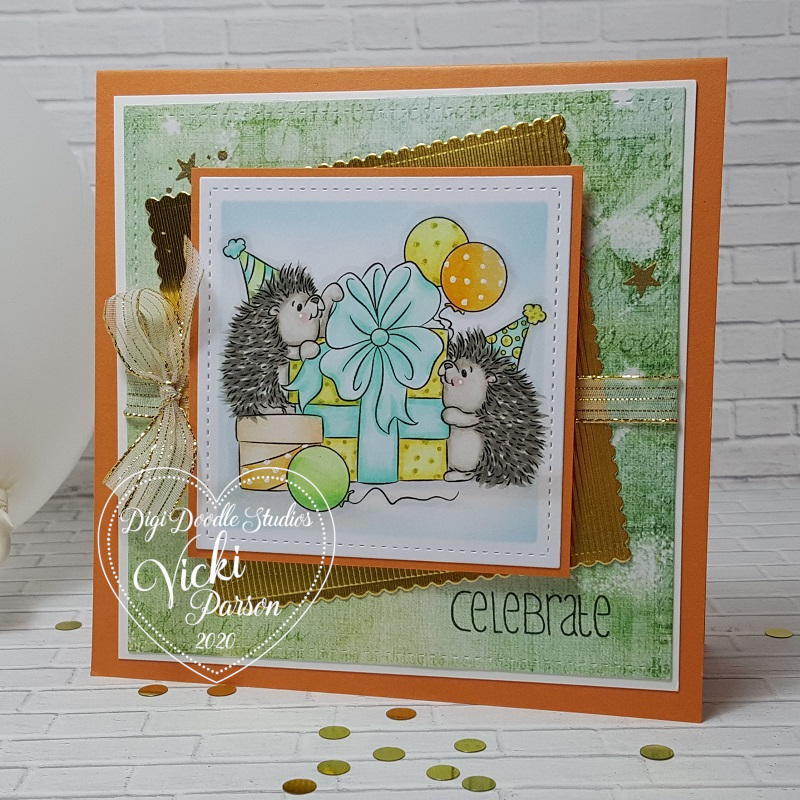
This image is called Hedgie Party from Digi Doodle Studios and it was super fun to color up for my card!  We can always use birthday cards in our stash, so I pulled out some papers from my stash…including some left over pieces to assemble the design.

I used a Simon Says Stamp stamp set to heat emboss the stars over the green decorative paper with gold EP.  I stamped the sentiment at the bottom of the paper from the same stamp set with black ink.  I cut out this panel with a square stitched die, layered over white cardstock and then attached it to a piece of orange top folding 5″ square card base.

I pulled out some gold mirror cardstock cut with a scallop square die and layered it over the design, wrapped some gold ribbon around it, placed the layered image panel over top of that with craft foam and added the bow.

Vicki-2CCCwithDDS-close

Here’s a closer view of the image I’ve colored with Copic markers.  I’ve also used a white and gold gel pen to create some polka dots over parts of the image.

Hard to see in the photo, but I covered the big present bow with a glitter brush pen too.

Vicki-2CCCwithDDS-flat

I hope you’ve enjoyed my card today using this sweet DDS image! Thanks for stopping in!

Other news:

Just FYI that this post will be my final creation as a design team member for not only 2 Crafty Critter Crazies, but also for Digi Doodle Studios as well.  Although I adore everyone on these design teams very much, it’s just time for me to let DTs go for a while.

Challenges:

  1.  Krafty Chicks – All Occasions
  2. Di’s Digi Challenge – Birthdays
  3. QKR Stampede – #391 Anything Goes
  4. Creative Knockouts – #343 Anything Goes
  5. Pammie’s Inky Pinkies – PIP2013 Ribbon
  6. Country View– Animal Magic

Purple Day Blog Hop For Epilepsy Awareness

Hello my friends!  Today starts the annual “Purple Day” blog hop and I have joined with my friend Fiki to help bring awareness about epilepsy.

Please take a moment and read important information about this special day:

Purple Day is a global grassroots event formed with the intention to increase worldwide awareness of epilepsy, and to dispel common myths and fears of this neurological disorder. Further intentions of this movement are to reduce the social stigmas commonly endured by many individuals afflicted with the condition; to provide assurance and advocacy to those living with epilepsy that they are not alone in their ongoing endurance; and to initiate individuals living with the condition to take action in their communities to achieve these aims.

The day occurs annually on March 26.  To read more about epilepsy or how you can help in the U.S., check out the Epilepsy Foundation’s website.

My card inspiration:

Vicki-DDS-purplebloghop

Isn’t she just the sweetest little girl with her big heart?!  So delighted, of course, to have been provided this darling image from Digi Doodle Studios which is one of the sponsors for our blog hop today!  This image is called Sweet Carlina and I’ve got her colored up in purples and pinks.  She has a little white heart tucked in her jacket pocket to go with the white hearts on my design.

I found some pretty purplish decorative papers from a recent card kit I had and then I just followed along with a sketch to complete my design. (See challenges below.)  After coloring her out, I’ve cut her out with a MFT Wonky Stitch rectangle die and then layered with a purple cardstock layer cut out with a MFT Scallop Stitch rectangle die.  I popped it up with craft foam over strips of lace, twine and accents I’ve created with the papers.  I’ve used a LF scallop border die to cut accents to go with my heart paper strips.  Extra hearts left over were used in the top corner.  I also added a purple flower button with twine to finish it off.

Vicki-DDSpurplebloghop-close

Here’s a closer view of the coloring I’ve done on her with my Copic markers.  I’ve used white gel pen to dot her checks and color the heart in her pocket.  You can barely see the shimmer that I’ve done over the heart she’s holding with a glitter brush pen.

You’ll also notice that I’ve printed out this image twice, fussy cut out just the portion of the heart she’s holding along with her hands and popped it out over the colored image to give it some depth.

Vicki-DDSpurplebloghop-flat

I hope you’ve enjoyed my inspiration for the blog hop!  I sure enjoyed creating it and helping to give support to my friend along with creating awareness for epilepsy!

Challenges:

  1. Time OutPurple (helping to support epilepsy awareness with us!)
  2.  Sketch Saturday – sketch #602
  3. Pammie’s Inky Pinkies – PIP2012 Anything Goes
  4. Arty Divas – #18 Anything Goes
  5. Through the Craft Room Door – Anything Goes
  6. Simon Says Stamp Wednesday – Anything Goes
  7. The House That Stamps Built – M2520

Peyton is Painting Eggs for Easter!

Hello there friends!  Where have I been?  Well, I went off looking for my “MOJO” and he’s doing some disappearing acts on me for sure!  I’m having such a hard time getting motivated and feel that my creative juices have completely dried out!  Do you ever feel this way too?  What are some things you have done to help you?  I will keep trying for now!  LOL!  So sorry for being MIA lately!

Today I must share with you a card I came up with using this really adorable image from Digi Doodle Studios just in time for Easter!

Vicki-DDSPayton-March13

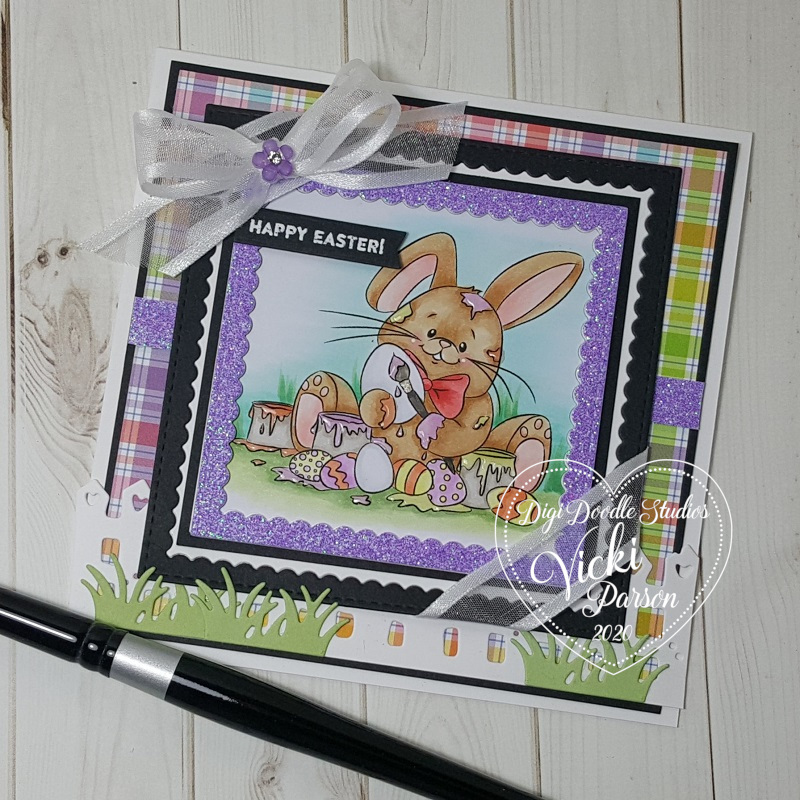
Isn’t he adorable?!  This digital image is called Peyton’s Painted Eggs from DDS and he’s busy at work painting up eggs to get them done in time for Easter!  I’d say he looks like myself getting messy and into the job!  LOL!

After coloring him up, I used a MFT die to cut him out and create the layered frame around him with some purple glitterstock along with some black and white cardstock.  I white heat embossed a sentiment (from Simon Says Stamp) and cut it out with a banner die to go over the image panel.

I took some white ribbon and wrapped it around the corners and attached a bow on the top corner with a flower embellishment in the center…found in my stash.

Also “found in my stash” was the fence and grass dies that I used to attach to the bottom of the card front panel.  Some of the “grass” was placed behind the image panel and some in front of it.  I also attached in the center a strip of the purple glitterstock Lawn Fawn Spring Plaid paper for the front of the card and this was layered over another piece of black cardstock which was mounted over a top folding 5″ square white card base.

Vicki-DDSPayton-March13-close

Here you can see how I’ve got him all colored up with Copic markers.  He was actually really fun to color up.  My first notion was to make him a white bunny, but I thought he would really stand out if he was brown in color instead.  I added some blades of grass around him with my markers.

I left the egg he was in the process of painting white along with the plain one on the ground…after all, he IS in the process of working on them! LOL!

I’ve only used the white gel pen for his cheeks and  I’ve used a clear metallic gel pen on the paint brush.  The “shinny” areas you see on the “fresh paint” colors are the places that I’ve covered with glossy accents.  The light is naturally highlighting them!

Vicki-DDSPayton-March13-flat

I hope that you’ve enjoyed my Easter bunny card today and it’s helped get you in the mood thinking warm Spring thoughts!  I know I’m really looking forward to warmer weather and being outdoors for sure!  Easter is just around the corner now!

Challenges:

  1.  Crafty Animals – Anything Goes + animal
  2. A Bit More Time to Craft – Anything Goes
  3. Crafts Galore Encore – #73 Anything Goes
  4. Love to Craft – LTCCB44 Anything Goes
  5. Lil Patch of Crafty Friends – #127 Anything Goes
  6. Creative with Stamps – #48 Egg
  7. Pammie’s Inky Pinkies – PIP2010 Anything Goes
  8. Crafty Creations – #407 Anything Goes
  9. Creative Fingers – #181 Anything Goes
  10. Sweet Stampers – #42 Easter or Spring
  11. The Sisterhood of Crafters – Easter

Owl-rageous Thanks

Hello friends!  We’re finally on the last Friday of February!  Yay!

Although we’ve had snow in our forecast recently, I’m feeling Spring will be in the air soon and I really look forward to it along with all of the pretty flowers and green grass!  So today, I’m sharing a card I’ve made using this adorable Pairables set from Digi Doodle Studios:

Vicki-Owlrageous2

Isn’t this little owl the cutest?!  I love how he has his little wings out for a hug!  I’ve used several of the images from the “Owl-rageous” Pairables set to create the scene on my card.   I have used Word.doc on my computer to arrange and size the different images where I wanted them for my scene and printed it out to color.  I’ve also printed out the flower image from the set along with the sentiment separately to cut out for my design.

As you can see, I’ve taken the flower image and sized it differently and arranged it around the stump for the scene.  I’ve also used it to cut it out separately to attach to the twine next to the sentiment as well as the twine bow at the bottom.

I’ve printed out the sentiment, cut it out and then cut the fish tails on each end and ink blended with brown ink around it.  I’ve matted it with the same brown cardstock that I’ve layered the image panel on and it’s also the base of my top folding A2 sized card.

I’ve pulled out some textured woodgrain cardstock as well as the Spring Plaid papers from my Lawn Fawn stash.  I thought the woodgrain and Spring-like colors worked well for this cute owl.  I’ve finished it off with some clear sequins.

Vicki-Owlrageous2-close

Here’s a closer look at the coloring I’ve done on this cutie!  I’ve used the W tones to color him in and then the E20s to color the stump.  I also end up going for the G24, G21 and G20 for coloring my grass.  I love the bright Spring green it gives I think.  I highlighted his cheeks and eyes with a white gel pen.

You can also see a subtle cloud line behind him.  I’ve used the MFT Cloud Stencil with my ink blending tool and Tumbled Glass distress ink to create the background.

You can see that I’ve wrapped some twine around the center of the card where the two different papers meet as well as wrapped around each corner of the image panel.  This is where I decided to add the cut out flowers on each end.

Vicki-Owlrageous2-flat

I feel like this owl with my arms open and ready to take in all of Spring when it comes and thank Mother Nature for bringing it around! LOL!  How about you?

Thanks so much for stopping in today my friends!  I’ll be seeing you soon! 🙂

Challenges:

  1.  Creative Fingers – #180 Anything Goes
  2. Through the Craft Room Door – Anything Goes
  3. Pammie’s Inky Pinkies – PIP2008 Anything Goes
  4. Arty Divas – #16 Anything Goes
  5. Simon Says Stamp Wednesday – Anything Goes
  6. Cute Card Thursday – Spring Fever